SHED MATTERS 2

Locked
User avatar
Stanley
Global Moderator
Global Moderator
Posts: 90802
Joined: 23 Jan 2012, 12:01
Location: Barnoldswick. Nearer to Heaven than Gloria.

Re: SHED MATTERS 2

Post by Stanley »

Image

The design committee alerted me this morning to the fact that perhaps the size of the bore through the eccentric strap needed some consideration as there was a chance that my final bore for the shaft might break through into the track the strap runs in. So, some concentrated thought and measuring. They were right, it's all very well making stuff out of your head but you have to keep checking!

Image

So, the three jaw and the set up came off the lathe and the 2 jaw SC went back on and I bored the strap out to what I worked out was the right size.

. Image

Lots of careful measuring and checking with every measuring device I have. The digi calliper is handy but I don't regard it as consistently accurate.

Image

Once I had the new bore size for the strap I got on with the difficult job of carving the track out in the eccentric for the strap. Lots of chatter and trying different tools. I got there in the end and finished to size with emery strip to get a finish.

Image

Here's my finished result.

Image

The next job was to check the diameter of the shaft and bore the eccentric. I started with a series of drills taking me up to .5" in stages.

Image

Then a very careful bore to a size that slips on the shaft comfortably, no need for a tight fit as the eccentric will be held by two 1/4" socket head grub screws when we get round to it. Next job was to clean up all the edges on the strap, polish the two end faces on the eccentric and after mounting the strap on the eccentric, try it on the engine.

Image

Lovely! A nice snug but sliding fit on the shaft. The strap is perhaps a touch on the tight side on the eccentric but that's good as it will soon wear in when the engine has been run a bit. This is good fitting and generous bearing surfaces. It will never wear out....
A good morning... I have tidied up most of the tools and first thing tomorrow I'll have a good clean up before measuring for the valve rod.

Image

And yes, you're right. That package is my new M&W dial calliper. Do not drop!
Stanley Challenger Graham
Stanley's View
scg1936 at talktalk.net

"Beware of certitude" (Jimmy Reid)
The floggings will continue until morale improves!
User avatar
Stanley
Global Moderator
Global Moderator
Posts: 90802
Joined: 23 Jan 2012, 12:01
Location: Barnoldswick. Nearer to Heaven than Gloria.

Re: SHED MATTERS 2

Post by Stanley »

Image

I left the shed quite tidy yesterday and started this morning by doing a bit of chip chasing with Henry the shop vac. Then I brought the engine in from the sideboard and had a bit of a gloat while I got my head straight about what I wanted to do.

Image

First job was to drill and tap the boss of the eccentric for two 1/4" whit grubscrews. These are needed to lock the eccentric on the shaft when we time the valves but I need to hold the eccentric steady while I do some measuring so they might as well go in now.

Image

Tidy job, ready to proceed.

Image

Before I measure up for the valve rod I wanted to reduce the length of the valve rod, it was about half an inch too long. That didn't take too long.

Image

Once I had the rod done I could do some measuring and the drawing office produced one of their immaculate blueprints.... I needed a minimum of 1" diameter to chop the valve rod out so I went for a dig in the treasure chest and found this rusty bar...

Image

Nice clean lathe, time to make some muck! Notice the tobacco tin in the chip tray. It's got tallow and graphite mixed together in it and it's my favourite lubricant for centres. Actually its mutton fat of a joint I cooked... Enough in that tin to last me out.....

Image

A nice sharp round nosed lump of HS for a cutter and away we go. The first job was to find out what I was dealing with and get a clean 1" diameter the length of the bar.

Image

Not long later and we have a transformation. As I've said before you never know what you're dealing with when you are working with scrap. I also say that there is a providence that looks after drunken men and idiots. This was the case here. When I pulled the bar out I noticed a bit of lilac paint on the end and I vaguely recalled that this was the stockist's way of identifying leaded steel. This must have been right because it turns beautifully, like butter and a nice finish.

Image

I've put this in to show how I work these days. Apart from not seeing straight, I'm getting older and need to continually check what I'm doing. It slows me down but notice how I hit my target dead on right down to the half inch I was chasing. Takes longer but in the end you save time and do a better job.

Image

It's a while since I got my patent parting tool holder out but I decided not to take any chances parting this off. Lovely job. It really is a brilliant tool...

Image

We have a blank, the right size and ready for fitting.

Image

I popped it back into the chuck and gave it a perfect face and a bevel on the back edge.

Image

Close of play. All it needs now is final shaping and fitting.... Nowt to it.....
Stanley Challenger Graham
Stanley's View
scg1936 at talktalk.net

"Beware of certitude" (Jimmy Reid)
The floggings will continue until morale improves!
User avatar
Stanley
Global Moderator
Global Moderator
Posts: 90802
Joined: 23 Jan 2012, 12:01
Location: Barnoldswick. Nearer to Heaven than Gloria.

Re: SHED MATTERS 2

Post by Stanley »

The design committee has been working on a knotty little problem overnight. The next stage is to drill the foot of the valve rod for the bolts that attach it to the eccentric strap. Only when the rod is fixed to the strap will I be able to make accurate measurements of the length. I have left plenty of meat on the end for final adjustment. It's an interesting insight on to how I have had to modify how I work to compensate for my lack of vision. Normally I could measure carefully and mark to positions of the holes but I don't trust my ability to do this. We have come up with an idea for direct transfer of the position from the strap to the foot.... We'll see later if it works!
Stanley Challenger Graham
Stanley's View
scg1936 at talktalk.net

"Beware of certitude" (Jimmy Reid)
The floggings will continue until morale improves!
User avatar
Stanley
Global Moderator
Global Moderator
Posts: 90802
Joined: 23 Jan 2012, 12:01
Location: Barnoldswick. Nearer to Heaven than Gloria.

Re: SHED MATTERS 2

Post by Stanley »

Image

This was the cunning plan. Set up two small toolmaker's clamps on the face to act as guides, put some marking blue on the face of the strap and press onto the foot. Just for good measure I poked a fine scriber down the thread holes in the strap and scribed circles as well. Good job I did because I put too much blue on and it squeezed out to cover the surface of the foot. However I had two clear marks and punched in the centres.

Image

They looked about right.

Image

So I squared the rod up in the pillar drill and poked a 3/16" hole through them.

Image

A little touch with a rat tailed file and we had a fit.

Image

I'd left plenty of meat on the foot and decided to reduce it a touch in the lathe.

Image

Not bad. I had to file a bit of clearance in the side of the rod to accept the nuts but this is always my problem with eccentrics, largely due to the fact that the castings I have for the strap are a bit short on width under the foot. No matter....

Image

I was able to offer the rod up and measure the final length. I'd left some spare at the end so I sawed it off and popped the rod in the lathe to face the end and file a bit of shape into it.

Image

The next bit of fitting was to thin the end of the rod down so it fitted in the clevis on the end of the valve rod itself. I hate milling something you have put so much work into but I'd arranged it so that the thickness was equal to the diameter of the rod so no measuring needed. Just mill until I started to touch the rod...

Image

When I offered the rod up for a trial fit it became obvious I needed to take a bit off the boss of the eccentric so I popped it into the lathe. The eccentricity was no problem because I was facing it.

Image

Another trial fit and we are getting close to drilling for the clevis pin but before I did that I had another milling job to do.

Image

I wanted to take the overhang of the foot off flush with the strap.

Image

Twenty minutes of light cuts later I had reached this point. Tomorrow I shall do the same with the other two faces but this is enough for today.
It's amazing how much time you have to put into something like this but I haven't made any serious errors and the other two cuts are a lot easier as I can grip the piece more firmly with no fear of distorting the strap. Onward and upward!
Stanley Challenger Graham
Stanley's View
scg1936 at talktalk.net

"Beware of certitude" (Jimmy Reid)
The floggings will continue until morale improves!
User avatar
Stanley
Global Moderator
Global Moderator
Posts: 90802
Joined: 23 Jan 2012, 12:01
Location: Barnoldswick. Nearer to Heaven than Gloria.

Re: SHED MATTERS 2

Post by Stanley »

Image

I have to report that I've been back in the shed. I was nattering myself about the milling of the foot and also my suspicion that when I was milling the large faces I might have squeezed the strap slightly out of shape.... No way I could have a sleep with that on my mind. So I went back in, milled the last two edges and had a trial fit. Just as I feared, the strap had been squeezed. First IA was a fairly brutal one, put the individual halves on the cam and belt them with the hammer... That took most of the distortion out but I had to spend half an hour easing the strap and fiddling until I got it to fit again. It's still tight if I tighten the clamp bolts up dead tight but I have slackened them back just a touch, still snug but not dead tight, and the eccentric runs fine. When I put some air on it and run it it will soon free up and I can tighten the clamps down fully. That was a let off! But I'm satisfied now and ready to mark the rod for drilling, make a clevis pin and call the valve rod fitted! Then we can time the valve and get on with the other small jobs we need to attend to before we can call it finished. It's going to be OK.....
Stanley Challenger Graham
Stanley's View
scg1936 at talktalk.net

"Beware of certitude" (Jimmy Reid)
The floggings will continue until morale improves!
micktoon
Regular User
Posts: 366
Joined: 05 Feb 2012, 21:23
Location: Newcastle upon Tyne

Re: SHED MATTERS 2

Post by micktoon »

Hi Stanly , you have almost cracked it now , its looking spot on too, I am looking forward to seeing it running now :grin:

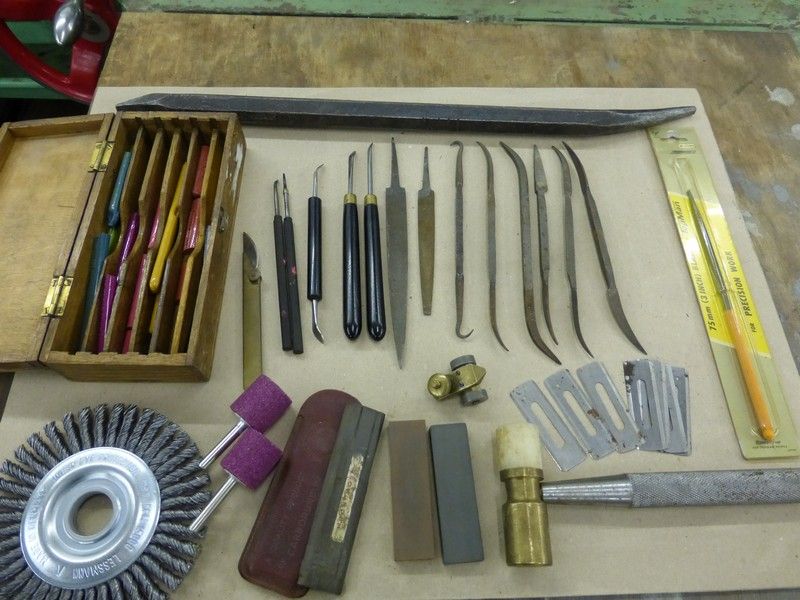
I got a few bits at the first bootsale of the year with John yesterday.

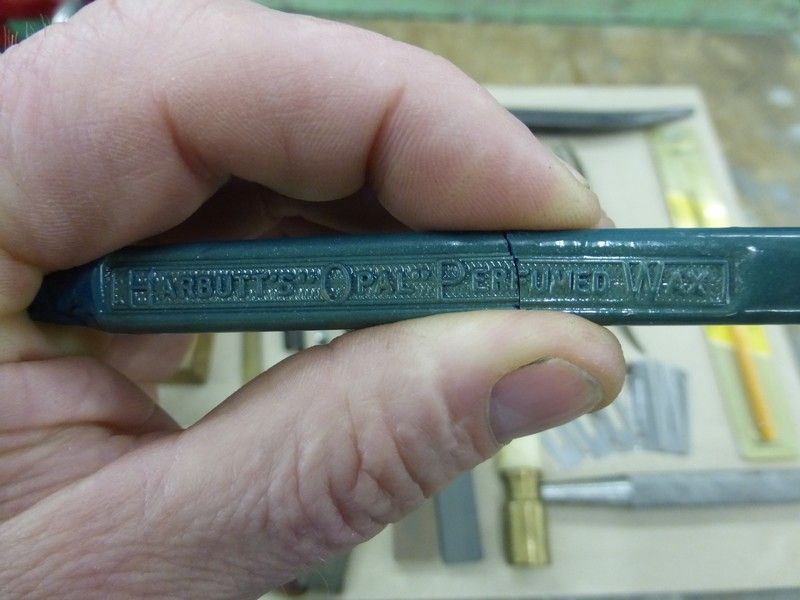
Some canny stuff, a selection of nice sharp Stubs files, including some good rifflers, a nice wood box with various coloured sealing waxes ( used to seal documents by melting then pressing a seal into the melted pool of wax, like in the old days ) a selecting of small clay moddling tools, some double sided razor blades marked patent 1911, a wire wheel for the grinder , two die grinder bits, small old pry bar, 3 x nice oil stones one in a leather holder, a small jig for holding engraving gravers while sharpening them and a nice shop made machinists brass and plastic hammer.................. the whole lot for a total of £13..... Ooops no £15 prybar was £2

Image

This is the sealing wax, I thought it was sealing wax but the perfumed bit made me doubt, it must just be so when melted it does not smell like burnt wax !
Image

Fingers crossed for good weather next week.

Cheers Mick
micktoon
Regular User
Posts: 366
Joined: 05 Feb 2012, 21:23
Location: Newcastle upon Tyne

Re: SHED MATTERS 2

Post by micktoon »

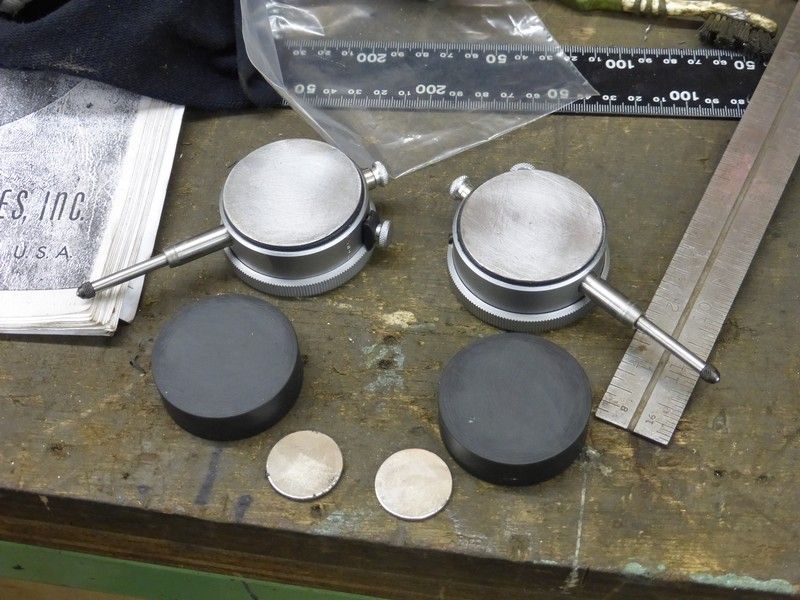
Hi Stanley , well my magnetic DTI's had a problem, the magnetic field was leeching into the workings as when i have come to use the DTI's they were not returning properly as they had been when I tested them after making them.
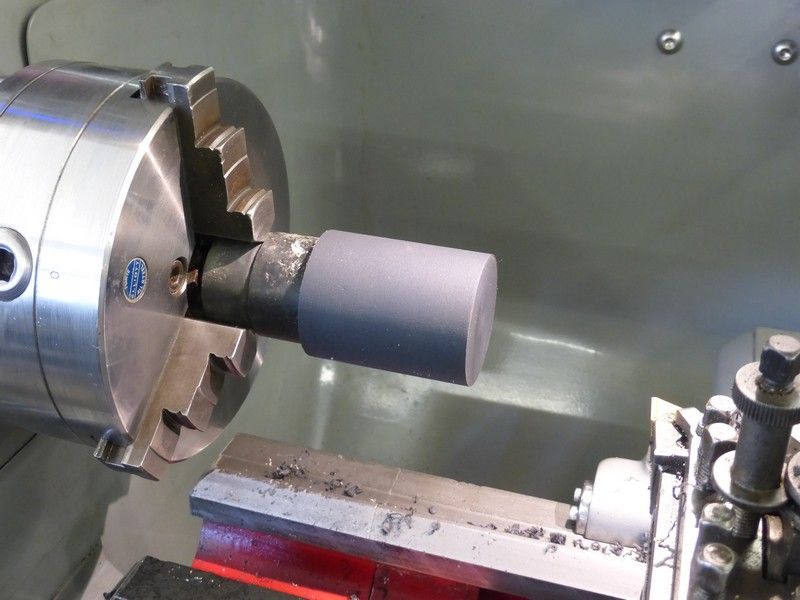
So phase two was needed, the plan to space the magnets away from the DTI's with a plastic bar spacer.
Not sure what type of plastic is is but stinks when turned in the lathe.

Image

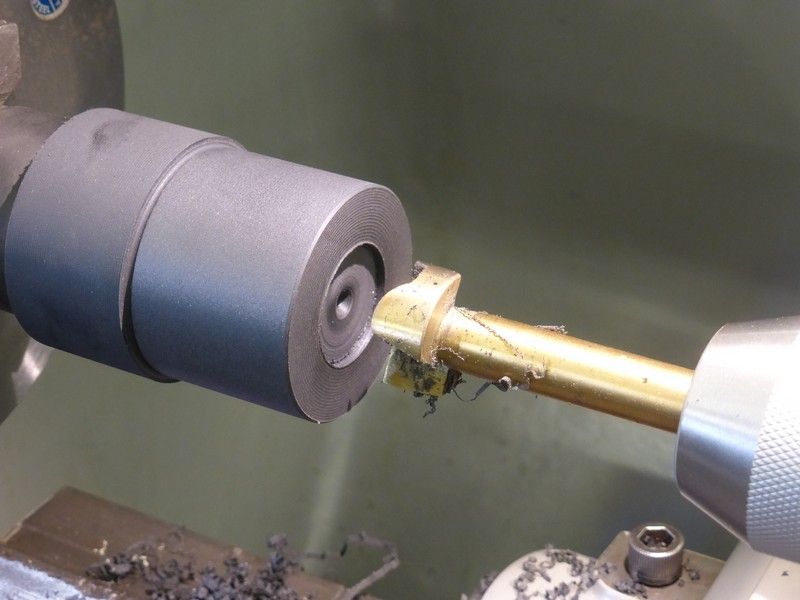
Recessed the bottom for the magnets to sit in which turned out to be mistake in the end.

Image

To get one of the magnets off the rear of the DTI I had to heat it slightly with pencil flame, I found out this spoils the magnet ( turns it into metal disc not magnet lol ) so after glueing the magnets in found one no longer was a magnet and the other was not sitting dead square so although it stuck, it would pivot on the most raised part.

Image

Image

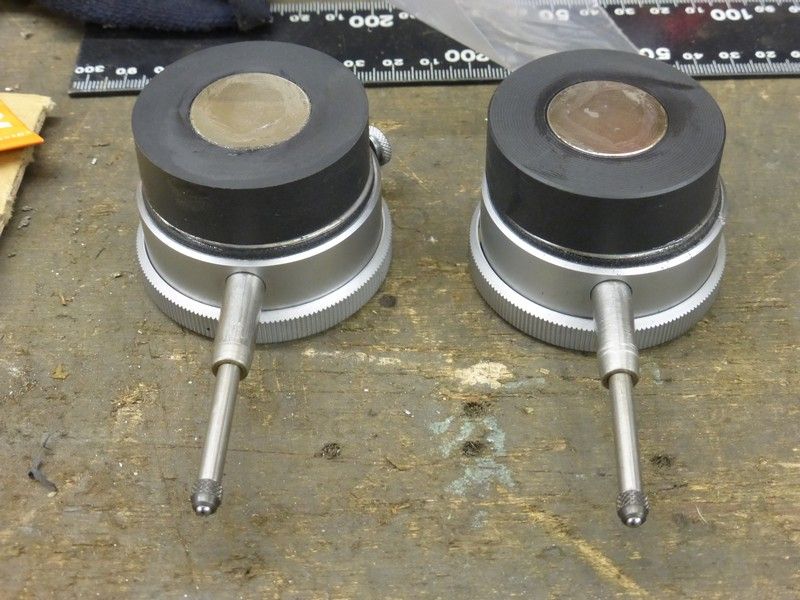
I am starting to get bored with this project now so tried sticking another magnet ontop of the dead magnet and it worked, then tested a second magnet ontop of the still magnetic magnet on the other DTI and it was again effecting the DTI so heated the glued magnet to kill it , then glued new magnet ontop and they both eventually work

Image

So I think and hope that is job done this time !

Cheers Mick.
User avatar
Stanley
Global Moderator
Global Moderator
Posts: 90802
Joined: 23 Jan 2012, 12:01
Location: Barnoldswick. Nearer to Heaven than Gloria.

Re: SHED MATTERS 2

Post by Stanley »

Mick, when I put the magnet on the back of a DTI and it proved too strong it never affected the DTI. The reason was that the body of the indicator was set in a heavy soft iron back which acted as a keeper for the magnet and blocked any death rays going into the works. So, answer is to glue a disc of CI or soft iron to the back of the DTI and drop the magnet on that.
Stanley Challenger Graham
Stanley's View
scg1936 at talktalk.net

"Beware of certitude" (Jimmy Reid)
The floggings will continue until morale improves!
User avatar
Stanley
Global Moderator
Global Moderator
Posts: 90802
Joined: 23 Jan 2012, 12:01
Location: Barnoldswick. Nearer to Heaven than Gloria.

Re: SHED MATTERS 2

Post by Stanley »

Image

The job today was to finish the eccentric rod. This meant taking it off and so I decided while I was at it I'd make a proper job of fitting the strap I distorted by gripping it too hard in the machine vice while I was milling the foot to shape. I know I've been reassuring you that it would soon bed in when I ran it, and I have no doubt that is true, but the right thing to do was to make it a proper fit. So, after marking the position of the hole in the end for the clevis pin I washed the strap and the eccentric off with spirit, blued the eccentric, put the strap back on, rotated it to get a mark, took it off and bolted it back together and got one of my Moore and Wright scrapers out. It was just a few minutes work to scrape the blue out, wash the eccentric and the strap again and pop it back on tightened dead tight. That fixed it! I should have done it in the first place.

Image

Before I put back on I drilled a 1/8" oil hole in it after starting with the centre drill to give me a pocket at the top.

Image

Then I drilled the clevis pin hole after checking it was indeed 1'4" by poking the shank of the 1/4" drill through. A quick tidy up of the edges on the grinder and a run round the hole with the de-burring tool and it was ready to go back on, hopefully for the last time!

Image

A quick check with the shank of the drill to make sure all was in line ....

Image

Some measuring up and a fag packet drawing and a trip into the scrap box to see what I had....

Image

Ten minutes later a piece of worthless rusty scrap was a pristine 1/2" bright steel bar. I love rescuing scrap like this, it's all good material if you give it a chance. As I've said before, you never know what you are working with until you get a cutter into it on the lathe. This particular piece turned out to be some tough stuff, EN9 I suspect, just right for clevis pins and you never know I might harden them before final fitting.

Image

I'm making two pins, one for the crosshead as well, the small piece of 1/4" that's in it is only temporary. So, once I'd formed one pin I reversed it in the lathe and made the other on the other end while I still had plenty to grab in the chuck. I sawed them off instead of parting them on account of it being tough stuff and then faced the heads and gave them a bevel in the lathe.

Image

Close of play. Both pins fit nicely. They need collars making now for the ends which will get drilled for a taper pin to make sure they stay where they are needed. No point doing that yet because tomorrow I want to set the valve and time it. I need to have the eccentric rod pin easy to take out while I am doing that.
A nice morning.... Tomorrow I can do the exciting bit, setting the valve.... Once that is done the lid can have some jointing compound popped in and be put back on for the last time. Then I'll make the oil cups for the pedestals and the cylinder and we'll be ready to tun.
However, there is a final job to do before we get there.... My cheap little compressor is poorly and from previous experience I suspect one of the steel valve strips has cracked so we'll have to look at that. We need all the pressure we can get!
Stanley Challenger Graham
Stanley's View
scg1936 at talktalk.net

"Beware of certitude" (Jimmy Reid)
The floggings will continue until morale improves!
User avatar
Stanley
Global Moderator
Global Moderator
Posts: 90802
Joined: 23 Jan 2012, 12:01
Location: Barnoldswick. Nearer to Heaven than Gloria.

Re: SHED MATTERS 2

Post by Stanley »

No change in plans, valve setting this morning. I know that many of my readers are beginners with engines so I thought I'd give a few pointers about valves before I start, it will save time when I post at dinnertime....
The Simple Slide Valve. The first thing to say is that I can make a slide valve that works and set it so that the engine will run but beyond that it is a mystery to me. It is anything but 'simple'! When a very famous locomotive engineer, Churchward, was retiring he said it was a pity he was stopping work as he was just about getting to the stage where he thought he understood the basic principles, he wasn't joking! The further you go into the design and theory of this simple mechanism the more complicated it gets. Just one problem.... If you think about it the speed of the valve across the seat is constantly changing because it reverses direction at each end. Then there is the angularity of the rod, and finally there are the complications of lap and lead. Go and start reading!
I keep sane by keeping the job simple. There are two main phases in my method. The first is to adjust the length of the rod so that the valve reaches the same point at each end of the stroke, in other words the range of movement is central over the seat. It doesn't matter where the eccentric is on the shaft for this, we are simply looking at the relationship between the eccentric and the valve. Once you have that right loosen the eccentric on the shaft and set the eccentric so that it is just about to open the steam port at one end. Keeping the eccentric in that position, rotate the engine in the direction it is to run until the piston is at the same end the steam port is about to open. Nip the eccentric in that position and rotate to check you have the same event at the other end. If you haven't, go back and do stage one again. There is one slight adjustment you can make to this position. If you arrange it so the valve starts to open slightly before TDC it gives time for the steam to get through to the cylinder and also gives a degree of compression that cushions the piston at the end of the stroke when working hard. This isn't necessary where all you want is for the engine to run.
That's all there is to it under my regime. As Johnny used to say, "We aren't running 300 looms!" The only way to tell if you have got it right is to put steam or air on and see if it runs. One further thing, If you have used Newton's method of having a driving block and a threaded valve rod you can make small adjustments very easily without taking the steam chest lid off. Simply knock the clevis pin out and turn the valve rod.
Right, let's get on with it.....
Stanley Challenger Graham
Stanley's View
scg1936 at talktalk.net

"Beware of certitude" (Jimmy Reid)
The floggings will continue until morale improves!
User avatar
Stanley
Global Moderator
Global Moderator
Posts: 90802
Joined: 23 Jan 2012, 12:01
Location: Barnoldswick. Nearer to Heaven than Gloria.

Re: SHED MATTERS 2

Post by Stanley »

Image

I started by doing what I said earlier. Made sure the valve was centred in the stroke of the eccentric and then set it so that the steam events were coming at the right time, at the beginning of each stroke. The valve is set so that the engine 'runs over'. In other words clockwise from this viewpoint. All the events are just right, this engine will run when it gets air on it.

Image

The next job was to make sure the glands on the valve chest and cylinder were properly packed and tightened down. The valve gland was OK but the cylinder gland need five more single strands in it. Both glands adjusted and the rotation checked. Running free....

Image

The next job was to go over all the nots and bolts and make sure that they were all tightened properly. Then another check on rotation, all OK, it still runs free.

Image

Then a coat of Stag compound on the valve lid, put the valve lid back on and tighten all the nuts down. All the trouble I spent on getting the studs right paid off, no problems with the lid at all. I have had some fights with long studs in the past.... Lovely tight but free fit.

Image

It's beginning to look like an engine!

Image

A trip into the scrap box for some material to make the retaining collars for the pins in the crosshead and the valve rod clevis. I knew this was tough stuff as it is an old punch. So before I went any further I did something that I have been meaning to do for a while, I made a new left and cutter. The old one was originally a chip breaker and I've never really liked it even though it cut OK.

Image

I soon had the stock faced and turned down to dead on 1/2". I drilled the bar 1/4" and took it out to put it under the pillar drill to drill two 1/16" holes through for the taper pins, easier to hold it solid.

Image

Then I bevelled the edge and parted both collars off.

Image

Here's how I held them to drill the pins with the hand drill through the holes in the collars. I got the crosshead straight but drifted off a bit on the clevis pin. I can't see whether I am straight or not so the first was sheer luck. No matter, the pin locks the collar and that's all I am worried about....

Image

Close of play. This is virtually a finished engine. All I have to do is make three tiddly brass lubricators, a gas engine type for the cylinder and cups for the two pedestal bearings.
Before I came out of the shed I cleaned up the lathe and the VM and left everything tidy. A nice straight edge for tomorrow....
It's been a very satisfying morning.....
Stanley Challenger Graham
Stanley's View
scg1936 at talktalk.net

"Beware of certitude" (Jimmy Reid)
The floggings will continue until morale improves!
micktoon
Regular User
Posts: 366
Joined: 05 Feb 2012, 21:23
Location: Newcastle upon Tyne

Re: SHED MATTERS 2

Post by micktoon »

Hi Stanley , well done , its almost ready for test run now, looking very nice too :grin: . I like the parting tool, good idea for the 'brace' to stop the job lifting and causing chatter could you do a couple more photos of it please. I wonder if they still make them ? , I have never noticed any for sale new anywhere but have seen them in old books before, it seems to work well anyway which is the main thing.

You really will have to start thinking of your next project soon !!!

Cheers Mick.
User avatar
Stanley
Global Moderator
Global Moderator
Posts: 90802
Joined: 23 Jan 2012, 12:01
Location: Barnoldswick. Nearer to Heaven than Gloria.

Re: SHED MATTERS 2

Post by Stanley »

The engine.... Thanks Mick. Apart from the fact I surmounted the problem of not being able to see traight, two things I like about it.... It looks 'right', I think that considering it just grew, it indicates that I have learned a little bit over the years. The second thing that pleases me is that dimensionally this is the most accurate machining I have ever done and you can tell when you turn it over. There is just one spot in the stroke where the pedestal bearings drag a bit but this is minimal and will go away the first time it is run. The only bearing that isn't snug is the crank brass, no play in it and it floats nicely on the crank pin which is how it should be. I'm going to make the lubricators today and possibly get into my compressor to rectify the delivery valve. One thing that is lurking in my head is that I'd like to make a proper valve for the steam supply. It has been rumbling round in my head and I think I know how to do it.
The parting tool holder...

Image

Image

Click to enlarge. It was made by Burnerd, they made good chucks as well and I have a couple of them. It is stamped on the shank with the name and 'Patent 23498-2'. Burnerd are now part of Pratt Burnerd at Heckmondwyke, same location as Harrisons.
I can't find the patent but I think you can get the idea from the pics. The top jaw is hardened and polished where it runs on the work. Dead easy to use if you have it in a quick change toolholder. The tool is always on centre height and the jaw can be raised and lowered to suit the diameter of the bar.
Brilliant idea and on small sizes it's a boon. Works best near the chuck of course but the top jaw acts as a steady so you can work further out with confidence...
Stanley Challenger Graham
Stanley's View
scg1936 at talktalk.net

"Beware of certitude" (Jimmy Reid)
The floggings will continue until morale improves!
User avatar
chinatyke
Donor
Posts: 3831
Joined: 21 Apr 2012, 13:14
Location: Pingguo, Guangxi, China

Re: SHED MATTERS 2

Post by chinatyke »

Stanley wrote:The engine.... Thanks Mick. Apart from the fact I surmounted the problem of not being able to see traight, two things I like about it.... It looks 'right', I think that considering it just grew, it indicates that I have learned a little bit over the years. The second thing that pleases me is that dimensionally this is the most accurate machining I have ever done and you can tell when you turn it over. . .
One thing that struck me was that you haven't used any plans or engineering drawings during its construction, just sketches, skill and knowledge from the "design committee". I feel it is a shame that there are no drawings for others to follow because I'm guessing many other modellers would like to try something similar. But then it would lose its uniqueness.
Looks great and well done. Any plans to loan it to a museum or public display?

Can you make a model of a nodding donkey as used in the oil fields? Not the most aesthetic piece of equipment but I think they are graceful in their action.
User avatar
Stanley
Global Moderator
Global Moderator
Posts: 90802
Joined: 23 Jan 2012, 12:01
Location: Barnoldswick. Nearer to Heaven than Gloria.

Re: SHED MATTERS 2

Post by Stanley »

My experience of museums and small steam engines is that most of them can't be trusted with them, Moorside Museum at Bradford seized Johnny's wonderful mill engine up by running it on compressed air and forgetting that this put condensation in the bore. They asked me if I'd have a look at it but I refused.... So no, I'll put it on the sideboard and gloat over it. You have no idea how much pleasure I get from looking at my engines.....
Nodding donkey is a good thought, I shall file it for future reference.
As for drawings.... I'm a fag packet man. If you could see Johnny's notebooks giving 'particulars' of big jobs they had to do you'd see where I am coming from. Just the basic dimensions and then make it....

Image

Johnny's magnificent cross compound mill engine in the shed at Federation Street.
Stanley Challenger Graham
Stanley's View
scg1936 at talktalk.net

"Beware of certitude" (Jimmy Reid)
The floggings will continue until morale improves!
User avatar
Stanley
Global Moderator
Global Moderator
Posts: 90802
Joined: 23 Jan 2012, 12:01
Location: Barnoldswick. Nearer to Heaven than Gloria.

Re: SHED MATTERS 2

Post by Stanley »

Later. All my tasks done, Jack walked and I'm ready for the shed. The design committee have put forward the suggestion that the lubricator on the cylinder should be bigger than the ones on the flyshaft. I think they are right......
Stanley Challenger Graham
Stanley's View
scg1936 at talktalk.net

"Beware of certitude" (Jimmy Reid)
The floggings will continue until morale improves!
User avatar
Stanley
Global Moderator
Global Moderator
Posts: 90802
Joined: 23 Jan 2012, 12:01
Location: Barnoldswick. Nearer to Heaven than Gloria.

Re: SHED MATTERS 2

Post by Stanley »

Image

Today is lubricators... First job was to do some measuring and design the gas engine type lubricator for the cylinder. Once I had got the size, a trip into the treasure chest to find a piece of brass bar....

Image

Next job, make it parallel and the right size.

Image

I Wanted 1/4" for the hole in the cylinder... Threaded it 1/4" X 26TPI brass thread...

Image

Then parted it off to the right length. Reversed it, poked the 1/8" oil holes through then bored it to tapping size, 11.5mm. Then I made the lid but I had a slip up.

Image

I'd forgotten that I had two 1/2" dies and one was a bad one. I put the lid back in and tried to rectify the thread but made a bugger of it so I made another one. Fitted perfectly and an 'O' ring under the edge for a seal...

Image

Making the replacement. I made this knurling tool many years ago and it works fine but the pivot pins have worn and I need to make new ones....

Image

We got there in the end..... It didn't take long to knock off the simple oil cups for the pedestal bearings...

Image

Close of play. We have an engine that's ready to run. By the way, remember I said that there was a tighter spot as you rolled it over? It's gone now, must have just needed a spot of oil!
Tomorrow I shall rip the compressor down and sort the valves..... Exciting stuff!
Stanley Challenger Graham
Stanley's View
scg1936 at talktalk.net

"Beware of certitude" (Jimmy Reid)
The floggings will continue until morale improves!
micktoon
Regular User
Posts: 366
Joined: 05 Feb 2012, 21:23
Location: Newcastle upon Tyne

Re: SHED MATTERS 2

Post by micktoon »

Hi Stanley , thanks for the parting tool photos , an interesting tool and looks makable really :grin:

As you say I agree the engine just looks right .......and that normally means it will be right from what I have seen with most things :laugh5: A project you can be proud of for sure Stanley and I am sure Jonny and Newton will be looking down nodding with approval too, I think its ended up having more than just a physical bit of them in it but also a bit of their spirit too, well done I say :grin:

Cheers Mick.
User avatar
Stanley
Global Moderator
Global Moderator
Posts: 90802
Joined: 23 Jan 2012, 12:01
Location: Barnoldswick. Nearer to Heaven than Gloria.

Re: SHED MATTERS 2

Post by Stanley »

The parting tool holder is definitely makable. It makes these small parting jobs routine.

Image

You will not be surprised to hear that I cracked last night.... After tea I went back in the shed and ripped the cylinder head off my little compressor. As I predicted, the delivery valve was in two pieces. It is only a small strip of .008 shim. Biggest job was seeing well enough to cut an accurate replacement but I managed in the end, popped it in, put the compressor back to gather and cracked it up. A nice healthy roar and it is now an effective tool for blowing chucks out etc. However, it has no accumulator and the only volume you have is what is built up in the susie. Even so, the initial belt is probably something over 80psi and it started the engine immediately. It goes like the clappers and if the compressor could keep up your biggest problem would be holding the speed back.
Mick, you're dead right about Johnny and Newton. Newton's con rod and crankshaft are doing what he made them for and I think Johnny would approve.... It's back on the sideboard now and I have the satisfaction of knowing that not only does it look right but it runs well. Very smooth and no knocks or clicks in it. When it's run in it will tick over beautifully. Definitely the best engine I have ever made....

Image
Stanley Challenger Graham
Stanley's View
scg1936 at talktalk.net

"Beware of certitude" (Jimmy Reid)
The floggings will continue until morale improves!
micktoon
Regular User
Posts: 366
Joined: 05 Feb 2012, 21:23
Location: Newcastle upon Tyne

Re: SHED MATTERS 2

Post by micktoon »

Well done Stanley , for it to be the best engine you have built with the problems you have with your eyes .........I think you deserve to give yourself a pat on the back :grin:

SO ..................come on then whats the next project ??????? you can not go back to sitting watching TV now lol :laugh5:

Cheers Mick.
User avatar
Stanley
Global Moderator
Global Moderator
Posts: 90802
Joined: 23 Jan 2012, 12:01
Location: Barnoldswick. Nearer to Heaven than Gloria.

Re: SHED MATTERS 2

Post by Stanley »

I might have no choice for a while Mick. Had a funny turn yesterday..... See Whet attracted Your Attention....
Stanley Challenger Graham
Stanley's View
scg1936 at talktalk.net

"Beware of certitude" (Jimmy Reid)
The floggings will continue until morale improves!
User avatar
Stanley
Global Moderator
Global Moderator
Posts: 90802
Joined: 23 Jan 2012, 12:01
Location: Barnoldswick. Nearer to Heaven than Gloria.

Re: SHED MATTERS 2

Post by Stanley »

Shed is off the menu until I get over whatever it is that has attacked me.... I'll be back!
Stanley Challenger Graham
Stanley's View
scg1936 at talktalk.net

"Beware of certitude" (Jimmy Reid)
The floggings will continue until morale improves!
User avatar
Stanley
Global Moderator
Global Moderator
Posts: 90802
Joined: 23 Jan 2012, 12:01
Location: Barnoldswick. Nearer to Heaven than Gloria.

Re: SHED MATTERS 2

Post by Stanley »

I'm having to resist shed fever! I had set myself the task of installing new pivots in my knurling tool and it's laid there on the surface plate waiting for me. However, I am not going to drop my guard. I had a severe set back and I'm still delicate. Far better safe than sorry.
On another matter, China was trying to entice me into making a walking beam oil field pump (Nodding Donkey). I looked into them but for various reasons it doesn't appeal to me. What is increasingly coming to the fore is the notion I'd like to build a three throw boiler feed pump, something I know well. Henry Brown and Sons under Johnny Pickles made some good ones.....

Image
Stanley Challenger Graham
Stanley's View
scg1936 at talktalk.net

"Beware of certitude" (Jimmy Reid)
The floggings will continue until morale improves!
User avatar
Stanley
Global Moderator
Global Moderator
Posts: 90802
Joined: 23 Jan 2012, 12:01
Location: Barnoldswick. Nearer to Heaven than Gloria.

Re: SHED MATTERS 2

Post by Stanley »

In the absence of any specific activity, the design committee is hard at work on the pump. The intention is to make it without castings, using only what I have in the treasure chests!
Stanley Challenger Graham
Stanley's View
scg1936 at talktalk.net

"Beware of certitude" (Jimmy Reid)
The floggings will continue until morale improves!
User avatar
Stanley
Global Moderator
Global Moderator
Posts: 90802
Joined: 23 Jan 2012, 12:01
Location: Barnoldswick. Nearer to Heaven than Gloria.

Re: SHED MATTERS 2

Post by Stanley »

Image

The shed is pulling.......
Stanley Challenger Graham
Stanley's View
scg1936 at talktalk.net

"Beware of certitude" (Jimmy Reid)
The floggings will continue until morale improves!
Locked

Return to “Crafts”