Wood carvings

Post Reply
micktoon
Regular User
Posts: 366
Joined: 05 Feb 2012, 21:23
Location: Newcastle upon Tyne

Wood carvings

Post by micktoon »

Good evening all , I have been having a go at woodcarving. I went to a wood show in Harrogate that has all things wood related going on, one of the stalls was a local woodcarving club , I have always fancied having a go and already had some carving gouges so went along to the club, its all very informal and friendly , One of the people involved in the club called Alan sharpened my tools and showed me how to sharpen them myself and set me away on a Yorkshire rose, for those not from the UK A Yorkshire rose is the symbol for the county of Yorkshire in Northern England Lancashire also has the same symbol the difference being the Yorkshire rose is a white rose and the Lancashire one is a red rose, there seems to be many variations of both and this is just how mine turned out rather than a sample of what it should look like. Before anyone asks how do I know mine is a Yorkshire Rose when its wood coloured ................ well Alan is a Yorkshireman ............. so its a Yorkshire Rose :thumbup:
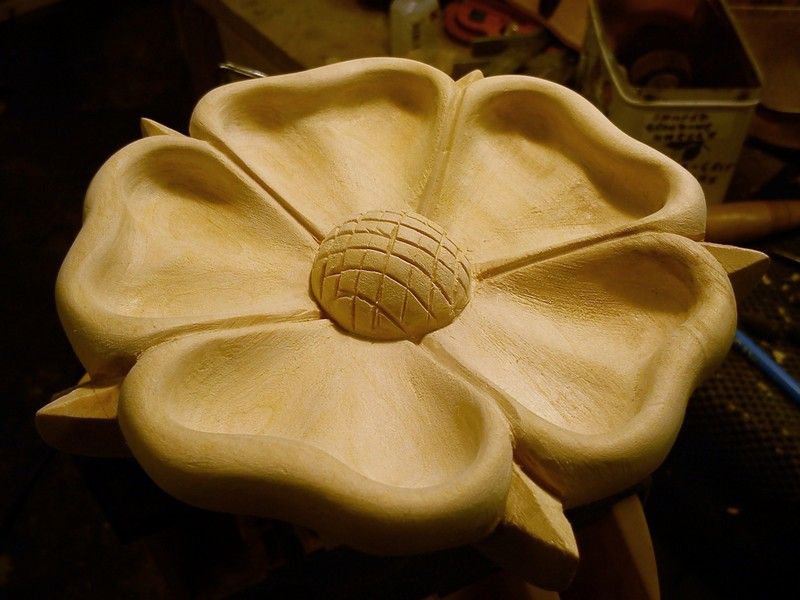
I only took a couple of photos of it getting done as I was too busy consentrating on doing the carving :dremel: The wood is lime wood , I think in the USA it might be called basswood or that is a very similar wood.

This is it half carved before any sanding took place.

Image

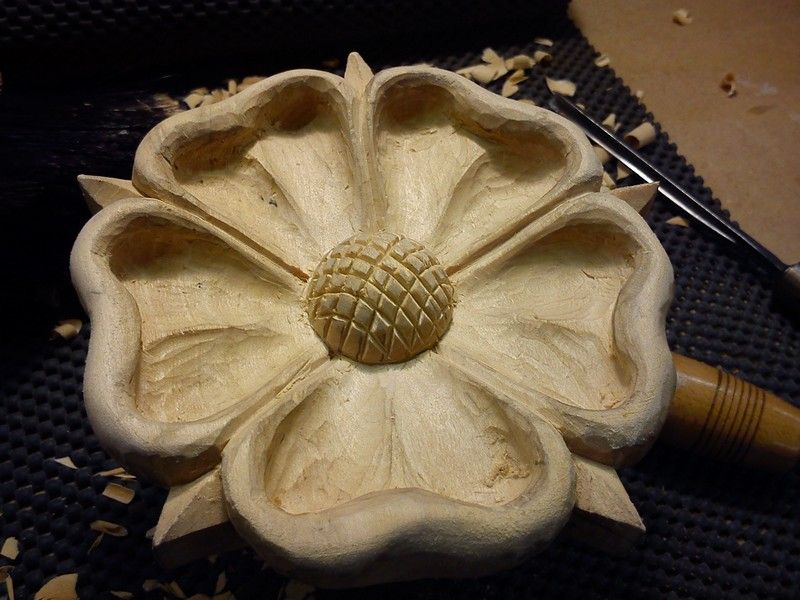
It then gets sanded , partly with small rotary bits in a dremel type power tool , then hand sanded starting with say about 80 grit and working down to about 600 grit, just refining the shape and form until its ready to finish.

Image

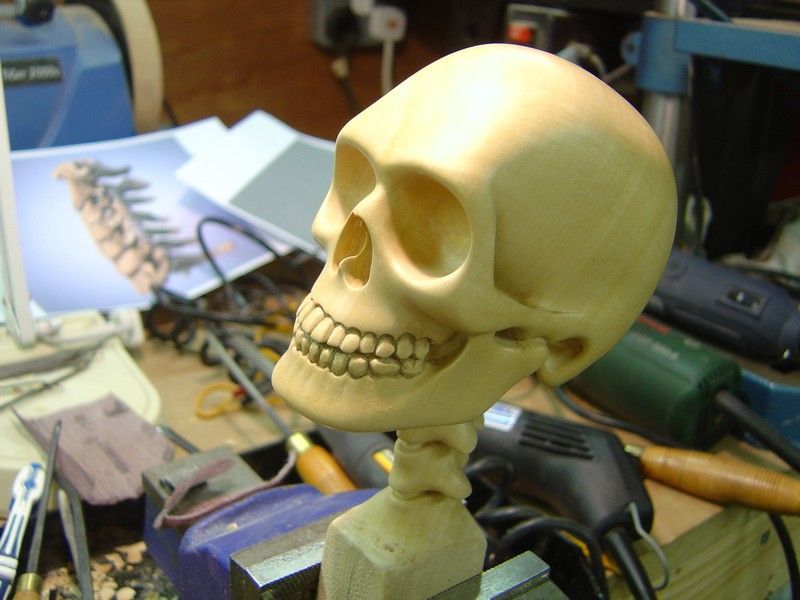
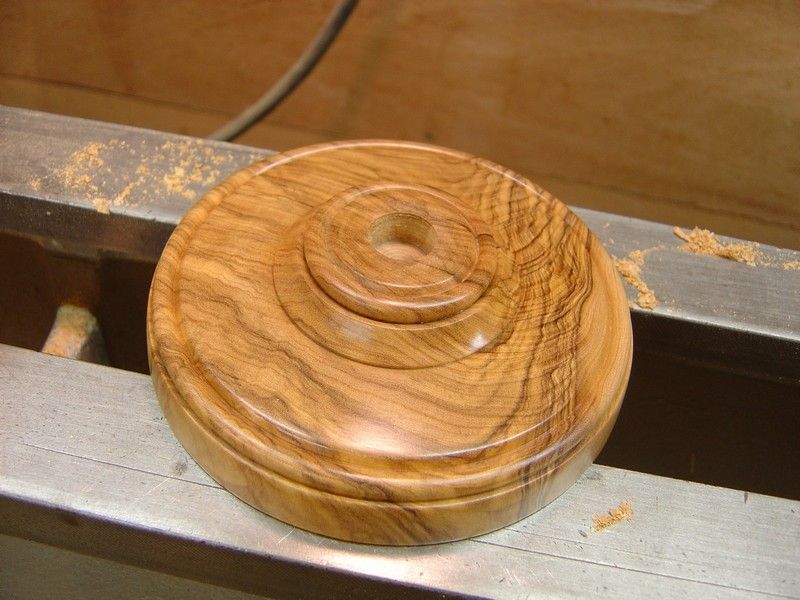
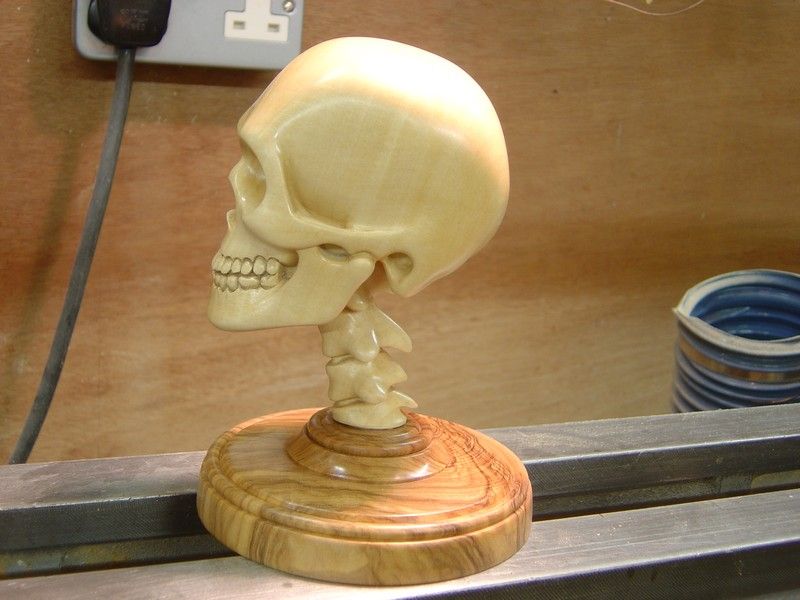
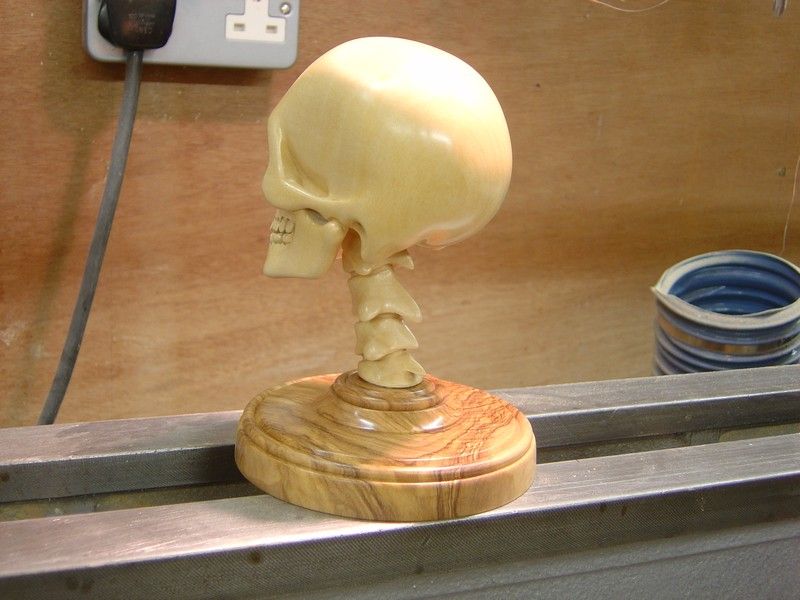
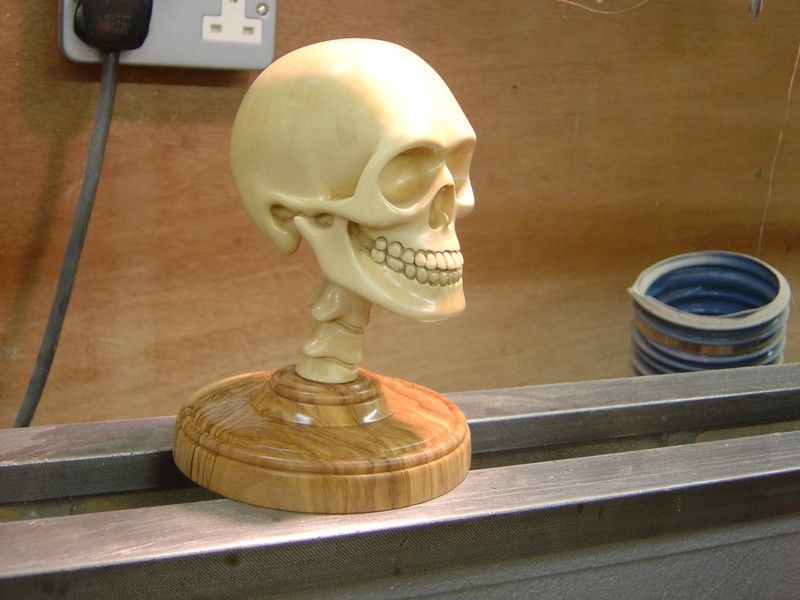
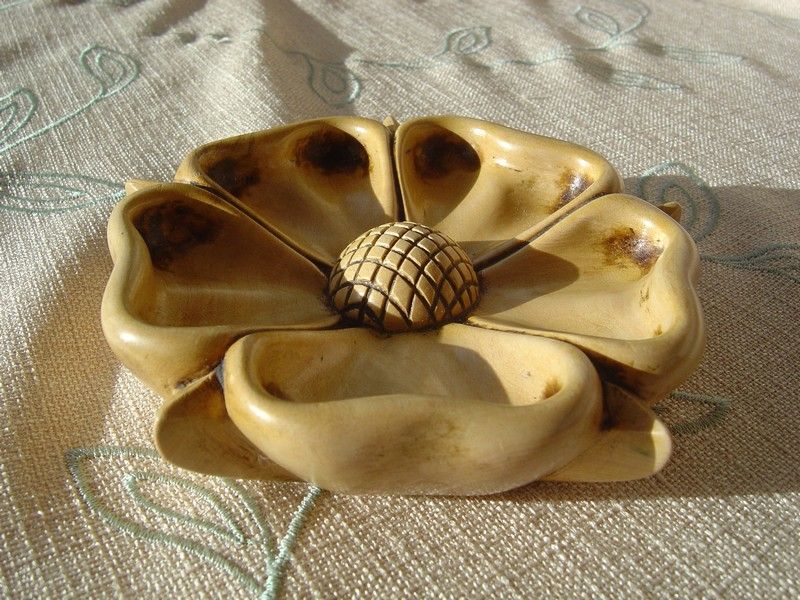
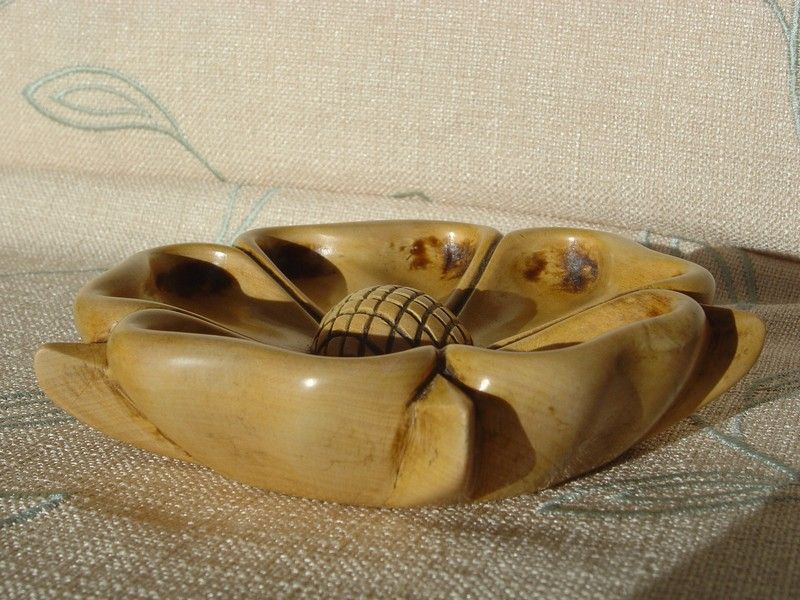
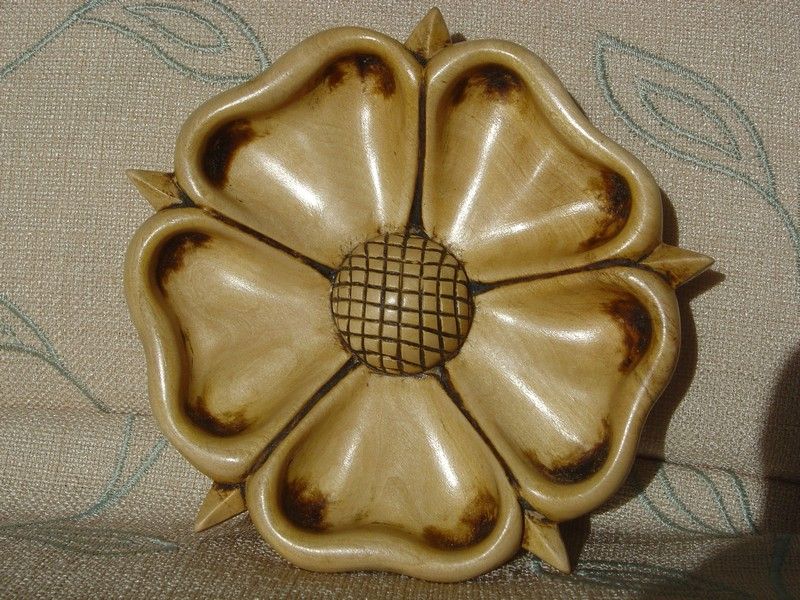
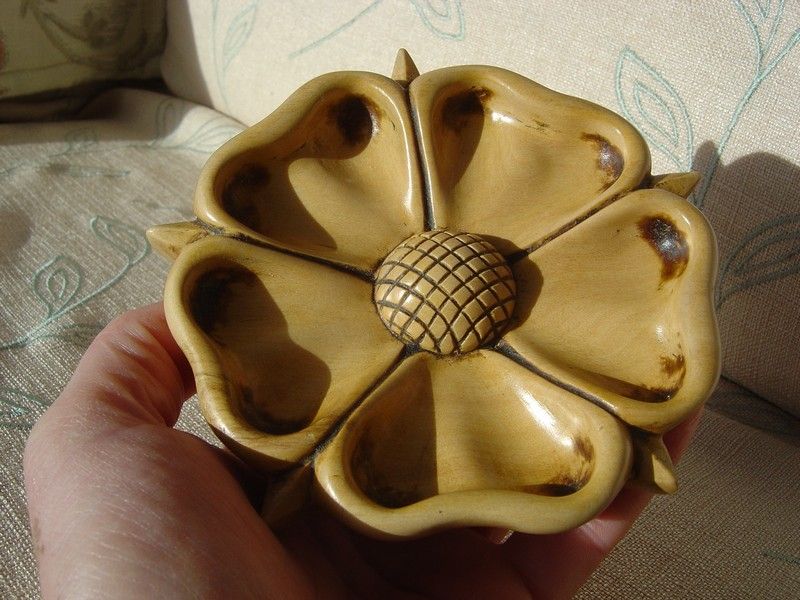
This is the finished thing , it was finished with a cellulose sanding sealer then a dark wax applied to highlite the deeper areas and make it have the old used look , then finished over that with clear wax. Here are a few more views of it finished, I am quite happy with it but there are bits that can be improved on................... keep scrolling down to see the next project :thumbup: I have been taking photos as this carving progresses :clap:


Image


Image


Image


Image

The next project was partly chosen because of the size of wood I had and also I wanted images from all angles of something to carve so this skull fitted the bill :thumbup:

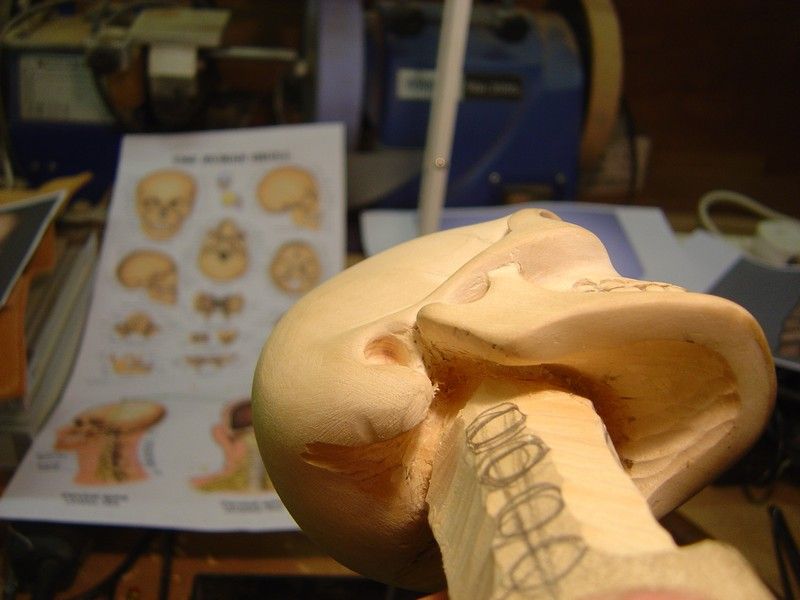
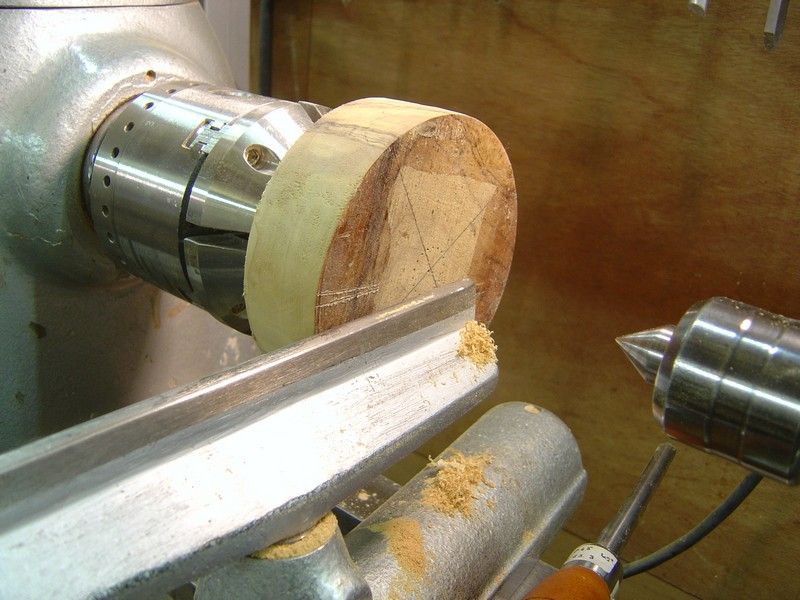
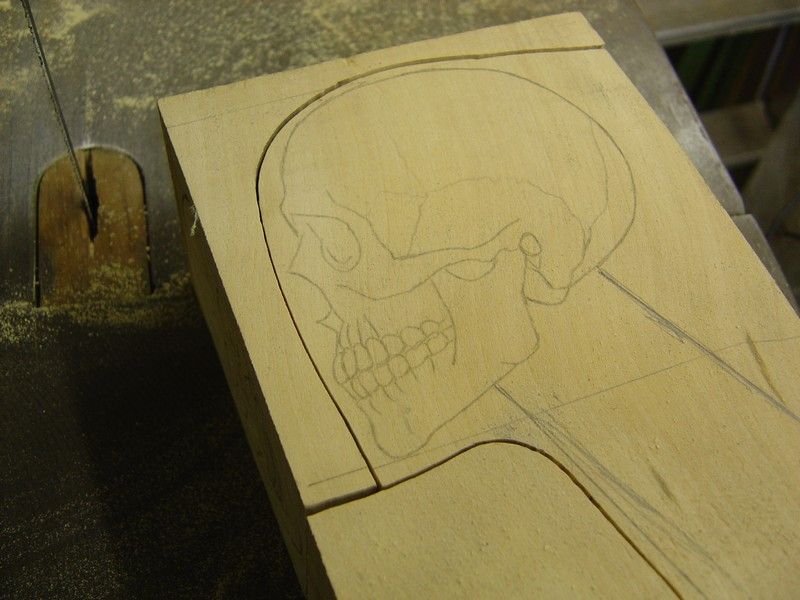
The first stage is to draw or trace the image onto the wood and bandsaw out from the side profile and the front profile. I have done a rough cut along the front of the skull here so I can remove that section and get into the various shapes along the front of the face area.


Image

Once its cut one way you tape the waste bits of wood back on so it remains in a block form then bandsaw the front profile out too.

Image

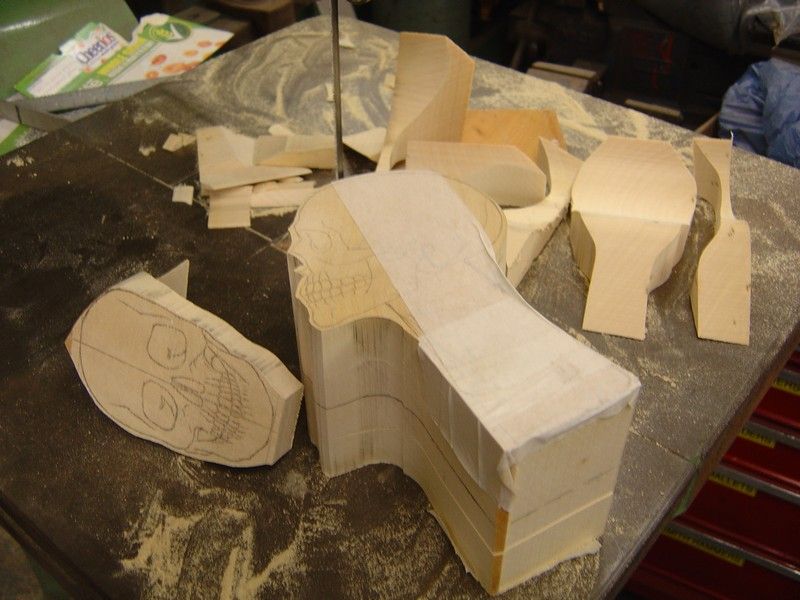
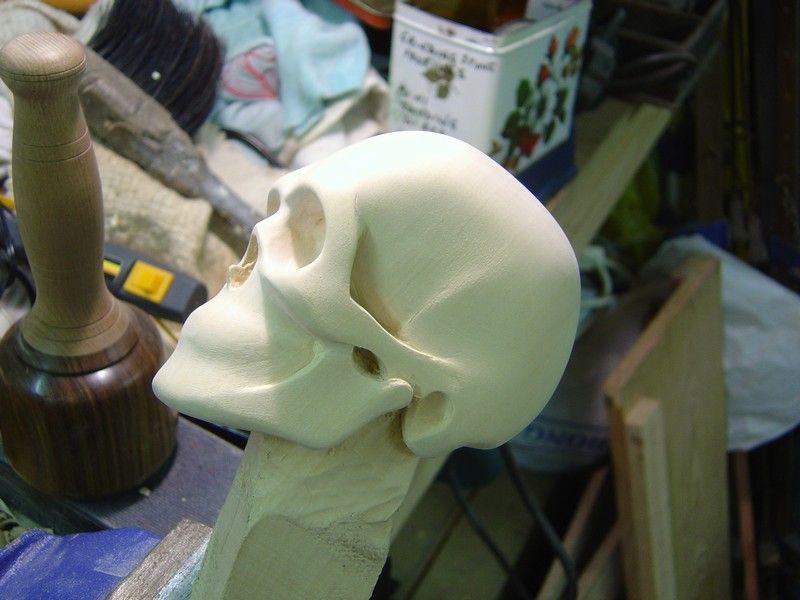
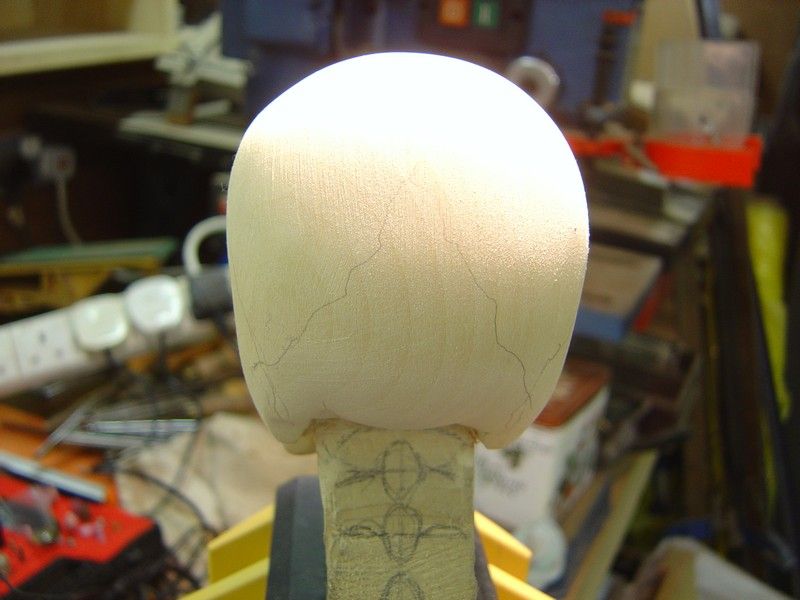
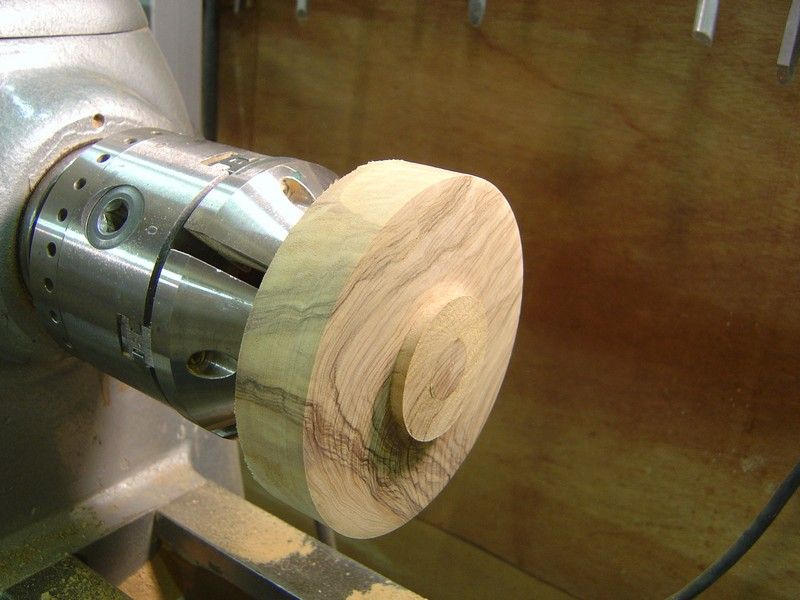
You end up with this type of thing , I have started to round the corners off here, its hard to get your head around what is safe to remove , once its cut off there is no going back :palm:

Image

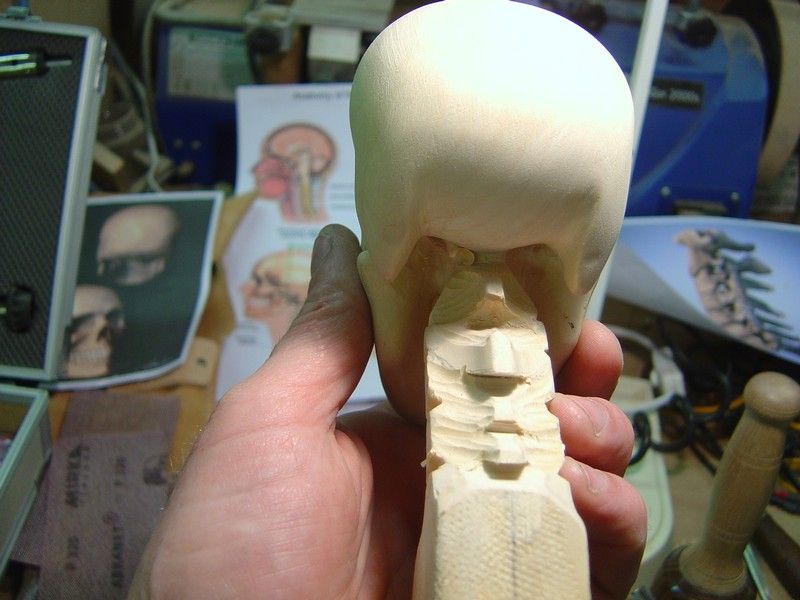
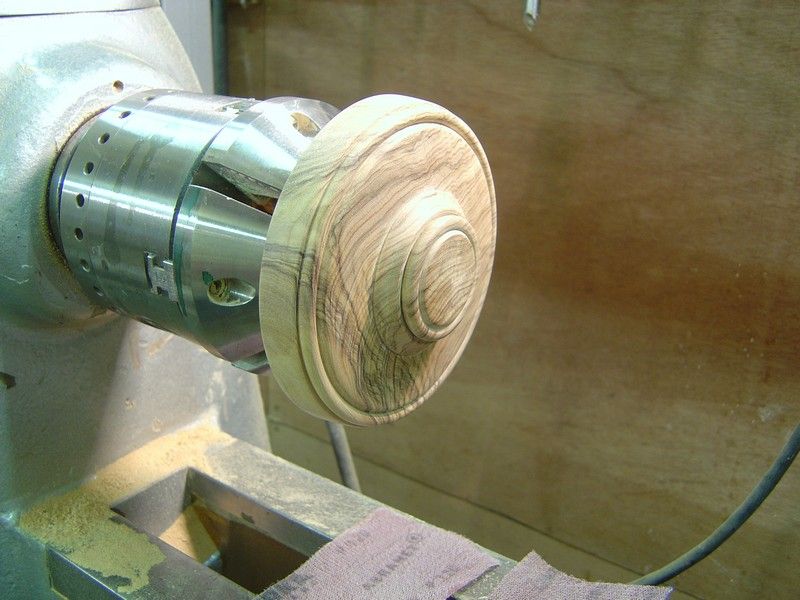
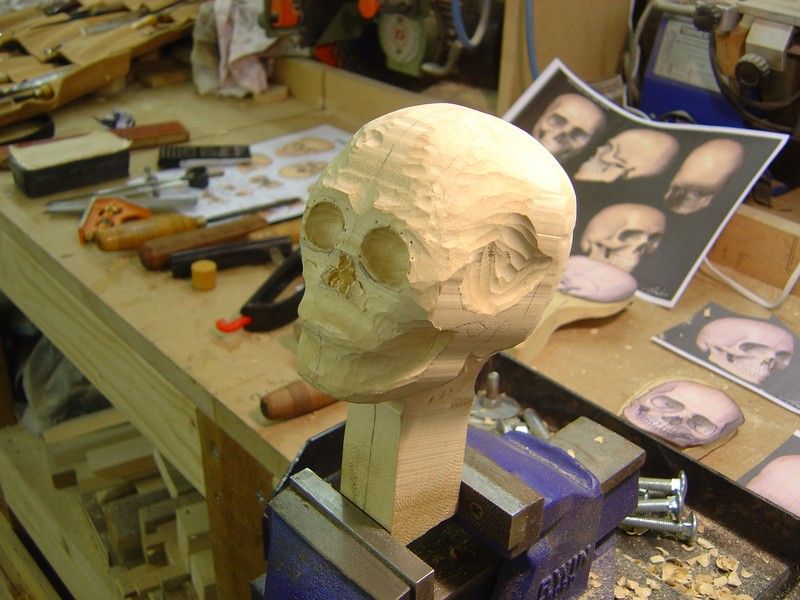
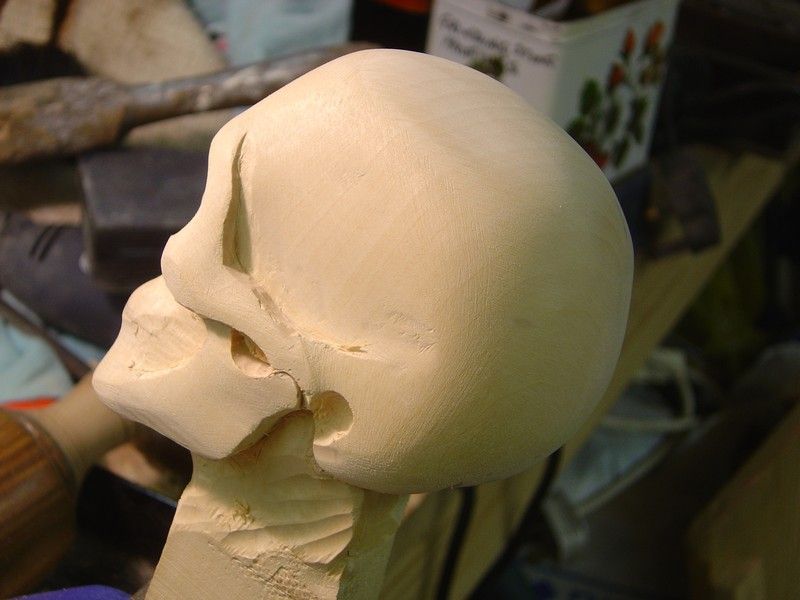
Then its just a case of carving away and refining the general shape at first, double checking everything as you go and also trying to work with the grain as much as possible.


Image

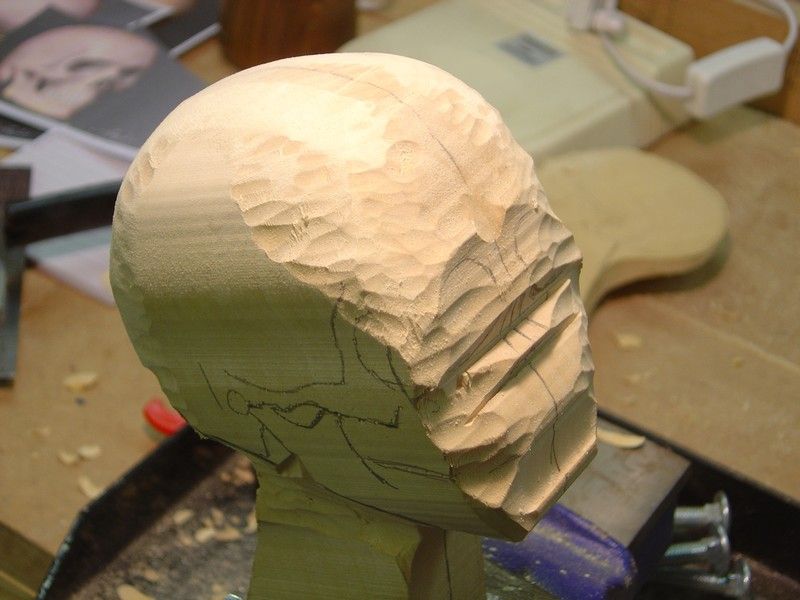
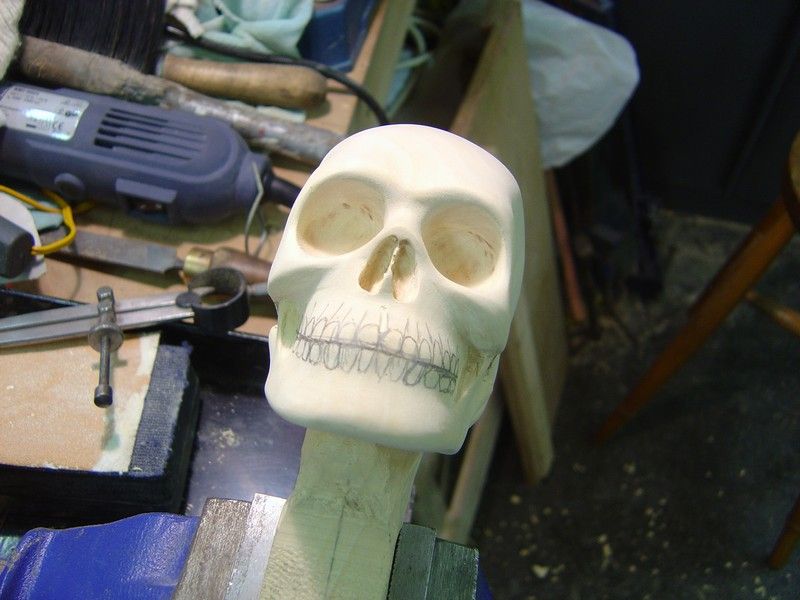
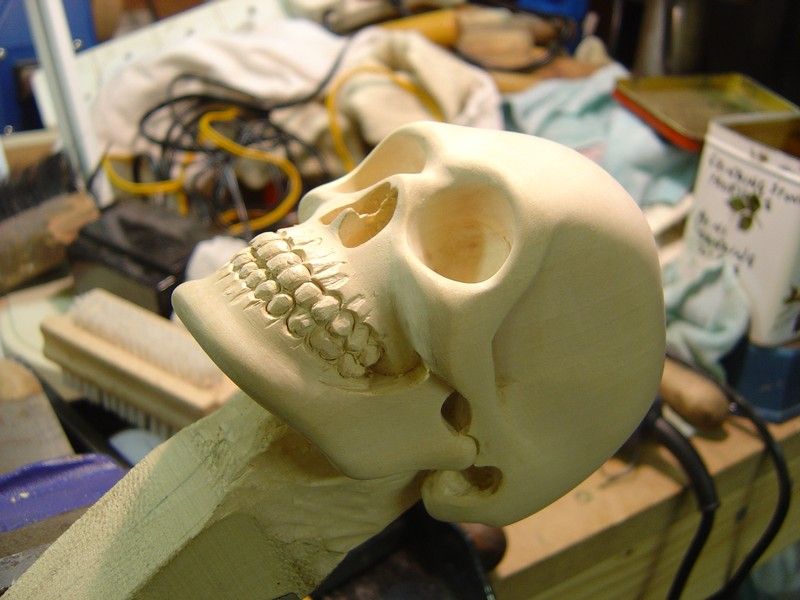
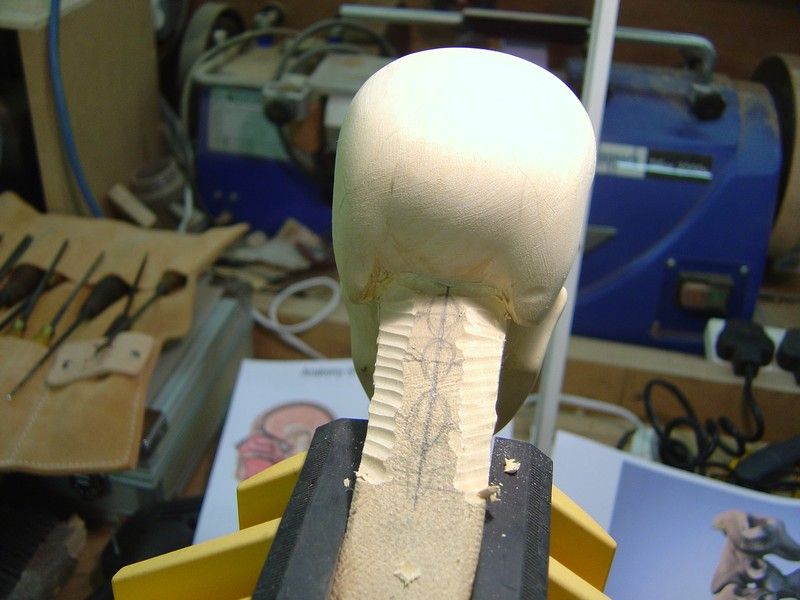
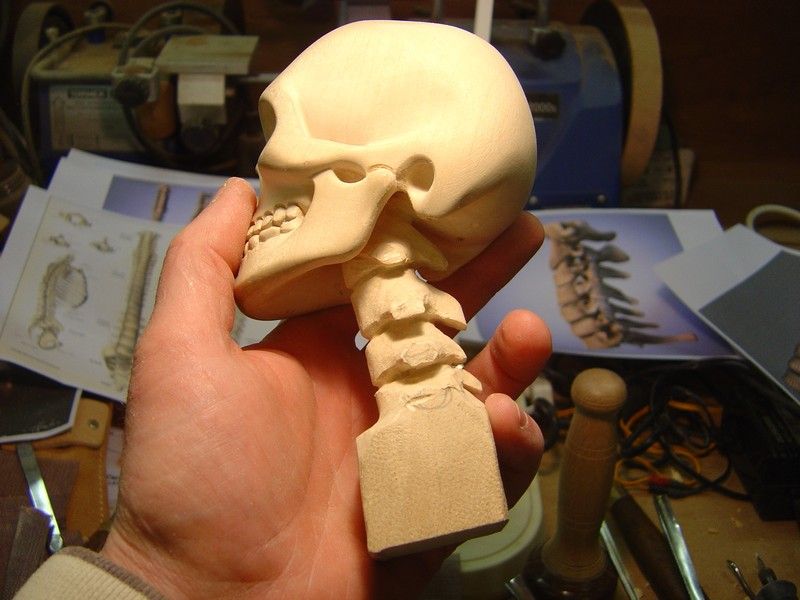
Its starting to take shape , you can see where I have held the image over the carving and spiked the outline of eye sockets etc to make it easier to see where things need to be.

Image

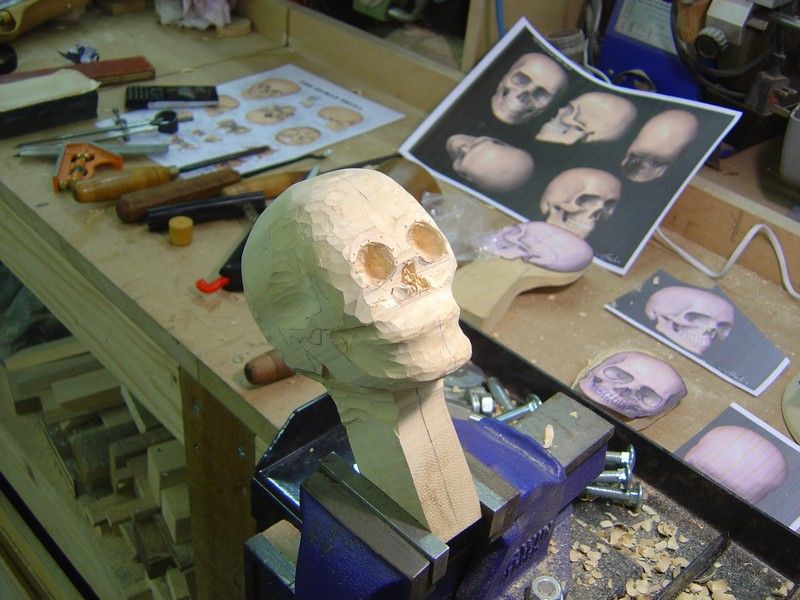
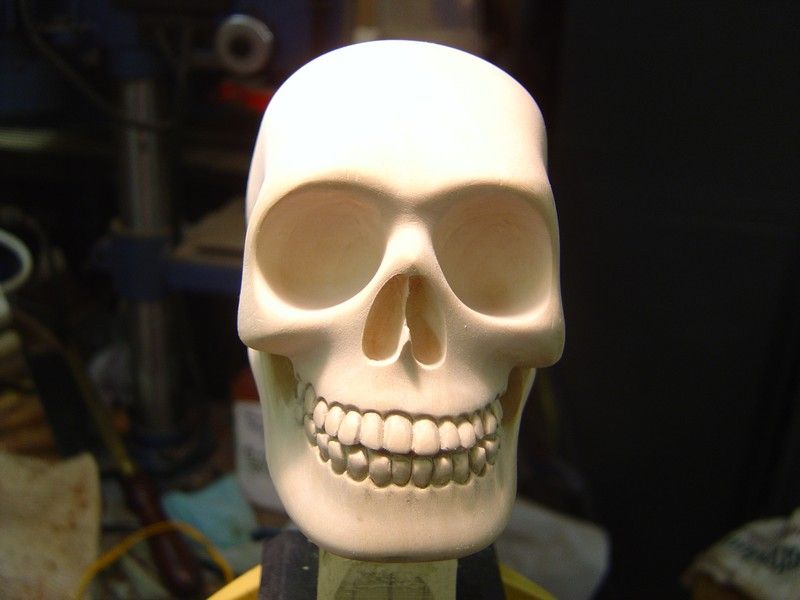
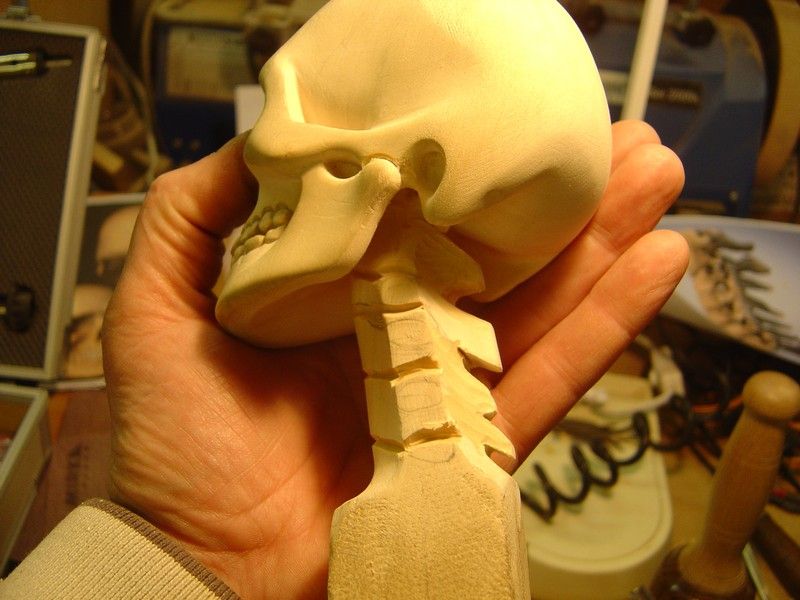
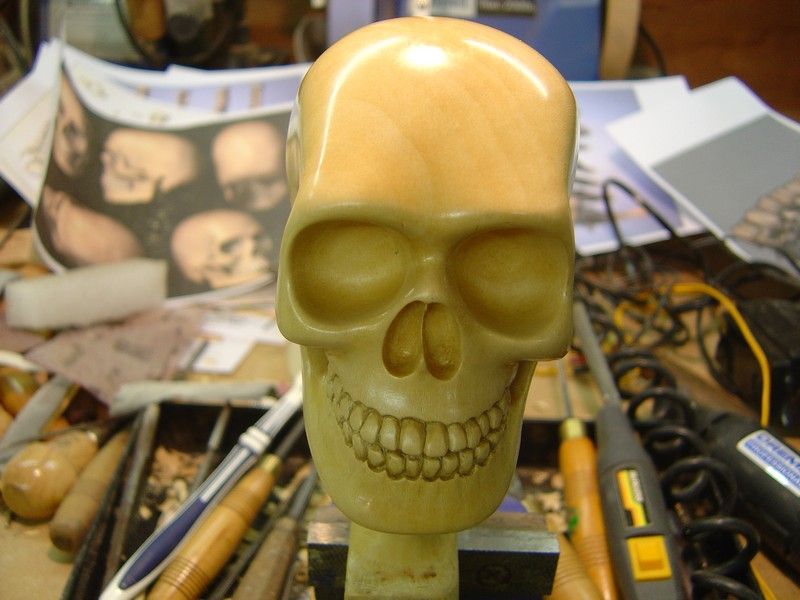
I have started to get the basic shape here, Its just a case of keep holding the images up beside the carving and going steady.

Image

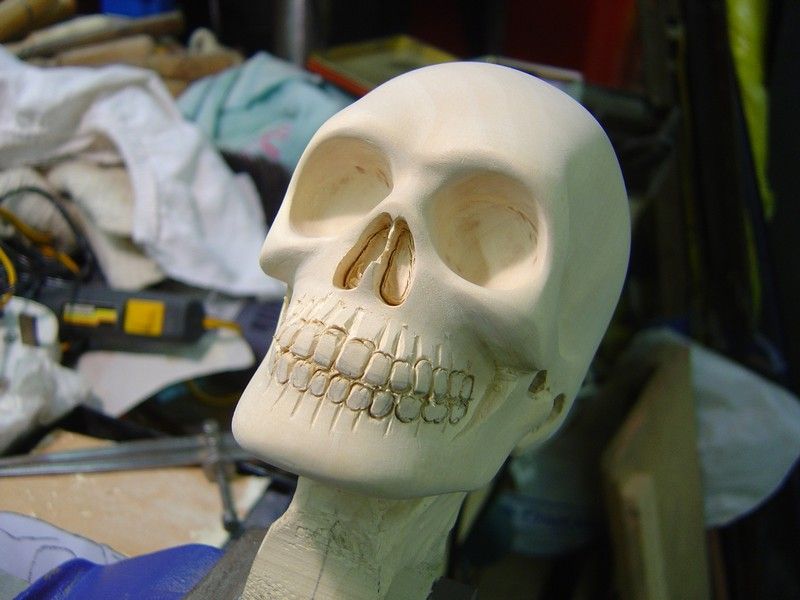
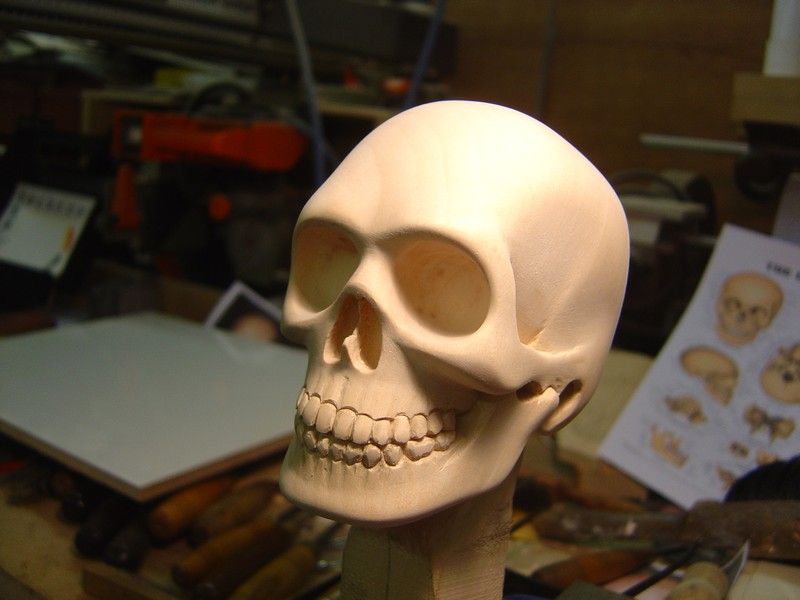
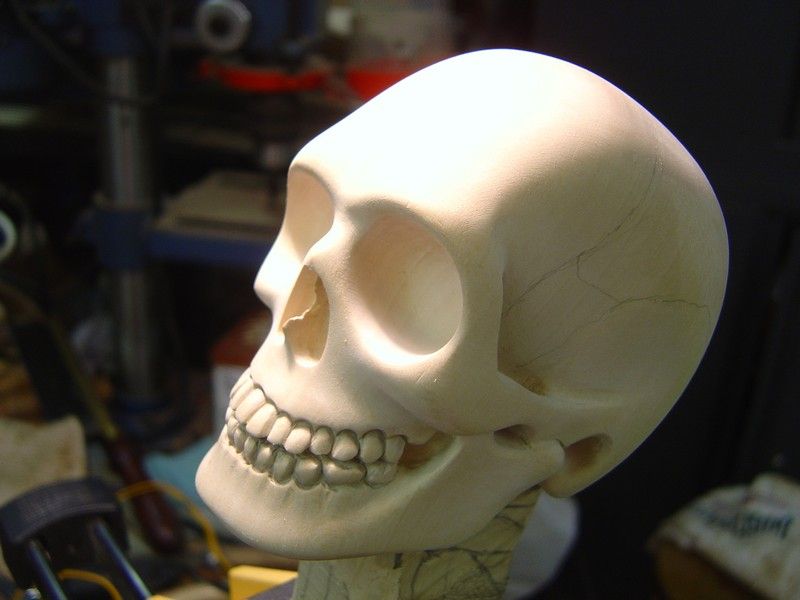
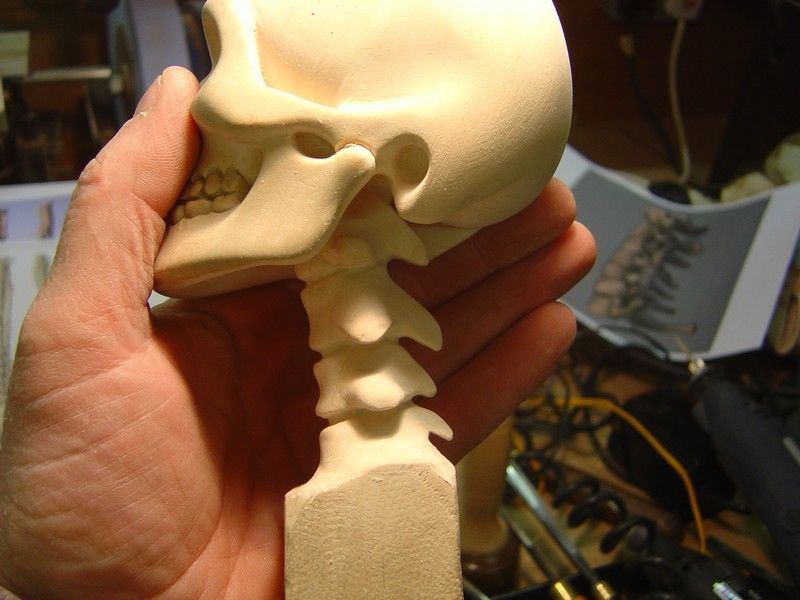
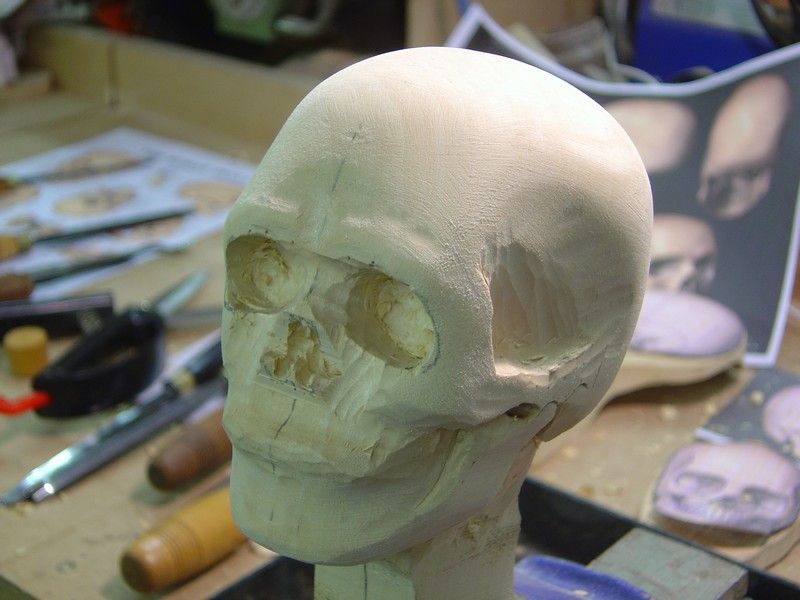
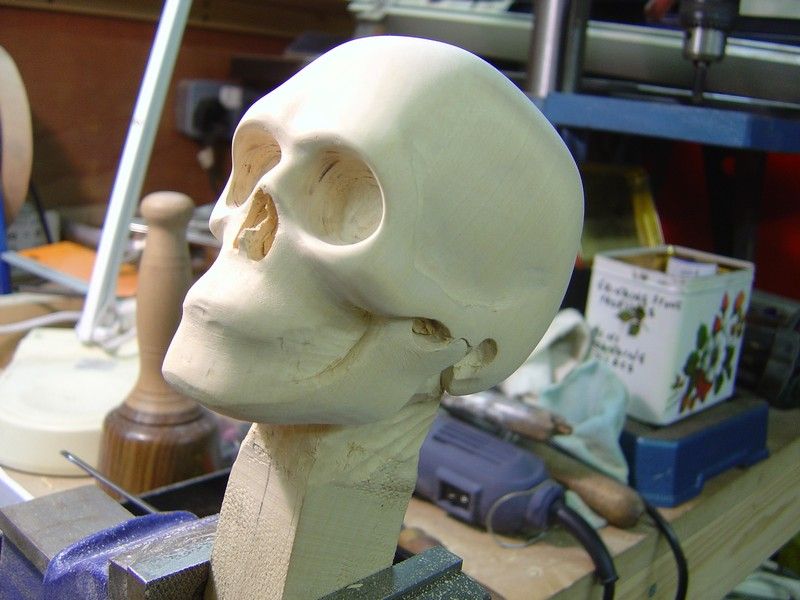
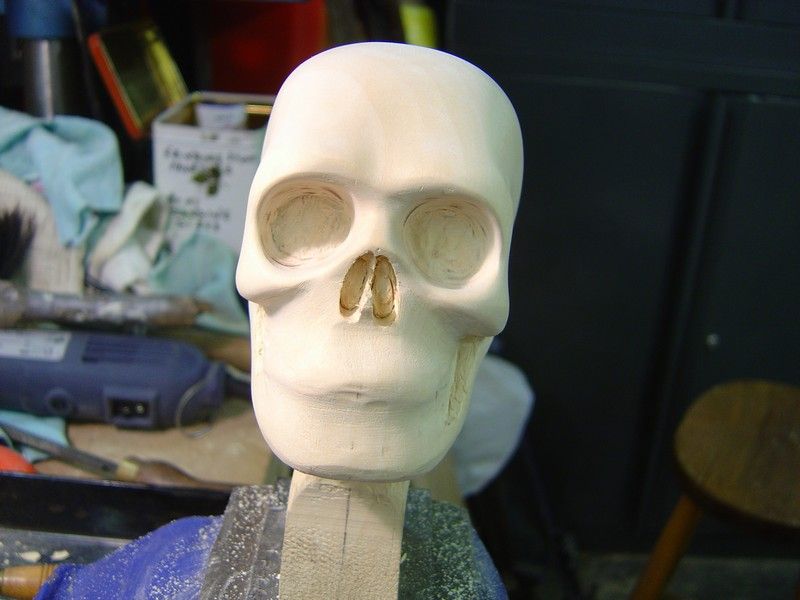
I have started to sand parts to get a better idea of what looks right. Then its just more carving followed by more sanding and just keep going always trying not to take anything off that needs to be there :scratch: , it sort of gets easier as you go as you can see what looks right and wrong more clearly as it starts to look like a skull.

Image

Image

Image

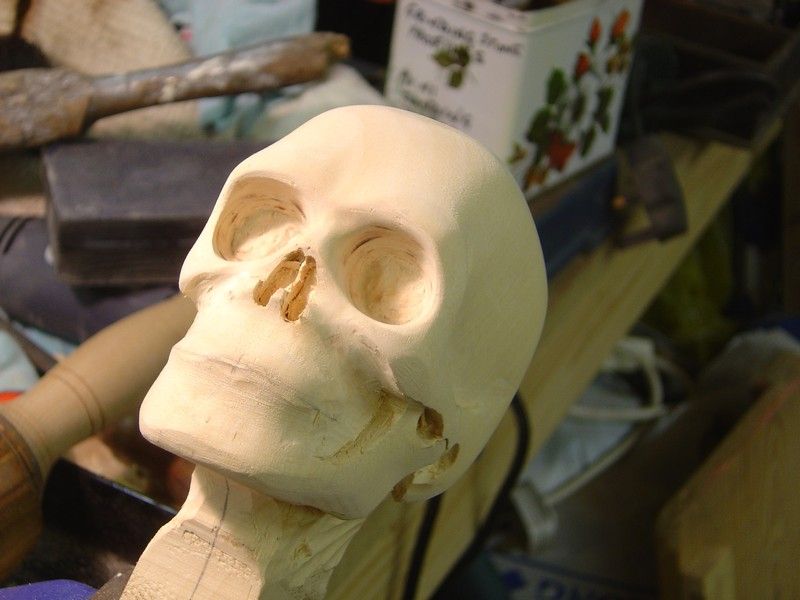
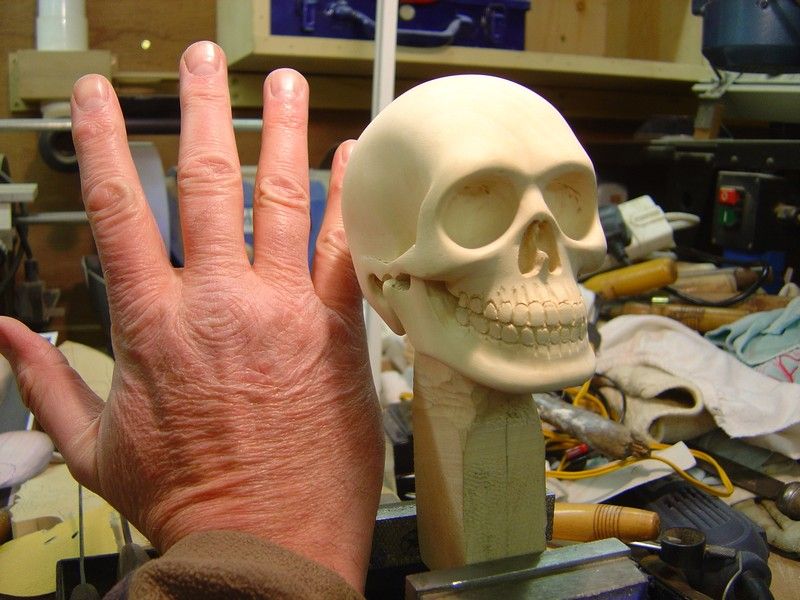
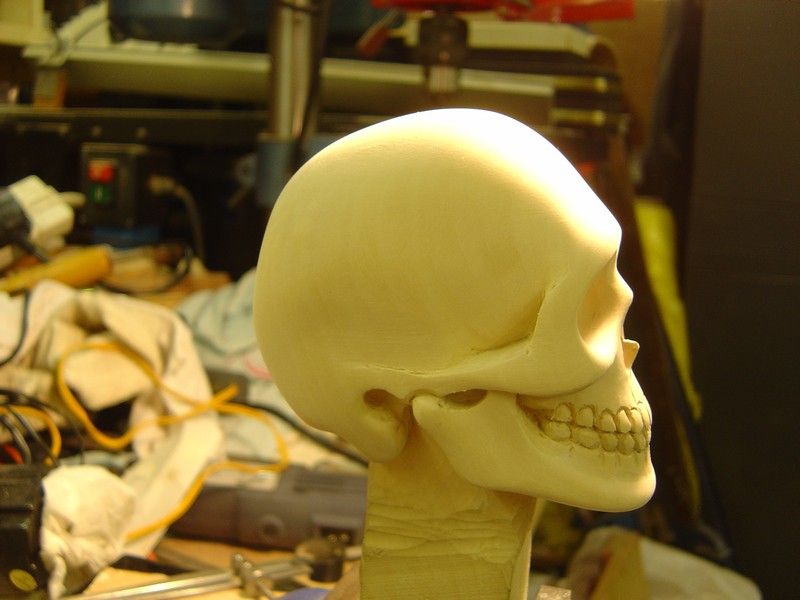
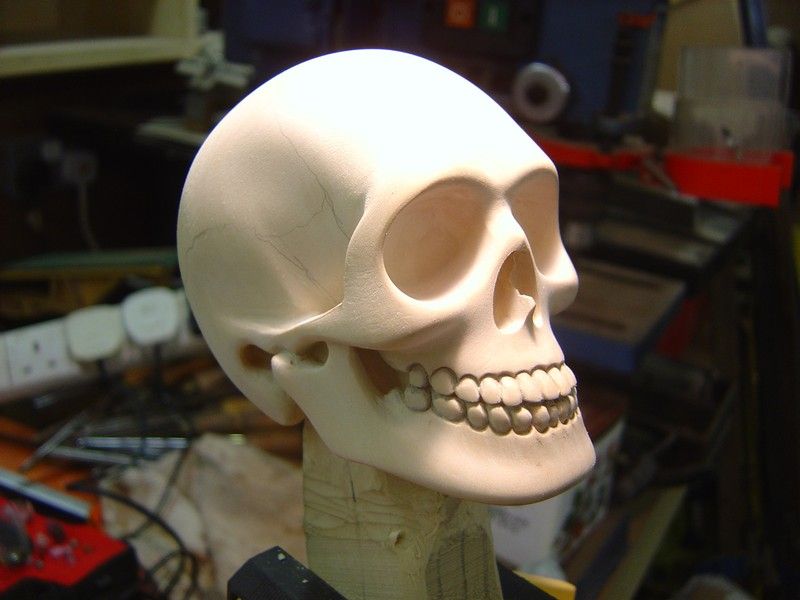
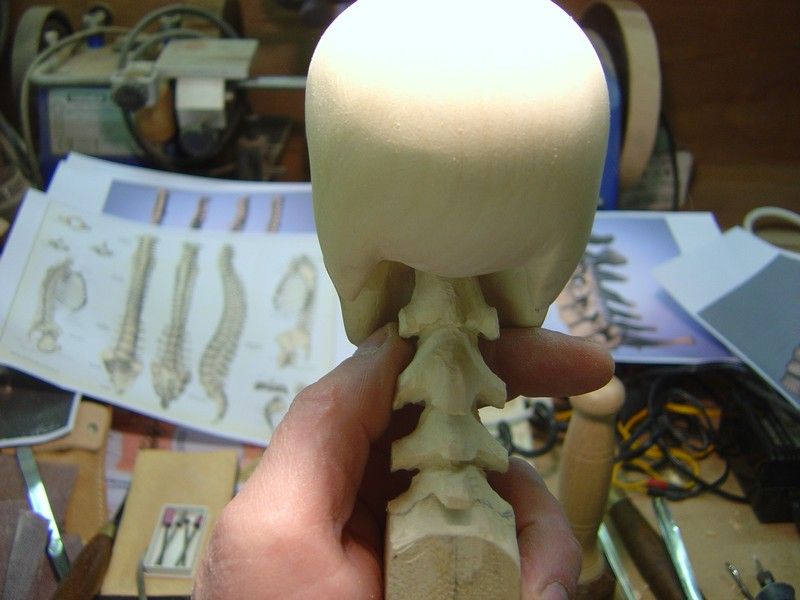
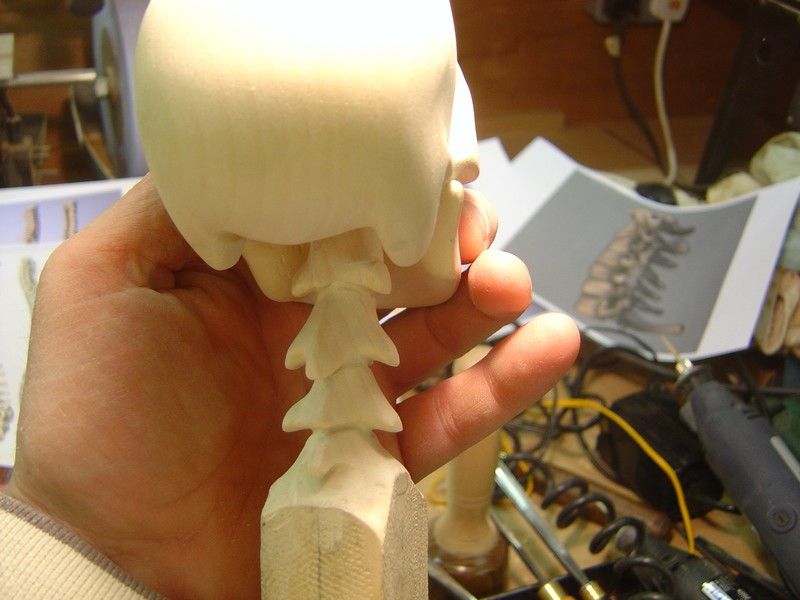
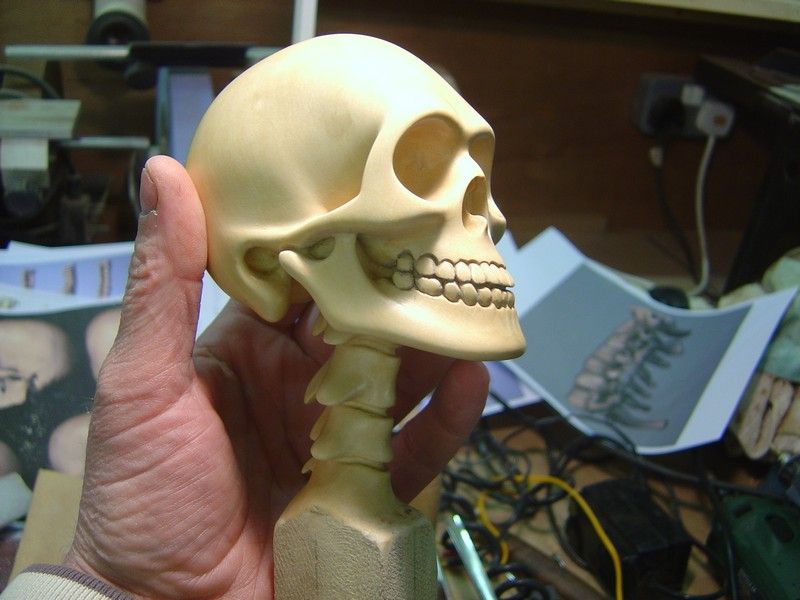
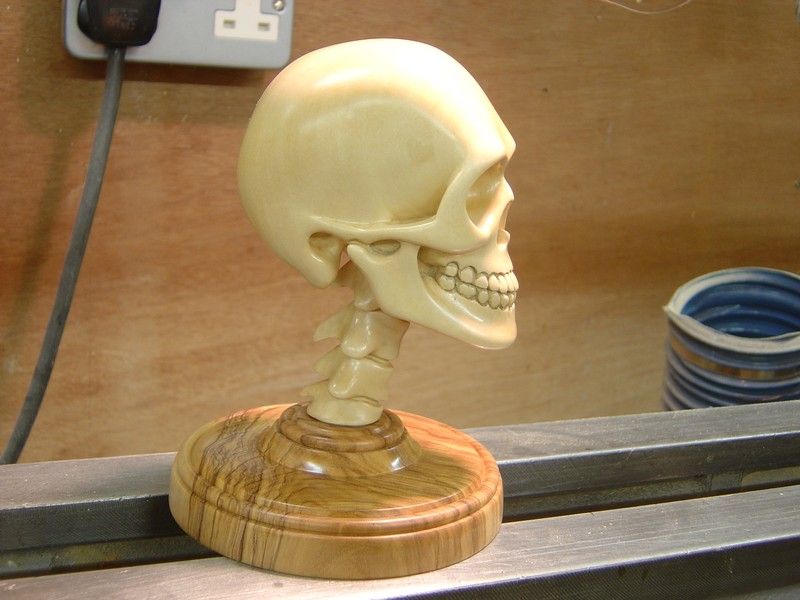
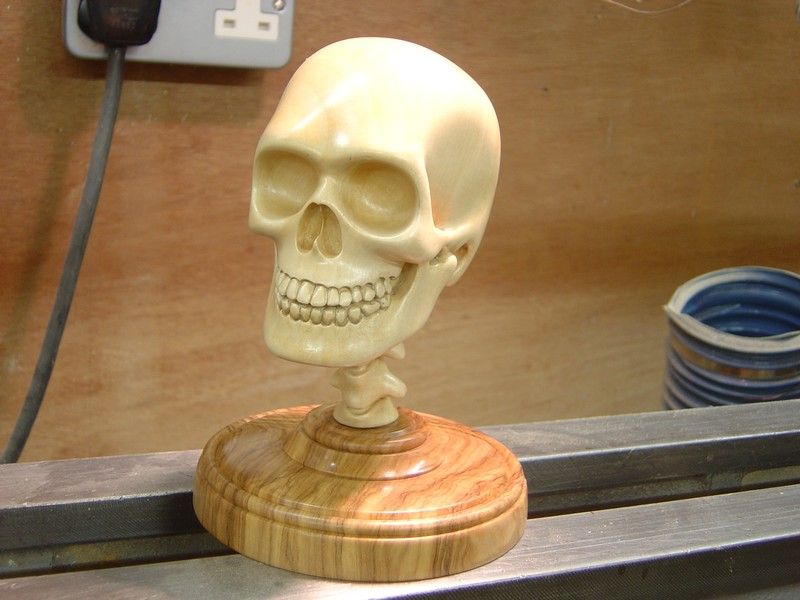
This is the stage I have it to at the moment, there is still plenty tricky bits to do and lots of hours left to do yet but hopefully it will turn out decent, I have made a portable carving horse that I take to the club but find the bench vice more solid when I am in the shed working on it. I will put a photo of this in my next post, Some of the carving tools I am using are from the mid 1800's you can tell from the makers marks on them, they are real quality and amazing to think that they will have out lasted a few carvers ! I am still looking for more tools as there are so many different shapes and sizes , the more you have the more chance of finding the exact shape/size you need.

Image

Image

I hope to get more done tomorrow so will keep taking photos and post the progress, I hope its of interest to people :coffee:. I would like to say a big thanks to Alan for all his help and advice so far :bow: :bow: :clap:

Cheers Mick.
User avatar
PanBiker
Site Administrator
Site Administrator
Posts: 16449
Joined: 23 Jan 2012, 13:07
Location: Barnoldswick - In the West Riding of Yorkshire, always was, always will be.

Re: Wood carvings

Post by PanBiker »

Fantastic Mick, you seem to have a great degree of natural talent with both metal and wood. I for one will certainly look forward to your progress and further posts.
Ian
User avatar
Stanley
Global Moderator
Global Moderator
Posts: 90301
Joined: 23 Jan 2012, 12:01
Location: Barnoldswick. Nearer to Heaven than Gloria.

Re: Wood carvings

Post by Stanley »

You've definitely got talent Mick, lovely work!
Stanley Challenger Graham
Stanley's View
scg1936 at talktalk.net

"Beware of certitude" (Jimmy Reid)
The floggings will continue until morale improves!
User avatar
Nolic
Senior Member
Posts: 1027
Joined: 23 Jan 2012, 12:10
Location: Barrowford

Re: Wood carvings

Post by Nolic »

Mick, I agree with Stanley. Thanks for taking the trouble to keep us up to date with your art and for the great pictures. Nolic
"I'm a self made man who worships his creator." Image
micktoon
Regular User
Posts: 366
Joined: 05 Feb 2012, 21:23
Location: Newcastle upon Tyne

Re: Wood carvings

Post by micktoon »

Thanks for the comments Panbiker , Stanley and Nolic, with 3D type stuff once I know what I want to make its just a case of having the right tools and keep comparing the drawings until it turns into what you want ! I bet most people would be better at this type of thing than they thought they would be if they had a go ............... After another good few hours of Skullduggery today this is what 'Richard the 3rd ' looks like now to now :D


This is the carving bench I have made so I can take it to the club, the front tool tray just slides off, the sliding seat lifts off and the front post with the vice on also lifts out so its able to fit in the car for transport, I just made the front swivel tilt set up the vice is attached to from what was lying about , its not ideal but does the job for now until version 2 gets made .

Image

Just more of the same really , carve more out with the gouges , then sand smooth , then decide the next area to alter comparing to the drawings.

Image

The same area as above after sanding smooth.

Image

I have drawn the teeth on , I have just sized them up then done them by eye , so they will not be perfect but things like this are better a little bit random as in real life.

Image

Starting to go around the teeth with fine gouges here , bearing in mind I have never carved teeth or been a dentist, its all just try it and see stuff going on here.

Image

This is to give you some idea of size, it would be easier to do these teeth if the skull was bigger I think.

Image

The indentations above the teeth in the jaw are the worst bit , the grain of the wood is running downwards and you can see where the wood has split off in places, I will get away with this much but I am having to be really carefull to stop anymore from splitting.

Image

This is a top view , I think the teeth are sticking proud about the right amount, I will just have to keep refining the teeth until they are as good as I can get them , the worst bit are the indents in the bones where the roots of the teeth would go, I will have to do some trial and error here as the very small gouges are not doing the job.
So this is the stage its at now, I will take it to the club tomorrow night and see if there are any ideas about the jaw indents.

Image

Image

Image

Hope none of you lads are having any skull nightmares mind :lol: :bugeye:
More to come soon :thumbup:
Cheers Mick
User avatar
PanBiker
Site Administrator
Site Administrator
Posts: 16449
Joined: 23 Jan 2012, 13:07
Location: Barnoldswick - In the West Riding of Yorkshire, always was, always will be.

Re: Wood carvings

Post by PanBiker »

Coming along nicely Mick and amazing for a first go.

Some of your smilies are not working. I'll test the thumbs up here, I cant see any of yours? :thumbsup:

Looking at the code I think mine must be a different one.
Ian
rossylass
Regular User
Posts: 156
Joined: 14 Aug 2012, 10:18
Location: Rawtenstall

Re: Wood carvings

Post by rossylass »

Wow!!
micktoon
Regular User
Posts: 366
Joined: 05 Feb 2012, 21:23
Location: Newcastle upon Tyne

Re: Wood carvings

Post by micktoon »

Afternoon Everyone , I have got a bit more done to the skull , just really been going over and doing more detail on the teeth and reshaping/ sanding some areas, there has been hours and hours more time spent but maybe not easy to spot on photos ?........ I sure wish I was getting what a dentist would be getting paid for the time I have spent on them teeth !

Image

This is the stage I am at now , the lines you can see on the skull have just been draw on with pencil this is where the fusion lines are on the skull, I am not sure if I will put these in or not yet as if they go wrong they will spoil the whole job.

Image

Image

I have started to reshape the back of the skull as it was not right , it still needs more work yet. I had intended the skull just to sit on the bottom of the jaw and the bottom of the rear of the skull but I might try to carve in a few neck bones and make a small base in a contrasting wood so it would sit up off the base supported by its own neck. If this did not work out I could revert to plan 'A' , cut the neck off and just have the skull.

Image

There is still quite a bit to do yet , I wish it was a bit bigger as getting some of the detail is tricky with it being so small. Watch this space ........ and dont have nightmares !

Cheers Mick

Hi Pan biker , the smilies wont be working as I have posted this on another forum so copied and pasted it here,to save typing it all out again, I will just not put the smilies etc in my original or delete and add them in on these replies and they should appear ok then. Thanks Mick.
micktoon
Regular User
Posts: 366
Joined: 05 Feb 2012, 21:23
Location: Newcastle upon Tyne

Re: Wood carvings

Post by micktoon »

Evening all, I have got some more done to my skull wood carving , I have attempted to do a spine type neck then will make a base so the skull will be raised above the plinth by its own neck, if there is any spinal surgeons out there they will notice its not 100% true to a real spine but its as close as I can get it in wood :dremel: I have gone off drawings from the internet but could really have done with a 3D real object to copy from in front of me to be honest, anyway here is the progress so far.

The spacing for the vertebrae is marked on with pencil and start to carve off the first bits of waste wood.

Image
Image

Then its just a case of keep looking at the drawings and removing more wood a bit at a time , remembering that you can not put it back on ! and just slowly trying to get it into a spine type shape, the carving is tricky here as its so easy to break a bit off along the grain and getting into all the various angles is a nightmare.

Image
Image

Once all that can be done with carving tools is done , its time for the good old dremel and just grind away areas with various burrs and sanding drums etc, its still hard to get to all the places you want to get to and I could do with more varied shapes of burrs etc. Its starting to get the rough shape now.

Image
Image
Image

I now use riffler files and sand paper wrapped around bits of wood etc to try and get into the hard to reach areas, refining the shape and smoothness, its starting to look more like bone than butchered wood anyway.

Image
Image
Image

This is the stage I have got to now , its taken over a day to do the spine bit !!, I think operating on a real spine would have been easier to be honest lol. It now just needs overall refining and sanding smoother , the base made and to be sealed and waxed, I am hoping to get more done tomorrow............so watch this space .
Cheers Mick.
User avatar
Nolic
Senior Member
Posts: 1027
Joined: 23 Jan 2012, 12:10
Location: Barrowford

Re: Wood carvings

Post by Nolic »

Mick, there's a short series on either BBC 3 or 4 about the history of carving. Sorry cannot remember when its on. Nolic
"I'm a self made man who worships his creator." Image
micktoon
Regular User
Posts: 366
Joined: 05 Feb 2012, 21:23
Location: Newcastle upon Tyne

Re: Wood carvings

Post by micktoon »

Good evening all , the skull is done , after lots and lots of dremel work and sanding :laugh5:

This it it fully sanded and smooth.

Image

It was then given a coat of 50/50 sanding sealer - thinner mix, which soaks in and seals any grain in the wood, it also make it look a touch darker.

Image

I then got a peice of wood to make the base , I think its Olive wood ? , this was trued up on the wood lathe.

Image

This it a spigot turned on the top of the lid so it can be held in the chuck to do the underneath of the lid, the underneath has a reverse of this so the jaws open into a recess rather than so the top can be done too.

Image

I just did a design as I went , I wanted the museum exhibit look lol, after this shot I drilled a hole 1/2 inch diameter and about 1/2 deep so I could make a spigot on the botton of the spine and glue the skull to the base.

Image

This is the finished base , its also been sanding sealered and waxed.
Image

Image

This is the skull after being waxed and buffed up, I did not take any photos but I then had to saw around the base onf the bottom of the spine and carve a round spigot onto it that fitted the hole in the top of the base , then glued the two together.

Image

This is the finished article, I am chuffed at how its come out, there are a few bits I would probably do different if I did another one and a few bits that are not anatomically correct to the last detail but overall I have learnt a lot doing it which is my main aim anyway.

Image

Image

Image

Image

I have my next project marked out its a round plaque with a heraldic rampant lion set into it in low relief, the mission this time is to leave it finished off the tool without any sanding ........ a tall order but I an so sick of sanding I will give it a good go :lol:
Hope you all like the finished skull :grin:

Cheers Mick
User avatar
Stanley
Global Moderator
Global Moderator
Posts: 90301
Joined: 23 Jan 2012, 12:01
Location: Barnoldswick. Nearer to Heaven than Gloria.

Re: Wood carvings

Post by Stanley »

Nice clean lathe bed......
Stanley Challenger Graham
Stanley's View
scg1936 at talktalk.net

"Beware of certitude" (Jimmy Reid)
The floggings will continue until morale improves!
User avatar
Big Kev
Site Administrator
Site Administrator
Posts: 10957
Joined: 23 Jan 2012, 20:15
Location: Foulridge

Re: Wood carvings

Post by Big Kev »

The skull looks excellent. You have a real skill, I'm jealous...
Kev

Stylish Fashion Icon.
🍹
hartley353

Re: Wood carvings

Post by hartley353 »

This may be of help to wood carvers, I buy a lot of tools and eqyipment from a company called Axminster tools they now have a large Wood turning, and carving section. I am not realy into this sort of craft but I bought a flexible drive attachement that allows rotary drive to be converted to reciprical drive, and it came with wood working chisels, I have yet to use it on any of my model boats I am building, but did try it on a peice of 3 x 2 and it cut well. Very envious of the bandsaw. Lots of segs on my hands from carving stick handles out of Walnut blocks....Mike.
Last edited by hartley353 on 15 Mar 2013, 20:47, edited 1 time in total.
micktoon
Regular User
Posts: 366
Joined: 05 Feb 2012, 21:23
Location: Newcastle upon Tyne

Re: Wood carvings

Post by micktoon »

Thanks for the nice comments lads :wink: , The Graduate lathe is in good nick Stanley , it has some marks/scratches on the bed but nothing to worry about , I have just started back on my metal lathe today so will be posting again soon about the rebuild.
I have a friend that has one of them flexi conversion to recprical drive things with the carving tools , he has only had a short test of it too but it seems to work well, I have bought things off Axminster tools and also Tilgear that do a similar type stock and have had good service from them both I am glad to report.
Cheers Mick.
hartley353

Re: Wood carvings

Post by hartley353 »

Noting Micktoons comments on sanding, Do other wood workers have my problem, My workroom is two rooms and a staircase away from the lounge, yet when sanding the dust manages to find its way to the tv screen,and this is only hand sanding.The particles must be close to atomic levels. As a further note I have achieved some impressive finishes on my stick handles using Zymol cleaner wax which is designed for car paint, it says on the bottle not for wood,but contains only natural contents....Mike.
Post Reply

Return to “Wood Working”