SHED MATTERS 2

Locked
User avatar
Stanley
Global Moderator
Global Moderator
Posts: 90802
Joined: 23 Jan 2012, 12:01
Location: Barnoldswick. Nearer to Heaven than Gloria.

Re: SHED MATTERS 2

Post by Stanley »

Image

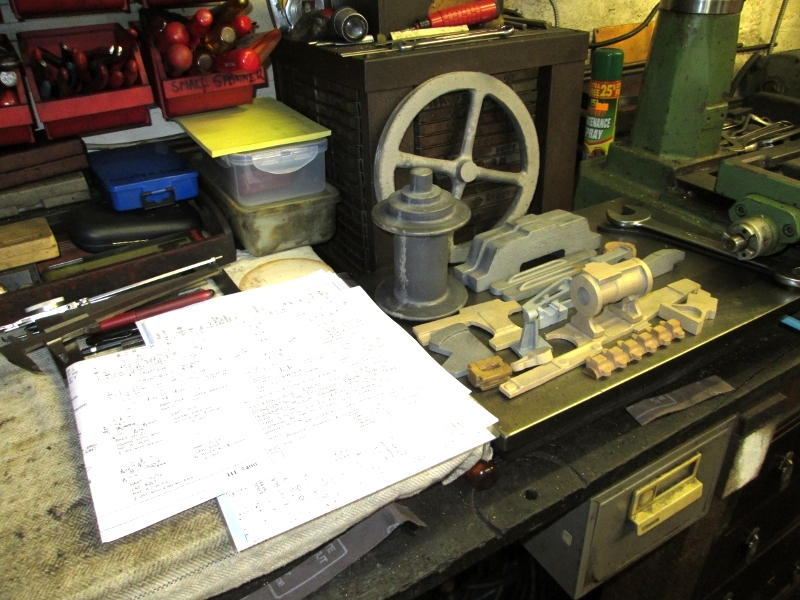
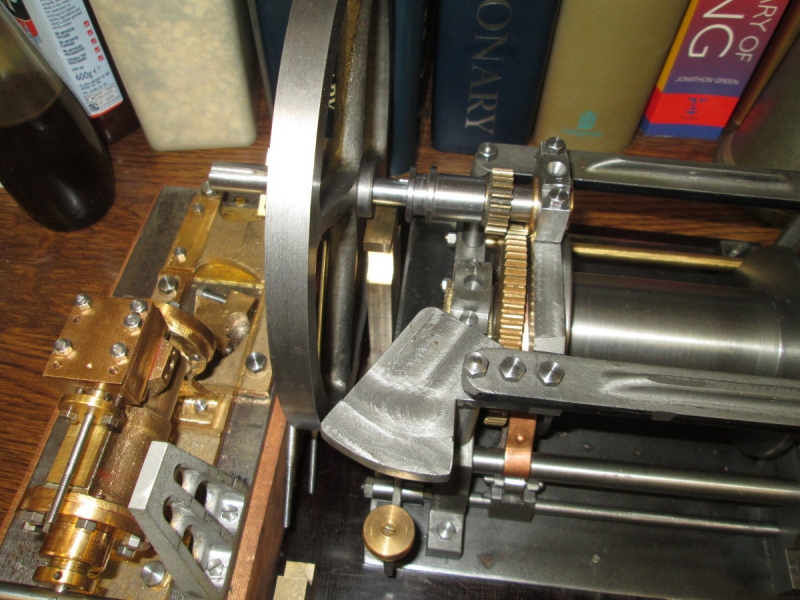
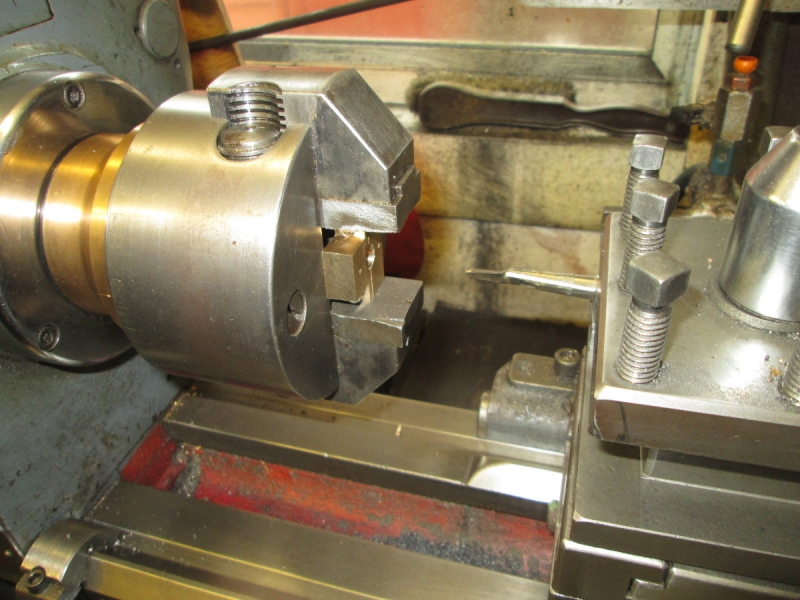
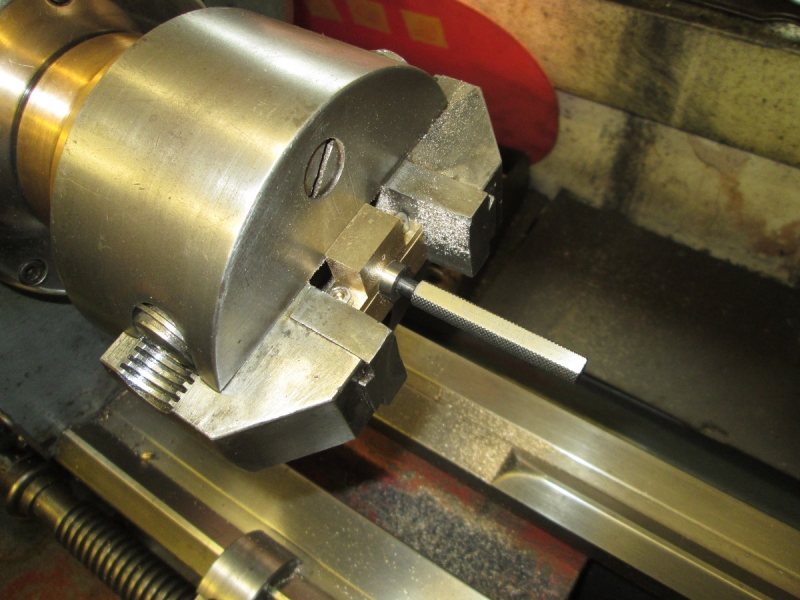
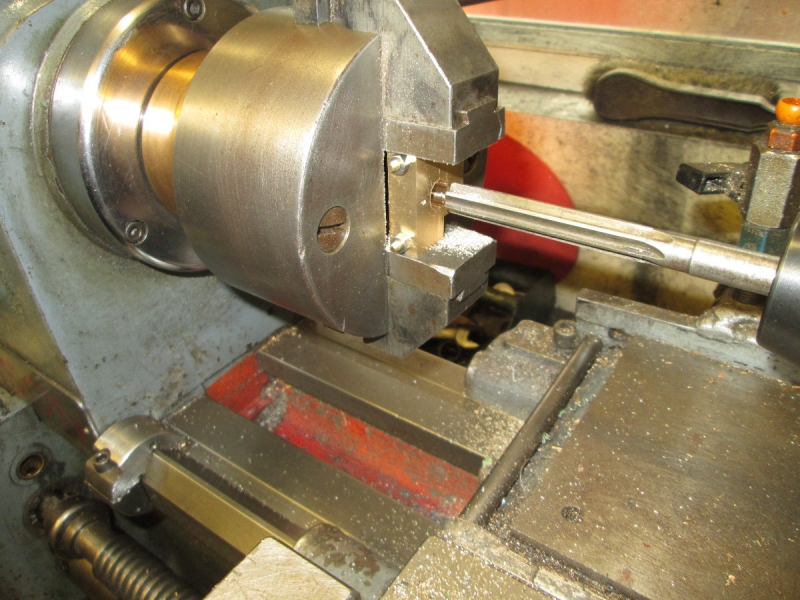
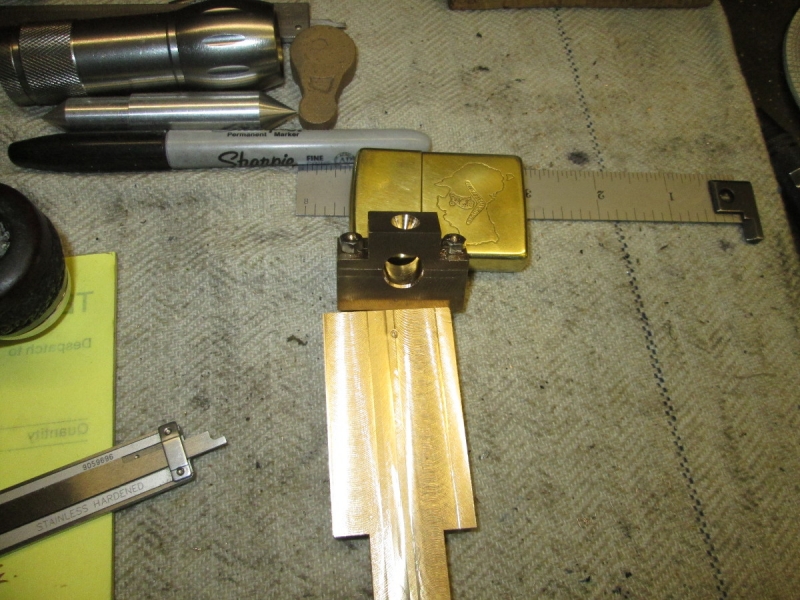
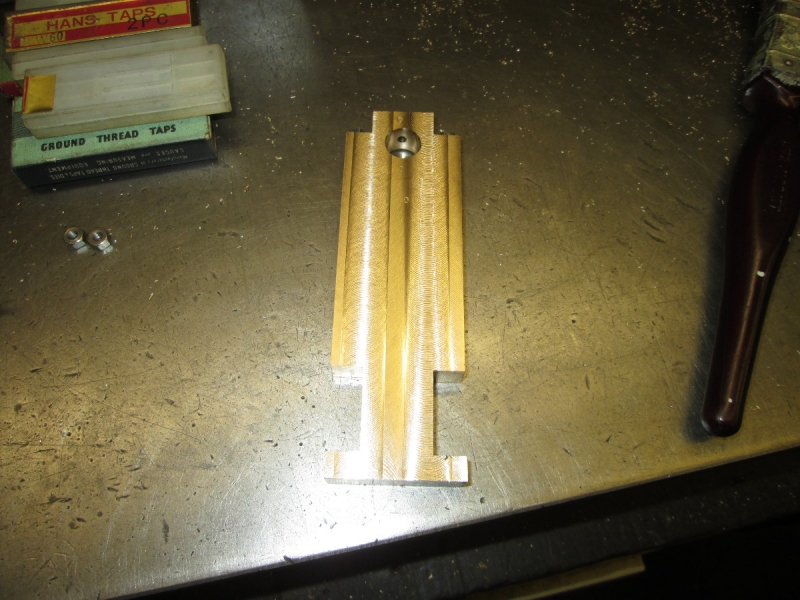
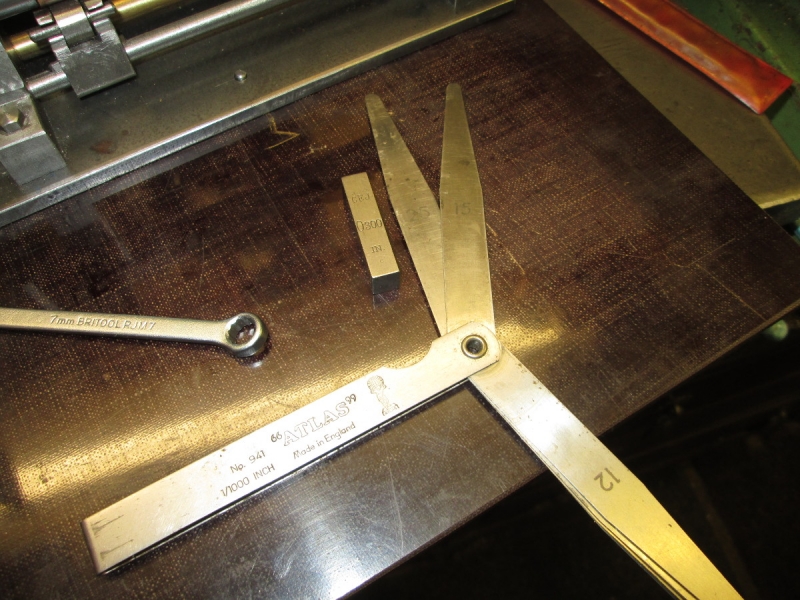
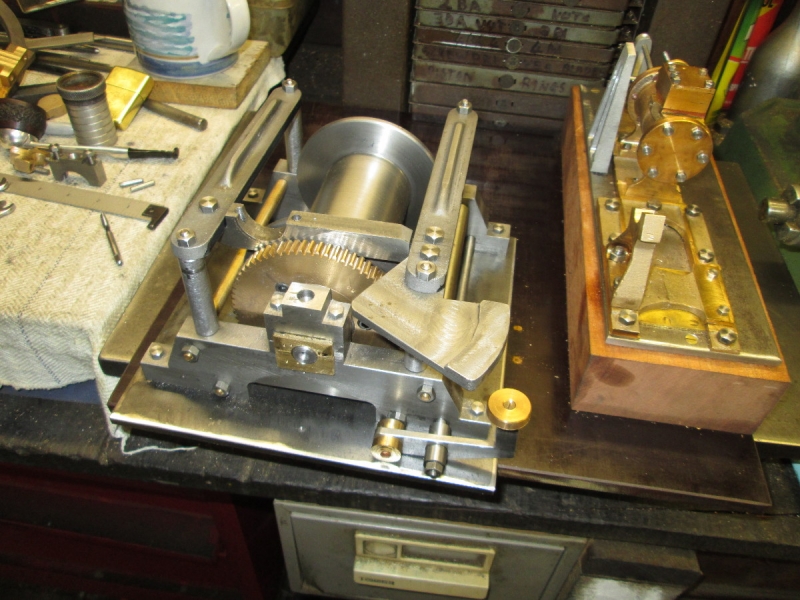
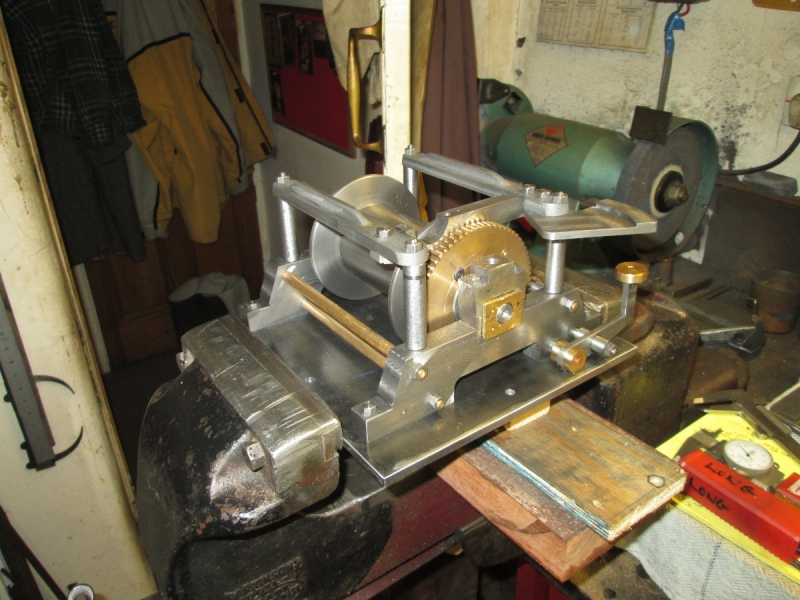
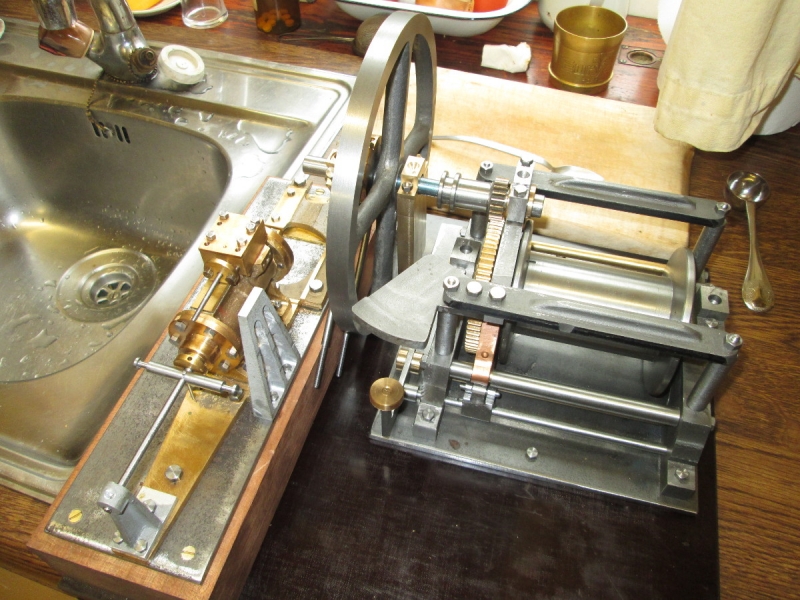
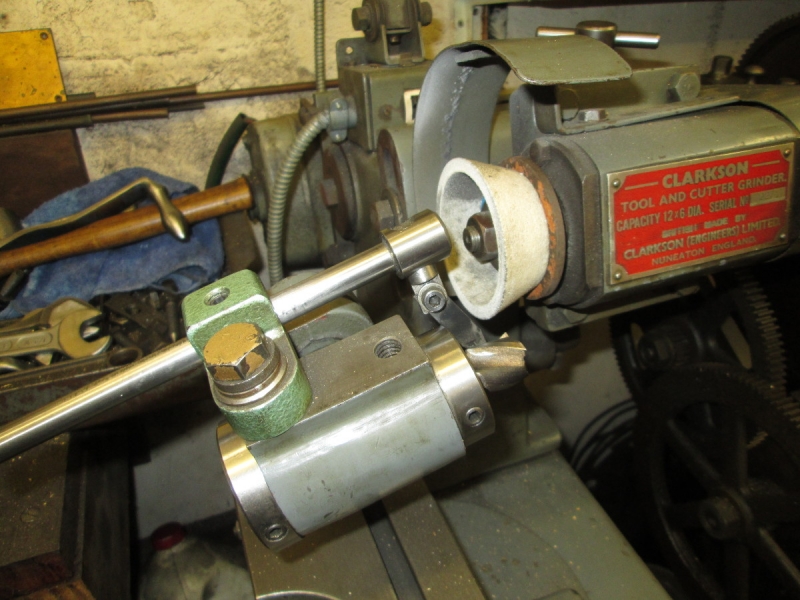
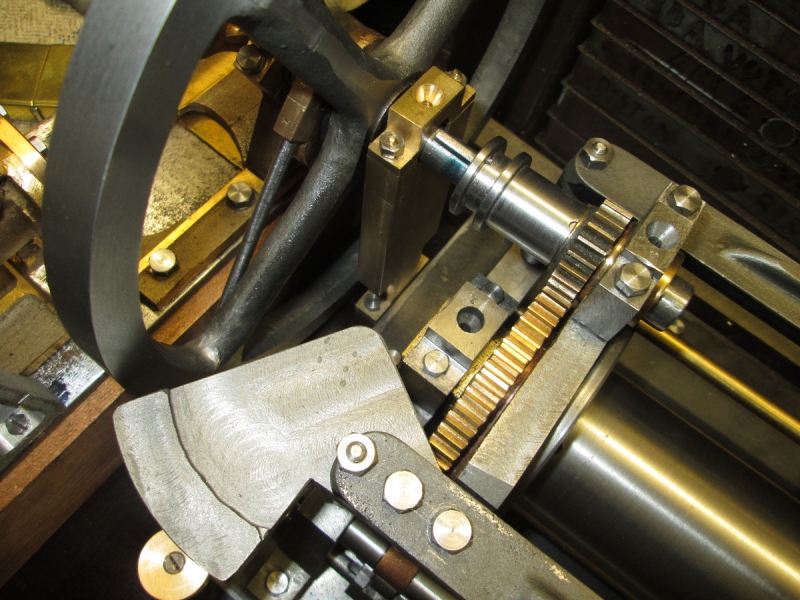
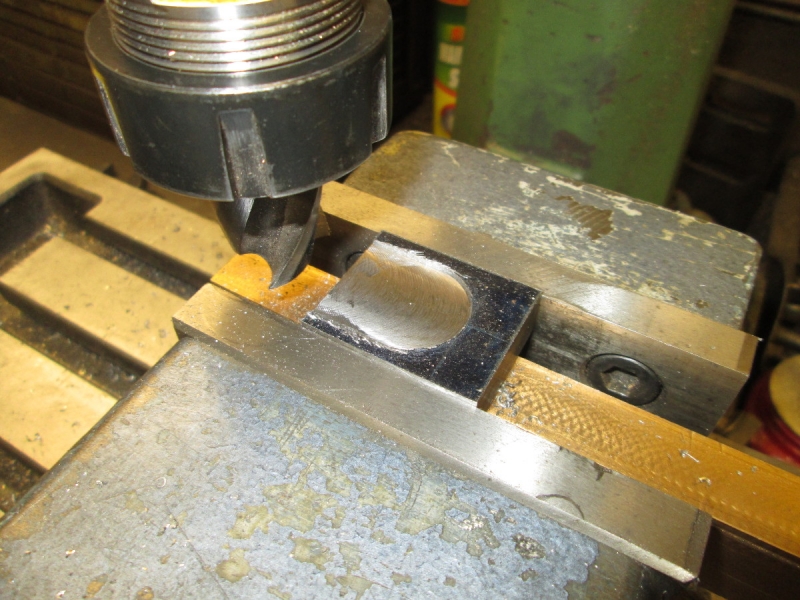
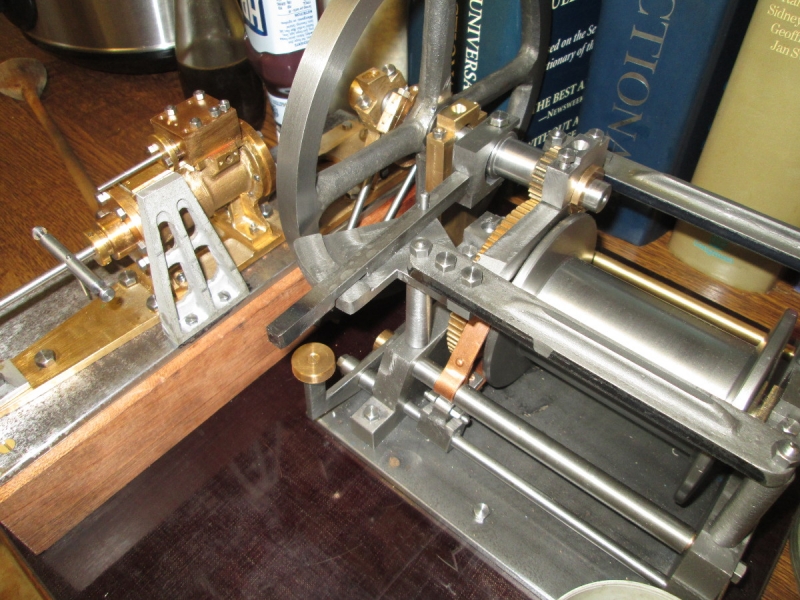
Remember me making the two lathe bed stops? One for Mick and one for me. It came out to play this morning and I soon knocked off two eccentric rods after polishing the stock.

Image

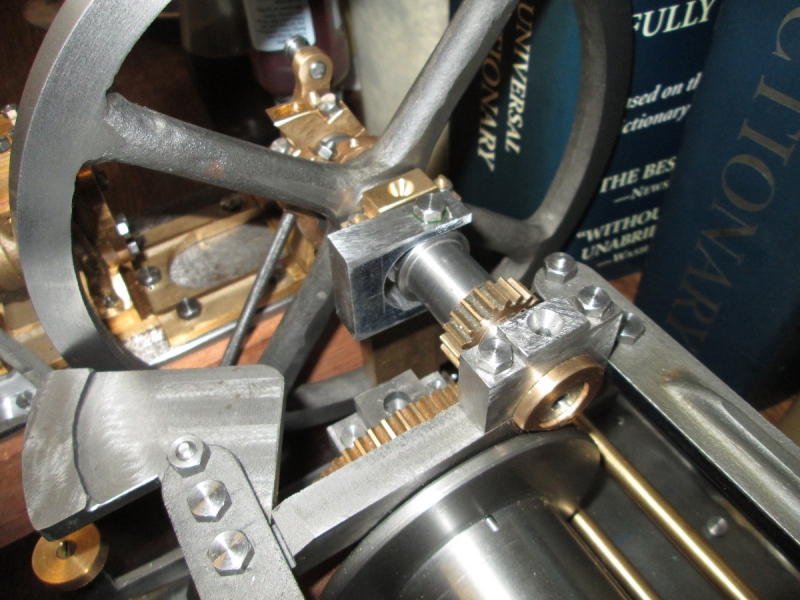
Now you can see why the clamp bolts were temporary. The rods will eventually need to have a bend in each end but I'll leave that until I have made the cross-member they fit in. I have no doubt that P will note I have cut the setscrews back until they are just below the surface of the eccentric boss.

Image

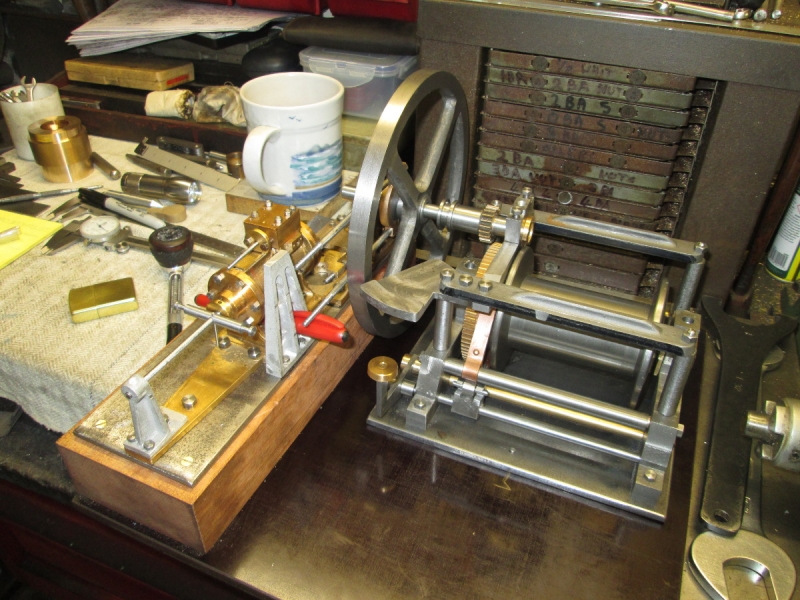
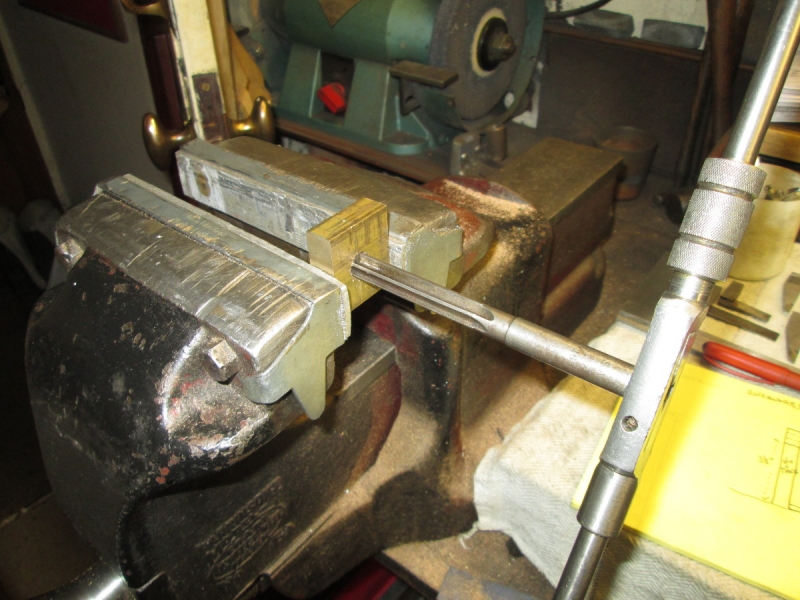
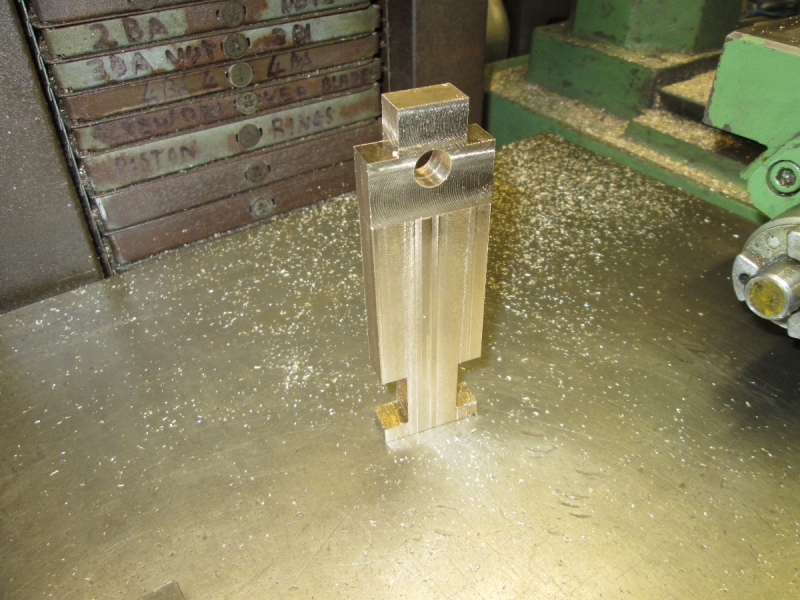
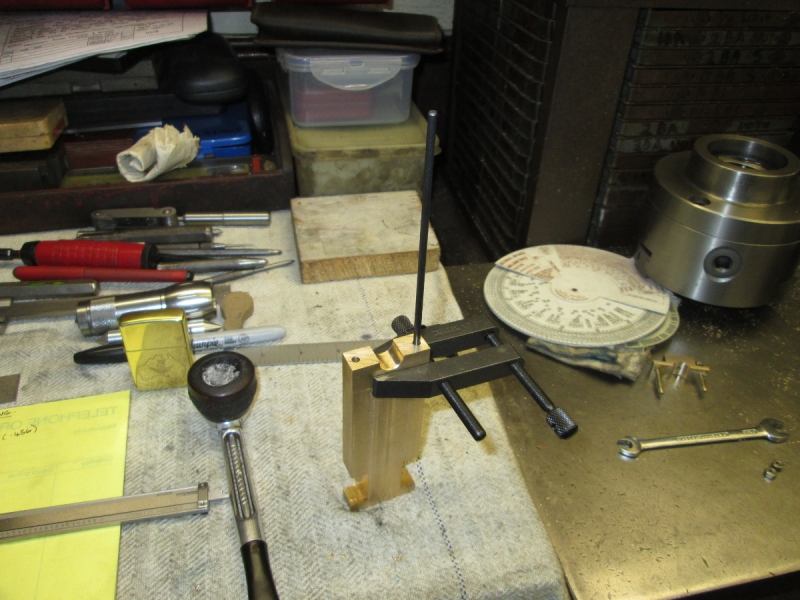
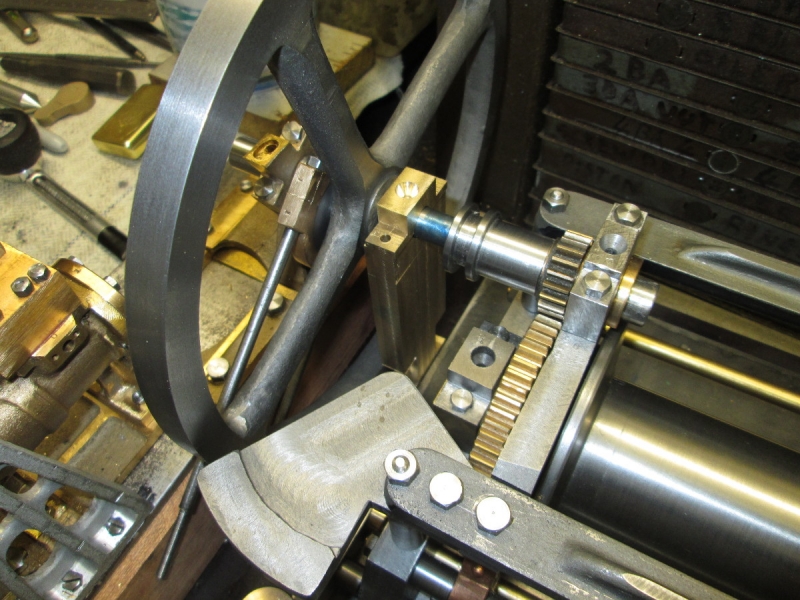
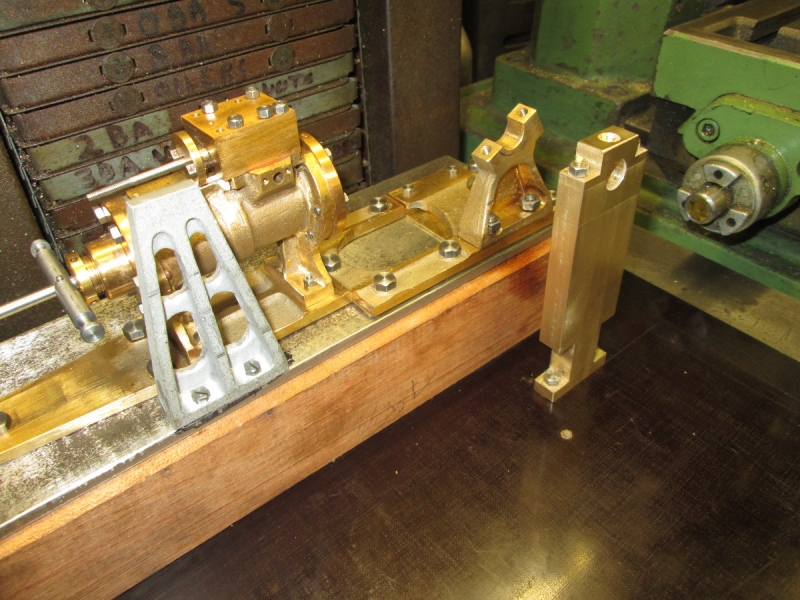
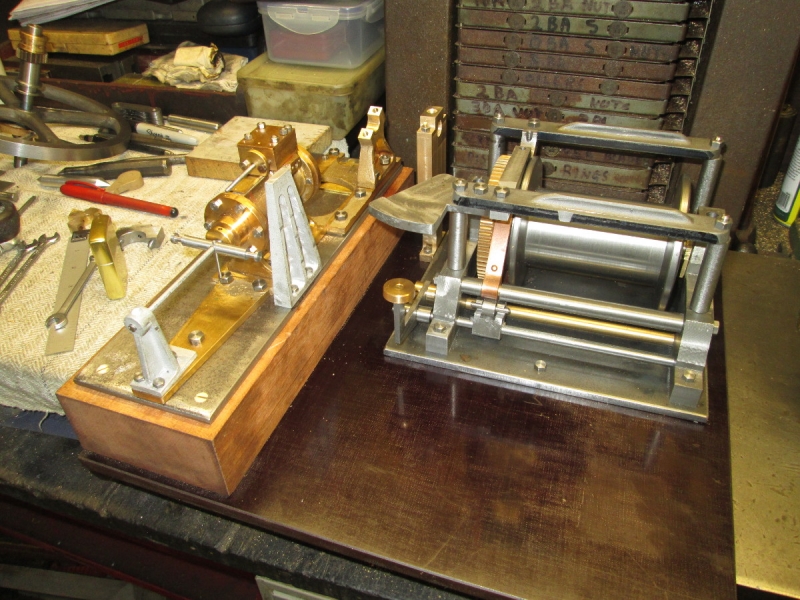
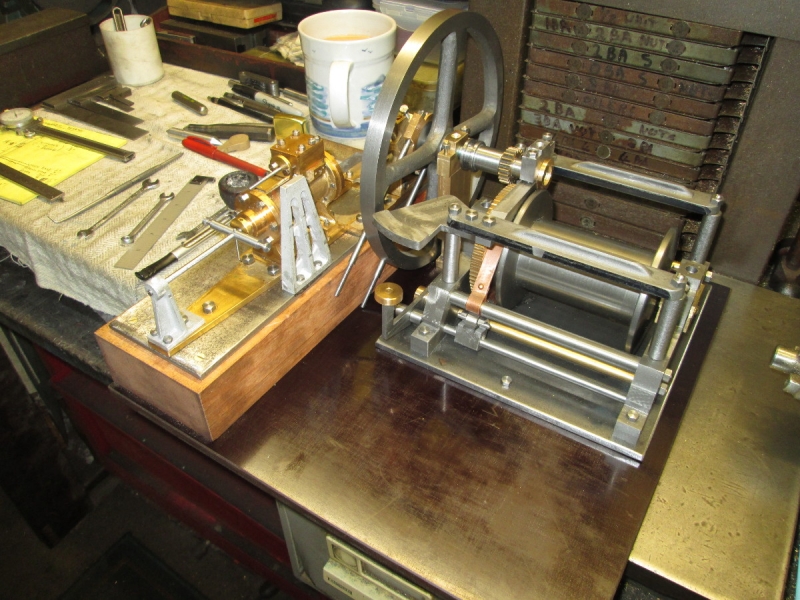
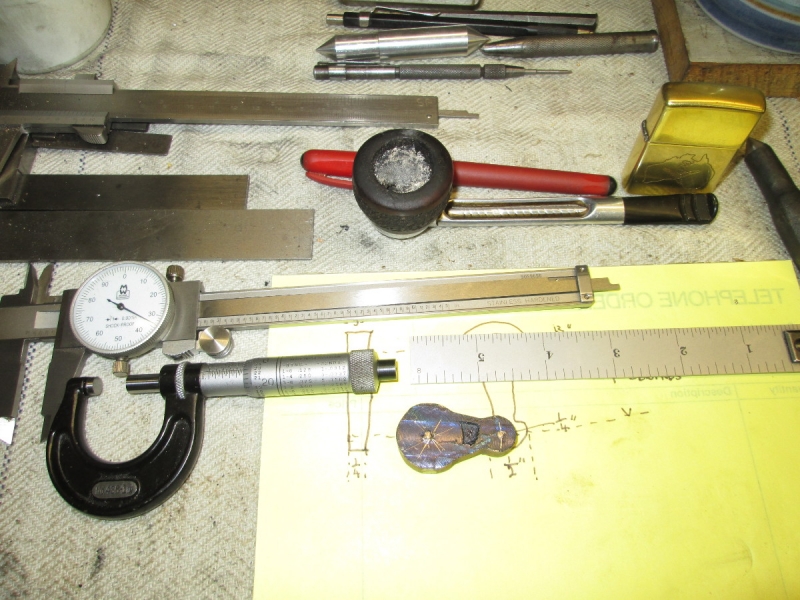
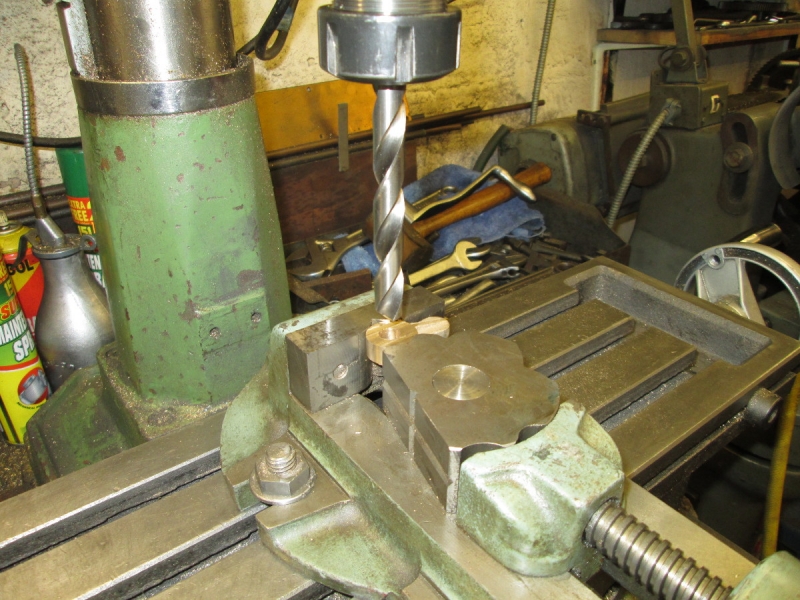
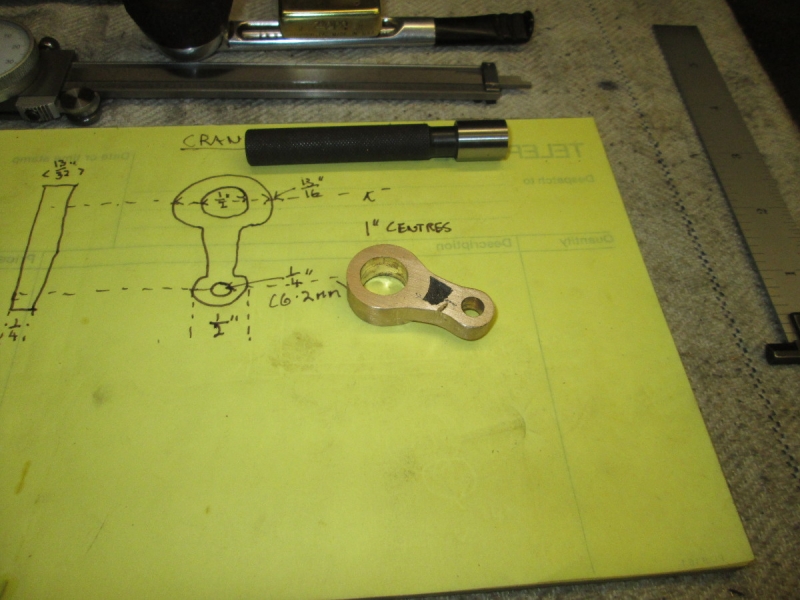
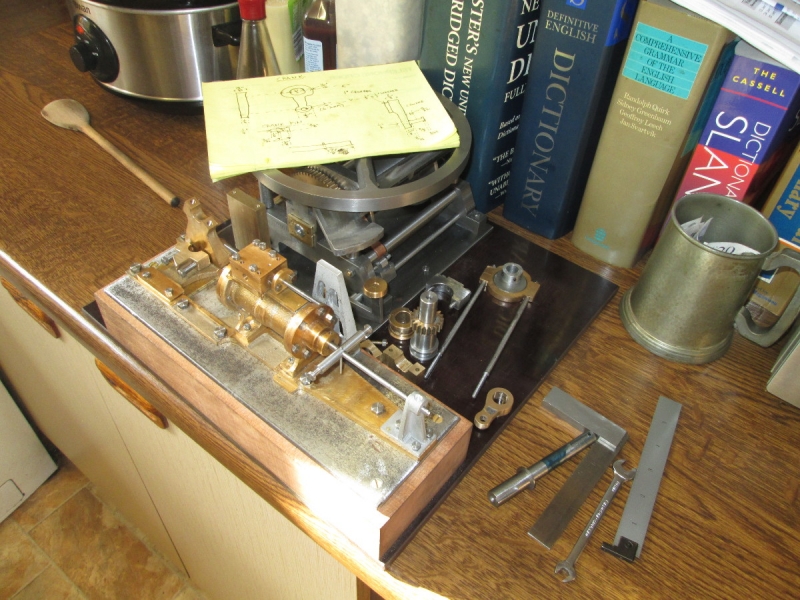
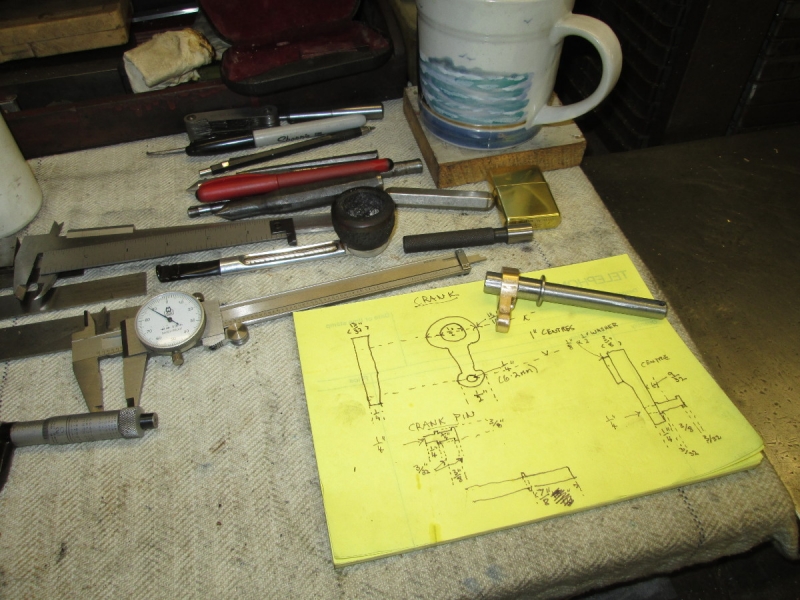
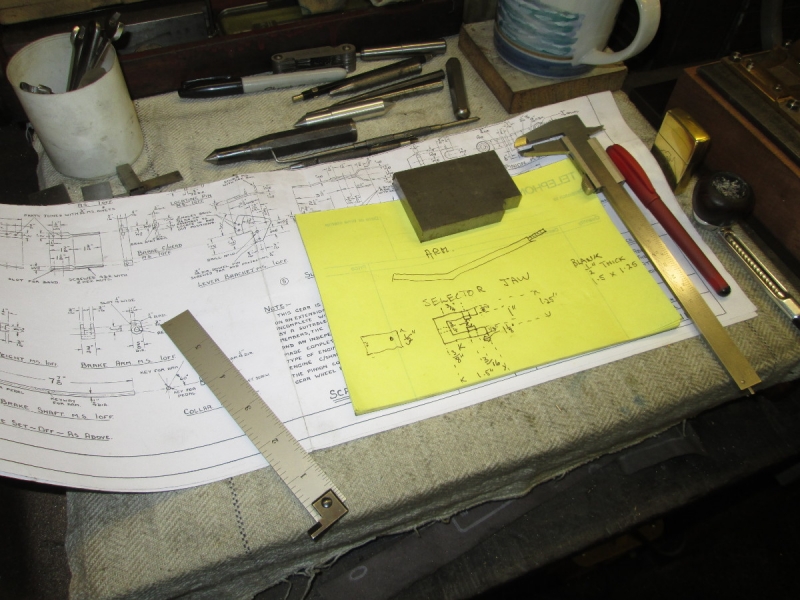
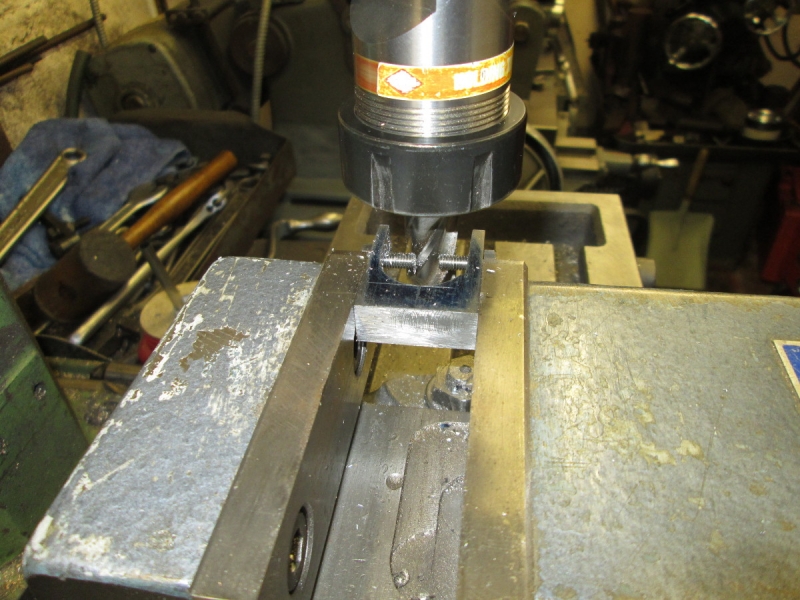
I've decided that the next job is to make a decision about the outrigger bearing. I work best when I can see the problem clearly so I mounted the winch in its place (Those dowels are a blessing!) and did some very careful measuring and a fag packet drawing. Then up to the treasure chest upstairs to find a piece of bronze stock. Just think what those treasure chests have saved me over the years, never walk past anything that looks useful!

Image

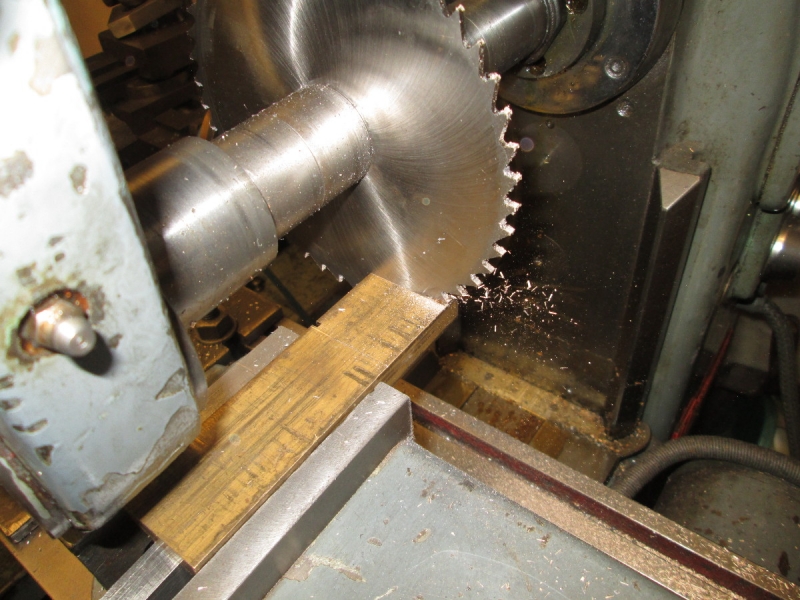
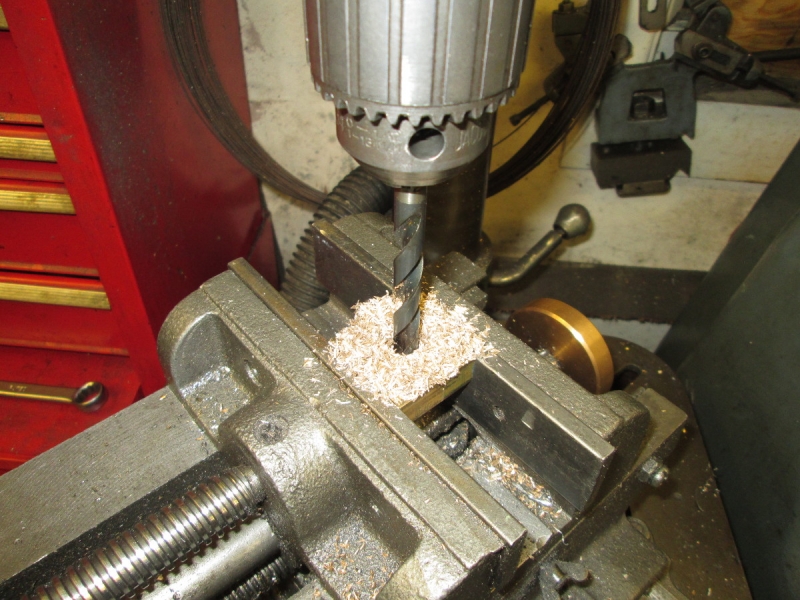
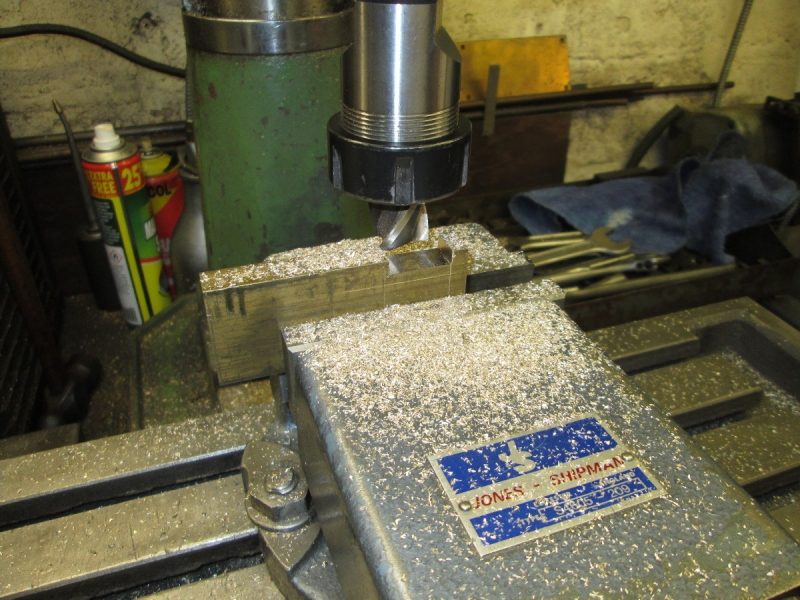
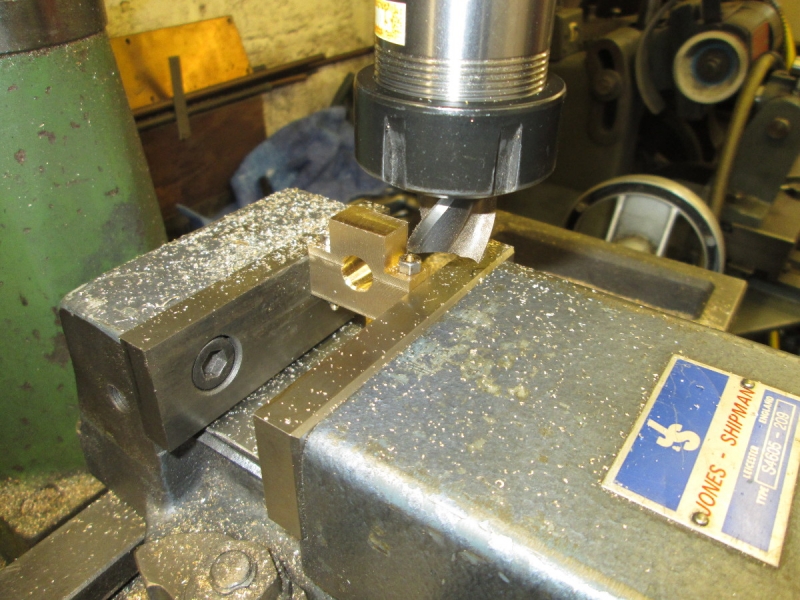
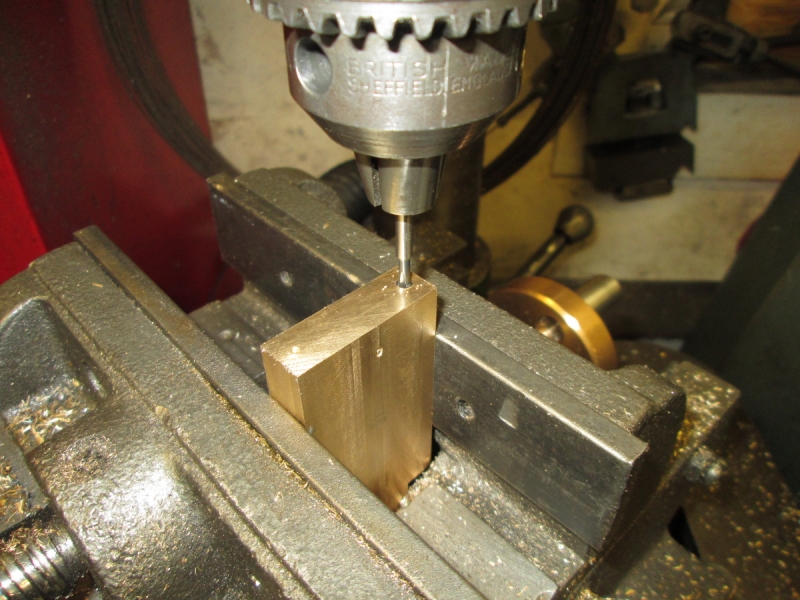
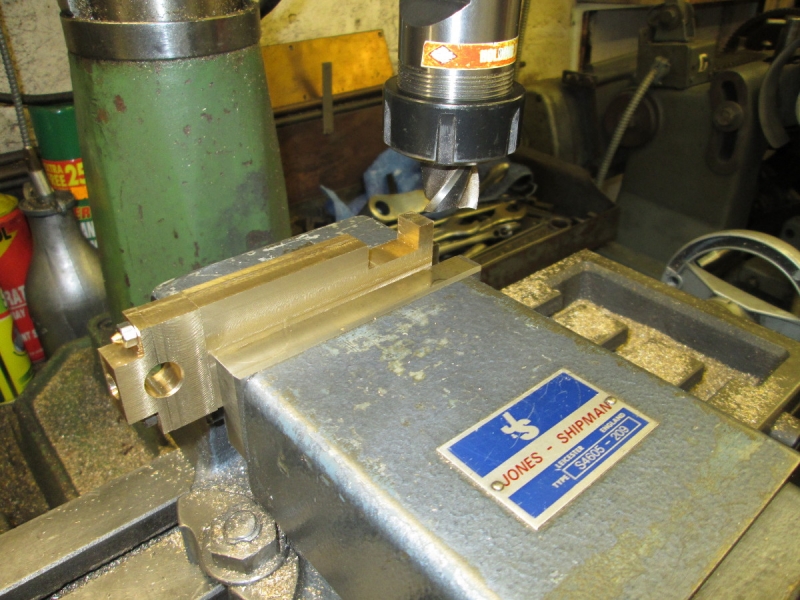
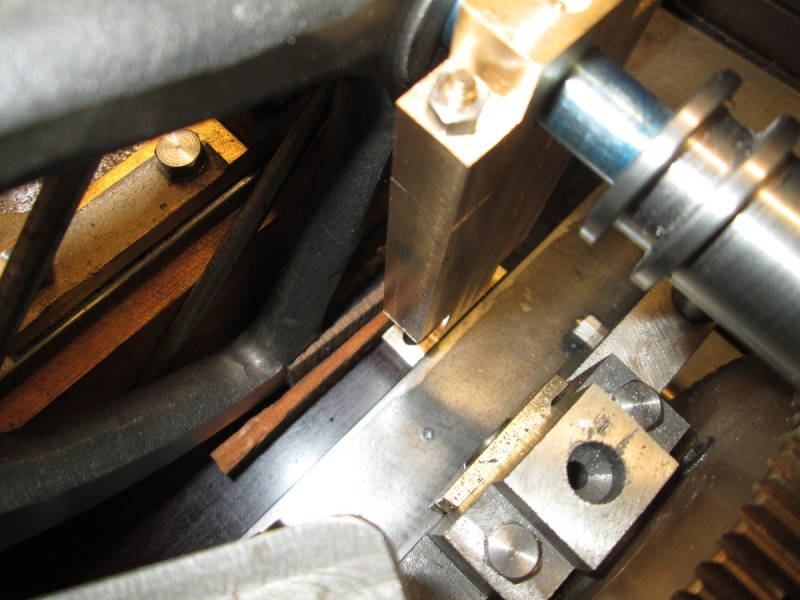
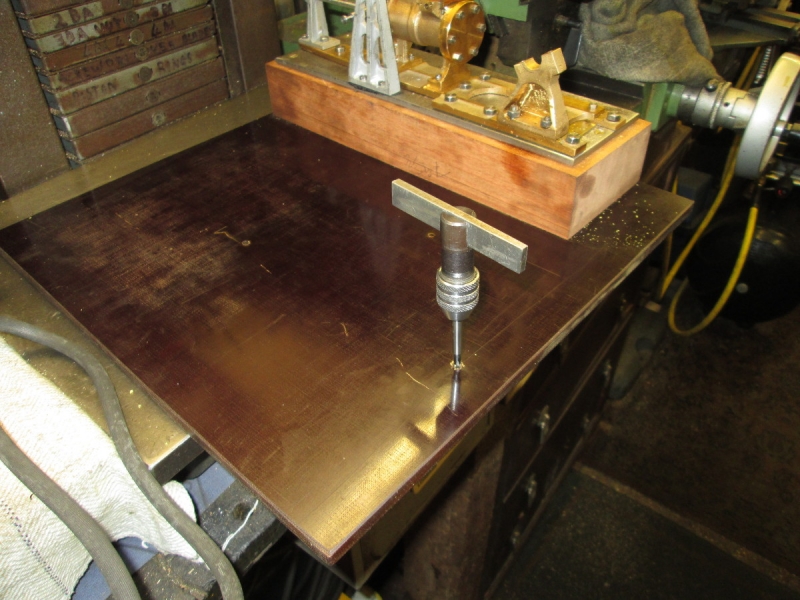
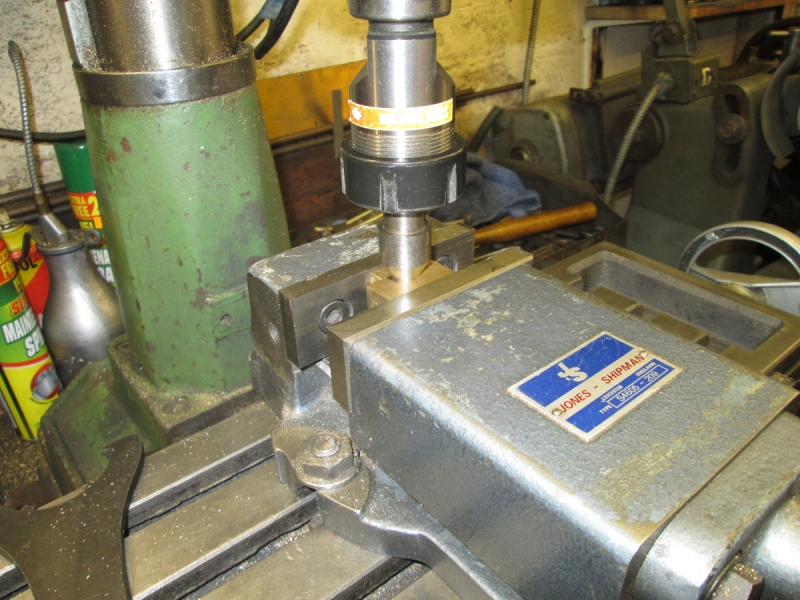
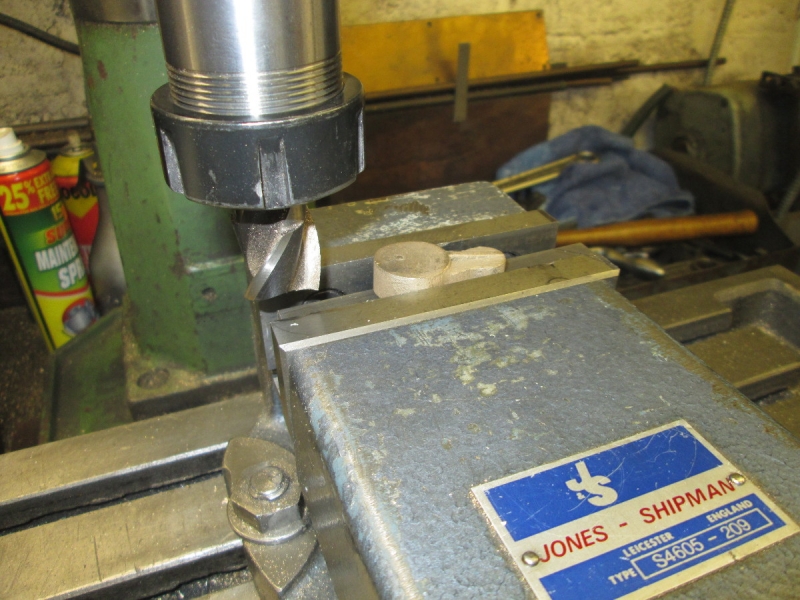
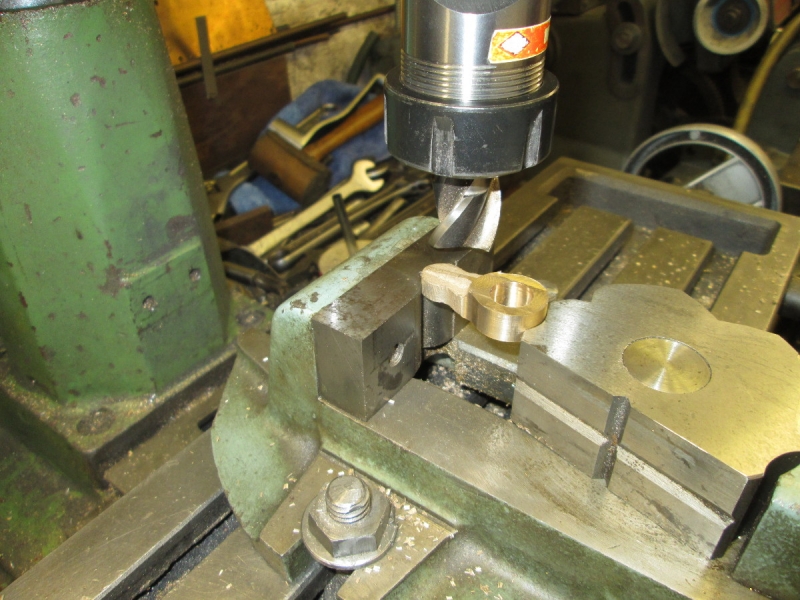
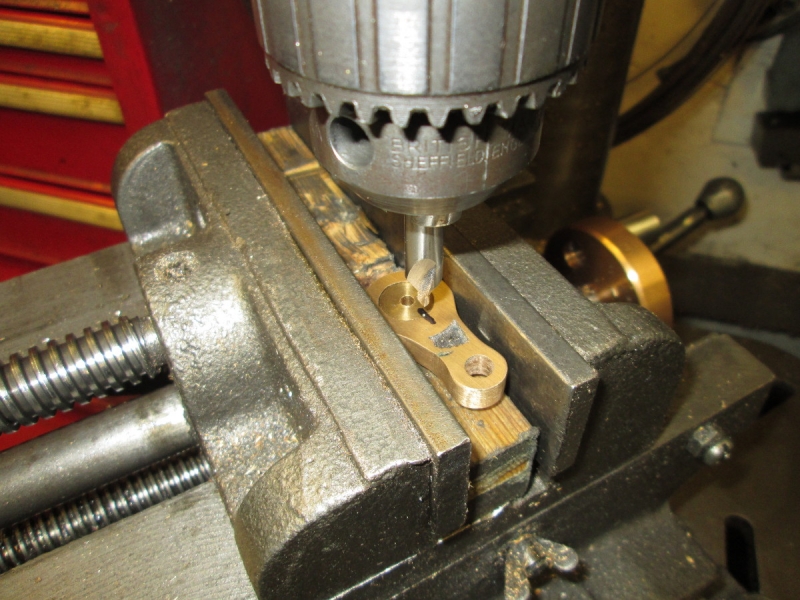
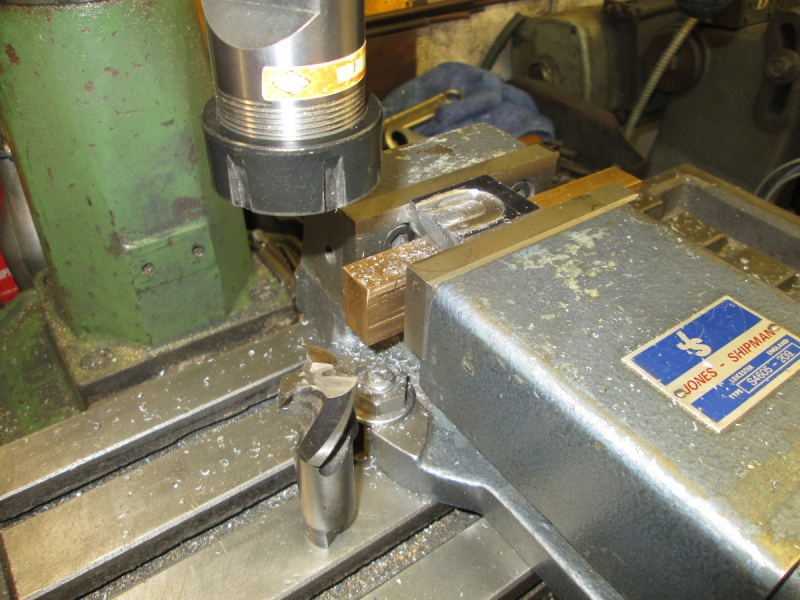
This is some 1 1/2" X 1/2" bronze bar that Eddie Spencer left behind when he lived in this house. Years later I told him how careless he had been and he told me to keep both bars. This is the fag end of the first one getting the treatment in the HM.

Image

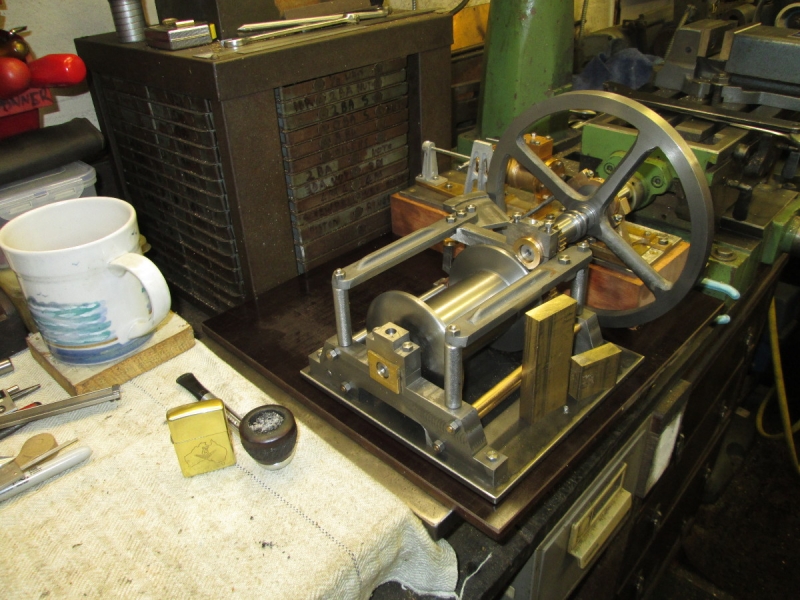
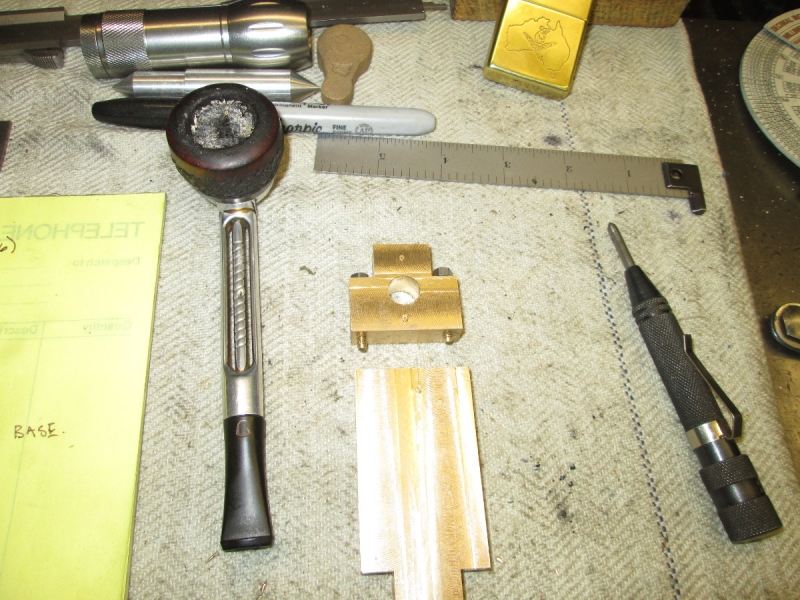
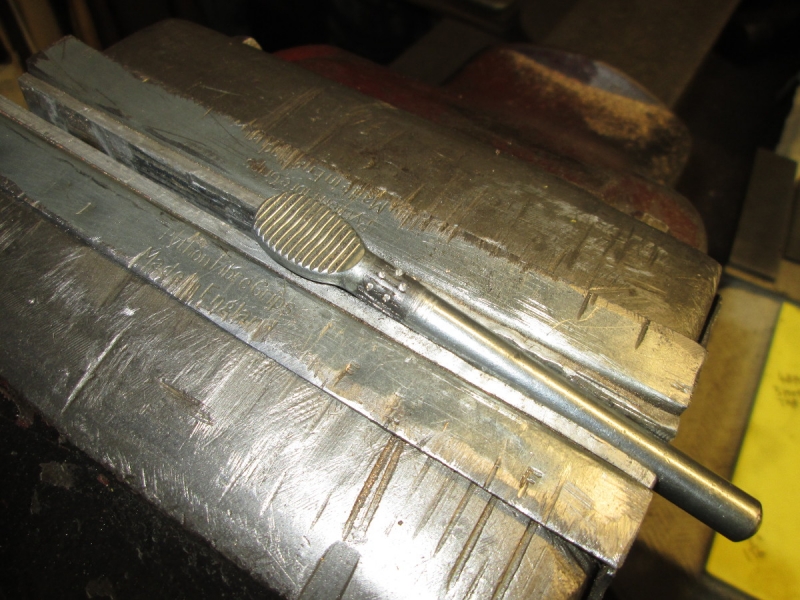
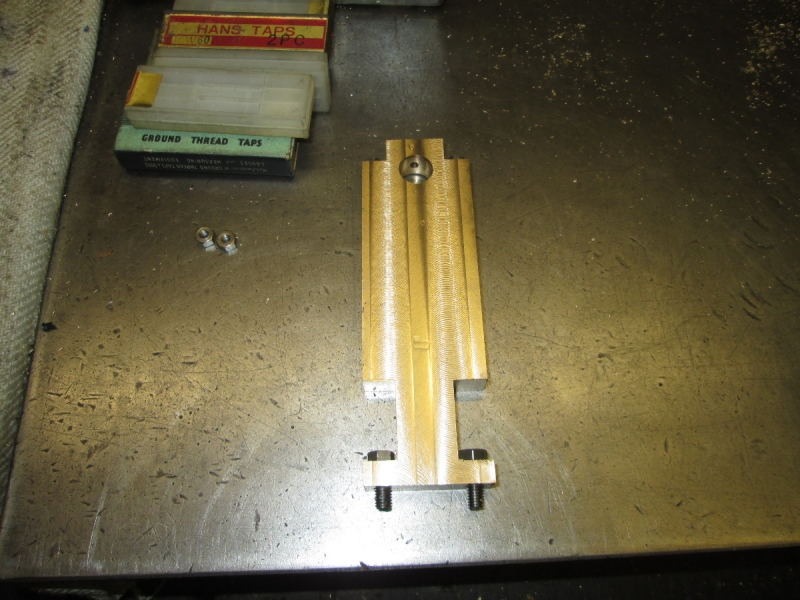
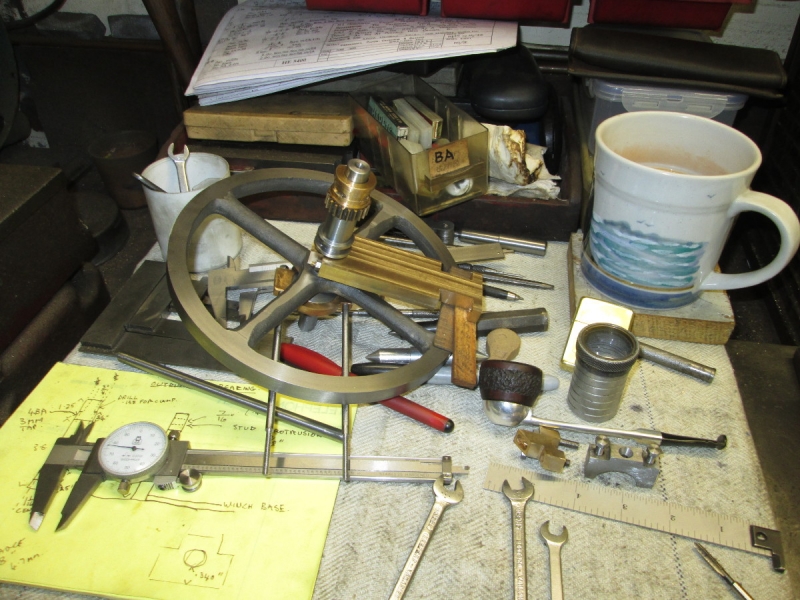
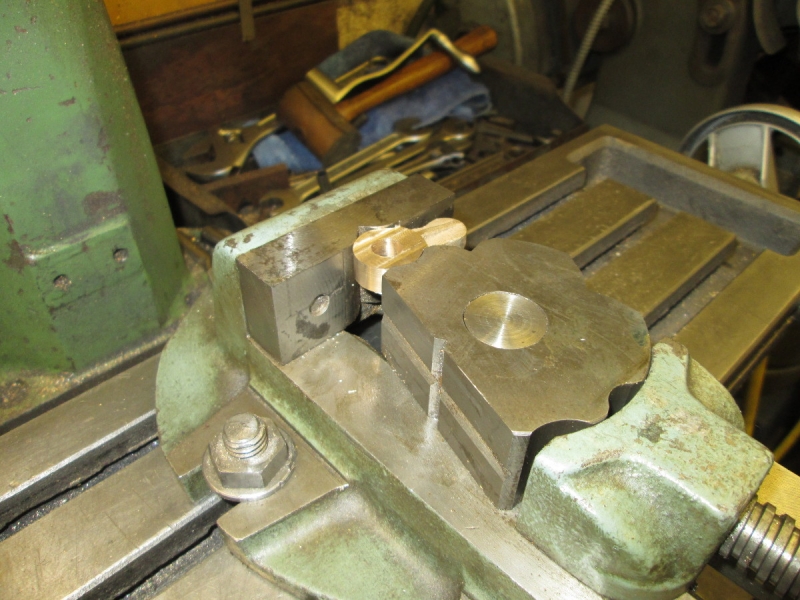
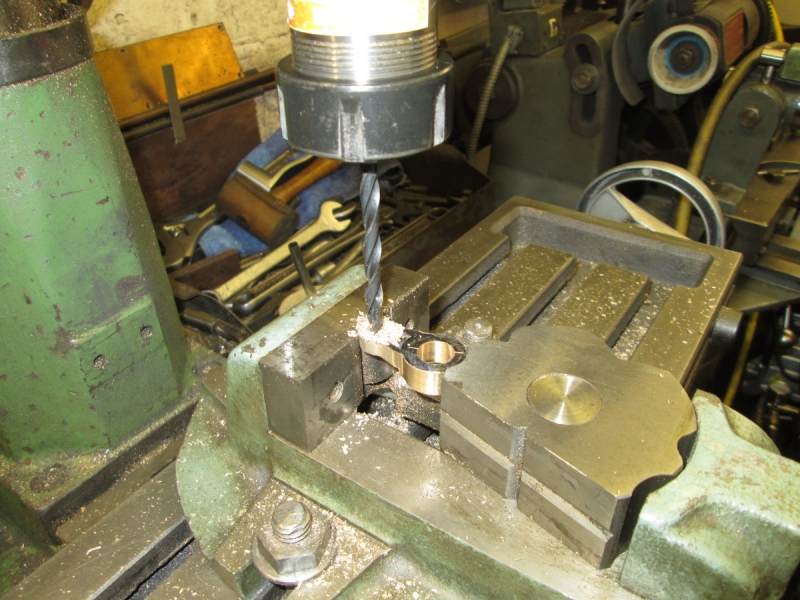
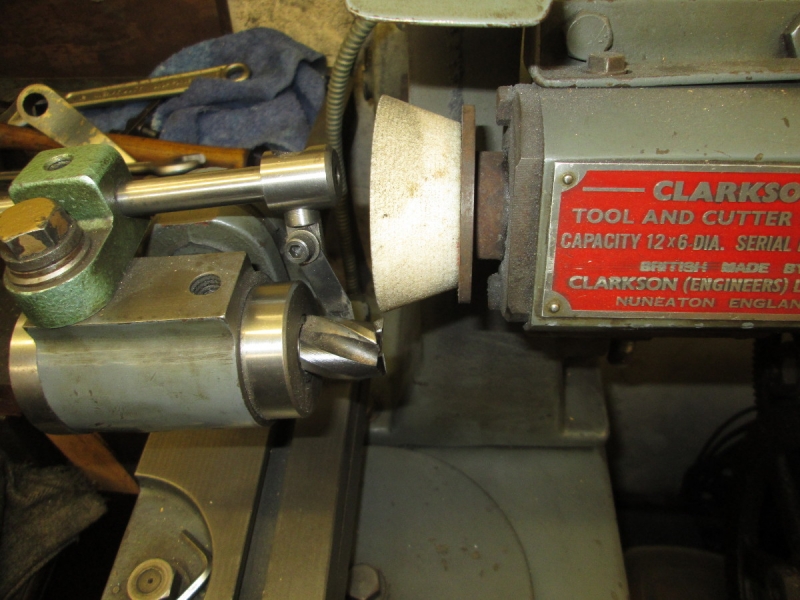
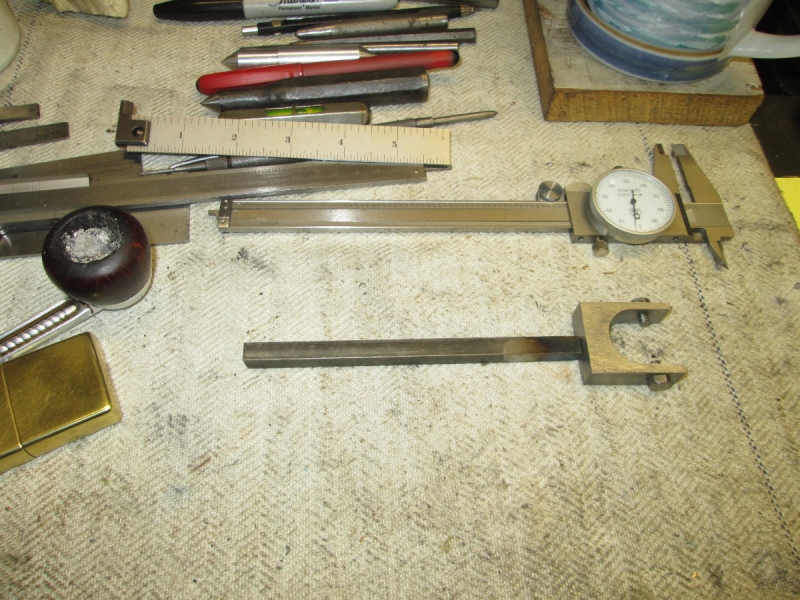
Here we are at knocking off time. I have the design clear in my head and the big piece is for the base. The smaller one will be made into the actual split bearing. I think I'm happy with it..... It's getting a bit populated isn't it! Don't worry about the size, these pieces are going to shrink as usual! All I seem to do is make lumps of metal smaller and a different shape. Engine building in a nutshell!
Stanley Challenger Graham
Stanley's View
scg1936 at talktalk.net

"Beware of certitude" (Jimmy Reid)
The floggings will continue until morale improves!
User avatar
chinatyke
Donor
Posts: 3831
Joined: 21 Apr 2012, 13:14
Location: Pingguo, Guangxi, China

Re: SHED MATTERS 2

Post by chinatyke »

It's looking very good. I was under the impression that when you bought kits you just assembled them like Meccano and didn't realise the work you had to put into it. Well done.
User avatar
Stanley
Global Moderator
Global Moderator
Posts: 90802
Joined: 23 Jan 2012, 12:01
Location: Barnoldswick. Nearer to Heaven than Gloria.

Re: SHED MATTERS 2

Post by Stanley »

Thanks China. Funnily enough I have just been asked for the first pic of the Fieldhouse. I think it was this one on 18 October 2016. I had just received the castings and drawings. About 350 hours have gone into it since then and probably 150 to go at a guess. It ain't easy!

Image
Stanley Challenger Graham
Stanley's View
scg1936 at talktalk.net

"Beware of certitude" (Jimmy Reid)
The floggings will continue until morale improves!
User avatar
Stanley
Global Moderator
Global Moderator
Posts: 90802
Joined: 23 Jan 2012, 12:01
Location: Barnoldswick. Nearer to Heaven than Gloria.

Re: SHED MATTERS 2

Post by Stanley »

I'm still glowing China, nice way to start the day! Thanks again.....
Stanley Challenger Graham
Stanley's View
scg1936 at talktalk.net

"Beware of certitude" (Jimmy Reid)
The floggings will continue until morale improves!
User avatar
Stanley
Global Moderator
Global Moderator
Posts: 90802
Joined: 23 Jan 2012, 12:01
Location: Barnoldswick. Nearer to Heaven than Gloria.

Re: SHED MATTERS 2

Post by Stanley »

Image

Today's task is to start making and fitting the outrigger bearing for the flyshaft. So I spent a while measuring and plotting and doing a fag packet drawing. Once I was sure I knew what I wanted and had my locations correct I drilled the bronze bar for the bearing. The target is 7/16" so I drilled it 27/64ths.

Image

And then poked a 7/16" reamer through it. Then of course I remembered that the bearing has to be split! Never mind, at least it isn't oversize!

Image

I did a check on the vise to make sure it was lined up properly. This very accurate clock showed up a tiny discrepancy so I put that right!

Image

The rest of the morning was taken up with some careful milling. I won't bore you with it.

Image

Here's where we are at knocking off time. I have made the cut outs at the bottom so I can get the 2BA fixing screws in. Now I need to do some drilling of bolt holes but that will do tomorrow!
Stanley Challenger Graham
Stanley's View
scg1936 at talktalk.net

"Beware of certitude" (Jimmy Reid)
The floggings will continue until morale improves!
User avatar
Stanley
Global Moderator
Global Moderator
Posts: 90802
Joined: 23 Jan 2012, 12:01
Location: Barnoldswick. Nearer to Heaven than Gloria.

Re: SHED MATTERS 2

Post by Stanley »

Image

As usual the day began with a good study. I am a bit short of room for the outrigger bearing. At first I considered moving the winch bodily 3'16" away from the engine but didn't like that. Neither did I fancy making the bearing shorter in the bore than 1/2" so I decided to take the small remaining boss off the flywheel. It will still have plenty of hold on the shaft because it is accurately bored and doesn't have to transmit any drive, It's only there for momentum.

Image

So here we are doing some high risk turning! I only have a sixteenth of an inch hold in the chuck. It relies on the pressure from the centre. Careful cuts until I could go now further and then (quelle horreur!), I grabbed it in the chuck by one spoke and ground the rest off with the angle grinder.

Image

Back to the bearing.... I drilled it for 4BA studs, gave it witness marks so it will always be assembled the right way round and then sawed it in two in the HM.

Image

I was going to re-size the bore using a drill under the pillar drill because that saved changing the chuck but soon pulled myself up and did it properly! Here we are ready to start boring.

Image

The 7/16" standard was useful as a gauge....

Image

I finished it with the reamer and broke the edges of the bore.

Image

I had left plenty on the top so I popped it into the mill and brought it down to a sensible level.

Image

Then under the drill and an oil hole and pocket popped in. That's it for today, another few careful steps forwards and no cock-ups!!
Stanley Challenger Graham
Stanley's View
scg1936 at talktalk.net

"Beware of certitude" (Jimmy Reid)
The floggings will continue until morale improves!
User avatar
Stanley
Global Moderator
Global Moderator
Posts: 90802
Joined: 23 Jan 2012, 12:01
Location: Barnoldswick. Nearer to Heaven than Gloria.

Re: SHED MATTERS 2

Post by Stanley »

I've just spent an hour cooking up a storm and building the next four meals from green veggies, one sausage and some lardons.... It's all right for those of you who have a live-in housekeeper. I have to manage my own sky. A short rest, a pot of tea and a smoke and I shall be in the shed.....
Stanley Challenger Graham
Stanley's View
scg1936 at talktalk.net

"Beware of certitude" (Jimmy Reid)
The floggings will continue until morale improves!
User avatar
Stanley
Global Moderator
Global Moderator
Posts: 90802
Joined: 23 Jan 2012, 12:01
Location: Barnoldswick. Nearer to Heaven than Gloria.

Re: SHED MATTERS 2

Post by Stanley »

Image

Today we carry on with the outrigger bearing. First job though was to take the two jaw brass chuck of Mrs Harrison and put a 3 jaw SC on. I decided to give the Taylor chuck an outing, it's a while since I used it. Then on to the bearing. I had already decided to finish fitting the bearing to the pedestal so the first job was to get accurate locations for the stud holes.

Image

Then drill and tap for the 4BA studs.

Image

You might wonder what's going on here! You know how it is, something is nattering you but you always have something more important to do. Of late I have been dropping the chuck key frequently and it usually hides behind the drill and has to be fished out with a magnet. I did it this morning and realised that the reason for it isn't my clumsiness or advanced years but the fact that the handle is loose in the key. I pulled it out, gave it a coat of pop marks and drove it back in again. Didn't take more than a few minutes and it'll save a lot of time cursing and scratting on the floor!

Image

I fitted the bearing, not bad but as expected not quite perfectly positioned on the pedestal so I popped the whole thing under the VM and took a light skim on all four faces. It's perfect now......

Image

I had an hour's cooking this morning so by this time it was knocking off time. I'm ready to attend to the 2BA holes in the foot for fixing it to the base board.....
Stanley Challenger Graham
Stanley's View
scg1936 at talktalk.net

"Beware of certitude" (Jimmy Reid)
The floggings will continue until morale improves!
User avatar
Stanley
Global Moderator
Global Moderator
Posts: 90802
Joined: 23 Jan 2012, 12:01
Location: Barnoldswick. Nearer to Heaven than Gloria.

Re: SHED MATTERS 2

Post by Stanley »

Image

Today I want to finalise the position of the outrigger bearing, check its height and mark the base for drilling for the 2BA holding down bolts. So the first job was some careful measuring and two clearance holes drilling in the foot of the pedestal.

Image

I milled a bit more out of the slot so as to be sure that the heads of the set screws can turn easily.

Image

Then I put the pedestal without the bearing in place after tightening all the bearings down on the shaft and measured the gap between the top of the pedestal and the shaft with one of my Matrix slips and feeler gauges. I need the bottom of the bearing to be .340" above the pedestal. I'd estimated the height when I first made the assembly and was pleasantly surprised when I checked it to find that I had it dead right, no adjustment needed.

Image

I put the assembly in place for a try out and the shaft rotates, a touch tight but that can be adjusted on the final fitting.

Image

Once I was sure the fit was OK I tightened the cap down and used two opposing wedges against the flywheel to force the pedestal up against the face of the winch bed. Then I marked the holes by scratching the base board through the bolt holes.

Image

Then I took the bearing caps off at each end, left the outrigger on the shaft and lifted the whole assembly off.

Image

Then I dismounted the winch from the base. You can see I have two good marks on the base board. As my next job is going to be drilling and tapping those two holes I decided that I would do the three holding down points on the winch at the same time. I say three, there are only two drilled at the moment so the first job tomorrow will be drilling the winch base for the third hole and marking the base. Then all five holes can be drilled tapping size and tapped. I shall leave the engine until later I think because that needs different treatment.

Image

Knocking off time. The bench looks as though someone has tossed a grenade onto it but this is organised chaos! Good morning's work and I look forward to tomorrow!
Stanley Challenger Graham
Stanley's View
scg1936 at talktalk.net

"Beware of certitude" (Jimmy Reid)
The floggings will continue until morale improves!
User avatar
Stanley
Global Moderator
Global Moderator
Posts: 90802
Joined: 23 Jan 2012, 12:01
Location: Barnoldswick. Nearer to Heaven than Gloria.

Re: SHED MATTERS 2

Post by Stanley »

Image

Today I want to permanently attach the outrigger bearing and the winch to the baseboard. I put a bit of finish on the bearing and here I am drilling the holes in the winch base 3/16" clearance size for the 2BA set screws that will bolt it to the base board. I had to do it with the 1/4" B&D drill which I must have had for 50 years!

Image

Next job was to drill the holes for the third winch base bolt and the two on the bearing and then tap all 5 holes 2BA. The compressed resin is good stuff to tap and gives a good hold.

Image

Here's the bearing and pedestal bolted down. I used a drop of shaft grade Loctite on all the threaded holes to ensure a firm permanent hold.

Image

I had to trim the set screws down to 11/16" before I bolted the winch down and afterwards turned the whole lot upside down so I could file the ends of the set crews dead flat on the bottom of the base.

Image

I got to this stage a bit before knocking off time but decided that it was a good place to halt and do some thinking. The way I have built it I can lift the drive shaft in and out at will even when the crank is fitted on the inboard end. So my next job is to complete the fitting of the driveshaft including fixing the flywheel and installing the selector lever for the winch drive. Once I have done that the winch and drive are finished and all the fitting is on the engine motion and accessories. The engine isn't fastened down yet, it's still located on its dowels. Fastening it down to the baseboard will be almost the last job. It's looking like an assemblage now but there's a lot of making and fitting to do yet and all of it bloody watchmaking! Still, tomorrow I can work on the shaft and the selector, that'll keep me going for a few days yet before I have to do the fiddly bits.....
Stanley Challenger Graham
Stanley's View
scg1936 at talktalk.net

"Beware of certitude" (Jimmy Reid)
The floggings will continue until morale improves!
User avatar
Stanley
Global Moderator
Global Moderator
Posts: 90802
Joined: 23 Jan 2012, 12:01
Location: Barnoldswick. Nearer to Heaven than Gloria.

Re: SHED MATTERS 2

Post by Stanley »

Image

The programme this morning is to temporarily fit the drive shaft to check the fitting and then address the crank which I have to get ready for fitting before I finalise the drive shaft. It was a good job I checked, God knows how I have managed it but the centre of the bearing is 3/32" out! So this becomes the priority.

Image

You know me well enough to know that I'm quite liable to take the quick dirty way out of a problem. So I got the bearing centred under the drill, found a 7/16" end mill and got set up.

Image

No mucking about, I measured up carefully and plunged the mill into the bearing....

Image

It worked and here's the shaft in it's place. Looking at it, despite the obvious oversize if you look carefully I have a feeling it might be perfectly satisfactory as the shaft is well supported at each end. I shall wait and see because if I decided to re-make the bearing completely it can still be done even if everything on the shaft is finally fitted.

Image

Time to have a look at the crank. I did all the measurements and made a fag packet drawing. The first thing I realised is that like the eccentric casting, this casting is very mean, there is absolutely no spare meat on it.

Image

Image

I got the casting in the vise and, taking the bare minimum off, got two parallel faces on it.

Image

Not possible to get correct centres for the shaft and crank pin by the normal methods because the casting is irregular. I used normal centre finding methods and lightly popped the locations and then used my head, did some careful measuring and thinking and finished up with two centres I am comfortable with.... This is tomorrow's job as it's knocking off time!
Stanley Challenger Graham
Stanley's View
scg1936 at talktalk.net

"Beware of certitude" (Jimmy Reid)
The floggings will continue until morale improves!
User avatar
Big Kev
Site Administrator
Site Administrator
Posts: 11062
Joined: 23 Jan 2012, 20:15
Location: Foulridge

Re: SHED MATTERS 2

Post by Big Kev »

I'll have to get a paper template of your baseplate, I need to make sure my measurements are up to scratch on the wooden mount.
Kev

Stylish Fashion Icon.
🍹
User avatar
Stanley
Global Moderator
Global Moderator
Posts: 90802
Joined: 23 Jan 2012, 12:01
Location: Barnoldswick. Nearer to Heaven than Gloria.

Re: SHED MATTERS 2

Post by Stanley »

Any time Kev. You know how to catch me.....
Stanley Challenger Graham
Stanley's View
scg1936 at talktalk.net

"Beware of certitude" (Jimmy Reid)
The floggings will continue until morale improves!
User avatar
Stanley
Global Moderator
Global Moderator
Posts: 90802
Joined: 23 Jan 2012, 12:01
Location: Barnoldswick. Nearer to Heaven than Gloria.

Re: SHED MATTERS 2

Post by Stanley »

Image

I wrote an article so I was a bit late into the shed. But no rushing, quiet and careful.....
Today is crank day so I set the rotary table up on the VM, centred it, drilled the crank 3/8" on the Progress drill, fastened it down and very carefully made the large diameter look pretty.

Image

A change of vise for this very handy tool when you have something irregular to hold. I am aiming for 1/2" so I drilled it 12.5mm.

Image

It was a brand new drill so I backed the cutting edge off to give it negative rake. The last thing we want is a grab!

Image

Knocking off time. All ready for reaming the last 6thou out of the hole.
Stanley Challenger Graham
Stanley's View
scg1936 at talktalk.net

"Beware of certitude" (Jimmy Reid)
The floggings will continue until morale improves!
User avatar
Stanley
Global Moderator
Global Moderator
Posts: 90802
Joined: 23 Jan 2012, 12:01
Location: Barnoldswick. Nearer to Heaven than Gloria.

Re: SHED MATTERS 2

Post by Stanley »

Image

Before I ream the bore for the shaft there are a few tidying up jobs that need doing..... One is finishing milling the parallel surfaces.

Image

Then I drilled the nominal 1/4" hole for the crank pin. I say nominal, I bored it slightly under-size because I am short of meat in the crank. I shall be making the pin to fit this hole so it doesn't matter. Before I went any further I reamed out the shaft bore and spent half an hour with files and emery strip breaking the edges and making the crank look as though someone cared for it!

Image

As I was at the stage where I could remove my little 'odd shape' vise and reinstall the 3/4" cutter I took the opportunity to back the cutter off and re-sharpen it before I put it back in the VM.

Image

I did a bit more titivating and then surveyed the piste.

Image

Before I go any further with the crank I need some accurate measurement particularly for the finished protrusion of the shaft beyond the pedestal and to do that I need to weigh up where the centre of the crank pin lies. I deliberately made the shaft plenty long enough and any time now will have to turn some off it. So, into the kitchen, do some thinking and measuring and then dismantle the shaft.

Image

Once I had it all sorted, back into the shed and another look at the rabbit.

Image

I'm at the stage now where I need to cut the keyway in the crank so I got my brass ends jar out, found a small stub of 1/2" bronze and fixed it in the shaft bore with some shaft lock. I shall do my usual trick of drilling a hole down the join between the slug and the crank to make sure I have a parallel start for filing the keyway out. I haven't got any 1/8" key steel but I found a piece I can file to size. I had all my ducks in a row at this point but it was getting on. I shan't start this job until tomorrow.
Stanley Challenger Graham
Stanley's View
scg1936 at talktalk.net

"Beware of certitude" (Jimmy Reid)
The floggings will continue until morale improves!
User avatar
Stanley
Global Moderator
Global Moderator
Posts: 90802
Joined: 23 Jan 2012, 12:01
Location: Barnoldswick. Nearer to Heaven than Gloria.

Re: SHED MATTERS 2

Post by Stanley »

Image

I was cut short this morning in full flow by a welcome visit by John Clayton but managed to do some work before he came. The first job was to drill a 1/8" hole to give me a good straight start for the keyway I need to make in the crank.

Image

I heated the crank to break the seal of the Fitlock and opened the keyway out with a 1/8" warding file.

Image

And then milled the 3/16" key steel down to the right size. I took a while refining it until I had what will be a drive fit. Then I shortened the shaft to the correct length and made the 1/8" bronze washer I need for the spacer between the back of the crank and the pedestal. I adjusted that until it was a good tight fit and at that point John arrived and shed work ceased......
Stanley Challenger Graham
Stanley's View
scg1936 at talktalk.net

"Beware of certitude" (Jimmy Reid)
The floggings will continue until morale improves!
User avatar
Stanley
Global Moderator
Global Moderator
Posts: 90802
Joined: 23 Jan 2012, 12:01
Location: Barnoldswick. Nearer to Heaven than Gloria.

Re: SHED MATTERS 2

Post by Stanley »

For some strange reason the site isn't allowing me to upload images in the normal way so I shall do them as attachments. Click on them to enlarge.
FIELDHOUSE WINDER 01 230317 .JPG
On with the crank.... First job was to make and fit the crank pin.
FIELDHOUSE WINDER 02 230317 .JPG
I checked all my measurements twice, made the pin and Loctited it in place.
FIELDHOUSE WINDER 03 230317 .JPG
My overall aim is to get all the components fitted on the flyshaft and get it fitted. One thing I have to do is finish the eccentric by making and fitting the eccentric head bar. First thing I did was check all the measurements, do a drawing and bend the eccentric rods to somewhere near their proper shape. I can fine tune this once the bar is made. It would be a horrible job trying to do this with the eccentric in situ on the shaft. Far better to do it now!
FIELDHOUSE WINDER 04 230317 .JPG
I had a dig in the key steel box and found a piece of material to make the head piece. I have it set up in the VM ready for reducing to the correct size.
FIELDHOUSE WINDER 05 230317 .JPG
Close of play. Quite an exciting stage......
You do not have the required permissions to view the files attached to this post.
Stanley Challenger Graham
Stanley's View
scg1936 at talktalk.net

"Beware of certitude" (Jimmy Reid)
The floggings will continue until morale improves!
User avatar
Stanley
Global Moderator
Global Moderator
Posts: 90802
Joined: 23 Jan 2012, 12:01
Location: Barnoldswick. Nearer to Heaven than Gloria.

Re: SHED MATTERS 2

Post by Stanley »

The bad news this morning is that I fear the shed will get a miss this morning as household and other tasks crowd in on me but better to get them all sorted so that tomorrow can be a full day!
Stanley Challenger Graham
Stanley's View
scg1936 at talktalk.net

"Beware of certitude" (Jimmy Reid)
The floggings will continue until morale improves!
micktoon
Regular User
Posts: 366
Joined: 05 Feb 2012, 21:23
Location: Newcastle upon Tyne

Re: SHED MATTERS 2

Post by micktoon »

Lots of quality progress Stanley, good to see and keeping you off the streets until the light nights and hopefully drier and hotter weather. I hope you got all your household jobs done today and you will back in the shed tomorrow.
Cheers Mick.
User avatar
Stanley
Global Moderator
Global Moderator
Posts: 90802
Joined: 23 Jan 2012, 12:01
Location: Barnoldswick. Nearer to Heaven than Gloria.

Re: SHED MATTERS 2

Post by Stanley »

Thanks for the comments. That's the plan Mick!
Much later.... The best intentions of mice and men gang aft agley as the Immortal Memory wrote. I am afraid I have to report that I failed miserably. By just after 8AM I had the vacuuming done and the kitchen floor mopped and dried. Than I go embroiled in the mysteries of Whatsapp, I won't bore you with the details but it was all solved by a lady who obviously has more computer literacy than I have!! I am having a rest now before watching F1 qualifying. I promise to do better tomorrow!
Stanley Challenger Graham
Stanley's View
scg1936 at talktalk.net

"Beware of certitude" (Jimmy Reid)
The floggings will continue until morale improves!
User avatar
Stanley
Global Moderator
Global Moderator
Posts: 90802
Joined: 23 Jan 2012, 12:01
Location: Barnoldswick. Nearer to Heaven than Gloria.

Re: SHED MATTERS 2

Post by Stanley »

Image

You'll be pleased to see I actually got some work done. I am carrying on with making the head piece for the eccentric rods, making and fitting it now is a lot easier than doing it while the eccentric is separated. Here I'm using the trick I came across the other week for milling a curve on the end.

Image

Here's the result after a bit of edge breaking and polishing.

Image

You might wonder what I am knurling. I gave the shaft a light knurl where the flywheel fits. It was OK but I thought it would benefit from being driven on to the shaft with a touch of Loctite.

Image

The eccentric is in place and the flywheel driven on, it was a good tight fit. Now it's the turn of the crank. I have the 1/2" spacer in behind the washer and the crank in case it tried to drift as I drive the key home. I pressed the key on with the chuck to get it started and then clouted it with the hammer until it was solid. It was a good tight fit, the crank will never move! I finished it by cutting the excess of and polishing it with a coarse diamond hone.

Image

Here's the finished result, I'm quite pleased with it.

Image

Here's the state of play at knocking off time. This is a permanent fit, I shan't be stripping it down again if I can help it. I am ready to start on the engine motion as soon as I have done one last thing on the winch. I need to make and fit the selector and lever for the gear shift. As for the fit, I have tightened all the bearings down fully and everything is just a touch tight but no binding. This is just how it should be, it will loosen up as we continue fitting and of course when I eventually get steam (Compressed air) on it. There is bound to be a very slight misalignment in the drive train as it is very tightly fitted and a tiny bit of wear as it beds in will mean it finishes up a perfect fit. The main thing is that the relationship between everything is obviously somewhere near in line. It's been a good morning!
Stanley Challenger Graham
Stanley's View
scg1936 at talktalk.net

"Beware of certitude" (Jimmy Reid)
The floggings will continue until morale improves!
User avatar
Stanley
Global Moderator
Global Moderator
Posts: 90802
Joined: 23 Jan 2012, 12:01
Location: Barnoldswick. Nearer to Heaven than Gloria.

Re: SHED MATTERS 2

Post by Stanley »

Don't expect any shed action today lads. I pulled a muscle in my thigh yesterday climbing about on work tops to clean walls and pictures. When will I learn! Old age can be a bugger......
Stanley Challenger Graham
Stanley's View
scg1936 at talktalk.net

"Beware of certitude" (Jimmy Reid)
The floggings will continue until morale improves!
User avatar
Stanley
Global Moderator
Global Moderator
Posts: 90802
Joined: 23 Jan 2012, 12:01
Location: Barnoldswick. Nearer to Heaven than Gloria.

Re: SHED MATTERS 2

Post by Stanley »

Much better today so I pushed it to the limit..... a full morning in the shed.

Image

Today's task is to start making the gear change lever for the sliding gear on the drive shaft which enables the winch to be disconnected from the engine to allow the trucks on the inclined rope-way to descend under gravity. As per usual, the drawings are a replica of the original and I don't like it so I set to to design my own version.

Image

Half an hour in the drawing office to get a fag packet drawing of what I want and then a furtle in the scrap box where I found this piece of 1/2" stock. Just the job because my version is 1/2" thick. So some bluing and marking.

Image

Into the HM where the sharp slitting saw courtesy of Mick and John made short work of the cutting. For this cut I had to remove one jaw so as to get the stock in.

Image

I milled the exterior faces to exactly the right size and ensured they were square, then marked for the cut out of the jaw. Here I'm ensuring that this cut will be dead centre.

Image

I put an inch end mill in the chuck and took the first cut but I don't like the way it is cutting. Not enough clearance in the centre.

Image

I gashed the centre on the grinding wheel and them popped it it the T&C grinder for a touch-up. At this point Wendy arrived and it was almost 10AM so I knocked off. I'm ready for a clean start tomorrow. Oh, by the way, I cleaned Mrs Harrison and the HM on my way to this conclusion. I work better in a clean shop!
Stanley Challenger Graham
Stanley's View
scg1936 at talktalk.net

"Beware of certitude" (Jimmy Reid)
The floggings will continue until morale improves!
User avatar
Stanley
Global Moderator
Global Moderator
Posts: 90802
Joined: 23 Jan 2012, 12:01
Location: Barnoldswick. Nearer to Heaven than Gloria.

Re: SHED MATTERS 2

Post by Stanley »

Image

Proof that I might be getting to grips with sharpening end mills! A much better cut after yesterday's adjustments. If you're thinking I could have shifted a lot of metal by drilling a 1" hole in it you are of course right but it would have to be milled in the end and the uneven cut as you hit the hole is just the thing to drag in backlash and nasties like that. This is an El Cheapo VM and as long as you realise this and its light construction you can do good work. The secret is sharp cutters and light cuts especially when you get to 1" end mills! They are about my limit. It worked, with care and patience I got a good clean cut through 1/2" metal with no dramatics.

Image

A bit of adjustment with the file and we have a good fit over the periphery of the selector. It looks a bit chunky at the moment but that will change when I get to final fitting, a lot of metal can be removed.

Image

The last thing I want is to squeeze the wings in so the next job was to accurately mill a spacer that is a tight fit in the jaws before putting punch marks in for the selector pegs which are going to be 2BA set screws.

Image

I drilled all the way through the selector and the block and threaded the holes for the pegs from each side.

Image

I need 3/4" clearance between the ends of the pegs so I centred the block in the VM and ran a sharp 5/8" cutter through followed by a 3/4" cutter. A bit of tidying up with a coarse diamond hone and a partial withdrawal followed by Loctite and a good tighten up and that's the pegs done.

Image

I did a trial fit just to check and it's OK.

Image

A bit of tidying up on the side of the grinding wheel but no edge breaking, that comes later. For the time being this is as far as I can go.

Image

The next job is the gear lever itself and the connection to the selector. So, into the drawing office and a search in the key steel for a suitable piece of stock. I found this length of 5/16" square key steel that will do nicely. At this point it was a bit before knocking off time but I had done over 2 hours and am still being kind to myself so I knocked off early with a clear job in front of me tomorrow. It will be good to think about it because there still some matters to be decided. Good progress and no cock-ups! My kind of morning.....
Stanley Challenger Graham
Stanley's View
scg1936 at talktalk.net

"Beware of certitude" (Jimmy Reid)
The floggings will continue until morale improves!
User avatar
Stanley
Global Moderator
Global Moderator
Posts: 90802
Joined: 23 Jan 2012, 12:01
Location: Barnoldswick. Nearer to Heaven than Gloria.

Re: SHED MATTERS 2

Post by Stanley »

Image

On with the gear lever..... First thing was to put the 4 jaw SC chuck on Mrs Harrison. Remember, you can't have too many chucks! First job was to put 3/8" of 2BA thread on the end.

Image

Next job, drill and thread the selector for the gear lever. Then countersink the thread into the selector so that the gear lever fitted flush. Then I offered the assembly up to the winch and marked where the pivot pin has to go on both the lever and the quadrant. I also marked the gear lever where it had to be cut out to clear the raised rim of the quadrant.

Image

I drilled the gear lever for a 5/32" pivot pin and then turned a matching pin threaded 2BA to go in the body of the quadrant. I also cut out a section of the lever to clear the raised part of the quadrant. Then I took the entablature bar with the quadrant attached bodily off the winch and marked it for the pivot pin.

Image

Next I drilled and tapped the quadrant and fitted the pivot pin, locked from below by a 2BA nut, there is plenty of clearance there.

Image

Finally, I refitted the entablature beam on the winch, mounted the gear lever on its pivot and took a view of where I was at. I am pleased. It looks to scale, fits and will do the job well. It looks much better than the recommended design on the drawings. This will do for today. Tomorrow it wants a nice handle forming on it, then drill the lever for the locking pin on the quadrant and the two holes in the quadrant at the right points for locking it either in gear or out. Then some general polishing up and making pretty. One last job that is to do is to refit the drive shaft and clutch with a bit more freedom to move. I have it fitted too closely at the moment and everything is too stiff. It would bed in with use but I'll give it a bit of help along the way! A nice morning, I enjoyed that!
Stanley Challenger Graham
Stanley's View
scg1936 at talktalk.net

"Beware of certitude" (Jimmy Reid)
The floggings will continue until morale improves!
Locked

Return to “Crafts”