Shed Matters 3

Re: Shed Matters 3
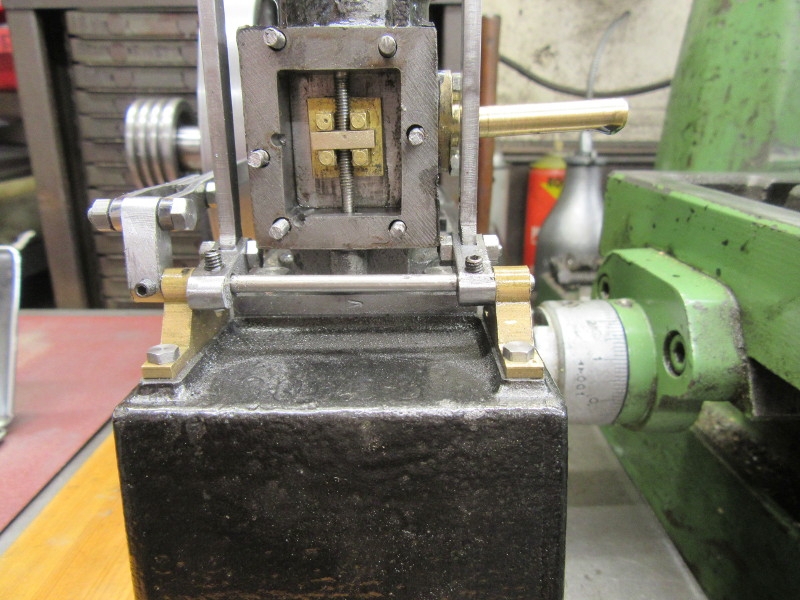
I can't quite see what keeps the two faces, the sliding valve and the box back face, in contact with each other. If it relies on the pantograph mechanism to keep the faces together then you may have big problems. Have you got any elastic bands in your treasure chest. Don't laugh I've seen them solve some tricky mechanical problems.
-
PanBiker

- Site Administrator

- Posts: 16447
- Joined: 23 Jan 2012, 13:07
- Location: Barnoldswick - In the West Riding of Yorkshire, always was, always will be.
Re: Shed Matters 3
Am I right in saying that a beam engine is more of a lethargic type engine and don't they run a lot slower but with loads of torque. Thinking back to the ones on display up at the Whitby steam engine rally a few years ago. Lot's on display and all just ticking over so to speak. I assume that after it has run in this will just come down to the PSI level from the compressor with a suitable regulator?
Ian
-
Stanley

- Global Moderator

- Posts: 90301
- Joined: 23 Jan 2012, 12:01
- Location: Barnoldswick. Nearer to Heaven than Gloria.
Re: Shed Matters 3
Nice to have responses.
Bob, spot on I always lap them in on a cast iron plate but with this one I didn't do anything beyond rubbing both faces down on fine emery on the old steam chest lid that Newton used as a surface plate, attending to that was already on my list for this morning together with making sure the drive bar is a sliding fit in the horns., the valve floats and the differential between steam pressure on the back and atmospheric (or near) on the face presses the valve down on the face. You're right about clearances they are minuscule!
Ken. It's the differential in pressure between the steam chest and the ports that presses the valve down on the face, that's why it's essential it can float.
Ian, no difference between horizontal or beam engines in theory but with the beam you have a bigger moving mass so they usually run slower, Whitelees was about 40RPM flat out, bigger engines are slower. No difference in torque, that's a product of piston area and pressure. Exhibition engines are usually run at tick over because that lets people see the motion and shows the aficionados the valve motion is correct as a slow even tick over isn't possible with badly fitted valve gear. I say it ran like hell because that's what I like to see, the motion moving so fast it is a blur!
One of the biggest problems with this design is the small amount of throw on the eccentric, I have that right, I've checked it. But it means everything connected with the valve has to be spot on. That's why the next move is to strip the valve out and re-fit it making absolutely sure everything is right. Resistance is useless! This is the fun part of making these little beasts, getting them exactly right!
By the way...I don't know if I mentioned it but one plus point is that the piston rod is exactly in the centre of the gland and running parallel, I must have got the Watt motion right!
Stanley Challenger Graham
Stanley's View
scg1936 at talktalk.net
"Beware of certitude" (Jimmy Reid)
The floggings will continue until morale improves!
Stanley's View
scg1936 at talktalk.net
"Beware of certitude" (Jimmy Reid)
The floggings will continue until morale improves!
-
Stanley
- Global Moderator
- Posts: 90301
- Joined: 23 Jan 2012, 12:01
- Location: Barnoldswick. Nearer to Heaven than Gloria.
Re: Shed Matters 3
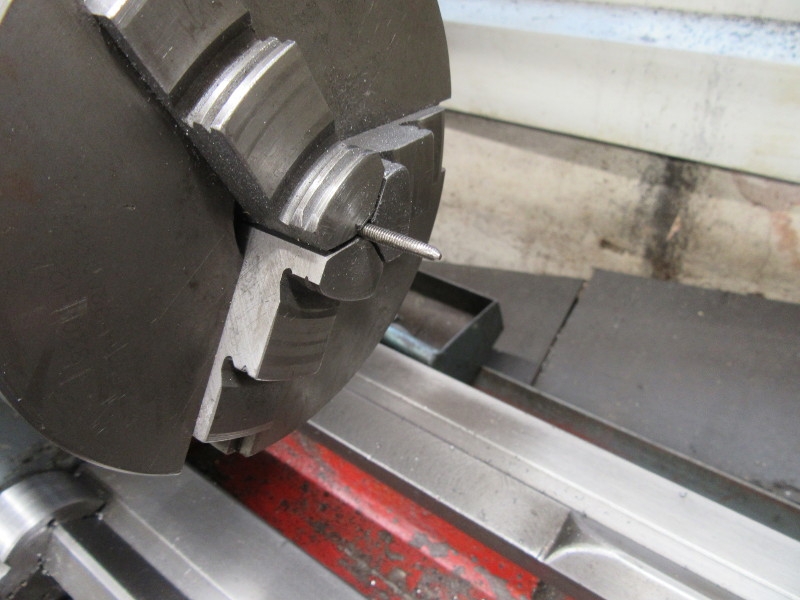
You all know what I have been doing today. One of the things I suspected was too tight a fit of the tail of the valve rod in the steam chest casting so I popped it in the lathe and filed the end of it down.
Basically I stripped everything out of the steam chest and refitted it. I laced everything up and it ran but I was still not satisfied so I took the rod out again to reduce it even further. I broke it off didn't I and thought oh shit. Never mind, make another but then a thought struck me. I've made plenty of engines without a tail rod and they have run fine so I just put it back in and the engine ran fine! I altered one or two other things like the angle of the cranks in the valve gear and then I remembered something else. All the videos I have seen of these engines running have shown them running what I always consider to be backwards. So altered the timing and tried it again.
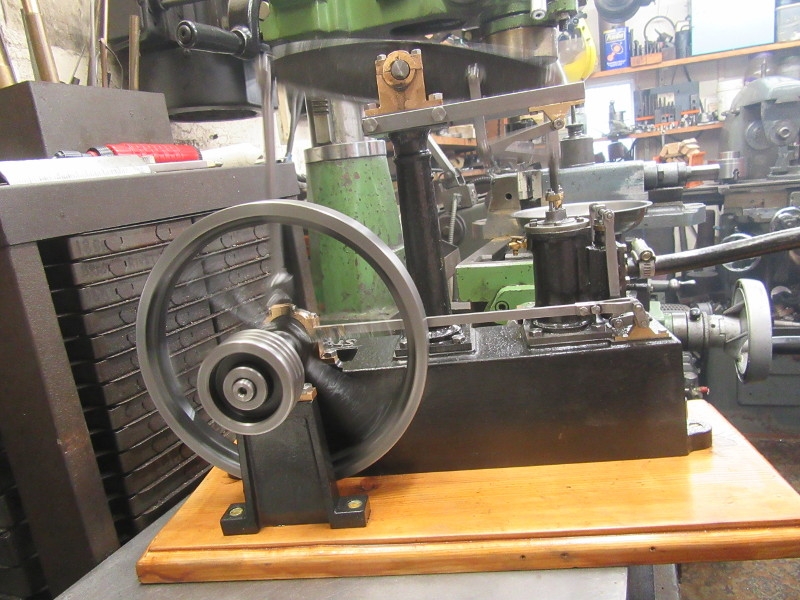
Off it went like a real 'un. I'm still not 100% satisfied, I never am but it was time to call it a day, I've had over 3 hours in the shed this morning. Now it needs all the nuts checking and a good clean. I am calling it finished!
Stanley Challenger Graham
Stanley's View
scg1936 at talktalk.net
"Beware of certitude" (Jimmy Reid)
The floggings will continue until morale improves!
Stanley's View
scg1936 at talktalk.net
"Beware of certitude" (Jimmy Reid)
The floggings will continue until morale improves!

Re: Shed Matters 3
Well done. It certainly looks good. Do you need to oil it up to preserve it from rust?
-
Stanley
- Global Moderator
- Posts: 90301
- Joined: 23 Jan 2012, 12:01
- Location: Barnoldswick. Nearer to Heaven than Gloria.
Re: Shed Matters 3
Thanks China, I'll make sure it has a light coat of oil, after that it's up to Mo and Kahara! They don't rust easily if kept warm and dry. Worst place is on a window cill, they'll rust there...
Stanley Challenger Graham
Stanley's View
scg1936 at talktalk.net
"Beware of certitude" (Jimmy Reid)
The floggings will continue until morale improves!
Stanley's View
scg1936 at talktalk.net
"Beware of certitude" (Jimmy Reid)
The floggings will continue until morale improves!
Re: Shed Matters 3
Nice one Stanley, glad it has worked out. So which way is ‘running backwards’? Looking at the last view which way is the flywheel turning. I must get my little beam engine outand look at it.

Re: Shed Matters 3
I think we need a video - if only to celebrate the successful end of the project. Get your Smart Phone into action, and start a Youtube channel.
If I can do it anyone can. Posterity beckons . . . .
If I can do it anyone can. Posterity beckons . . . .
Born to be mild
Sapere Aude
Ego Lego
Preferred pronouns - Thou, Thee, Thy, Thine
My non-working days are Monday - Sunday
Sapere Aude
Ego Lego
Preferred pronouns - Thou, Thee, Thy, Thine
My non-working days are Monday - Sunday
-
Stanley
- Global Moderator
- Posts: 90301
- Joined: 23 Jan 2012, 12:01
- Location: Barnoldswick. Nearer to Heaven than Gloria.
Re: Shed Matters 3
I would need four hands David! If someone was to pop round......
Bob 'running over is when the top of the flywheel is moving away from the cylinder. Has advantages in a horizontal but not so much in a beam engine where the con rod is vertical.
If I tell the truth it's not quite right, too tight, but it'll do and will get better with age. As Johnny used to say "It's not running 300 looms at Clough!" So I shall order the castings and make another, that ensures I can't die before I find if I can do better!
Stanley Challenger Graham
Stanley's View
scg1936 at talktalk.net
"Beware of certitude" (Jimmy Reid)
The floggings will continue until morale improves!
Stanley's View
scg1936 at talktalk.net
"Beware of certitude" (Jimmy Reid)
The floggings will continue until morale improves!
-
Stanley
- Global Moderator
- Posts: 90301
- Joined: 23 Jan 2012, 12:01
- Location: Barnoldswick. Nearer to Heaven than Gloria.
Re: Shed Matters 3
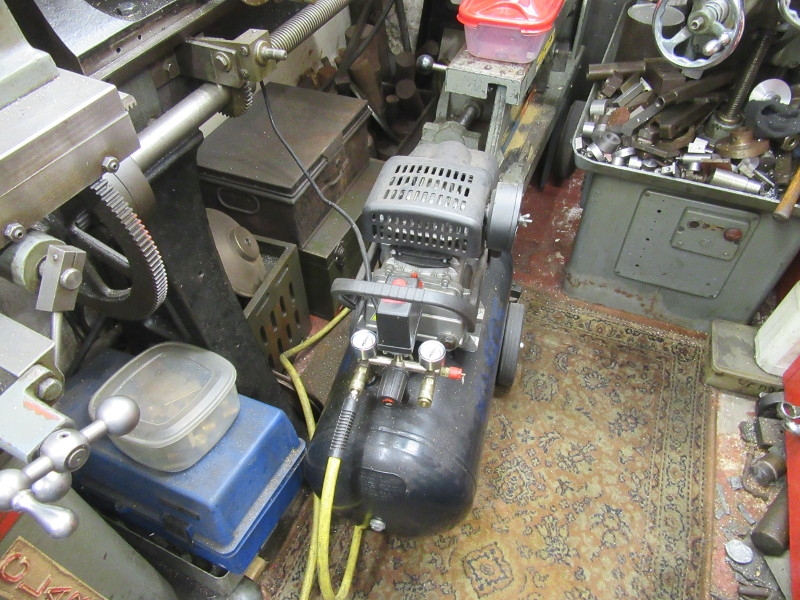
I've had an hour in the shed. First job was to check the oil levels in the compressor and drain the water from the receiver.

Then a tidy up, clean and a new tablecloth. Surface plates oiled up and other small jobs. We have a clean tidy shed!
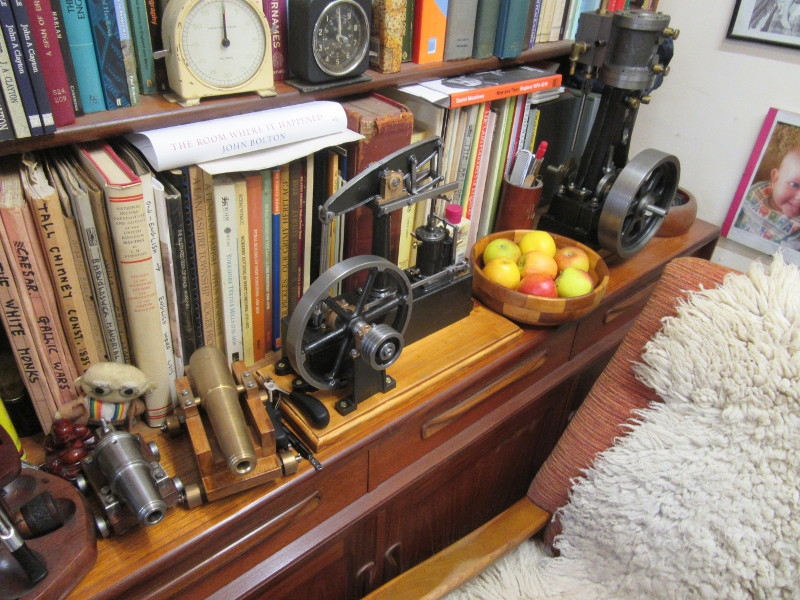
The engine has flitted into the kitchen temporarily. Before it got there I checked the running and gave it a superficial clean up. I don't expect it to be there long as Mo is itching to get his hands on it! He wants to run it for Kahara.
Now I shall go on the web and spend £400 I can ill afford for another set of castings. I have the urge to build another beam engine. A project will keep me alive for another 6 or 9 months as I can't die before it's finished.
I am expecting a new tool as well, something I should have got long ago which will improve my accuracy... I'll show it to you when I get it!
Stanley Challenger Graham
Stanley's View
scg1936 at talktalk.net
"Beware of certitude" (Jimmy Reid)
The floggings will continue until morale improves!
Stanley's View
scg1936 at talktalk.net
"Beware of certitude" (Jimmy Reid)
The floggings will continue until morale improves!
-
Stanley
- Global Moderator
- Posts: 90301
- Joined: 23 Jan 2012, 12:01
- Location: Barnoldswick. Nearer to Heaven than Gloria.
Re: Shed Matters 3
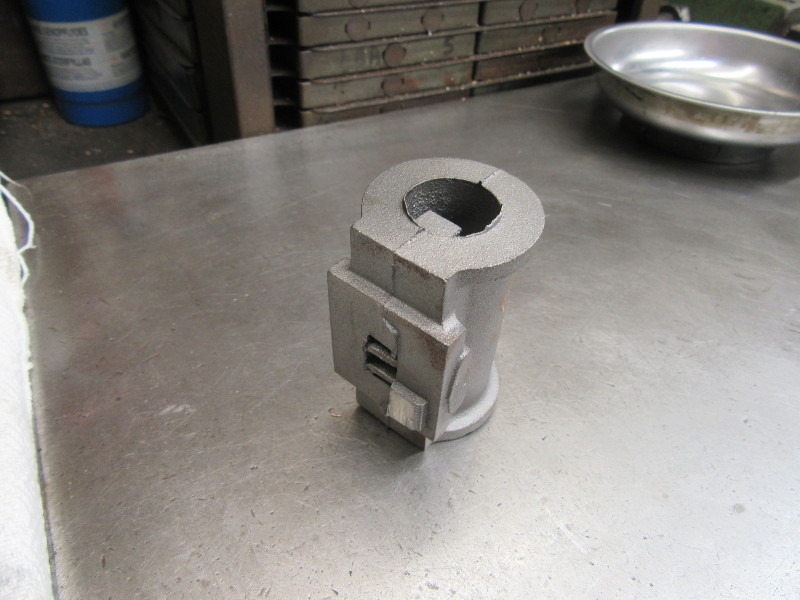
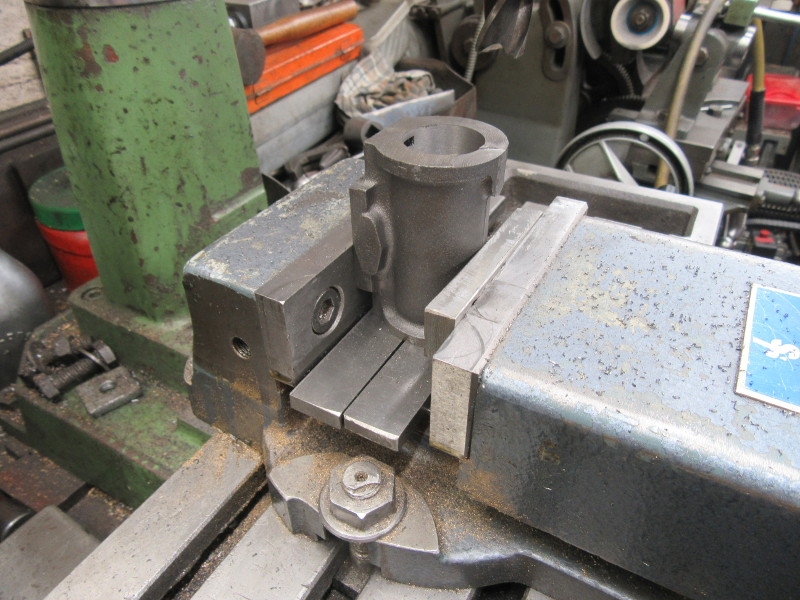
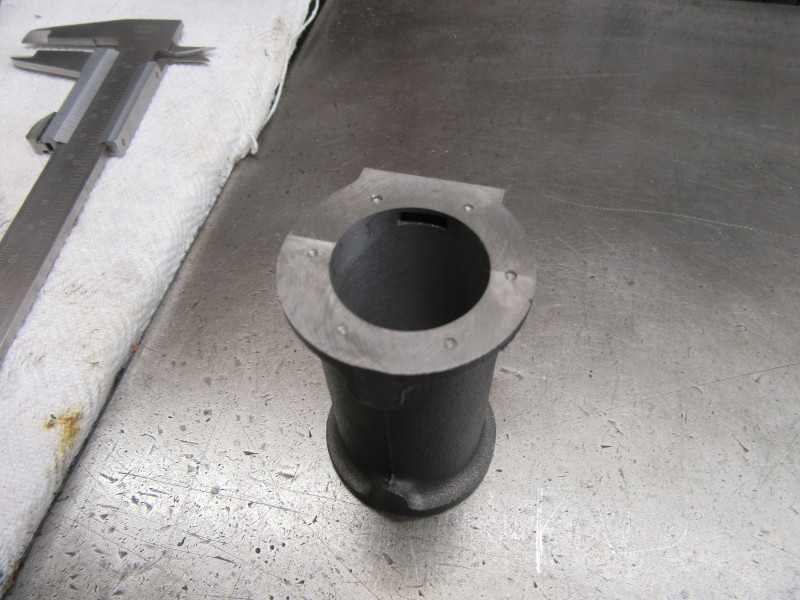
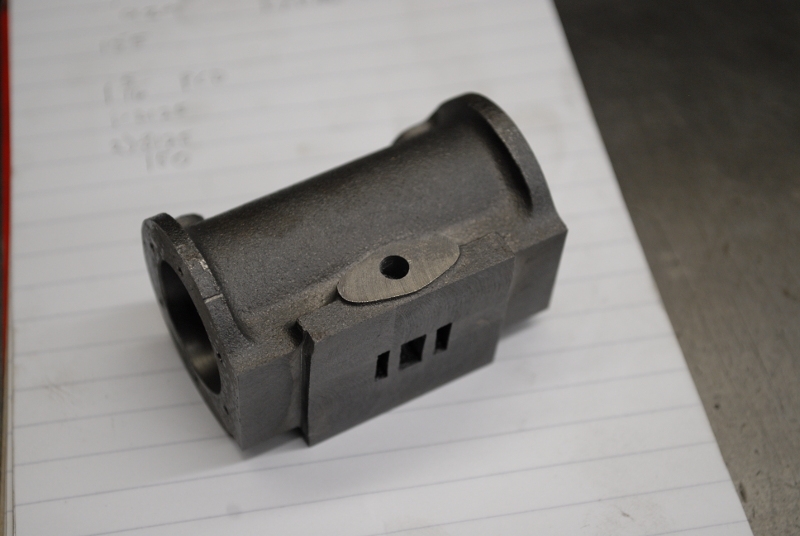
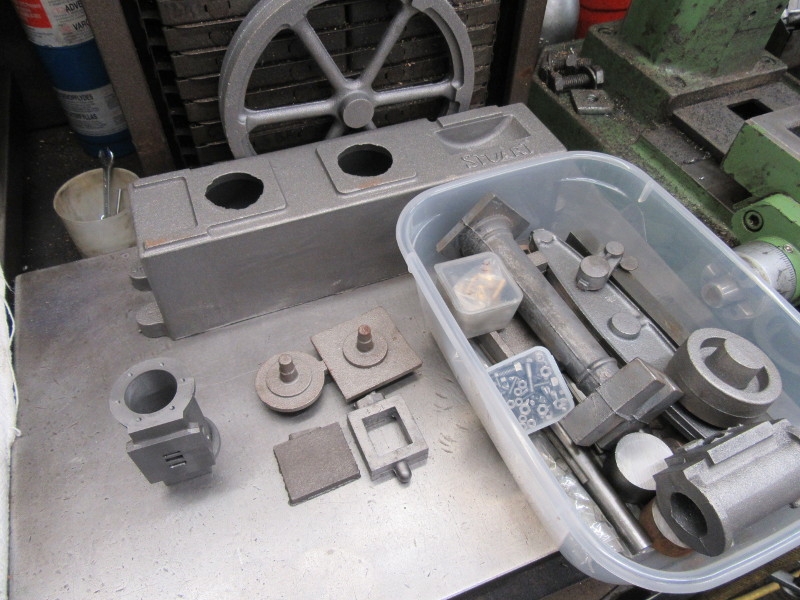
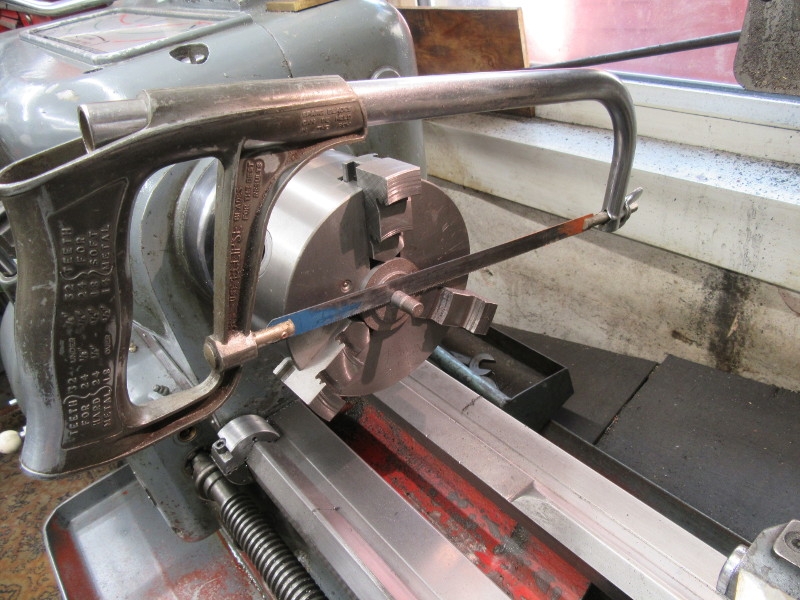
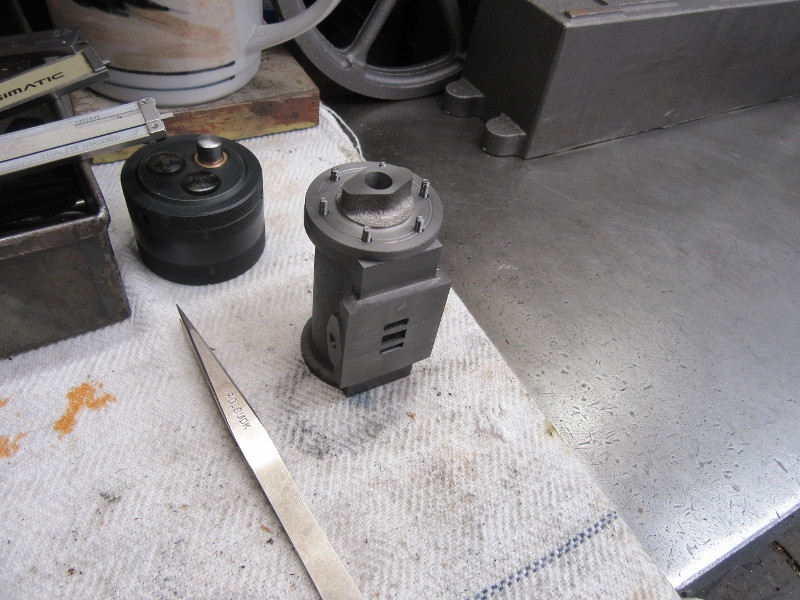
I've bitten the bullet and ordered the castings. I put aside worrying whether I can afford them and remembered that I happen to have a beam engine cylinder about my person so I don't need to hang about waiting for the courier. Here it is, I can start this morning. First I cleaned off the worst bits of flash with a hammer and punch and a big round file, I also made sure all the casting sand was cleared from the steam passages in the casting.
I need a reference surface and when doing a cylinder I use the valve face. So, remembering I have ground the ends reasonably flat and true I set it up in the milling vise and did my measuring to make sure I had it in as near the right position as possible. It's a casting though and so can't be accurate. You have to do the best you can.
That looks better! Nothing like a nice sharp cutter!
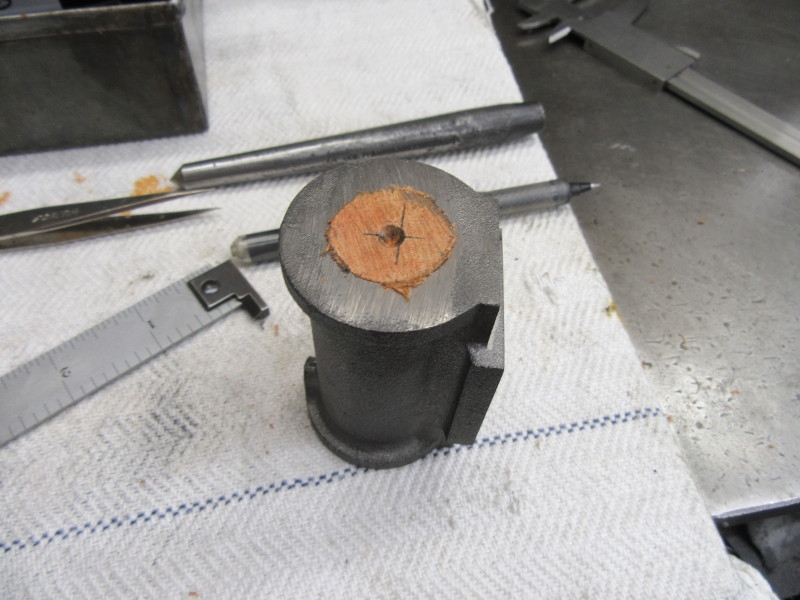
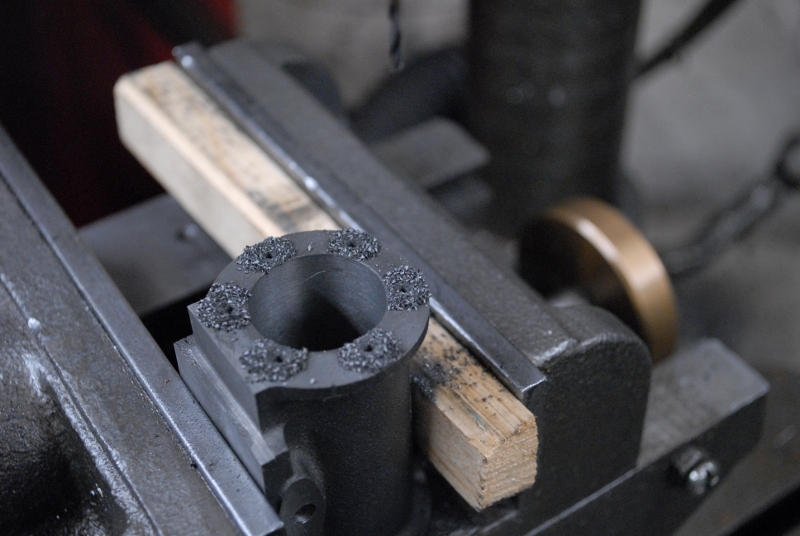
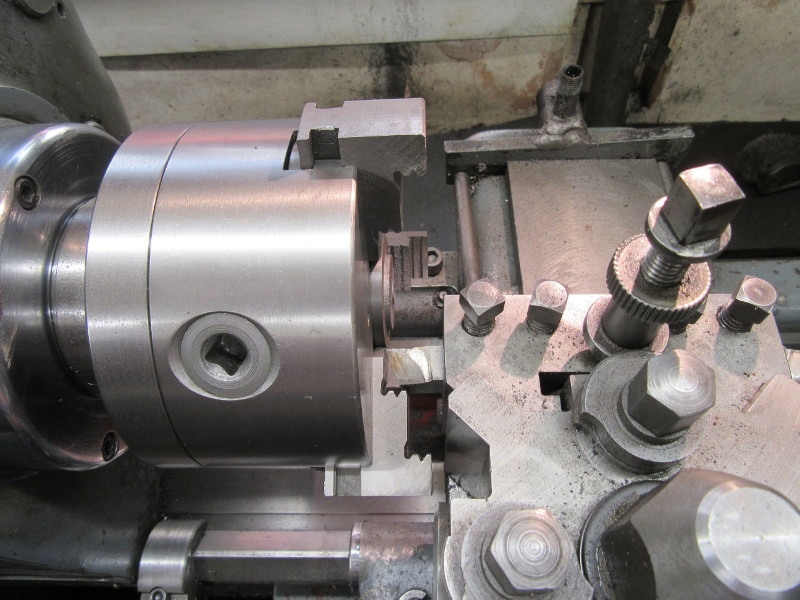
Then I had to do a bit of wood turning in the lathe and make a wooden plug I could drive into the bore. Once it was in place I measured and marked the centre as near as possible in each end. (If you are thinking this is off centre, no, it was my line that was wrong. Pesky eyes again!)
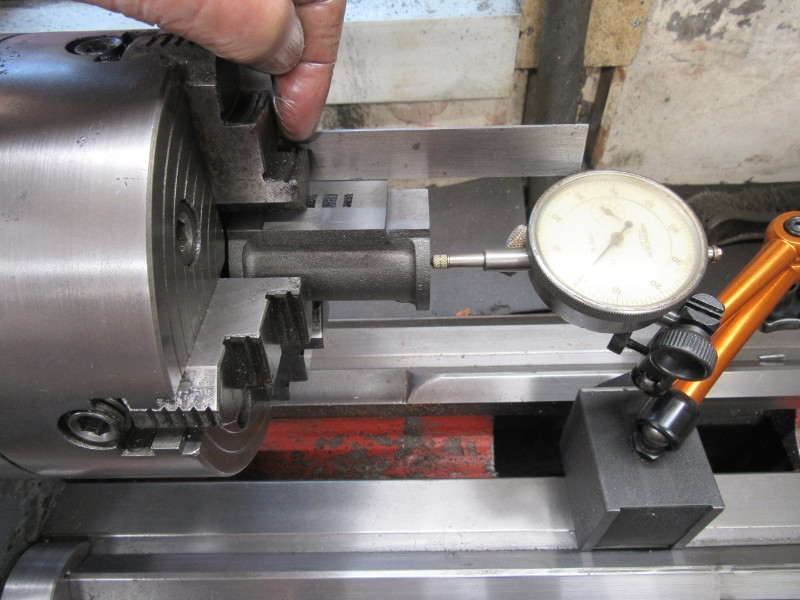
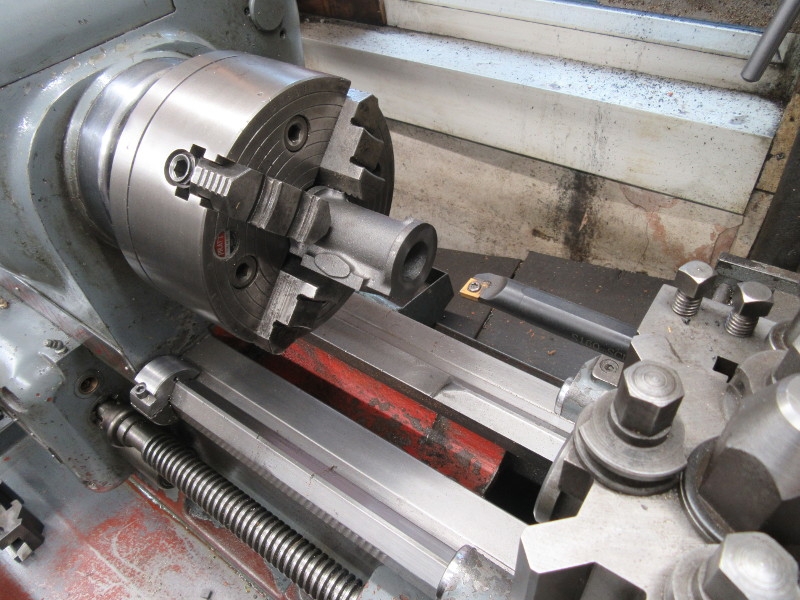
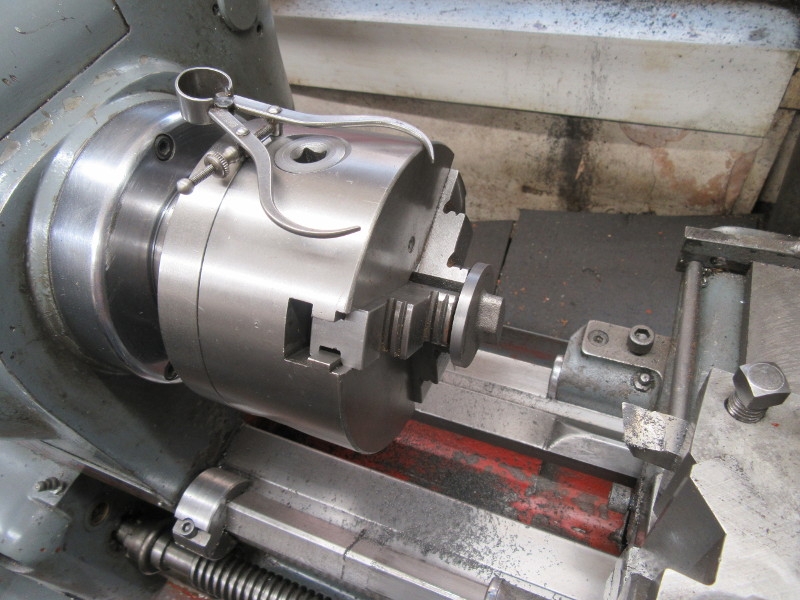
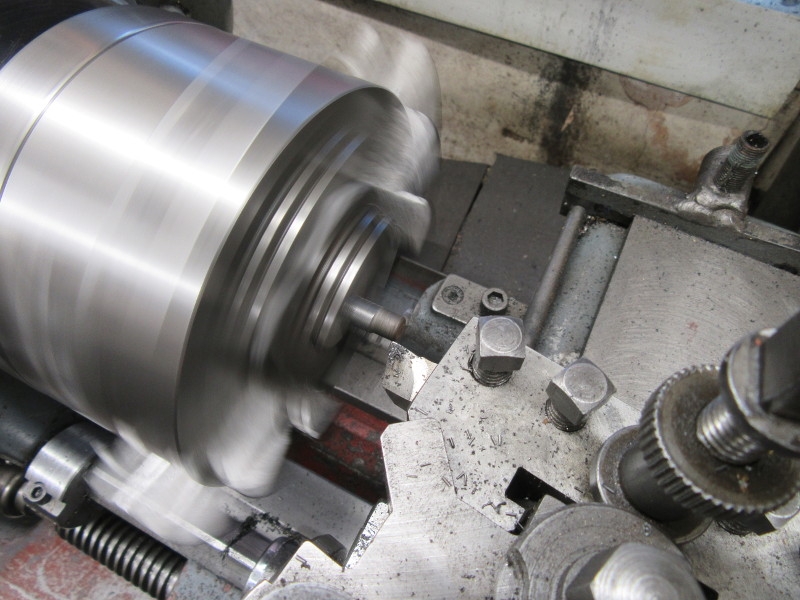
Newton's advice about turning a rough casting was "grab it as best you can and get going!". I am not as good as him and cylinders are not easy, they are very irregular, not concentric and are only gripped on four small points of contact. So I spent over half an hour adjusting, checking and readjusting and eventually decided I had it as good as it was going to get.
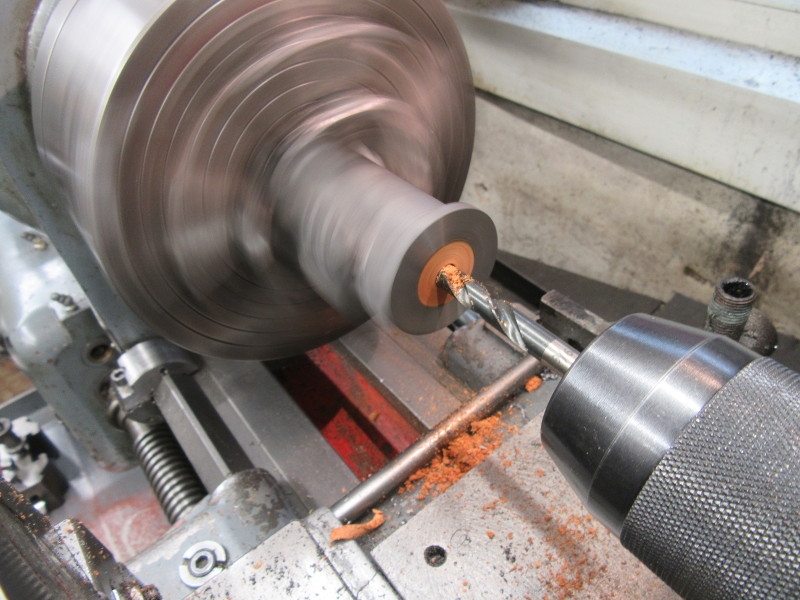
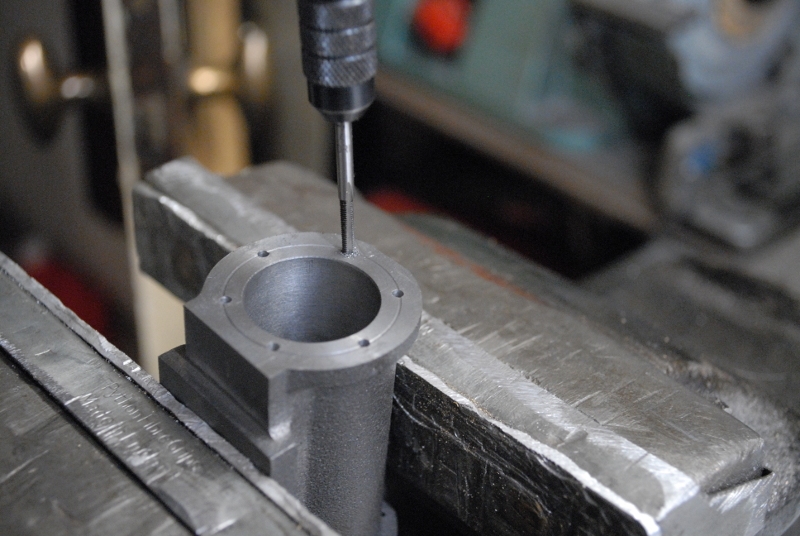
Next I drilled the plug out using increasing sizes, no point in having a grab and spoiling the set up. I've faced the cylinder end and I want the bore at right angles to this cut.
Here's where I was at knocking off time. The last drill I put through was taking a touch of cast iron all the way through. If the bore is is true in the casting this is a good sign. I shall only know when I see the other end but can't disturb the set up.
So I am ready for boring tomorrow. Two and a half hours of honest endeavour and I think I have it right. We shall see!
Stanley Challenger Graham
Stanley's View
scg1936 at talktalk.net
"Beware of certitude" (Jimmy Reid)
The floggings will continue until morale improves!
Stanley's View
scg1936 at talktalk.net
"Beware of certitude" (Jimmy Reid)
The floggings will continue until morale improves!
-
Stanley
- Global Moderator
- Posts: 90301
- Joined: 23 Jan 2012, 12:01
- Location: Barnoldswick. Nearer to Heaven than Gloria.
Re: Shed Matters 3
Susan says she will be pleased to give the next beam engine a home so I'm committed to this one and the next as Margaret will have to have one. That should keep me motivated for a while!
I feel I short changed Bob on 'running over' when he asked the question. So here's a bit more explanation.
Bob is rebuilding a steam loco at the moment and the valve gear is almost certainly Walchaert's. What is certain is that it will have guide bars at the top and bottom of the crosshead. These are necessary because when the loco reverses the forces acting on the crosshead reverse also and have to be constrained.
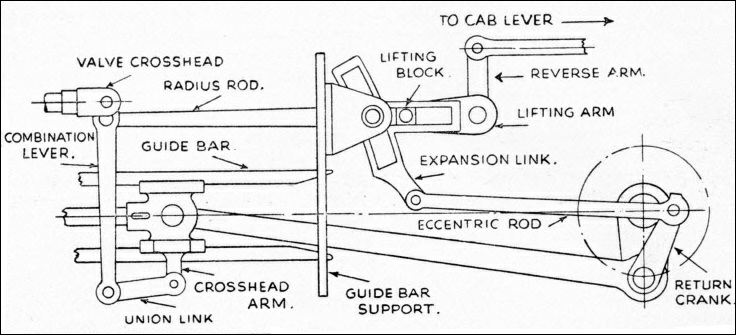
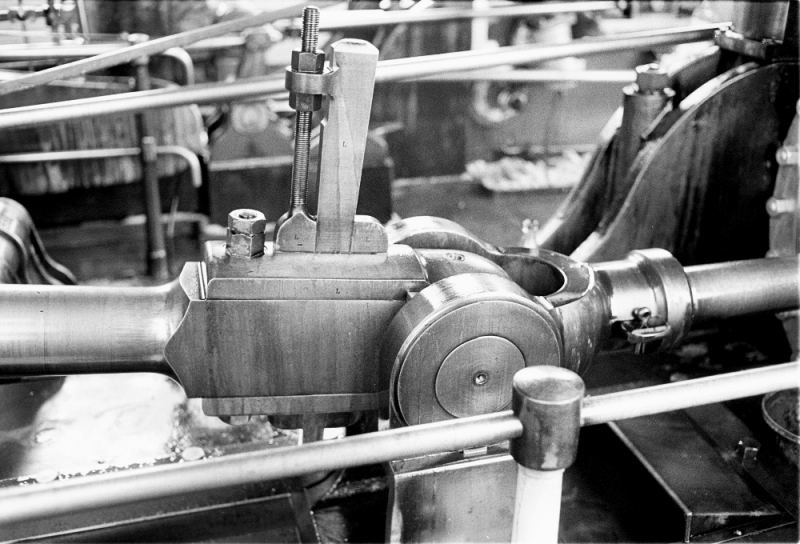
Other reversing engines like winding engines on colliery shafts need the same constraint, usually in the form of a trunk slide.
Like this one at Chatterly Whitfield colliery.
On all these prime movers there is no right or wrong rotation as they are efficient whichever way they run.
I have gained all my experience on textile engines and one major characteristic of these is that they never run in reverse as the shaft has to turn in the same direction all the time. This being the case, they don't need any restraint on the top of the crosshead because the forces acting on it are all in the same direction, downwards.
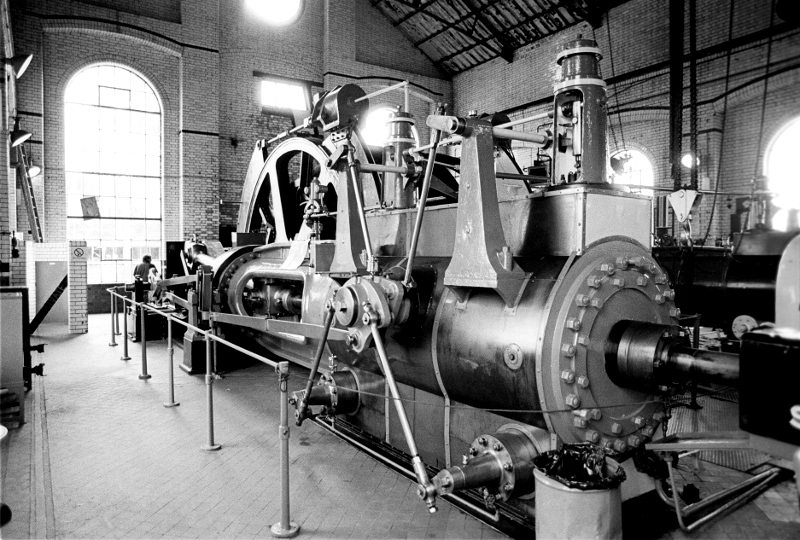
As in the Bancroft engine. This makes the engine bed less complicated and so the majority of textile engines have flat slides and the bottom of the crosshead runs on this. There are some exceptions but these are usually on engines where the same general design is used for all their stationary engines.
So, having the top of the flywheel moving away from the cylinder makes for a more simple build.
There is another Factor.
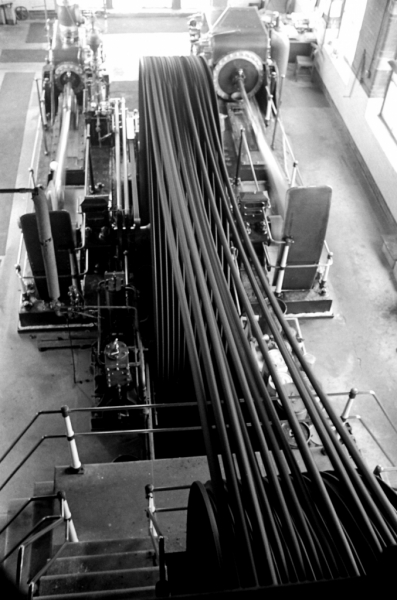
On a rope drive engine like Bancroft or Ellenroad Rotating the flywheel away from the cylinder means that the slack in the ropes is at the top of the drive and the bottom is taught and straight. This means that the sag in the ropes brings more of the rope into contact with the grooves in both the flywheel and the second motion. This means more adhesion and a better drive in terms of slippage on the wheels. In practice this is almost non-existent but will obviously be improved if the slack is in the top of the drive.
So, I am used to seeing the flywheel 'running over' and any engine that runs the opposite way, like the beam engine looks 'wrong' to me. Hope that's all clear Bob!
I feel I short changed Bob on 'running over' when he asked the question. So here's a bit more explanation.
Bob is rebuilding a steam loco at the moment and the valve gear is almost certainly Walchaert's. What is certain is that it will have guide bars at the top and bottom of the crosshead. These are necessary because when the loco reverses the forces acting on the crosshead reverse also and have to be constrained.
Other reversing engines like winding engines on colliery shafts need the same constraint, usually in the form of a trunk slide.
Like this one at Chatterly Whitfield colliery.
On all these prime movers there is no right or wrong rotation as they are efficient whichever way they run.
I have gained all my experience on textile engines and one major characteristic of these is that they never run in reverse as the shaft has to turn in the same direction all the time. This being the case, they don't need any restraint on the top of the crosshead because the forces acting on it are all in the same direction, downwards.
As in the Bancroft engine. This makes the engine bed less complicated and so the majority of textile engines have flat slides and the bottom of the crosshead runs on this. There are some exceptions but these are usually on engines where the same general design is used for all their stationary engines.
So, having the top of the flywheel moving away from the cylinder makes for a more simple build.
There is another Factor.
On a rope drive engine like Bancroft or Ellenroad Rotating the flywheel away from the cylinder means that the slack in the ropes is at the top of the drive and the bottom is taught and straight. This means that the sag in the ropes brings more of the rope into contact with the grooves in both the flywheel and the second motion. This means more adhesion and a better drive in terms of slippage on the wheels. In practice this is almost non-existent but will obviously be improved if the slack is in the top of the drive.
So, I am used to seeing the flywheel 'running over' and any engine that runs the opposite way, like the beam engine looks 'wrong' to me. Hope that's all clear Bob!
Stanley Challenger Graham
Stanley's View
scg1936 at talktalk.net
"Beware of certitude" (Jimmy Reid)
The floggings will continue until morale improves!
Stanley's View
scg1936 at talktalk.net
"Beware of certitude" (Jimmy Reid)
The floggings will continue until morale improves!
-
Stanley
- Global Moderator
- Posts: 90301
- Joined: 23 Jan 2012, 12:01
- Location: Barnoldswick. Nearer to Heaven than Gloria.
Re: Shed Matters 3
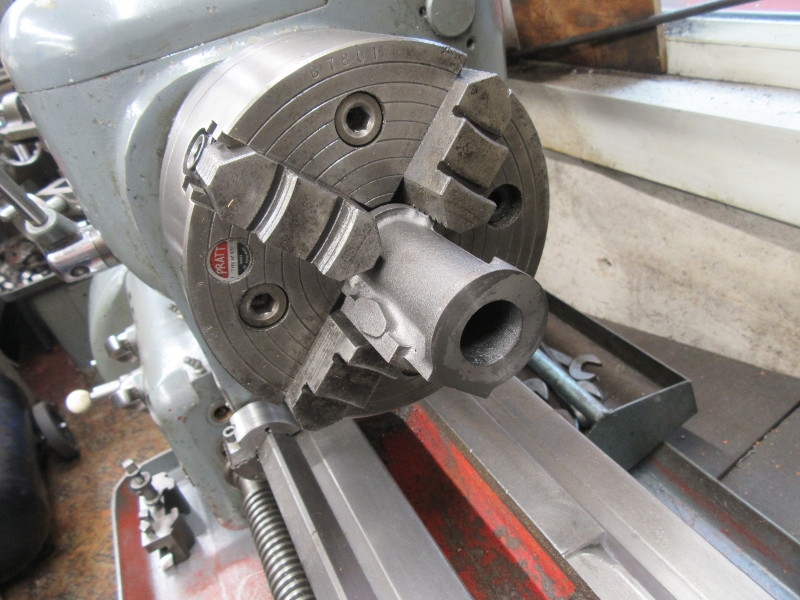
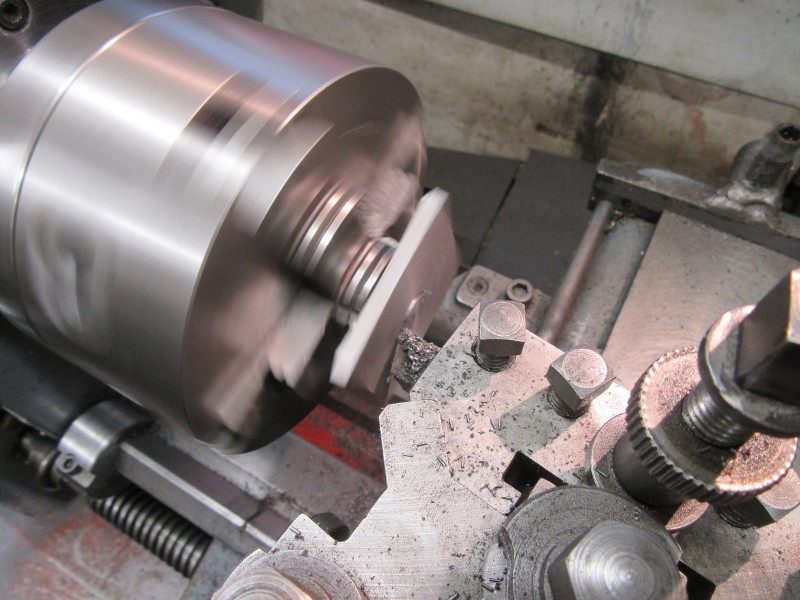
Cooking got under the feet but I have been in the shed for an hour. The job was setting the boring bar up, checking it was on centre, it wasn't so I adjusted it and then into boring. Remember you only have an imperfect hold on the casting so small careful cuts.
Only serious measuring will do. I took it steady and could tell by the sound of the cutter that I was dead in line with the bore. Patience and small cuts.... I finished up with a lovely smooth bore dead on one inch diameter. I was fairly optimistic about the far end that it would be central.
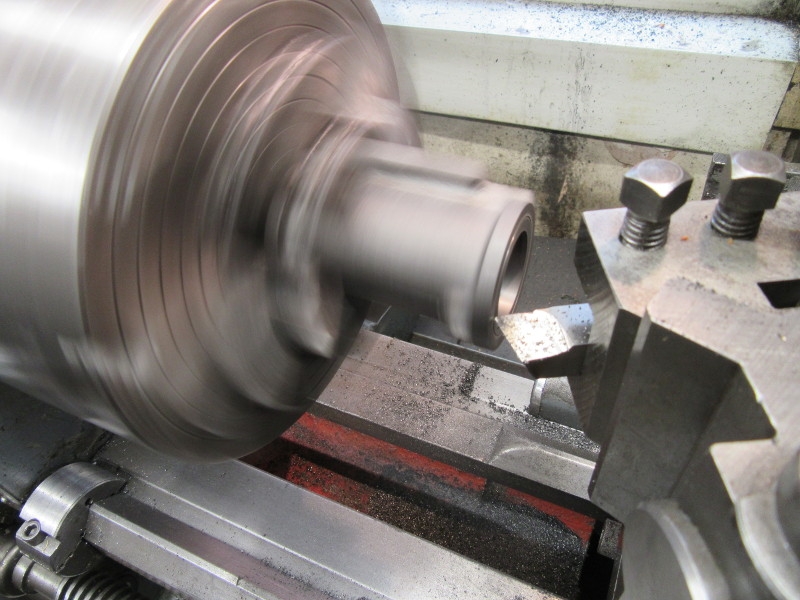
The last job was to mark the pitch circle diameter of the cylinder lid studs. Then I could take it out.
Knocking off time, I am largely satisfied but not pleased by the fact that the end of the bore is slightly off centre. Not enough to cause problems but I really thought I had got it right this time. No sweat, I can only remember once getting it dead right but you are always living in hope. This is a perfectly serviceable cylinder with much going for it. I can definitely live with it.
Stanley Challenger Graham
Stanley's View
scg1936 at talktalk.net
"Beware of certitude" (Jimmy Reid)
The floggings will continue until morale improves!
Stanley's View
scg1936 at talktalk.net
"Beware of certitude" (Jimmy Reid)
The floggings will continue until morale improves!
-
Stanley
- Global Moderator
- Posts: 90301
- Joined: 23 Jan 2012, 12:01
- Location: Barnoldswick. Nearer to Heaven than Gloria.
Re: Shed Matters 3
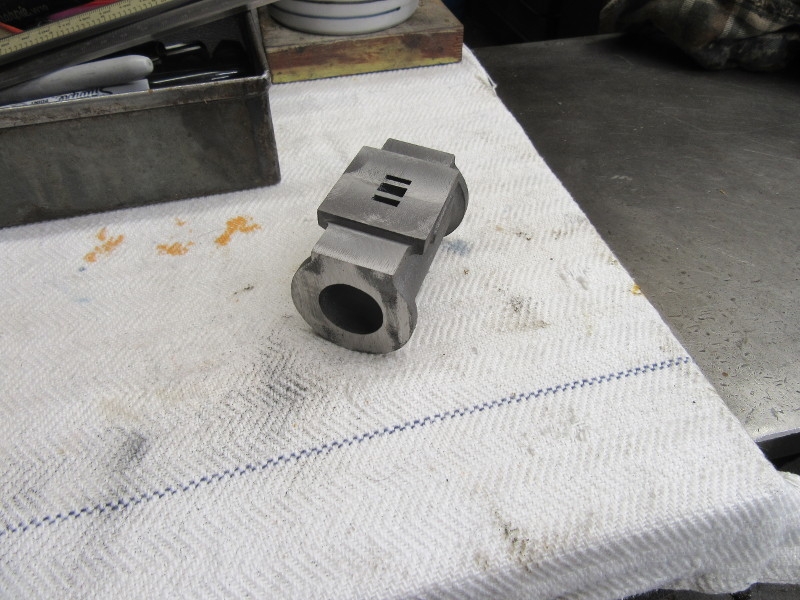
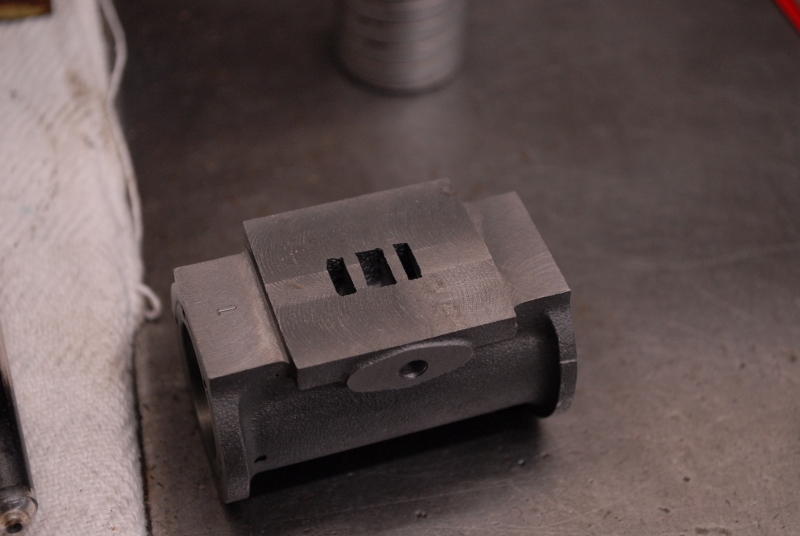
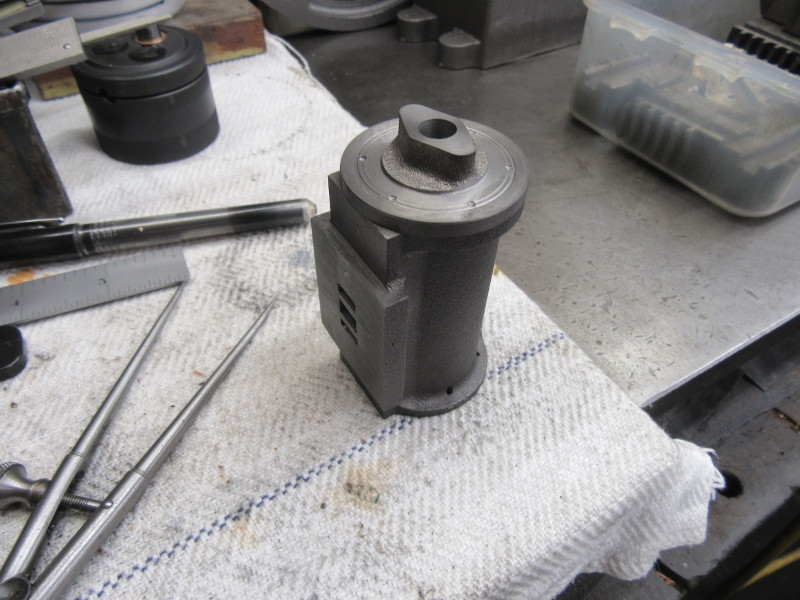
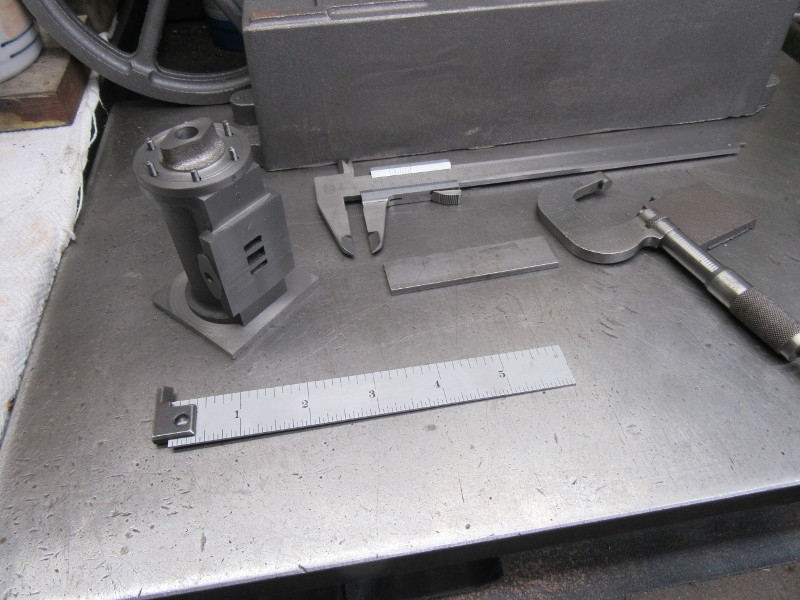
Today is all about refining the cylinder. First order of business was finishing it to length, 2 and 9/16" face to face. At the same time, because I know the other end is faced at exactly 90 degrees to the bore, I used that to ensure that whilst reducing the length I am cutting it parallel with the opposite face and of course at 90 degrees to the bore. I measured it afterwards and found it was 3 thou out of square, nothing to worry about. I marked the top end, the one with the PCD already marked on it with a 'T' as witness.
Next I addressed the valve face. I took a chance and used the two faces to ensure it was positioned correctly. I adjusted the level crossways with an accurate spirit level. The cut was exactly as suspected and not only aligned the face accurately but got rid of the marks left by the jaw of the 4 jaw chuck because I had to grip it tightly.
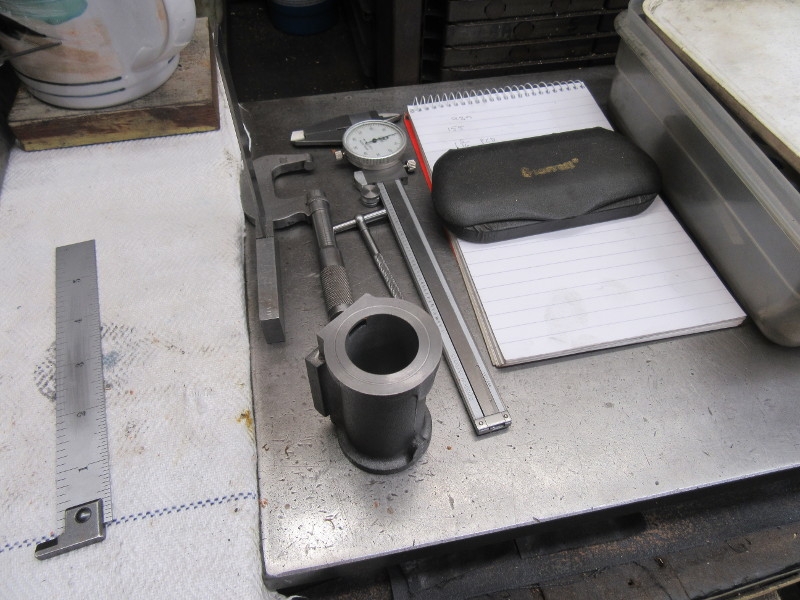
I set the cylinder up on a ground silver steel bar and two 'V' blocks on the surface plate and checked the relationship of the valve face with the bore. My surface plate is nowhere near tool room quality but is perfectly good enough for jobs like this. The bore is parallel with the face.
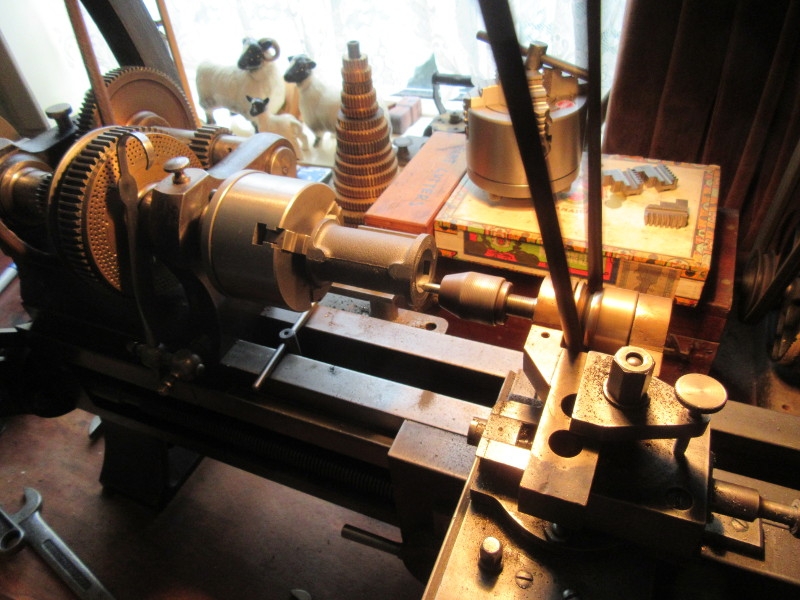

Then a treat, it's always nice to use Johnny's 1927 lathe. I want to mark six stud holes equidistant on the PCD. This lathe is ideal because it has built in dividing gear in the headstock and one of the divisions on the pulley is 12 so dead easy to do the dividing. The biggest problem I had was sharpening the 3/8" centre drill, long overdue! I did it with a diamond hone and of course my problem is I can't see it! Never mind, I improved it. (Perhaps it's time I bought some small centre drills.) Remember to make sure you mark each side of the steam passage! You don't want tapping holes going through there. Once I had done the end with the PCD marked I reversed it and did the other end at the same setting, again, dead easy.
So far so good! The bottom end.
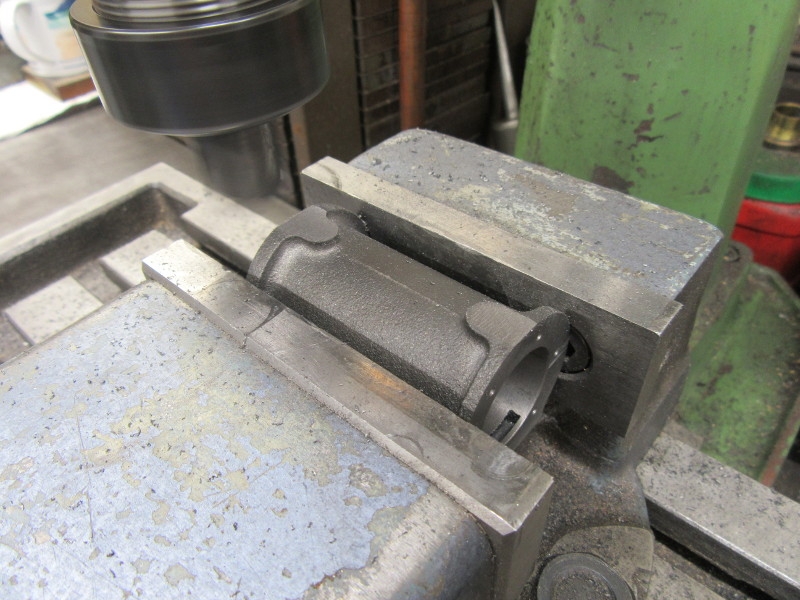
Two small jobs. First was to cut the faces where the drain cocks will be so they too are parallel with the bore. This makes sure that if I put it back in the vice using them and the valve face I have an accurate register.
One last cut, the face of the pad that the exhaust pipe mounts on.
Knocking off time after two hours of honest endeavour. We have a very respectable cylinder that is accurate. Plenty more to do yet but that's a good spell, we have nice progress and no cock-ups! That'll do me....
Stanley Challenger Graham
Stanley's View
scg1936 at talktalk.net
"Beware of certitude" (Jimmy Reid)
The floggings will continue until morale improves!
Stanley's View
scg1936 at talktalk.net
"Beware of certitude" (Jimmy Reid)
The floggings will continue until morale improves!
Re: Shed Matters 3
That’ll do nicely I recon Stanley. A good session in the workshop then. Many thanks for the piece on directions of rotation. I got my little beam engine out and put some air on it and it does run over as you say. I’ll remember that sometime soon as I have a set of Stuart 10H castings to machine. My next job is to make a new gasket for the duchess regulator and fefit that. Then the blower stay/tube through the boiler will have to come out as the front bush is leaking at the front tube plate joint. Just tightening never cures these little niggles.
-
Stanley
- Global Moderator
- Posts: 90301
- Joined: 23 Jan 2012, 12:01
- Location: Barnoldswick. Nearer to Heaven than Gloria.
Re: Shed Matters 3
Too right Bob. The long way round is usually the quickest in the end.
Here's what I have been up to this morning.....

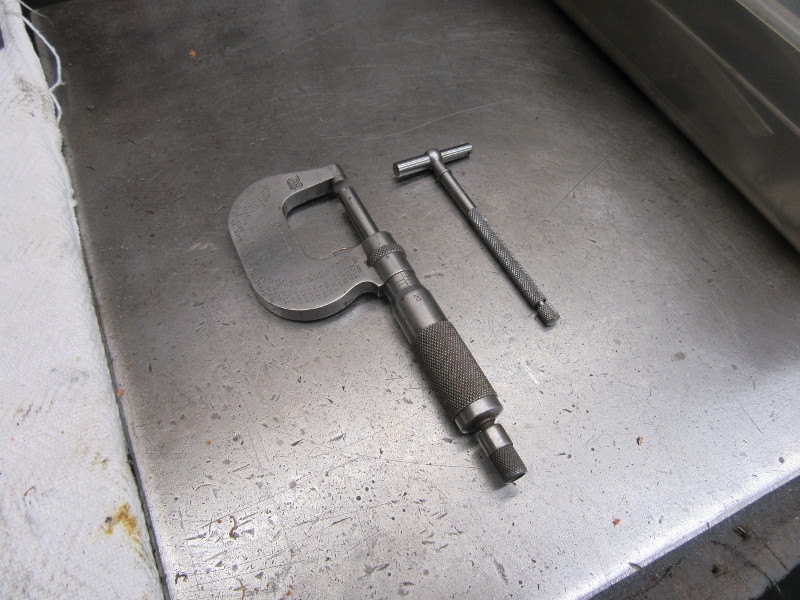
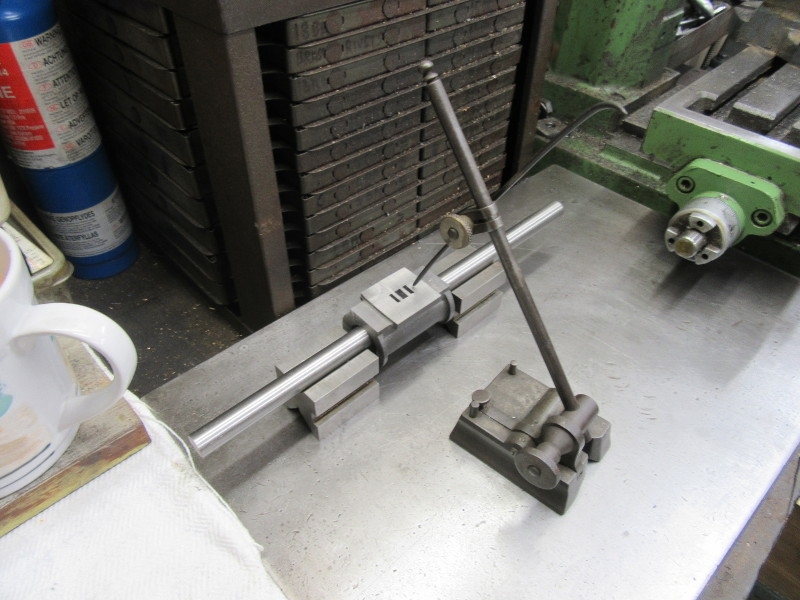
We start the day with a new toy. As you know, one of my problems is bad eyesight. For a long time I have been wondering whether an optical centre punch would help. In case you haven't encountered one, it is a rotating head in a body and has three preset positions located by a pin. It has two optical sights, one with cross hairs and one with a small circle with a dot in the centre. The theory is that you locate the mark you wish to punch with one of the sights then rotate the head until the punch is in the same position and give it a tap so you have a register for a serious punch mark. What I have learned so far is that it is no good for small irregular shaped pieces. So the jury is out, I need more experience using it.
First job was to drill the exhaust passage in the casting. I shall drill for the holding bolts of the flange on the pipe when I have made it.
Next I went under the pillar drill and drilled the tapping holes for 7BA studs with a number 46 drill which is a good tapping size for this thread in cast iron. I did the other end as well. Normally I make the lids and use them as a template for doing this job but I haven't got them yet. Theoretically this way round is OK. I will have to be very accurate marking the lids for the clearance holes!
Then into the vise and thread all twelve holes 7BA. I used a pin vise and finger pressure only.
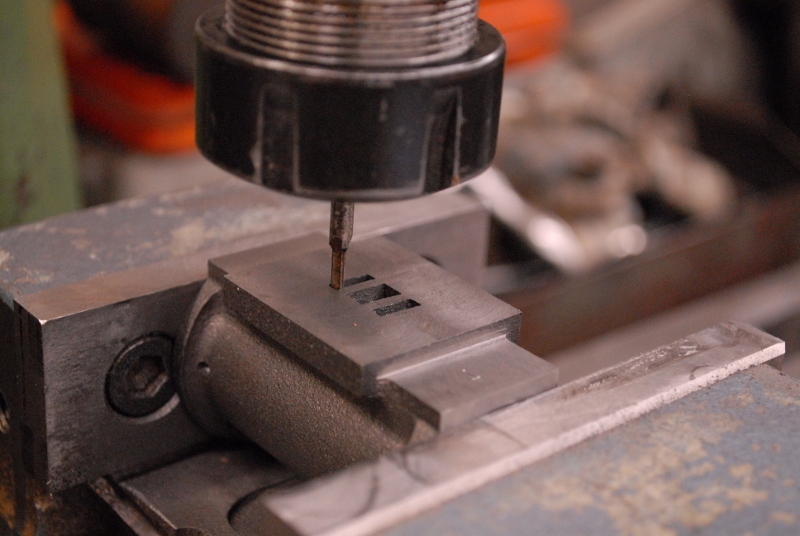
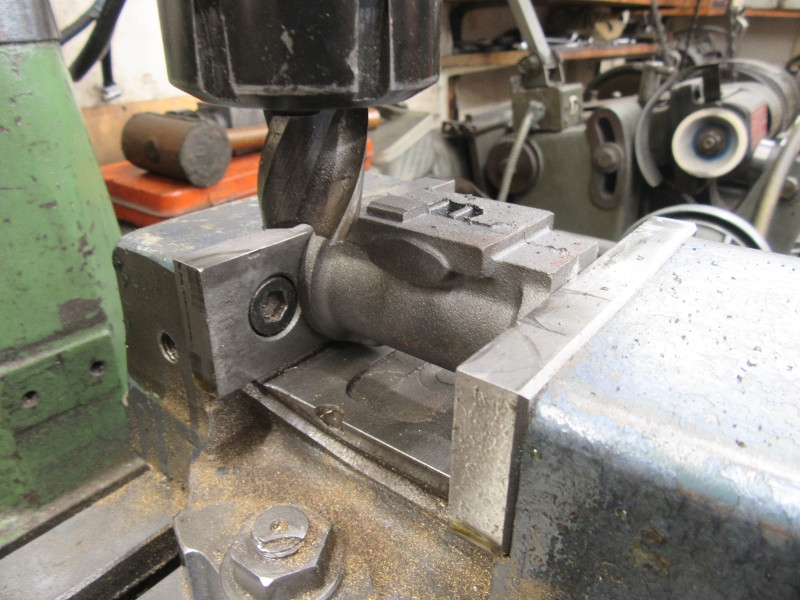
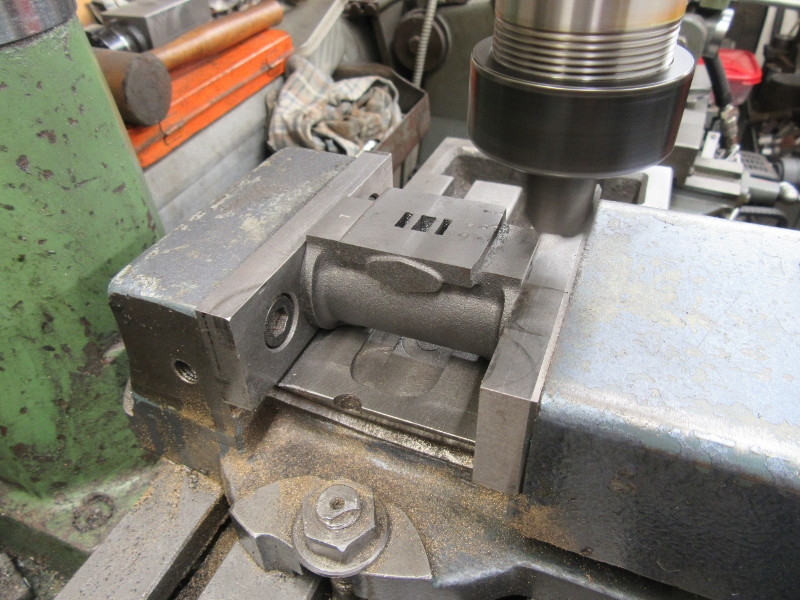
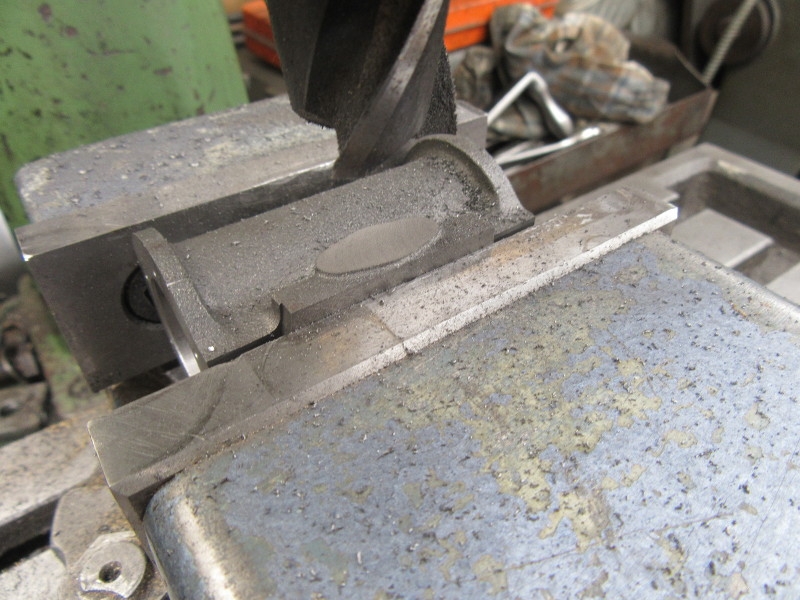
Here I am under the VM and cleaning the edge of the steam port with a 3/32" cutter. Only the outside edges because those are the ones that matter. As cast they are a bit ragged.
That's a bit better!
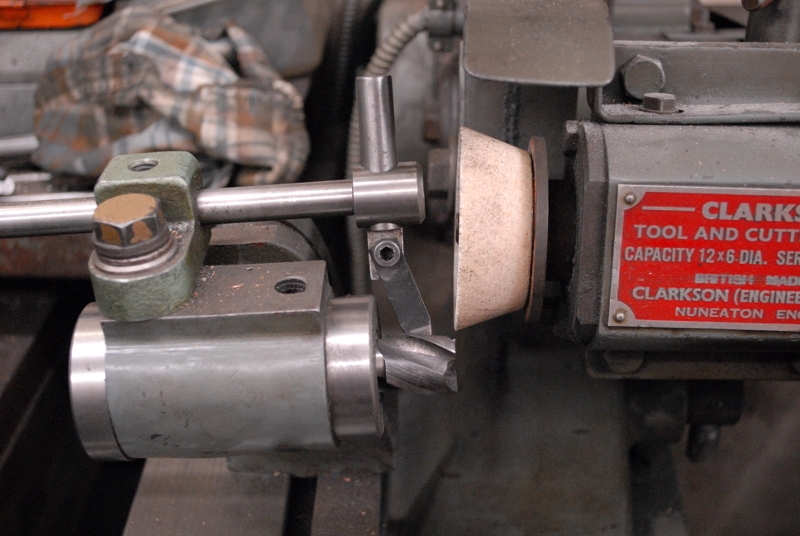
It won't surprise you to see that since I had the normal end mill out of the head I took the opportunity to give it a quick touch up. You can't beat a razor sharp HSS cutter.
A good two hours, I enjoyed that!
Here's what I have been up to this morning.....
We start the day with a new toy. As you know, one of my problems is bad eyesight. For a long time I have been wondering whether an optical centre punch would help. In case you haven't encountered one, it is a rotating head in a body and has three preset positions located by a pin. It has two optical sights, one with cross hairs and one with a small circle with a dot in the centre. The theory is that you locate the mark you wish to punch with one of the sights then rotate the head until the punch is in the same position and give it a tap so you have a register for a serious punch mark. What I have learned so far is that it is no good for small irregular shaped pieces. So the jury is out, I need more experience using it.
First job was to drill the exhaust passage in the casting. I shall drill for the holding bolts of the flange on the pipe when I have made it.
Next I went under the pillar drill and drilled the tapping holes for 7BA studs with a number 46 drill which is a good tapping size for this thread in cast iron. I did the other end as well. Normally I make the lids and use them as a template for doing this job but I haven't got them yet. Theoretically this way round is OK. I will have to be very accurate marking the lids for the clearance holes!
Then into the vise and thread all twelve holes 7BA. I used a pin vise and finger pressure only.
Here I am under the VM and cleaning the edge of the steam port with a 3/32" cutter. Only the outside edges because those are the ones that matter. As cast they are a bit ragged.
That's a bit better!
It won't surprise you to see that since I had the normal end mill out of the head I took the opportunity to give it a quick touch up. You can't beat a razor sharp HSS cutter.
A good two hours, I enjoyed that!
Stanley Challenger Graham
Stanley's View
scg1936 at talktalk.net
"Beware of certitude" (Jimmy Reid)
The floggings will continue until morale improves!
Stanley's View
scg1936 at talktalk.net
"Beware of certitude" (Jimmy Reid)
The floggings will continue until morale improves!
Re: Shed Matters 3
At first glance i though you were referring to Sue there. . .
Born to be mild
Sapere Aude
Ego Lego
Preferred pronouns - Thou, Thee, Thy, Thine
My non-working days are Monday - Sunday
Sapere Aude
Ego Lego
Preferred pronouns - Thou, Thee, Thy, Thine
My non-working days are Monday - Sunday
-
Stanley
- Global Moderator
- Posts: 90301
- Joined: 23 Jan 2012, 12:01
- Location: Barnoldswick. Nearer to Heaven than Gloria.
Re: Shed Matters 3
Be careful David! 
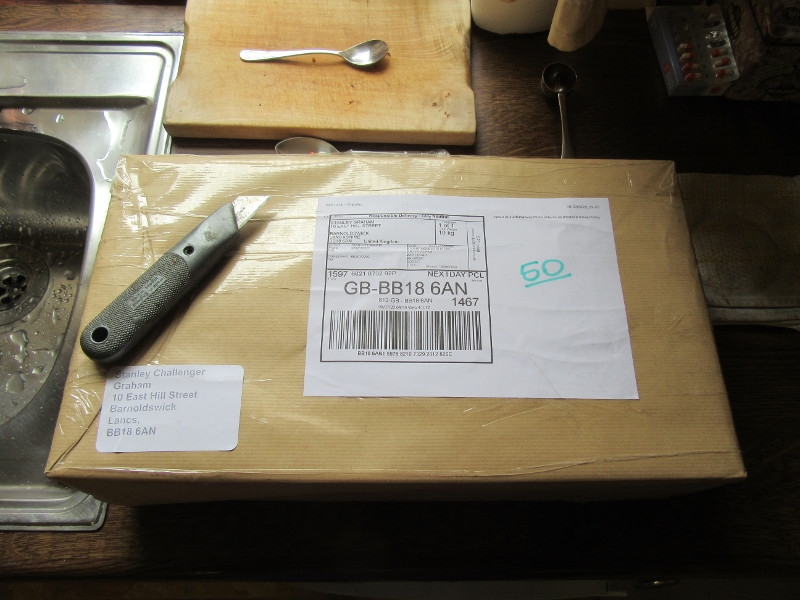
A package arrived.
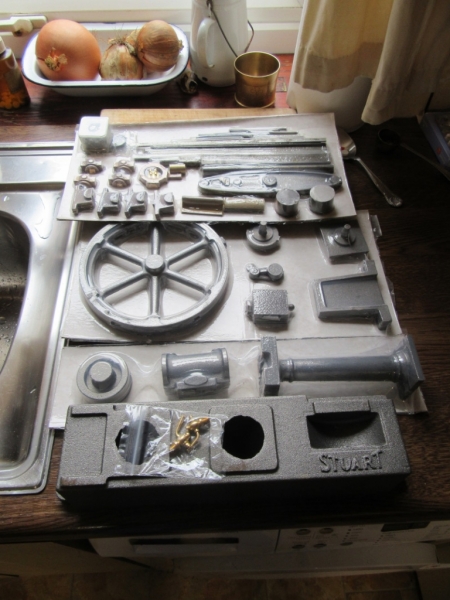
Lovely packaging.... Trouble is it took half an hour to extract it from the shrink wrap. But it's all out now, in the right place in the shed and I have at least six months pleasurable work in front of me. Nice.
The DPD courier took a pic of the parcel on the doorstep with me there and when I asked him why he said that it was new policy and instead of the signature. I asked him if he had heard about his colleague doing that on the wrong doorstep. He hadn't and had a good laugh.
A package arrived.
Lovely packaging.... Trouble is it took half an hour to extract it from the shrink wrap. But it's all out now, in the right place in the shed and I have at least six months pleasurable work in front of me. Nice.
The DPD courier took a pic of the parcel on the doorstep with me there and when I asked him why he said that it was new policy and instead of the signature. I asked him if he had heard about his colleague doing that on the wrong doorstep. He hadn't and had a good laugh.
Stanley Challenger Graham
Stanley's View
scg1936 at talktalk.net
"Beware of certitude" (Jimmy Reid)
The floggings will continue until morale improves!
Stanley's View
scg1936 at talktalk.net
"Beware of certitude" (Jimmy Reid)
The floggings will continue until morale improves!
Re: Shed Matters 3
stanley have you not looked into getting a optivisor for marking
out and center punching, this can be used over your glasses
https://www.ebay.co.uk/itm/133297514013
as for the optical center finder are quite tricky to use but once you get used to it its easy to use, i did look into making one but never got round to it
out and center punching, this can be used over your glasses
https://www.ebay.co.uk/itm/133297514013
as for the optical center finder are quite tricky to use but once you get used to it its easy to use, i did look into making one but never got round to it
-
Stanley
- Global Moderator
- Posts: 90301
- Joined: 23 Jan 2012, 12:01
- Location: Barnoldswick. Nearer to Heaven than Gloria.
Re: Shed Matters 3
I have looked many at time. Will re-investigate if the centre finder doesn't help. Thanks for the thought.
Stanley Challenger Graham
Stanley's View
scg1936 at talktalk.net
"Beware of certitude" (Jimmy Reid)
The floggings will continue until morale improves!
Stanley's View
scg1936 at talktalk.net
"Beware of certitude" (Jimmy Reid)
The floggings will continue until morale improves!
Re: Shed Matters 3
I ‘aquired’ an Anglepoise magnifier with ring light from our Manchester workshop when it closed. It was headed for the skip so I don’t feel guilty. That and an eyeglass usually suffice for me at present but I am a little younger than you Stanley. When the circular tube failed recently I bought a led ring light online. It was almost the same size so a little carving and balance adjustment had it working again.
-
Stanley
- Global Moderator
- Posts: 90301
- Joined: 23 Jan 2012, 12:01
- Location: Barnoldswick. Nearer to Heaven than Gloria.
Re: Shed Matters 3
I used to have one Bob but it was an el cheapo and cluttered the bench so I gave it away.
We have the castings so I am going to completely finish the cylinder, build ready. First job was to sort me bits out.
Change of chuck for the smaller 3 jaw. Clean the peg up on the back of the lid then reverse it and finish the face including putting the PCD circle on it after a lot of calculating and mistakes!
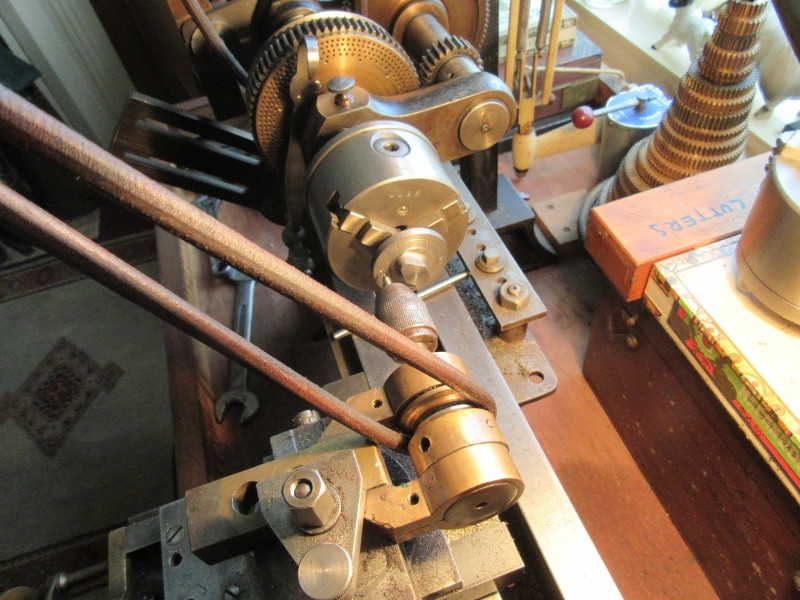
Then, always a delight, into Johnny's 1927 lathe. I hadn't altered the settings on it since doing the cylinders and it coincided with my PCD mark so I was encouraged. All the stud holes marked after ensuring the gland housing was at right angles to where the valve face will be. I got it skewed on the last engine because I never thought about it.
A change of jaws, I had already drilled for the piston rod gland. After sawing the peg off and after a very close set up I had a clean Lid and tried it on the cylinder. Very nice fit.
Here we are at knocking off time. Next job is to pop some studs in and ensure the holes in the lid match. The reason for that is that I will use the lid as a template for drilling the bottom lid, the stud holes on the cylinder were done on the same setting as the top. I think I have the holes right in the lid. We'll find out tomorrow!
We have the castings so I am going to completely finish the cylinder, build ready. First job was to sort me bits out.
Change of chuck for the smaller 3 jaw. Clean the peg up on the back of the lid then reverse it and finish the face including putting the PCD circle on it after a lot of calculating and mistakes!
Then, always a delight, into Johnny's 1927 lathe. I hadn't altered the settings on it since doing the cylinders and it coincided with my PCD mark so I was encouraged. All the stud holes marked after ensuring the gland housing was at right angles to where the valve face will be. I got it skewed on the last engine because I never thought about it.
A change of jaws, I had already drilled for the piston rod gland. After sawing the peg off and after a very close set up I had a clean Lid and tried it on the cylinder. Very nice fit.
Here we are at knocking off time. Next job is to pop some studs in and ensure the holes in the lid match. The reason for that is that I will use the lid as a template for drilling the bottom lid, the stud holes on the cylinder were done on the same setting as the top. I think I have the holes right in the lid. We'll find out tomorrow!
Stanley Challenger Graham
Stanley's View
scg1936 at talktalk.net
"Beware of certitude" (Jimmy Reid)
The floggings will continue until morale improves!
Stanley's View
scg1936 at talktalk.net
"Beware of certitude" (Jimmy Reid)
The floggings will continue until morale improves!
Re: Shed Matters 3
If you have a spare cylinder which looks about the most complicated of the castings, have you thought of making a variation beam engine to your own design out of treasure chest stock material?
-
Stanley
- Global Moderator
- Posts: 90301
- Joined: 23 Jan 2012, 12:01
- Location: Barnoldswick. Nearer to Heaven than Gloria.
Re: Shed Matters 3
Yes Ken and it's quite likely that will happen if I am spared. Might not be a beam engine, there are other types of steam engine with vertical cylinders....
Stanley Challenger Graham
Stanley's View
scg1936 at talktalk.net
"Beware of certitude" (Jimmy Reid)
The floggings will continue until morale improves!
Stanley's View
scg1936 at talktalk.net
"Beware of certitude" (Jimmy Reid)
The floggings will continue until morale improves!
-
Stanley
- Global Moderator
- Posts: 90301
- Joined: 23 Jan 2012, 12:01
- Location: Barnoldswick. Nearer to Heaven than Gloria.
Re: Shed Matters 3

Today I want to drill the clearance holes in the lid and the first job was to put all my little bits and pieces in the same box and find 6 studs.
Next I drilled the holes, no 35 drill to give me a touch of leeway.
Lovely! I got the drillings exactly right. This means I can use the lid as a template for the base of the cylinder and that's the next job (But first I had to go to the Co-p to do essential shopping while there were hardly any others in there.)
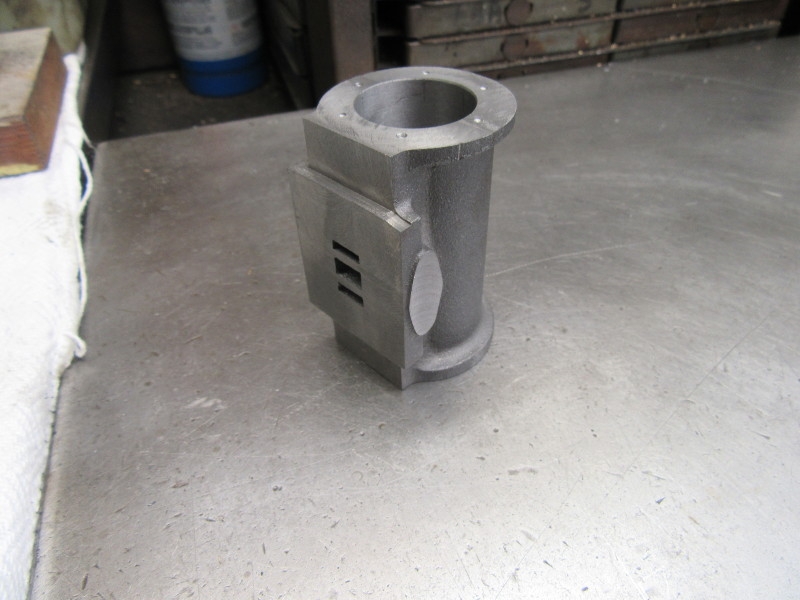
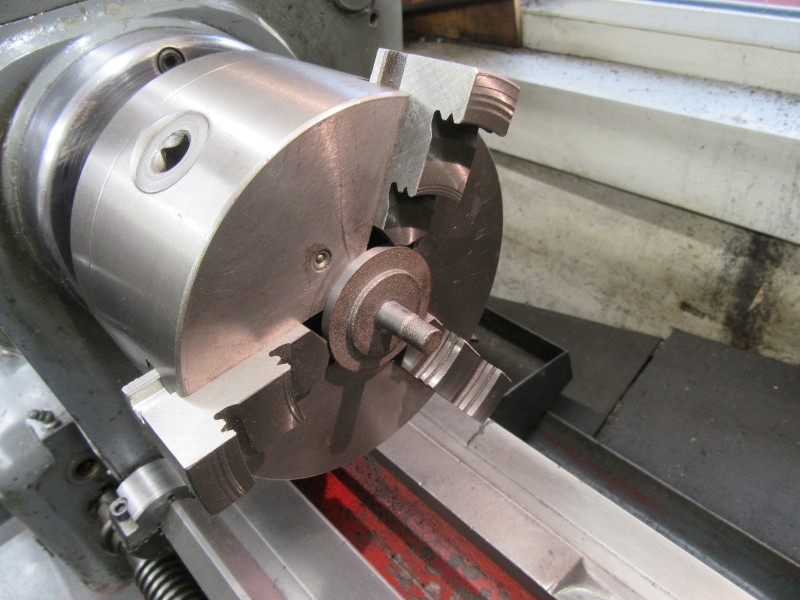
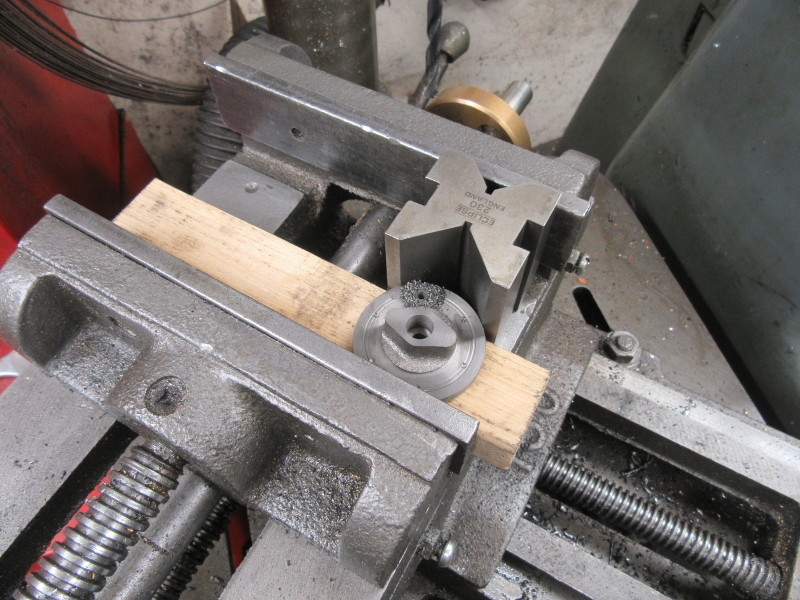
The base is square so after a quick square up with a file in the vice I popped it in the chuck and turned the spigot on the casting.
Then a quick reverse and turn the bottom of the base flat. I forgot to do a pic of the next stage which was another reverse and turn the register for the cylinder bore on the base.
Knocking off time. Lots to do yet but once more, satisfying progress. A nice morning! I forgot to say, if you look carefully you'll see that I have put a witness mark on the cylinder casting and the edge of the lid.
Stanley Challenger Graham
Stanley's View
scg1936 at talktalk.net
"Beware of certitude" (Jimmy Reid)
The floggings will continue until morale improves!
Stanley's View
scg1936 at talktalk.net
"Beware of certitude" (Jimmy Reid)
The floggings will continue until morale improves!