Shed Matters 3

User avatar
Stanley
Global Moderator
Global Moderator
Posts: 90439
Joined: 23 Jan 2012, 12:01
Location: Barnoldswick. Nearer to Heaven than Gloria.

Re: Shed Matters 3

Post by Stanley »

Image

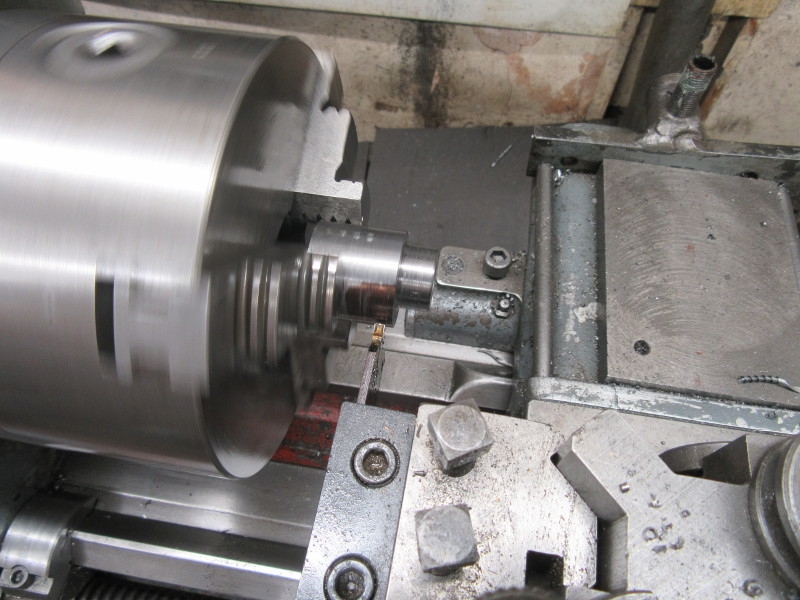
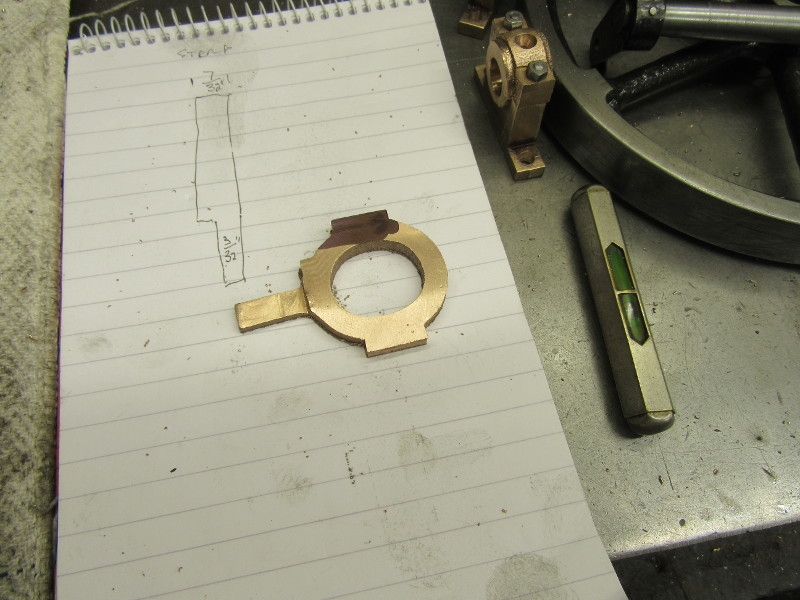
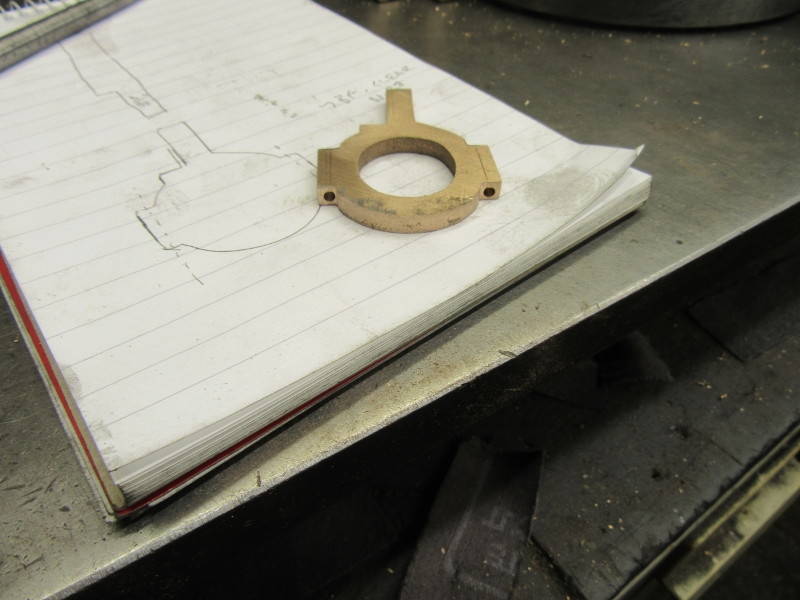
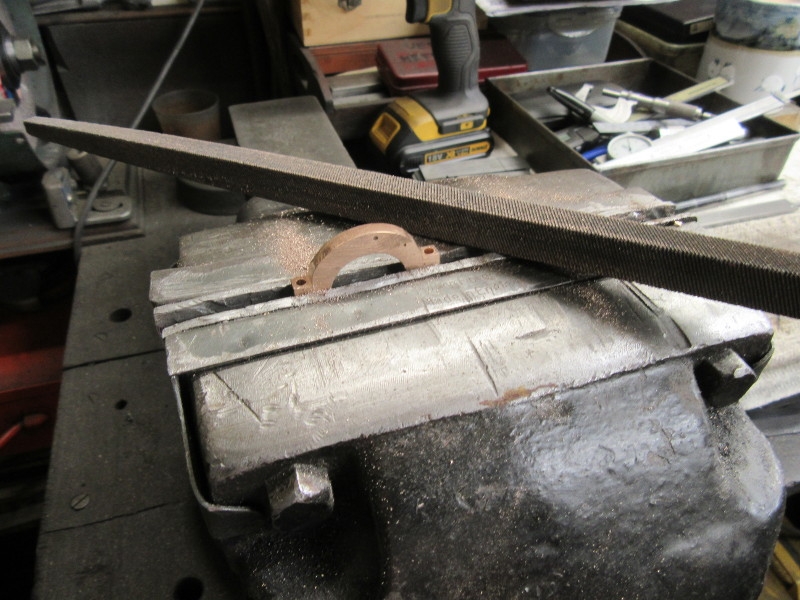
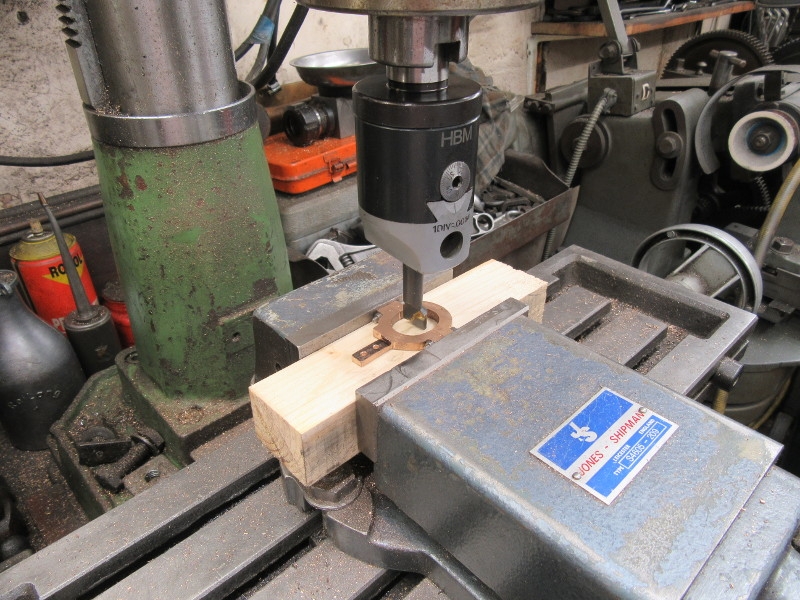
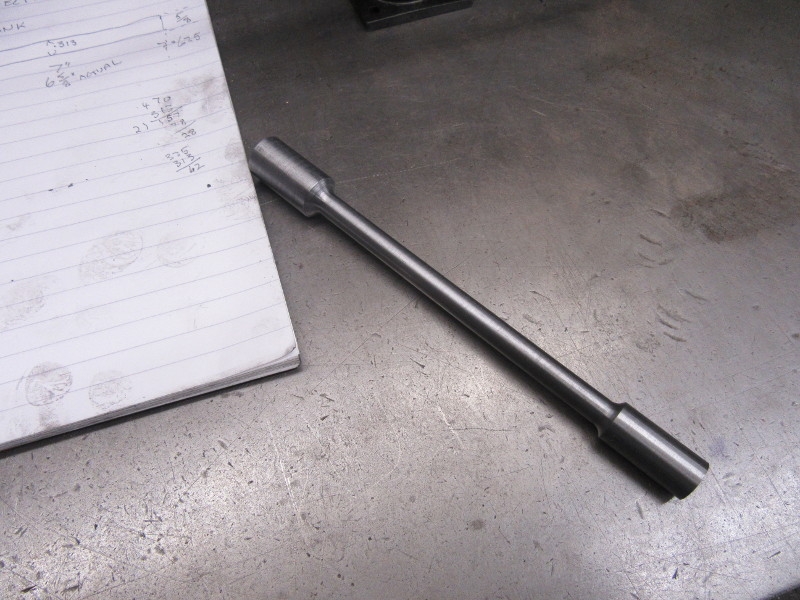
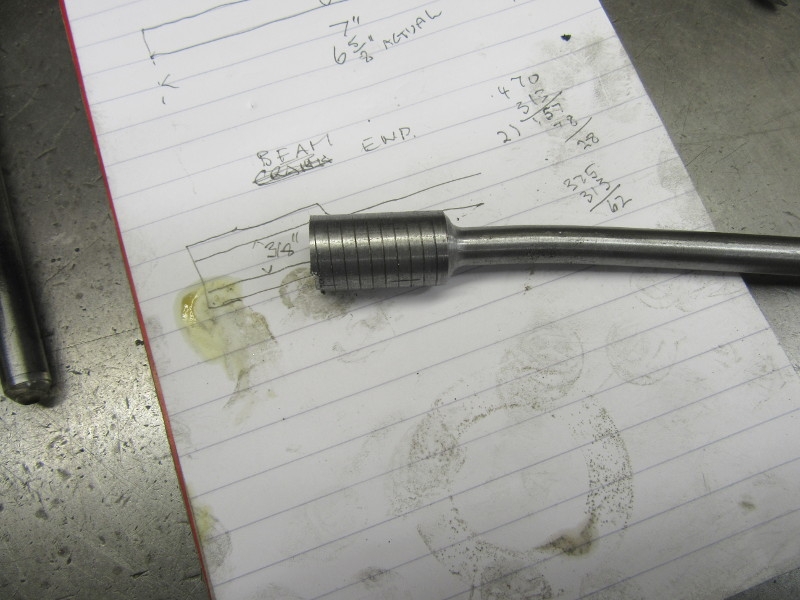
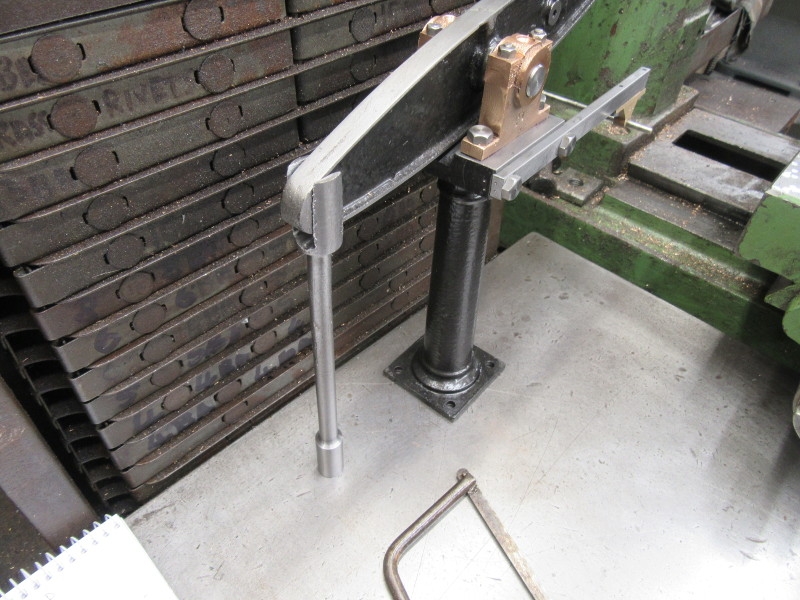
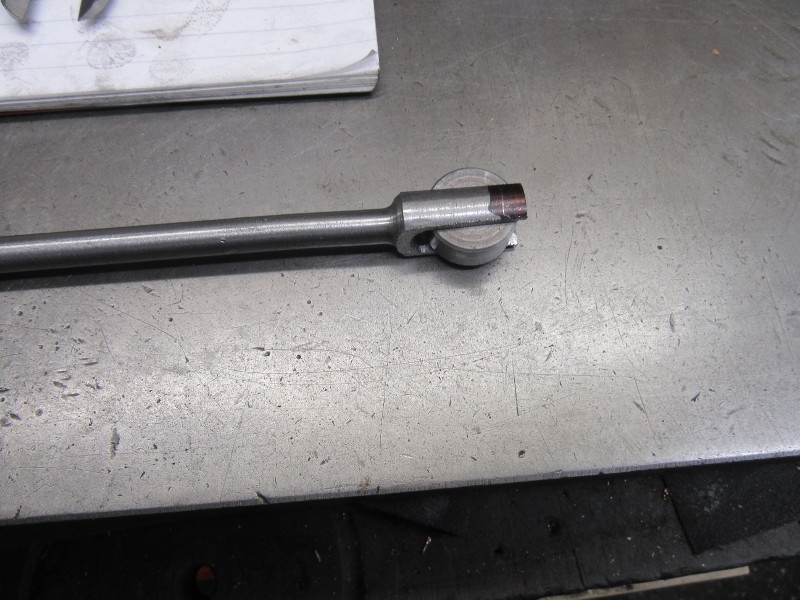
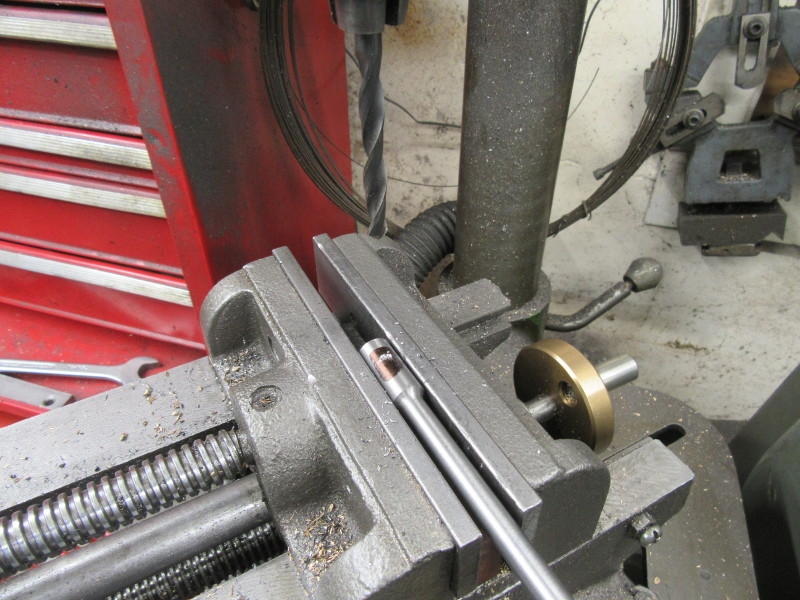
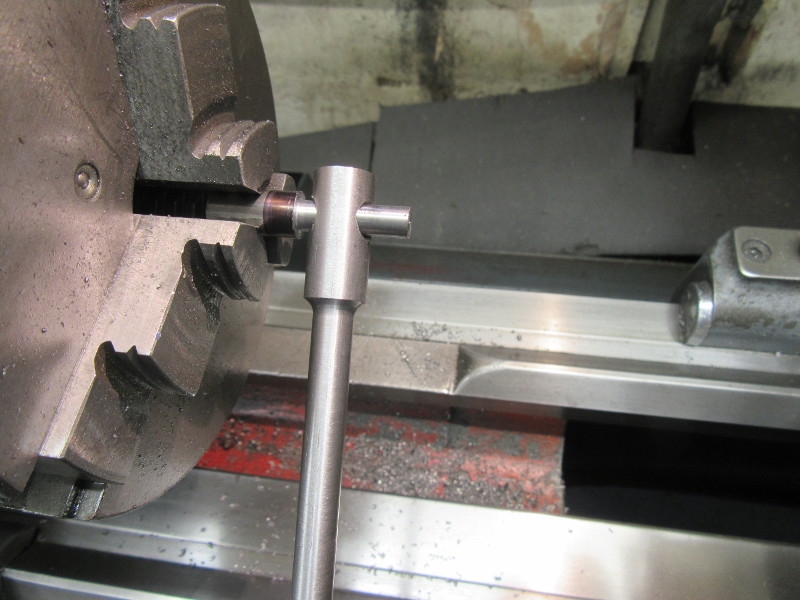
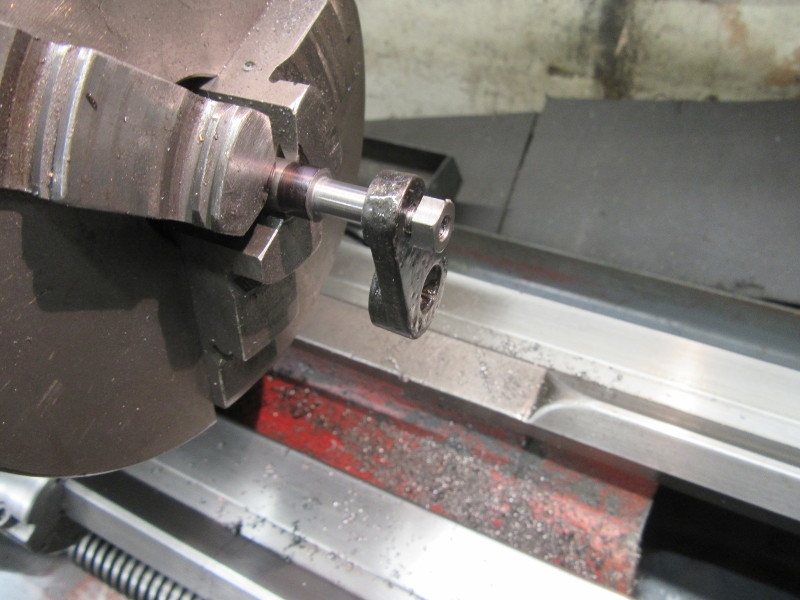
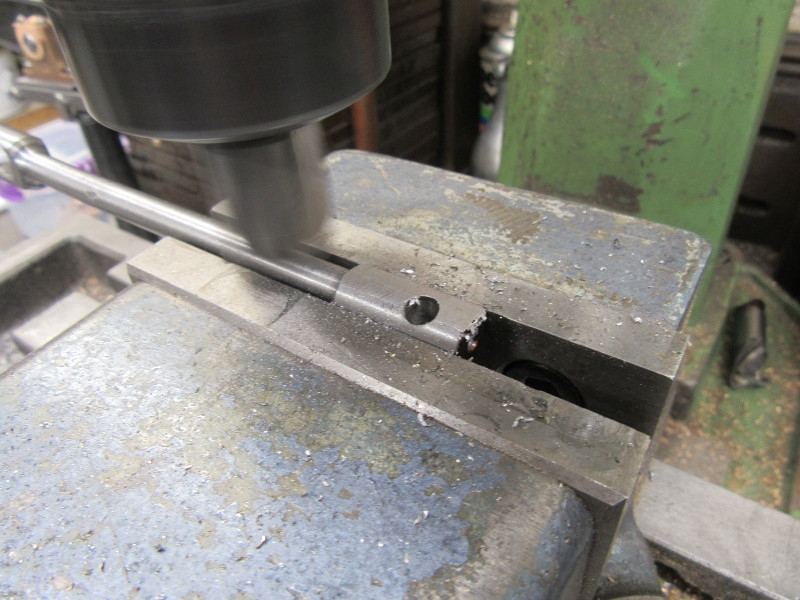
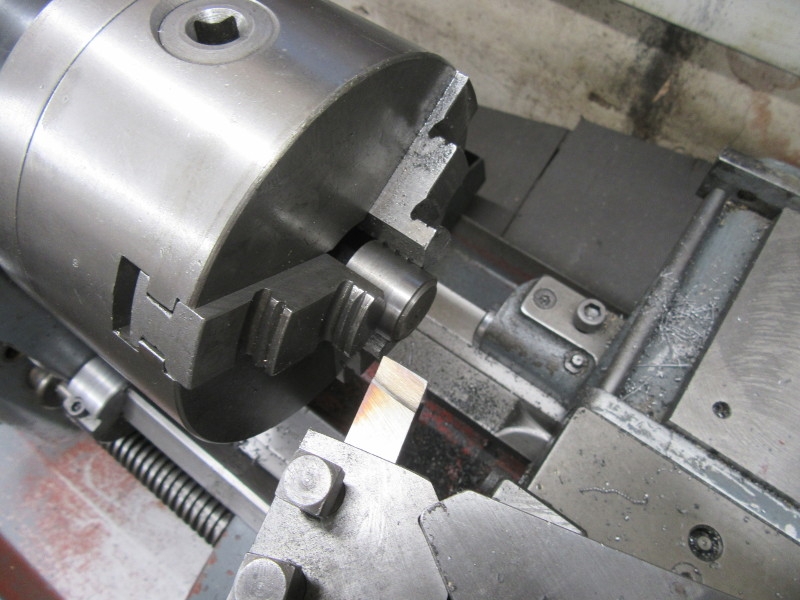
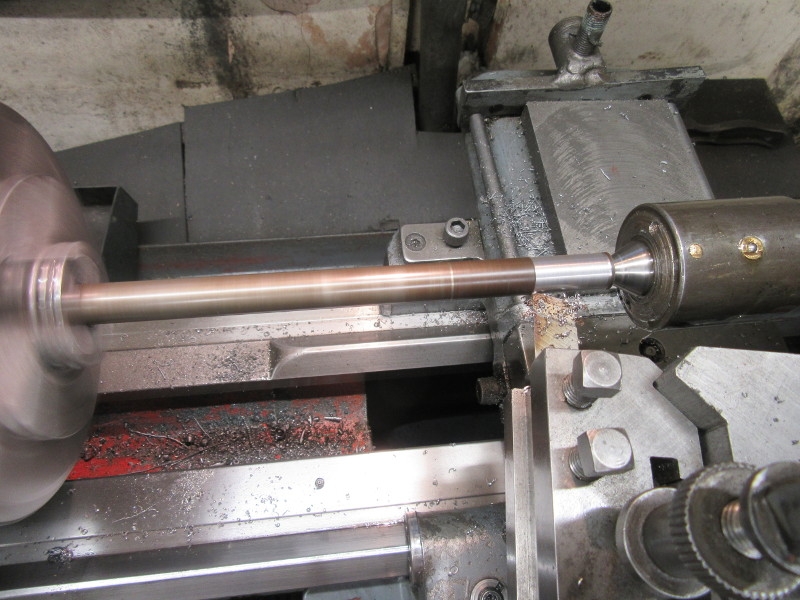
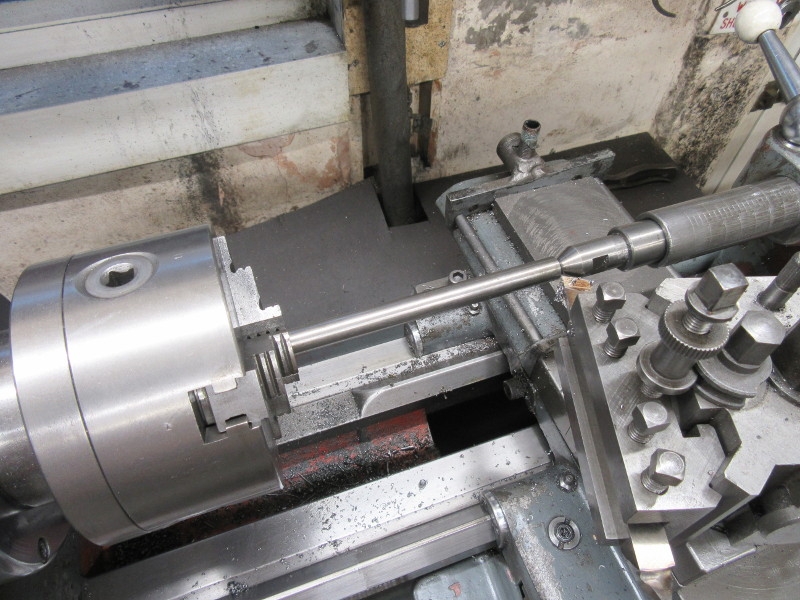
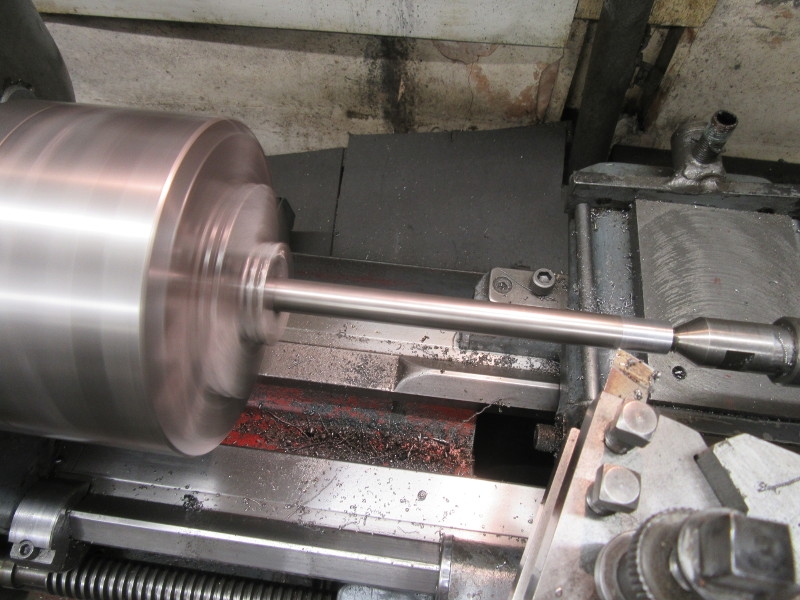
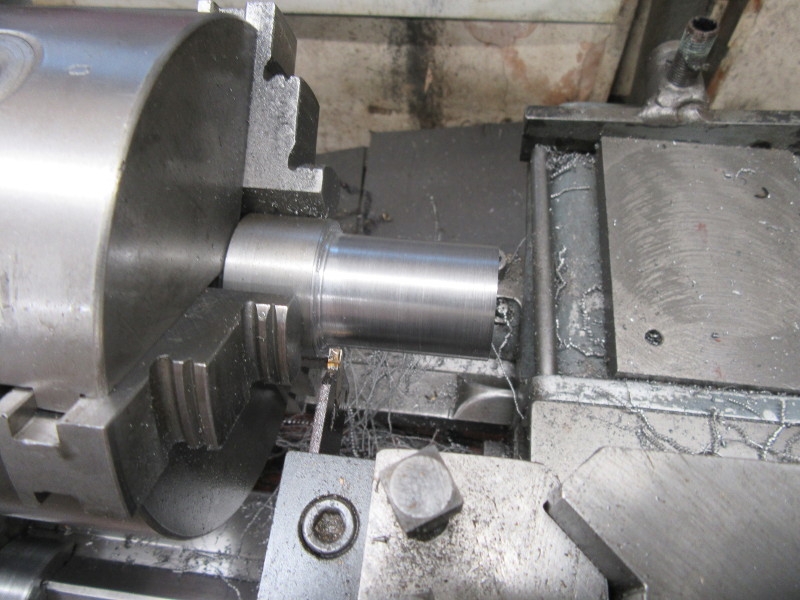
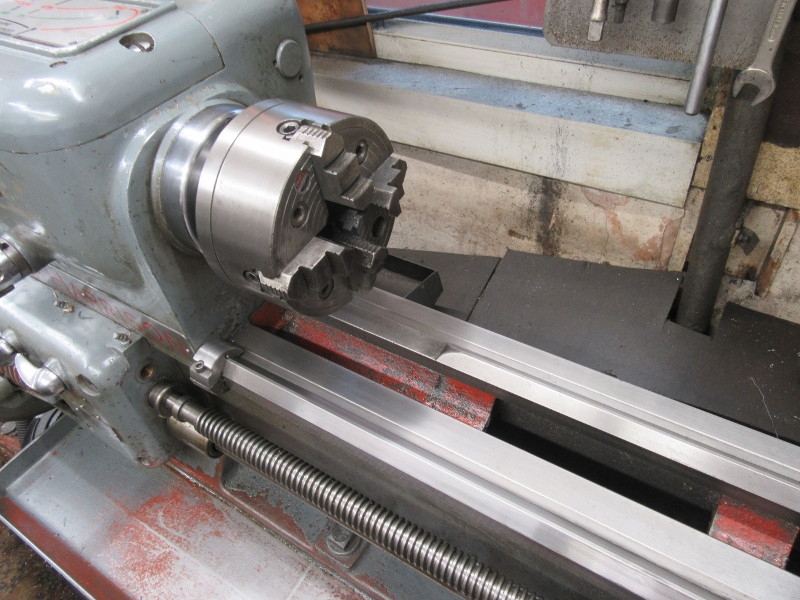
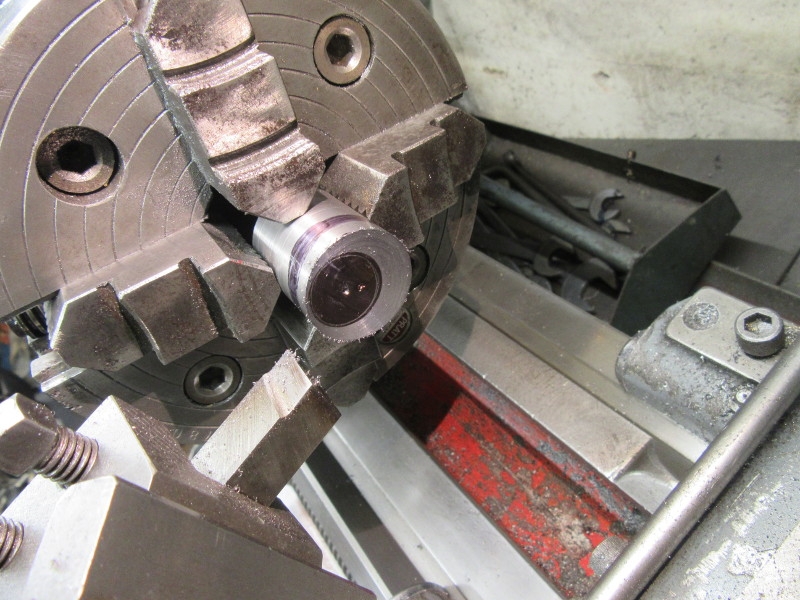
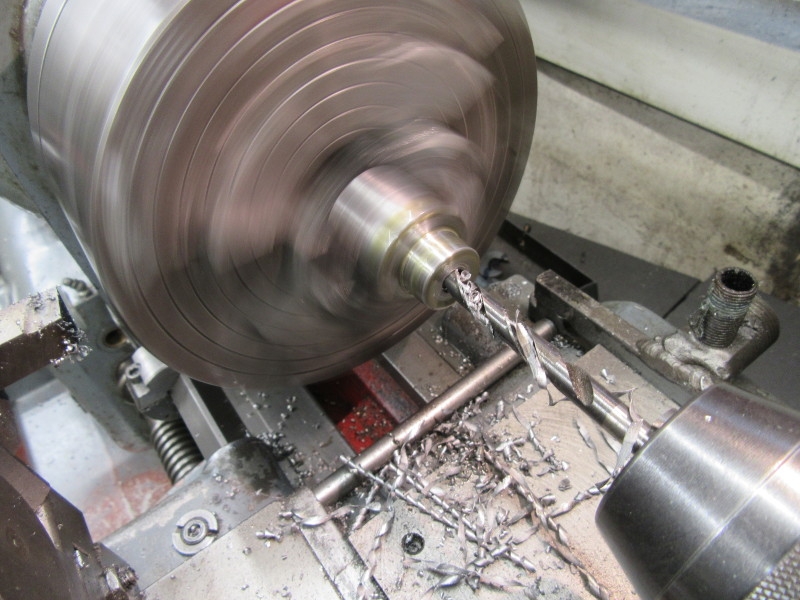
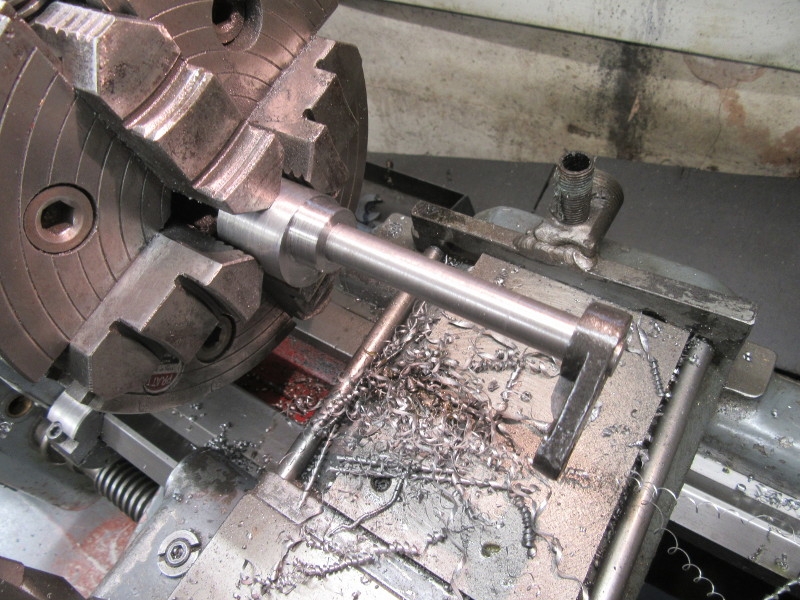
I took the con rod out of the lathe, cleaned it up and cleaned the lathe as well. Today's task is to cut the slot in the larger end that fits over the end of the beam. Nowt to it.....

Image

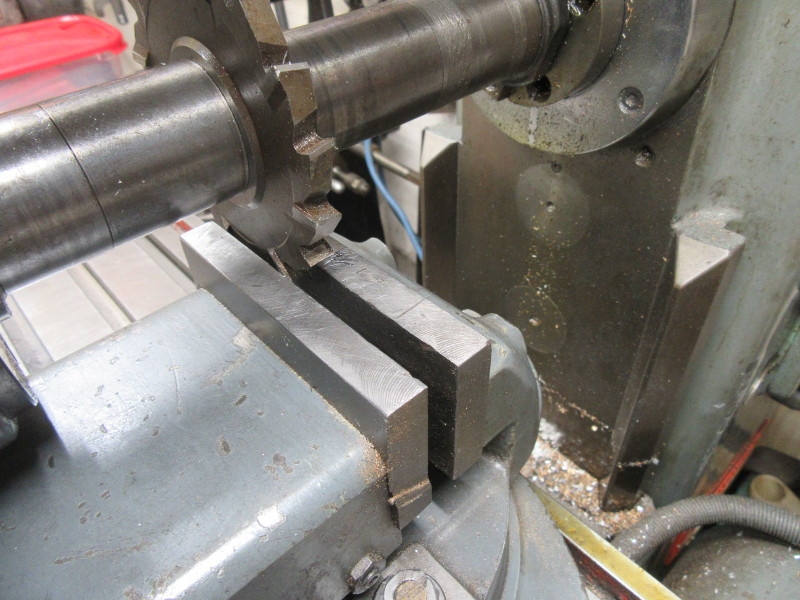
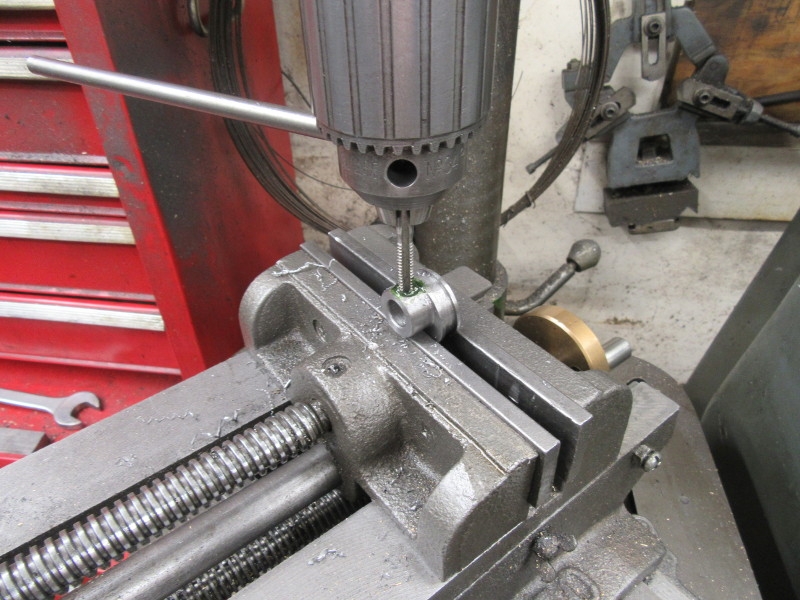
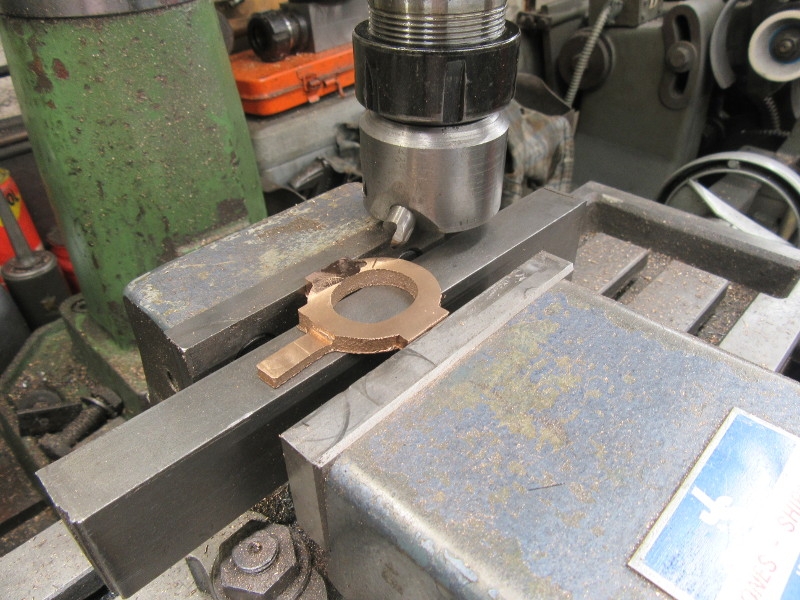
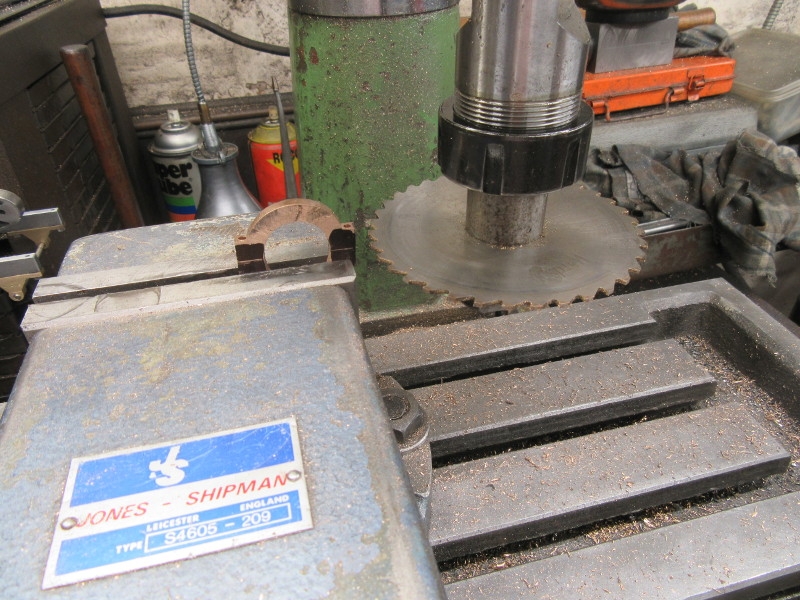
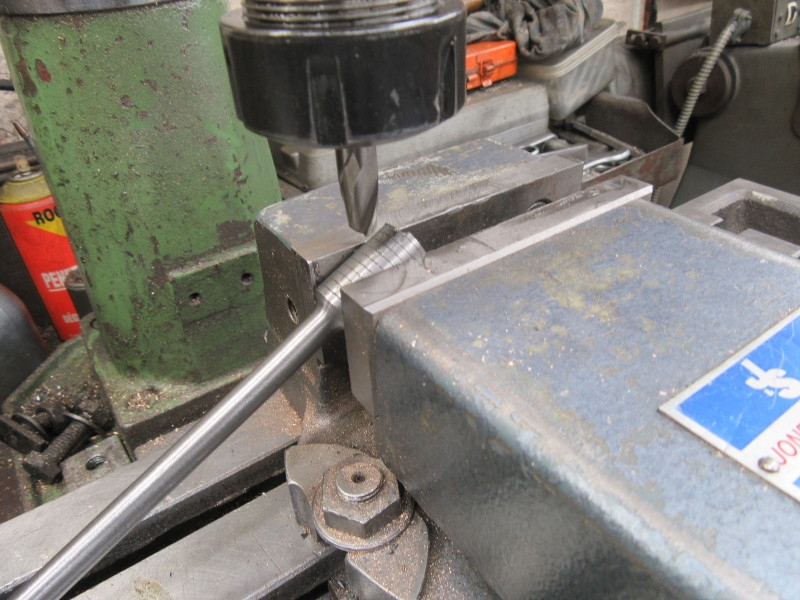
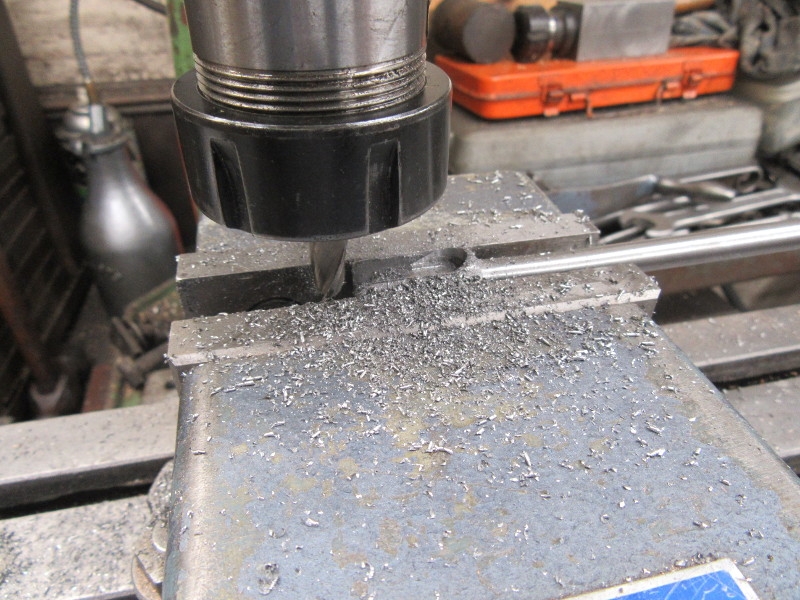
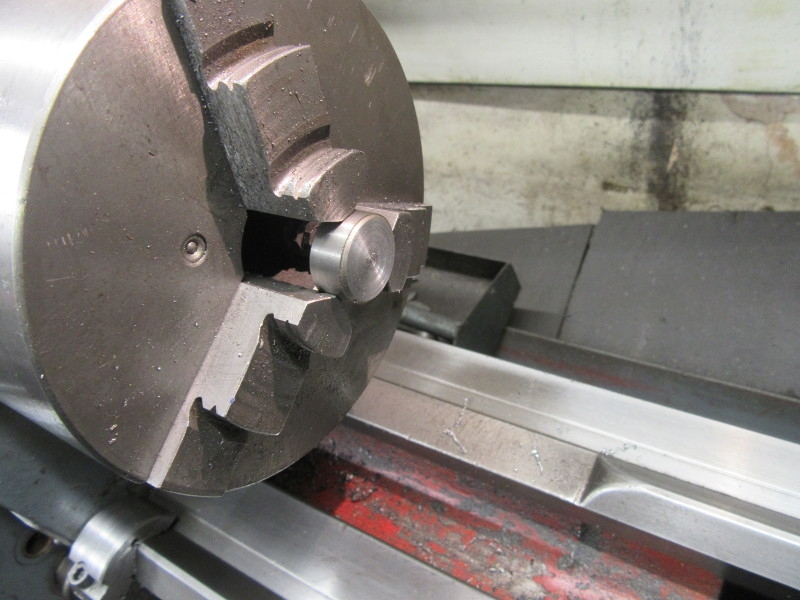
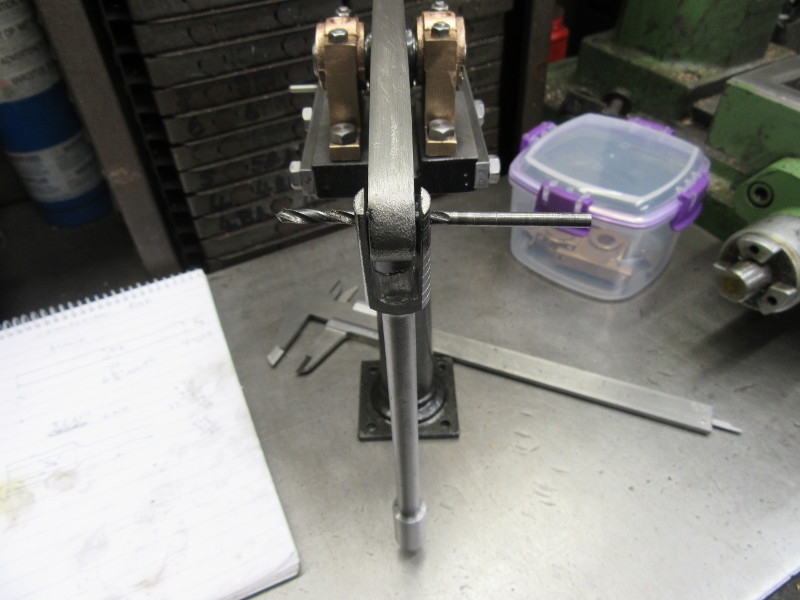
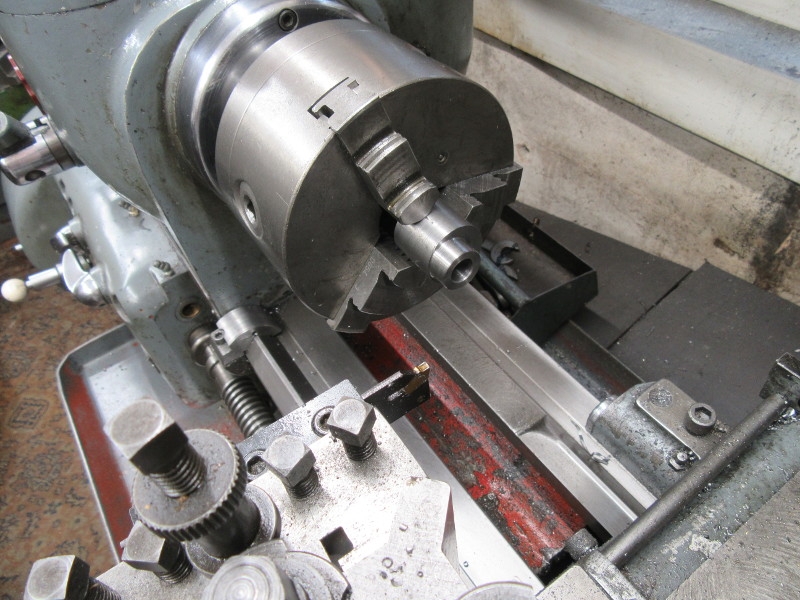
I decided to cut it with a 3/8" cutter on the horizontal mill. So first job was to get the vice mounted on the mill and make sure it was dead in line with the cutter. Lots of ways to do this but the simplest is to tighten the jaws on the cutter before you tighten down the nuts that hold it on the bed.

Image

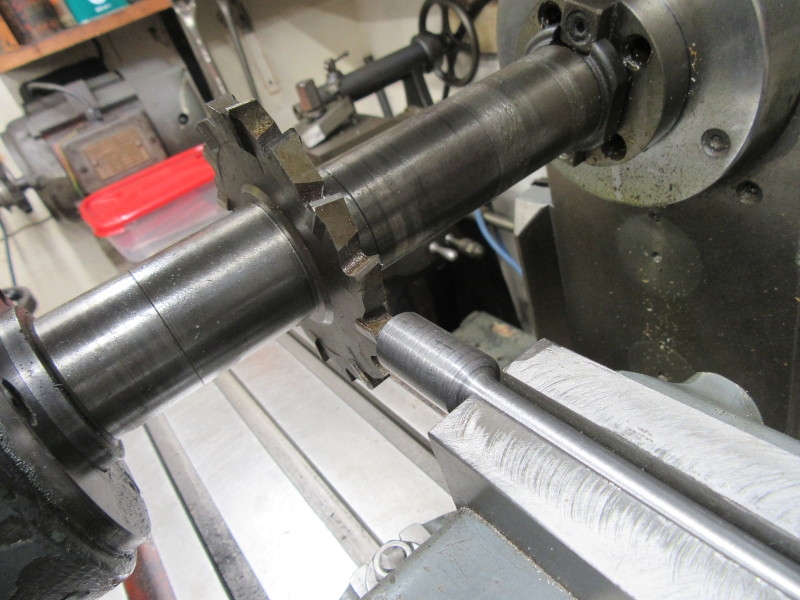
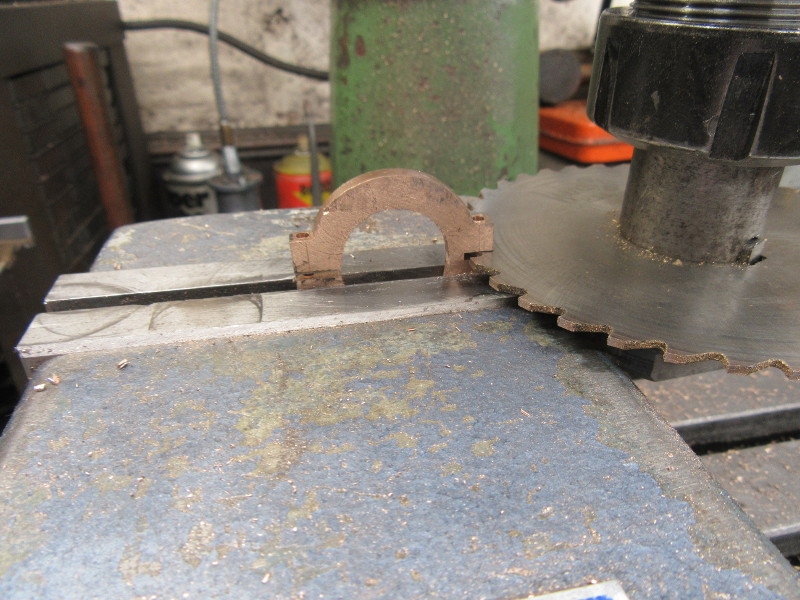
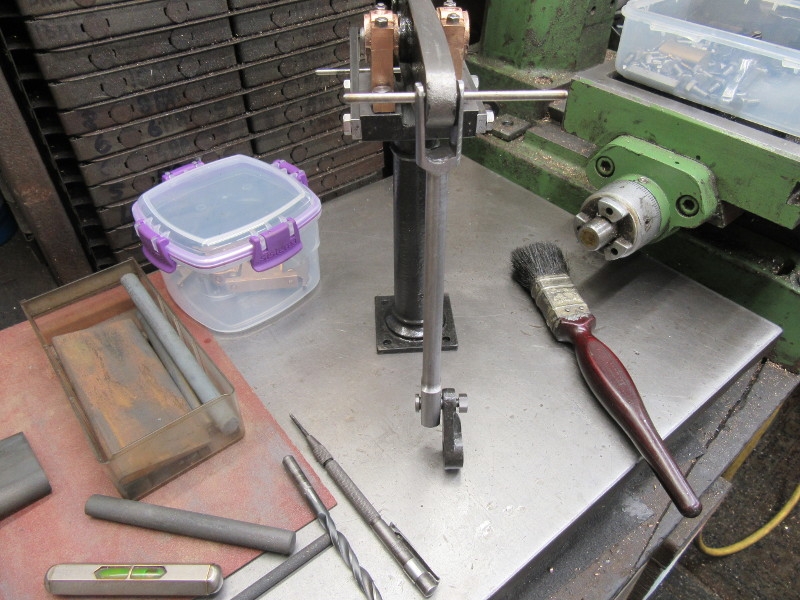
All set up and ready to go!

Image

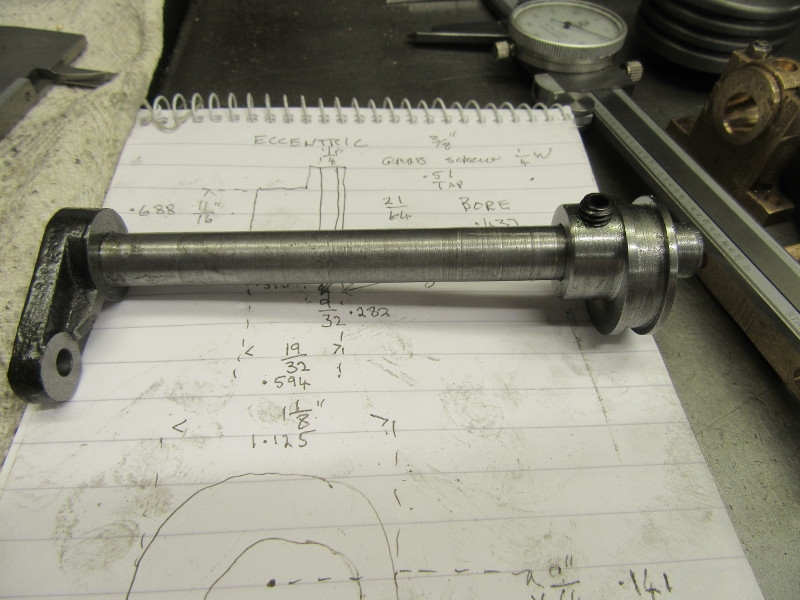
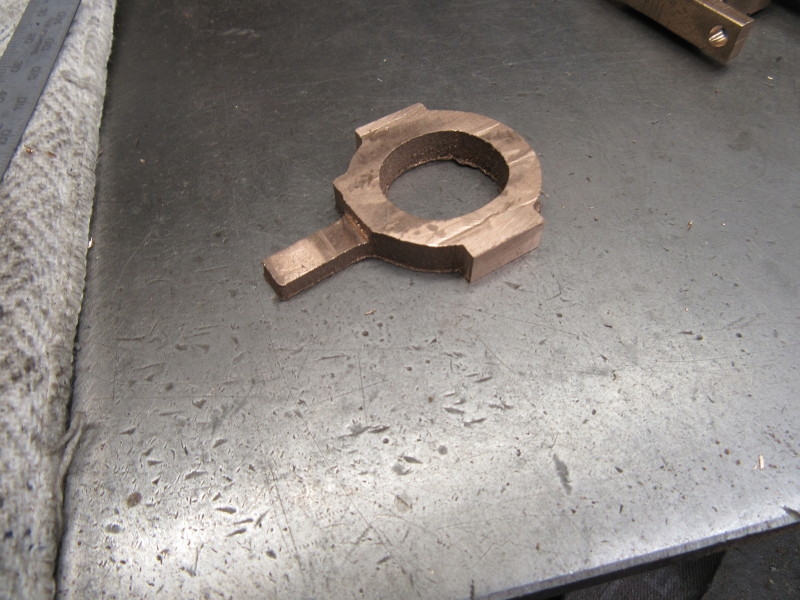
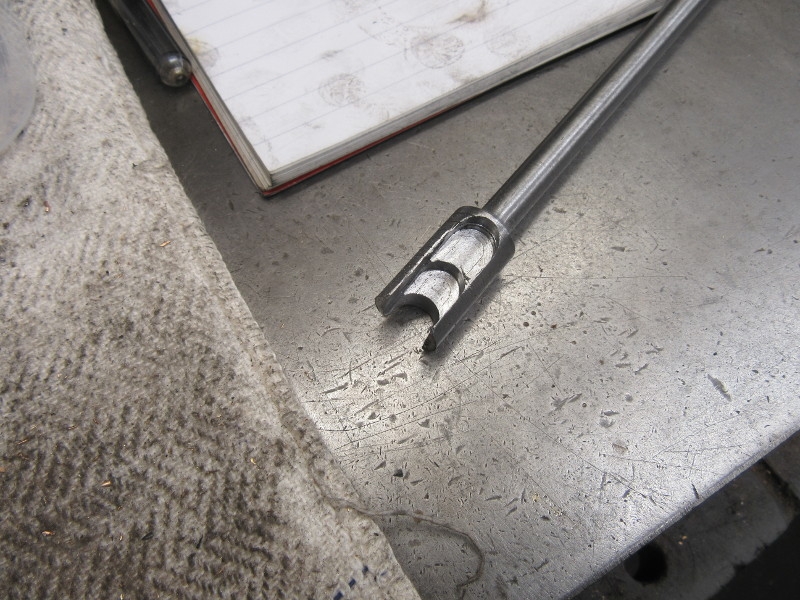
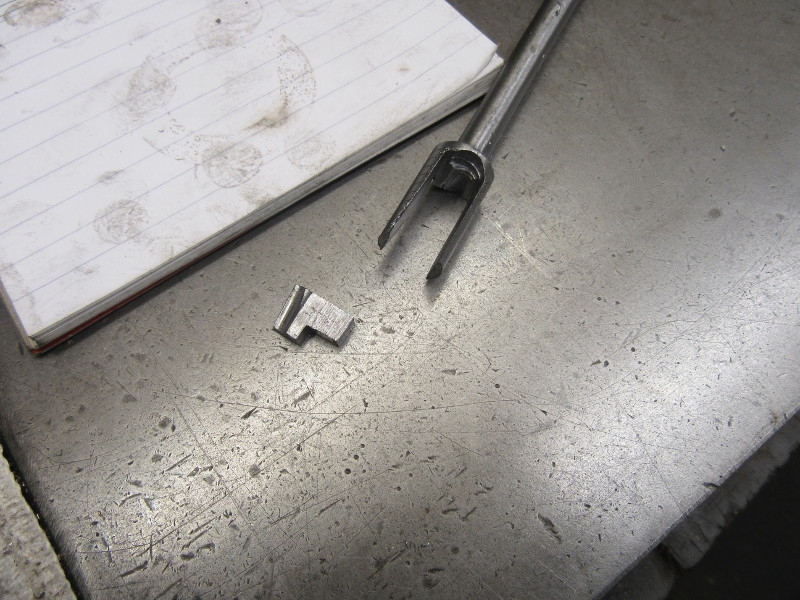
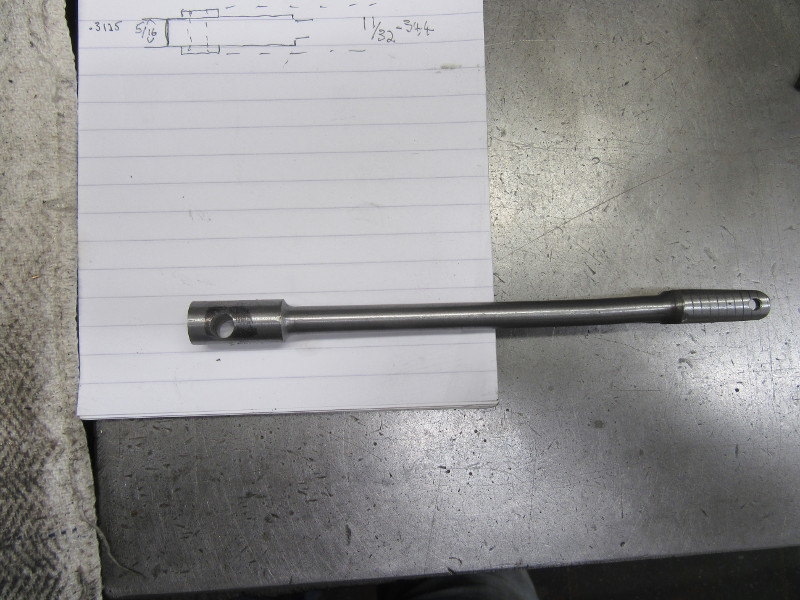
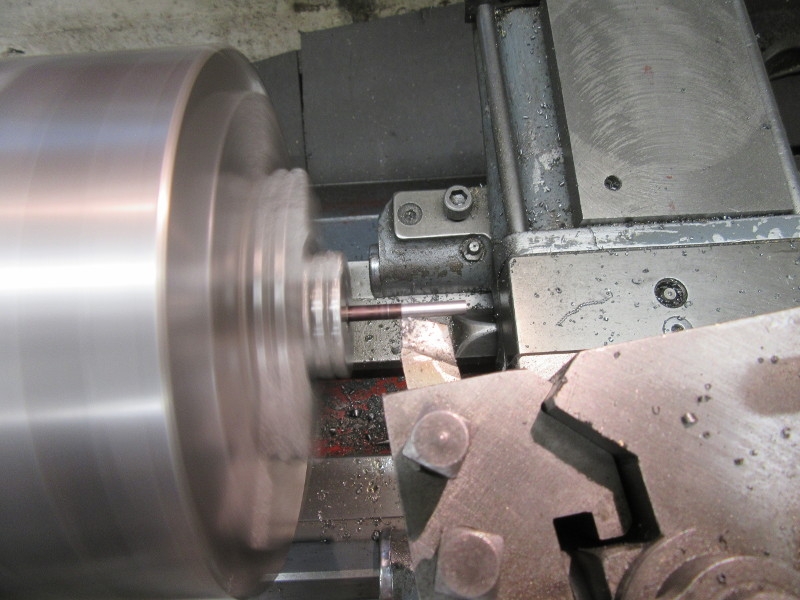
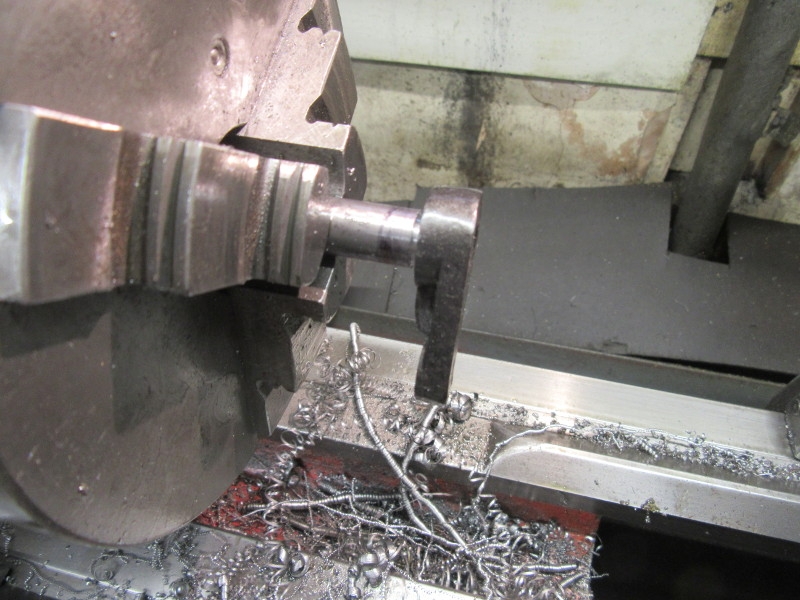
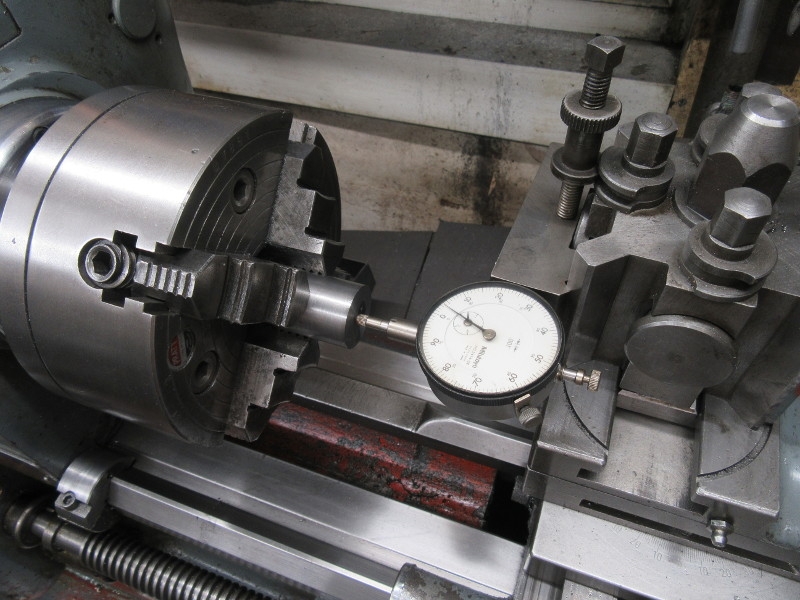
This was the result, I bent the rod. Nice. Deep Joy.

Image

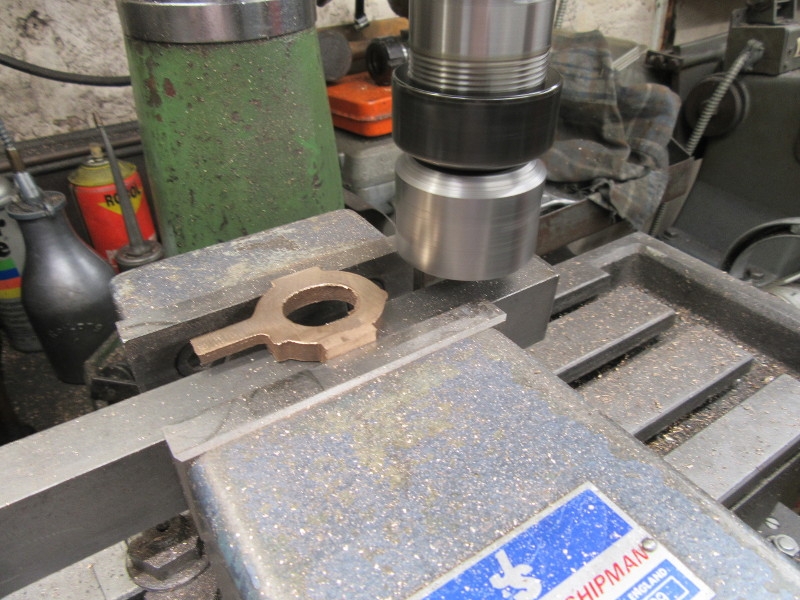
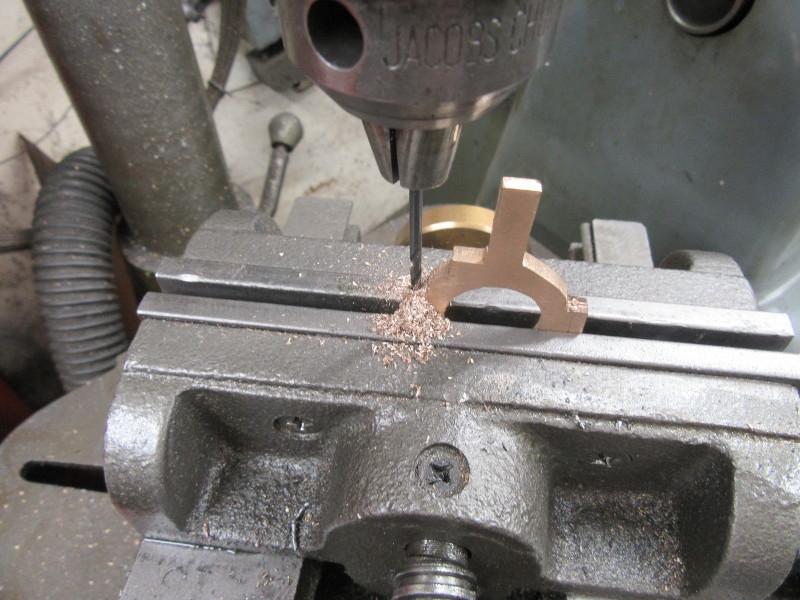
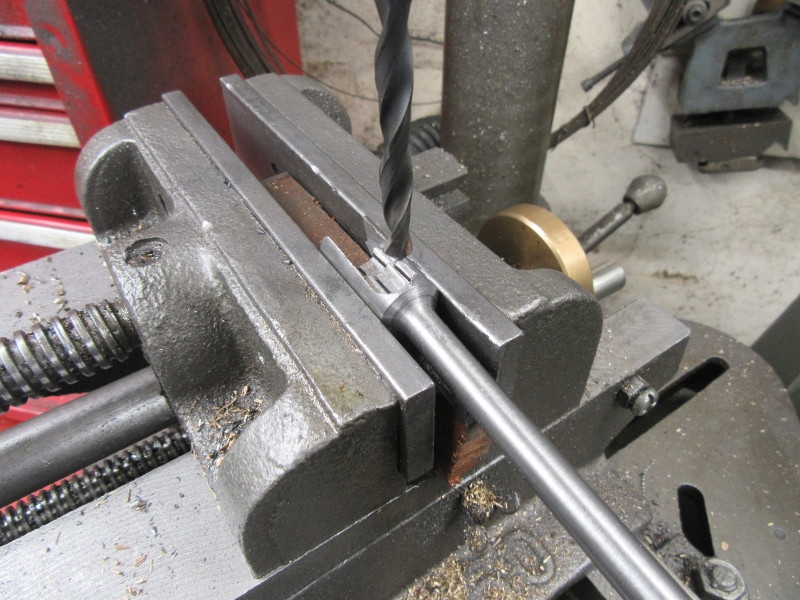
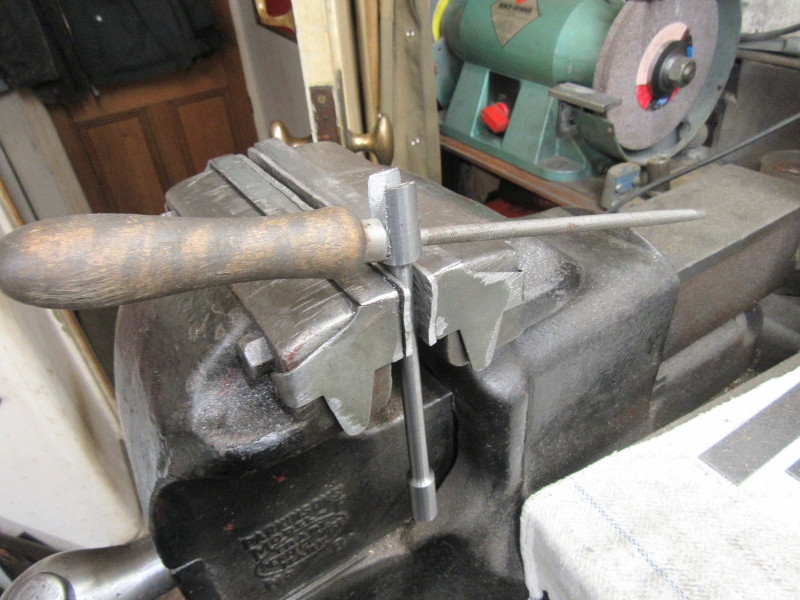
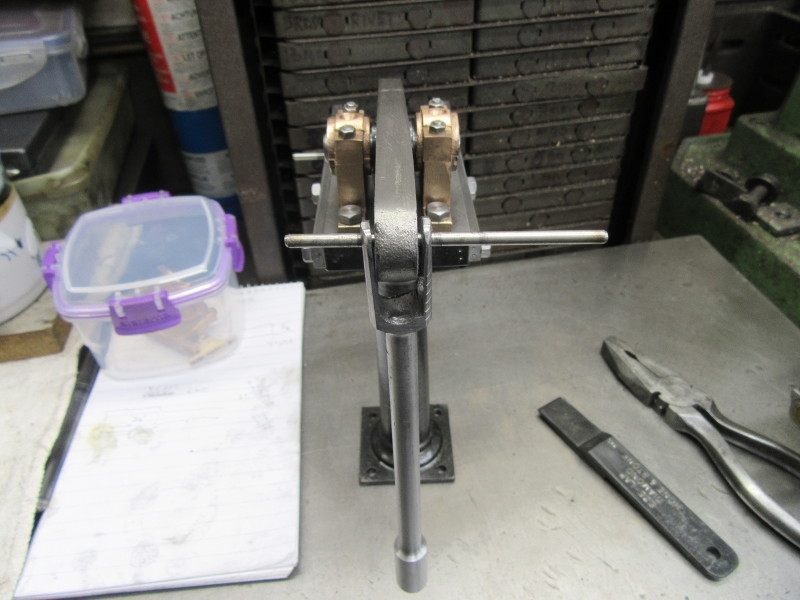
So... we move on the plan 'B' (after straightening the rod by eye, bending it in the vise.) I shall cut the slot with a 3/8" end mill.

Image

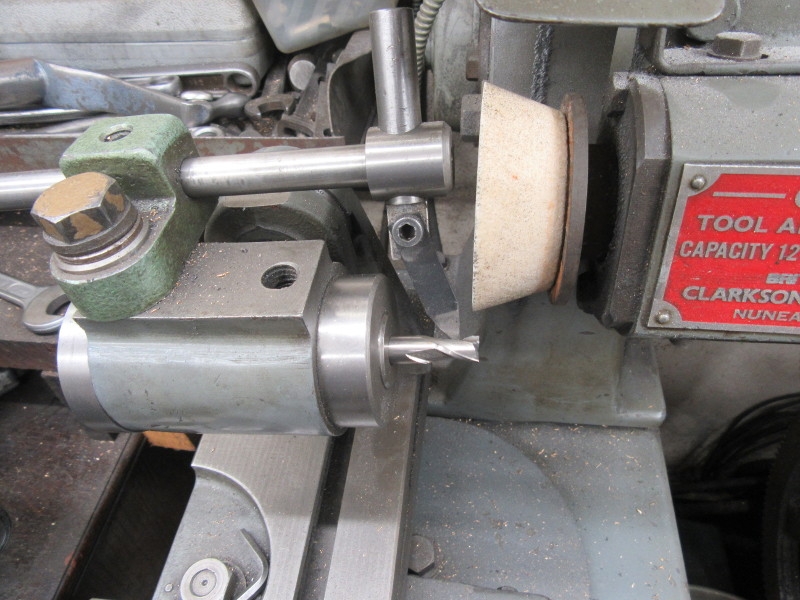
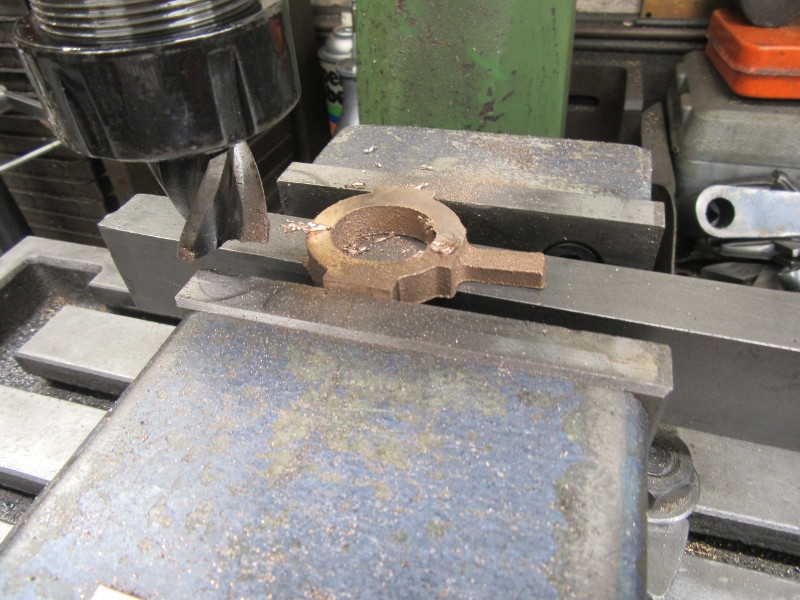
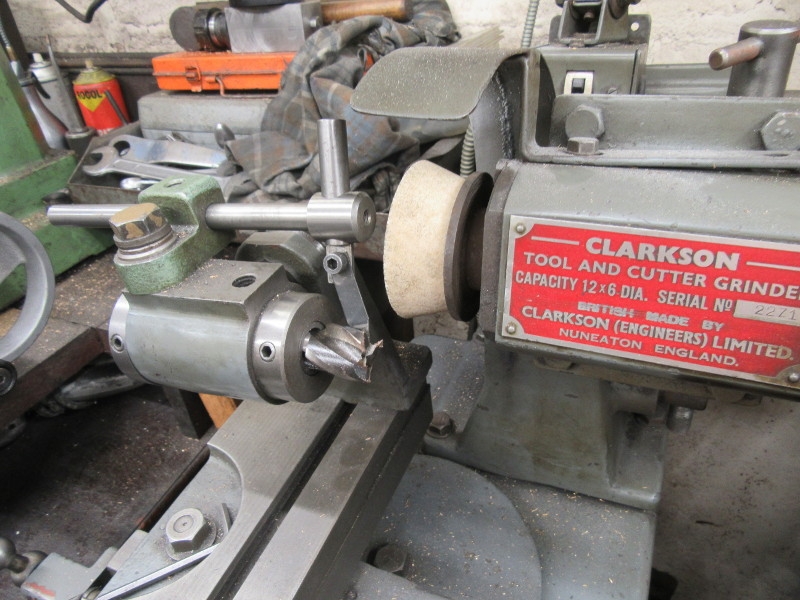
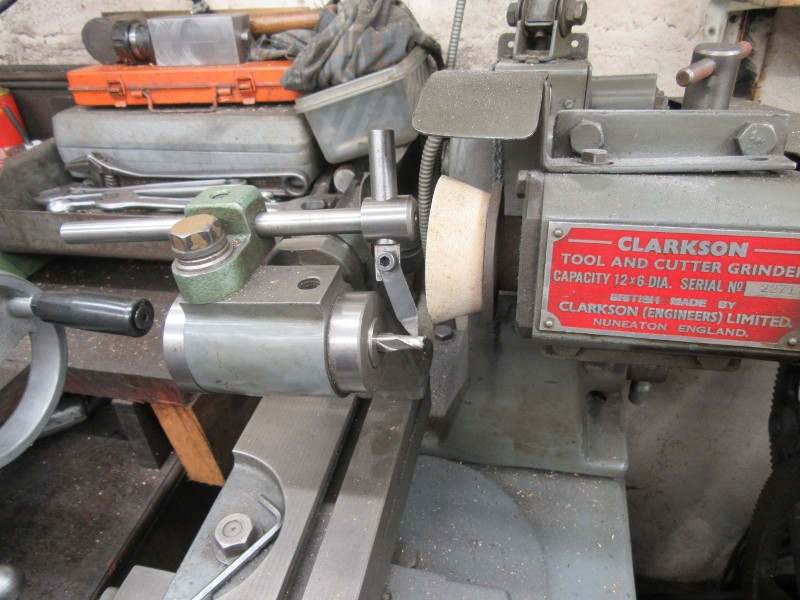
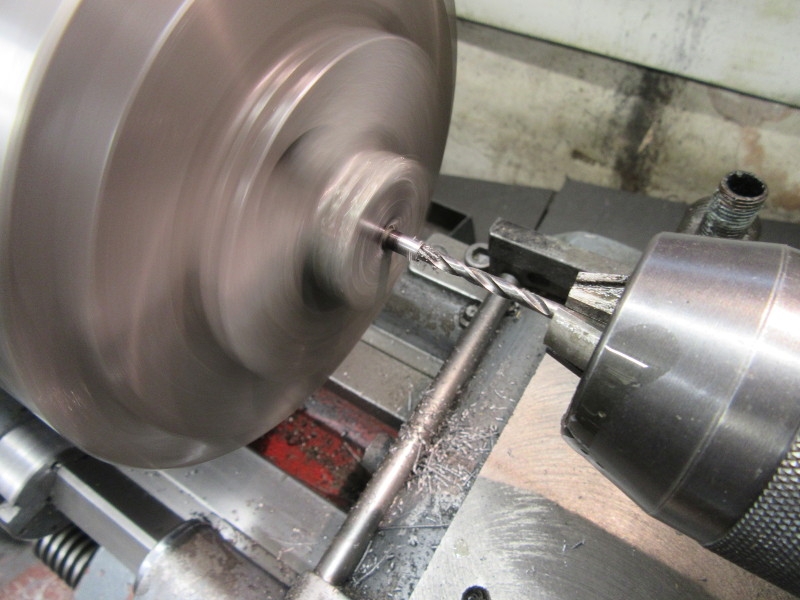
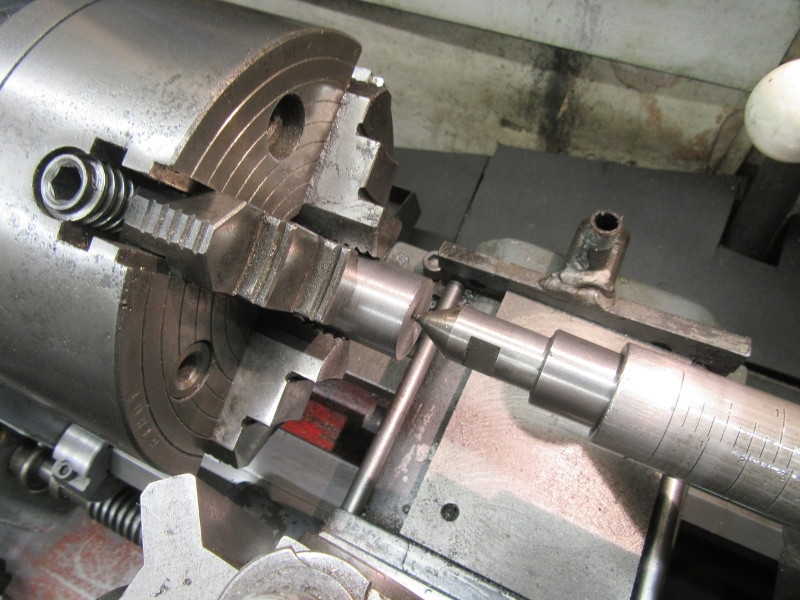
After a couple of passes I decided we needed to sharpen the cutter.

Image

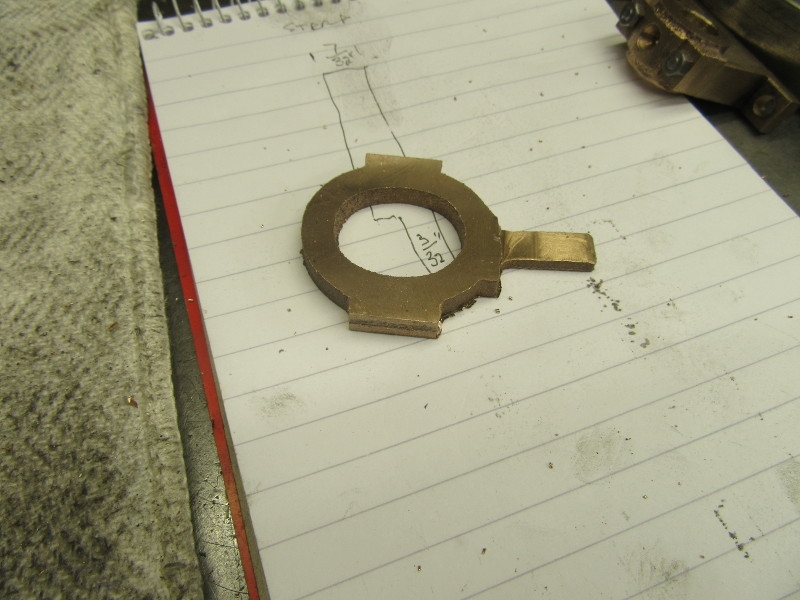
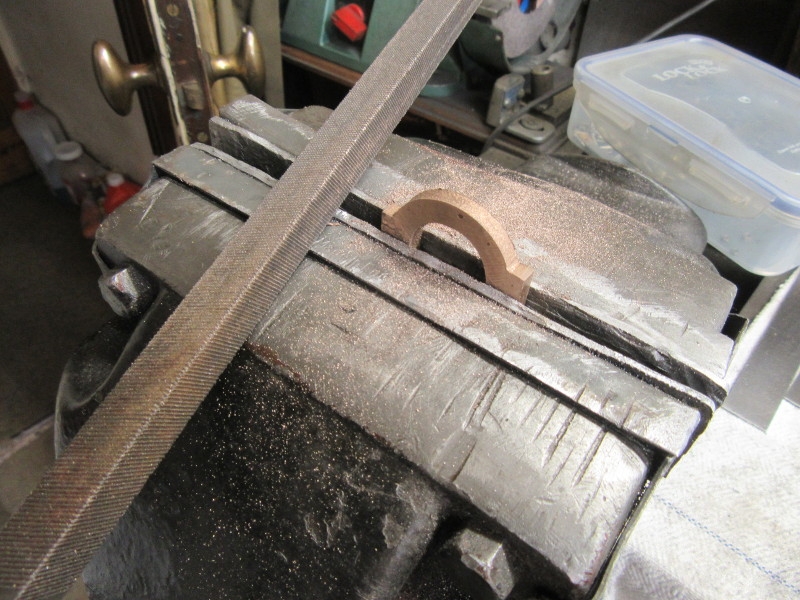
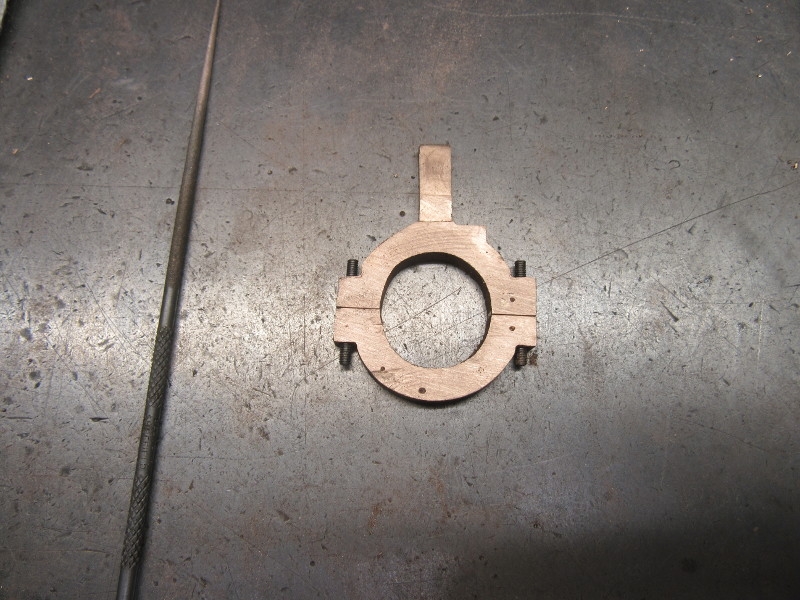
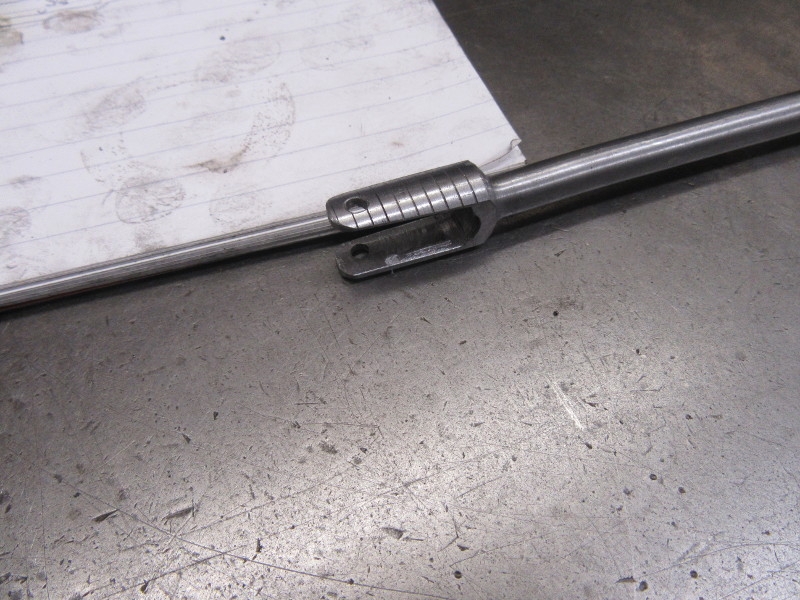
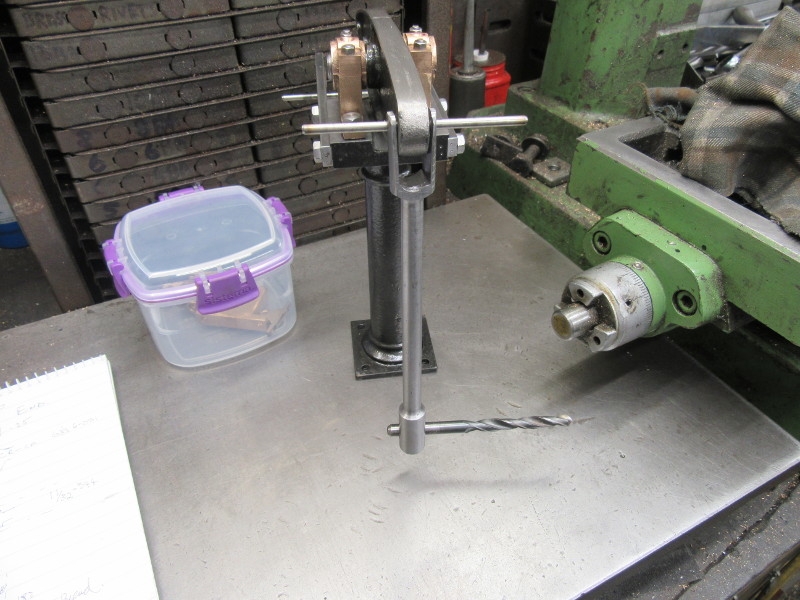
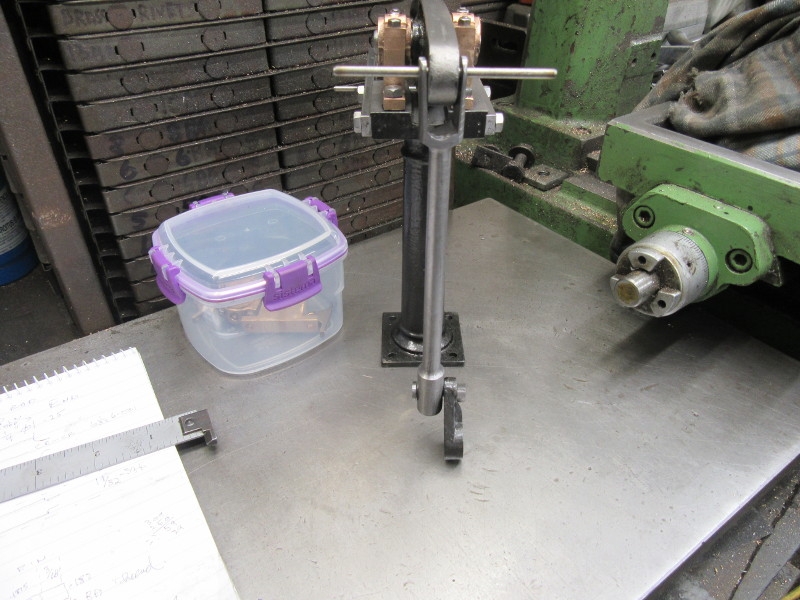
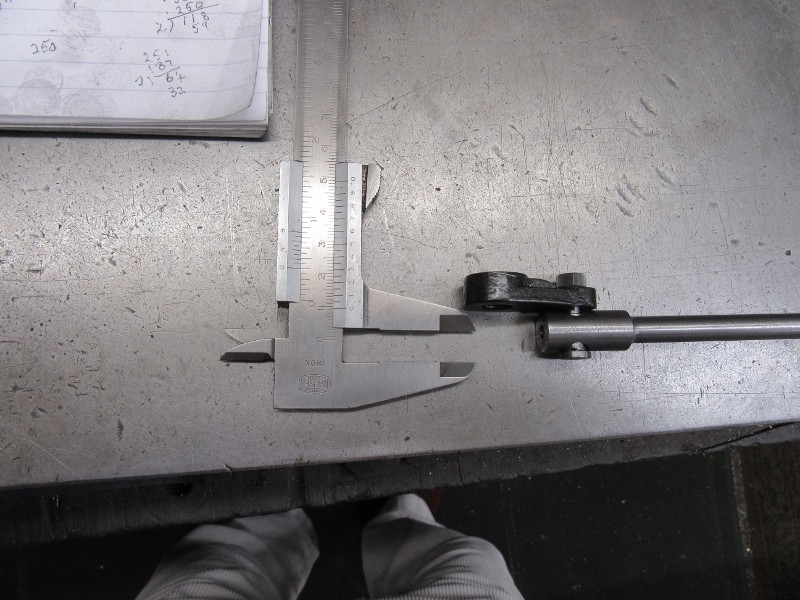
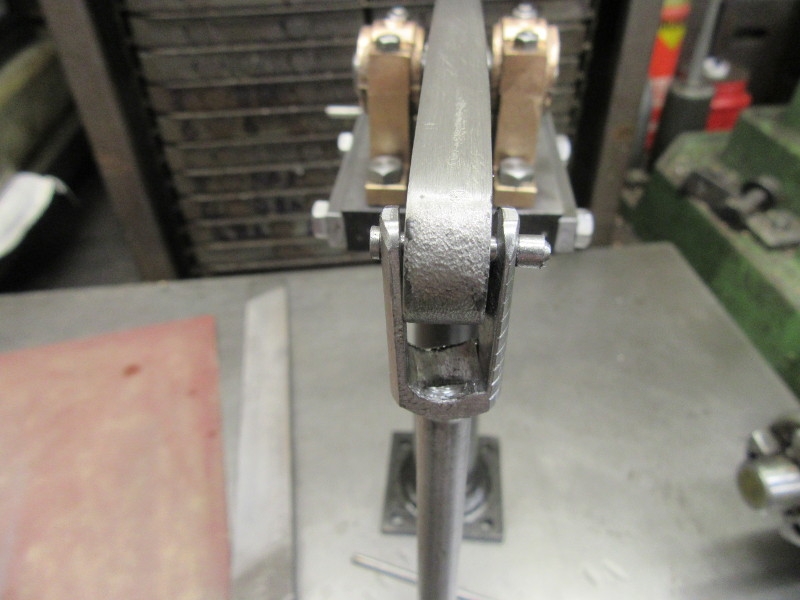
I cut as far as I could on the slant and tried it against the beam, it's a nice fit. So next job is to cut from the other side but that can wait until tomorrow. All that frustration for two hours has exhausted me. All right, I am a wimp but I don't want another cock-up. I shall come back to the problem fresh...
Stanley Challenger Graham
Stanley's View
scg1936 at talktalk.net

"Beware of certitude" (Jimmy Reid)
The floggings will continue until morale improves!
User avatar
Stanley
Global Moderator
Global Moderator
Posts: 90439
Joined: 23 Jan 2012, 12:01
Location: Barnoldswick. Nearer to Heaven than Gloria.

Re: Shed Matters 3

Post by Stanley »

Image

Today I'm on the rescue mission, saving the con rod! I've consulted with the design committee and we are agreed, we have to go very carefully and not leave anything to chance. So, the first thing I did was resist piling into cutting I looked very carefully at my cutter. One wing had a small chip so I ground the end out, gulleted it and gave it a complete re-sharpen.

Image

It was a good idea to sharpen the cutter. My first Move was to take out as much of the metal as possible with the cutter. The problem is of course that the more you cut out, the more chance there is of the vise squeezing the clevis shut so I stopped in good time before that happened. I got a fair bit of metal out of it.

Image

This how far I got before I stopped. I think you can see I was getting a nice clean cut.

Image

In the old days before my sight worsened this is how I cut a clevis out, drilled a hole at the base, cut down each side and then finished with a file. I have a pretty good guide now with what I've cut out so I cut Down each side making sure I kept away from the finished size, I was only partially successful, you wouldn't believe how my cuts wandered.

Image

Then I went under the pillar drill and popped a 1/4" drill through at the base, The drill wandered of course but it was just about OK. Then into the vice and a lot of filing!

Image

After a long time I got here. The clevis fits the end of the beam but needs tidying up. I shall do that tomorrow.

Image

Here's what the clevis looks like at knocking off time. It's rough but it fits. The chunk of metal is what I got out in one lump after the drilling. We are nowhere near a finish but today was a good step forwards. As good as could be expected so it's been a good morning.
Stanley Challenger Graham
Stanley's View
scg1936 at talktalk.net

"Beware of certitude" (Jimmy Reid)
The floggings will continue until morale improves!
User avatar
Stanley
Global Moderator
Global Moderator
Posts: 90439
Joined: 23 Jan 2012, 12:01
Location: Barnoldswick. Nearer to Heaven than Gloria.

Re: Shed Matters 3

Post by Stanley »

Image

After a break of a couple of days to heal my back I was back in the shed working on the con rod this morning. First job was a bit more filing at the base of the clevis and then I had to think about marking it up and drilling for the clevis pin.

Image

Image

The problem is that I have taken so much material out that the legs of the clevis aren't strong enough to stand up to the drill. So I made a button that fits the jaws and used that to support the jaws as I drilled 1/8" for the pivot pin under the pillar drill.

Image

Image

Lots of little adjustments to get the fit right. Not just a question of the clevis pin fitting but ensuring that it swung freely through the whole of its arc and putting some shape and polish into it. This meant that there had to be some minor adjustments to the thickness of the beam end. All this takes time!

Image

Here's where I got to by the time I had to leave off to do my Co-op shop. I have a 1/8" bar through the joint and it is swinging freely but is a good tight fit. Not perfect but this will do for me considering my eyes. It will work and that's the thing that matters.
Stanley Challenger Graham
Stanley's View
scg1936 at talktalk.net

"Beware of certitude" (Jimmy Reid)
The floggings will continue until morale improves!
User avatar
Stanley
Global Moderator
Global Moderator
Posts: 90439
Joined: 23 Jan 2012, 12:01
Location: Barnoldswick. Nearer to Heaven than Gloria.

Re: Shed Matters 3

Post by Stanley »

Image

We need to prepare and fit the other end of the rod for the crank pin. Here I am ready to drill the actual hole but it took half an hour of measuring and thinking to get here and now I have to rely on my bum eyes! Courage mon brave!

Image

No surprise here! I drilled the hole off centre. It's a given these days!

Image

However, here's the rod on the beam with the 1/4" drill through the hole and in the plane that matters, the holes being parallel, it's OK. The offset forward due to its not being central doesn't have any affect because it is still in the radius of movement of the crank·

Image

Before I think of reducing the thickness of the end of the con rod I want to make the crank pin and fit it as that tells me exactly what needs taking off and from where.

Image

Image

A bit of accurate turning and we ended up with a crank pin that's an exact fit on the rod and in the crank and I have also threaded the end for the enormous 2BA nut.

Image

Here we are at knocking off time. I'm ready now to put the flats on each side of the con rod end and get them to exactly fit the crank pin. I shall do that tomorrow and then consider where I go next. Given my shortcomings in finding the centre, all has gone well. This will work and that's what matters. That is a nice morning for me!
Stanley Challenger Graham
Stanley's View
scg1936 at talktalk.net

"Beware of certitude" (Jimmy Reid)
The floggings will continue until morale improves!
User avatar
Stanley
Global Moderator
Global Moderator
Posts: 90439
Joined: 23 Jan 2012, 12:01
Location: Barnoldswick. Nearer to Heaven than Gloria.

Re: Shed Matters 3

Post by Stanley »

Image

First job is to put a flat on each side of the clevis so that it fits the 3/8" bearing surface on the crank pin. You can take it for granted that a lot of measurement and checking went into this matter before I did any marking or cutting.

Image

I was going to do it by hand because any slip up at this point would be a small catastrophe. But after a rethink I decided it was better done under the mill. Some very careful setting up and cutting ensued. Again you probably knew that!

Image

Some time later, after breaking some edges and adjustment I finished up with a working solution. I was going to round off the bottom of the con rod but decided it didn't need it.

Image

I was tempted to stop at that point but then decided to make the pivot pin for the clevis on the beam. 1/8" diameter so some tiny turning!

Image

Drilling a 1/8" hole in a 3/16" workpiece is tiny turning for all except watchmakers! They'd think this was enormous!

Image

Knocking off time, it fits. In case you're wondering how I will fasten the collar, no mucking about, I shall simply Loctite it on when doing the final fitting. Overall all the bearing surfaces are a very good fit, there won't be any knocking from the crank or the beam end! Satisfying morning. Now I can start to look at the crankshaft.
Stanley Challenger Graham
Stanley's View
scg1936 at talktalk.net

"Beware of certitude" (Jimmy Reid)
The floggings will continue until morale improves!
User avatar
Stanley
Global Moderator
Global Moderator
Posts: 90439
Joined: 23 Jan 2012, 12:01
Location: Barnoldswick. Nearer to Heaven than Gloria.

Re: Shed Matters 3

Post by Stanley »

Image

The beam and the con rod can take a back seat until fitting now, it's time to address the crankshaft. Here are all the parts that must fit on it. My first job was to do a fag packet drawing as per the main drawing but then to measure all the bores carefully and see how they compare with the suggested sizes. Variations always creep in as you are making parts when you are getting down to fits that have to be within a thousandth of an inch. So next I measured all the bores twice to check, averaged them out and made my decisions, all of them slightly below the official size. This is down to old drills and reamers being worn and cutting slightly under size. It's not a fault, simply a fact that has to be addressed.

Image

So what's happening here? As you know I do almost all my turning with a favourite HSS cutter and over time, with repeated sharpening, you tend to move towards a geometry that is a long way from the ideal. I have plenty of HSS so I got a new piece out and ground it to a correct and accurate profile. No point boring you with pics of that, this is the last stage, honing the edges on a diamond hone.

Image

Image

Next job was to test the cutter for centre height and good cutting. Lots of tricks you can use to get somewhere near but the real proof of the pudding is to cut a face and a decent longitudinal cut. So we now know the cutter is OK for edge and height.

Image

Here we are ready to cut the crankshaft. The stock is faced and centred and ready for action. This is where I knocked off because there are other matters afoot. I have to be ready for daughter Susan coming at 9AM to pamper my feet. Equally as important. So tomorrow will be serious work without diversions but this mornings one hour plus wasn't wasted, every now and again you have to do essential maintenance!
Stanley Challenger Graham
Stanley's View
scg1936 at talktalk.net

"Beware of certitude" (Jimmy Reid)
The floggings will continue until morale improves!
BobH
Regular User
Posts: 133
Joined: 15 Nov 2019, 18:09
Location: Rochdale

Re: Shed Matters 3

Post by BobH »

I have been tiling the base for the vertical boiler. It is only possible to do one row at a time as levelling the small tiles, about 3/4” square, disturbs the adjacent row. Spot the deliberate mistake, now corrected.
You do not have the required permissions to view the files attached to this post.
User avatar
plaques
Donor
Posts: 8094
Joined: 23 May 2013, 22:09

Re: Shed Matters 3

Post by plaques »

Spot the deliberate mistake, now corrected. At first I thought you had a white tile too many, but if you swapped the black tile for a white tile you would have a black tile too many. Stumped, I give in. :biggrin2:
User avatar
Stanley
Global Moderator
Global Moderator
Posts: 90439
Joined: 23 Jan 2012, 12:01
Location: Barnoldswick. Nearer to Heaven than Gloria.

Re: Shed Matters 3

Post by Stanley »

I can't believe Ken isn't pulling your leg Bob. It's the black tile at the near corner, you have since replaced it with the white one. I'm afraid I'd rather spend half an hour grinding a new cutter that do that tiling!
Stanley Challenger Graham
Stanley's View
scg1936 at talktalk.net

"Beware of certitude" (Jimmy Reid)
The floggings will continue until morale improves!
User avatar
Stanley
Global Moderator
Global Moderator
Posts: 90439
Joined: 23 Jan 2012, 12:01
Location: Barnoldswick. Nearer to Heaven than Gloria.

Re: Shed Matters 3

Post by Stanley »

Image

Not aiming to do a lot today but I need a crankshaft and all is set for making it.

Image

A bit later I have a shaft that's the right length and has the crank fitted on the end, it's a good tight fit and will need a tap with the hammer to drive it fully home.

Image

The drawings call for a simple fit and a 3/32" pin driven in to secure it. I didn't want to make the shaft a tight fit in the crank, I haven't forgotten bursting the last one! So, I have put it on with a dab of Loctite and tomorrow when that has set I shall go for belt and braces and fit the pin as well.

Image

Here's an idea of where we are at. All that's needed before fitting is the eccentric and that is the next job. Only just over an hour but a satisfying morning. I have other matters to attend to!
Stanley Challenger Graham
Stanley's View
scg1936 at talktalk.net

"Beware of certitude" (Jimmy Reid)
The floggings will continue until morale improves!
BobH
Regular User
Posts: 133
Joined: 15 Nov 2019, 18:09
Location: Rochdale

Re: Shed Matters 3

Post by BobH »

Good progress Stanley. You say that you would not like to do tiling such as I am currently doing. I do just a bit each day, one more row today nicely lined up, levelled and gently wiped clean. I then have another project to get on with whilst the tile cement hardens a bit ready for another day. Currently I am having a reorganisation of my rod and bar stock. I am using an idea from a friend to use lengths of square drain pipe screwed to the underside of a shelf.
User avatar
Stanley
Global Moderator
Global Moderator
Posts: 90439
Joined: 23 Jan 2012, 12:01
Location: Barnoldswick. Nearer to Heaven than Gloria.

Re: Shed Matters 3

Post by Stanley »

You're better organised than me Bob. My stock is just stacked in any spare space I can find!

Image

How about this for tiling. My friend Walter Brunner's cross compound engine.
Stanley Challenger Graham
Stanley's View
scg1936 at talktalk.net

"Beware of certitude" (Jimmy Reid)
The floggings will continue until morale improves!
BobH
Regular User
Posts: 133
Joined: 15 Nov 2019, 18:09
Location: Rochdale

Re: Shed Matters 3

Post by BobH »

That is a very smart job Stanley, diagonal tiling as well. I have put a channel in to represent a drain and am wondering what sort or cover to put on it. When finished I am thinking of distressing it a bit, perhaps a little oil and soot rubbed in around the boiler firing door and oil around the engine. That is quite some way off but it pays to plan ahead so long as you realise that plans can be changed.
User avatar
Stanley
Global Moderator
Global Moderator
Posts: 90439
Joined: 23 Jan 2012, 12:01
Location: Barnoldswick. Nearer to Heaven than Gloria.

Re: Shed Matters 3

Post by Stanley »

"it pays to plan ahead so long as you realise that plans can be changed."
Very true Bob and one of the things I like doing.

Image

First little job was fitting the locking pin to the crank. Like the shaft itself, Loctited in, that will never come loose!

Image

I am going to make the eccentric next so the first job was to do a fag packet drawing using the quoted sizes and then put in the changes I shall make. First things like the bore have to match the shaft and second, the fact I don't like the way it is designed and will make it differently. That took quite a long time, this has to be right or the valves won't work!

Image

There is a piece of stock in the kit but it's too short to make it easy to hold or part off when finished so I went into the scrap box and found a little lump and chucked that up. I didn't mess about, I made some lovely blue swarf!

Image

When I had the stock to exactly the right major diameter I parted it off and faced the cut end of it.

Image

I had the stock ready for marking for the eccentricity but that can wait until tomorrow. My last blow was to clean the lathe and fit the 4 jaw independent chuck, I need that for the next step. Quiet progress and no cock-ups. That'll do me.
Stanley Challenger Graham
Stanley's View
scg1936 at talktalk.net

"Beware of certitude" (Jimmy Reid)
The floggings will continue until morale improves!
User avatar
Stanley
Global Moderator
Global Moderator
Posts: 90439
Joined: 23 Jan 2012, 12:01
Location: Barnoldswick. Nearer to Heaven than Gloria.

Re: Shed Matters 3

Post by Stanley »

Image

First job was to mark the slug with the offset centre. It's 9/64" so you can guess how long it took me to set that up and mark it!

Image

Image

It took me quite a while to get set up, first by getting the centre right, then clocking it to get the face parallel and then re-checking the centre.

Image

Then careful cutting. It was while I was doing this that I had a serious jam up, totally my fault because I'd missed something obvious. I'm so ashamed of it I am not going to tell you what it was apart from it was down to old age and not checking everything three times. Luckily I got a way without spoiling the stock or breaking the lathe. I was very lucky!

Image

Image

Then I drilled and reamed the bore and tried the shaft, a lovely fit, just right.

Image

This was closing time, the three jaw is back on and I'm ready to cut the groove for the strap and part the eccentric off. That needs some checking and measurement first so I shall leave it until tomorrow.
Stanley Challenger Graham
Stanley's View
scg1936 at talktalk.net

"Beware of certitude" (Jimmy Reid)
The floggings will continue until morale improves!
User avatar
Stanley
Global Moderator
Global Moderator
Posts: 90439
Joined: 23 Jan 2012, 12:01
Location: Barnoldswick. Nearer to Heaven than Gloria.

Re: Shed Matters 3

Post by Stanley »

I had a nightmare last night about my mistake yesterday and got up with it still on my mind. I have decided honesty is the best policy and it might help purge the image from my brain if I come clean about yesterday! It might prevent someone else making the same mistake.
It's all there in the images. Look at the second one where I am indicating the face, in order to get at it using that set up I shifted the toolpost forwards in the top slide as I was at the limit of the cross slide screw. No problem with that, its an old turner's trick. The problem came when I forgot and started turning the eccentric without bringing the toolpost back into the centre of its slot! I got through all the interrupted cuts with no problem, they were only light but when I took a longitudinal cut to clean the boss up the different forces undid me! The toolpost nodded forward, the cutter dug in and brought the lathe to a dead stop in full flight. Imagine the shock and strain on the drive train, it's a wonder I didn't damage a gear in the head.
What saved me is the fact that Mrs Harrison is so well built, I seem to have got away with it. A lesser machine would have broken. However, you know how I love that machine and look after it and you'll understand why that moment of stupidity affected me so much. So I hope by coming clean I might have saved someone else's bacon! You can't afford to let your guard down when you are using machinery. Be safe!
Stanley Challenger Graham
Stanley's View
scg1936 at talktalk.net

"Beware of certitude" (Jimmy Reid)
The floggings will continue until morale improves!
BobH
Regular User
Posts: 133
Joined: 15 Nov 2019, 18:09
Location: Rochdale

Re: Shed Matters 3

Post by BobH »

I think we have all been there Stanley. I thought at first that the chuck jaws had fouled some part attached to the cross slide. At least if the machine has a belt in the motor drive that takes the peak out of the shock. It doesn’t do much for the shock to the operator😈. That is where, in my opinion, that some small Chinese machines fall down with all gear drive. They put one nylon gear in the train as a sacrificial element to fail Under such conditions. My little mill had one of those. There were two problems, firstly you needed to keep a spare so that you could continue working and secondly it was very noisy. I needed ear muffs near the machine or came away with dulled hearing. I have converted it to belt drive, much smoother, impact protected and quieter, 3 wins in one mod.
User avatar
Stanley
Global Moderator
Global Moderator
Posts: 90439
Joined: 23 Jan 2012, 12:01
Location: Barnoldswick. Nearer to Heaven than Gloria.

Re: Shed Matters 3

Post by Stanley »

Absolutely right Bob. Luckily the internal systems protected me, the clutch kicked out and the breaker tripped. I'm happy to report that I have just come out of the shed after two hours and Mrs Harrison has forgiven me, service as usual!
Stanley Challenger Graham
Stanley's View
scg1936 at talktalk.net

"Beware of certitude" (Jimmy Reid)
The floggings will continue until morale improves!
User avatar
Stanley
Global Moderator
Global Moderator
Posts: 90439
Joined: 23 Jan 2012, 12:01
Location: Barnoldswick. Nearer to Heaven than Gloria.

Re: Shed Matters 3

Post by Stanley »

Image

First job was to finish the eccentric, first I did some weighing up and measuring because I am not following the drawing but doing it my way. Then cut the groove for the eccentric strap which is not going to be a fiddly little ridge but take the whole width of the strap which will be 1/4". It will never wear out!

Image

Then I drilled and tapped for the set screw that locks it to the shaft. I am using a 1/4" Whitworth Unbrako screw, not the silly little set screw supplied.

Image

Here's the result, the eccentric is a good fit and ready for the strap. That's the next job.

Image

First I milled the flats on the lugs that accept the bolts that hold it together when it is split and used them to hold the eccentric flat in the vise. You can't tighten the strap up too much it would squash it. Then some careful cutting.

Image

I wasn't satisfied with my cutter so I did a quick re-sharpen, it was much better.

Image

This was closing time, I have the major surfaces tidied up and now I can do some finish measurements and then reduce it to 1/4" thick to fit the eccentric. At the same time I have to leave the tag that attaches it to the valve rod down to 3/32". That's quite tricky so I've left it for tomorrow. A nice morning when everything went well and I didn't make any stupid mistakes. I like that...
Stanley Challenger Graham
Stanley's View
scg1936 at talktalk.net

"Beware of certitude" (Jimmy Reid)
The floggings will continue until morale improves!
User avatar
Stanley
Global Moderator
Global Moderator
Posts: 90439
Joined: 23 Jan 2012, 12:01
Location: Barnoldswick. Nearer to Heaven than Gloria.

Re: Shed Matters 3

Post by Stanley »

Image

A broken morning because I had to go and do my weekly Co-op shop as soon as they opened so there were as few people in there as possible. So I wasn't aiming to do a lot. The Target is to get under the mill and thin the eccentric strap down until it fits the groove in the eccentric which is 7/32" for an easy fit which it needs to be. At the same time I have to maintain the tag that attaches to the valve rod at 3/32". I put a fly cutter in so as to get a better finish.

Image

Here's the result a far better finish and I am ready to drill for the bolts that will hold the two halves together. Then I can make a saw cut across the eccentric and bolt it together. Once that is done it can be bored to fit the groove, then tidied up and made pretty!
Stanley Challenger Graham
Stanley's View
scg1936 at talktalk.net

"Beware of certitude" (Jimmy Reid)
The floggings will continue until morale improves!
User avatar
Stanley
Global Moderator
Global Moderator
Posts: 90439
Joined: 23 Jan 2012, 12:01
Location: Barnoldswick. Nearer to Heaven than Gloria.

Re: Shed Matters 3

Post by Stanley »

Image

I did a bit of measuring and found I had been a bit lax yesterday, one side of the strap was 1/32" thicker than the other and this had to be corrected.

Image

So under the mill and a lovely series of light clean cuts with the fly cutter.

Image

I had to file the shoulders of the lugs to make room for the drilling for the 7BA bolts that will hold it together. At the same time I filed some of the worst roughness of the outside of the casting.

Image

Then what for me was the most difficult part of the morning, drilling the clearance holes in the lugs for the bolts. They have to be dead central and my problem was measuring and marking then setting up.

Image

This was the result. This is the exit side of the drillings and they are both dead centre. I was very surprised and of course pleased.

Image

Image

I had to make two cuts as the saw couldn't get deep enough to do it in one cut. Then I spent a long time with very fine abrasive implements intended for ladies nail treatment!

Image

I had to open the drillings slightly with a needle file to get a good tight fit for the 7BA studs. I have to enlarge the lands on the lug by filing them to make room for the nuts. That's for tomorrow, I've done enough for today. Very pleased with the morning, no cock-ups!
Stanley Challenger Graham
Stanley's View
scg1936 at talktalk.net

"Beware of certitude" (Jimmy Reid)
The floggings will continue until morale improves!
User avatar
Stanley
Global Moderator
Global Moderator
Posts: 90439
Joined: 23 Jan 2012, 12:01
Location: Barnoldswick. Nearer to Heaven than Gloria.

Re: Shed Matters 3

Post by Stanley »

Image

The first job this morning was to use the file to make the ends of the lugs large enough to accept the 7BA nuts and ensure that the studs were a good accurate fit.

Image

That will do. Next I checked the size of the tag that connects to the valve rod and mark for the 7BA bolts that will attach it.

Image

Image

Then under the pillar drill to drill the holes in the tag and also to put the oil hole in the strap.

Image

Next I had to set up for boring the strap. I think you'll realise that there was a lot of setting up and then some careful boring. Not a lot of metal to be taken out but it had to be accurate. My boring head isn't a good one, it's an El Cheapo and it has its limitations but handled with care it does a good job. Remember I had very little pressure on the strap, it's very fragile and of course becomes even more so as you bore it. I must have got it right, there were no dramas!

Image

The proof of the pudding. I bored the strap a touch oversize but got that right as well because it's a good fit on the diameter. I gave it plenty of side play so that when it's running it can adjust itself to any variations in the valve gear and rod. I like it. It's been a good morning. At last I can move away from the eccentric!
Stanley Challenger Graham
Stanley's View
scg1936 at talktalk.net

"Beware of certitude" (Jimmy Reid)
The floggings will continue until morale improves!
User avatar
Tripps
VIP Member
Posts: 8810
Joined: 23 Jan 2012, 14:56

Re: Shed Matters 3

Post by Tripps »

This thread is a big beneficiary of the new improved loading speed. :smile:
Born to be mild
Sapere Aude
Ego Lego
Preferred pronouns - Thou, Thee, Thy, Thine
My non-working days are Monday - Sunday
User avatar
chinatyke
Donor
Posts: 3831
Joined: 21 Apr 2012, 13:14
Location: Pingguo, Guangxi, China

Re: Shed Matters 3

Post by chinatyke »

Tripps wrote: 22 Sep 2020, 15:48 This thread is a big beneficiary of the new improved loading speed. :smile:
Not for me! Shed Matters opened with only 1 photo. Then the others started to open line by line. Like watching paint dry! I've given up waiting!
3 pics opened up after a few minutes.

Tried again 5 minutes later and the same 3 pictures opened immediately but no others. They must need to be activated or something!
User avatar
PanBiker
Site Administrator
Site Administrator
Posts: 16488
Joined: 23 Jan 2012, 13:07
Location: Barnoldswick - In the West Riding of Yorkshire, always was, always will be.

Re: Shed Matters 3

Post by PanBiker »

DNS propagation of the site changes has been quite positive with entries now showing on servers on all continents, (including Antarctica), complete propagation can take up to 48 hours for all the servers to sync up their routing tables. Some of your countries restrictions on traffic may also be playing catch up for while. The virtual server instance is now based in a UK data centre it was formerly in Germany.
Ian
Post Reply

Return to “Crafts”