Shed Matters 3

User avatar
Stanley
Global Moderator
Global Moderator
Posts: 90301
Joined: 23 Jan 2012, 12:01
Location: Barnoldswick. Nearer to Heaven than Gloria.

Re: Shed Matters 3

Post by Stanley »

Image

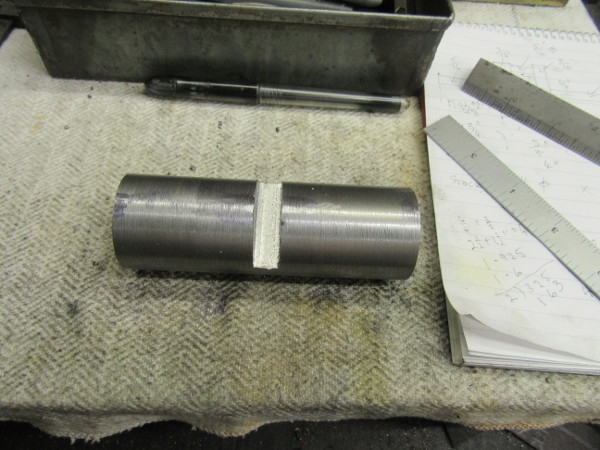
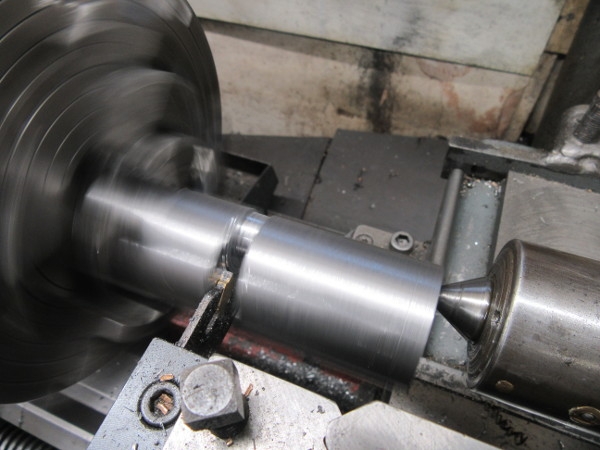
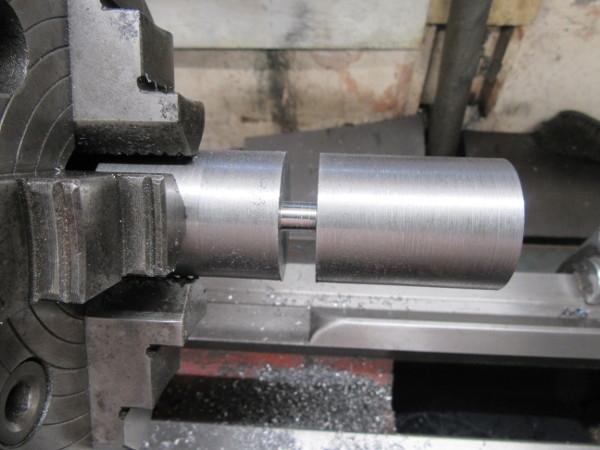
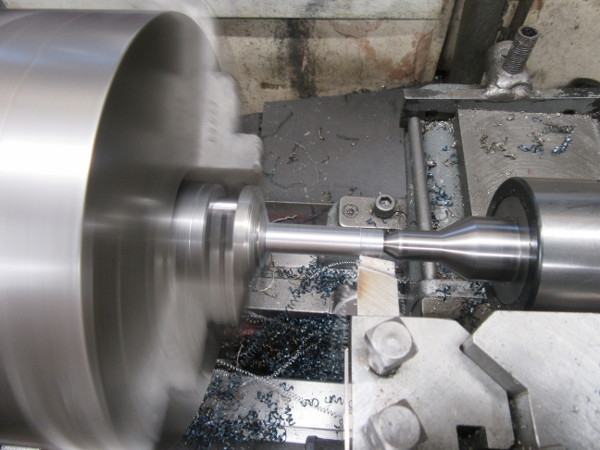
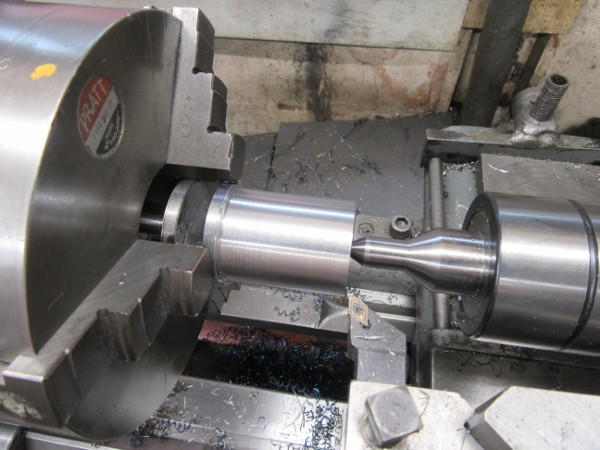
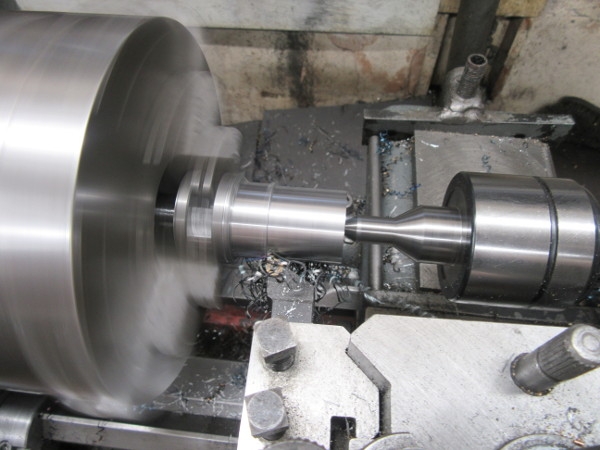
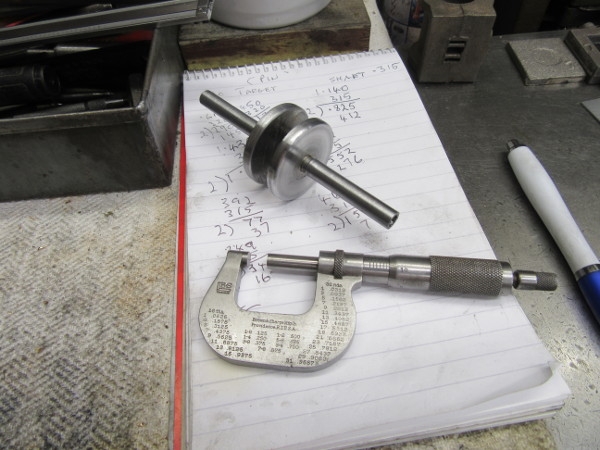
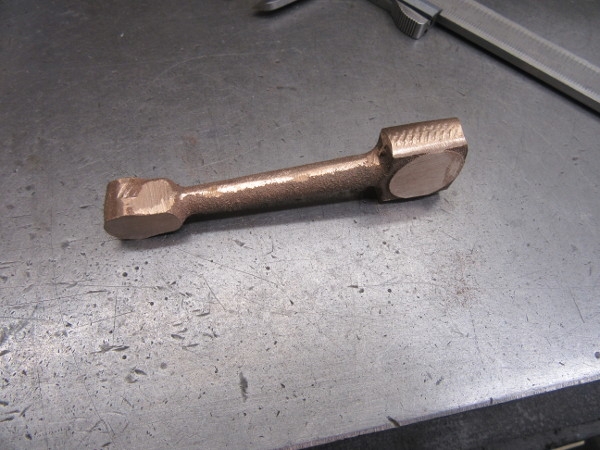
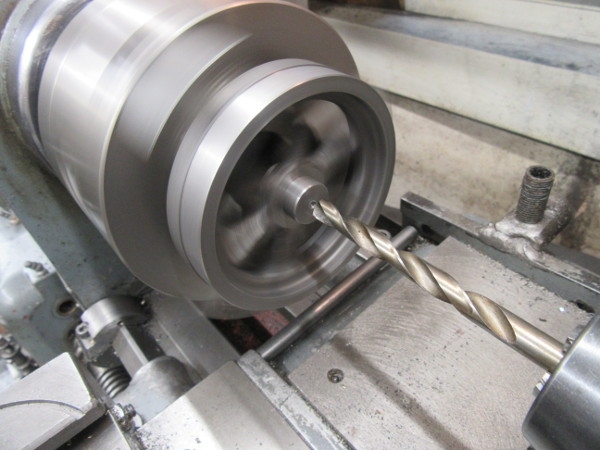
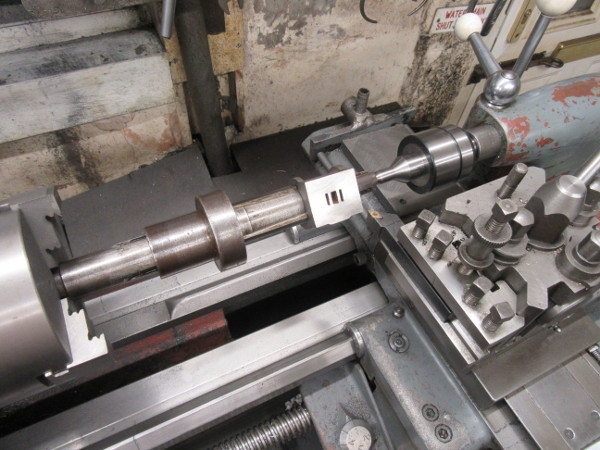
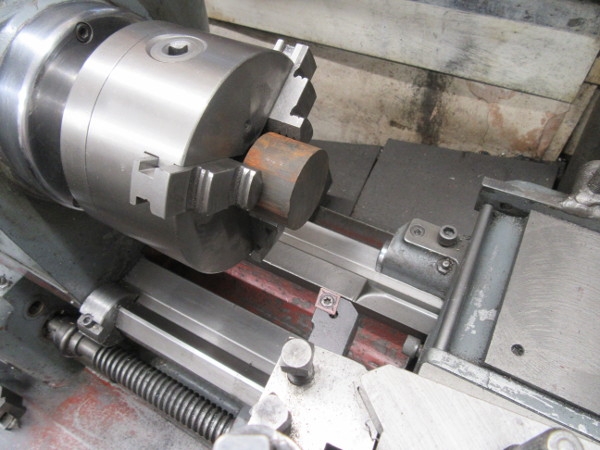
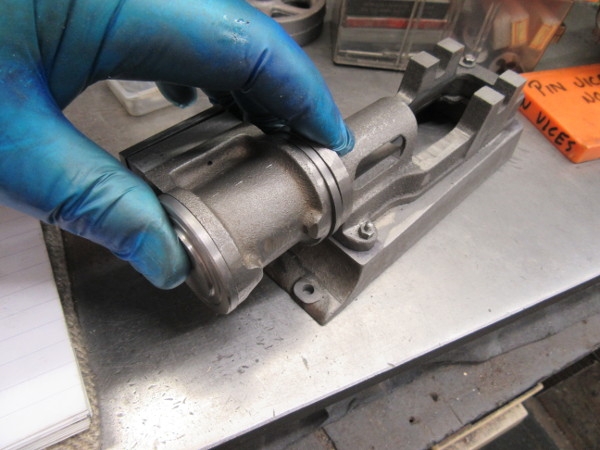
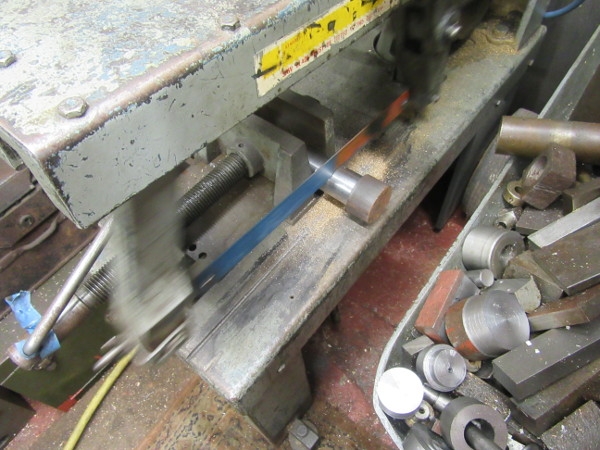
I started the day with a light cut to get me to finished size and then measure the length I want and cut it in Mrs McMaster.

Image

Image

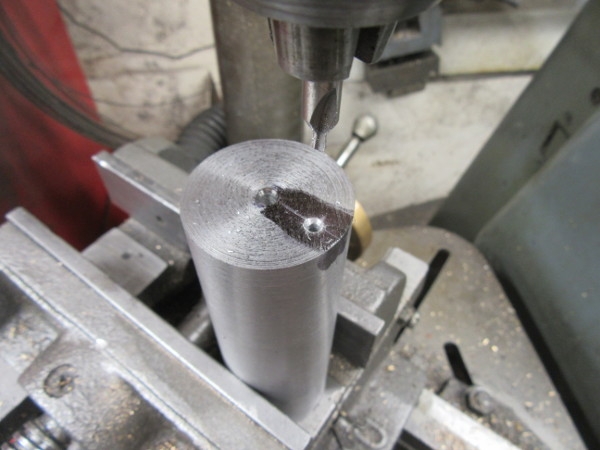
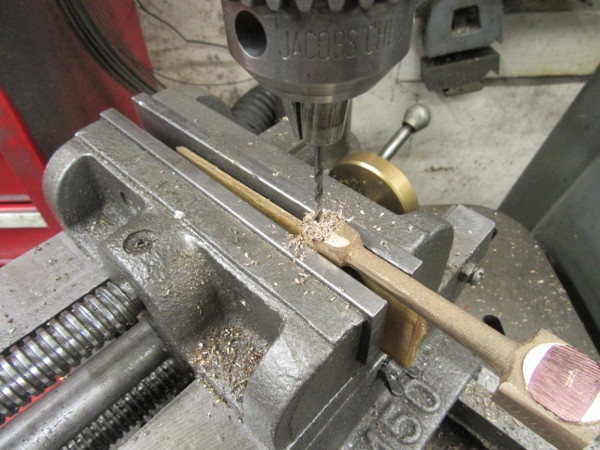
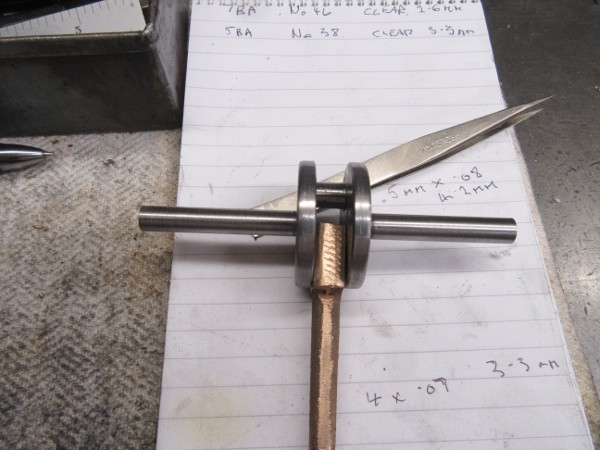
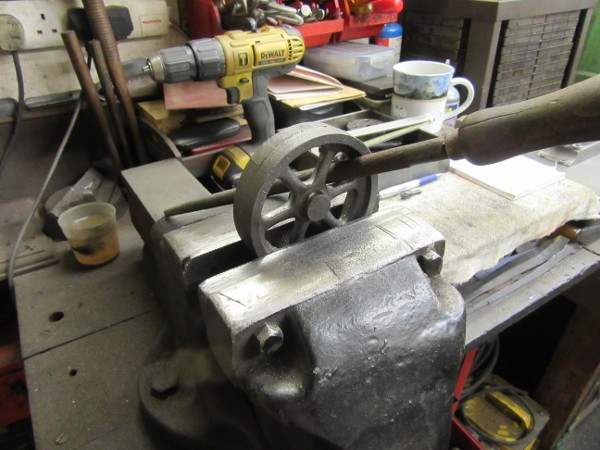
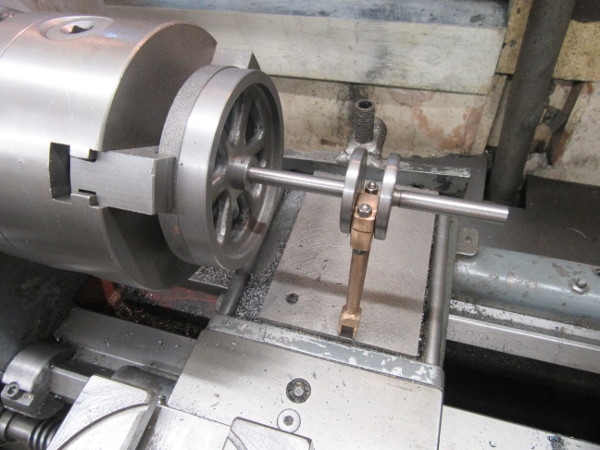
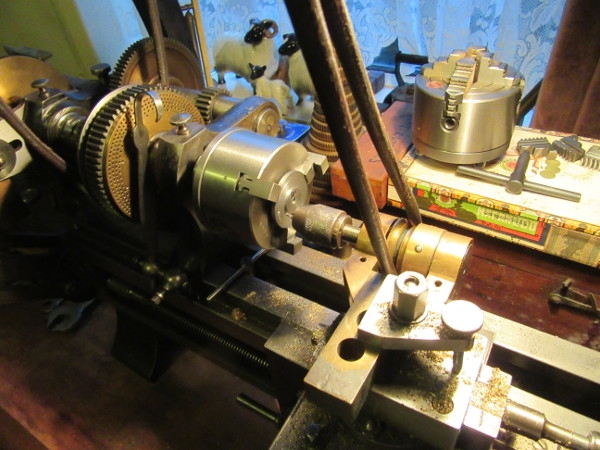
Then some measuring and marking to establish a centre on each end for the crank pin.

Image

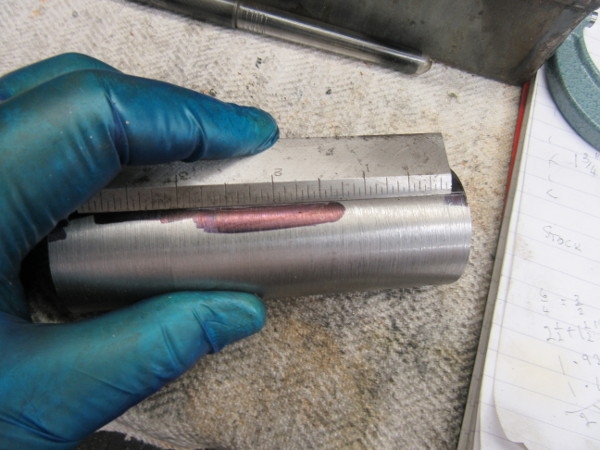
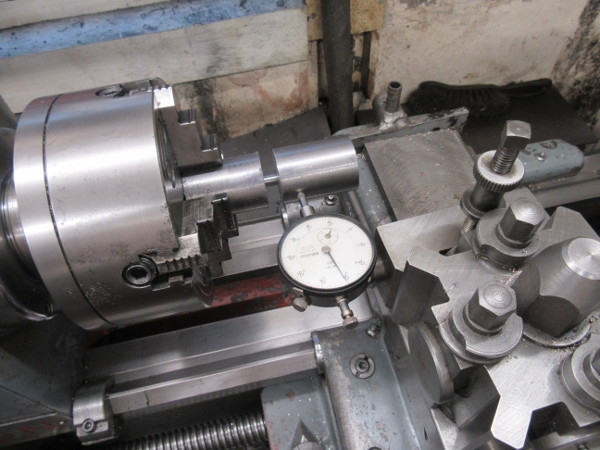
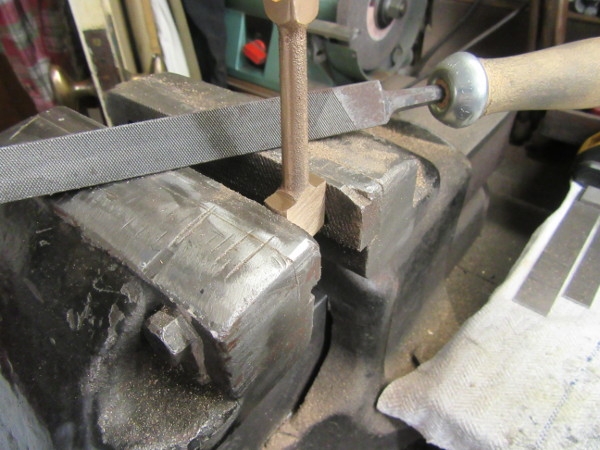
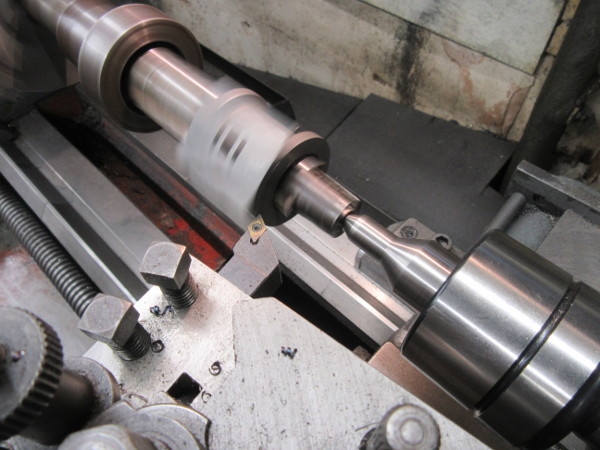
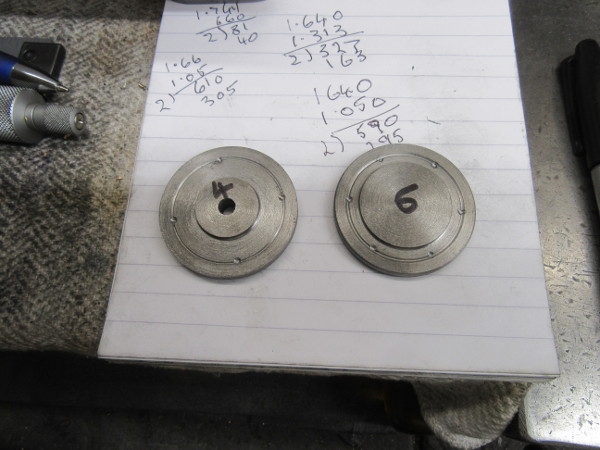
I put this pic in to demonstrate the use of the shaft ruler which, due to its shape, always makes a line parallel with the centre of the shaft.

Image

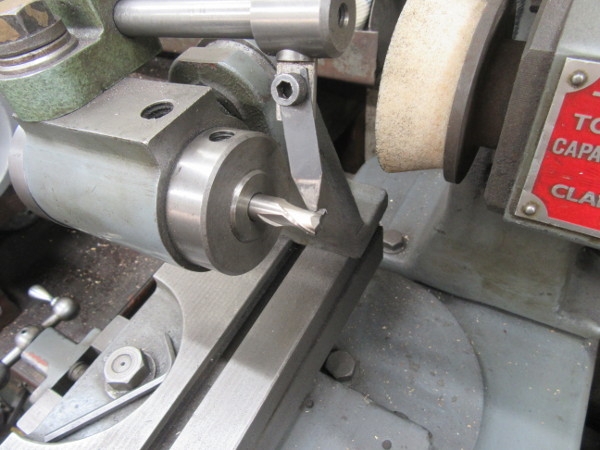
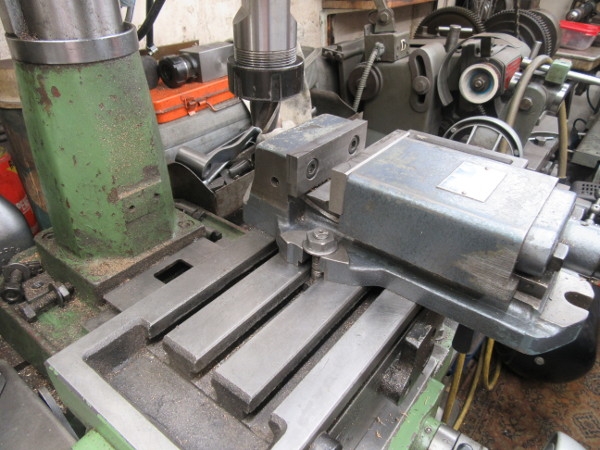
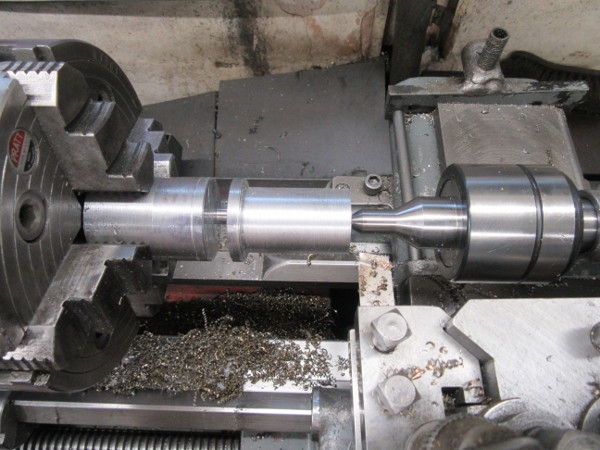
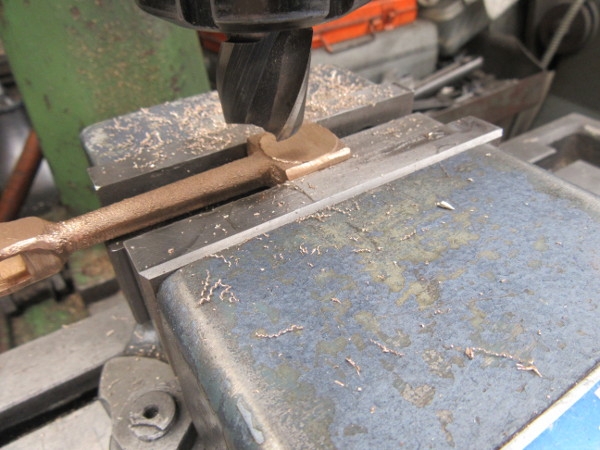
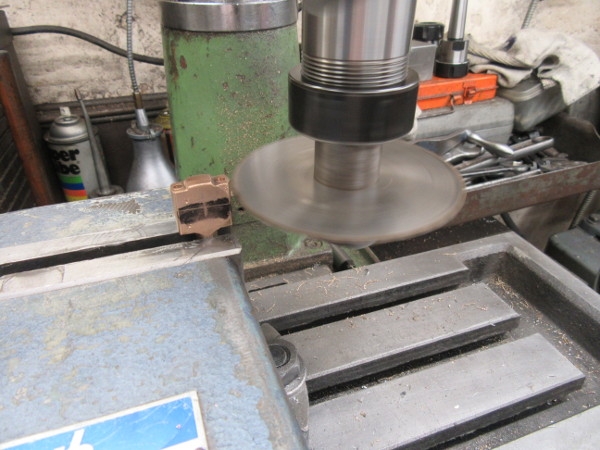
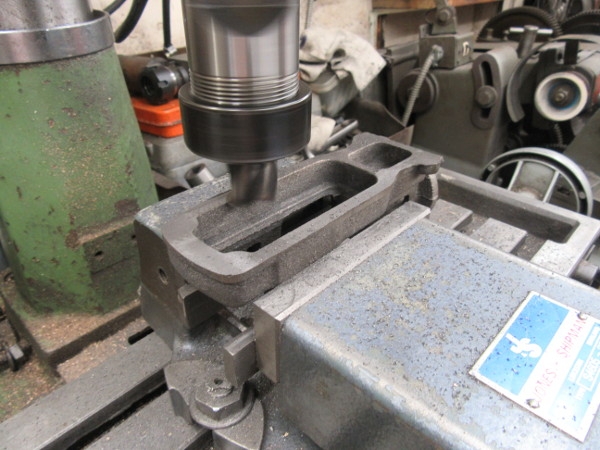
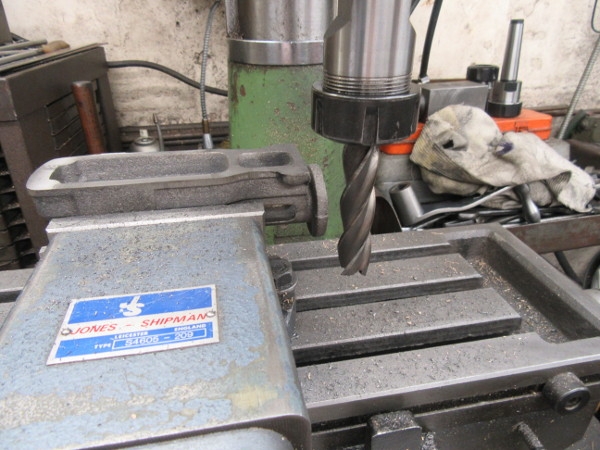
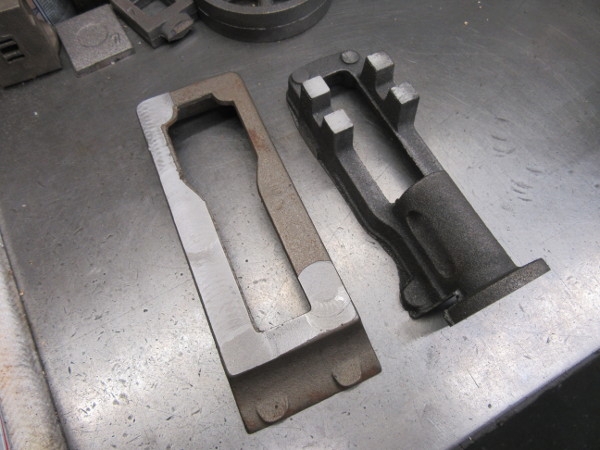
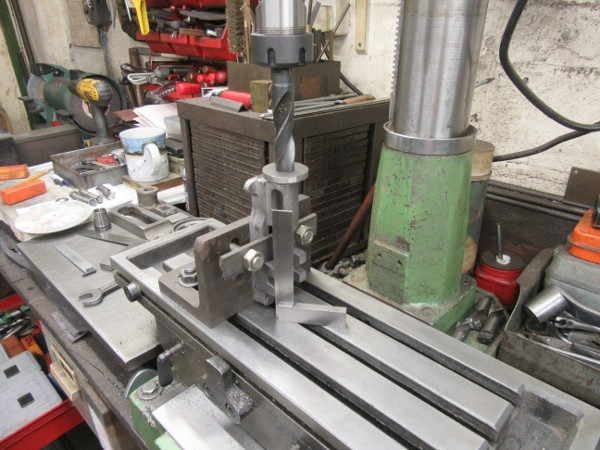
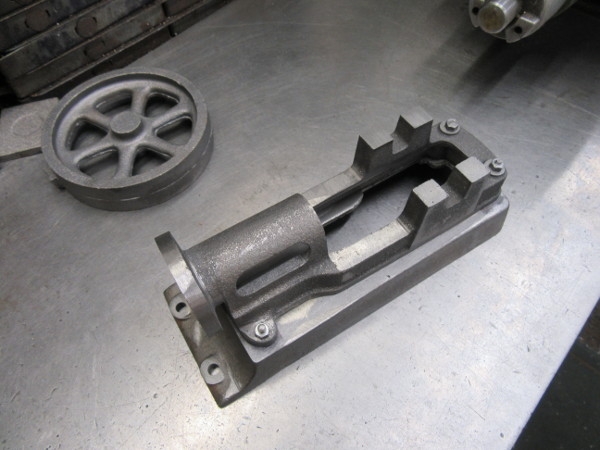
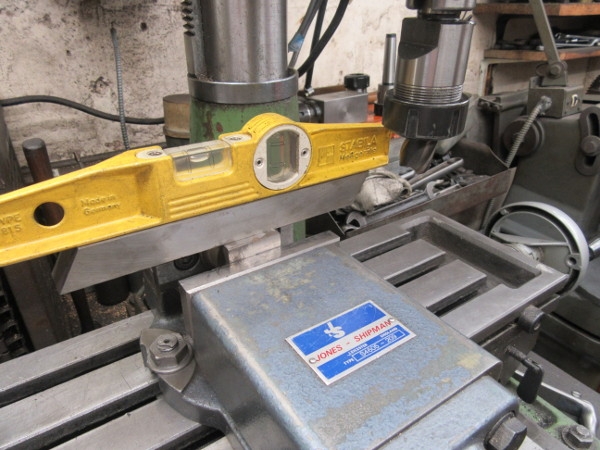
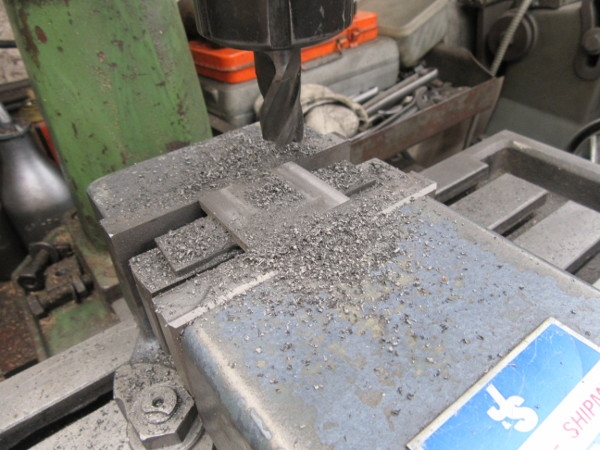
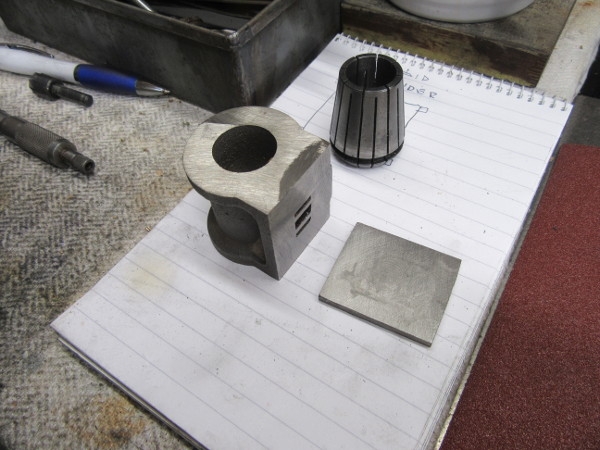
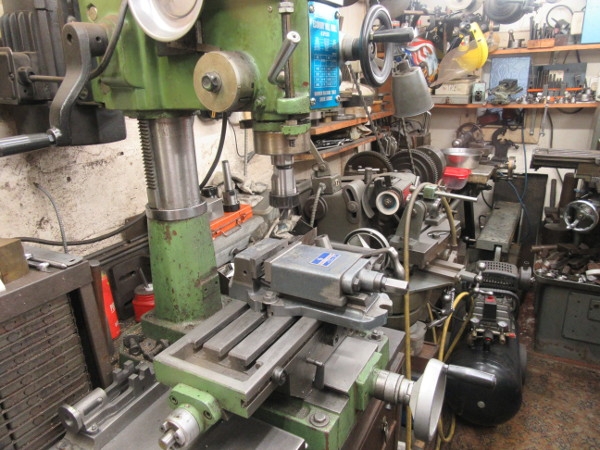
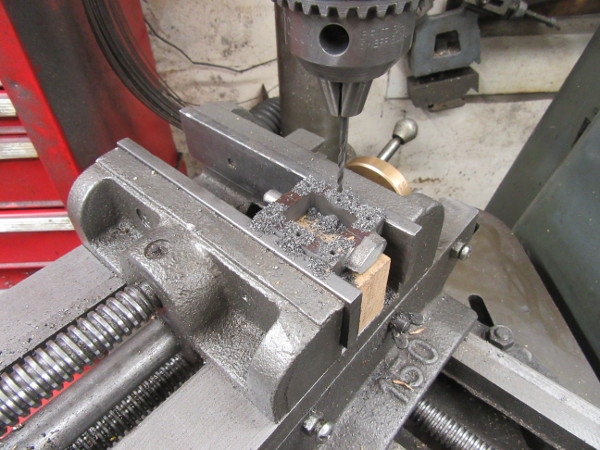
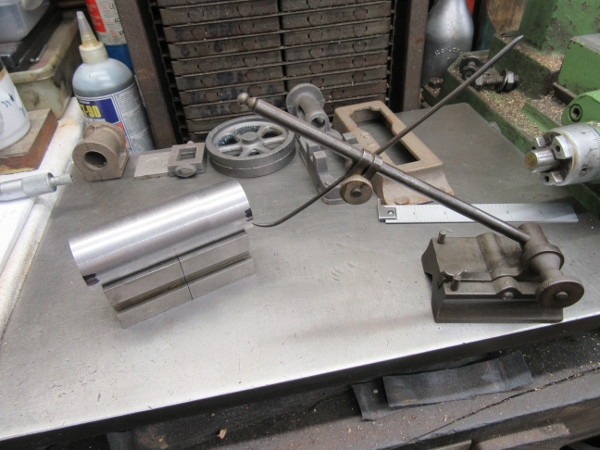
I'm going to cut my crank pin in a slightly different way (favoured by my mate Newton) which involves cutting out a lot of the waste material with the milling machine before you start turning. This is particularly helpful when you are chopping out more complicated shafts for compounds and triple expansion engines.

Image

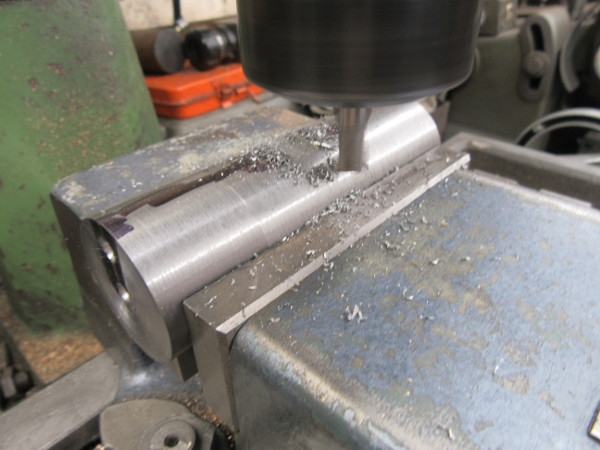
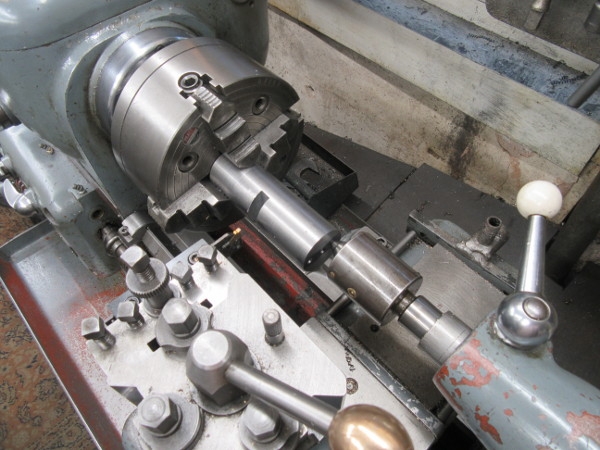
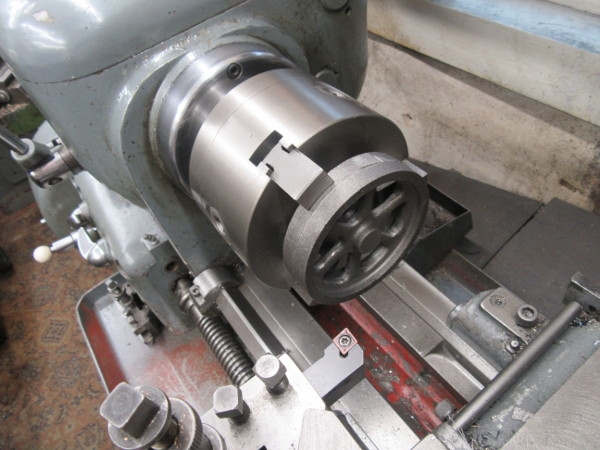
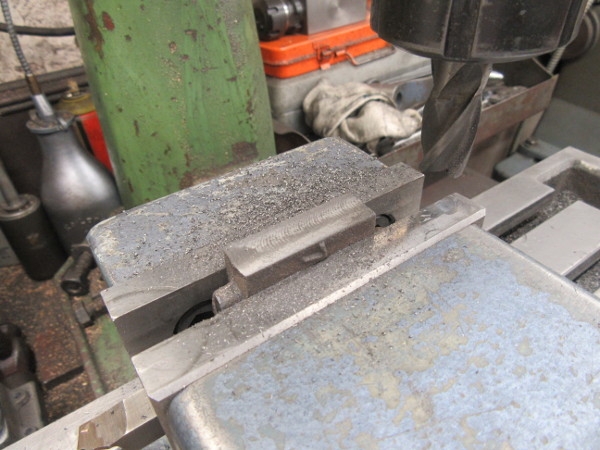
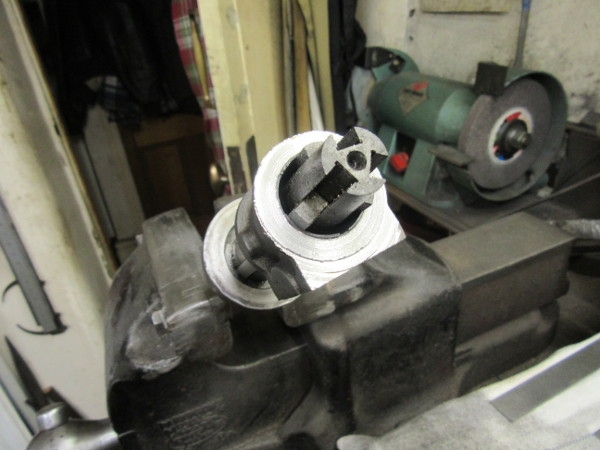
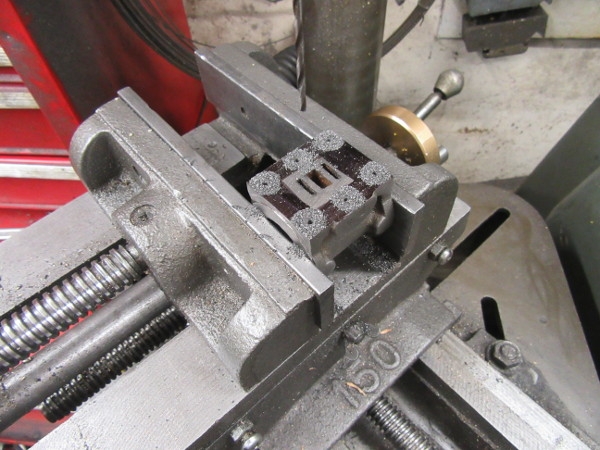
Into the VM and has anyone spotted the mistake? I'm cutting on the wrong side and will have to re-mark my centres 180 degrees from these. I'm getting old.... Luckily it won't make any difference.

Image

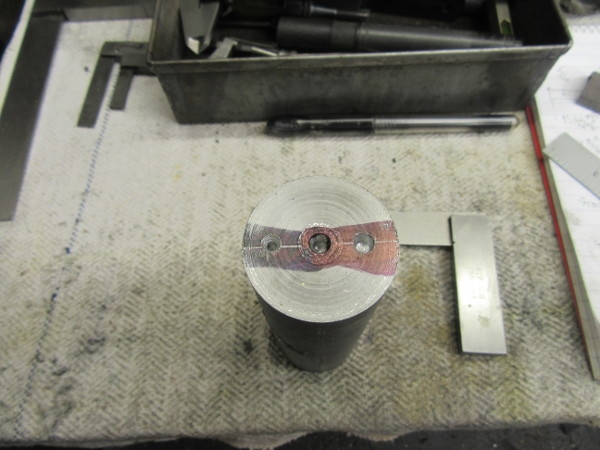
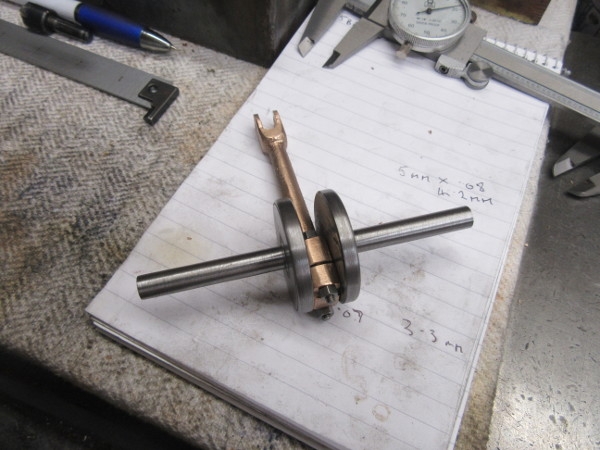
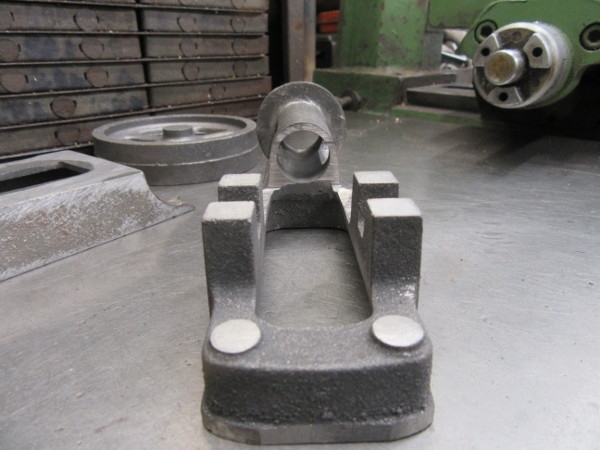
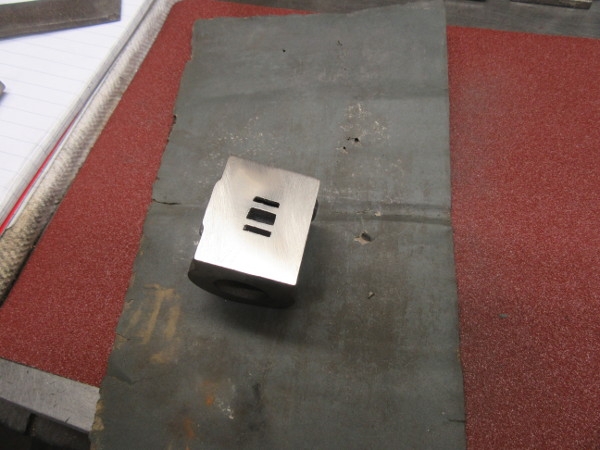
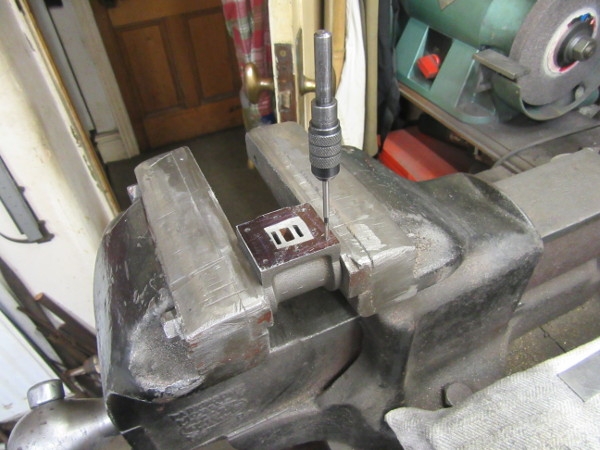
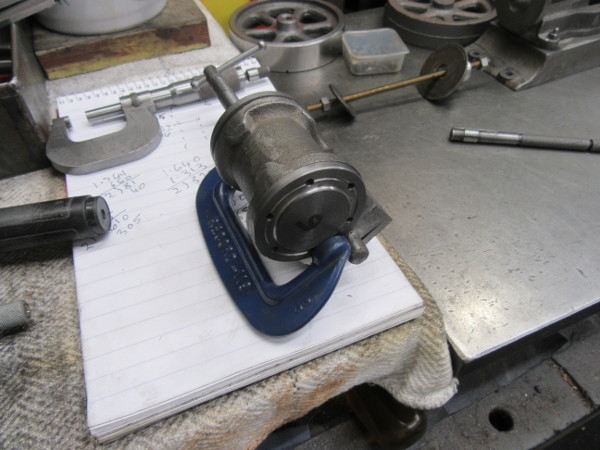
A new centre marked in each end....

Image

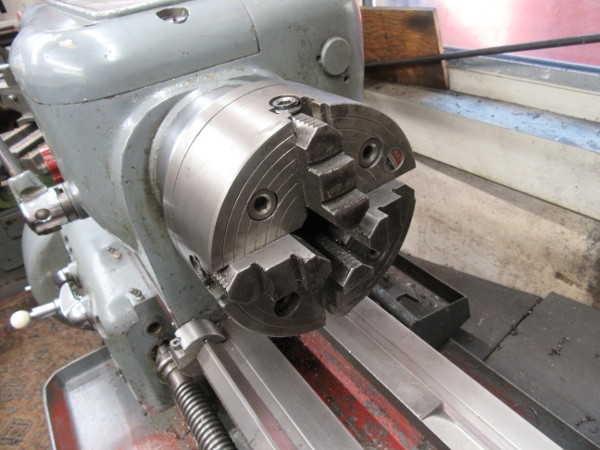
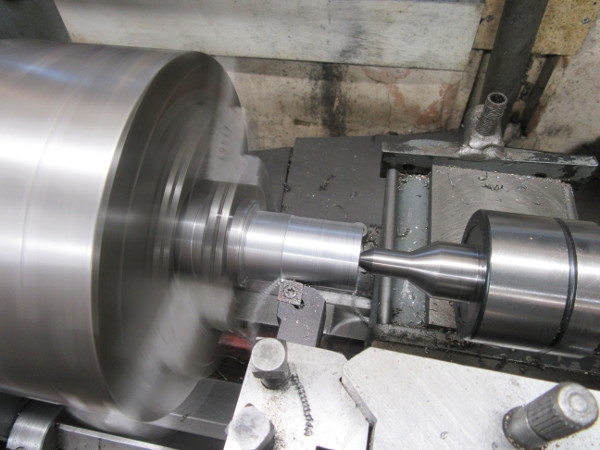
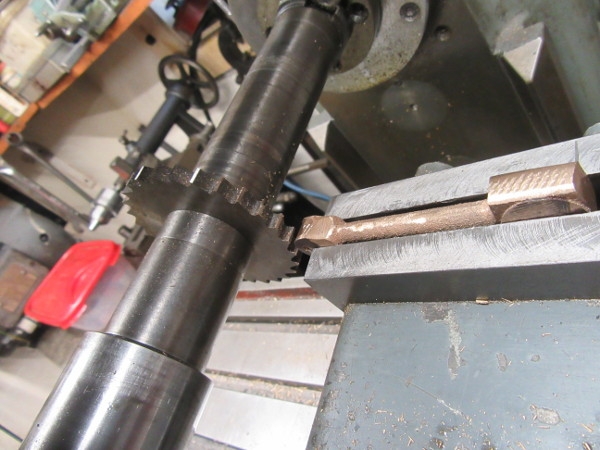
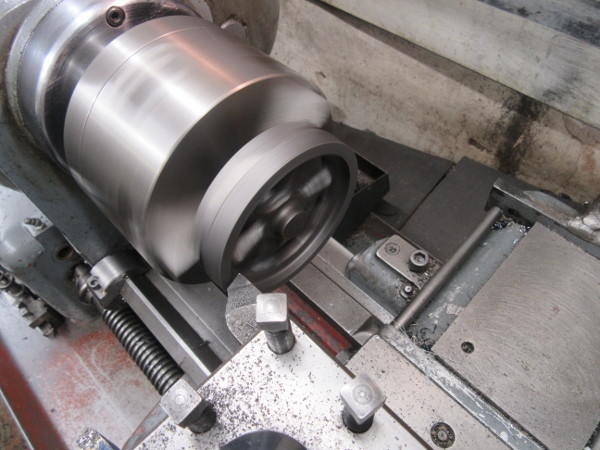
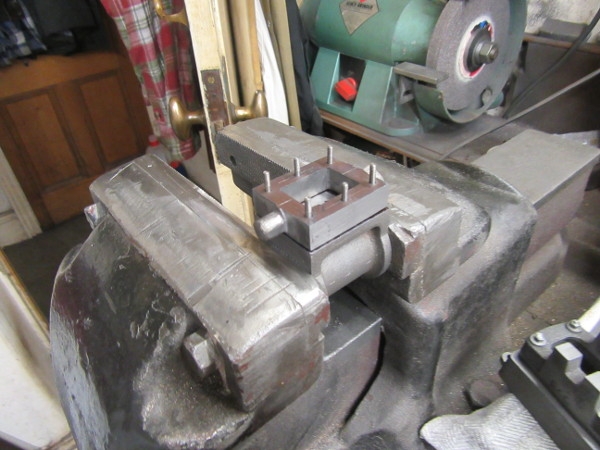
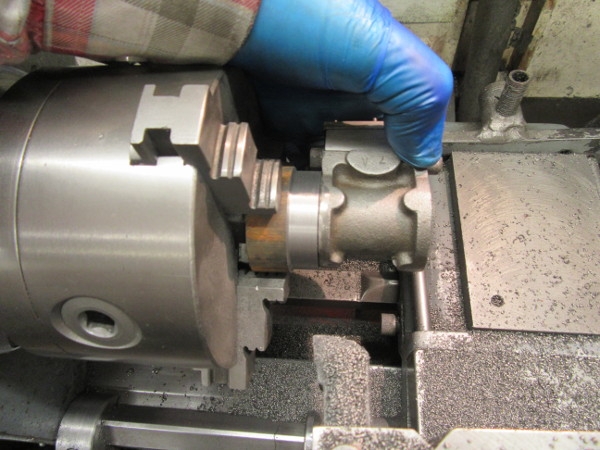
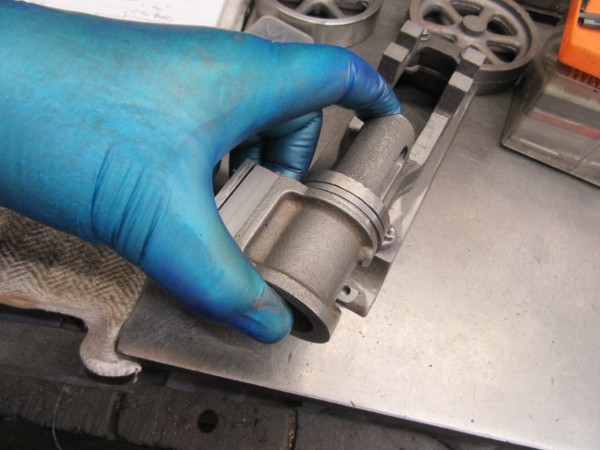
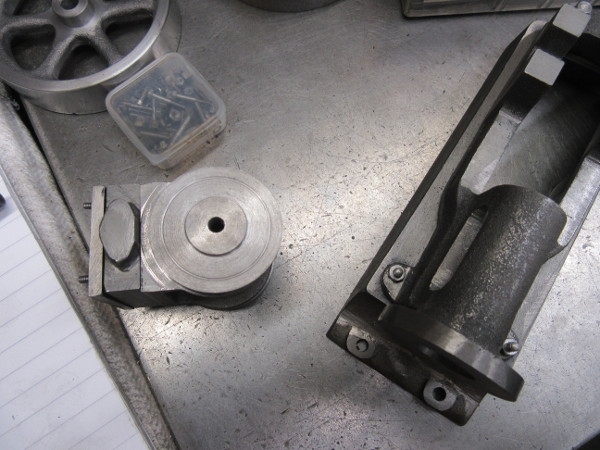
The three jaw SC off and the 4 jaw independent on. We're ready to set up for crankpin turning tomorrow....
Stanley Challenger Graham
Stanley's View
scg1936 at talktalk.net

"Beware of certitude" (Jimmy Reid)
The floggings will continue until morale improves!
User avatar
Stanley
Global Moderator
Global Moderator
Posts: 90301
Joined: 23 Jan 2012, 12:01
Location: Barnoldswick. Nearer to Heaven than Gloria.

Re: Shed Matters 3

Post by Stanley »

Image

First job was to put the normal cutter back in the VM and have a chip chase. Things go so much better when the shed is clean!.

Image

Here's my stock ready for mounting in the lathe. As you can see, Much of the metal I would have had to cut out in eccentric turning has gone. Newton's method speeds things up.

Image

A bit of fiddly work and we are set up ready to start cutting. I am playing safe and doing most of the cutting with the parting tool.

Image

Half an hour's careful cutting and I have got to the point where I am cutting a complete circle. Now I have to take it down to almost the finished size and then clean the cheeks out so that I have 3/8" all the way down. Conservative cutting means that the slot naturally slopes in. It will soon be cleaned out tomorrow using a less flexible cutter.
Stanley Challenger Graham
Stanley's View
scg1936 at talktalk.net

"Beware of certitude" (Jimmy Reid)
The floggings will continue until morale improves!
User avatar
Stanley
Global Moderator
Global Moderator
Posts: 90301
Joined: 23 Jan 2012, 12:01
Location: Barnoldswick. Nearer to Heaven than Gloria.

Re: Shed Matters 3

Post by Stanley »

Image

I started this morning by cleaning out the cheeks of the crankshaft and taking the pin down to finished size. Very careful cutting but patience is rewarded.

Image

We have a crank pin and the cheeks are 3/8" all the way down. Good progress...

Image

I wanted the cut for the shaft to be as accurate as possible so I didn't go for the 3 jaw, I dialled the piece in in the 4 Jaw.

Image

Here we are at knocking off time. I'm cutting with the HSS tool rather than the indexed carbide because this puts less load on the drive which now is a 5/16" crank pin. So light cuts and patience!
Stanley Challenger Graham
Stanley's View
scg1936 at talktalk.net

"Beware of certitude" (Jimmy Reid)
The floggings will continue until morale improves!
User avatar
Stanley
Global Moderator
Global Moderator
Posts: 90301
Joined: 23 Jan 2012, 12:01
Location: Barnoldswick. Nearer to Heaven than Gloria.

Re: Shed Matters 3

Post by Stanley »

Image

First thing I did this morning was change from the 4 jaw independent to the 3 jaw self centring so that I could grab the crankshaft by the meat of it and not have to rely on the drive through the offset crank pin. I feel a lot safer this way.

Image

When I got close to size I switched to HSS tooling and took very light cuts, that way I get a better finish.

Image

Here's where I was at closing time, one side of the shaft is finished and I have started the muck shifting that will give me the other side. I am slow because I am being ultra careful. I know my limitations and I don't want any silly mistakes destroying three days work! I've changed tools because the other indexed tip I was using was running very hot.
Stanley Challenger Graham
Stanley's View
scg1936 at talktalk.net

"Beware of certitude" (Jimmy Reid)
The floggings will continue until morale improves!
User avatar
Stanley
Global Moderator
Global Moderator
Posts: 90301
Joined: 23 Jan 2012, 12:01
Location: Barnoldswick. Nearer to Heaven than Gloria.

Re: Shed Matters 3

Post by Stanley »

Image

Straight into muck shifting this morning, an hour and a half of quiet careful turning and finishing.

Image

Here we are, I've finished the shaft with a file and emery paper and we have a near perfect shaft. I've also cleaned all the stringy blue swarf off Mrs Harrison and it's in the recycling bin. I could have started on another part of the engine but thought I'd done enough!
Stanley Challenger Graham
Stanley's View
scg1936 at talktalk.net

"Beware of certitude" (Jimmy Reid)
The floggings will continue until morale improves!
User avatar
Stanley
Global Moderator
Global Moderator
Posts: 90301
Joined: 23 Jan 2012, 12:01
Location: Barnoldswick. Nearer to Heaven than Gloria.

Re: Shed Matters 3

Post by Stanley »

Image

I've decided to do some work on the connecting rod, partly because it's another high risk part and partly because it is such a rough casting. Very bad quality.

Image

The first move was to attack it with a big file and get some of the roughest bits of flash and gates off it. Always with the measurements in mind. I want the measurements of the big end to match the little end because I want to be able to hold it firmly while I cut the slot in the clevis.

Image

It took me almost half an hour to get to this stage, not finished but a bit less rough.

Image

The clevis has to be threaded 5BA on one leg and be 5BA clear on the other so before I cut the gap in the clevis I drilled through the casting with a no. 38 drill, tapping size for 5BA.

Image

High risk, I bent the rod when I was doing the last engine. I did better this time and got as much meat as possible out of the clevis. I couldn't get all of it because the vise fouls on the body of the support for the mandrel.

Image

I finished the gap in the clevis with a file and then gave the clevis a good polish with the wire wheel..

Image

Knocking off time and progress. These two are a bit closer to getting better acquainted. I shall make the crank end now and fit it to the shaft. A good morning, no cock-ups! :biggrin2:
Stanley Challenger Graham
Stanley's View
scg1936 at talktalk.net

"Beware of certitude" (Jimmy Reid)
The floggings will continue until morale improves!
User avatar
Stanley
Global Moderator
Global Moderator
Posts: 90301
Joined: 23 Jan 2012, 12:01
Location: Barnoldswick. Nearer to Heaven than Gloria.

Re: Shed Matters 3

Post by Stanley »

Image

I was delayed and only got just over an hour in the shed but went straight to the connecting rod. I drilled one side of the clevis 5BA clear, 3.3mm and threaded the other leg for the 5BA crosshead pin I have yet to make.

Image

I want to adjust the thickness of the big end and so I popped the cutter into the T&C grinder and touched it up.

Image

A bit of careful milling.

Image

And here's the result, the big end of the con rod fits the crankshaft nicely.

Image

Next move was to file flats on the shoulders of the big end so that I can fit the 5BA bolts that will hold the two halves together.

Image

Then under the pillar drill and drill for the bolts. ( I need to get these fitted before I split the bearing.)

Image

Here we are at knocking off time. The bolts are fitted, the bearing has witness marks so that we fit it the right way round and I have marked for the cut and the centre of the bore for the crank pin. All has gone well. Nice! :biggrin2:
Stanley Challenger Graham
Stanley's View
scg1936 at talktalk.net

"Beware of certitude" (Jimmy Reid)
The floggings will continue until morale improves!
User avatar
Stanley
Global Moderator
Global Moderator
Posts: 90301
Joined: 23 Jan 2012, 12:01
Location: Barnoldswick. Nearer to Heaven than Gloria.

Re: Shed Matters 3

Post by Stanley »

Image

I started the day by splitting the con rod bearing.

Image

Once I had split it I bolted it back together and bored it to fit the crank pin. Here it is and it's a good fit, I can move on to the castings.

Image

Image

Image

I did the levelling of the castings in the VM which meant some dodgy work holding. On the whole it went well and I milled the face of the target end as well, perpendicular to the beds. You might notice that the base casting isn't completely milled. This is because I made the beginners error of trying to hold flimsy castings too tightly. I was doing the second side of the casting when it cracked. It's not serious, only a cosmetic crack which will not interfere with fitting and will vanish with a coat of paint. I shall finish the preparation of the castings the old fashioned way, with big files!
Stanley Challenger Graham
Stanley's View
scg1936 at talktalk.net

"Beware of certitude" (Jimmy Reid)
The floggings will continue until morale improves!
User avatar
Stanley
Global Moderator
Global Moderator
Posts: 90301
Joined: 23 Jan 2012, 12:01
Location: Barnoldswick. Nearer to Heaven than Gloria.

Re: Shed Matters 3

Post by Stanley »

Image

I started the day by splitting the con rod bearing.

Image

Once I had split it I bolted it back together and bored it to fit the crank pin. Here it is and it's a good fit, I can move on to the castings.

Image

Image

Image

Image

I did the levelling of the castings in the VM which meant some dodgy work holding. On the whole it went well and I milled the face of the target end as well, perpendicular to the beds. You might notice that the base casting isn't completely milled. This is because I made the beginners error of trying to hold flimsy castings too tightly. I was doing the second side of the casting when it cracked. It's not serious, only a cosmetic crack which will not interfere with fitting and will vanish with a coat of paint. I shall finish the preparation of the castings the old fashioned way, with big files!
Stanley Challenger Graham
Stanley's View
scg1936 at talktalk.net

"Beware of certitude" (Jimmy Reid)
The floggings will continue until morale improves!
User avatar
Stanley
Global Moderator
Global Moderator
Posts: 90301
Joined: 23 Jan 2012, 12:01
Location: Barnoldswick. Nearer to Heaven than Gloria.

Re: Shed Matters 3

Post by Stanley »

Image

Image

These two pictures tell the whole story. If you are cleaning castings up it's a matter of patient use of the file. My tip is use the biggest you can get to the job. The pictures show the start with two files and the shut down with more than two! I haven't finished with these two yet so I've left them out. I shall be filing cast iron tomorrow as well.....
Stanley Challenger Graham
Stanley's View
scg1936 at talktalk.net

"Beware of certitude" (Jimmy Reid)
The floggings will continue until morale improves!
User avatar
Stanley
Global Moderator
Global Moderator
Posts: 90301
Joined: 23 Jan 2012, 12:01
Location: Barnoldswick. Nearer to Heaven than Gloria.

Re: Shed Matters 3

Post by Stanley »

I started the day with my files but then got to the stage where I could move on. The obvious thing to do was to get set up to bore the trunk slide. It probably took me 20 minutes just to get set up.

Image

Not easy to adjust and square but I did my best.

Image

No dramas, I bored the trunk slide slowly and carefully.

Image

I must have done something right. Spot on and a nice finish in the bore.

Image

Then a clean up and reinstate the vise on the vertical mill, it needed tramming in of course. Tomorrow I shall finish drilling most of the holes in the two castings, base and bed. A nice productive two hours.
Stanley Challenger Graham
Stanley's View
scg1936 at talktalk.net

"Beware of certitude" (Jimmy Reid)
The floggings will continue until morale improves!
BobH
Regular User
Posts: 133
Joined: 15 Nov 2019, 18:09
Location: Rochdale

Re: Shed Matters 3

Post by BobH »

It is when I get to hand tools that I really miss not doing a proper apprenticeship. I did work with a number of ‘old farts’ who were only too pleased to show me how things were done if I asked. It would cost me a beer or a stores chit for 2 new files, one for my tool box and one for the ad hoc tutor.
User avatar
Stanley
Global Moderator
Global Moderator
Posts: 90301
Joined: 23 Jan 2012, 12:01
Location: Barnoldswick. Nearer to Heaven than Gloria.

Re: Shed Matters 3

Post by Stanley »

I'm not good with files, just better than most because Newton took the trouble to give me little tips.
One of my favourite engineering quotations concerns files. One of Maudslay's workmen said of him after he died; "It was a pleasure to watch Mr Maudslay with a hand tool of any description but he was particularly fine with an 18" flat file."
Stanley Challenger Graham
Stanley's View
scg1936 at talktalk.net

"Beware of certitude" (Jimmy Reid)
The floggings will continue until morale improves!
User avatar
Stanley
Global Moderator
Global Moderator
Posts: 90301
Joined: 23 Jan 2012, 12:01
Location: Barnoldswick. Nearer to Heaven than Gloria.

Re: Shed Matters 3

Post by Stanley »

Image

When I went in the shed this morning I was confronted with this, a base for the engine cut out and the O Gee moulding applied. It wasn't the fairies, I did it yesterday afternoon because I felt like it and it was dry.

Image

I sanded it and gave it a coat of raw linseed oil. It's sat on the kitchen table now ready for when it's needed.

Image

This was the main object this morning. Drilling and tapping all the connections between the Bed and the base and the drilling of the holes in the base for holding it down. This took me 90 minutes because I made a bad job of marking the holes and had to do a lot of fitting. Never mind, it's done....

Image

Image

I had done my two hours but did one final thing, I spent 15 minutes filing the spokes of the flywheel. Then I changed chucks and mounted the flywheel in the lathe and set up for some flywheel turning tomorrow. (Or this afternoon if I have another funny turn! :biggrin2: )
Stanley Challenger Graham
Stanley's View
scg1936 at talktalk.net

"Beware of certitude" (Jimmy Reid)
The floggings will continue until morale improves!
User avatar
Stanley
Global Moderator
Global Moderator
Posts: 90301
Joined: 23 Jan 2012, 12:01
Location: Barnoldswick. Nearer to Heaven than Gloria.

Re: Shed Matters 3

Post by Stanley »

Image

Straight into the flywheel using the Wimet cutter.

Image

Image

No problems in the actual turning but when I finished it I realised the flywheel is full of blowholes and inclusions. Stuarts will be getting the message and a request for another casting. I tried the crankshaft and it's a lovely interference fit.

Image

Image

Image

I Went on to the cylinder and immediately ran into a problem, it was chilled and I had to get to a finish by grinding. I knocked the edge off my cutter of course and had to re-sharpen it.

Image

I moved in to the steam chest lid and knocked the edge off the cutter again. I found the one carbide cutter I have and managed to cut it with that.

Image

Knocking off time. I've had to cheat with abrasives but I have got useable parts, the cylinder and the steam chest lid. I sharpened the cutter I had blunted and came out of the shed after a stressful two and a half hours.
Stanley Challenger Graham
Stanley's View
scg1936 at talktalk.net

"Beware of certitude" (Jimmy Reid)
The floggings will continue until morale improves!
User avatar
Stanley
Global Moderator
Global Moderator
Posts: 90301
Joined: 23 Jan 2012, 12:01
Location: Barnoldswick. Nearer to Heaven than Gloria.

Re: Shed Matters 3

Post by Stanley »

Image

Image

I started by doing the best I could with this chilled casting using my only carbide cutter. Then I used a file to get it all to the right shape. I couldn't get the correct dimensions because the casting had no spare meat on it. I did the best I could and it will do.

Image

Image

Next for shaving was the cylinder, it needs boring to 1". Nowt to it, sharpen a 1" drill and bore it, this will get under the skin and should be OK. It'll be slightly over size but that's OK I can just make the piston slightly larger. Problem was that the internal surface was chilled and knocked the edge off the drill immediately. I had to re-think.

Image

Image

I have carbide tipped tools for my boring head, I should have done this in the first place. I should have said that I got so mad with this bore that I went into overtime and ended up doing 3 hours in the shed. I carefully bored it out and whilst it was a bit rough in the first place as I got into the metal it improved.

Image

Knocking off time, I have a good bore slightly oversize but that is no problem. I shall clean up tomorrow!
That was a frustrating 3 hours at times but the end result is good so that's a good spell in the shed!
Stanley Challenger Graham
Stanley's View
scg1936 at talktalk.net

"Beware of certitude" (Jimmy Reid)
The floggings will continue until morale improves!
User avatar
Stanley
Global Moderator
Global Moderator
Posts: 90301
Joined: 23 Jan 2012, 12:01
Location: Barnoldswick. Nearer to Heaven than Gloria.

Re: Shed Matters 3

Post by Stanley »

Image

There will be, in any workshop, useful tools which spend most of their time idle in the cupboard. Today we are indebted to such a tool. The Le Count style expanding mandrel which allows you to mount something with an accurate bore safely so that other work can be done on it. I have two, this is the small one. In this case I want to face the ends of the cylinder to reduce the overall length but also to make absolutely sure the bore, valve face and end surfaces are at exactly 90 degrees to each other.

Image

But first I returned the mill to normal configuration by taking the boring head off and replacing it with the collet chuck. I had a good clean up as well.

Image

Image

I put a carbide tipped tool in the lathe and cut the face. It was as hard as the hobs of hell but I managed to get a clean cut by ignoring the way the tool was abused. The second pic shows the result of the first cut, butchered but accurate I think.

Image

I did the second one and it was even worse. I ended up with putting a new tip in because I had destroyed the one I was using. Than I took the worst of the tool marks out on the side of the grinding wheel. This pic shows the cylinder after this has been done. If you look carefully you'll see that the end of the bore is irregular. This is where the metal shatters under the cutter because its as hard as glass.

Image

Stuarts are sending a replacement flywheel casting but I put this one in the lathe, cleaned it up and polished it. If the new casting is better I can replace it.

Image

Closing time. All these castings have faults but if I can drill and tap the cylinder I can manage. If not I shall have to ask Stuarts for another. (I've emailed Stuarts and sent them a pic of the shattered edge of the bore. Let's see what they do.)
Stanley Challenger Graham
Stanley's View
scg1936 at talktalk.net

"Beware of certitude" (Jimmy Reid)
The floggings will continue until morale improves!
User avatar
Whyperion
Senior Member
Posts: 3073
Joined: 23 Jan 2012, 22:13
Location: Stockport, after some time in Burnley , After leaving Barnoldswick , except when I am in London

Re: Shed Matters 3

Post by Whyperion »

Modern metal shaping, amongst other things, is computer controlled. On one of the Car S.O.S videos/ TV Broadcasts a Gearbox for (I think an Austin Rover Metro - the rally car version) first a new gearbox external was scanned by a laser, the dimensions held in a 3D CAD file, and then the broken/ worn external aperture built up with metal spraying (aluminium) , then milled back to depth and diameter by the controlled mill machine.
User avatar
Stanley
Global Moderator
Global Moderator
Posts: 90301
Joined: 23 Jan 2012, 12:01
Location: Barnoldswick. Nearer to Heaven than Gloria.

Re: Shed Matters 3

Post by Stanley »

Stuarts didn't leap forward with a new cylinder casting, they have asked me to let them know how I get on with the drilling and tapping. Deep Joy.
Stanley Challenger Graham
Stanley's View
scg1936 at talktalk.net

"Beware of certitude" (Jimmy Reid)
The floggings will continue until morale improves!
User avatar
Stanley
Global Moderator
Global Moderator
Posts: 90301
Joined: 23 Jan 2012, 12:01
Location: Barnoldswick. Nearer to Heaven than Gloria.

Re: Shed Matters 3

Post by Stanley »

Image

Unusually today's shed matters starts in the kitchen. The drawing supplied with these castings is faded and not very clear. Obvious that a fag packet interpretation is needed but yesterday afternoon I did it on the kitchen table and made it a bit more detailed.

Image

Image

Image

Image

I think the pictures tell the story. I decided to start with mounting the steam chest and lid as this face of the cylinder casting is very hard. I started by putting the clearance holes in the steam chest and using that as the template for drilling the cylinder and the lid. Very careful and thoughtful work, particularly the tapping.

Image


It went well, here I am after two hours, the steam chest and the lid are a good fit on the cylinder. Now I have to make the lids so I can use them as templates to drill the cylinder faces and the target end on the bed. Here's hoping tomorrow goes as well.
Stanley Challenger Graham
Stanley's View
scg1936 at talktalk.net

"Beware of certitude" (Jimmy Reid)
The floggings will continue until morale improves!
BobH
Regular User
Posts: 133
Joined: 15 Nov 2019, 18:09
Location: Rochdale

Re: Shed Matters 3

Post by BobH »

What are the screw sizes Stanley? The 10 series of engines seem to be all odd number BA sizes. I always thought that it was because the design had been scaled down from another engine so 5 and 7 BA were the nearest scaled from the original. On the 10 series there is no doubt that those sizes ‘look’ right. Are these even numbered BA?
User avatar
Stanley
Global Moderator
Global Moderator
Posts: 90301
Joined: 23 Jan 2012, 12:01
Location: Barnoldswick. Nearer to Heaven than Gloria.

Re: Shed Matters 3

Post by Stanley »

No Bob, the cylinder has 4, 5 and 7BA not counting the tiny screws for the insulting wrap. I shall not be using that because the 4 screws would definitely be in a pot hard area.
Stanley Challenger Graham
Stanley's View
scg1936 at talktalk.net

"Beware of certitude" (Jimmy Reid)
The floggings will continue until morale improves!
User avatar
Stanley
Global Moderator
Global Moderator
Posts: 90301
Joined: 23 Jan 2012, 12:01
Location: Barnoldswick. Nearer to Heaven than Gloria.

Re: Shed Matters 3

Post by Stanley »

Image

I need to make the lids so I can use them as templates for drilling the cylinder for the studs. So the first thing was to do my measuring and get a lump of Cast Iron stock mounted in the chuck.

Image

I've got the stock to the right diameter and hit on a size for the bore, the latter being a bit dodgy because it's pot hard and didn't finish well. I've done the best I can and here's the best way to check, it's OK!
That was it because this morning is early doors Co-op shop. :biggrin2:
Stanley Challenger Graham
Stanley's View
scg1936 at talktalk.net

"Beware of certitude" (Jimmy Reid)
The floggings will continue until morale improves!
User avatar
Stanley
Global Moderator
Global Moderator
Posts: 90301
Joined: 23 Jan 2012, 12:01
Location: Barnoldswick. Nearer to Heaven than Gloria.

Re: Shed Matters 3

Post by Stanley »

Image

Image

Image

Image

I was in the shed early this morning because I want to get my second sleep in before I go the Skipton with Susan.
I think the images tell the story, I have made the two lids, marked them for PCD for the stud holes and they are then the templates for the stud holes on each end of the cylinder and the clearance holes in the target end of the bed. The eagle eyed amongst you will have noticed that I haven't provided a gland on the front lid. This is because this engine is going to be a toy for a young lad and although it will be a runner it doesn't need to be perfect.
So first job tomorrow will be on Johnny's 1927 lathe in the front room which will be used to do the dividing for the holes.
Stanley Challenger Graham
Stanley's View
scg1936 at talktalk.net

"Beware of certitude" (Jimmy Reid)
The floggings will continue until morale improves!
User avatar
Stanley
Global Moderator
Global Moderator
Posts: 90301
Joined: 23 Jan 2012, 12:01
Location: Barnoldswick. Nearer to Heaven than Gloria.

Re: Shed Matters 3

Post by Stanley »

Image

Today started on Johnny's 1927 lathe, dividing and marking the two lids, one 4 holes the other 6 holes. Such a good tool....

Image

Ready for drilling. Straightforward job under the pillar drill.

Image

But first I have to mark the components so that I can drill the holes in the cylinder in the right place, it would not do the end up drilling into a steam port!

Image

This doesn't bode well for drilling the holes in the cylinder. I couldn't mark the cylinder with a saw or file and had to get the Dremel out to mark the casting. The skin is as hard as hell.

Image

The lids clamped to the cylinder in the correct orientation so I could mark for drilling through the holes in the lids.

Image

I'm ready to attempt the drilling and tapping. I've done an hour and a half and I shall leave this adventure for tomorrow. I want to come to it fresh! So far so good.
Stanley Challenger Graham
Stanley's View
scg1936 at talktalk.net

"Beware of certitude" (Jimmy Reid)
The floggings will continue until morale improves!
Post Reply

Return to “Crafts”