Shed Matters 3
Re: Shed Matters 3
Nice one again Stanley. I see that with the cylinder you are following our old work saying: “when all else fails, mend it with a new one”.
-
Stanley

- Global Moderator

- Posts: 90319
- Joined: 23 Jan 2012, 12:01
- Location: Barnoldswick. Nearer to Heaven than Gloria.
Re: Shed Matters 3
Thanks Bob. The next cylinder will be fine!
Stanley Challenger Graham
Stanley's View
scg1936 at talktalk.net
"Beware of certitude" (Jimmy Reid)
The floggings will continue until morale improves!
Stanley's View
scg1936 at talktalk.net
"Beware of certitude" (Jimmy Reid)
The floggings will continue until morale improves!
-
Stanley
- Global Moderator
- Posts: 90319
- Joined: 23 Jan 2012, 12:01
- Location: Barnoldswick. Nearer to Heaven than Gloria.
Re: Shed Matters 3
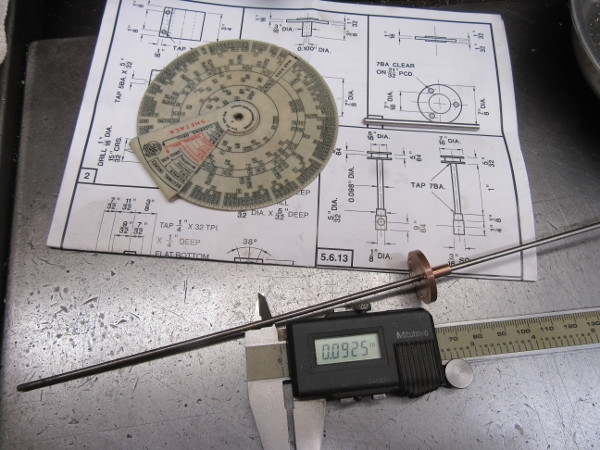
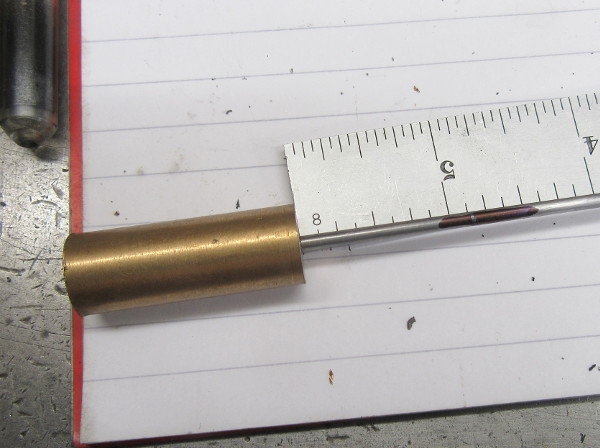
It's been a funny old morning.... I decided to have a look at the piston rod.... I immediately realised that they were calling for an oddball size and the material supplied, stainless steel, was too thick and we all know what happens when you try to turn 1/8" stainless down to 28 thou thinner. A recipe for disaster even if I got out my little small size turning accessory. Instead I went looking in the treasure chests. I found some silver steel rod that theoretically is too small but we are only talking small amounts here and it's a perfect size in the 3/8" extension of the lower lid that serves as a gland. I decided to do some experimenting. Anything to avoid turning stainless steel rod down 30 thou!
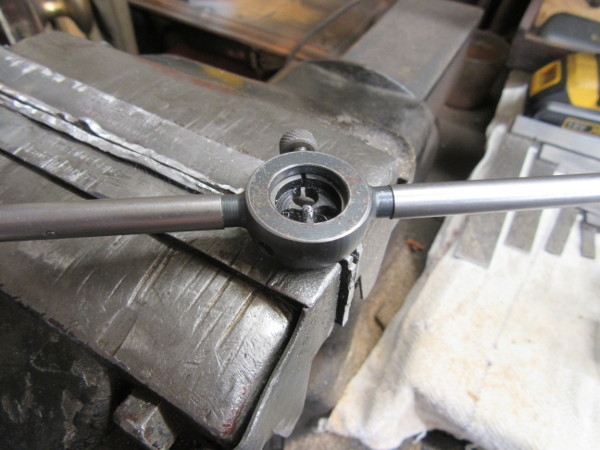
First thing was to see if I could get a good 7BA thread on the undersized rod. Remember it will grow a bit in the die as the cutting displaces metal. I got what looked like a good thread on the rod.
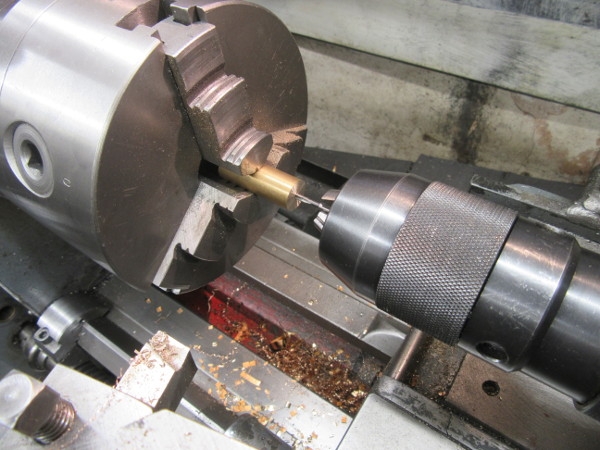
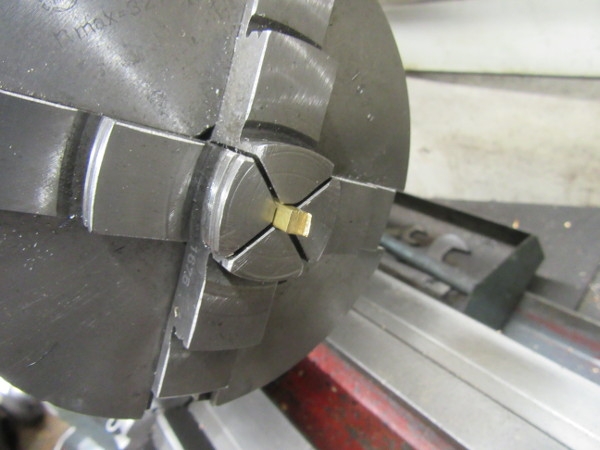
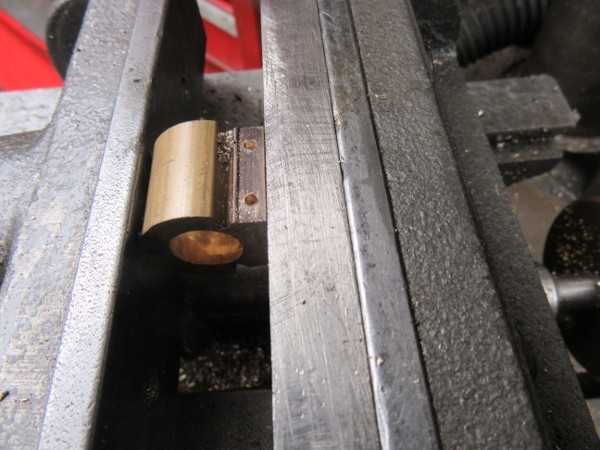
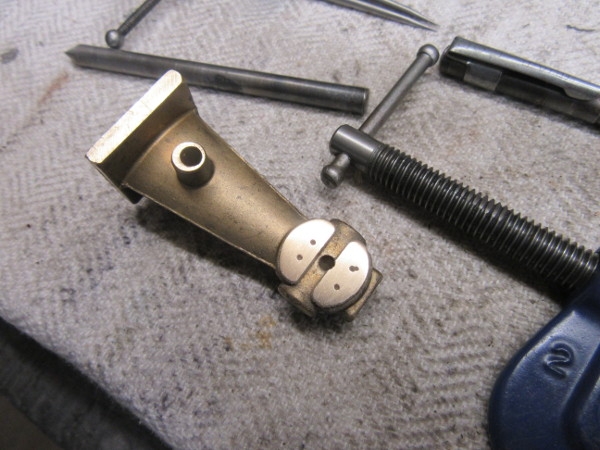
The best way to Test whether the thread was good was to drill and tap the piston blank and see if the rod fits. That led to another glitch as the piece of stock supplied was oversize and I had to check to make sure I had the right size in my head, 7/16". It was correct so I went into the brass ends box and found a piece of brass closer to size. I drilled and tapped it.
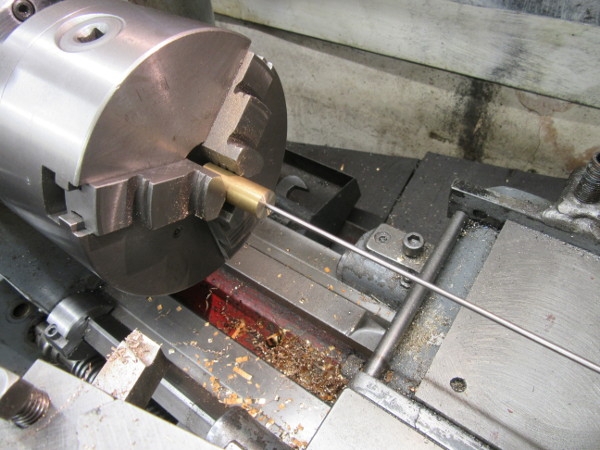
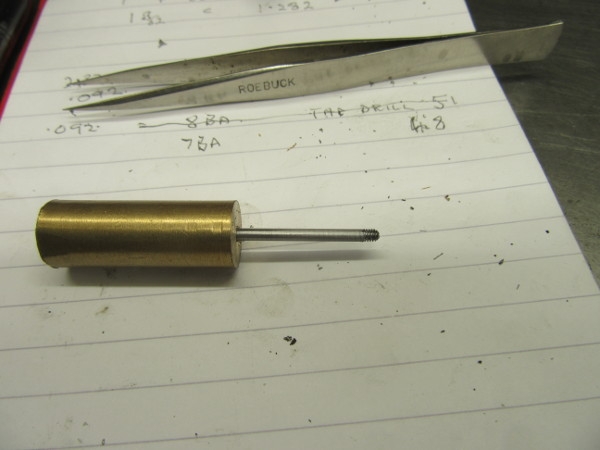
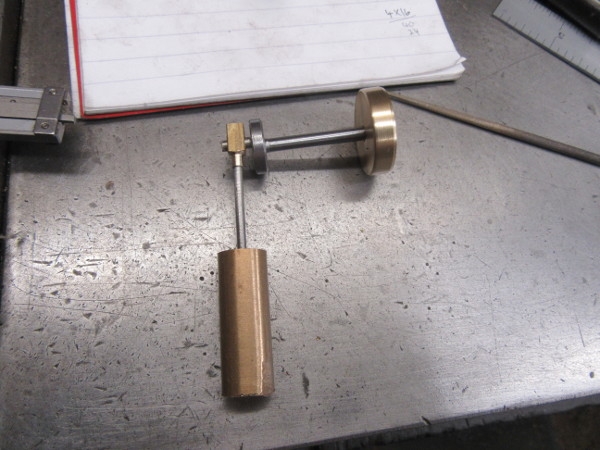
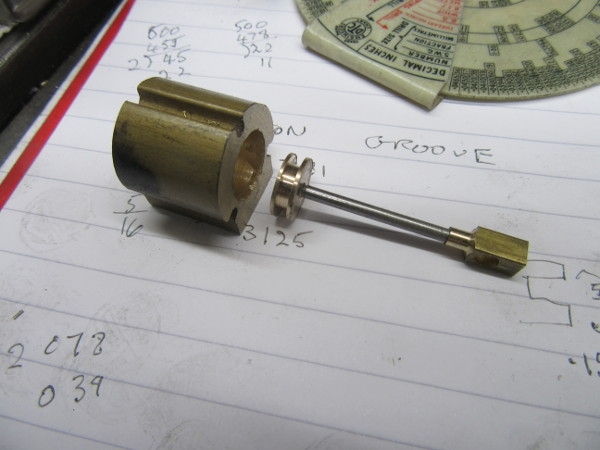
Here's the result, a perfect fit. Lovely!
So here we are after an hour and a half. We got there but not quite via the route Stuarts tried to send me. I shall finish making the piston when I have the cylinder bored and can make it an exact fit. My next job will be to cut the rod to size, thread the other end and make the crank piece that fits on the pin.
Everything took too long but we got there in the end. Thank God for good treasure chests and magnifying glasses!
Stanley Challenger Graham
Stanley's View
scg1936 at talktalk.net
"Beware of certitude" (Jimmy Reid)
The floggings will continue until morale improves!
Stanley's View
scg1936 at talktalk.net
"Beware of certitude" (Jimmy Reid)
The floggings will continue until morale improves!
-
Stanley
- Global Moderator
- Posts: 90319
- Joined: 23 Jan 2012, 12:01
- Location: Barnoldswick. Nearer to Heaven than Gloria.
Re: Shed Matters 3
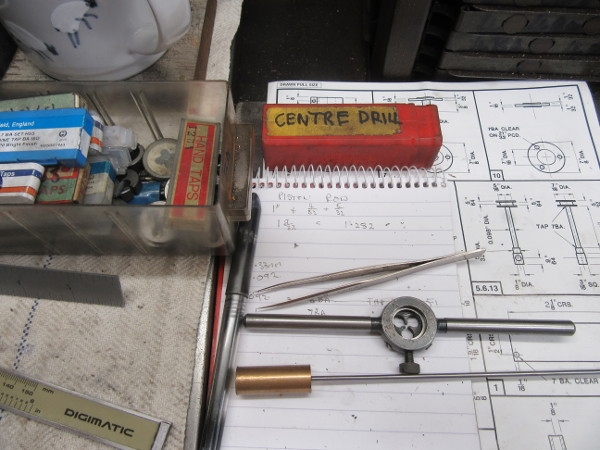
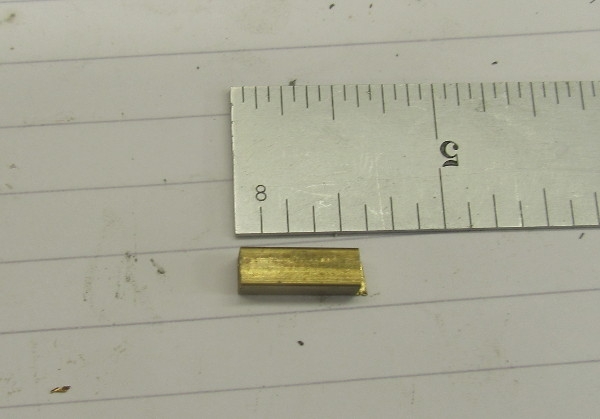
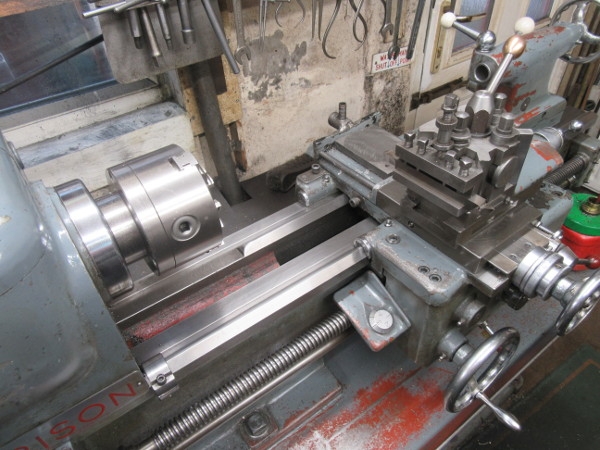
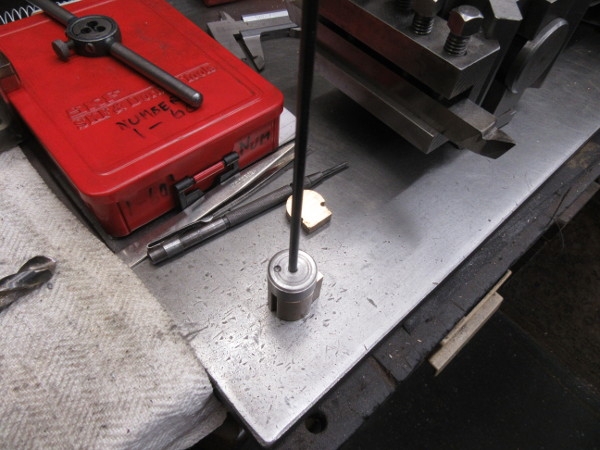
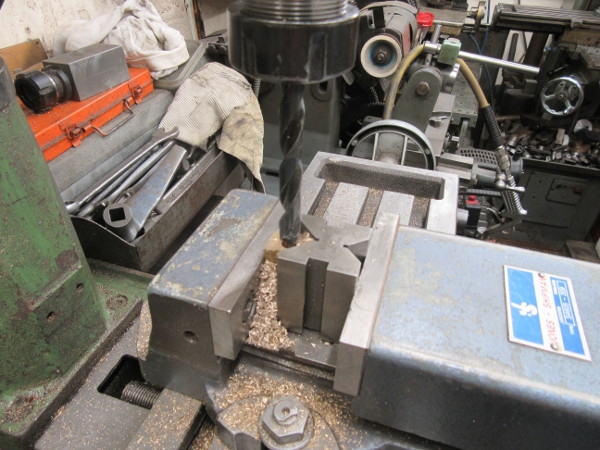
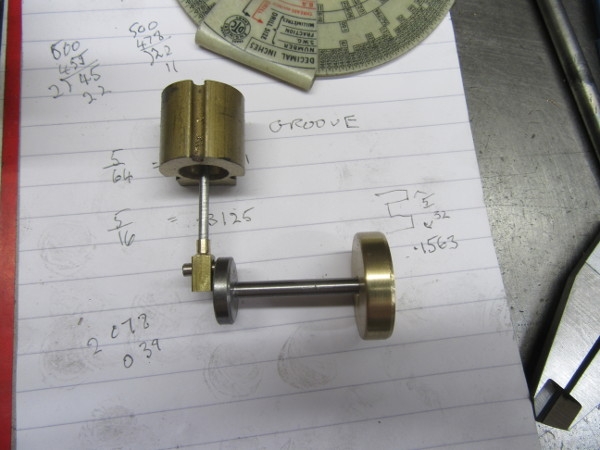
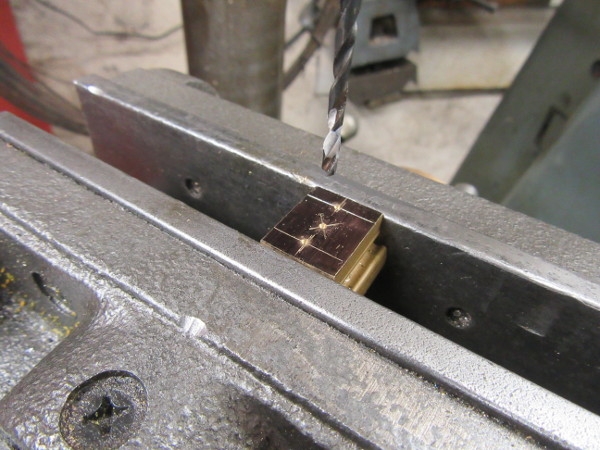
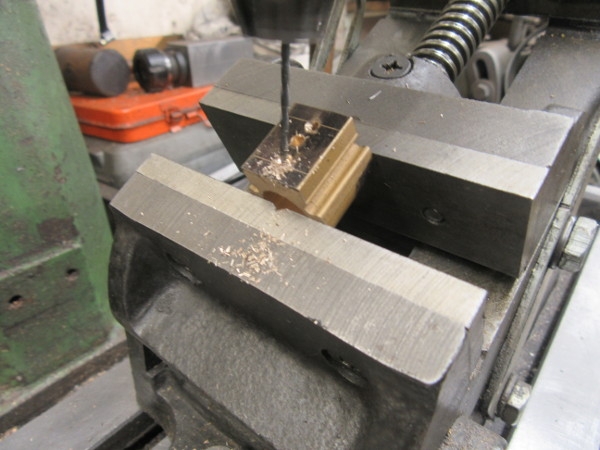
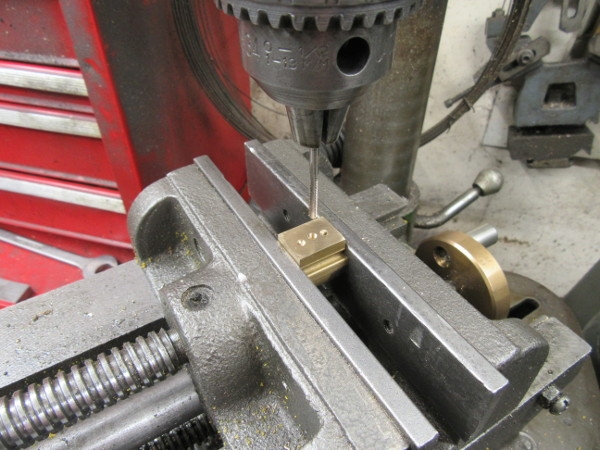
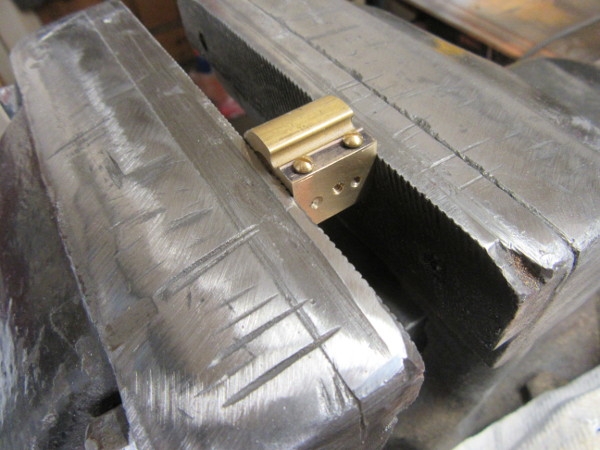
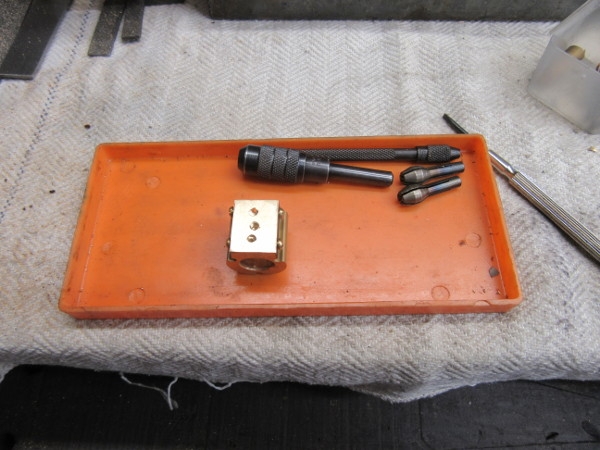
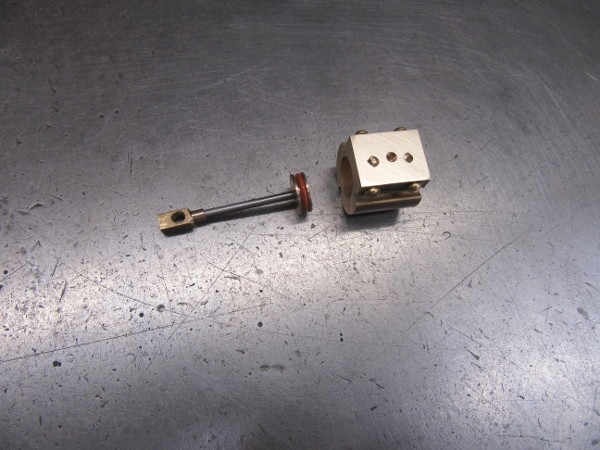
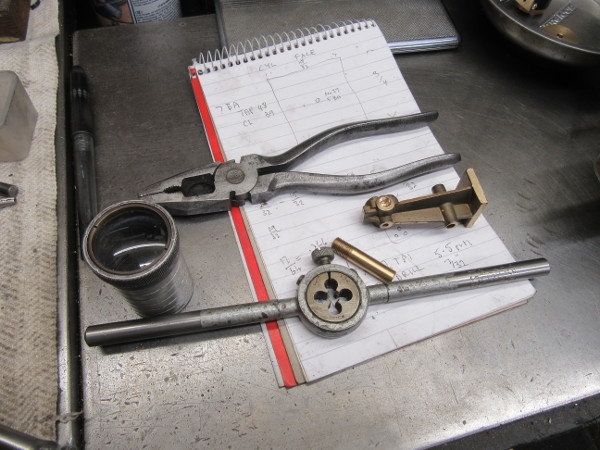
First move this morning was to measure the rod, cut it to length and thread the end of it 7BA. Then swap the 3 jaw out for the 4 jaw as we are moving onto square material to make the bearing for the crank on the end of the rod.
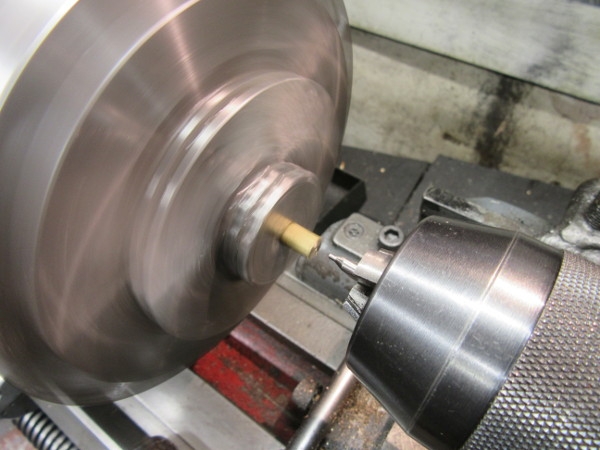
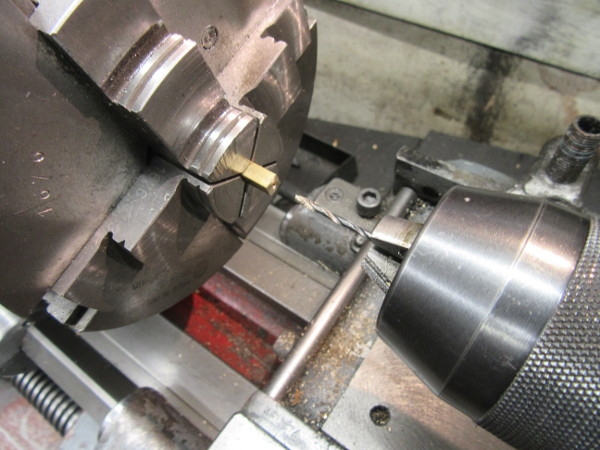
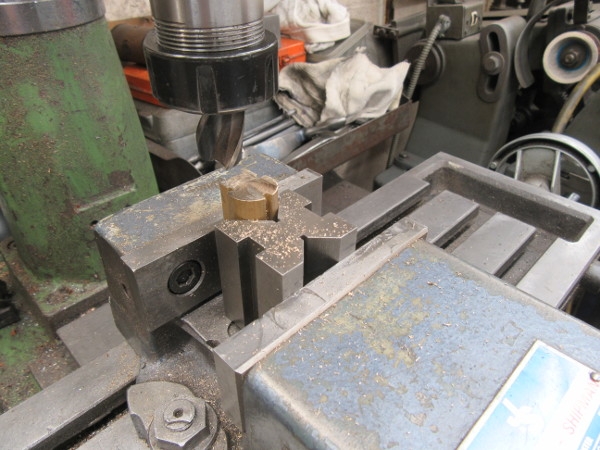
I think the images tell you the story, very small and so delicate work.
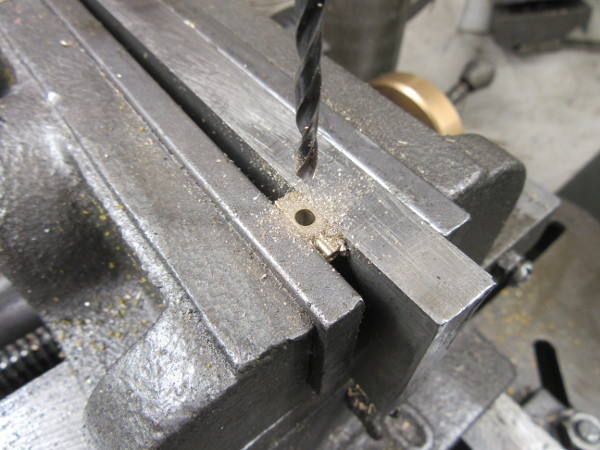
This enormous drill is 1/8"....
Closing time. I am ready to finish making the piston as soon as I have the cylinder bored. It might come today.....
Stanley Challenger Graham
Stanley's View
scg1936 at talktalk.net
"Beware of certitude" (Jimmy Reid)
The floggings will continue until morale improves!
Stanley's View
scg1936 at talktalk.net
"Beware of certitude" (Jimmy Reid)
The floggings will continue until morale improves!
-
Stanley
- Global Moderator
- Posts: 90319
- Joined: 23 Jan 2012, 12:01
- Location: Barnoldswick. Nearer to Heaven than Gloria.
Re: Shed Matters 3
The cylinder blank didn't come so I had nothing wobbler oriented to do.
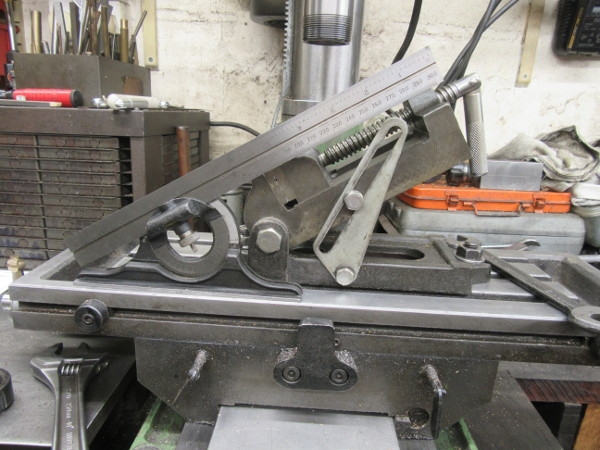
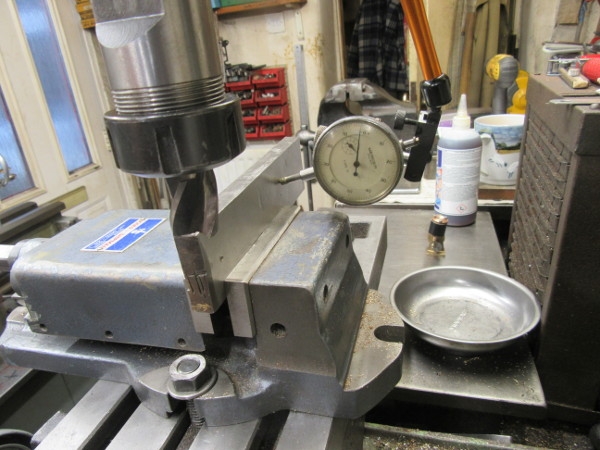
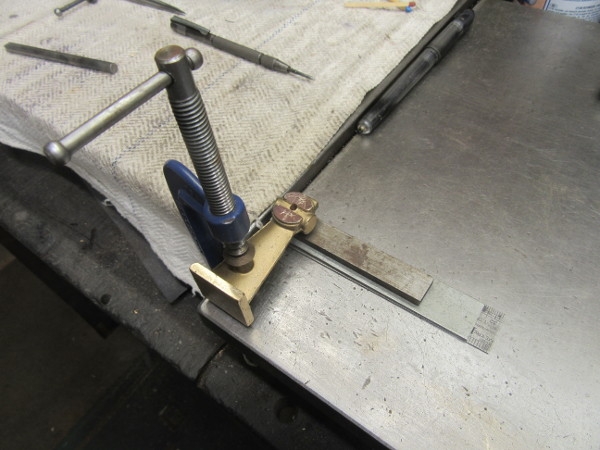
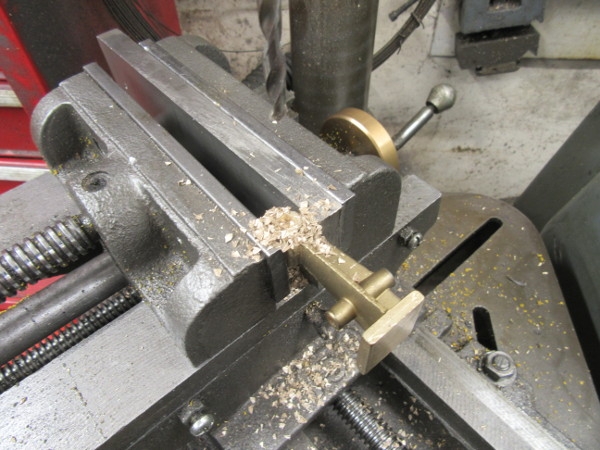
As you know I am a great fan of my compound vise which sits permanently on the table of my old pillar drill. It's an El Cheapo Chinese import and not the best quality but it does the job. One thing that has always bugged me is the slight variation in the jaw in that it doesn't move in a perfectly parallel way at 90 degrees to the lower plane. So this morning I decided to make it more accurate.
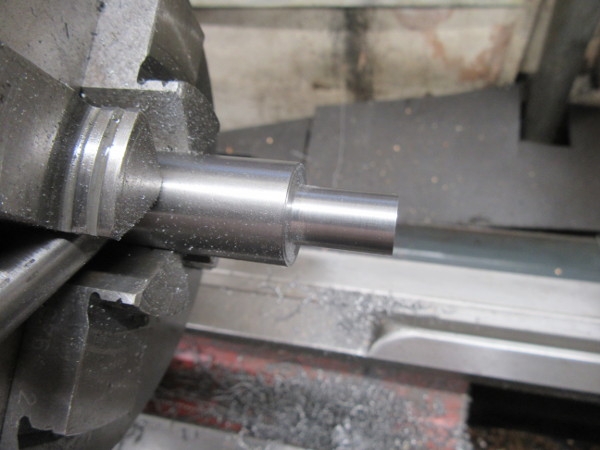
This is a bit of showing off actually. I wanted to use a particular indicator mounted in the drill chuck. The post of the mount is too big for the 1/2" chuck in the drill so I turned it down. This pic is to show off the tool finish I get regularly with my HSS cutter. I think I may have cracked sharpening cutters! God knows it has taken long enough.
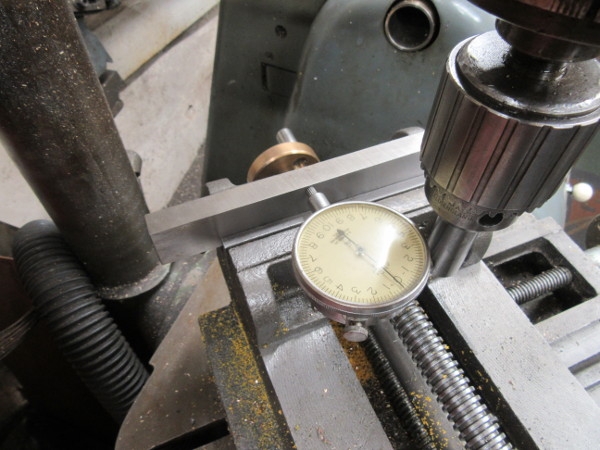
I put a piece of ground tool steel stock in the vise to give me a good surface to indicate off. I got the top slide to within 2thou over the six inch width. No point in trying to do any better because the ways in the vise aren't accurate. The vise is better than it was and that was the object of the exercise.
As you know I am a great fan of my compound vise which sits permanently on the table of my old pillar drill. It's an El Cheapo Chinese import and not the best quality but it does the job. One thing that has always bugged me is the slight variation in the jaw in that it doesn't move in a perfectly parallel way at 90 degrees to the lower plane. So this morning I decided to make it more accurate.
This is a bit of showing off actually. I wanted to use a particular indicator mounted in the drill chuck. The post of the mount is too big for the 1/2" chuck in the drill so I turned it down. This pic is to show off the tool finish I get regularly with my HSS cutter. I think I may have cracked sharpening cutters! God knows it has taken long enough.
I put a piece of ground tool steel stock in the vise to give me a good surface to indicate off. I got the top slide to within 2thou over the six inch width. No point in trying to do any better because the ways in the vise aren't accurate. The vise is better than it was and that was the object of the exercise.
Stanley Challenger Graham
Stanley's View
scg1936 at talktalk.net
"Beware of certitude" (Jimmy Reid)
The floggings will continue until morale improves!
Stanley's View
scg1936 at talktalk.net
"Beware of certitude" (Jimmy Reid)
The floggings will continue until morale improves!
Re: Shed Matters 3
What did you do to the compound vice to correct the runout Stanley? I have one that does just the same.
-
Stanley
- Global Moderator
- Posts: 90319
- Joined: 23 Jan 2012, 12:01
- Location: Barnoldswick. Nearer to Heaven than Gloria.
Re: Shed Matters 3
Just altered the way it is fastened to the drill table. I slackened all three nuts and just moved it about until it seemed to like it better and and the relationship between the two planes improved. I had adjusted the tightness of the gibs as well. All told, it's slightly more accurate now than it was. I suppose it's just a process of finding a way to get the inherent inaccuracies to sit better with each other.
The only other way would be a complete strip down, machine the ways and make new gibs. I am not up for that!
The only other way would be a complete strip down, machine the ways and make new gibs. I am not up for that!
Stanley Challenger Graham
Stanley's View
scg1936 at talktalk.net
"Beware of certitude" (Jimmy Reid)
The floggings will continue until morale improves!
Stanley's View
scg1936 at talktalk.net
"Beware of certitude" (Jimmy Reid)
The floggings will continue until morale improves!
-
Stanley
- Global Moderator
- Posts: 90319
- Joined: 23 Jan 2012, 12:01
- Location: Barnoldswick. Nearer to Heaven than Gloria.
Re: Shed Matters 3
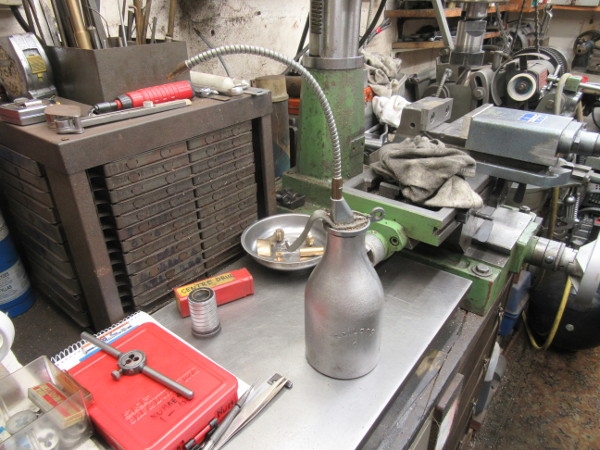
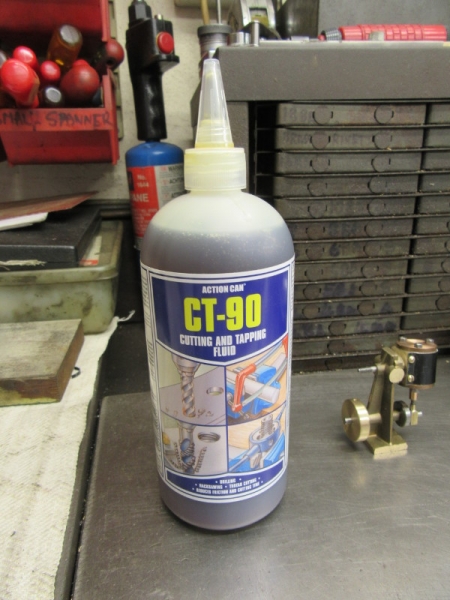
I couldn't do anything on the wobbler because my cylinder blank hasn't arrived yet but there are always useful things to do. I refilled my cutting oil pots and oil cans. (I noted the other day that Reilang oil cans like mine are almost £40 each. They are still worth it, you won't find a better oil can anywhere...)
The main event was a deep clean and lubricate for Mrs Harrison and a clean of the floor as well. If the cylinder blank arrives today we have a nice clean shed to work in. If it doesn't, a rethink will be needed.
Stanley Challenger Graham
Stanley's View
scg1936 at talktalk.net
"Beware of certitude" (Jimmy Reid)
The floggings will continue until morale improves!
Stanley's View
scg1936 at talktalk.net
"Beware of certitude" (Jimmy Reid)
The floggings will continue until morale improves!
-
Stanley
- Global Moderator
- Posts: 90319
- Joined: 23 Jan 2012, 12:01
- Location: Barnoldswick. Nearer to Heaven than Gloria.
Re: Shed Matters 3

The cylinder blank arrived yesterday. It won't surprise you to see that the first thing I did was make sure that my cutter was as sharp as I could get it. I want a good finish when I finish off sizing it.
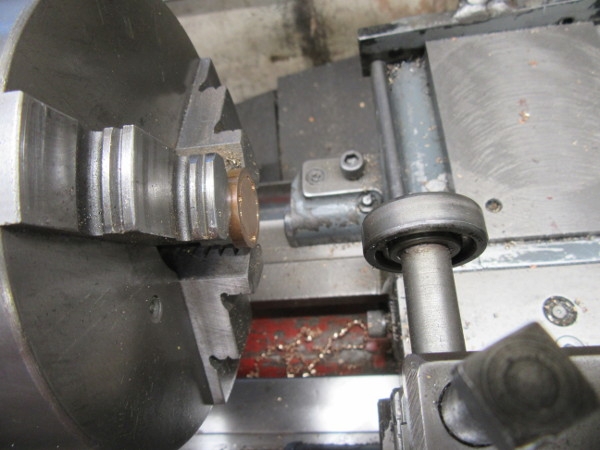
First job was to make sure one end was perfectly smooth and square as I'll be measuring from here.
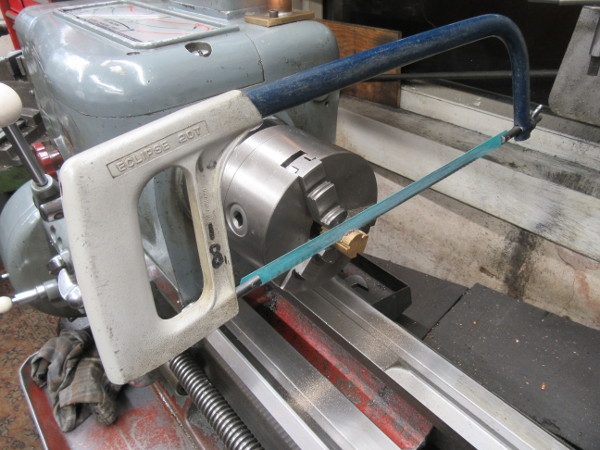
I cut most of the excess off with the hacksaw. The 3 jaw is the best vise to hold it.
I cut the blank back to exactly 3/4" and then did some very careful measuring.
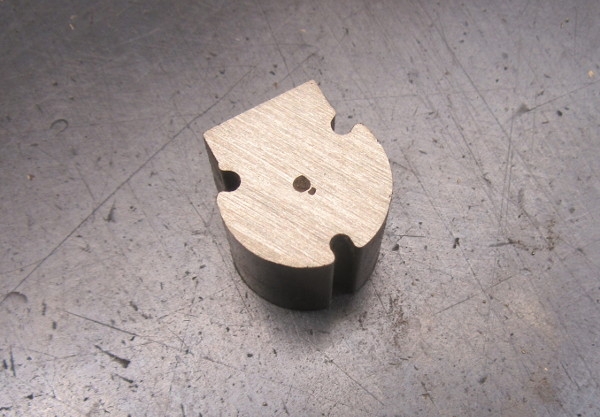
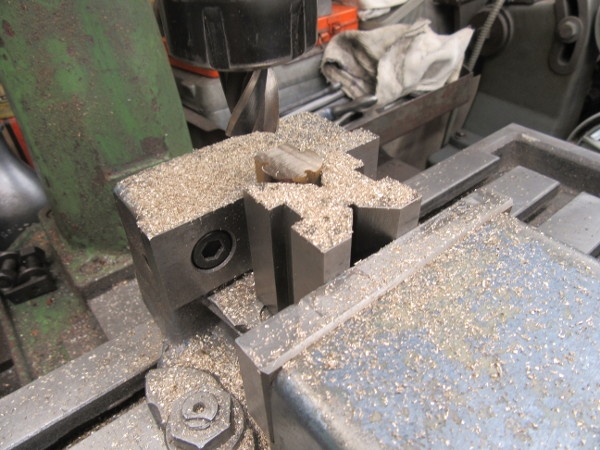
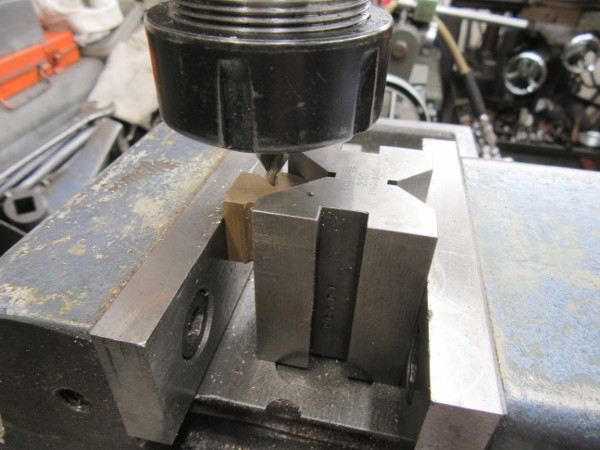
This was knocking off time. (I have to go to the Co-op for my early doors shop.) I think I've got the centre and holding it in the 'V' block against the back fixed jaw should ensure that it is at right angles to the cutter.
(It'll be a bit of a bloody laugh if it isn't!)
Stanley Challenger Graham
Stanley's View
scg1936 at talktalk.net
"Beware of certitude" (Jimmy Reid)
The floggings will continue until morale improves!
Stanley's View
scg1936 at talktalk.net
"Beware of certitude" (Jimmy Reid)
The floggings will continue until morale improves!

Re: Shed Matters 3
The big black dot doesn't seem central to me? Is central supposed to be equal between the bolt relief grooves. ??
-
Stanley
- Global Moderator
- Posts: 90319
- Joined: 23 Jan 2012, 12:01
- Location: Barnoldswick. Nearer to Heaven than Gloria.
Re: Shed Matters 3
I think you're right Old Lad, that's the problem with being handicapped. I shall let the centre drill drift over a shade when I drill it tomorrow. I quite often do that but never really know whether to trust what I see.....
Later, I've had a proper look Ken and you are dead right. I shall mark again on the other end using a different method....
Later, I've had a proper look Ken and you are dead right. I shall mark again on the other end using a different method....
Stanley Challenger Graham
Stanley's View
scg1936 at talktalk.net
"Beware of certitude" (Jimmy Reid)
The floggings will continue until morale improves!
Stanley's View
scg1936 at talktalk.net
"Beware of certitude" (Jimmy Reid)
The floggings will continue until morale improves!
-
Stanley
- Global Moderator
- Posts: 90319
- Joined: 23 Jan 2012, 12:01
- Location: Barnoldswick. Nearer to Heaven than Gloria.
Re: Shed Matters 3
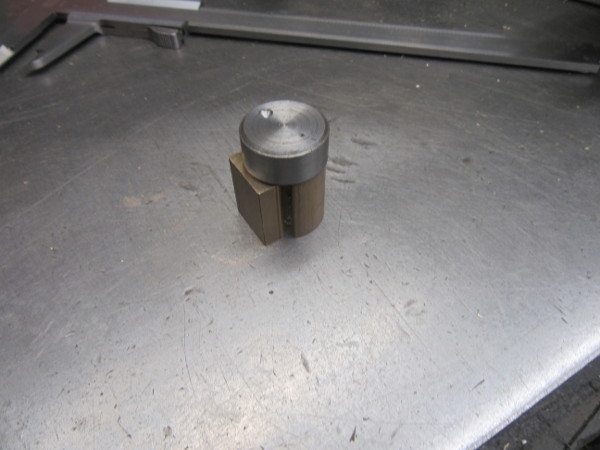
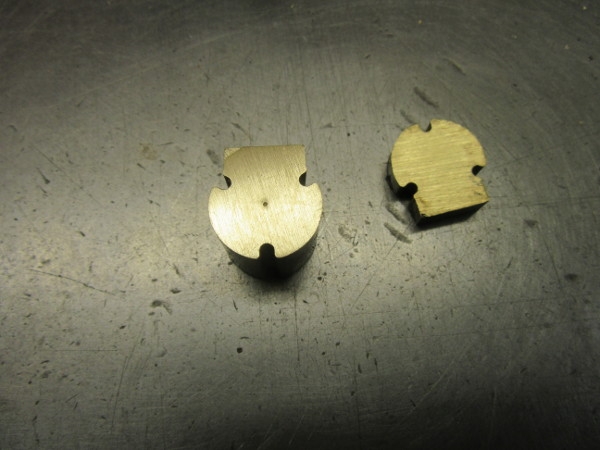
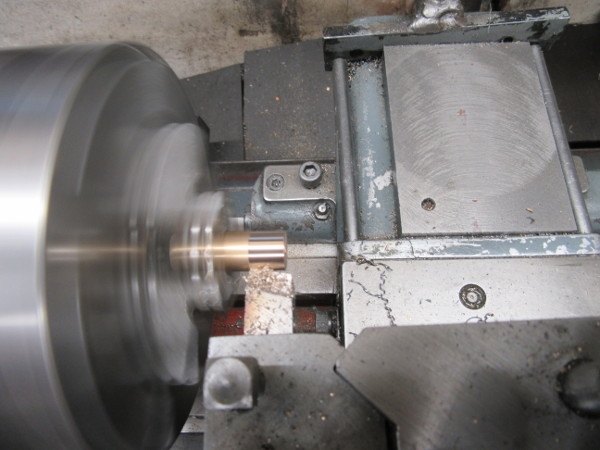
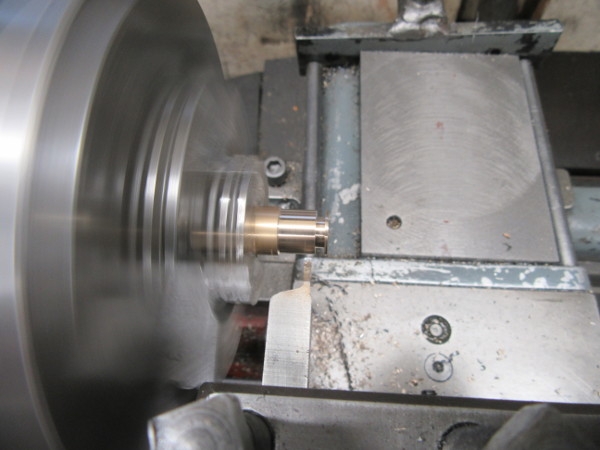
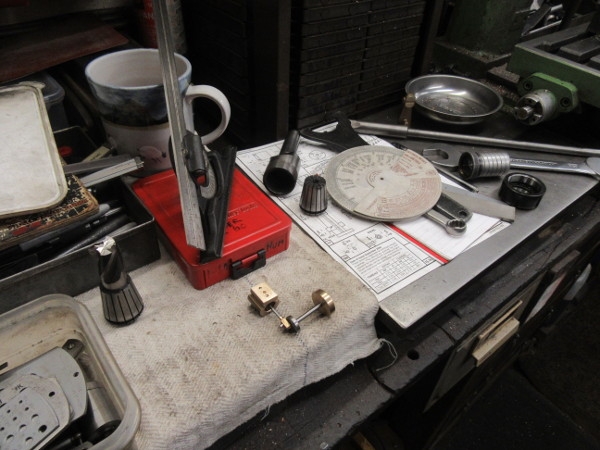
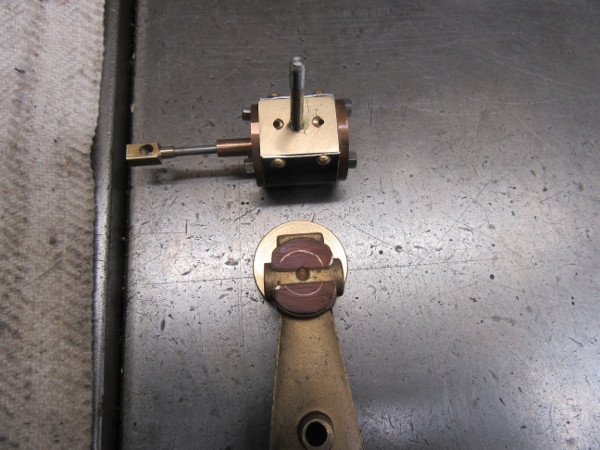
This is the cunning wheeze..... I have a disc that's the same diameter as the main body of the stock so I shall drill it in the lathe which will ensure it's central and use it to mark the blank.
That looks a bit better! Into the VM...
Centre drill first then drill to size. This should be vertical!

Then put the blank I already have for the piston in the lathe and actually make the piston. Straight turning but tiny!
I had to use a very small parting tool. This is getting ridiculously small!
It fits!
Knocking off time. I suppose now I'll have to address steam ports and passages. Deep Joy!
Stanley Challenger Graham
Stanley's View
scg1936 at talktalk.net
"Beware of certitude" (Jimmy Reid)
The floggings will continue until morale improves!
Stanley's View
scg1936 at talktalk.net
"Beware of certitude" (Jimmy Reid)
The floggings will continue until morale improves!
-
Stanley
- Global Moderator
- Posts: 90319
- Joined: 23 Jan 2012, 12:01
- Location: Barnoldswick. Nearer to Heaven than Gloria.
Re: Shed Matters 3
Steam ports and passages. Not looking forwards to this, they are all tiny! I decided to operate on the cylinder first.
This was the easy one, drill a hole to tap 5BA for the pivot of the cylinder. It mustn't break into the cylinder and that's the reason for the white paint on the drill. I got away with that one.
Then it got complicated. Two 1/16" steam passages from the face to the cylinder. They have to be drilled at an angle of 30 degrees. They have to be started with a centre drill of course because of the sloped face. The angle has to be right so the Moore and Wright Protractor had to come out to set the angle vise.
This is the second hole. I got the angle and the size right but admit to being slightly off centre! It's a bugger not being able to trust what your eyes are seeing. But this will be OK I think.
I stopped there, the bench is a bit crowded! I put a lot of tackle away and started to put things back in place. I shall tram the vise on the VM in tomorrow and start by tapping the cylinder pivot 5BA. A trying morning but I think it will all be OK.....
Stanley Challenger Graham
Stanley's View
scg1936 at talktalk.net
"Beware of certitude" (Jimmy Reid)
The floggings will continue until morale improves!
Stanley's View
scg1936 at talktalk.net
"Beware of certitude" (Jimmy Reid)
The floggings will continue until morale improves!
-
Stanley
- Global Moderator
- Posts: 90319
- Joined: 23 Jan 2012, 12:01
- Location: Barnoldswick. Nearer to Heaven than Gloria.
Re: Shed Matters 3
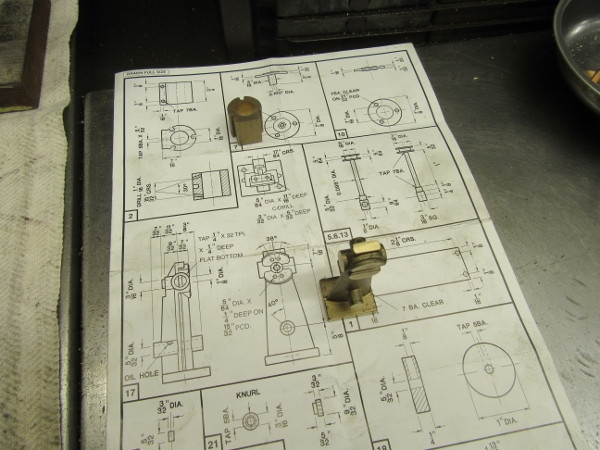
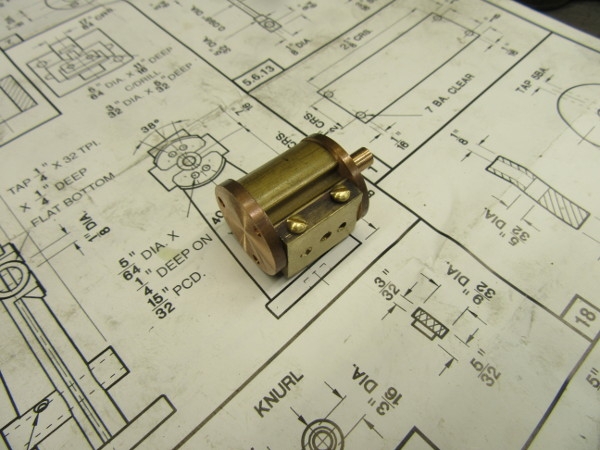
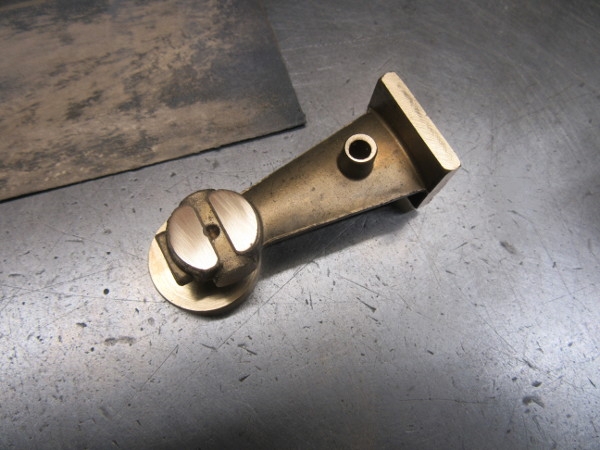
This is the general area, gives you a general idea of the size.... I shall start by tapping the central hole in the face that carries the 5BA shaft that the cylinder rocks on.
I tapped the hole under the drill to ensure it was square and cut first time as there are only about 5 threads in the hole....
This is where I ended up, in a completely different place. I have bored the standard for the shaft the cylinder rocks on and the crankshaft. They are both a good fit but don't cheer too soon. I am beginning to think something has changed in my bad eye because every bloody hole I drill looks good until I have done it then it is not central. I can't do anything about that, it's a fact of life. I shall just keep plodding on and hope for the best.
Stanley Challenger Graham
Stanley's View
scg1936 at talktalk.net
"Beware of certitude" (Jimmy Reid)
The floggings will continue until morale improves!
Stanley's View
scg1936 at talktalk.net
"Beware of certitude" (Jimmy Reid)
The floggings will continue until morale improves!
Re: Shed Matters 3
My Stuart 10H passed first run test today. It was a bit hesitant to start but did run. Then I realised that I hadn’t put the drain cocks in so the cylinder was a bit well vented. It ran much better with the cocks in and shut Next job is to fit the cylinder lagging.
You do not have the required permissions to view the files attached to this post.
-
Stanley
- Global Moderator
- Posts: 90319
- Joined: 23 Jan 2012, 12:01
- Location: Barnoldswick. Nearer to Heaven than Gloria.
Re: Shed Matters 3
That was quick Bob!
I forgot to mention yesterday, I keep my small parts in a little plastic box with a secure lid, nothing worse than losing tiny screws etc. This morning my sleeve caught the open box and sent it and its contents flying. It took me almost twenty minutes on my hands and knees to find them. All that was missing was a 7BA nut but I have plenty of them.
All part of the rich pattern of shed experience!
Stanley Challenger Graham
Stanley's View
scg1936 at talktalk.net
"Beware of certitude" (Jimmy Reid)
The floggings will continue until morale improves!
Stanley's View
scg1936 at talktalk.net
"Beware of certitude" (Jimmy Reid)
The floggings will continue until morale improves!
-
Stanley
- Global Moderator
- Posts: 90319
- Joined: 23 Jan 2012, 12:01
- Location: Barnoldswick. Nearer to Heaven than Gloria.
Re: Shed Matters 3
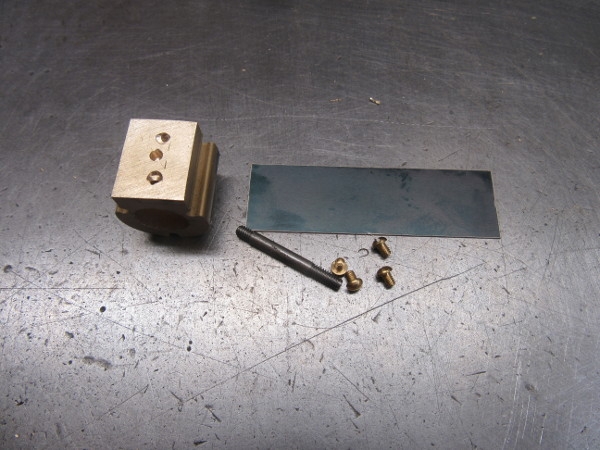
More tiny work. I started by cutting the blued aluminium for the cylinder to size and drilling the holes for the 7BA screws that will fasten it to the cylinder.
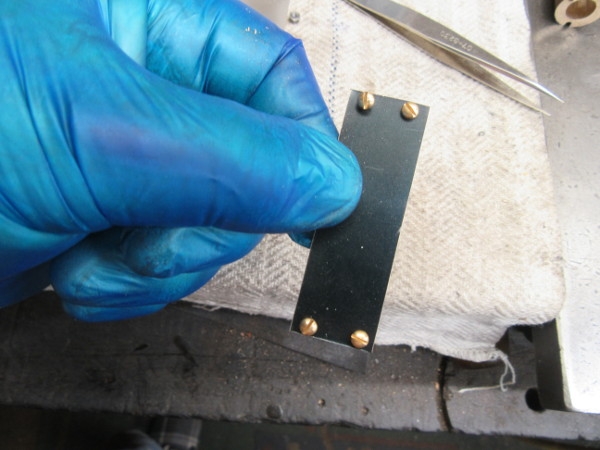
This gives an idea of the scale.
Next job was to drill the cylinder and tap 7BA for the fastening screws. Note that the drillings are in line with the steam ports so the holes had to be no deeper than necessary! Note also that I have ditched my aluminium soft jaws which have reached their sell by date. Please note that I am not responsible for any of the damage to the vice jaws, all down to the previous proud owner. But the jaws are still in reasonable shape.
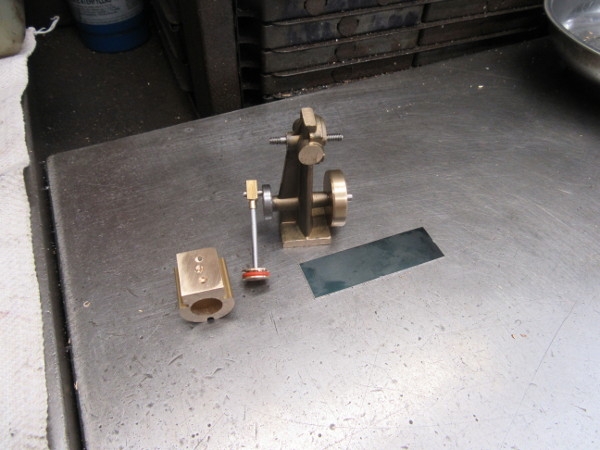
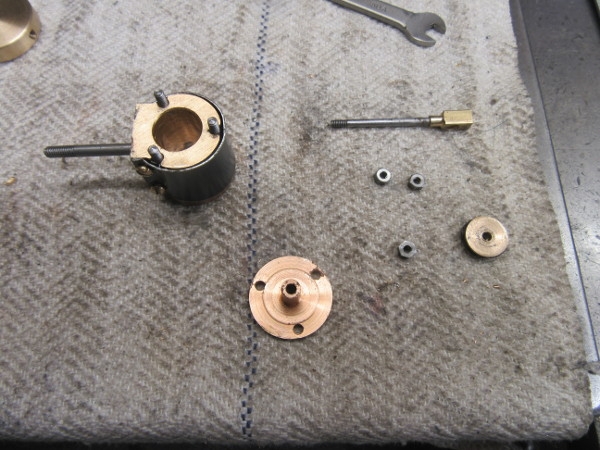
Next I addressed the cylinder lids. They were too thick because I was thinking of putting registers on them but I decided not to bother and reduced them both to 1/16" thick. Notice the ball bearing pusher for truing the lid up in the chuck. Works like a charm. John Mills introduced me to that.
Stanley Challenger Graham
Stanley's View
scg1936 at talktalk.net
"Beware of certitude" (Jimmy Reid)
The floggings will continue until morale improves!
Stanley's View
scg1936 at talktalk.net
"Beware of certitude" (Jimmy Reid)
The floggings will continue until morale improves!
Re: Shed Matters 3
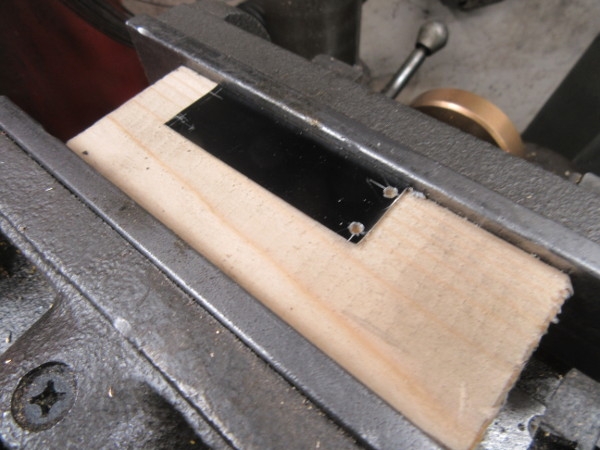
Progress on the 10H might have seemed quick but I have been working on it for the 3 months of lockdown. Like you, I drilled the piece of blackened aluminium yesterday but I am not pleased with the fixing hole spacing. I have made a new pattern in mild steel and will clamp that to a piece of 20thou” brass to drill through backing with a piece of wood. Then, if I am happy, I’ll drill and tap the cylinder for the fixing screws. I am not sure whether to paint the brass satin black or polish it.
-
Stanley
- Global Moderator
- Posts: 90319
- Joined: 23 Jan 2012, 12:01
- Location: Barnoldswick. Nearer to Heaven than Gloria.
Re: Shed Matters 3
Leave it how it is...
Stanley Challenger Graham
Stanley's View
scg1936 at talktalk.net
"Beware of certitude" (Jimmy Reid)
The floggings will continue until morale improves!
Stanley's View
scg1936 at talktalk.net
"Beware of certitude" (Jimmy Reid)
The floggings will continue until morale improves!
-
Stanley
- Global Moderator
- Posts: 90319
- Joined: 23 Jan 2012, 12:01
- Location: Barnoldswick. Nearer to Heaven than Gloria.
Re: Shed Matters 3
Funny you should be talking about cladding yesterday....

Before I knew what was happening I had the lids on and was fitting the cladding. I can't tell you adequately what a pain this tiny work is when you can't see well. But patience is a virtue and so exercise it!
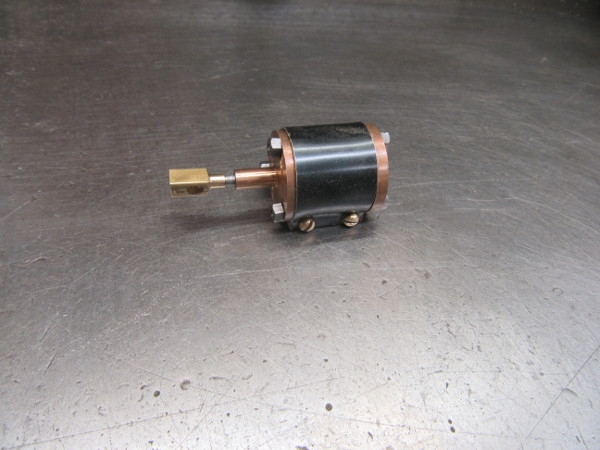
After a short period of suffering, I had a cylinder! (No way I will take this to bits again even if the bugger won't run!)
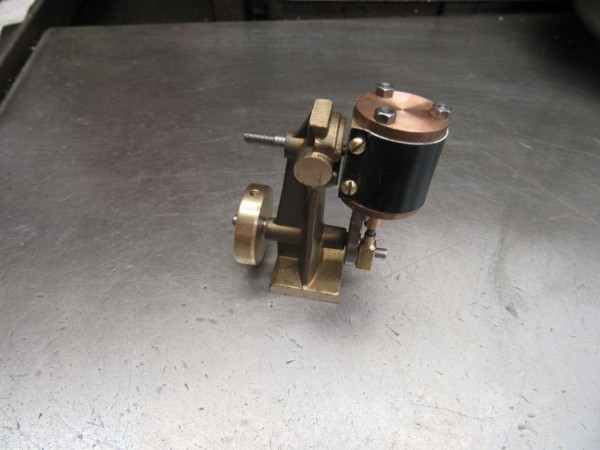
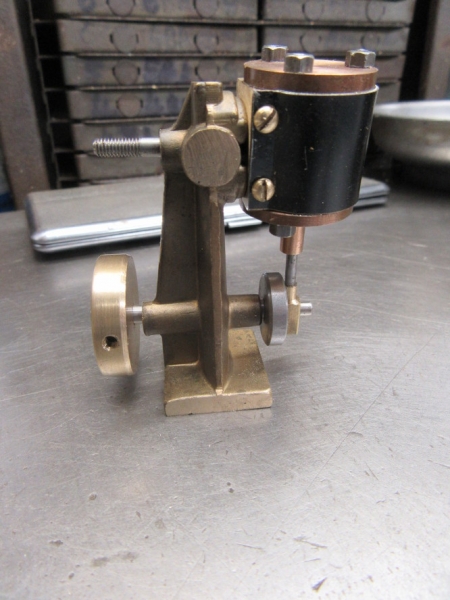
Just for a laugh I offered the cylinder up to the stand. It's beginning to look like an engine. But there is a lot that needs to happen yet! All the passages have to be installed in the stand, we need 4 screw holes for mounting and we may have to make slight alterations to the alignment. At the moment it's too stiff to turn over due to things not being lined up properly and my usual fault, fitting too close. All will become clear.....
Stanley Challenger Graham
Stanley's View
scg1936 at talktalk.net
"Beware of certitude" (Jimmy Reid)
The floggings will continue until morale improves!
Stanley's View
scg1936 at talktalk.net
"Beware of certitude" (Jimmy Reid)
The floggings will continue until morale improves!
Re: Shed Matters 3
Nice work Stanley, as you say, steady does it. I use a large anglepoise bench magnifier as below. Over the years I have had to change the circular fluorescent lamp in it for a modern led unit. Luckily I found one that would fit with just a bit of fettling and for only about £12. I got this from a workshop clearance about 1992, it was going into a skip with lots of other stuff. I wished I had more room in the car but even with permission from the workshop foreman I still had to slip past security on the gate.
You do not have the required permissions to view the files attached to this post.
-
Stanley
- Global Moderator
- Posts: 90319
- Joined: 23 Jan 2012, 12:01
- Location: Barnoldswick. Nearer to Heaven than Gloria.
Re: Shed Matters 3
I used to have one Bob but it was El Cheapo and got ditched to make space on the bench. Perhaps it's time to think about an upgrade.
I've been hearing good things about this so I am giving it a go.....
I've been hearing good things about this so I am giving it a go.....
Stanley Challenger Graham
Stanley's View
scg1936 at talktalk.net
"Beware of certitude" (Jimmy Reid)
The floggings will continue until morale improves!
Stanley's View
scg1936 at talktalk.net
"Beware of certitude" (Jimmy Reid)
The floggings will continue until morale improves!
-
Stanley
- Global Moderator
- Posts: 90319
- Joined: 23 Jan 2012, 12:01
- Location: Barnoldswick. Nearer to Heaven than Gloria.
Re: Shed Matters 3
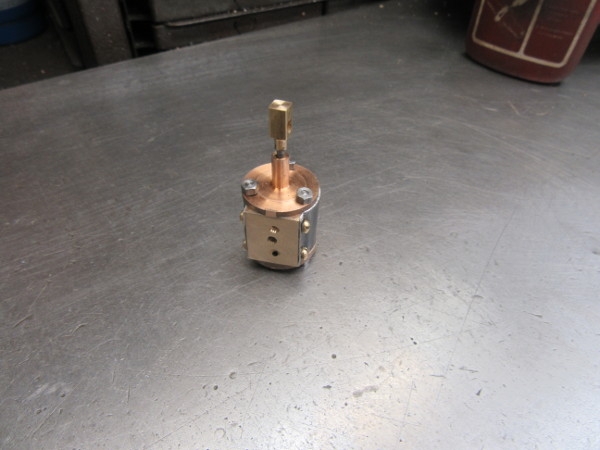
I was held up for a while with domestic matters but eventually got into the shed.
The first job was to get set up for drilling the stand so I trammed the vice in.
Then I addressed something that had bothered me yesterday. The engine wouldn't turn over because the packing I had put in was too efficient. So I took the bottom lid off, removed the string and replaced the 'O' ring even though it is a bit loose. I put the whole lot back together and fitted the engine up again. Just like that!
It didn't look a lot different at knocking off time but it is! It turns over easily now. All right there will be a lot of blow by of the piston but I have plenty of air and we are not running 300 looms! It will be all right, as long as I get my passages right in the stand. But that's for another day.
Stanley Challenger Graham
Stanley's View
scg1936 at talktalk.net
"Beware of certitude" (Jimmy Reid)
The floggings will continue until morale improves!
Stanley's View
scg1936 at talktalk.net
"Beware of certitude" (Jimmy Reid)
The floggings will continue until morale improves!
Re: Shed Matters 3
The Stuart 10H is now finished. I had 3 attempts at the cylinder cladding, the drawing was 4mm short or did I not take enough off the port face....
You do not have the required permissions to view the files attached to this post.
-
Stanley
- Global Moderator
- Posts: 90319
- Joined: 23 Jan 2012, 12:01
- Location: Barnoldswick. Nearer to Heaven than Gloria.
Re: Shed Matters 3
Who cares Bob, it ended up fitting and looking OK.
Today is finishing the faces on the stand and marking where I have to drill the passages etc.
The pics tell the story, fiddly work and very small measurements but I marked for the holes in the face eventually, then I had to set it up so I could put punch marks in. You wouldn't believe how long that took!
But we got there in the end with only one aberration, I'll know which one to drill when I get round to that!
I had to drill for the 1/4" X 32tpi steam pipe. Then I had to give it a flat bottom with a small end mill. I remembered to mark for the oil hole in the casting for the shaft. The hole for the steam pipe of course had to stop before it reached the hole in the casting for the Pivot shaft for the cylinder. It's only a 1/4" deep and so I had to grind the end of one of my taps flat to get as much thread as possible. Same drilling on the other side for the exhaust.
Here's where I was at closing time after almost two hours. I am ready to make the steam pipe and thread it. Then I can start drilling the rest of the passages They are all marked and checked. Tiny bits and fiddly work. Never mind, I am getting there!
Stanley Challenger Graham
Stanley's View
scg1936 at talktalk.net
"Beware of certitude" (Jimmy Reid)
The floggings will continue until morale improves!
Stanley's View
scg1936 at talktalk.net
"Beware of certitude" (Jimmy Reid)
The floggings will continue until morale improves!