
I do
Shed Matters 3
-
PanBiker

- Site Administrator

- Posts: 16447
- Joined: 23 Jan 2012, 13:07
- Location: Barnoldswick - In the West Riding of Yorkshire, always was, always will be.
Re: Shed Matters 3
Whether or not you get email notifications of replies to posts and PM' etc is controlled by the profile settings for your account on the site. You can toggle various settings on/off depending on your own preferences.
Ian
-
Stanley

- Global Moderator

- Posts: 90301
- Joined: 23 Jan 2012, 12:01
- Location: Barnoldswick. Nearer to Heaven than Gloria.
Re: Shed Matters 3
I thought it might be that. I have that turned off, I get enough emails without automatic ones... 
Stanley Challenger Graham
Stanley's View
scg1936 at talktalk.net
"Beware of certitude" (Jimmy Reid)
The floggings will continue until morale improves!
Stanley's View
scg1936 at talktalk.net
"Beware of certitude" (Jimmy Reid)
The floggings will continue until morale improves!
Re: Shed Matters 3
I found it, thank you.
That casting kit looks good Stanley, first problem is to break into the shrink wrapping , pretty easy after that.
That casting kit looks good Stanley, first problem is to break into the shrink wrapping
 , pretty easy after that.
-
Stanley
- Global Moderator
- Posts: 90301
- Joined: 23 Jan 2012, 12:01
- Location: Barnoldswick. Nearer to Heaven than Gloria.
Re: Shed Matters 3
You're right Bob. They certainly do a good job of packing!
I didn't get in the shed, other matters took precedence.... I shall try harder tomorrow.
I didn't get in the shed, other matters took precedence.... I shall try harder tomorrow.
Stanley Challenger Graham
Stanley's View
scg1936 at talktalk.net
"Beware of certitude" (Jimmy Reid)
The floggings will continue until morale improves!
Stanley's View
scg1936 at talktalk.net
"Beware of certitude" (Jimmy Reid)
The floggings will continue until morale improves!
-
Stanley
- Global Moderator
- Posts: 90301
- Joined: 23 Jan 2012, 12:01
- Location: Barnoldswick. Nearer to Heaven than Gloria.
Re: Shed Matters 3
I decided to do my weekly shop tomorrow and went in the shed to do a full hour and a half at least.
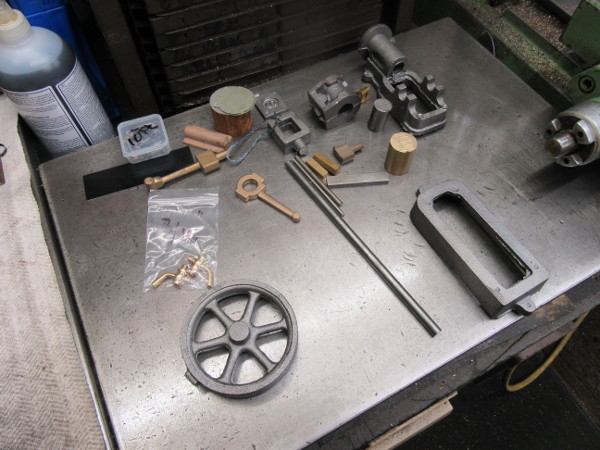
First job, as Bob said, was to get the kit out of the bubble wrap.
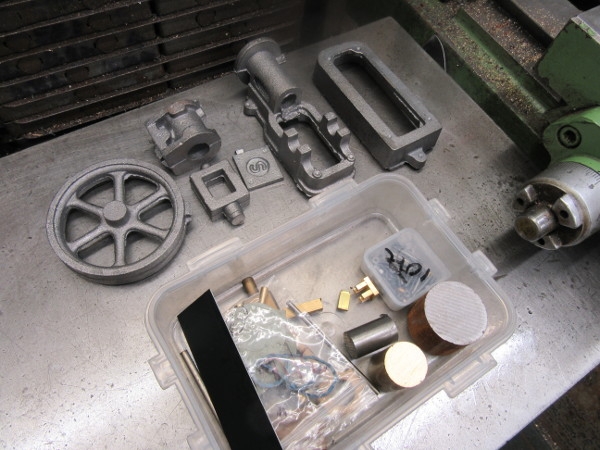
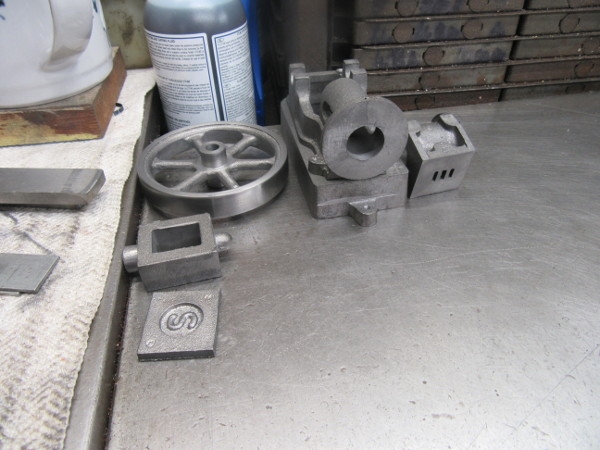
The first split was to separate all the castings and get the other parts organised.
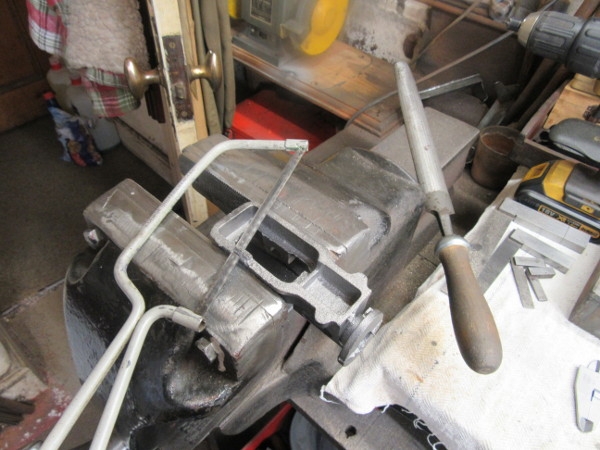
This pic encapsulates the next hour and a bit. Sawing the gates off and using big files to clean the flash off the castings. I got my head down and got on with it.
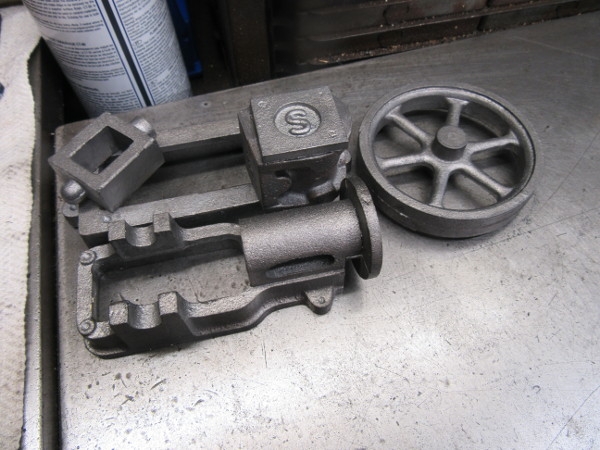
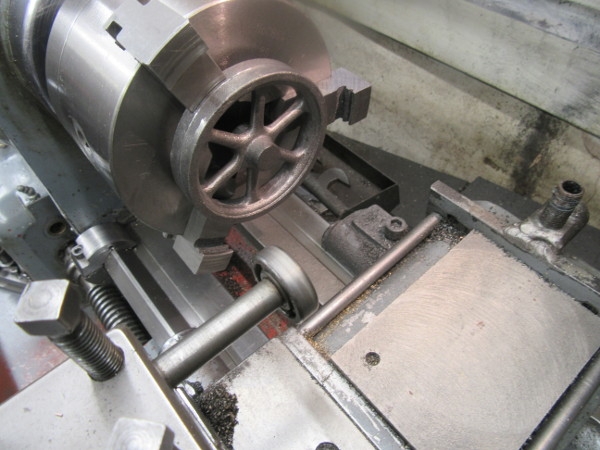
By 08:00 we had a set of clean castings and that includes the flywheel spokes. Tomorrow I can decide if it's the flywheel in the lathe or the other castings under the milling machine. It's a good start. By the way at the moment I am inclined to make the crankshaft out of the solid and not built up but we'll see.....
First job, as Bob said, was to get the kit out of the bubble wrap.
The first split was to separate all the castings and get the other parts organised.
This pic encapsulates the next hour and a bit. Sawing the gates off and using big files to clean the flash off the castings. I got my head down and got on with it.
By 08:00 we had a set of clean castings and that includes the flywheel spokes. Tomorrow I can decide if it's the flywheel in the lathe or the other castings under the milling machine. It's a good start. By the way at the moment I am inclined to make the crankshaft out of the solid and not built up but we'll see.....
Stanley Challenger Graham
Stanley's View
scg1936 at talktalk.net
"Beware of certitude" (Jimmy Reid)
The floggings will continue until morale improves!
Stanley's View
scg1936 at talktalk.net
"Beware of certitude" (Jimmy Reid)
The floggings will continue until morale improves!
Re: Shed Matters 3
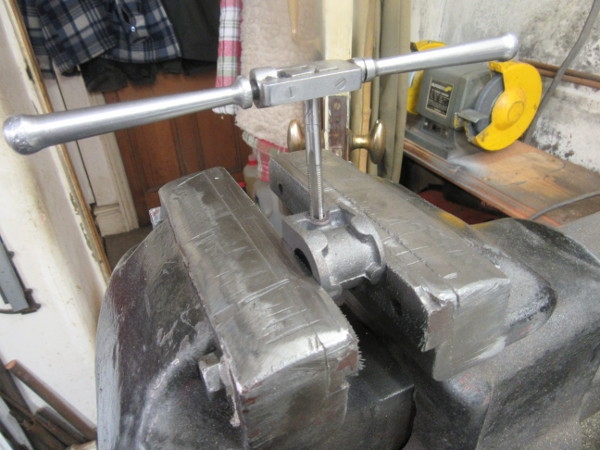
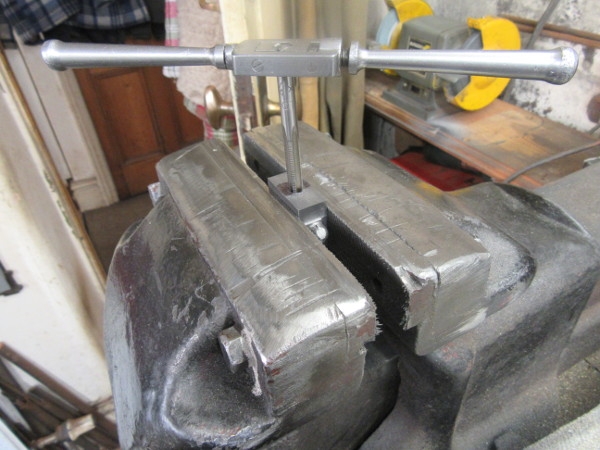
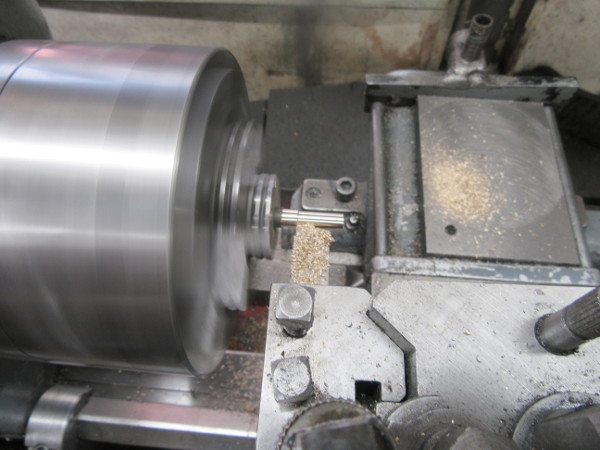
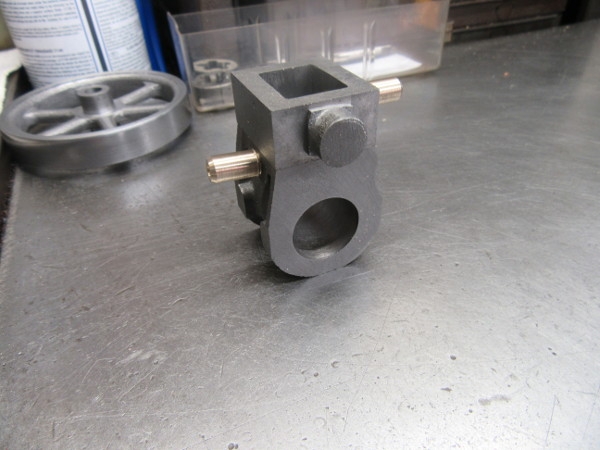
I fabricated my crankshaft. Before cutting the through shaft I pinned the joints then silver soldered it. I am a bit of a silver solder junkie .
.
 .
.-
Stanley
- Global Moderator
- Posts: 90301
- Joined: 23 Jan 2012, 12:01
- Location: Barnoldswick. Nearer to Heaven than Gloria.
Re: Shed Matters 3
I've never done one that I like Bob. Chopping out of solid always works for me.....
Stanley Challenger Graham
Stanley's View
scg1936 at talktalk.net
"Beware of certitude" (Jimmy Reid)
The floggings will continue until morale improves!
Stanley's View
scg1936 at talktalk.net
"Beware of certitude" (Jimmy Reid)
The floggings will continue until morale improves!
-
Stanley
- Global Moderator
- Posts: 90301
- Joined: 23 Jan 2012, 12:01
- Location: Barnoldswick. Nearer to Heaven than Gloria.
Re: Shed Matters 3


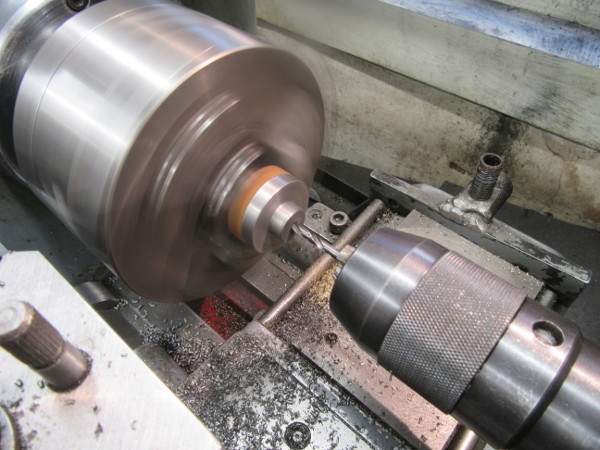
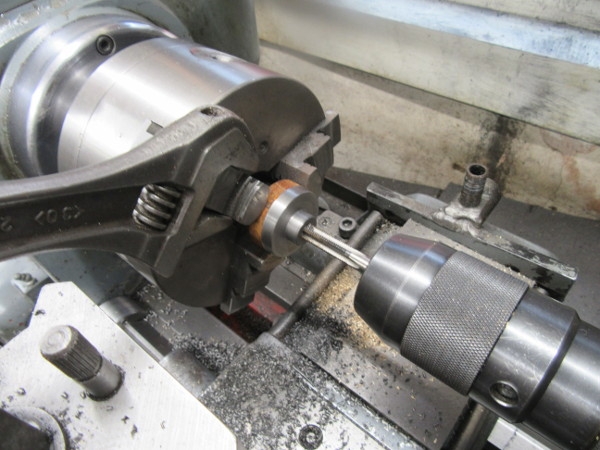
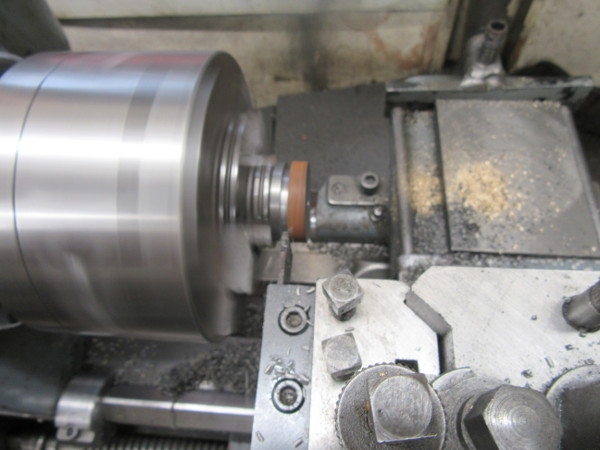
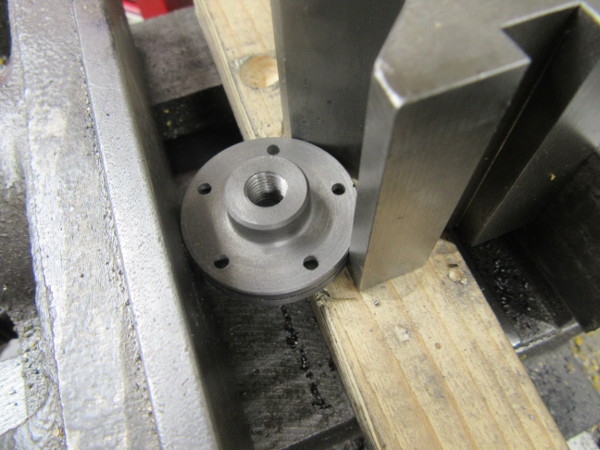
This morning was early shopping so I didn't have any elevated target, just to make as good a job as possible of preparing the flywheel for fitting. I paid particular attention to getting the centre correct and finished up with the casting finished and bored to 9/32". No problems about the drill boring slightly oversize, if indeed it has, because when I make the crankshaft I shall turn it to be a good fit in the wheel. All it needs now is boring for the set screw. I might not do that, a good fit on the shaft and a bit of Loctite is far better because it doesn't tend to make the shaft run off centre. Nice start.....
Stanley Challenger Graham
Stanley's View
scg1936 at talktalk.net
"Beware of certitude" (Jimmy Reid)
The floggings will continue until morale improves!
Stanley's View
scg1936 at talktalk.net
"Beware of certitude" (Jimmy Reid)
The floggings will continue until morale improves!
-
Stanley
- Global Moderator
- Posts: 90301
- Joined: 23 Jan 2012, 12:01
- Location: Barnoldswick. Nearer to Heaven than Gloria.
Re: Shed Matters 3
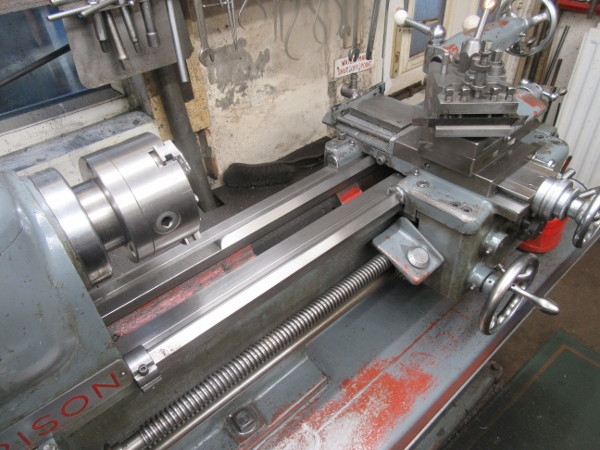
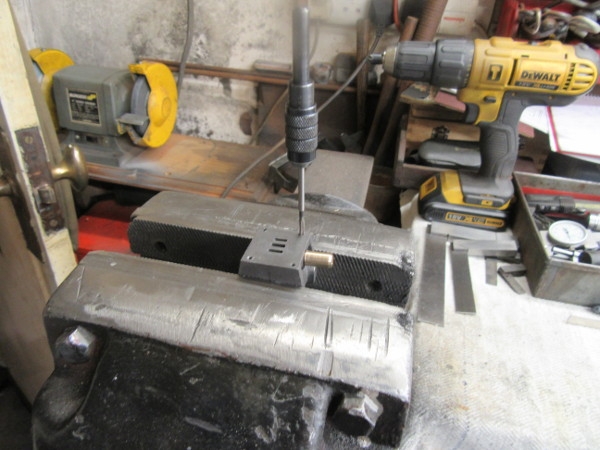
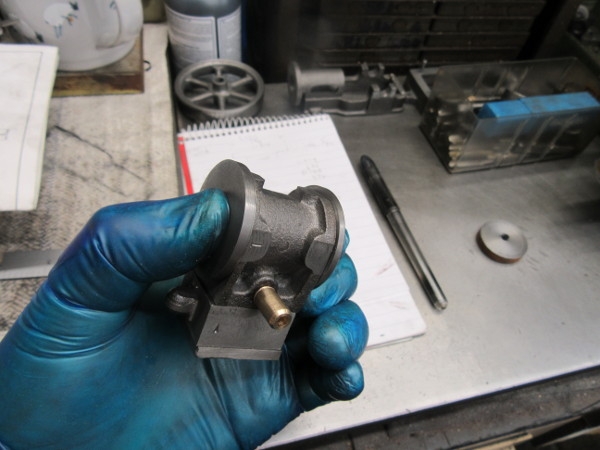
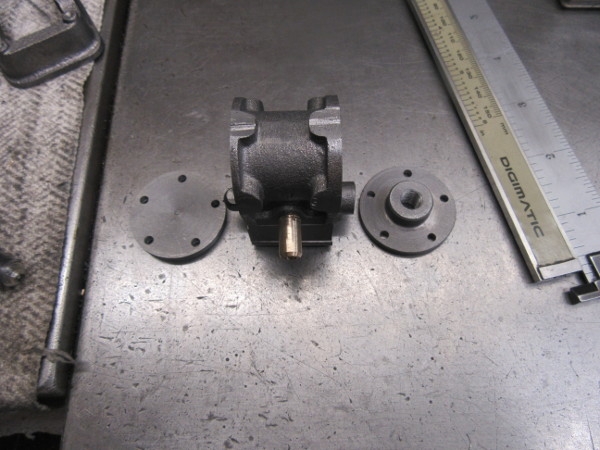
First job was to clean the CI dust off Mrs Harrison. Then into getting the cylinder the right size and shape and boring it.
I think you can follow that and the end result was a cylinder that is well on the way to being ready for use.
You won't be surprised to know that my last blow was to clean the mill and touch up the cutter before replacing it.
Stanley Challenger Graham
Stanley's View
scg1936 at talktalk.net
"Beware of certitude" (Jimmy Reid)
The floggings will continue until morale improves!
Stanley's View
scg1936 at talktalk.net
"Beware of certitude" (Jimmy Reid)
The floggings will continue until morale improves!
-
Stanley
- Global Moderator
- Posts: 90301
- Joined: 23 Jan 2012, 12:01
- Location: Barnoldswick. Nearer to Heaven than Gloria.
Re: Shed Matters 3
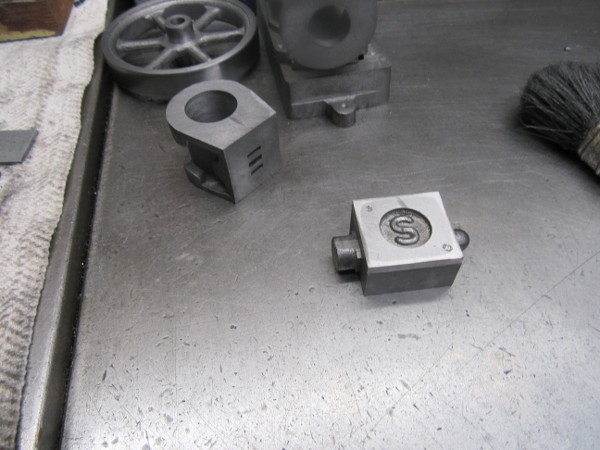
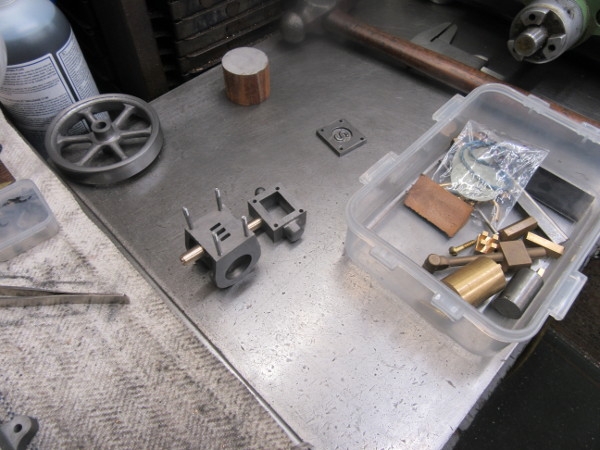
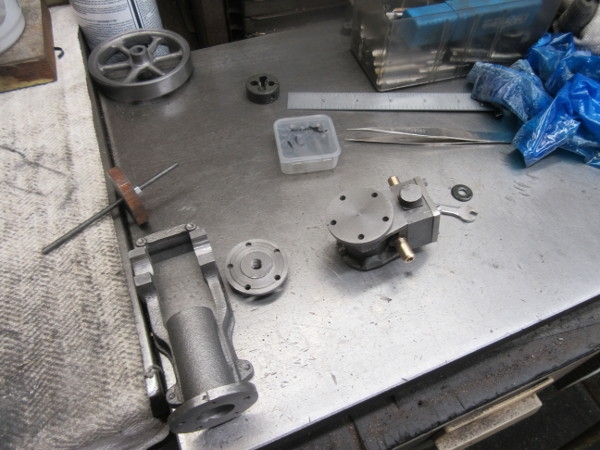
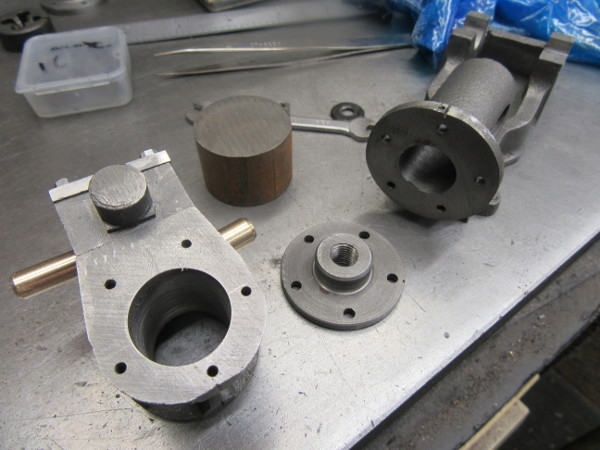
I've had an hour and a half in the shed working on the castings.
This was knocking off time, lots to do but we have taken some useful steps forward and cleaned up as well!
Stanley Challenger Graham
Stanley's View
scg1936 at talktalk.net
"Beware of certitude" (Jimmy Reid)
The floggings will continue until morale improves!
Stanley's View
scg1936 at talktalk.net
"Beware of certitude" (Jimmy Reid)
The floggings will continue until morale improves!
-
Stanley
- Global Moderator
- Posts: 90301
- Joined: 23 Jan 2012, 12:01
- Location: Barnoldswick. Nearer to Heaven than Gloria.
Re: Shed Matters 3
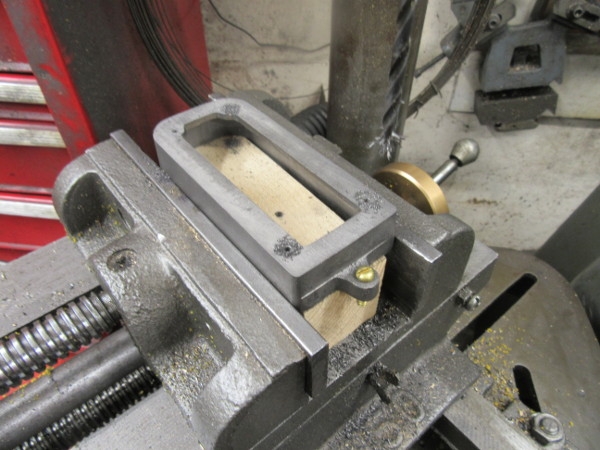
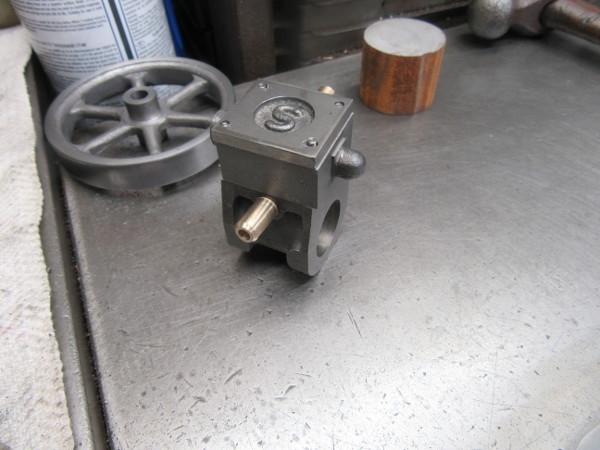
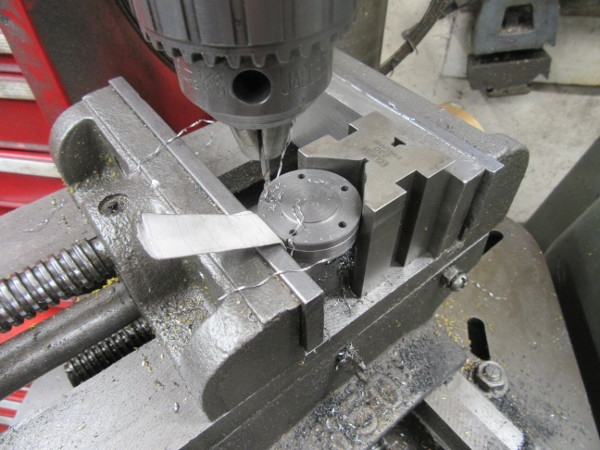
Dead easy this morning, I want to get the steam chest and lid straight and ready for further work. So into the mill and some careful cutting. One bit of a neg, my cutter wasn't quite up to top performance.
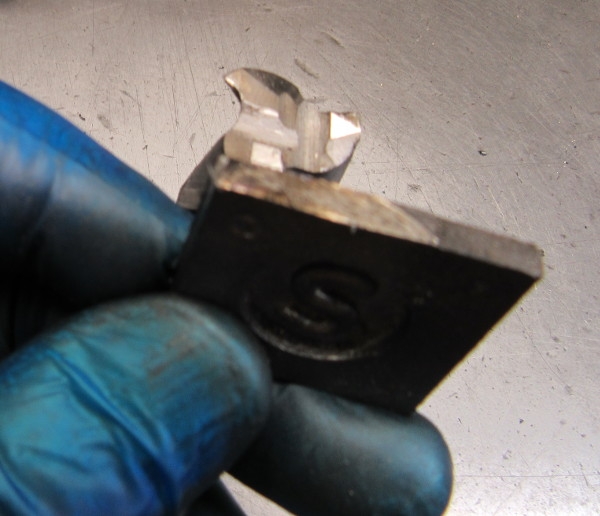
Big does and little does I got the steam chest to the right shape and size and moved on to the lid. I don't know whether you can see but it was a chilled casting, was pot hard and wrecked my cutter.

This led to a complete refurb of two cutters, gulleting, backing off and sharpening. Then I attacked the steam chest lid with the grinder and dealt with that. Not the best way to do it but I managed and ended up with a lid that was the right size and looked reasonable. What it will be like to drill is another matter. Sufficient unto the day is the evil thereof!
Knocking off time, doesn't look much does it? I'm pleased with progress actually.
Stanley Challenger Graham
Stanley's View
scg1936 at talktalk.net
"Beware of certitude" (Jimmy Reid)
The floggings will continue until morale improves!
Stanley's View
scg1936 at talktalk.net
"Beware of certitude" (Jimmy Reid)
The floggings will continue until morale improves!
-
Stanley
- Global Moderator
- Posts: 90301
- Joined: 23 Jan 2012, 12:01
- Location: Barnoldswick. Nearer to Heaven than Gloria.
Re: Shed Matters 3
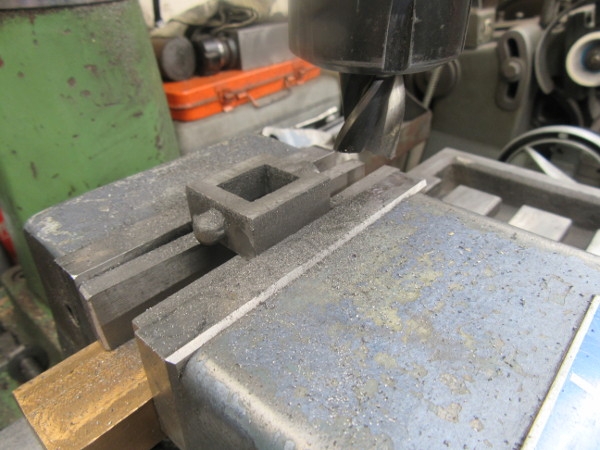
More work on the castings.
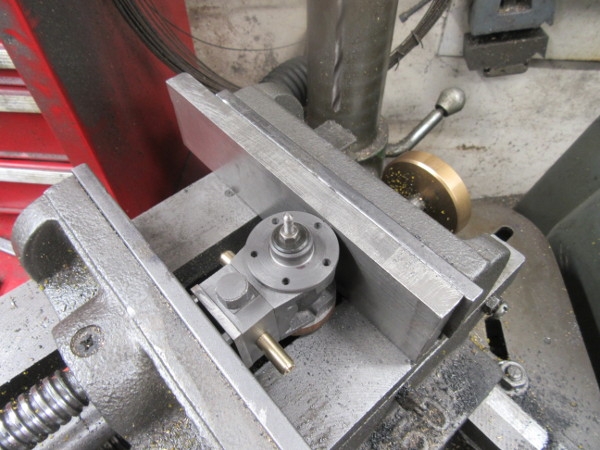
I decided this was the best way to measure the height of the centre in the engine bed bearing jaws. Once I had the cutter on the right level I brought it round to this side and used it to cut a mark on the white paint.
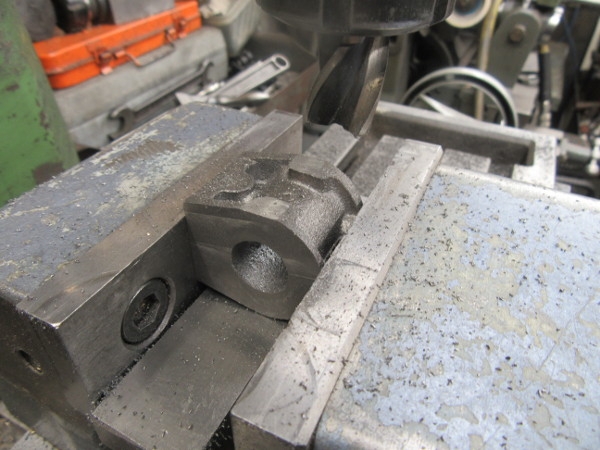
Then a different set up to open the casting jaws to 7/16". I checked the depth and made sure they were level by a small adjustment with files.
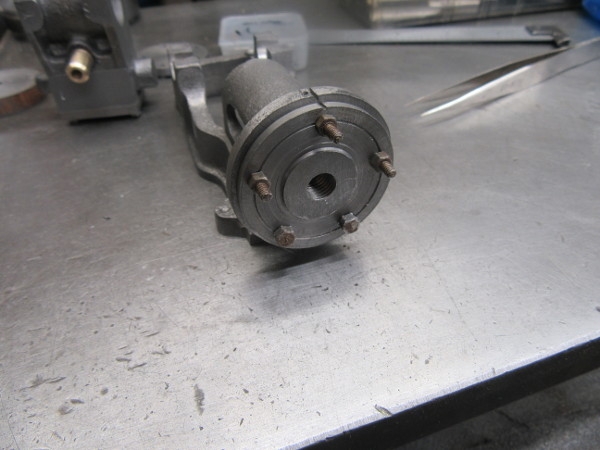
The bearing castings fit nicely and I am sure they are on centre height.
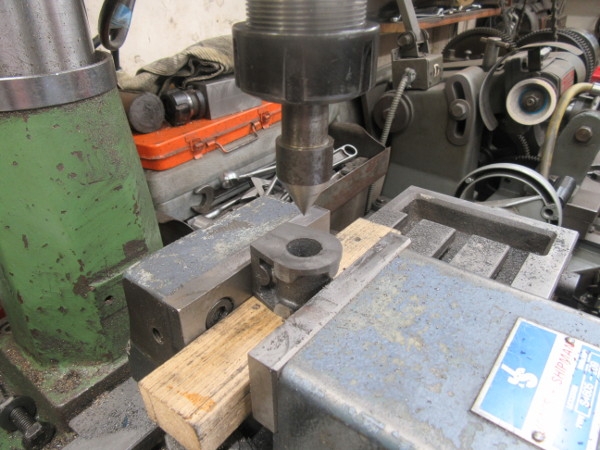
Next I drilled for tapping the bed 7BA.
At the same time I drilled for the screws that will hold the bed down onto the base.
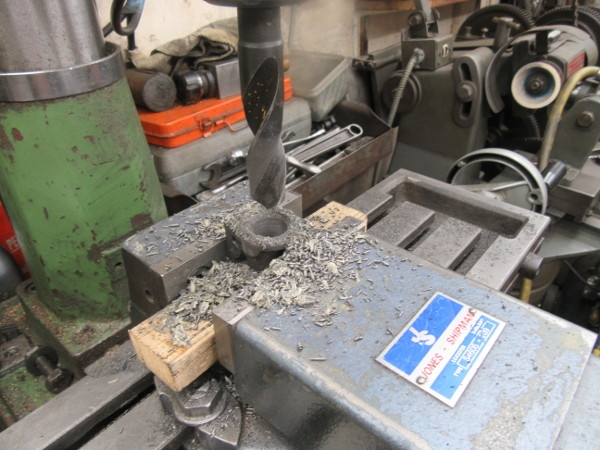
Next some careful tapping.....
This was knocking off time, small steps forward!
I decided this was the best way to measure the height of the centre in the engine bed bearing jaws. Once I had the cutter on the right level I brought it round to this side and used it to cut a mark on the white paint.
Then a different set up to open the casting jaws to 7/16". I checked the depth and made sure they were level by a small adjustment with files.
The bearing castings fit nicely and I am sure they are on centre height.
Next I drilled for tapping the bed 7BA.
At the same time I drilled for the screws that will hold the bed down onto the base.
Next some careful tapping.....
This was knocking off time, small steps forward!
Stanley Challenger Graham
Stanley's View
scg1936 at talktalk.net
"Beware of certitude" (Jimmy Reid)
The floggings will continue until morale improves!
Stanley's View
scg1936 at talktalk.net
"Beware of certitude" (Jimmy Reid)
The floggings will continue until morale improves!
-
Stanley
- Global Moderator
- Posts: 90301
- Joined: 23 Jan 2012, 12:01
- Location: Barnoldswick. Nearer to Heaven than Gloria.
Re: Shed Matters 3
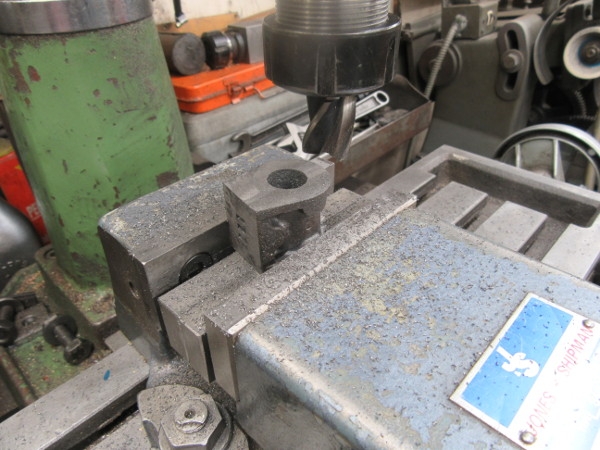
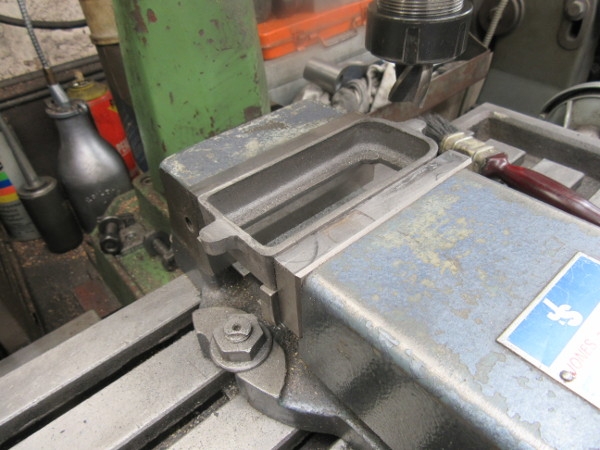
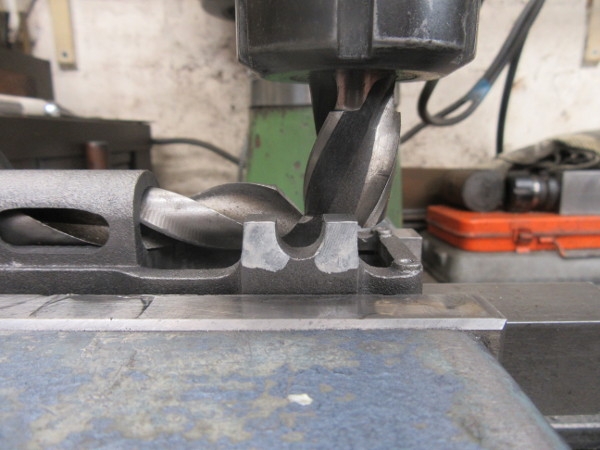
The aim this morning is dead simple, nowt to it.... I want to end up with a cylinder casting and a steam chest drilled and tapped and with a steam and exhaust pipe fitted. Here are some pics.
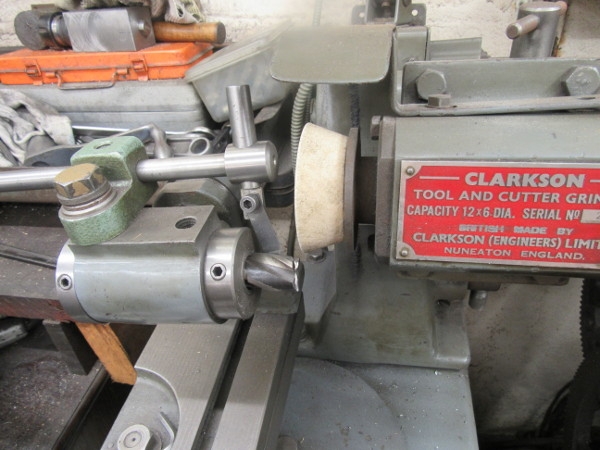
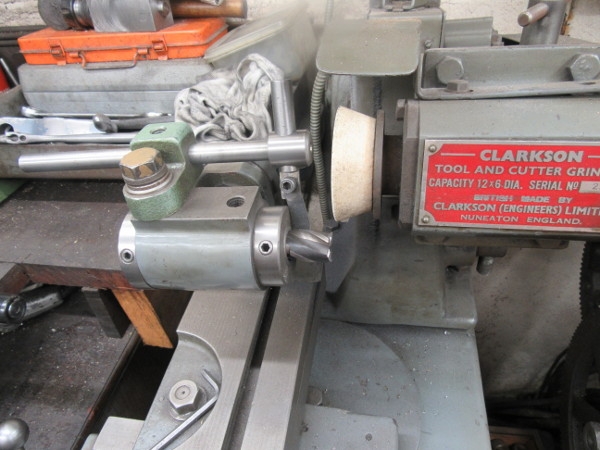
All straightforward work but embedded in this was a small problem. When I used the mill to adjust the cylinder casting I found that my cutter wasn't sharpened on the right angle, I slipped up the last time I sharpened it and its mate. So I had to have a spell in the T&C grinder putting them both right. All that took time.
This was knocking off time. We have taken an hour and a half to do it but ended up with the result we wanted, the cylinder and steam chest have steam and exhaust pipes!
Stanley Challenger Graham
Stanley's View
scg1936 at talktalk.net
"Beware of certitude" (Jimmy Reid)
The floggings will continue until morale improves!
Stanley's View
scg1936 at talktalk.net
"Beware of certitude" (Jimmy Reid)
The floggings will continue until morale improves!
Re: Shed Matters 3
Whilst you were working with cast iron parts we visited Darkhill Iron Works.
I don’t think that enough is made of the work done there by Robert Mushet to improve the quality of iron and steel that we all use. Darkhill was founded by David Mushet in the early 19th century. It was his son Robert who later ran the works but became a metallurgist and made many advances in processing iron and steel. In particular he worked out how to refine the technique of operating Bessemer’s converter to obtain a controlled quality. It was easy really, the difficult bit was to stop blowing the converter when the right traces of carbon etc were left. What Muchet did was to blow the convertion to completion then add a controlled amount of carbon. He also added other trace metals to create an early version of high speed steel. There is a monument to the Muchets.
There is not a lot left of the works but the furnace was in the lower foreground here
You do not have the required permissions to view the files attached to this post.
-
Stanley
- Global Moderator
- Posts: 90301
- Joined: 23 Jan 2012, 12:01
- Location: Barnoldswick. Nearer to Heaven than Gloria.
Re: Shed Matters 3
That looks like a good day out Bob. I hope the lunch was up to the same standard!
Stanley Challenger Graham
Stanley's View
scg1936 at talktalk.net
"Beware of certitude" (Jimmy Reid)
The floggings will continue until morale improves!
Stanley's View
scg1936 at talktalk.net
"Beware of certitude" (Jimmy Reid)
The floggings will continue until morale improves!
-
Stanley
- Global Moderator
- Posts: 90301
- Joined: 23 Jan 2012, 12:01
- Location: Barnoldswick. Nearer to Heaven than Gloria.
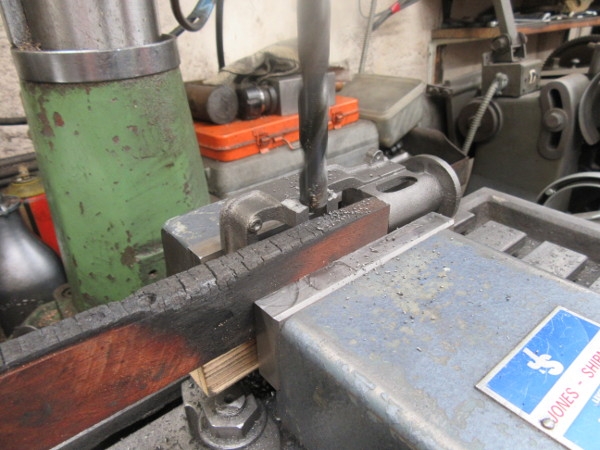
Re: Shed Matters 3
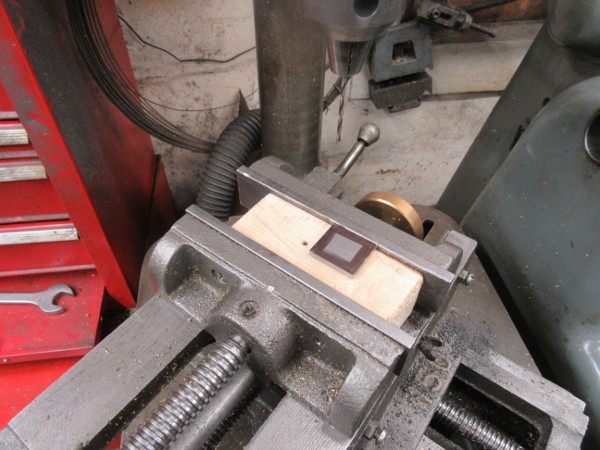
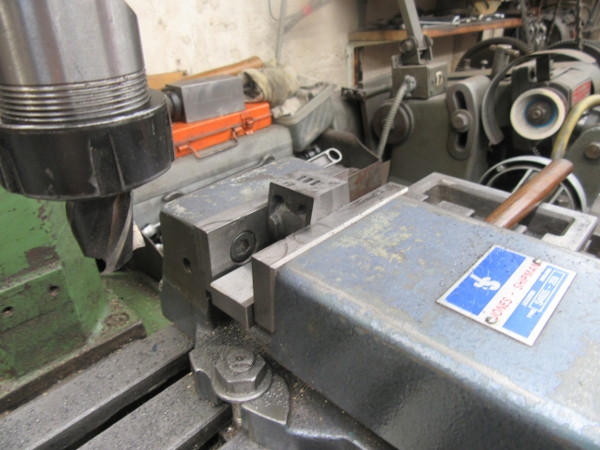
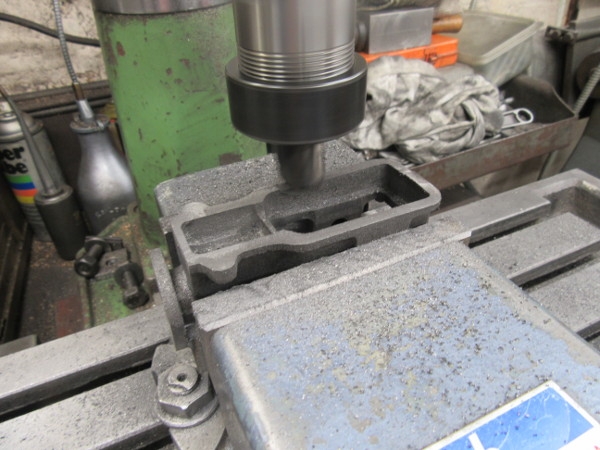
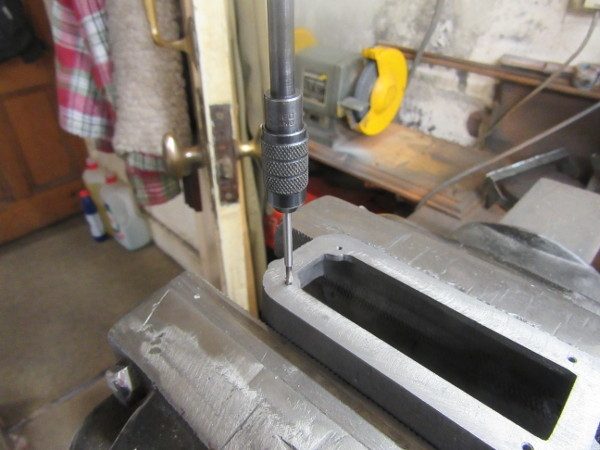
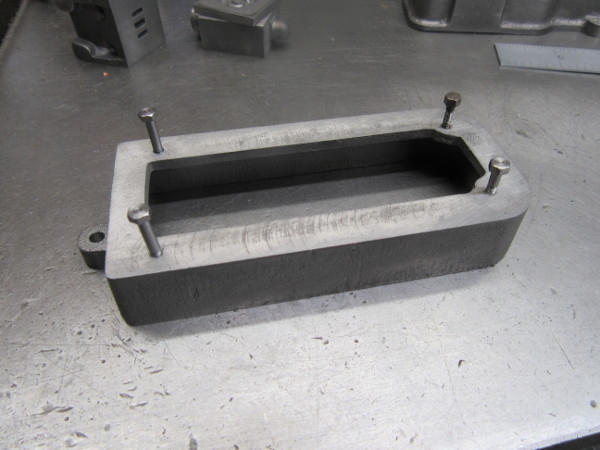
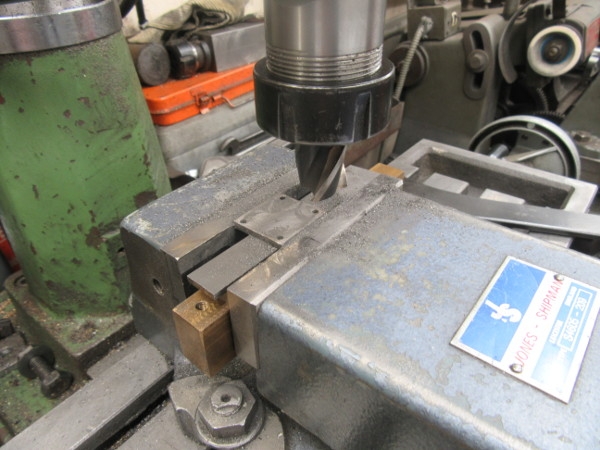
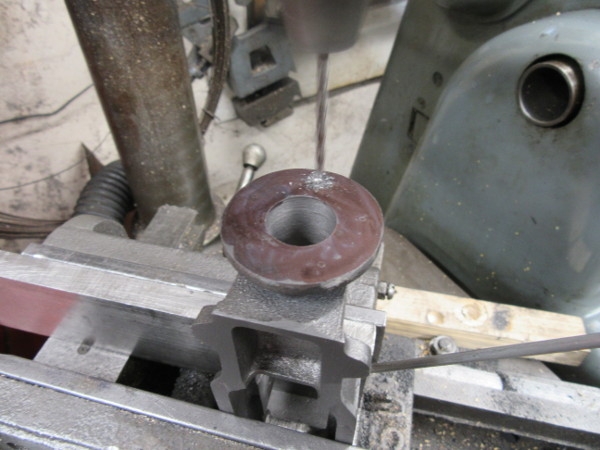
I had an hour to get something done. My aim was to drill the lid, steam chest and cylinder so they are ready for tapping and assembling. First job was to mark and drill the lid so it could be used as a template for the other castings. I'm drilling it tapping size for 7BA which is a no. 46 drill.
I used the lid as a template and spotted the cylinder and valve chest to locate the holes.

Then drill the stud locations in the cylinder ready for tapping.
Then I changed the drill for a 2.6mm drill which is clearance size for 7BA and drilled both the lid and the steam chest.
This was closing time. The next job is to tap the cylinder drillings, fit the studs and check the alignment of the castings, they always drift a bit during fitting.
Stanley Challenger Graham
Stanley's View
scg1936 at talktalk.net
"Beware of certitude" (Jimmy Reid)
The floggings will continue until morale improves!
Stanley's View
scg1936 at talktalk.net
"Beware of certitude" (Jimmy Reid)
The floggings will continue until morale improves!
-
Stanley
- Global Moderator
- Posts: 90301
- Joined: 23 Jan 2012, 12:01
- Location: Barnoldswick. Nearer to Heaven than Gloria.
Re: Shed Matters 3
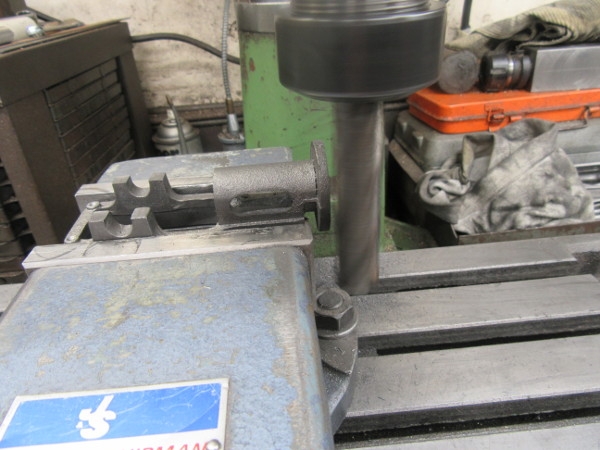
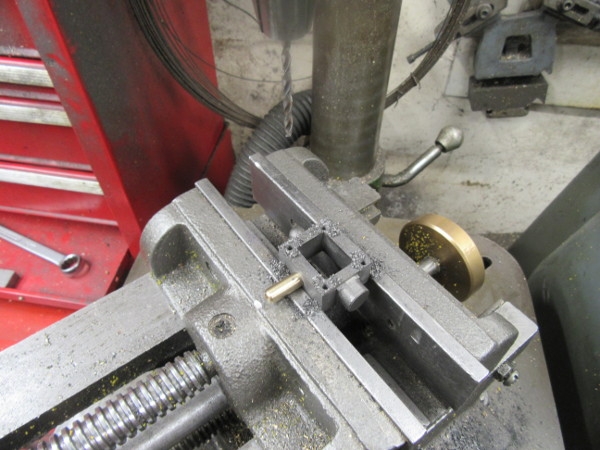
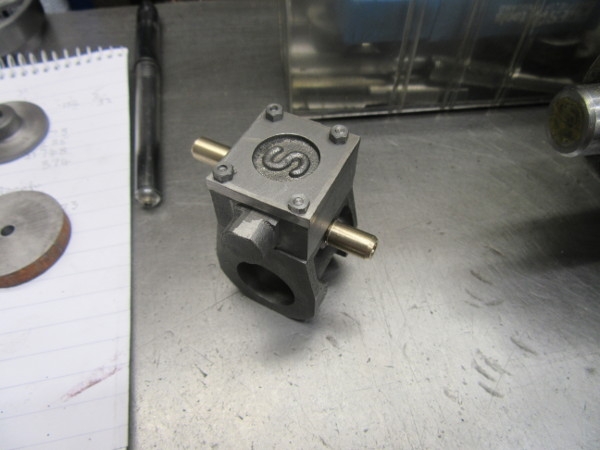
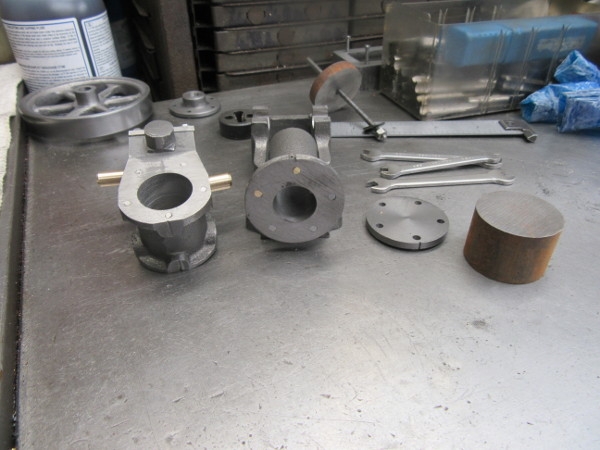
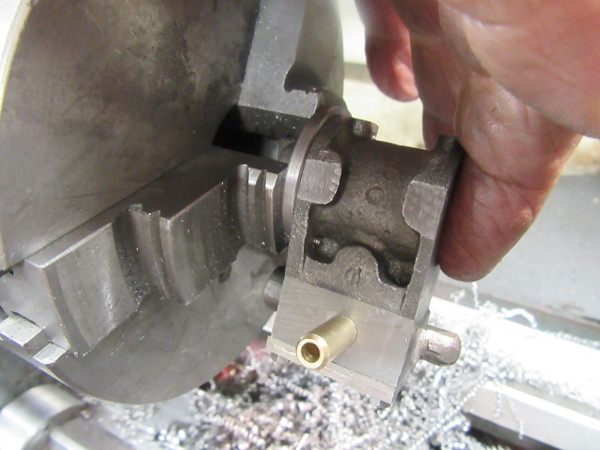
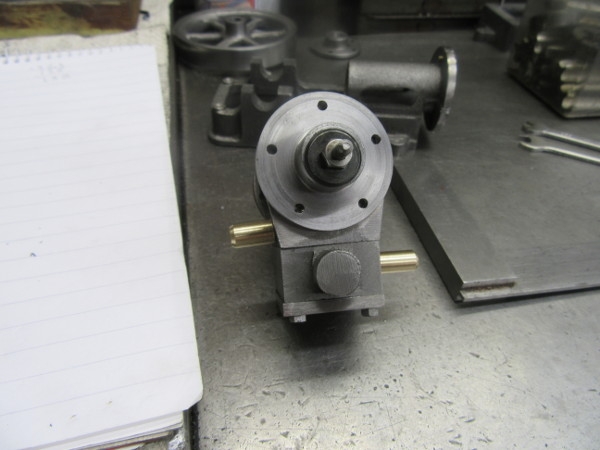
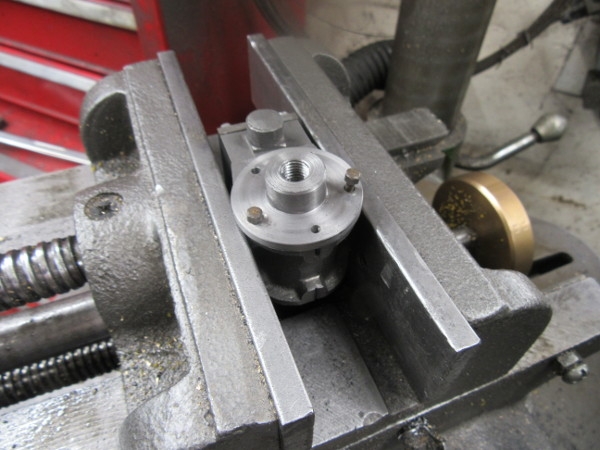
First thing this morning was to tap the drillings in the cylinder, fit the studs and see if all the clearance drilling works. It does and the reason why the studs don't poke out far enough is because I screwed them into the tappings too far. Notice in the background a slug of cast iron. This is the material for the next task, making the lids for the cylinder.
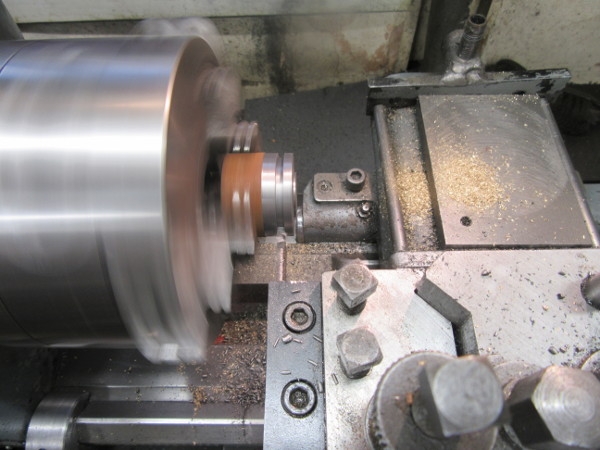
A straight turning job to make two lids.
Here we are, two lids that fit. They are made to the size on the drawing and I think the overhang on the casting is to allow the fitting of the cylinder cladding. I still have to finish the top lid and I shall use the piece of CI left to make a template for the lids and cylinder. A nice couple of hours....
Stanley Challenger Graham
Stanley's View
scg1936 at talktalk.net
"Beware of certitude" (Jimmy Reid)
The floggings will continue until morale improves!
Stanley's View
scg1936 at talktalk.net
"Beware of certitude" (Jimmy Reid)
The floggings will continue until morale improves!
-
Stanley
- Global Moderator
- Posts: 90301
- Joined: 23 Jan 2012, 12:01
- Location: Barnoldswick. Nearer to Heaven than Gloria.
Re: Shed Matters 3
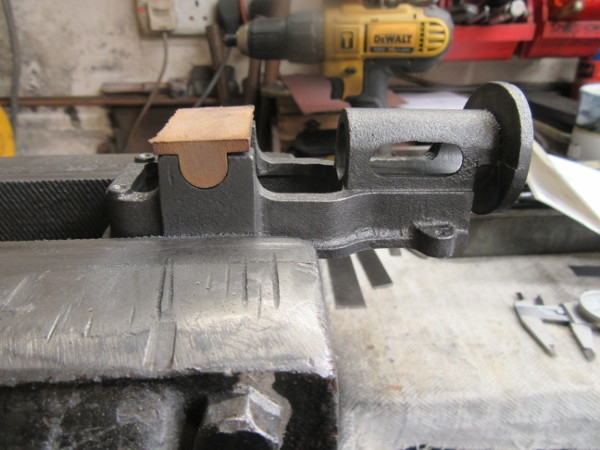
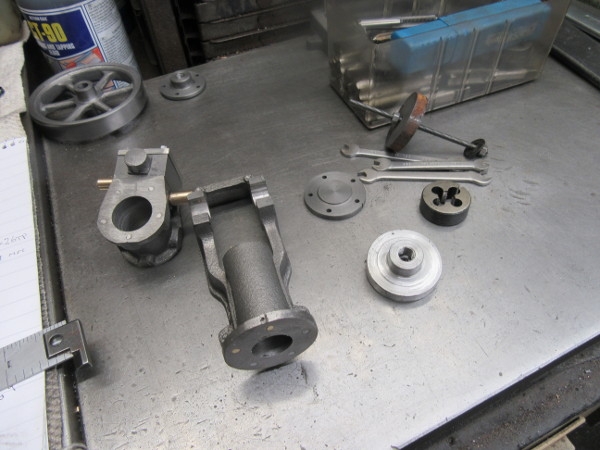
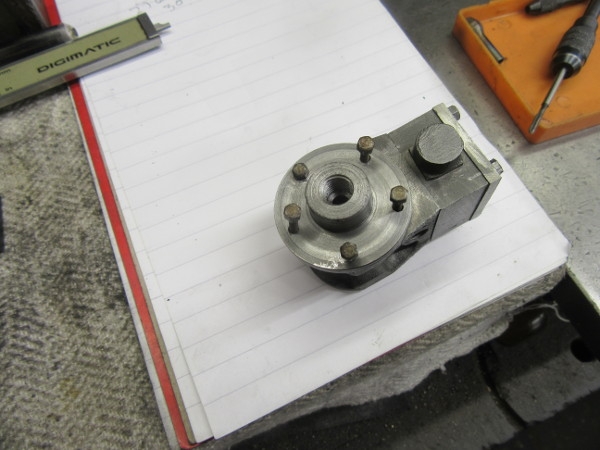
The first thing I did was make a big mistake. I decided to reduce the thickness of the steam chest lid by 1/32", forgetting that the lid was chilled and pot hard. So I destroyed the edge on my milling cutter. I shall have to have a rethink about the lid....
I slightly increased the size of the clearance holes in the lid and the steam chest, screwed the studs out a touch and refitted the lid and steam chest complete with nuts.
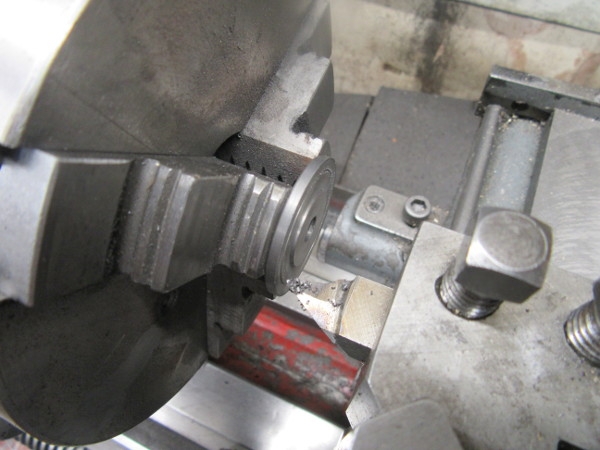
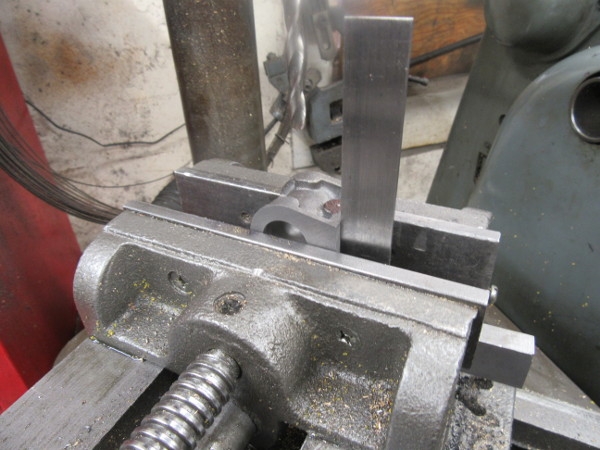
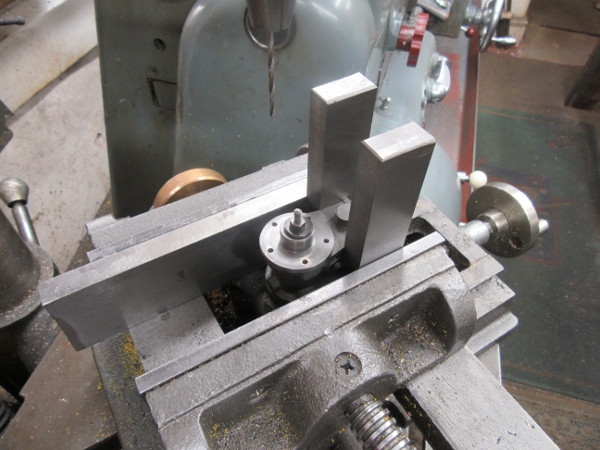
I was going to make a template from the CI bar I had left but changed my mind and used a lid. Here I am cutting the 1 1/8" PCD prior to dividing for five studs.
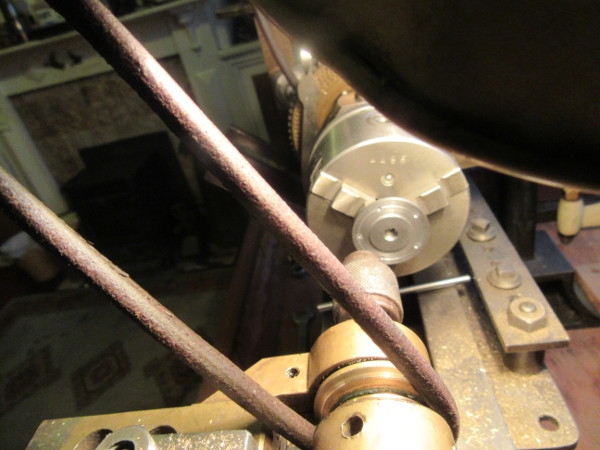
One of my favourite jobs, into Johnny's 1927 lathe and divide for 5 holes. The head has a 100 division circle so it was a question of counting twenty holes between each hole. No problems and I took a divided lid back into the shed.
I drilled the lid and transferred those drillings to the other lid. I shall mark the cylinder using the lids.
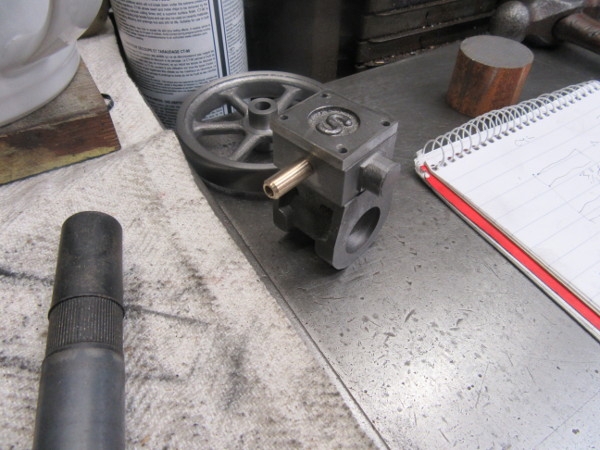
Here's the final position with the cylinder, ready to drill and tap the cylinder for the lids.
My last job was to reclaim my cutter but after a close look decided it was a big job so I fitted another cutter and this one will have to wait.
Stanley Challenger Graham
Stanley's View
scg1936 at talktalk.net
"Beware of certitude" (Jimmy Reid)
The floggings will continue until morale improves!
Stanley's View
scg1936 at talktalk.net
"Beware of certitude" (Jimmy Reid)
The floggings will continue until morale improves!
-
Stanley
- Global Moderator
- Posts: 90301
- Joined: 23 Jan 2012, 12:01
- Location: Barnoldswick. Nearer to Heaven than Gloria.
Re: Shed Matters 3
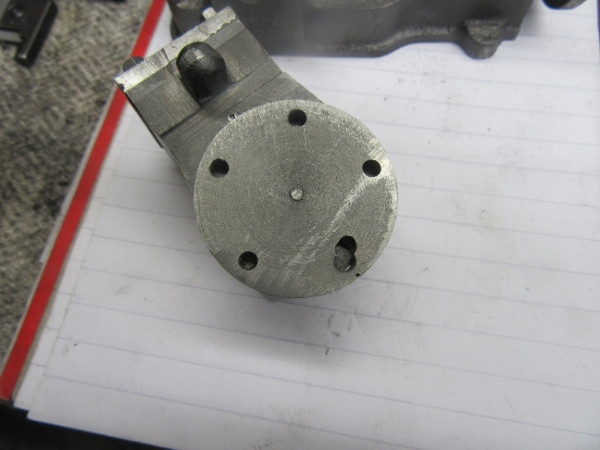
Not one of my best days. I don't want to say too much about it but I totally cocked up this morning and got my cylinder aligned 90 degrees out! What it means is that I have to retrieve the situation and in effect this means making another front lid. I would have been better staying in bed....
Stanley Challenger Graham
Stanley's View
scg1936 at talktalk.net
"Beware of certitude" (Jimmy Reid)
The floggings will continue until morale improves!
Stanley's View
scg1936 at talktalk.net
"Beware of certitude" (Jimmy Reid)
The floggings will continue until morale improves!
Re: Shed Matters 3
I have seen a few 10H engines assembled with the valve chest on the opposite side to that shown on the drawings.
-
Stanley
- Global Moderator
- Posts: 90301
- Joined: 23 Jan 2012, 12:01
- Location: Barnoldswick. Nearer to Heaven than Gloria.
Re: Shed Matters 3
Which would be OK and manageable but not when the valve chest is facing downwards Bob. Tomorrow I shall make this morning go away and start again from fresh! I jusyt crashed on without putting my brain in gear.
Stanley Challenger Graham
Stanley's View
scg1936 at talktalk.net
"Beware of certitude" (Jimmy Reid)
The floggings will continue until morale improves!
Stanley's View
scg1936 at talktalk.net
"Beware of certitude" (Jimmy Reid)
The floggings will continue until morale improves!
-
Stanley
- Global Moderator
- Posts: 90301
- Joined: 23 Jan 2012, 12:01
- Location: Barnoldswick. Nearer to Heaven than Gloria.
Re: Shed Matters 3
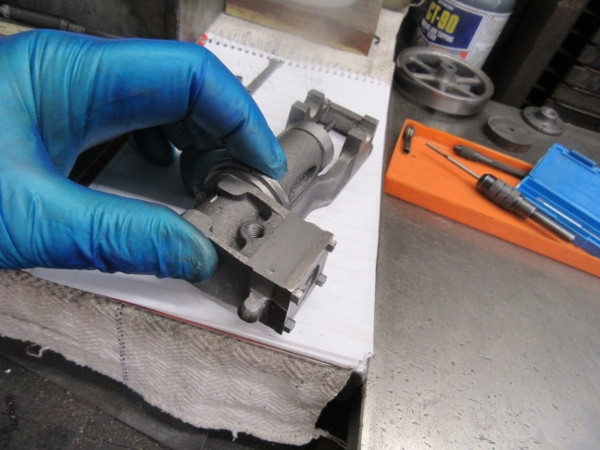
Here's the size of the rabbit. Everything on here is wrong. The lid is a scrapper, not up to standard, the holes drilled in the bed casting and the cylinder are all in the wrong place and need plugging. Lastly the slug of cast iron isn't big enough so the front lid will be steel but that doesn't matter.

Quiet careful work tapping the holes, screwing in material, cutting the plugs off and finishing the surfaces.

Next job was address remaking the lid. I found a piece of steel in the scrap.
By closing time the lid was well on the way to being finished. That's for tomorrow and then I can start getting those pesky holes in the right place!
Stanley Challenger Graham
Stanley's View
scg1936 at talktalk.net
"Beware of certitude" (Jimmy Reid)
The floggings will continue until morale improves!
Stanley's View
scg1936 at talktalk.net
"Beware of certitude" (Jimmy Reid)
The floggings will continue until morale improves!
-
Stanley
- Global Moderator
- Posts: 90301
- Joined: 23 Jan 2012, 12:01
- Location: Barnoldswick. Nearer to Heaven than Gloria.
Re: Shed Matters 3
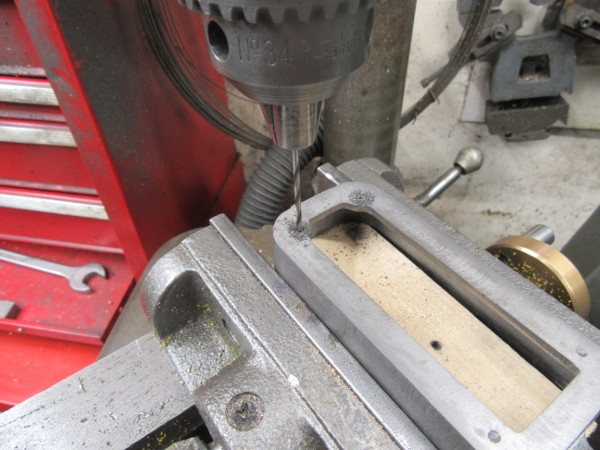
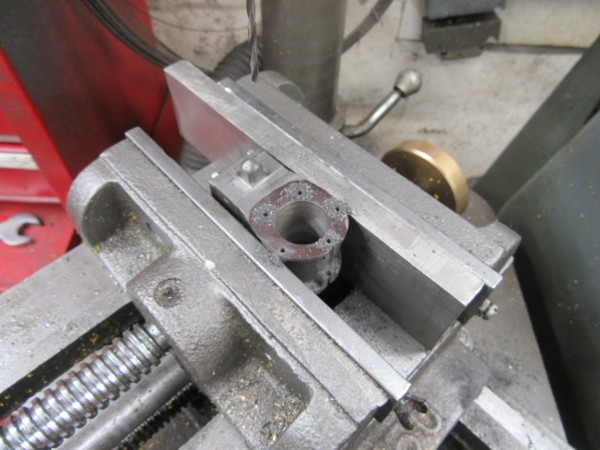
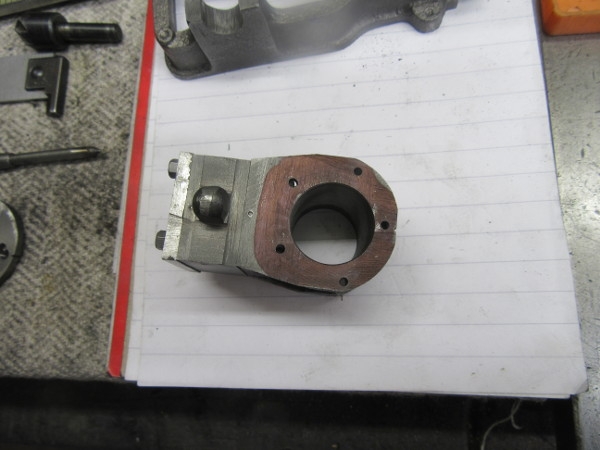
I turned the replacement lid flat so I could accurately transfer the hole pattern and then put the new lid in the lathe and finished it to thickness and with an accurate register.
I installed the new lid on the cylinder after making quite sure I had the orientation correct!
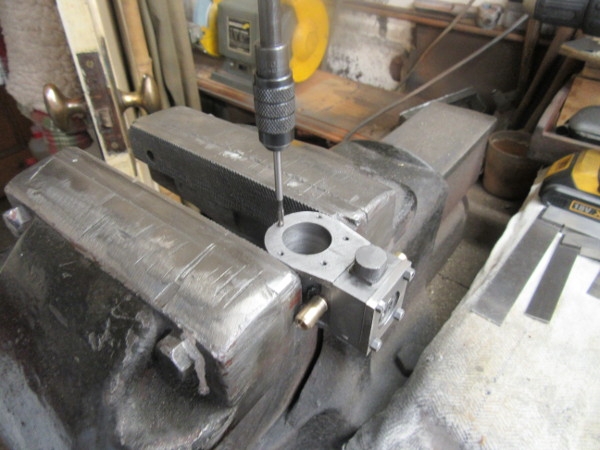
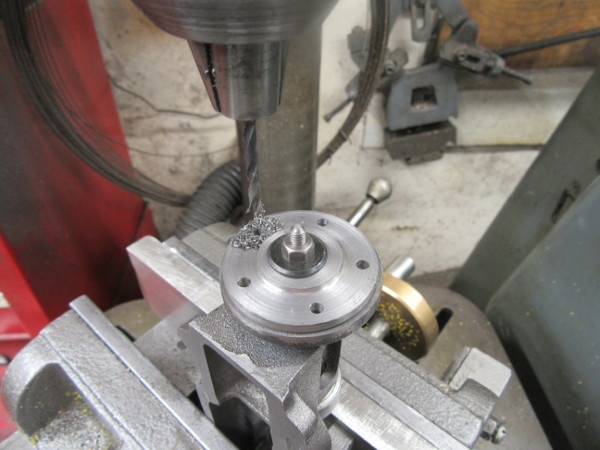
Then a set up in the drill and drill the cylinder with a no. 46 drill ready for 7BA tapping. I could only reach three holes but that's OK.

Unfortunately one of the locations broke out of the casting. Bugger. I shall make it do.....
I am ready for drilling the other three holes but I have had to drill the last hole I tapped out again because my 7BA set screw broke in the hole. I have drilled it out, re-tapped it and now I'm ready to drill the other two and tap.
Here's where I was at closing time. Now I will use the new lid to mark the bad casting for drilling. That's for tomorrow.
Stanley Challenger Graham
Stanley's View
scg1936 at talktalk.net
"Beware of certitude" (Jimmy Reid)
The floggings will continue until morale improves!
Stanley's View
scg1936 at talktalk.net
"Beware of certitude" (Jimmy Reid)
The floggings will continue until morale improves!
-
Stanley
- Global Moderator
- Posts: 90301
- Joined: 23 Jan 2012, 12:01
- Location: Barnoldswick. Nearer to Heaven than Gloria.
Re: Shed Matters 3
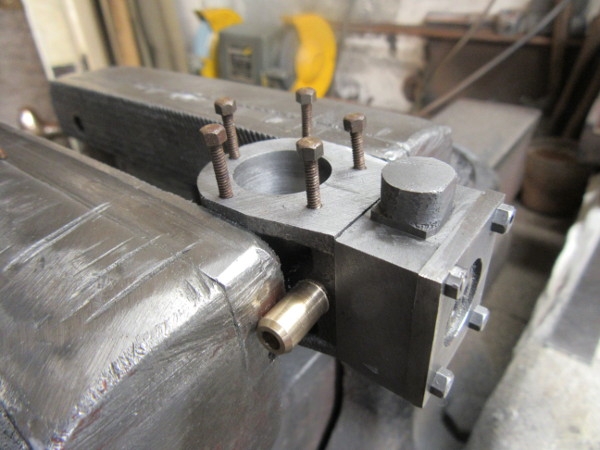
A quick check I had the orientation right...

And then fix the new lid to the bed casting so I can drill the bed flange clearance for 7BA.
Next I moved on to the top lid and realised it had one hole too close to the edge. No getting away from it, I drilled the bore too far from the valve face. So I tapped the hole, plugged it with a 4BA plug only to see it come out when I drilled for the new stud position. I'm making a right mess of this.....
I've transferred the hole locations and at closing time I am ready to tap the cylinder. It's progress I suppose but all a bit strained and hard work. I shall do much better with the next one!
Stanley Challenger Graham
Stanley's View
scg1936 at talktalk.net
"Beware of certitude" (Jimmy Reid)
The floggings will continue until morale improves!
Stanley's View
scg1936 at talktalk.net
"Beware of certitude" (Jimmy Reid)
The floggings will continue until morale improves!