Shed Matters 3

User avatar
Stanley
Global Moderator
Global Moderator
Posts: 90301
Joined: 23 Jan 2012, 12:01
Location: Barnoldswick. Nearer to Heaven than Gloria.

Re: Shed Matters 3

Post by Stanley »

Image

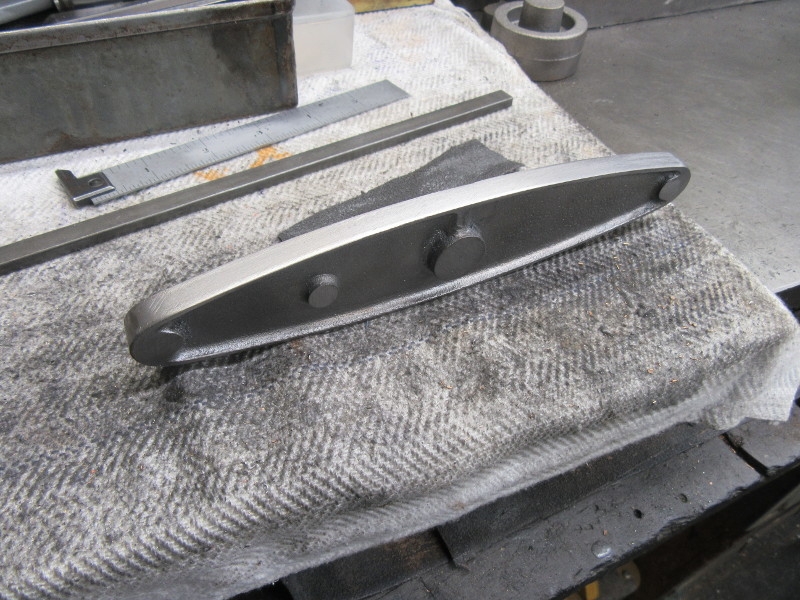
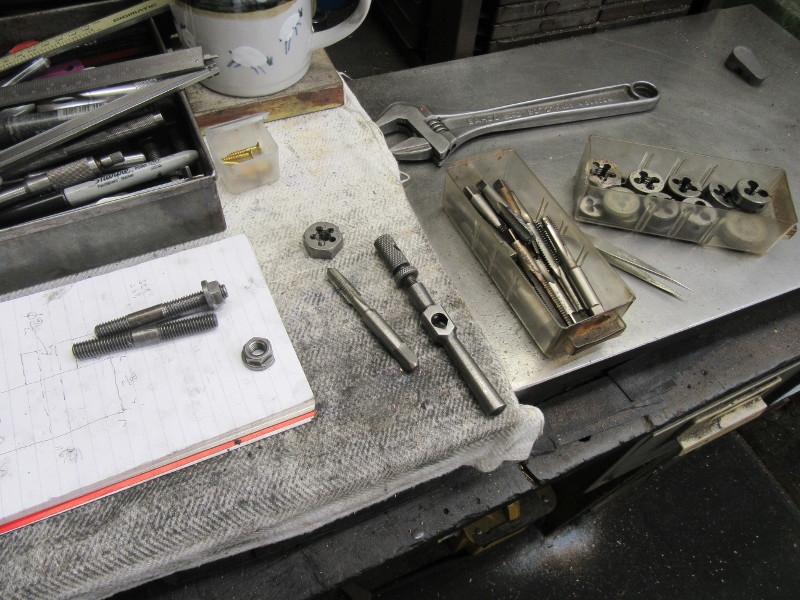
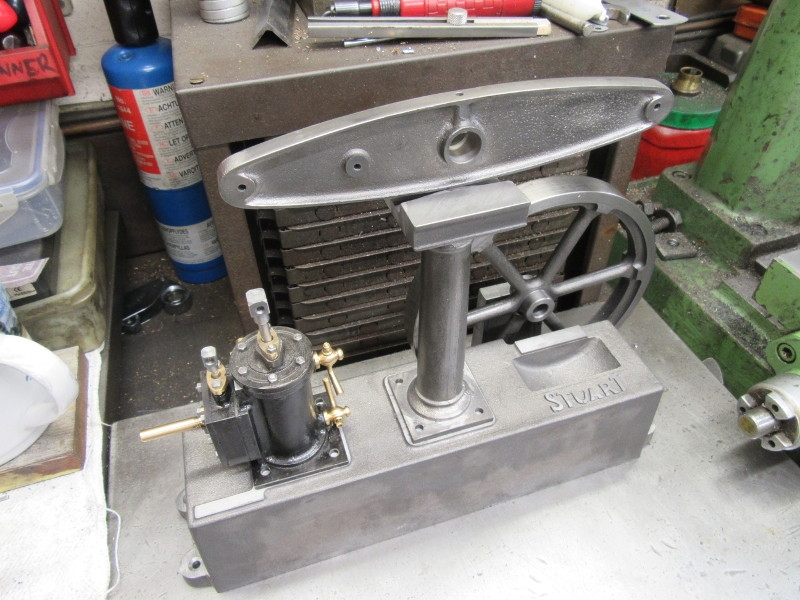
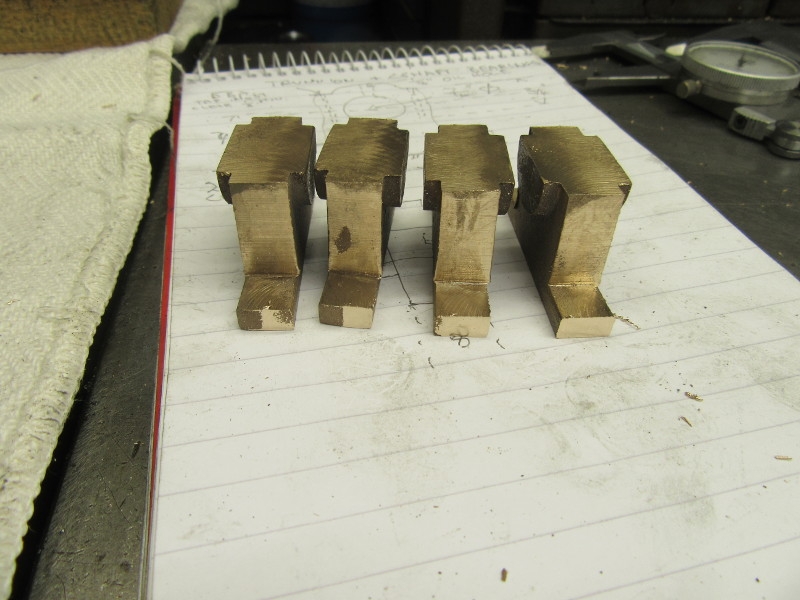
Back to my column. What we are doing today is sorting out the dimensions so first job was to get the drawings out and make sure I knew what they were!

Image

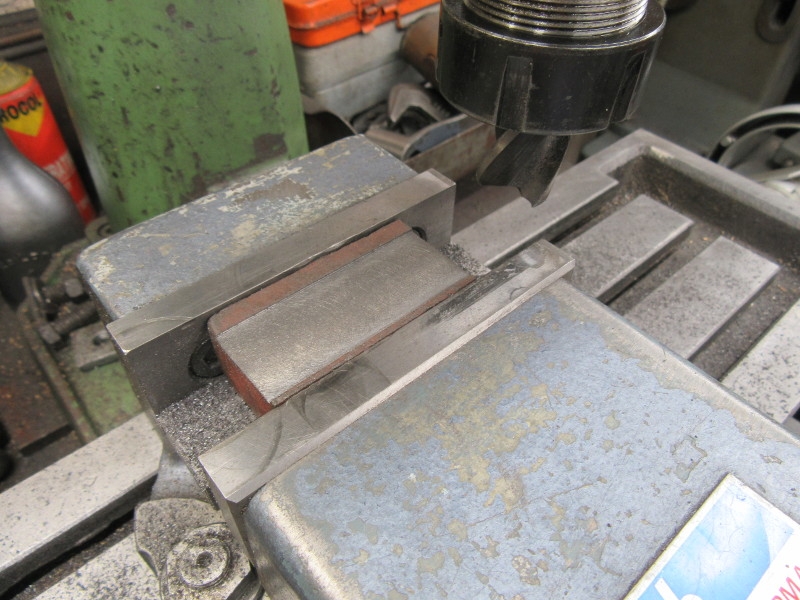
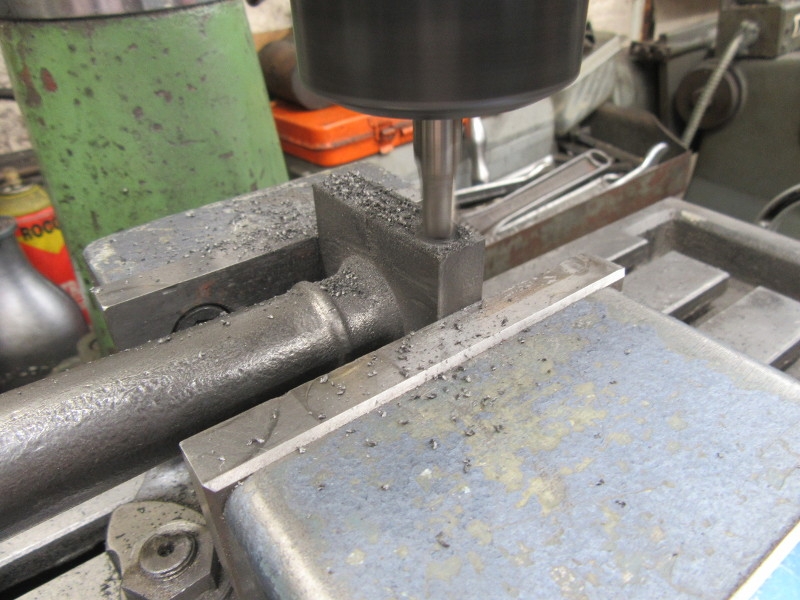
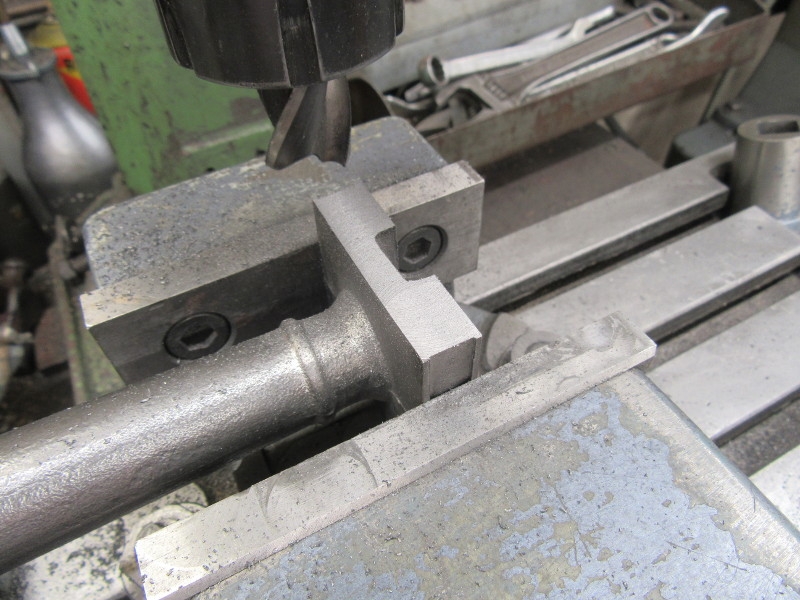
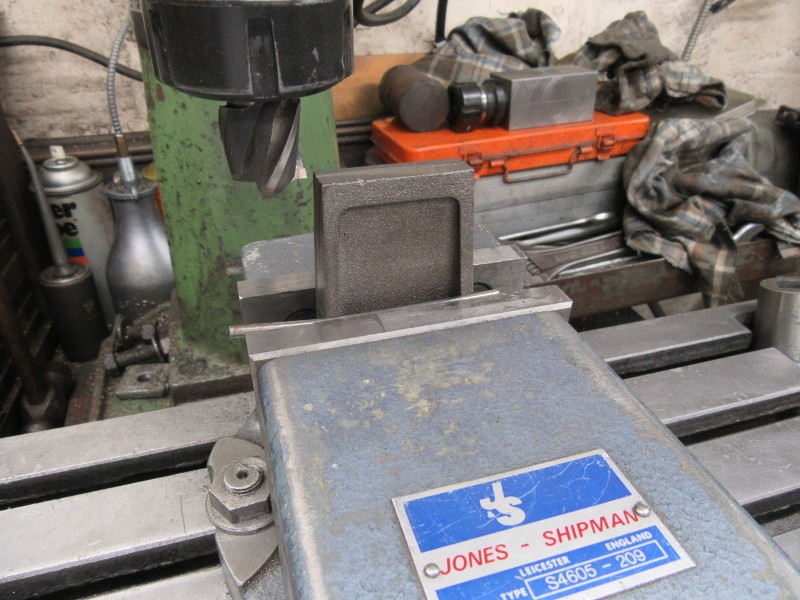
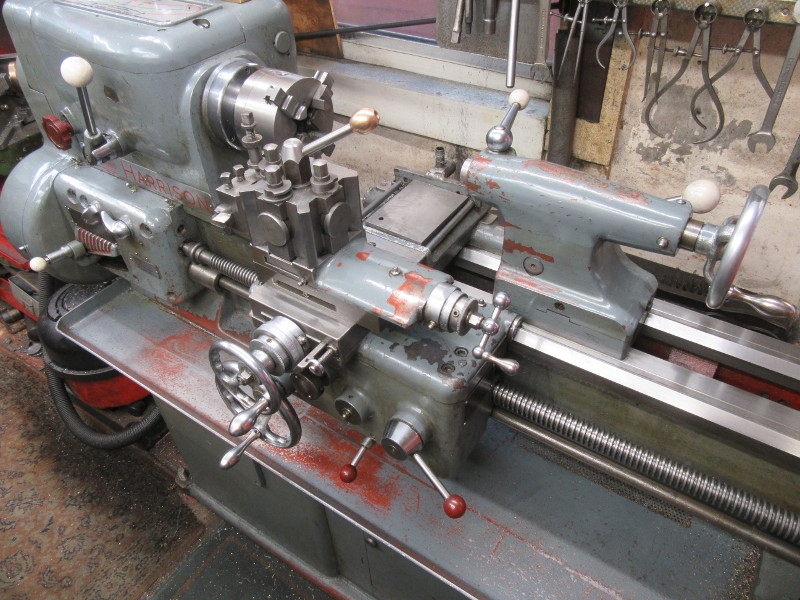
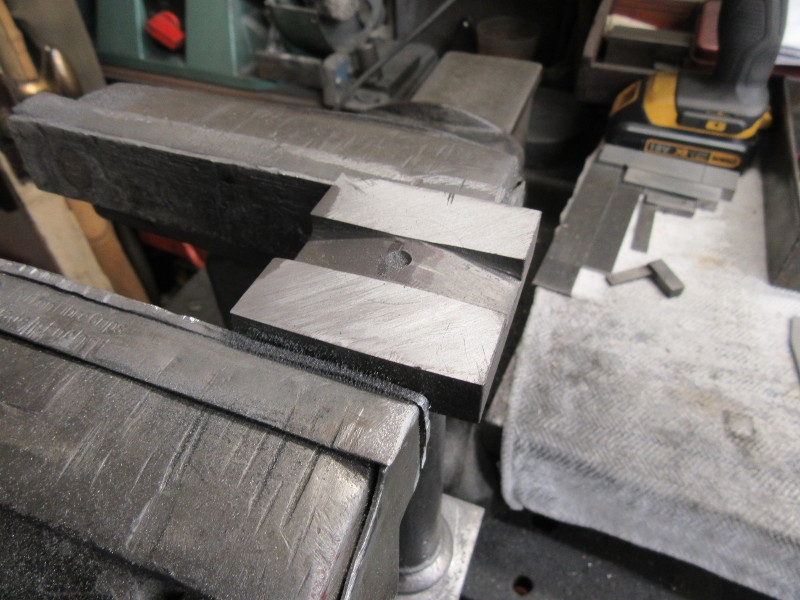
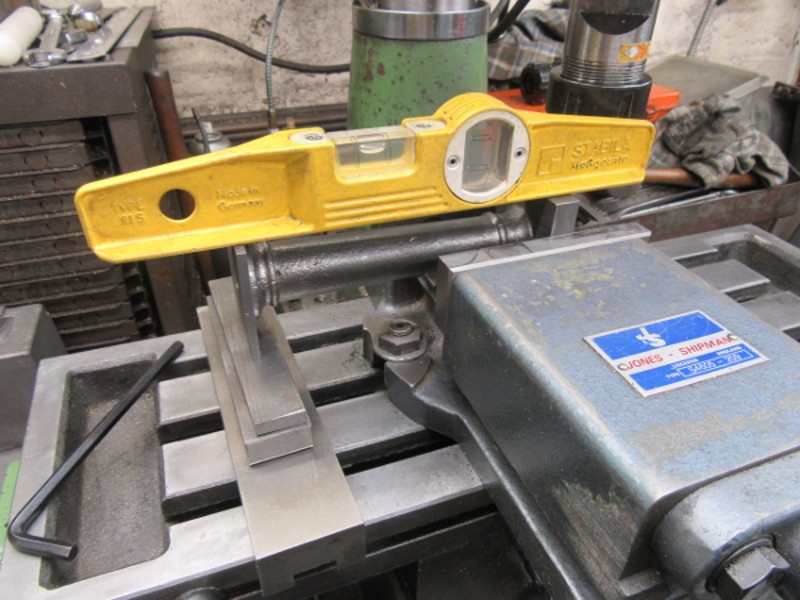
But first I wanted to check the tramming of my vise. I wasn't completely satisfied with the way I did it yesterday. The most accurate way is to actually mill an edge and measure the distance to the inside of the fixed jaw. So I fished out a piece of cast iron popped it under the cutter and took a cut across it then measured it. I was right, it was a couple of thou out so I put that right. We are under a thou now and that is good enough for me.

Image

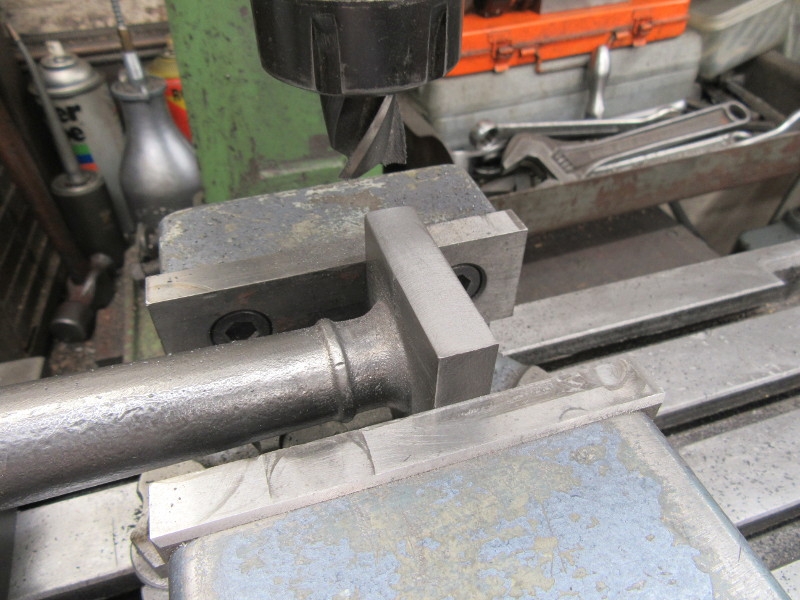
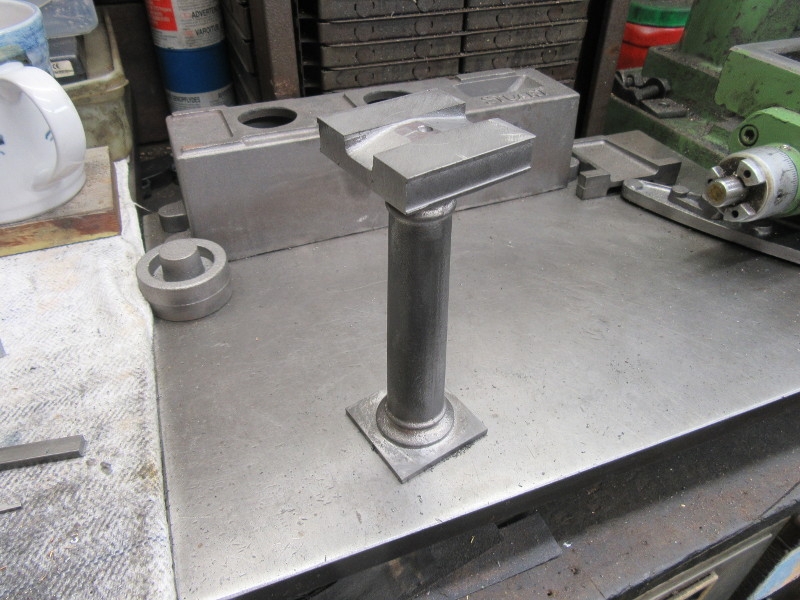
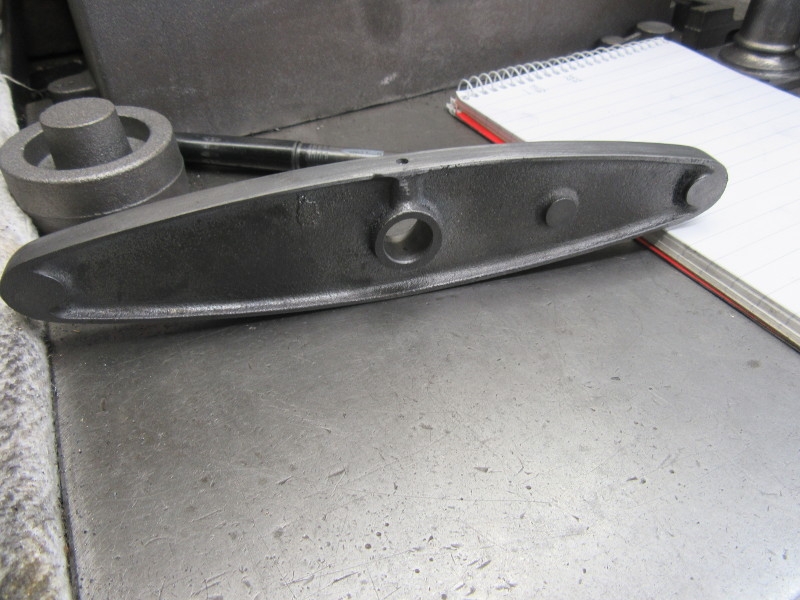
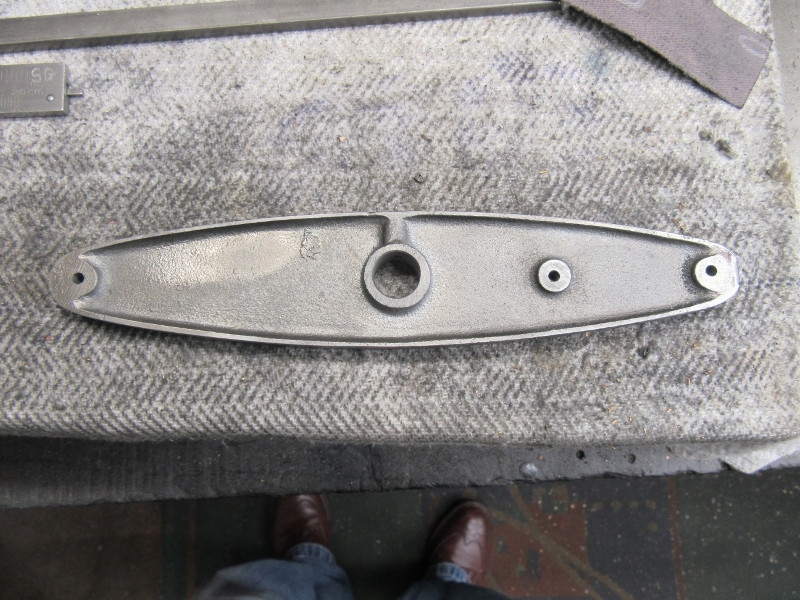
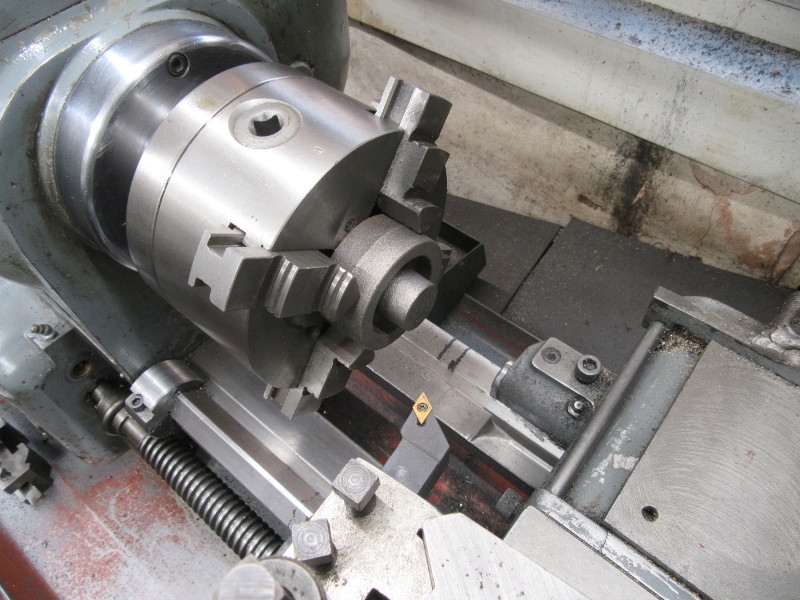
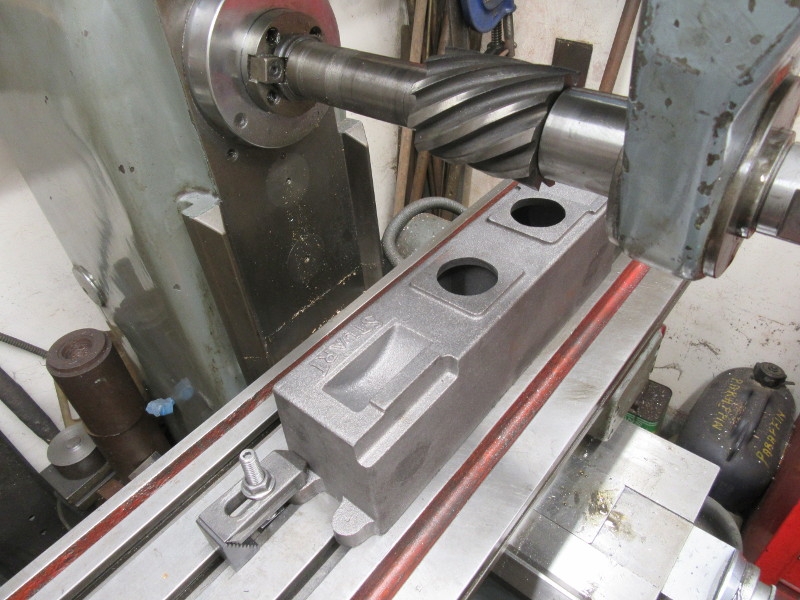
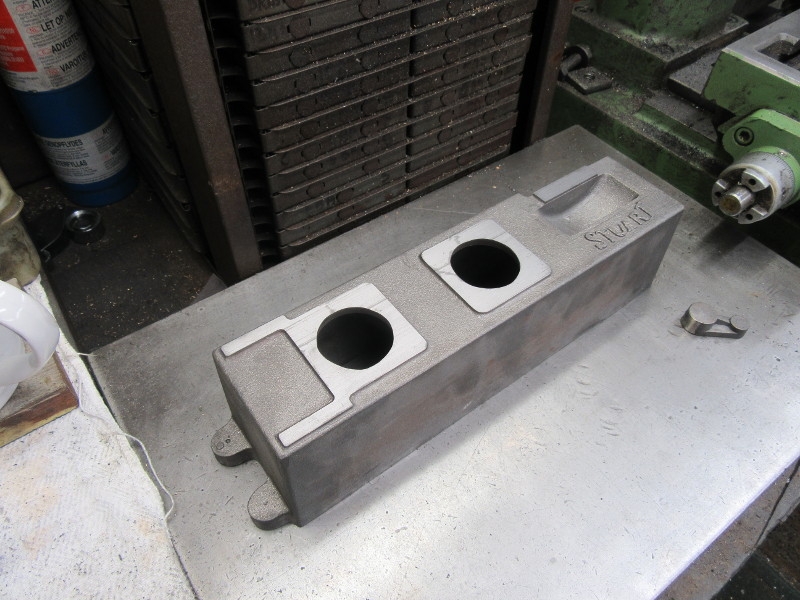
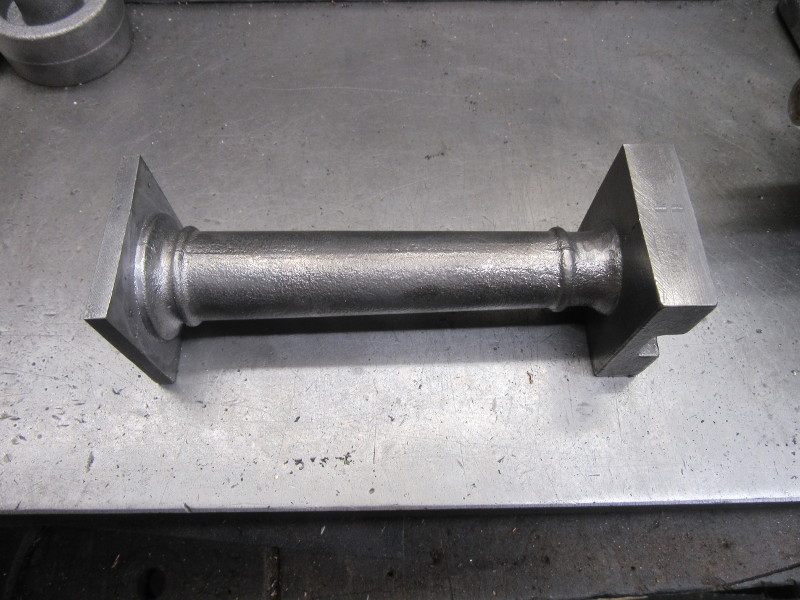
Next job was the overall length. I know from the last one I need as much metal in the head as possible so first job was to reduce the base to 1/6", funny figure I know but that's what it measures at.

Image

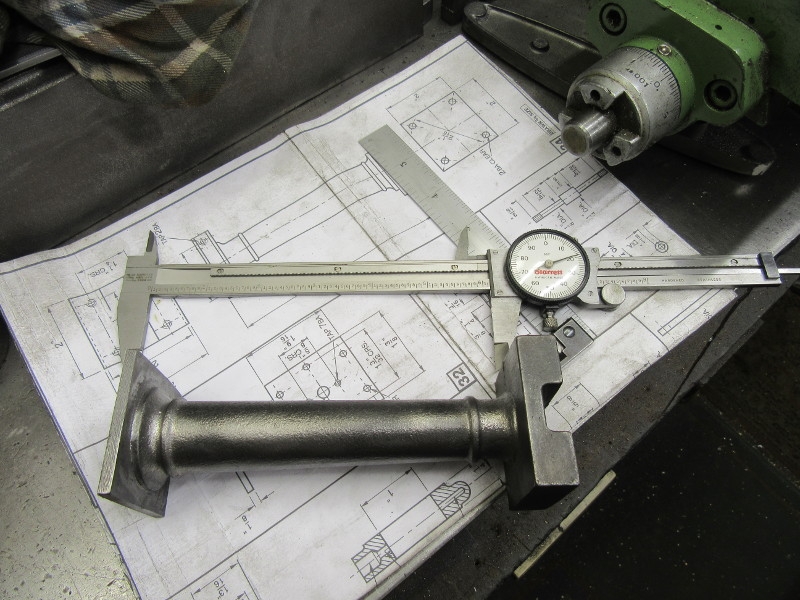
The drawing calls for 6" so I had to get the 9" dial calliper out that Mick gave me. Once I had the measurement I could work out the cut I needed and get set up and cutting.

Image

Image

Image

Image

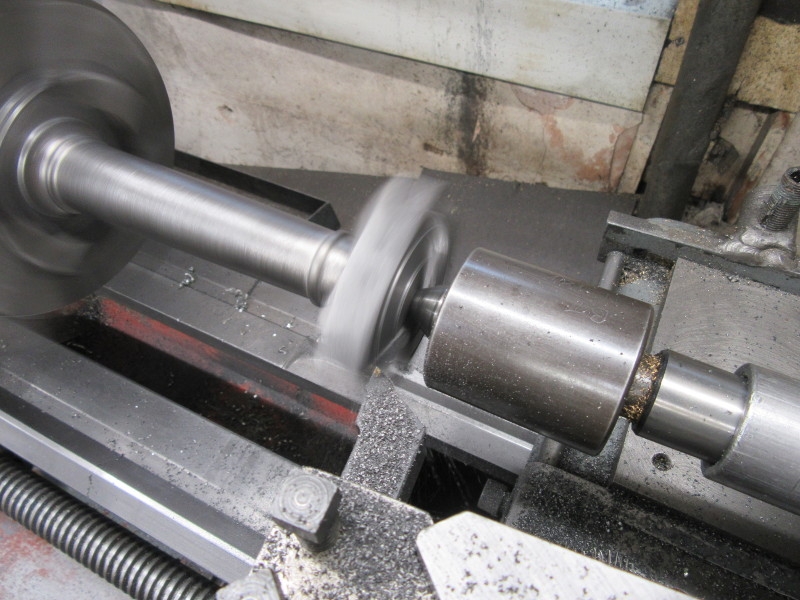
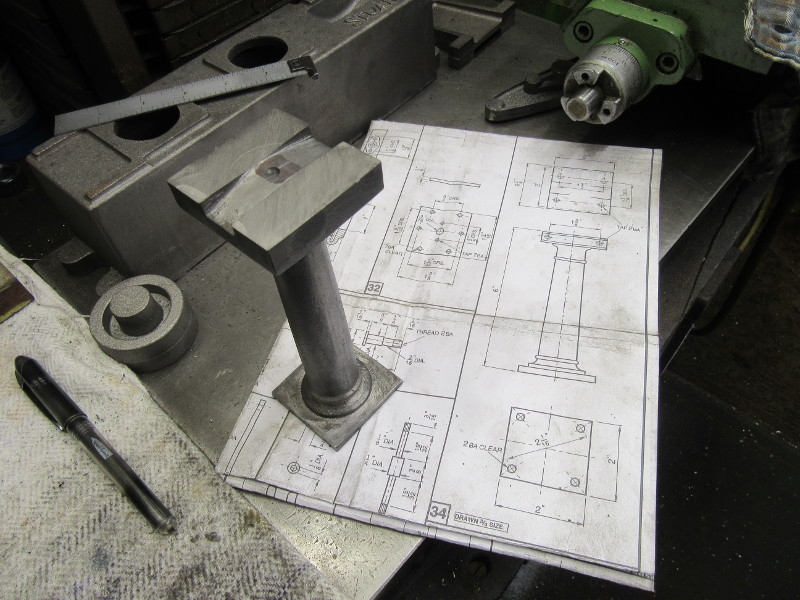
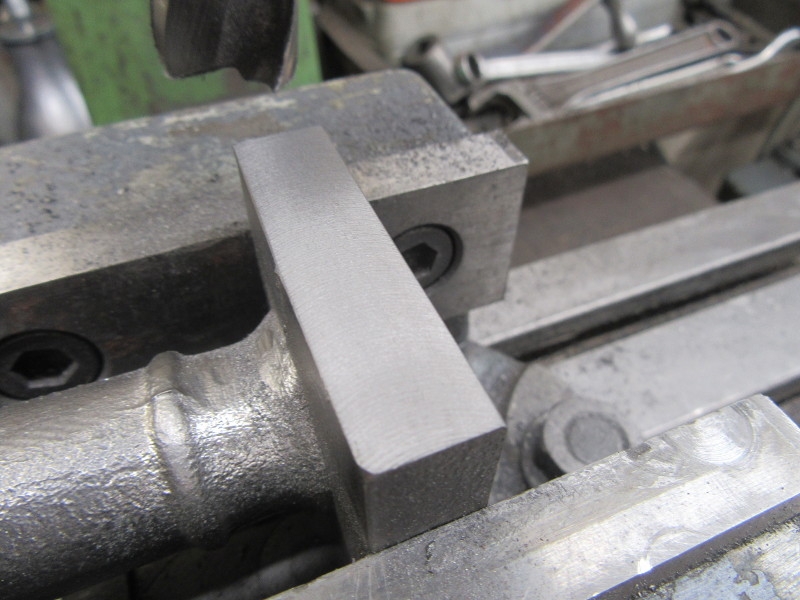
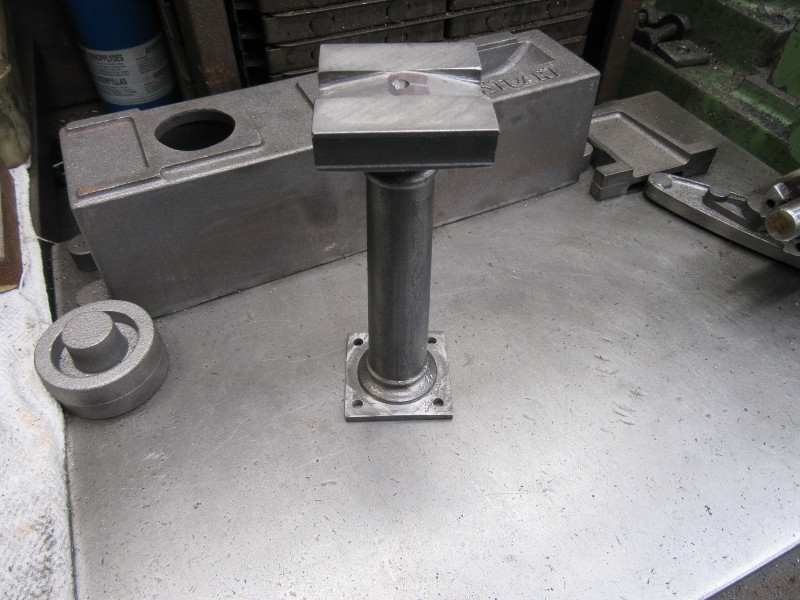
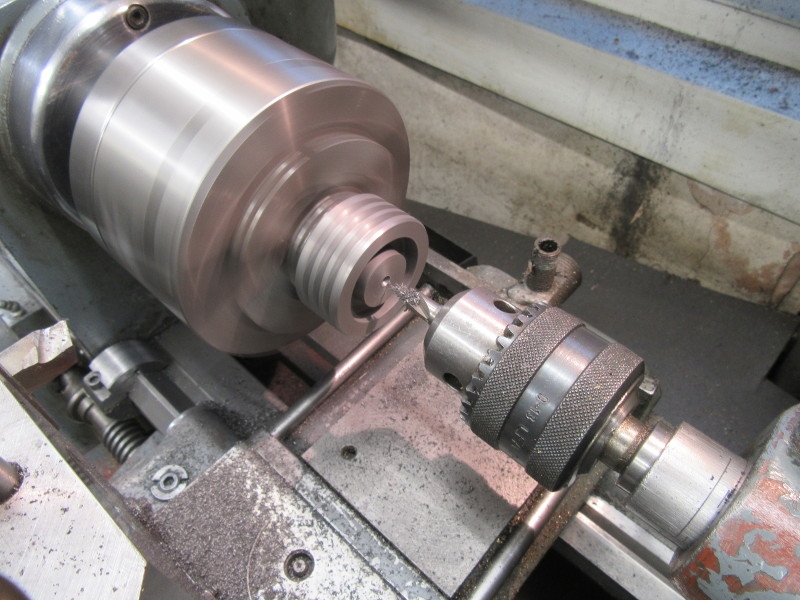
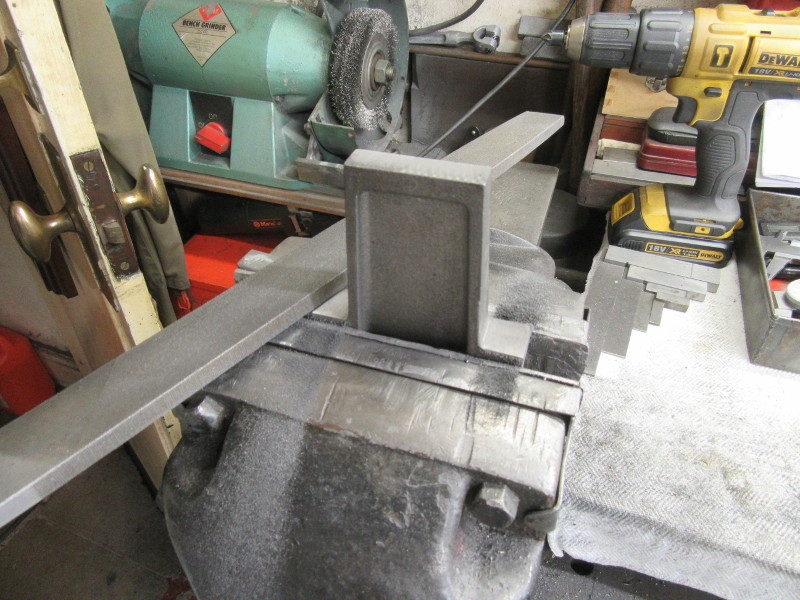
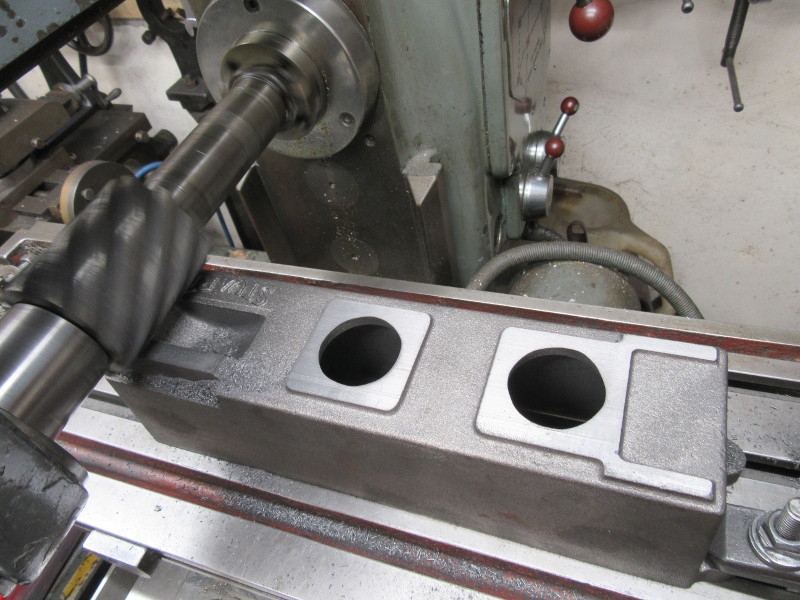
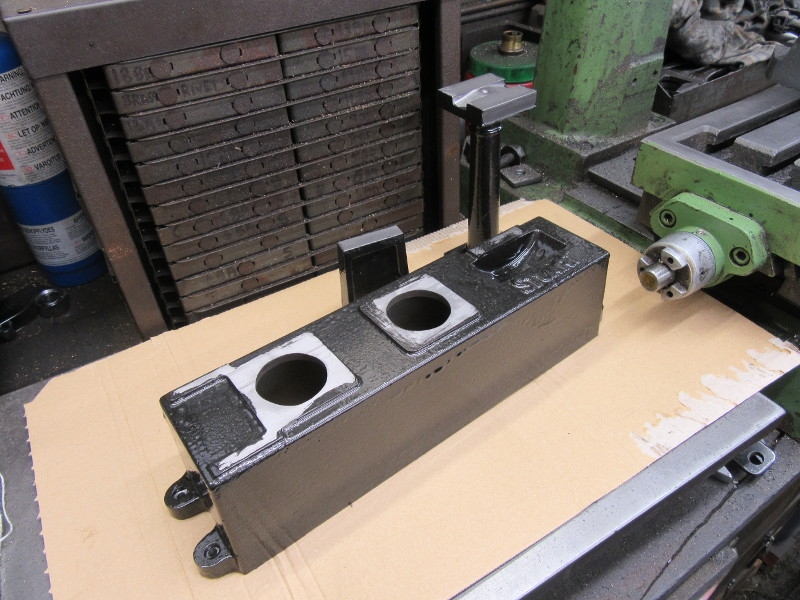
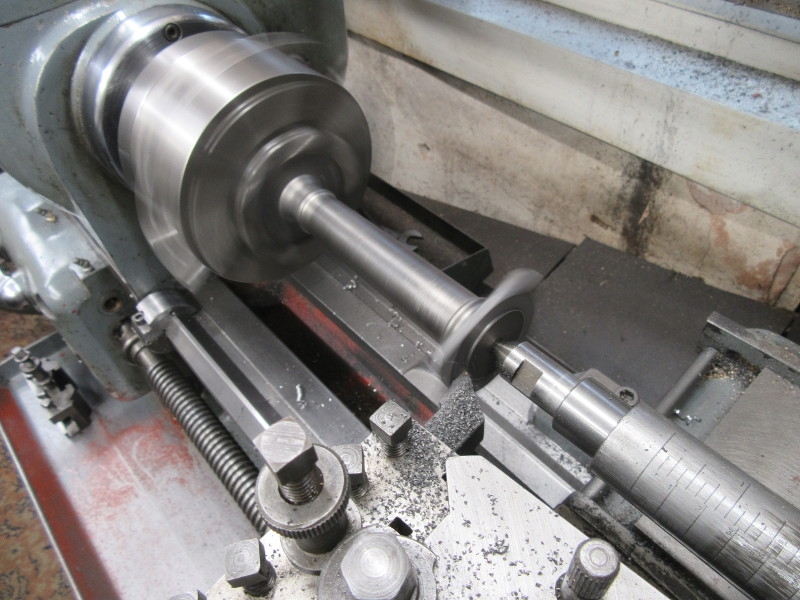
I couldn't get right into the centre so I had to get old fashioned and get a big rough file out. I ended up with a column that is exactly 6" long and has square ends. Next job is milling the sides of the head for the supporting bars for the parallel motion.

Image

Image

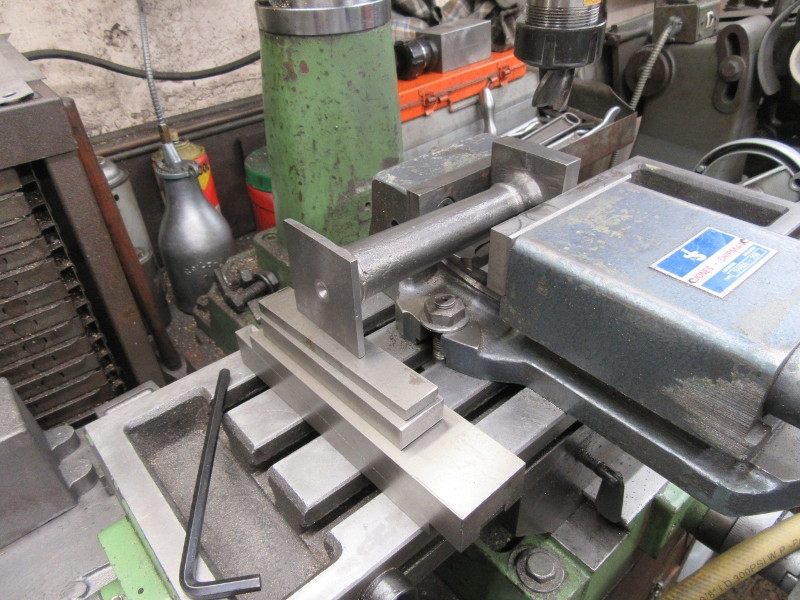
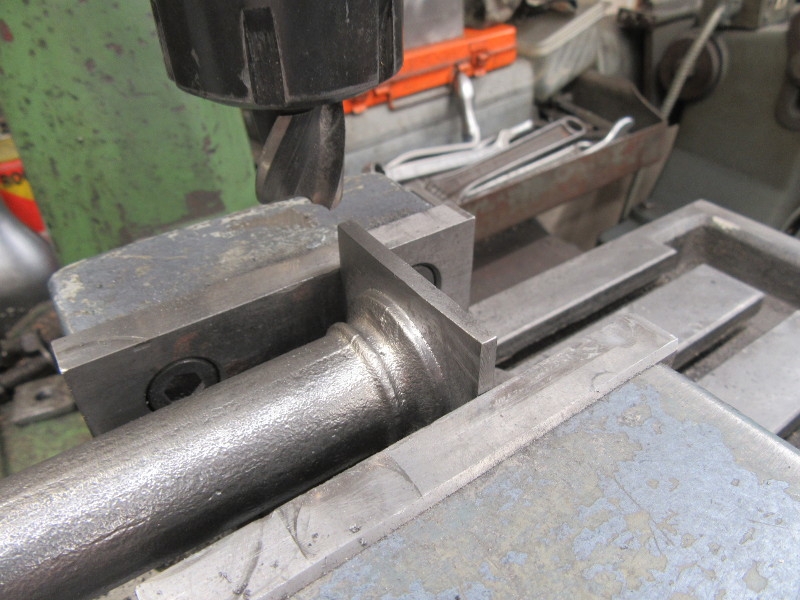
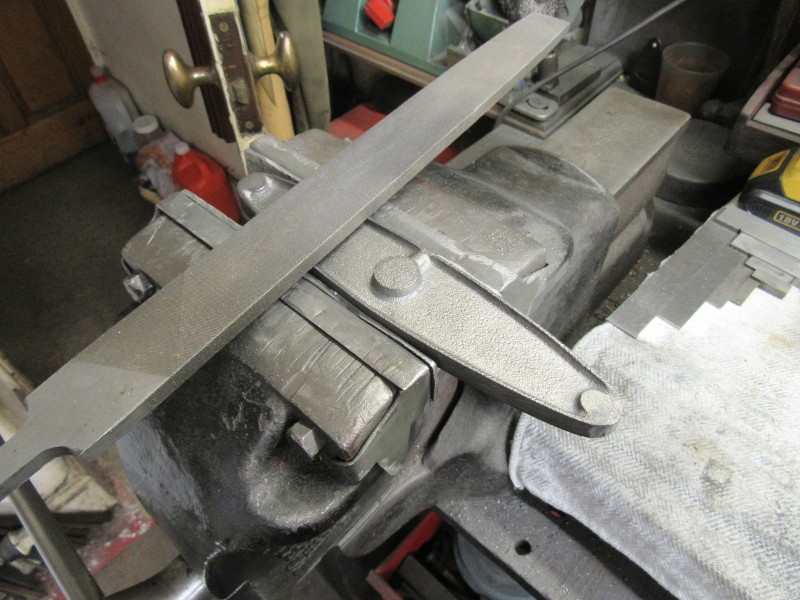
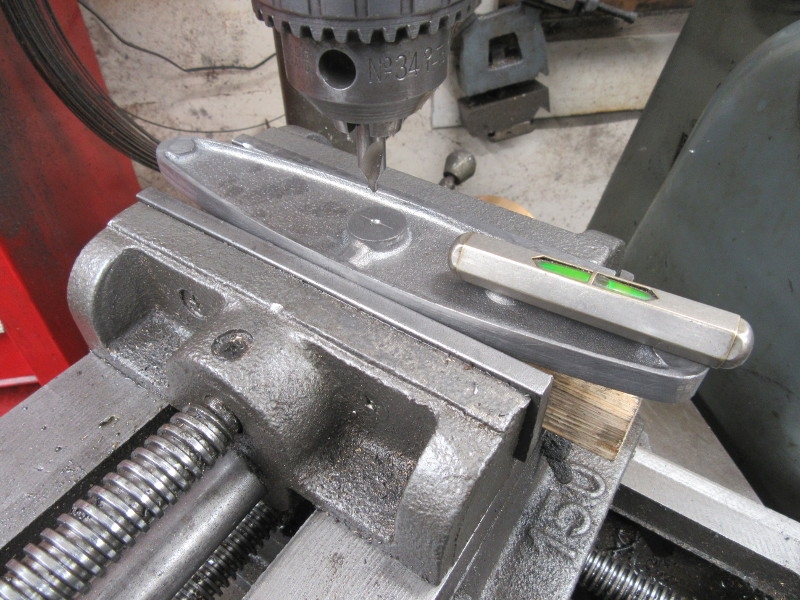
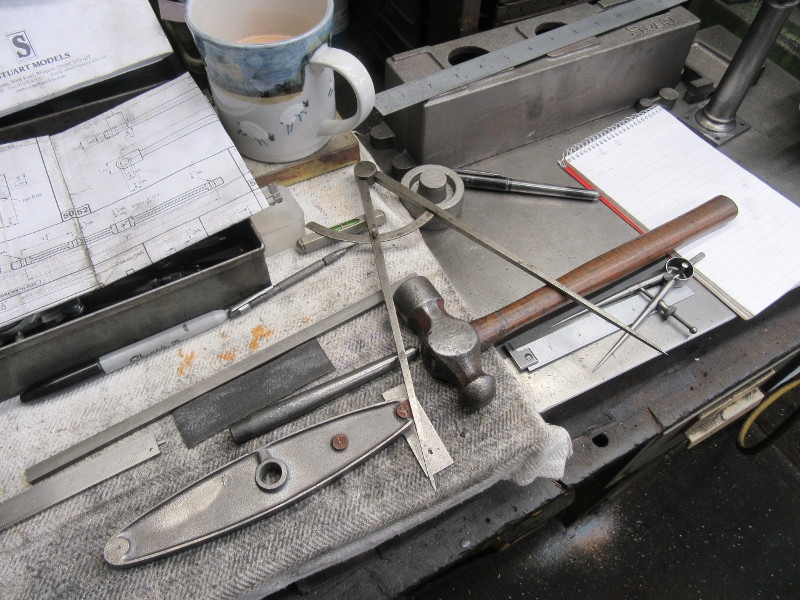
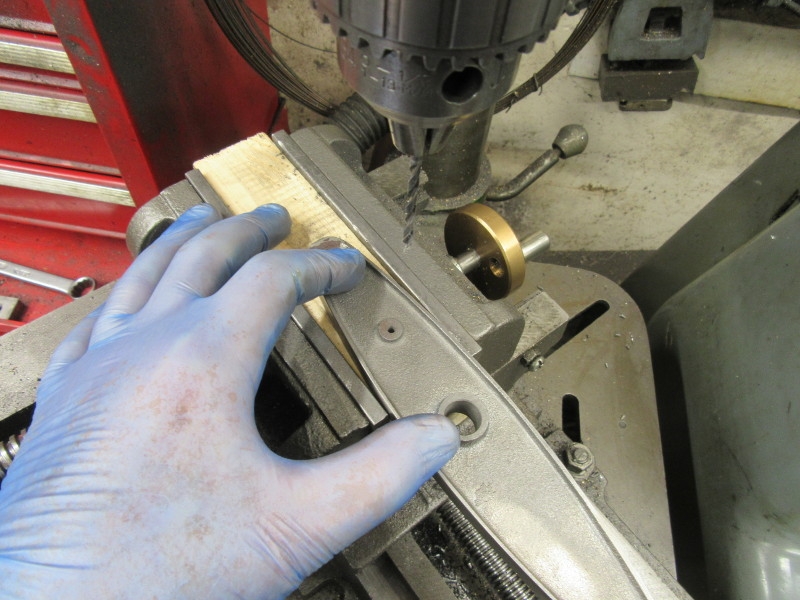
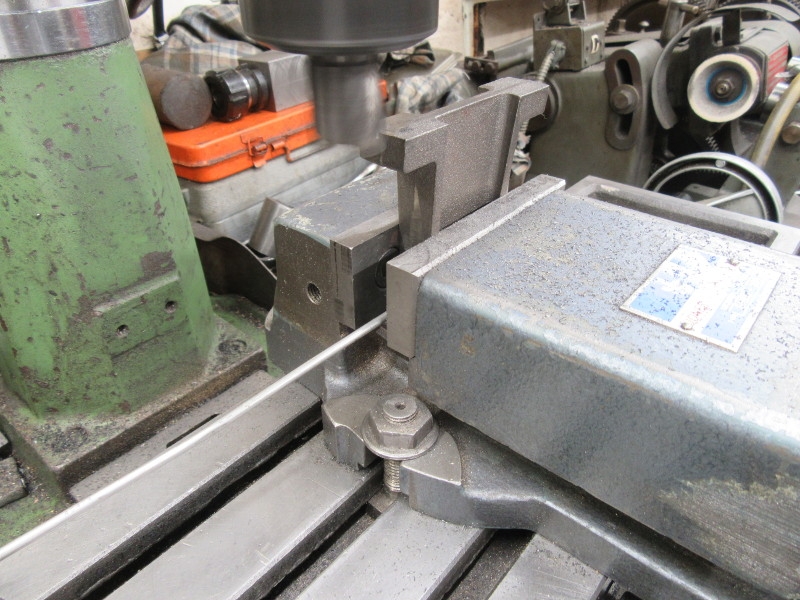
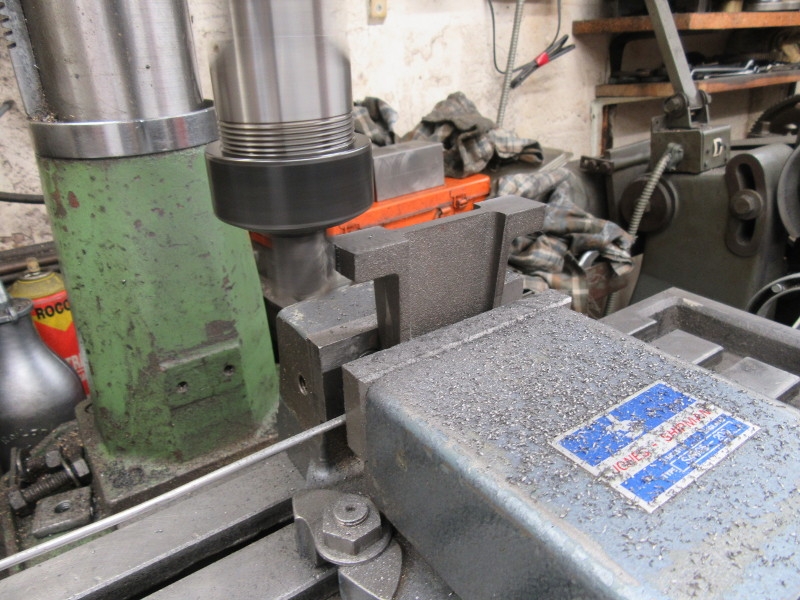
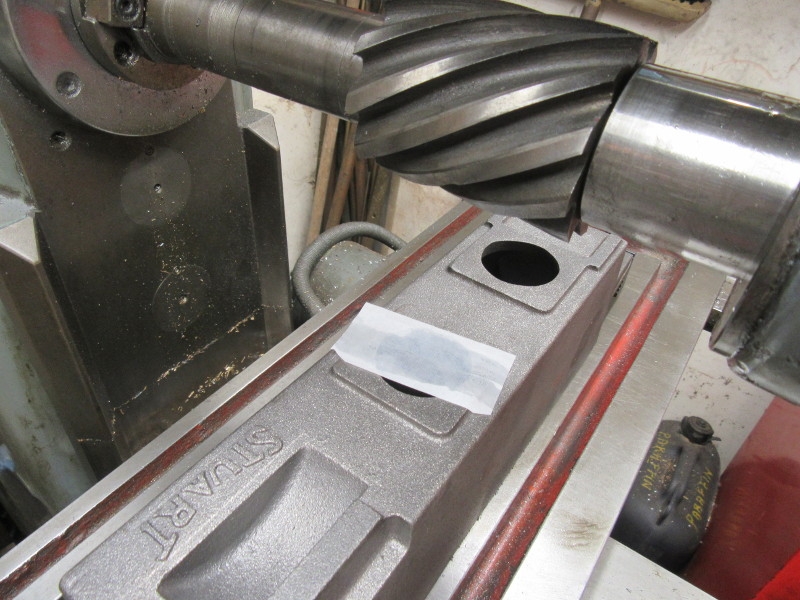
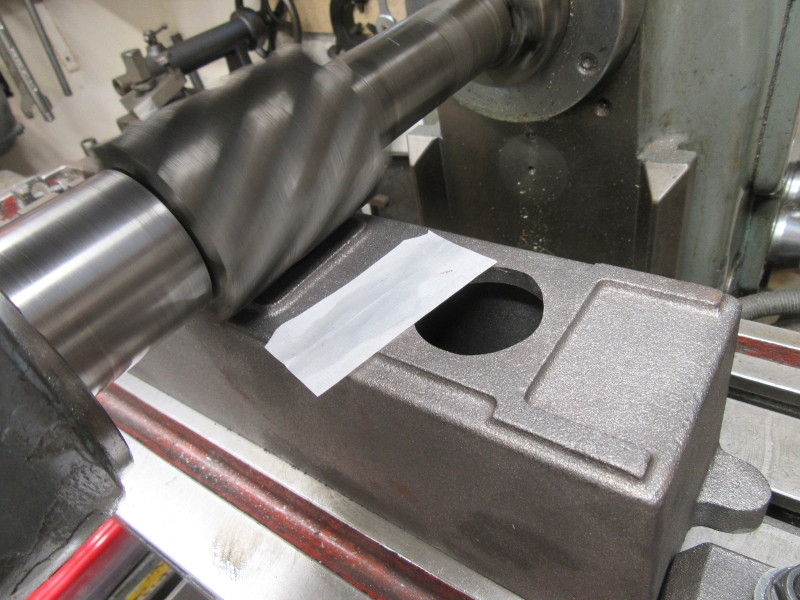
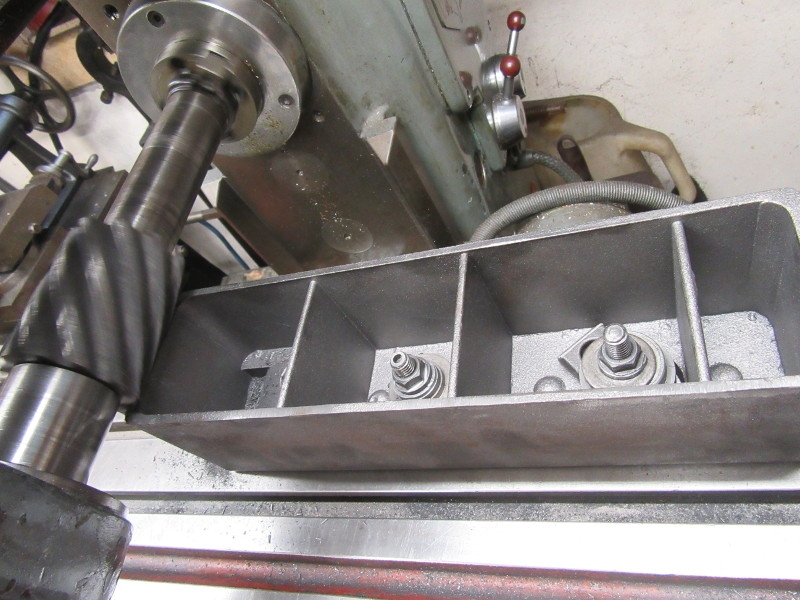
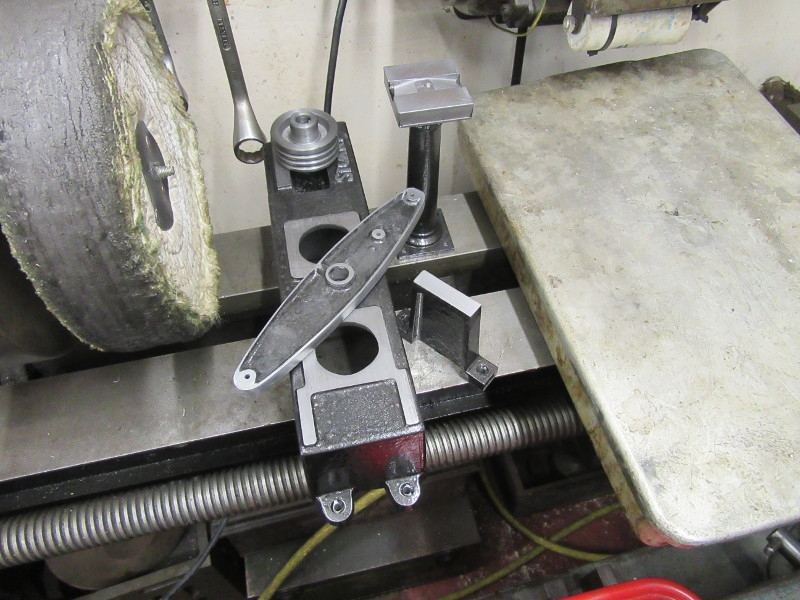
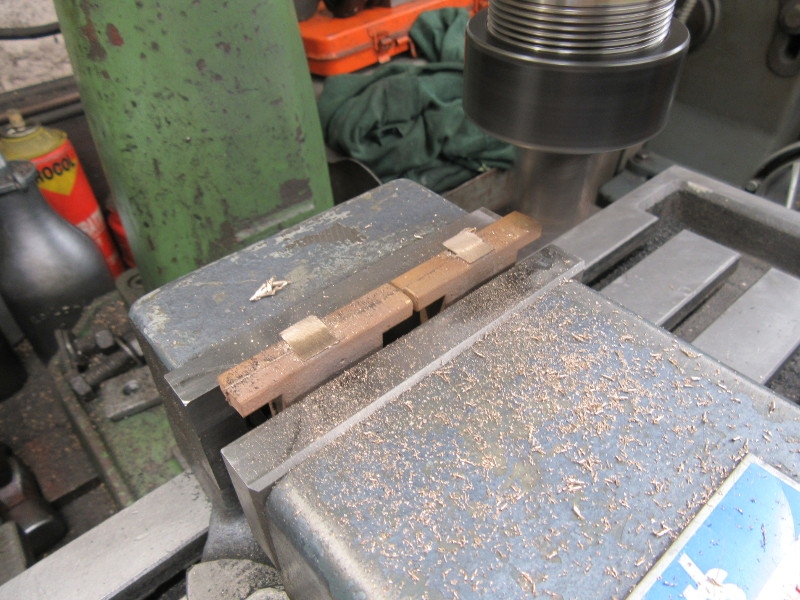
We need a good accurate stable set up under the cutter. It involves an adjustable parallel and some packing for the outside end. The last pic is knocking off time, we are ready to start cutting again.
Two hours careful work with plenty of checking, I think I have everything right so far!
Stanley Challenger Graham
Stanley's View
scg1936 at talktalk.net

"Beware of certitude" (Jimmy Reid)
The floggings will continue until morale improves!
User avatar
Stanley
Global Moderator
Global Moderator
Posts: 90301
Joined: 23 Jan 2012, 12:01
Location: Barnoldswick. Nearer to Heaven than Gloria.

Re: Shed Matters 3

Post by Stanley »

Image

Straight into milling the head of the column. All set up and ready.

Image

Image

Once I had cleaned up the face I milled the channel for the parallel motion support bars. Much better than my last column, fits perfectly. Then I repeated the process on the opposite face.

Image

You won't be surprised to see that before I put my favourite end mill back in the VM I spent a few minutes with Mrs Clarkson. I know I have said it before but I don't understand how anyone can run a mill with HSS tools without a T&C grinder.

Image

The finish on the last face before I milled the groove in it demonstrates what the results can be with a sharp cutter.

Image

Image

Then I wiped all the other faces over with the cutter and broke the edges.

Image

By 07:00 after an hour in the shed I had finished what I need to do to the column for the time being. Time for essential shopping at the Co-op before it gets busy. A good hour, I am ready to move on to the other castings, I;ll decide which tomorrow.
Stanley Challenger Graham
Stanley's View
scg1936 at talktalk.net

"Beware of certitude" (Jimmy Reid)
The floggings will continue until morale improves!
User avatar
Stanley
Global Moderator
Global Moderator
Posts: 90301
Joined: 23 Jan 2012, 12:01
Location: Barnoldswick. Nearer to Heaven than Gloria.

Re: Shed Matters 3

Post by Stanley »

Image

First job today was to break all the edges on the column and drill the holes that will mount it on the base. It can be put aside now while I attack the other castings.

Image

Next for shaving is the beam casting. First job was to fettle it with an 18" smooth file. I wanted faces on all the casting features including the edges, both sides of course.

Image

Then I spent a long time with various grades of emery cloth and the wire wheel making the surfaces pretty. I also checked my thickness measurements, all OK.

Image

Then some careful measurement and marking and under the pillar drill to make the 1/2" hole for the trunnion shaft and while I was at it the 3/32" Hole in the top of the beam that will take the pin that anchors the shaft in the beam.

Image

Here's where I ended up. Not much to show for two hours work but making castings pretty is very time-consuming and can't be hurried. I have the trunnion shaft bore done, now I need to Address the measuring and marking of the three 1/8" holes, one for the con-rod pin and the other two for the parallel motion. I need to take my time over that and that's for tomorrow.
Stanley Challenger Graham
Stanley's View
scg1936 at talktalk.net

"Beware of certitude" (Jimmy Reid)
The floggings will continue until morale improves!
User avatar
Stanley
Global Moderator
Global Moderator
Posts: 90301
Joined: 23 Jan 2012, 12:01
Location: Barnoldswick. Nearer to Heaven than Gloria.

Re: Shed Matters 3

Post by Stanley »

Image

First order of the day was to finish current operations on the beam. So we had to do some measuring and marking. Not often the larger dividers come out!

Image

Image

Then some careful drilling and we finished up with all the holes completed. If they look slightly at odds with the pads on the casting that's because of variations in them, not the measurements.

Image

Image

Image

Then I turned my attention to the pulley. Routine turning and boring and despite having to pop to the Co-op for a couple of essentials. Tomorrow I'll put the grub screw in the pulley and while I am at it, the flywheel. Nice couple of hours.....
Stanley Challenger Graham
Stanley's View
scg1936 at talktalk.net

"Beware of certitude" (Jimmy Reid)
The floggings will continue until morale improves!
User avatar
Stanley
Global Moderator
Global Moderator
Posts: 90301
Joined: 23 Jan 2012, 12:01
Location: Barnoldswick. Nearer to Heaven than Gloria.

Re: Shed Matters 3

Post by Stanley »

Image

As promised, the first task of the day is to install the grub screws in the pulley and flywheel.

Image

One of the good things about getting old is that you have had time to gather in the right tools for the job. Here's a case in point, not the easiest place to tap a 1/4" Whit hole. Dead easy with the ratchet.

Image

That's better, box on!

Image

Image

Image

Then I addressed the outrigger for the crankshaft. Top and bottom faces milled smooth and parallel and I wiped the ends as well with the side of the cutter. The wire is there because the two sides of the casting aren't parallel, the soft wire deforms to accept the discrepancy.

Image

Image

I cleaned up the other faces with a file, broke all the edges and sorted my brass screws that will be used eventually to fix the base and the outrigger to the wooden base board. I drilled the outrigger base and countersunk the holes.

Image

Funny thin g that. When you need your holding tackle the threads always need cleaning up. Most times it gets missed but does waste time so I bit the bullet and cleaned up the threads!

Image

This was knocking off time, ready to proceed with milling the base. Normally I'd do the base first and mill the top parallel but the top side won't sit flat, it rocks on the surface plate. The base is rock solid so I'll use that and mill the top flat. Horizontal Mills are seen as old fashioned today but this is a perfect way to do this job, one pass with a slab cutter and it is done. Watch this space tomorrow....
A nice two hours in the shed, good progress!
Stanley Challenger Graham
Stanley's View
scg1936 at talktalk.net

"Beware of certitude" (Jimmy Reid)
The floggings will continue until morale improves!
User avatar
Stanley
Global Moderator
Global Moderator
Posts: 90301
Joined: 23 Jan 2012, 12:01
Location: Barnoldswick. Nearer to Heaven than Gloria.

Re: Shed Matters 3

Post by Stanley »

Image

Today we sort the box bed casting. So why am I starting with paper floating round? It's an old machinist's trick. A cigarette paper is one and a half thousandths of an inch thick. So if you wet one and pop it on top of what you think may be the high point of the casting, start the spindle and raise the table until it just catches the paper and whisks it away.

Image

You now know that your cutter is a thou and a half shy of the surface. Move the cutter to the beginning of the cut, raise it two thou and then add your cut, in this case 10 thou. Start your cut.

Image

In my case the casting was a bit more warped than I thought and the first cut didn't clean up so I took another 25 thou and got a result. I know now it is dead flat.

Image

Then I turned it over, added another 25 thou cut and took a pass. You'll notice that the cutter is offset, this is because I know the cutter is not quite wide enough to get both sides at once so two passes. There was one tiny low spot on one side where the fettler had gone a bit too deep but it's insignificant. We now have a casting with a base dead parallel to the faces on top. It's overkill of course but if you aim for perfection you'll get quality.

Image

This pic is bragging again. You can't have too many different tools! I needed a socket to get to the nuts on the clamps inside the bed. No problem!

Image

This is knocking off time. A good two hours in the shed being very careful and as accurate as I could. We have a box bed that has a perfectly flat base parallel with the mounting pads on top. Tomorrow I'll tidy up the mounting lugs with a file. I could mill them on the vertical mill but they only need to be clean and flat and I can do that perfectly well with a file. I enjoyed that, not least because I've done a good job with what is seen today as outdated technology, it's not fast enough for the modern world but it was just right for the job. The one thing I have in spades is time.
Stanley Challenger Graham
Stanley's View
scg1936 at talktalk.net

"Beware of certitude" (Jimmy Reid)
The floggings will continue until morale improves!
BobH
Regular User
Posts: 133
Joined: 15 Nov 2019, 18:09
Location: Rochdale

Re: Shed Matters 3

Post by BobH »

Today I tried the fittings on my boiler. A project that I have had around for a while, it had its shell pressure test over a year ago. So next move is to seal the joints and give the whole system a pressure test.
A8331775-86C1-4309-94C2-DE95E59313C0.jpeg
You do not have the required permissions to view the files attached to this post.
User avatar
Stanley
Global Moderator
Global Moderator
Posts: 90301
Joined: 23 Jan 2012, 12:01
Location: Barnoldswick. Nearer to Heaven than Gloria.

Re: Shed Matters 3

Post by Stanley »

Looking tidy Bob, when do you get it dirty by doing a steam test?
Stanley Challenger Graham
Stanley's View
scg1936 at talktalk.net

"Beware of certitude" (Jimmy Reid)
The floggings will continue until morale improves!
User avatar
Stanley
Global Moderator
Global Moderator
Posts: 90301
Joined: 23 Jan 2012, 12:01
Location: Barnoldswick. Nearer to Heaven than Gloria.

Re: Shed Matters 3

Post by Stanley »

Image

No point in a lot of pictures. I got stuck into the box bed. I broke all the edges, even wiped over the STUART logo with a file as the cutter didn't reach it. Than I filed the lugs flat and drilled and countersunk them for the brass screws that will fasten the engine to the base board eventually.

Image

Next for shaving was the cast iron crank. Ken will be glad to see I remembered what happened last time and did both bores without gripping the crank.

Image

Here's a bit of high risk milling to reduce the two bosses to size. I did it very carefully and slowly and got away with it.

Image

Like the bed, all edges broken and the whole casting wiped over with the file. If the bores look slightly off centre you're right but that's mainly because the casting isn't quite symmetrical. Believe me it will work.

Image

Knocking off time after two hours in the shed and a bit of a tease. This gives an idea of how much has been done. I have finished with the castings and can now move on to the shiny bits but I shall take a view tomorrow. I have a yen to paint the castings so they have plenty of time to harden. We'll see....
Stanley Challenger Graham
Stanley's View
scg1936 at talktalk.net

"Beware of certitude" (Jimmy Reid)
The floggings will continue until morale improves!
BobH
Regular User
Posts: 133
Joined: 15 Nov 2019, 18:09
Location: Rochdale

Re: Shed Matters 3

Post by BobH »

My boiler will get dirty eventually Stanley. I am still considering whether to gas fire it. I have found a piece of teak window bottom for a base and think I might tile that. I have to castings for a Stuart 10H to go with it but that will have to wait until the Duchess locomotive is off the bench. I made so e progress on this one whilst waiting for the sealant to harden a bit on the Duchess’ boiler before hydraulic testing again. That might be todays job.

As a matter of interest what type of boiler would have been installed to power a beam engine such as you are making?
User avatar
Stanley
Global Moderator
Global Moderator
Posts: 90301
Joined: 23 Jan 2012, 12:01
Location: Barnoldswick. Nearer to Heaven than Gloria.

Re: Shed Matters 3

Post by Stanley »

Morning Bob. In the late 19th century it would have been a Cornish, single flue, horizontal shell boiler. As soon as the Lancashire boiler was introduced in 1844 by Fairbairn it rapidly gained ground and any boilers replaced after that were Lancashire type with two furnace tubes. Mind you, the vertical boiler like yours was always popular and was brought to a high stage of efficiency by Galloways and they were very popular where steam demand was low. A beam engine like mine could very well have been a candidate especially in general industry and small scale mining.

I've had an hour and a half in the shed. No great ambition this morning.

Image

I started by giving Mrs Harrison a deep clean as I have finished turning cast iron for a while. After getting the CI dust off it I oiled all the ways and bearings to flush out the dirty oil and any stray chips.

Image

Then out into the warm backyard and get set up for painting castings with my old favourite, black Hammerite. A very forgiving paint and good protection.

Image

Image

Here's where I ended up, all the castings have a coat of paint. Notice that I have made no attempt to keep the paint off the surfaces I want to keep bright and machined. Far easier to make them bright again when the paint has set and a lot easier than trying to avoid over painting.
One tip. Normal solvents don't work with Hammerite, there is a special solvent which I haven't got. So how to clean the brush? Simple, put some good detergent in the bottom of a stainless steel sink and work the brush in it. The paint will dissolve and can be washed away by cold water. Repeat that three times, then shake the water out of the brush and flush the water away with WD40. Shake the excess out and put the brush away. It will be perfectly serviceable the next time you need it.
Glad that's out of the way, the castings will have plenty of time to harden as I work on the next tranche of parts. I can soon restore the bright parts. Nice morning and I haven't over stressed myself.
Stanley Challenger Graham
Stanley's View
scg1936 at talktalk.net

"Beware of certitude" (Jimmy Reid)
The floggings will continue until morale improves!
BobH
Regular User
Posts: 133
Joined: 15 Nov 2019, 18:09
Location: Rochdale

Re: Shed Matters 3

Post by BobH »

Very interesting Stanley and I’ll remember the tip for cleaning Hammerite from brushes. Hammerite solvent is an oddity and highly volatile, I had a small can once and used about half of it, the can is now empty even though I thought the lid was well sealed. I am currently reading a book on the development of Newcomen engines. I have got to the later part where Smeaton was comparing power and efficiencies. He experimented with varying distances between the fire grate and boiler bottom then went on to try putting the flue through the boiler with only mixed success. The techniques for making boilers were only just being developed in the late 18th century.
User avatar
Stanley
Global Moderator
Global Moderator
Posts: 90301
Joined: 23 Jan 2012, 12:01
Location: Barnoldswick. Nearer to Heaven than Gloria.

Re: Shed Matters 3

Post by Stanley »

The history of steam boilers is fascinating Bob. I've never found a good single source just bits here and there. Try asking your library if they can get you Bourne on Steam on inter library loan. You'll love it!
Stanley Challenger Graham
Stanley's View
scg1936 at talktalk.net

"Beware of certitude" (Jimmy Reid)
The floggings will continue until morale improves!
User avatar
Big Kev
Site Administrator
Site Administrator
Posts: 10956
Joined: 23 Jan 2012, 20:15
Location: Foulridge

Re: Shed Matters 3

Post by Big Kev »

Hammerite can be diluted, or brushes cleaned, with cellulose paint thinners
https://www.amazon.co.uk/CarPlan-BTH500 ... th=1&psc=1
Kev

Stylish Fashion Icon.
🍹
User avatar
Stanley
Global Moderator
Global Moderator
Posts: 90301
Joined: 23 Jan 2012, 12:01
Location: Barnoldswick. Nearer to Heaven than Gloria.

Re: Shed Matters 3

Post by Stanley »

I seem to manage without it Kev but thanks for the link.
I bought a can anyway. Always good to have another solvent in stock!
Stanley Challenger Graham
Stanley's View
scg1936 at talktalk.net

"Beware of certitude" (Jimmy Reid)
The floggings will continue until morale improves!
User avatar
Stanley
Global Moderator
Global Moderator
Posts: 90301
Joined: 23 Jan 2012, 12:01
Location: Barnoldswick. Nearer to Heaven than Gloria.

Re: Shed Matters 3

Post by Stanley »

Image

Despite the residual heat in the shed I stretched a point and did an hour on cleaning off the overpaint on the castings. I have left the crank and the flywheel until tomorrow, no point going daft!
Stanley Challenger Graham
Stanley's View
scg1936 at talktalk.net

"Beware of certitude" (Jimmy Reid)
The floggings will continue until morale improves!
User avatar
Stanley
Global Moderator
Global Moderator
Posts: 90301
Joined: 23 Jan 2012, 12:01
Location: Barnoldswick. Nearer to Heaven than Gloria.

Re: Shed Matters 3

Post by Stanley »

Image

No trees torn up in the shed this morning. I cleaned the overpainting off the Flywheel and the crank and polished the shiny bits. The easiest way to do the flywheel was to mount it in the lathe. The eagle eyed will notice that despite my comments about not bothering too much about cast iron dust I have stretched a point this morning and put a cloth on the bed. This because I don't see the point in mucking up a lathe that has just been deep cleaned and lubricated. We now have all the castings cleaned up and oiled, ready for their next appearance in the saga.

Image

I am ready now to move onto making all the other parts for the engine so it made sense to clean up the bench and the surface plates and fit a clean tablecloth. You all know how I love a straight edge. That will do for today, less than an hour in the shed but I don't feel guilty. We are now in good shape to press on with other things.
By the way, I was asked the other day about the block of wood I put my pot of tea on. If you don't do this and put it directly on the tablecloth you soon build up a nice rust patch on the surface plate due to the heat forcing moisture down through the tablecloth. The block of wood cures that.
Stanley Challenger Graham
Stanley's View
scg1936 at talktalk.net

"Beware of certitude" (Jimmy Reid)
The floggings will continue until morale improves!
User avatar
Stanley
Global Moderator
Global Moderator
Posts: 90301
Joined: 23 Jan 2012, 12:01
Location: Barnoldswick. Nearer to Heaven than Gloria.

Re: Shed Matters 3

Post by Stanley »

Image

Today I am addressing the wire wheel and the first thing I want to do is take it off the grinder because it's unbalancing it and I have had enough. I shall have to spend money on a good grinding wheel. Question is how do you hold the shaft and I always use a wooden wedge on the other wheel.

Image

Off with the wheel and you'll notice I took heed of Kev's advice, we have cellulose thinners.

Image

I'm going to make an arbor for the wheel so I can mount it on the pillar drill. I found a piece of scrap and set to.

Image

A trial fit on the arbor, I have got it right.

Image

Here we are after an hour in the shed. It will be of some use on the pillar drill and safer to use. I shall seek out a good grinding wheel and buy it. Ready now to start on my bits!
Stanley Challenger Graham
Stanley's View
scg1936 at talktalk.net

"Beware of certitude" (Jimmy Reid)
The floggings will continue until morale improves!
User avatar
plaques
Donor
Posts: 8094
Joined: 23 May 2013, 22:09

Re: Shed Matters 3

Post by plaques »

it goes without saying Always, Always use eye protection when using wire wheels. I once switched mine on before I had donned my glasses I hadn't got to the stage of polishing anything a bit flew off and entered my eye. Spent the rest of the afternoon at the hospital having it dug out so that even now I've a tiny peripheral blind spot. Could have been much worse.
User avatar
PanBiker
Site Administrator
Site Administrator
Posts: 16447
Joined: 23 Jan 2012, 13:07
Location: Barnoldswick - In the West Riding of Yorkshire, always was, always will be.

Re: Shed Matters 3

Post by PanBiker »

Stanley wrote: 16 Aug 2020, 08:07 It will be of some use on the pillar drill and safer to use.
How can it be safer to use on the drill when it has no guard or rest for the work?
Ian
User avatar
Stanley
Global Moderator
Global Moderator
Posts: 90301
Joined: 23 Jan 2012, 12:01
Location: Barnoldswick. Nearer to Heaven than Gloria.

Re: Shed Matters 3

Post by Stanley »

It's the guards and rests that are the danger Ian. Look at any commercial buffer or wire wheel, a simple spindle with no obstructions round it. The important safety item is eye protection from flying broken bits of wire. Again, the pillar drill is safer because you can run it more slowly.

Image
Stanley Challenger Graham
Stanley's View
scg1936 at talktalk.net

"Beware of certitude" (Jimmy Reid)
The floggings will continue until morale improves!
User avatar
PanBiker
Site Administrator
Site Administrator
Posts: 16447
Joined: 23 Jan 2012, 13:07
Location: Barnoldswick - In the West Riding of Yorkshire, always was, always will be.

Re: Shed Matters 3

Post by PanBiker »

Thanks, I can see that now. A case of H&S appearing more safe but making a worse job of things.
Ian
Magnu420
Newbie
Posts: 41
Joined: 15 Feb 2016, 20:49
Location: in a house in lancashire

Re: Shed Matters 3

Post by Magnu420 »

just a note would the pillar drill be able to take the side loading, ive seen a few set ups like this but using small wire wheels on a arbor thats tighten up by the jacobs chuck, many a times ive seen the jacobs chuck fly off the main spindle. mainly becuase the bearings couldnt take the side load of pressure when you cleaning up metal as this is because the bearings are not tapered roller thrust bearing type like they have on milling machines

i be carefull if i was you
User avatar
Stanley
Global Moderator
Global Moderator
Posts: 90301
Joined: 23 Jan 2012, 12:01
Location: Barnoldswick. Nearer to Heaven than Gloria.

Re: Shed Matters 3

Post by Stanley »

I am, it's a good drill with a firm Morse Taper fitting. (And operating at a fairly low speed, I only want to polish.
Stanley Challenger Graham
Stanley's View
scg1936 at talktalk.net

"Beware of certitude" (Jimmy Reid)
The floggings will continue until morale improves!
User avatar
Stanley
Global Moderator
Global Moderator
Posts: 90301
Joined: 23 Jan 2012, 12:01
Location: Barnoldswick. Nearer to Heaven than Gloria.

Re: Shed Matters 3

Post by Stanley »

Image

Image

I've had my buffing wheel on Johnny's big lathe for a while and this morning put the wire wheel on it. Perhaps that will lessen peoples worries about my safety!

Image

Now for the main event! I've got all the bearings out I need for the next stage of the build. I decided to start on the largest ones, the ones for the trunnions and the crankshaft. First thing to do was do a fag packet drawing I can go from there.

Image

Image

Image

Here are the different stages. All I am after is clean, square castings. Next job is to decide on the dimensions. They won't need a lot off them, that's why I haven't gone for a perfect finish, too easy to end up with being short of metal! As near as possible, all the bearings are exactly the same size.
Stanley Challenger Graham
Stanley's View
scg1936 at talktalk.net

"Beware of certitude" (Jimmy Reid)
The floggings will continue until morale improves!
Post Reply

Return to “Crafts”