Shed Matters 3
-
Stanley

- Global Moderator

- Posts: 90344
- Joined: 23 Jan 2012, 12:01
- Location: Barnoldswick. Nearer to Heaven than Gloria.
Re: Shed Matters 3
Kennions came up trumps. 6BA HSS taps, setscrews and threaded rod arrived in the post.
Stanley Challenger Graham
Stanley's View
scg1936 at talktalk.net
"Beware of certitude" (Jimmy Reid)
The floggings will continue until morale improves!
Stanley's View
scg1936 at talktalk.net
"Beware of certitude" (Jimmy Reid)
The floggings will continue until morale improves!
-
Stanley
- Global Moderator
- Posts: 90344
- Joined: 23 Jan 2012, 12:01
- Location: Barnoldswick. Nearer to Heaven than Gloria.
Re: Shed Matters 3
Everything is conspiring against the shed at the moment but I shall return!
Stanley Challenger Graham
Stanley's View
scg1936 at talktalk.net
"Beware of certitude" (Jimmy Reid)
The floggings will continue until morale improves!
Stanley's View
scg1936 at talktalk.net
"Beware of certitude" (Jimmy Reid)
The floggings will continue until morale improves!
-
Stanley
- Global Moderator
- Posts: 90344
- Joined: 23 Jan 2012, 12:01
- Location: Barnoldswick. Nearer to Heaven than Gloria.
Re: Shed Matters 3
Sorry Lads! Still writing for the paper.....
Stanley Challenger Graham
Stanley's View
scg1936 at talktalk.net
"Beware of certitude" (Jimmy Reid)
The floggings will continue until morale improves!
Stanley's View
scg1936 at talktalk.net
"Beware of certitude" (Jimmy Reid)
The floggings will continue until morale improves!
-
Stanley
- Global Moderator
- Posts: 90344
- Joined: 23 Jan 2012, 12:01
- Location: Barnoldswick. Nearer to Heaven than Gloria.
Re: Shed Matters 3
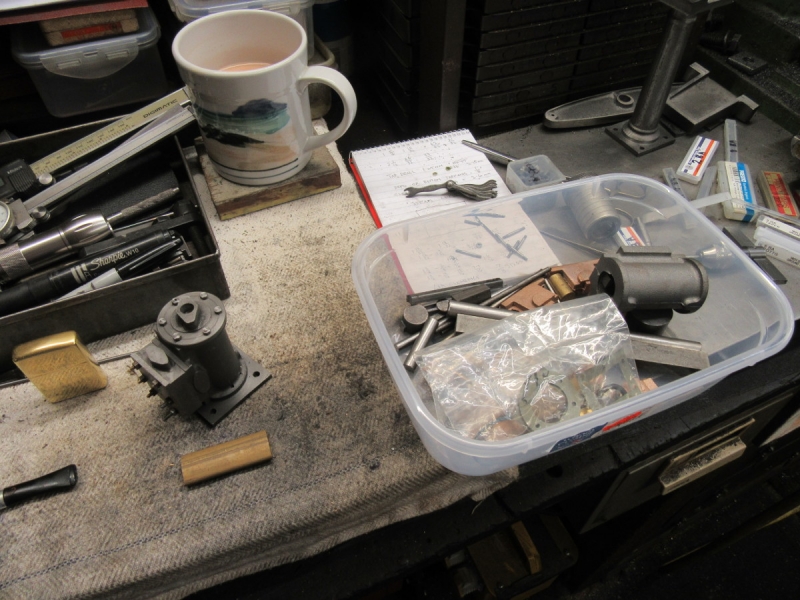
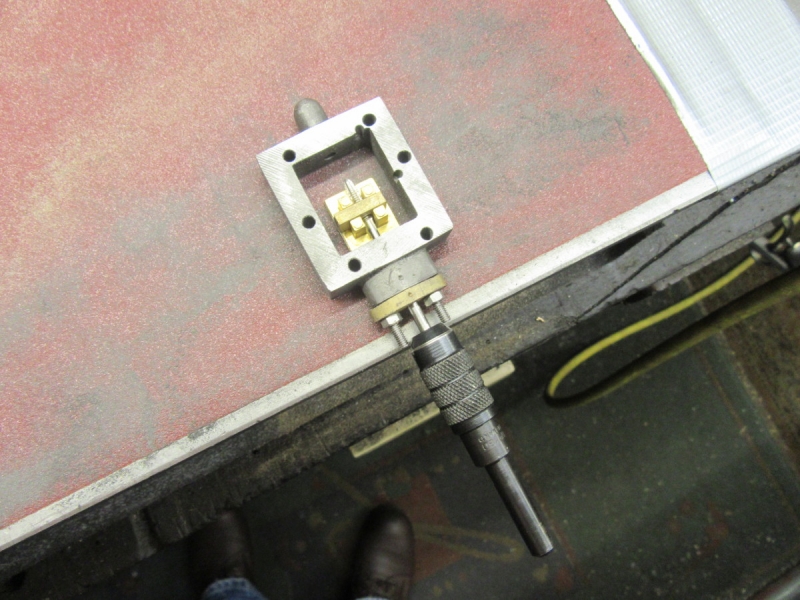
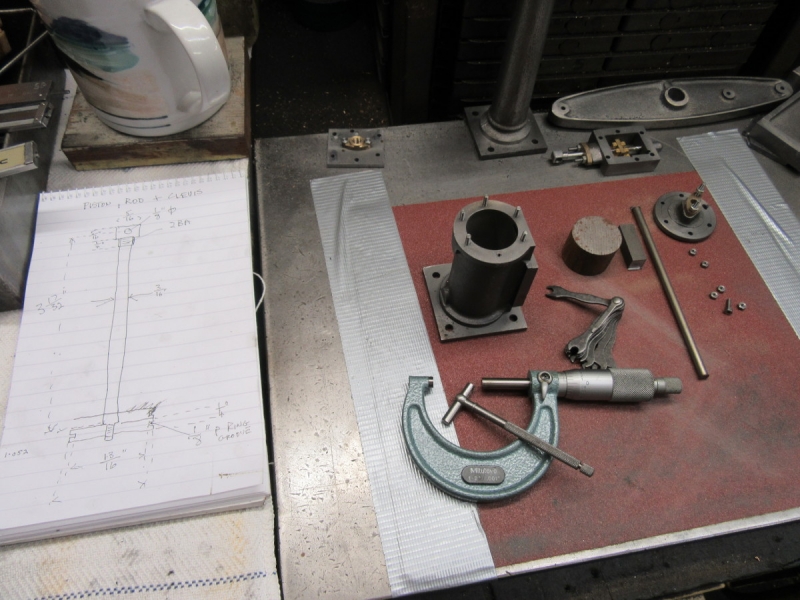
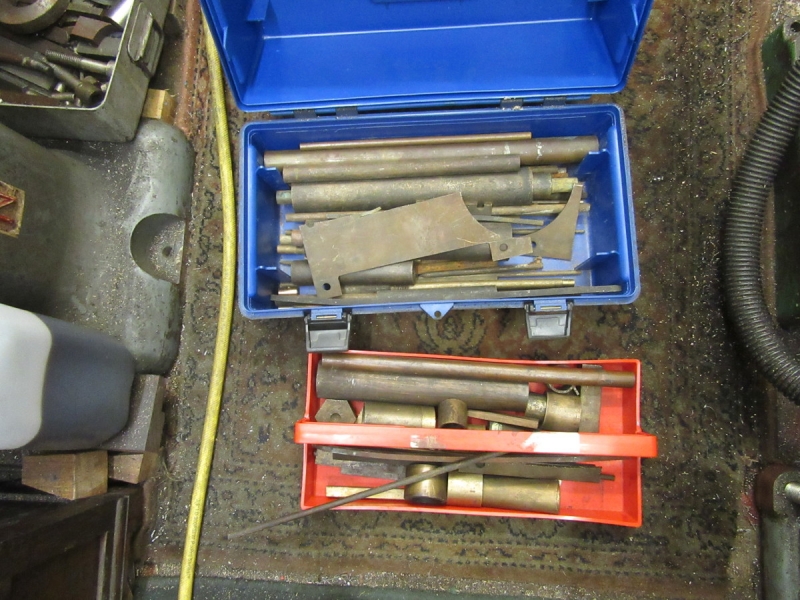
Back in the shed this morning. The target is the two small brass fittings that are the attachment for the steam and exhaust pipes to the cylinder. These are probably the reason why I have been shying away from the shed, they are so small and I have difficulty seeing them. However we have to bite the bullet. First thing was to find the stock in my box of tricks.
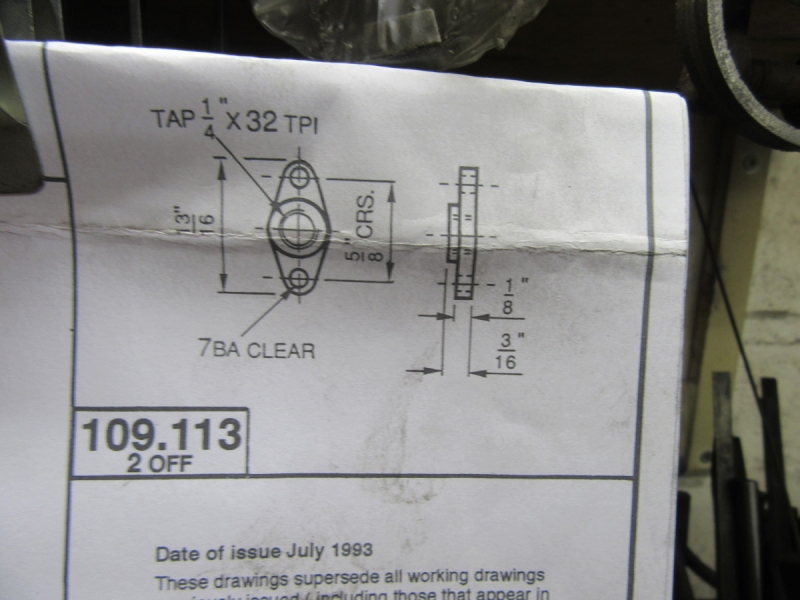
Then a good look at the drawings to identify the first two of the four I need for the cylinder. I shall be putting 6BA studs in and not the 7BA the drawings call for. Reason for this is that they are slightly bigger and I have all the studding and nuts I need and I got a set of 3 HSS 6BA taps so I have a good start instead of struggling with old CS taps.
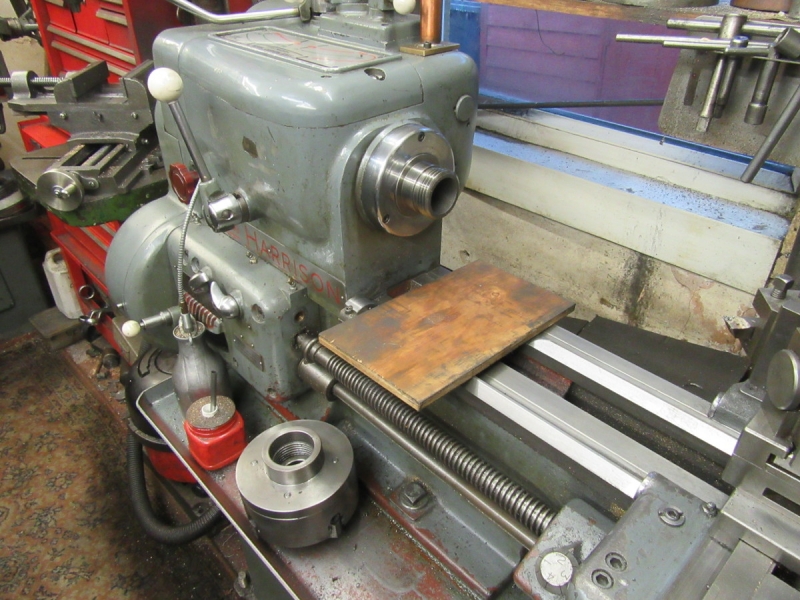
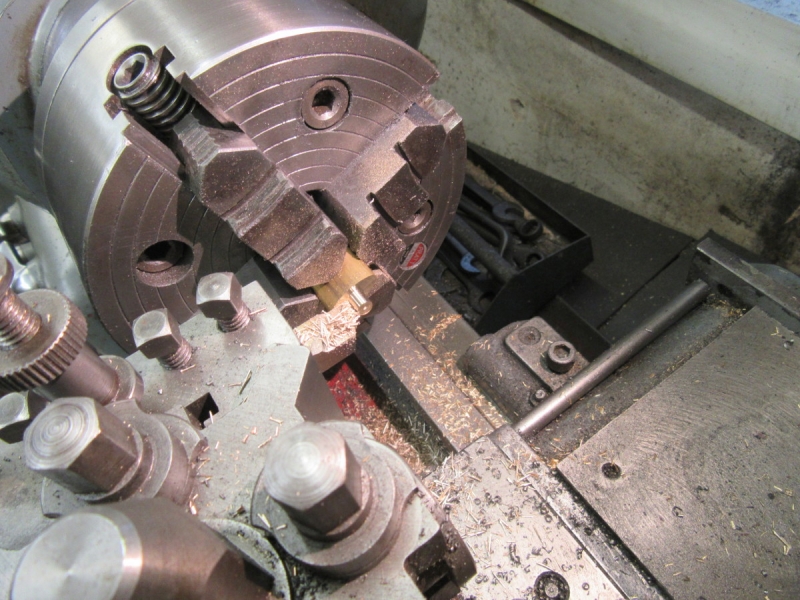
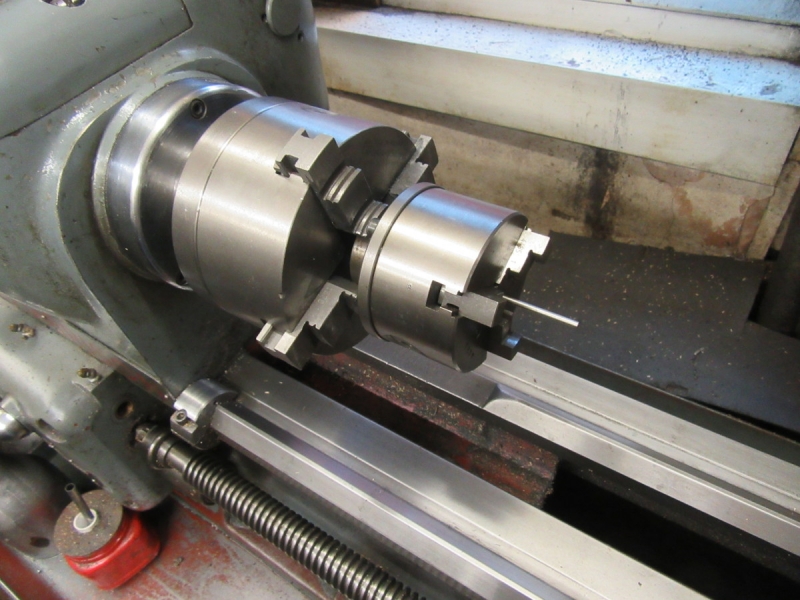
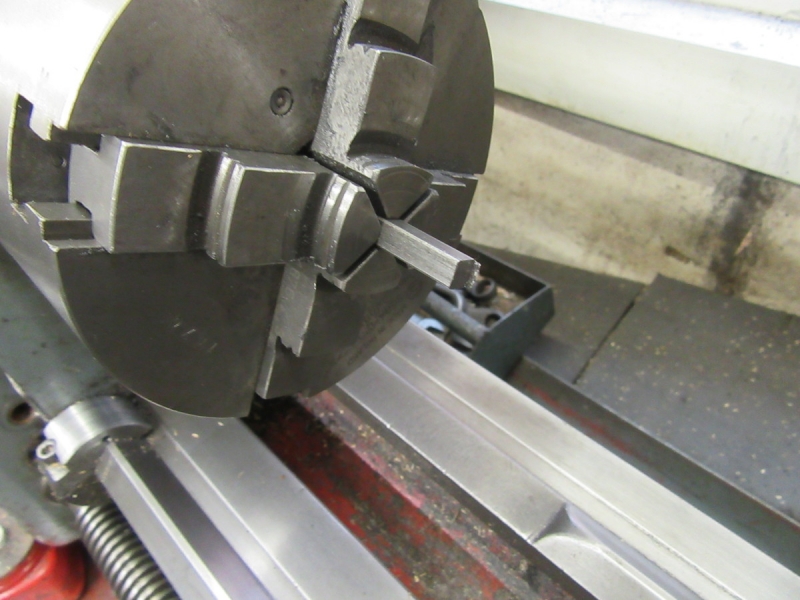
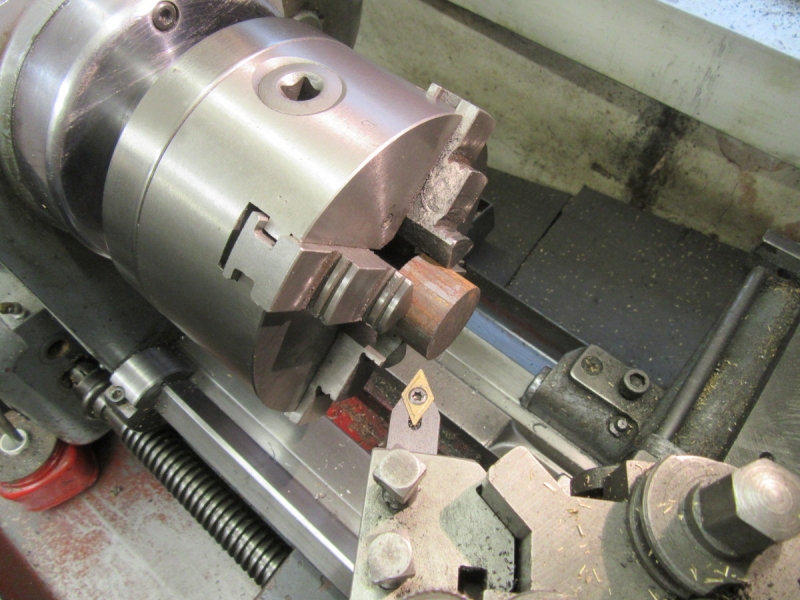
Next job was to get Johnny's old 4 jaw chuck mounted on Mrs Harrison, a bit of a clean up at the same time.

Then get the stock set on centre. I found the centre of the stock and used the tail stock centre to get it positioned.
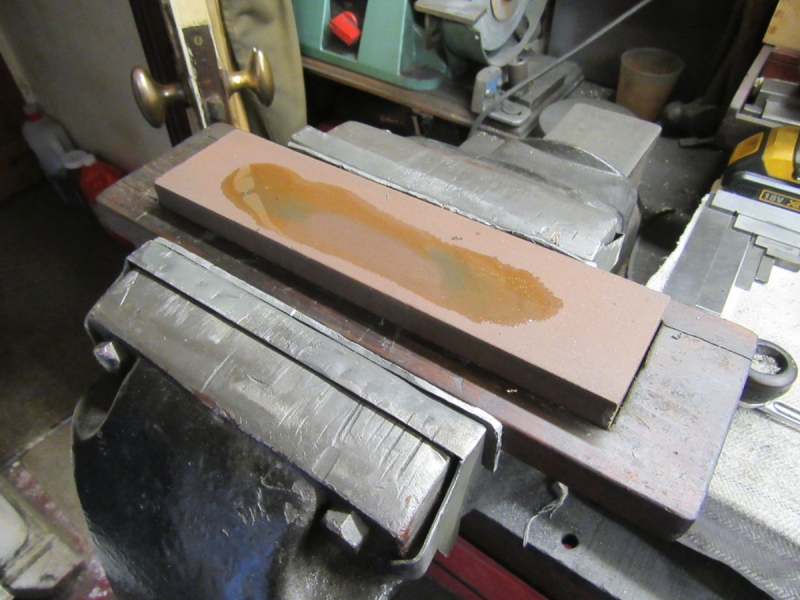
Then I addressed my HSS cutter, you can't beat HSS for brass. It was already sharp so all I had to do was hone it by hand on a fine India stone. Then set up for the first cut. Final step was to do a fag packet drawing of the piece with my modified thread and putting in the dimensions which aren't on the drawing. That's it. Enough for this morning, I am all set up for some actual machining. That's progress.
Stanley Challenger Graham
Stanley's View
scg1936 at talktalk.net
"Beware of certitude" (Jimmy Reid)
The floggings will continue until morale improves!
Stanley's View
scg1936 at talktalk.net
"Beware of certitude" (Jimmy Reid)
The floggings will continue until morale improves!
-
Stanley
- Global Moderator
- Posts: 90344
- Joined: 23 Jan 2012, 12:01
- Location: Barnoldswick. Nearer to Heaven than Gloria.
Re: Shed Matters 3

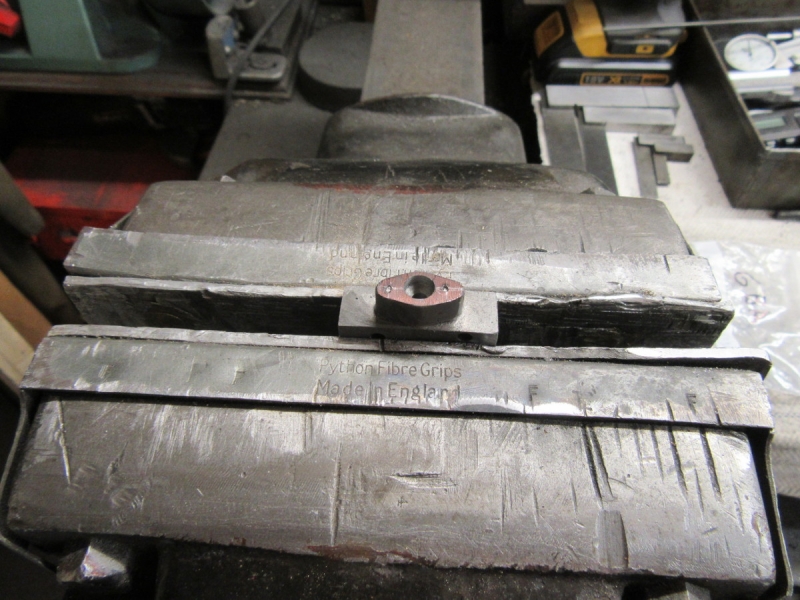
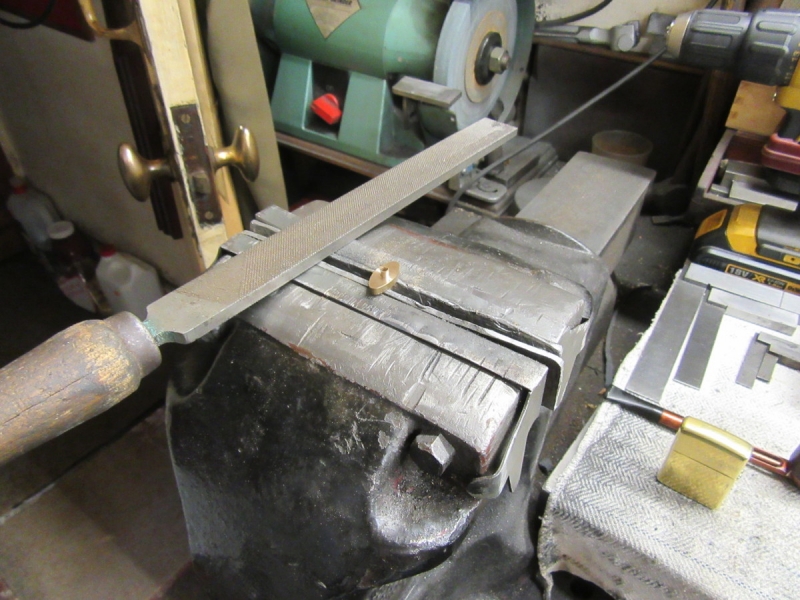
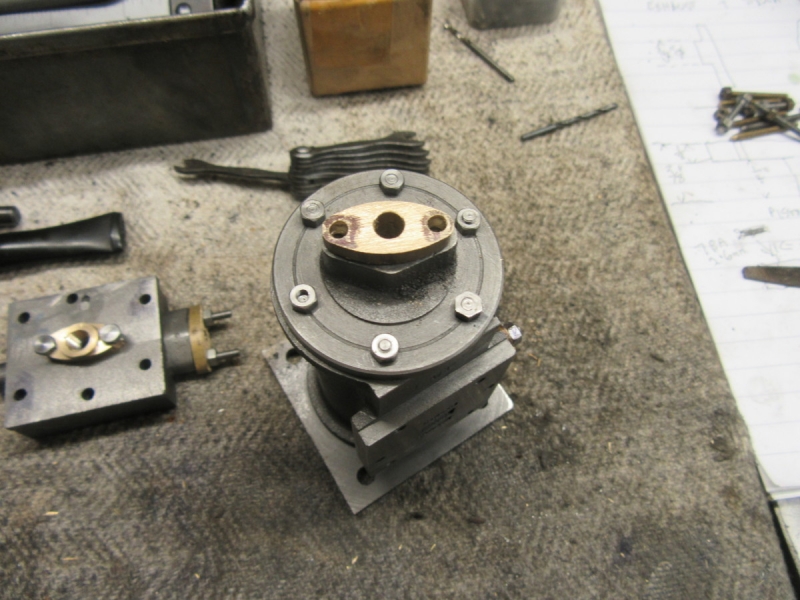
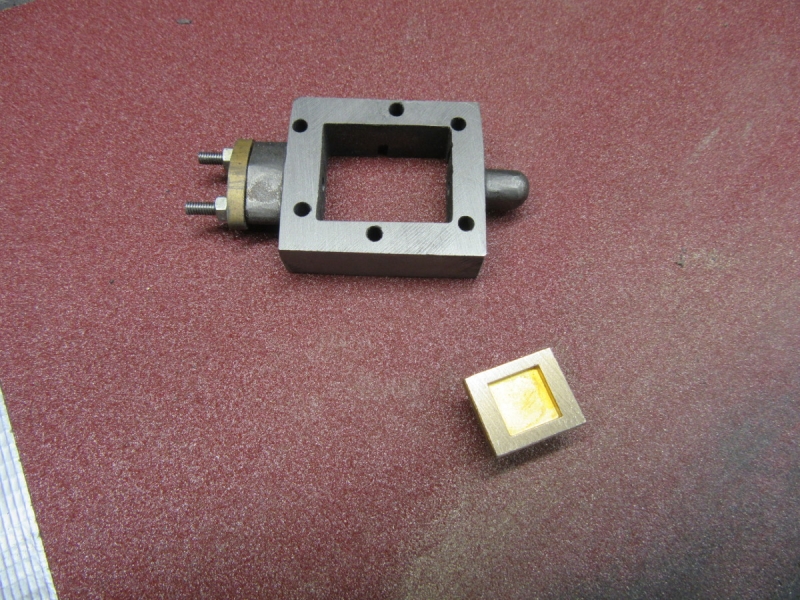
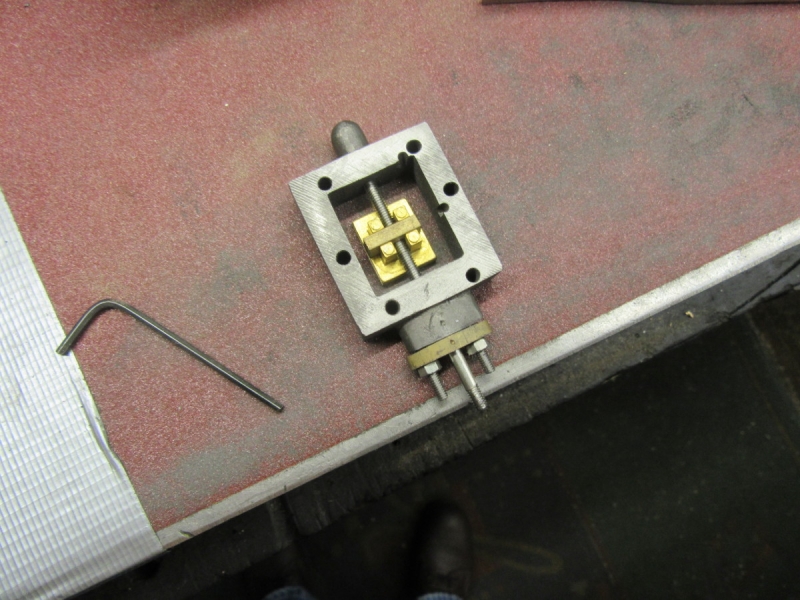
I only had 45 minutes in the shed but managed to knock out the two flanges.
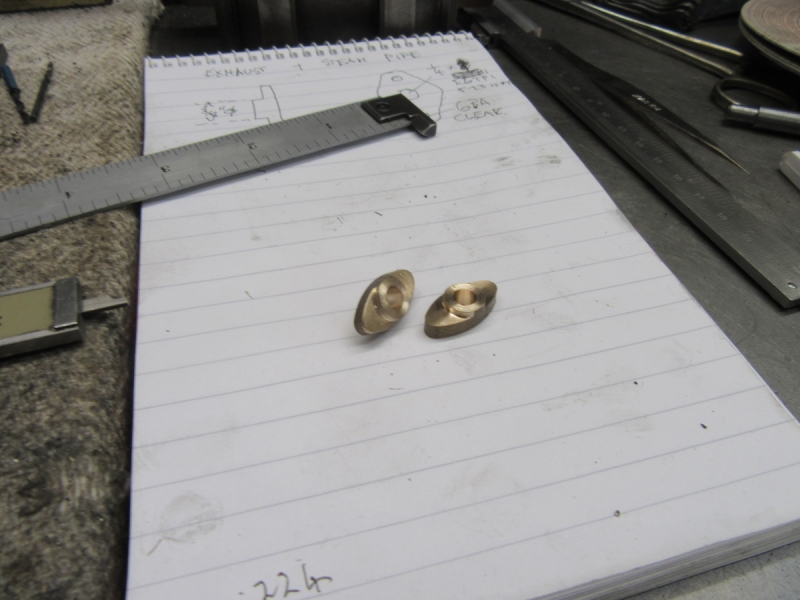
Here they are at knocking off time. Too bloody small!
However, I wasted a lot of time because when I set to with my newly sharpened HSS cutter it was terrible! My eyes had let me down, I had got the orientation of the cutter in the holder wrong and I was trying to cut with the wrong edge! So I had to stop and put that right.... It's right now and cutting beautifully.
One other thing, they specify a 1/4" X 32tpi thread for the pipes. God knows what that is, so I have changed it to 1/4" X 26tpi. No trees torn up but it's progress.
Stanley Challenger Graham
Stanley's View
scg1936 at talktalk.net
"Beware of certitude" (Jimmy Reid)
The floggings will continue until morale improves!
Stanley's View
scg1936 at talktalk.net
"Beware of certitude" (Jimmy Reid)
The floggings will continue until morale improves!
-
Stanley
- Global Moderator
- Posts: 90344
- Joined: 23 Jan 2012, 12:01
- Location: Barnoldswick. Nearer to Heaven than Gloria.
Re: Shed Matters 3
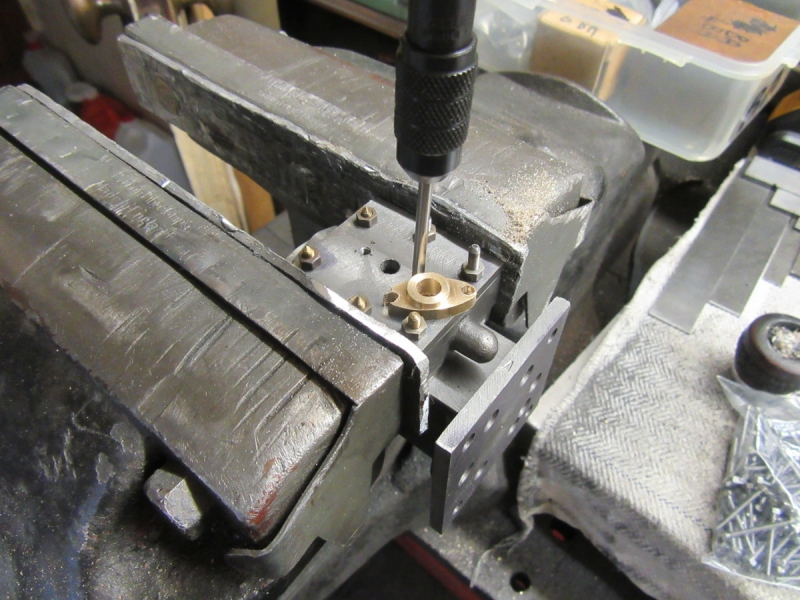
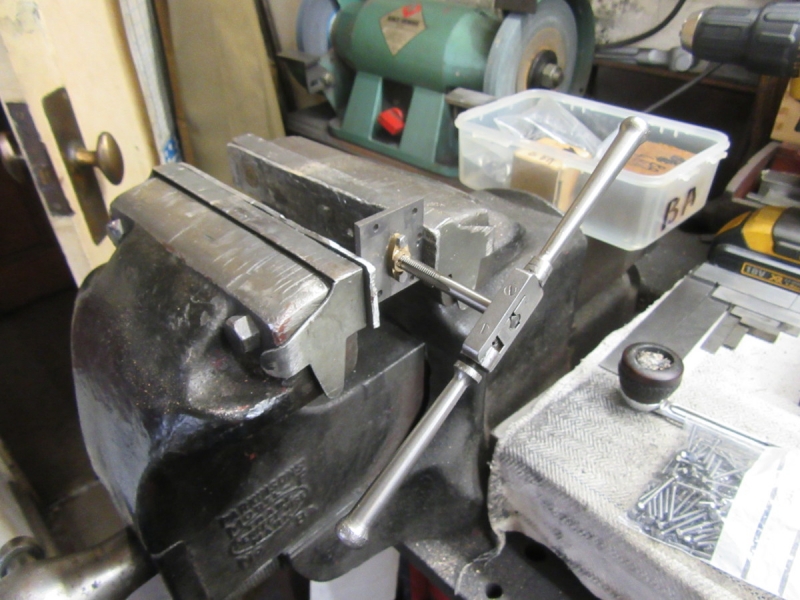
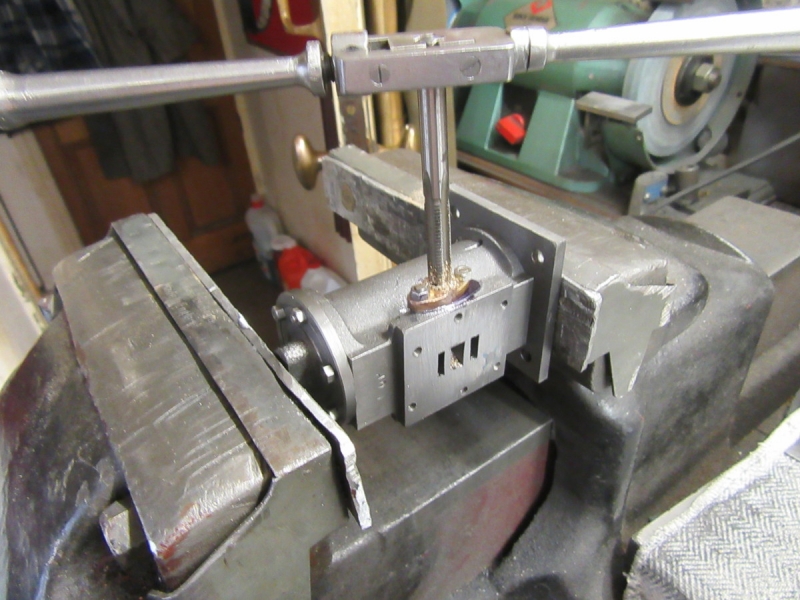
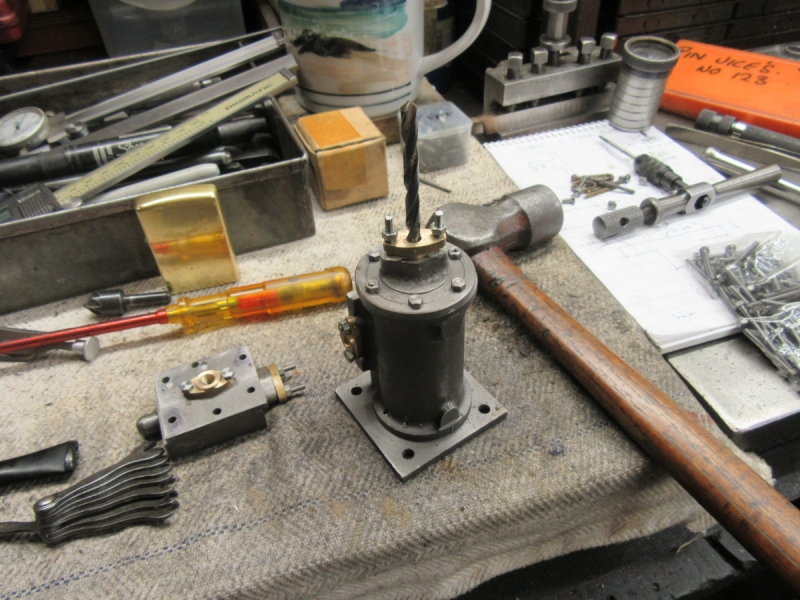
We need to fix the flanges on the cylinder, steam chest cover first. Here I am tapping the stud holes 6BA.
I cocked up with the clearance hole in the flange, too close to the edge and it broke out. Can't let that stop me! I also had to finish boring the hole through it for tapping 1/4 X 26. However after about an hour (!) I got here.
I turned the lid over and filed the studs down to a flat surface.
I left tapping the bore of the flange for the steam pipe, this is the best way to hold it.
The next job is to drill the exhaust passage into the cylinder. That will do tomorrow. It has taken me an hour and a half to get this morning's flange sorted. But, it's progress!
Stanley Challenger Graham
Stanley's View
scg1936 at talktalk.net
"Beware of certitude" (Jimmy Reid)
The floggings will continue until morale improves!
Stanley's View
scg1936 at talktalk.net
"Beware of certitude" (Jimmy Reid)
The floggings will continue until morale improves!
-
Stanley
- Global Moderator
- Posts: 90344
- Joined: 23 Jan 2012, 12:01
- Location: Barnoldswick. Nearer to Heaven than Gloria.
Re: Shed Matters 3
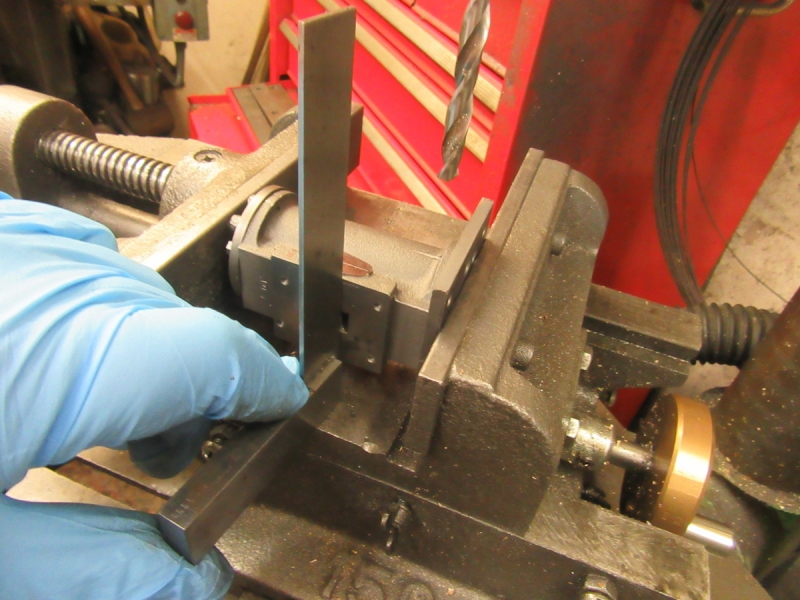
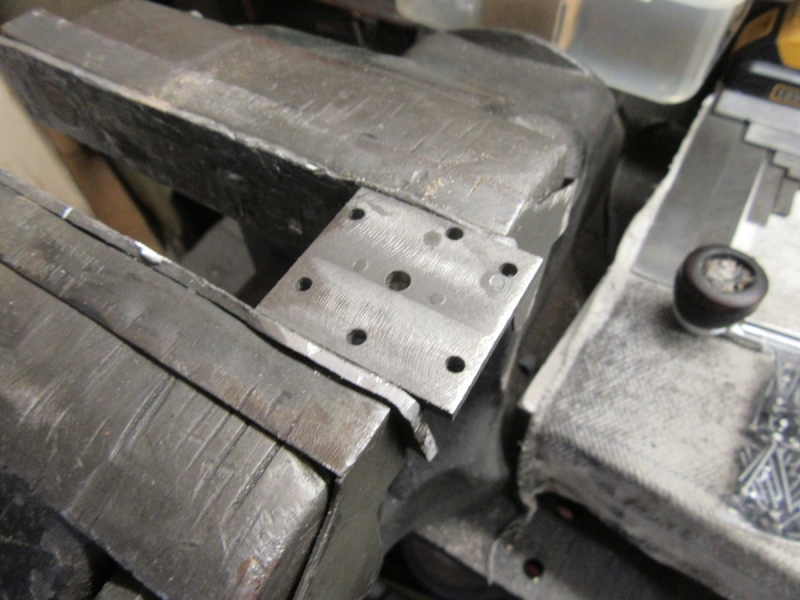
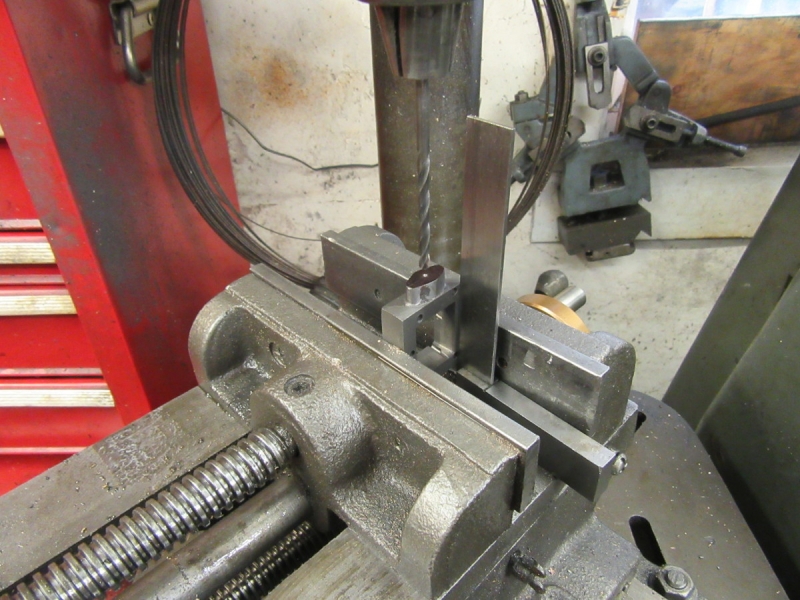
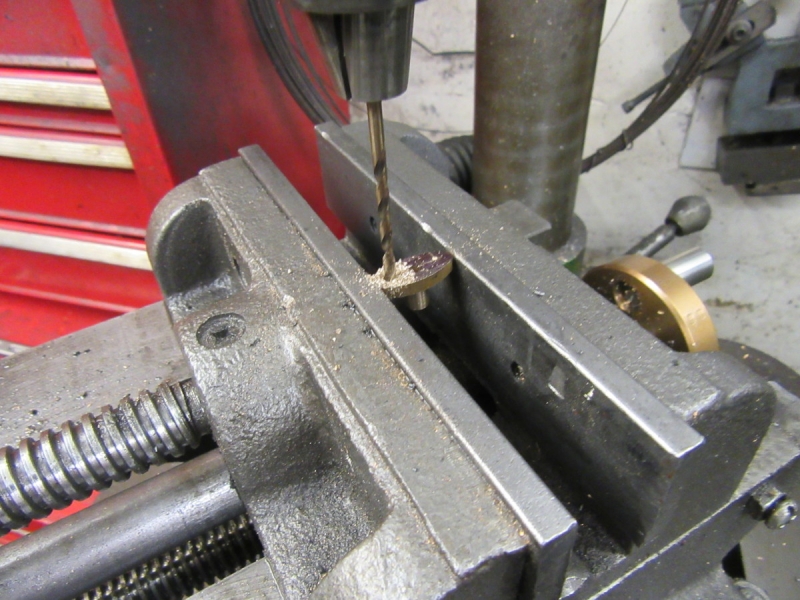
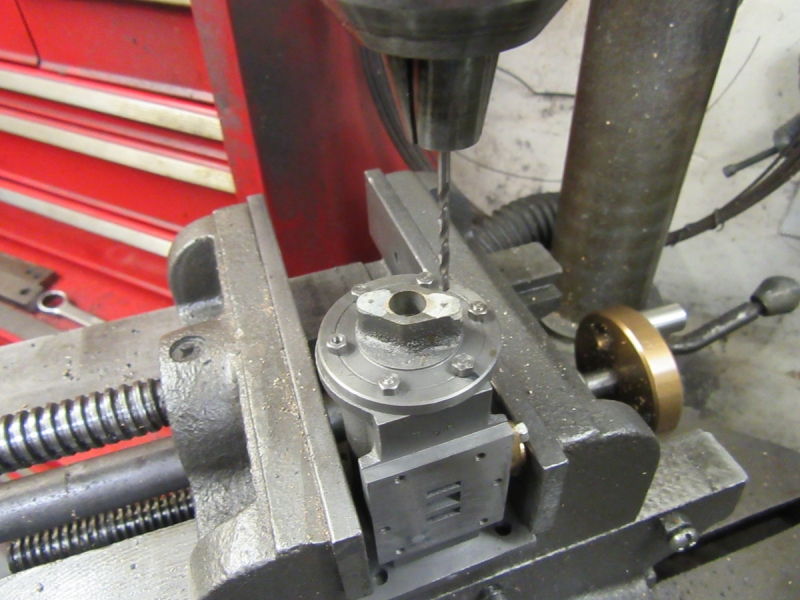
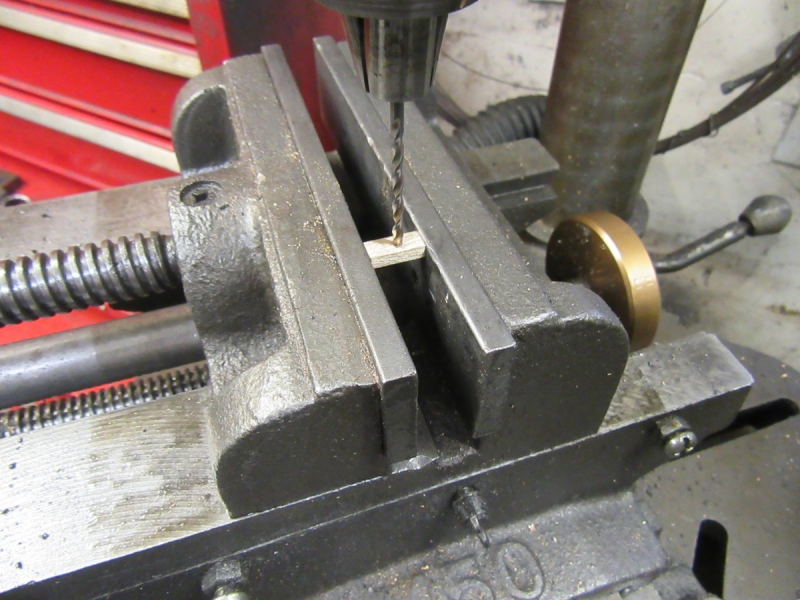
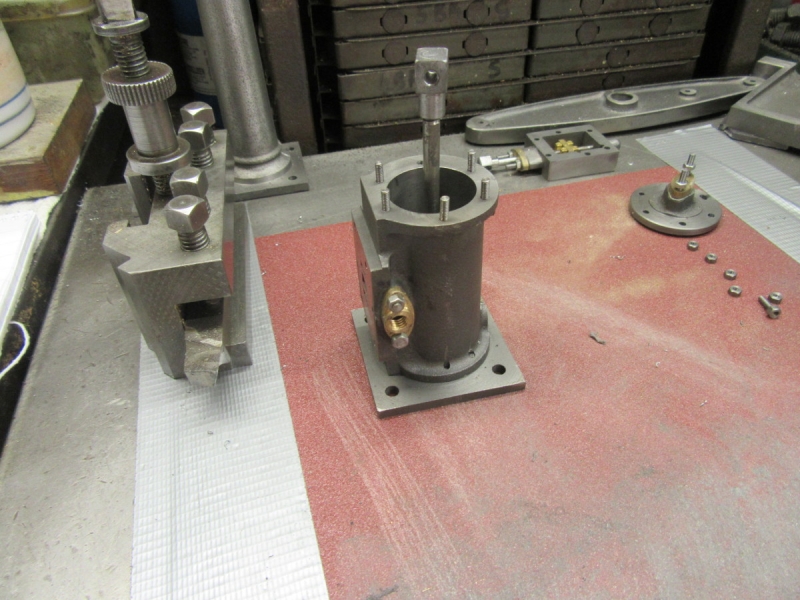
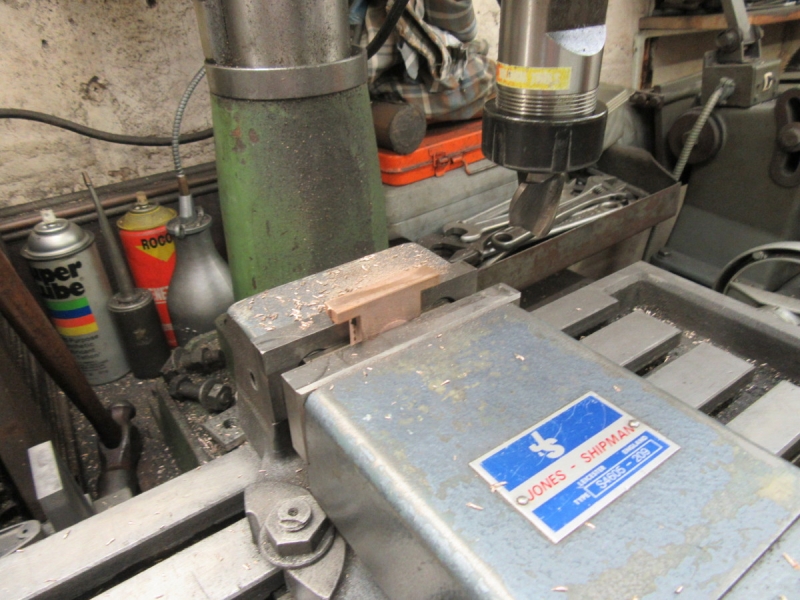
This morning's task is to fix the flange that takes the exhaust pipe. First job is to drill the steam passage in the casting so after marking it I am making sure that the cylinder is mounted square in the vice on the pillar drill. Then a careful drilling especially when I broke into the actual exhaust port in the casting.
The drilling in the casting is the same size as the tapping size bore in the flange, so it's easy to do a trial fit and get an idea of its position.
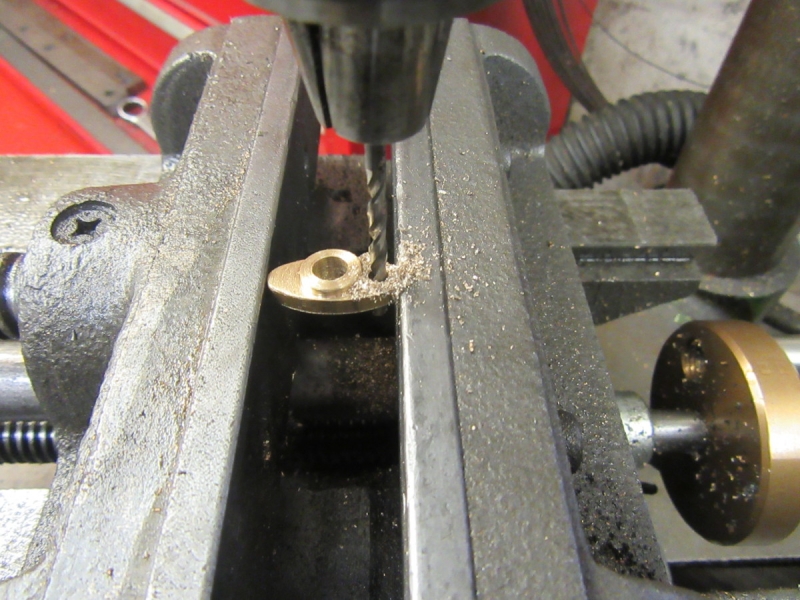
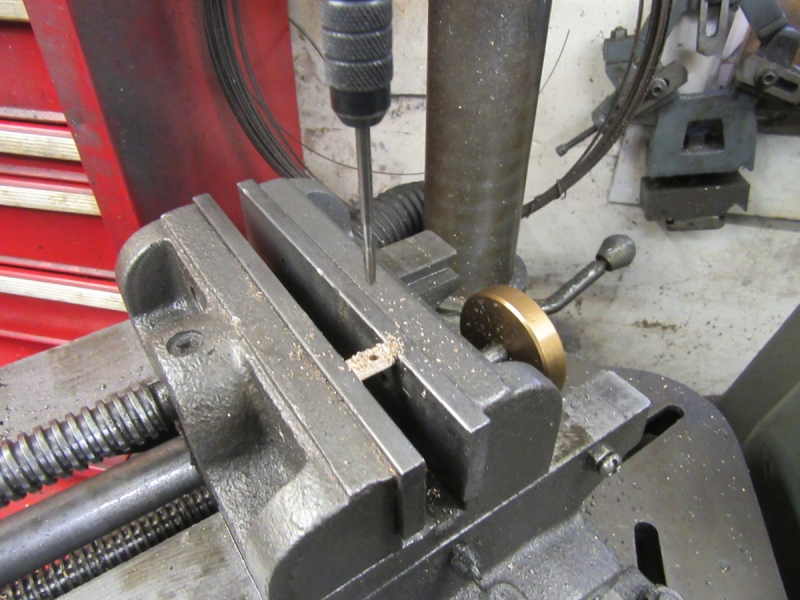
Then some high risk drilling of the flange for clearance for the studs. Too small to easily mark them so I did them by eye. Then I used the flange to mark the position of the tapping holes in the casting and did them.
Then a bit of careful tapping using the new and expensive HSS taps. A good investment!
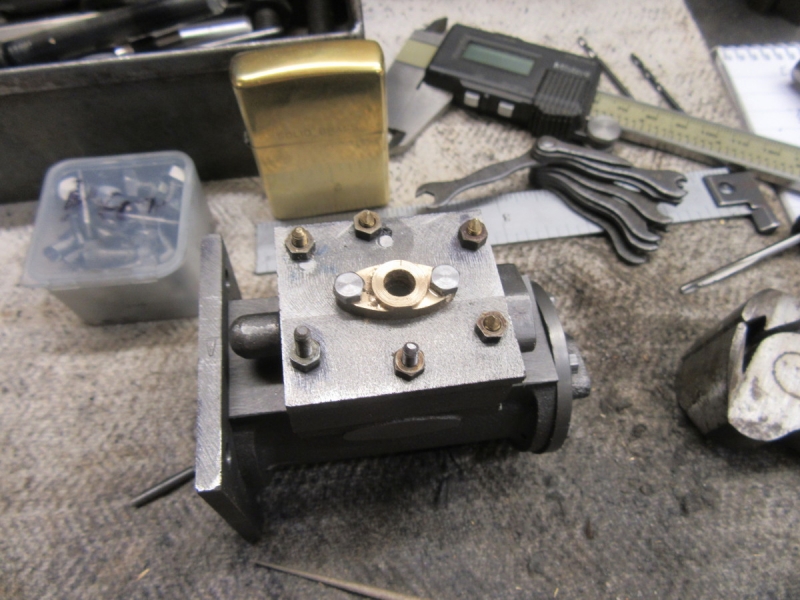
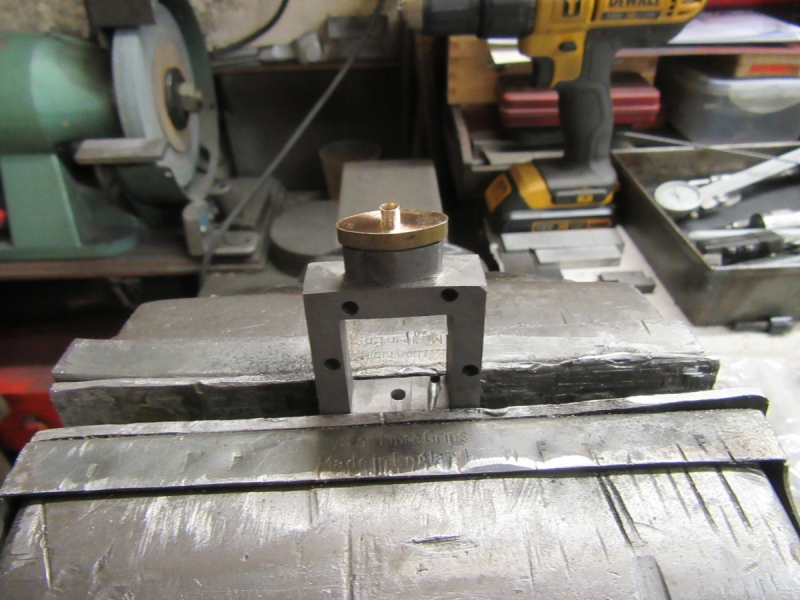
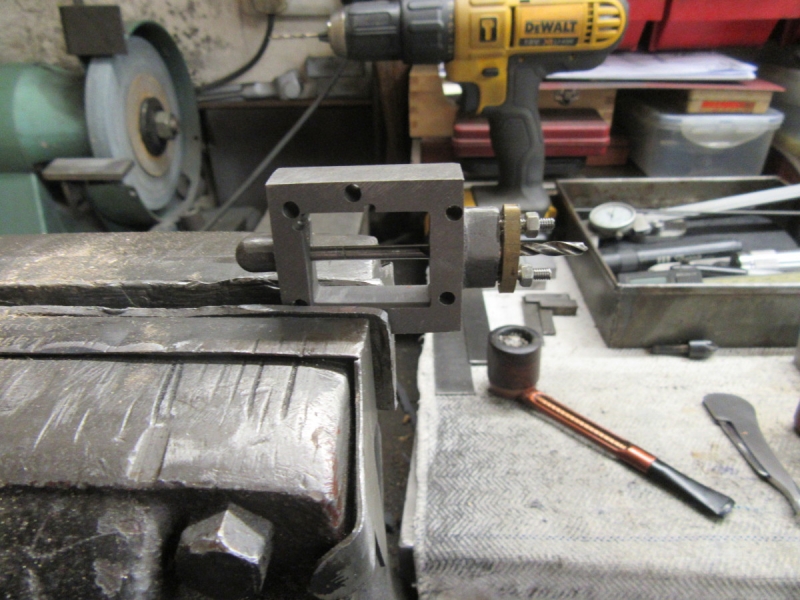
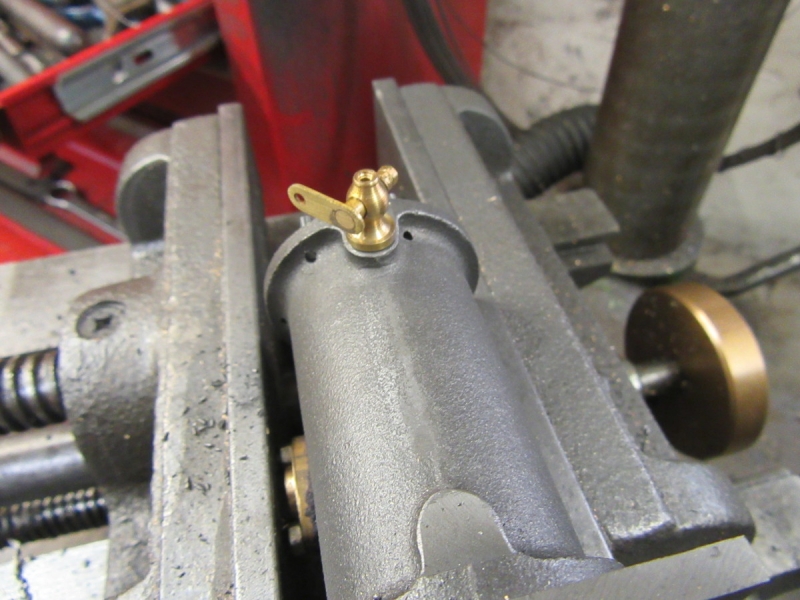
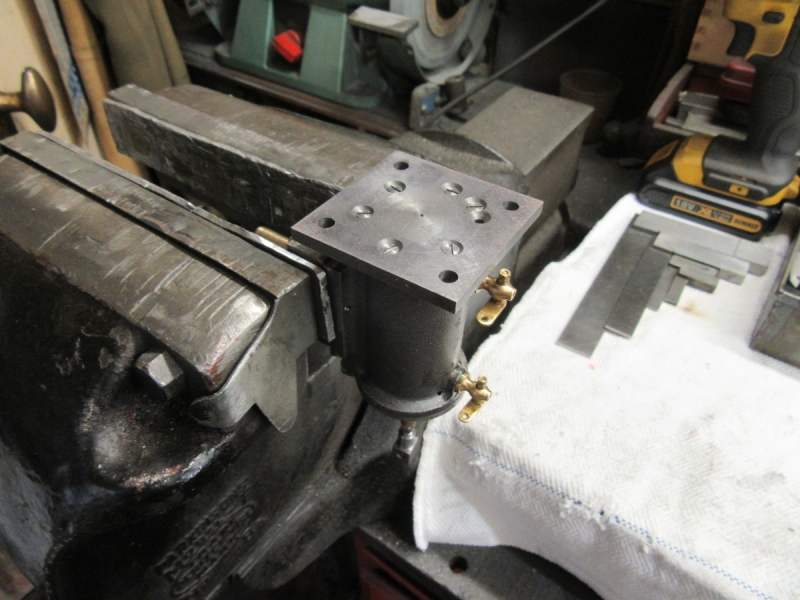
Then the moment of truth, a trial fit with a couple of set screws which I shall cut off at the right height to act as suds. At the moment I am just after a fit.
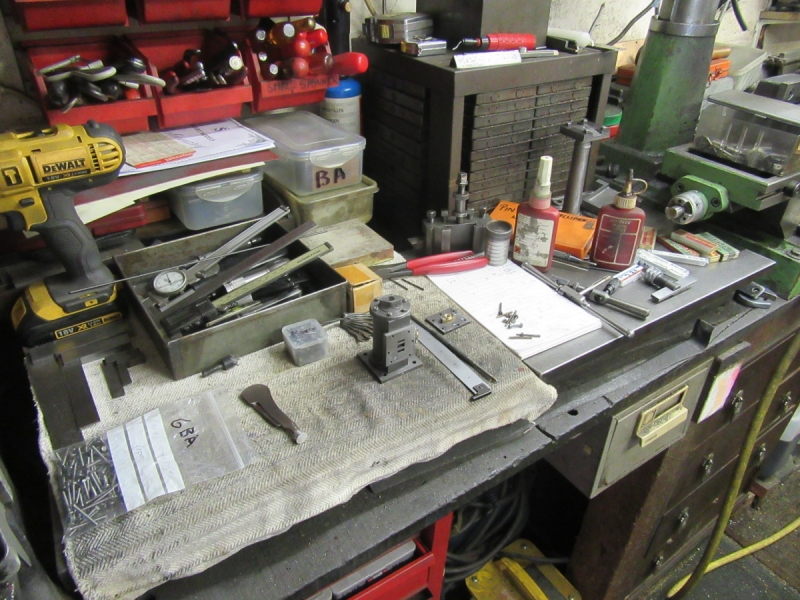
Knocking off time. We've made progress and the state of the bench shows I have been busy! No point putting any tools away, they are going to be needed again for the other two flanges. Not bad for a half blind bloke! I am happy.
Stanley Challenger Graham
Stanley's View
scg1936 at talktalk.net
"Beware of certitude" (Jimmy Reid)
The floggings will continue until morale improves!
Stanley's View
scg1936 at talktalk.net
"Beware of certitude" (Jimmy Reid)
The floggings will continue until morale improves!
-
Stanley
- Global Moderator
- Posts: 90344
- Joined: 23 Jan 2012, 12:01
- Location: Barnoldswick. Nearer to Heaven than Gloria.
Re: Shed Matters 3
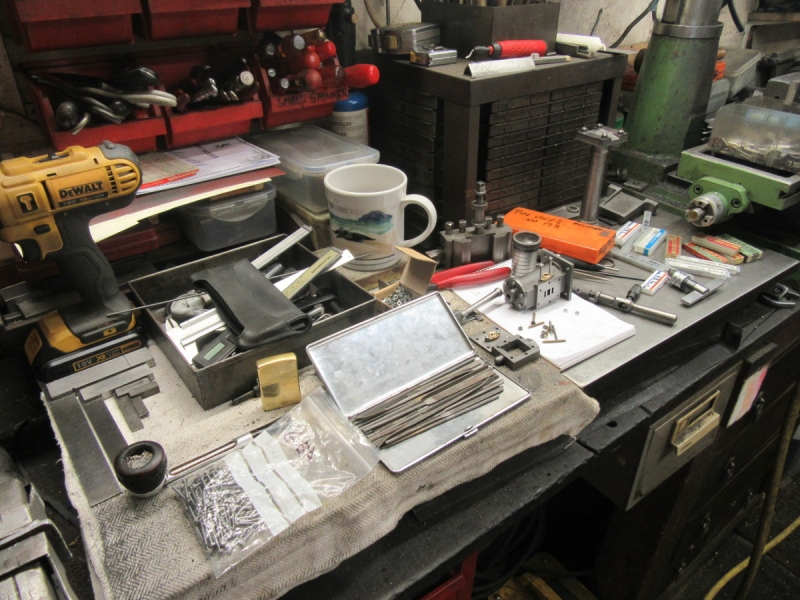
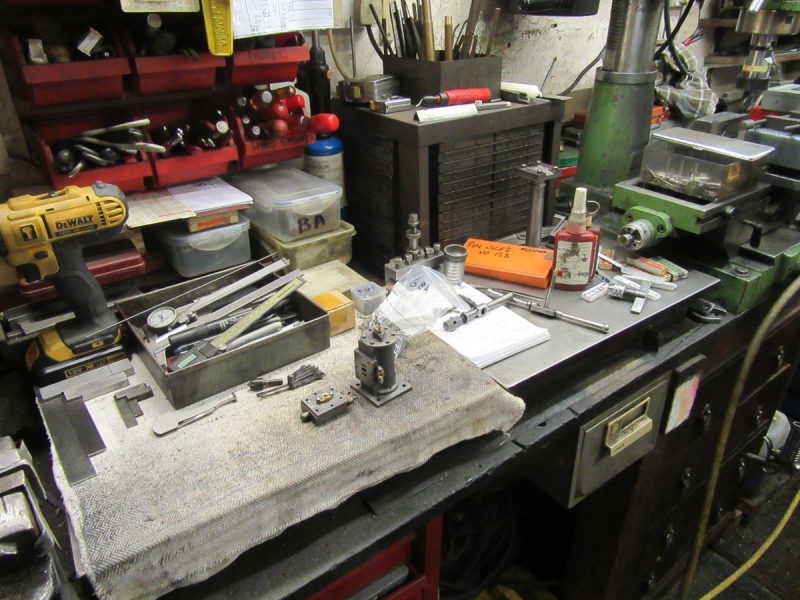
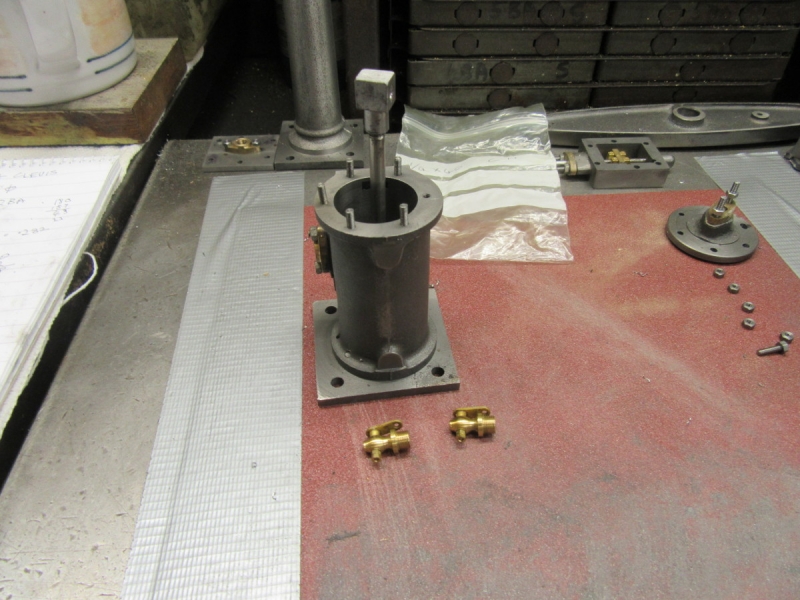
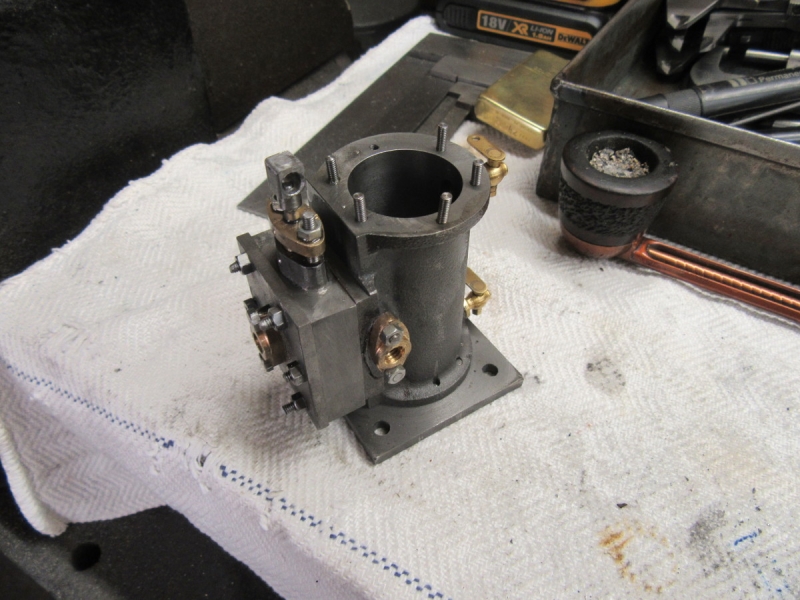
I started the day by fitting the flange so it seated well, screwed the set screws in tight with Loctite shaft fit and then cut them off at the right height. Then a dab of plastic gasket on the face of the flange and fit the nuts screwing them down tight. The flange was then held securely enough to tap it for the 1/4" pipe.
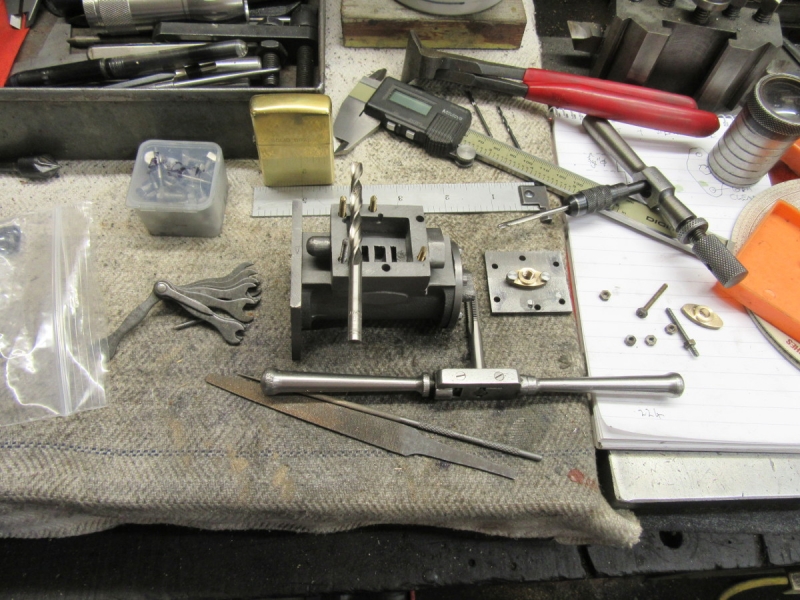
Then I turned my attention to the steam chest. The first job is to drill it for the valve rod. Here we are set up to do that. But it was knocking off time because I have to listen to In our time on R4. Never mind, it's progress.
As you can see, the mess on the bench has grown. I must have had a busy hour!
Stanley Challenger Graham
Stanley's View
scg1936 at talktalk.net
"Beware of certitude" (Jimmy Reid)
The floggings will continue until morale improves!
Stanley's View
scg1936 at talktalk.net
"Beware of certitude" (Jimmy Reid)
The floggings will continue until morale improves!
-
Stanley
- Global Moderator
- Posts: 90344
- Joined: 23 Jan 2012, 12:01
- Location: Barnoldswick. Nearer to Heaven than Gloria.
Re: Shed Matters 3
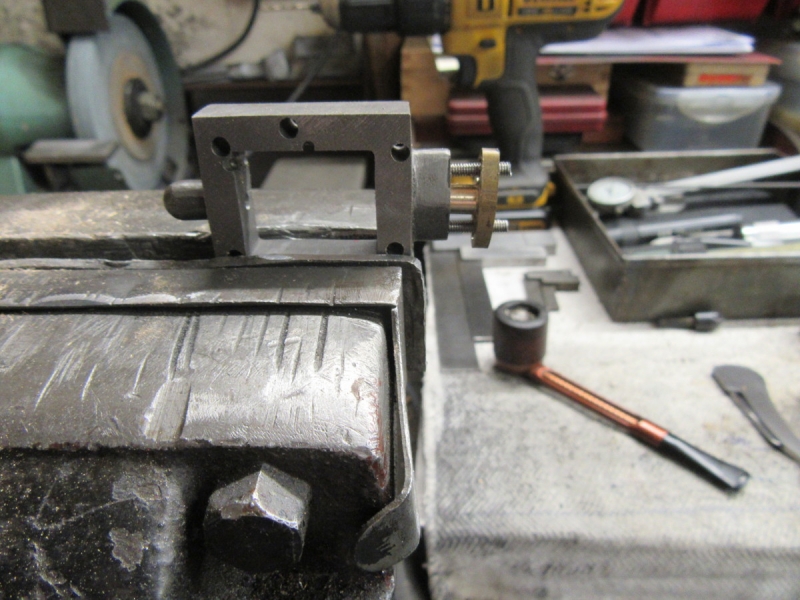
In case you're wondering, the new tool with the rounded end is a pipe tool I was given by Aston's after I complained about their web site. Tamping the tobacco in the bowl of your pipe whilst wearing plastic gloves is not productive!
Something else has cropped up. For years I have had a favourite pair of glasses which suited work in the shed but I have some new and more powerful reading glasses so I tried them in the shed and they are fine, I don't need distance lens in there. Makes reading scales etc. easier (but not perfect!).
Something else has cropped up. For years I have had a favourite pair of glasses which suited work in the shed but I have some new and more powerful reading glasses so I tried them in the shed and they are fine, I don't need distance lens in there. Makes reading scales etc. easier (but not perfect!).
Stanley Challenger Graham
Stanley's View
scg1936 at talktalk.net
"Beware of certitude" (Jimmy Reid)
The floggings will continue until morale improves!
Stanley's View
scg1936 at talktalk.net
"Beware of certitude" (Jimmy Reid)
The floggings will continue until morale improves!
-
Stanley
- Global Moderator
- Posts: 90344
- Joined: 23 Jan 2012, 12:01
- Location: Barnoldswick. Nearer to Heaven than Gloria.
Re: Shed Matters 3
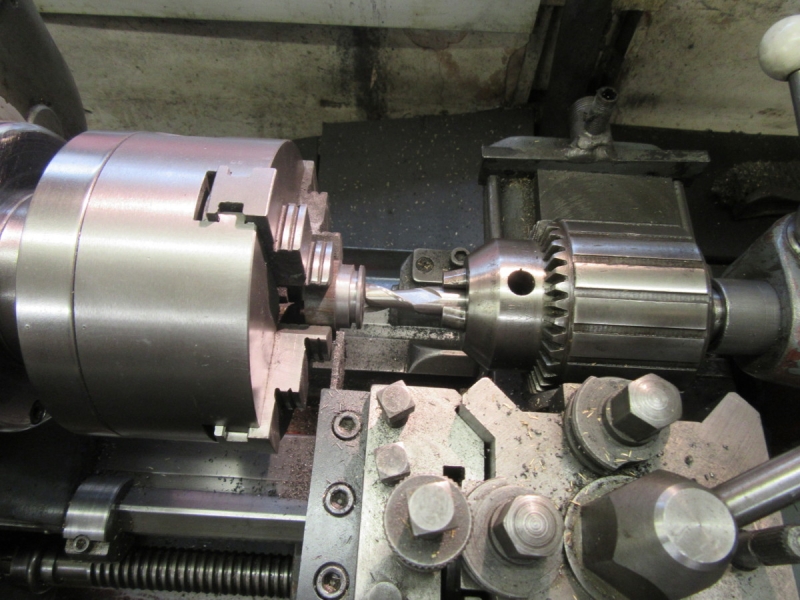
Another fiddly morning, I worked very slowly and carefully! First job was to drill the steam chest for the valve rod, where I left off.
Then open the bore up to 1/4" for the packing and the gland.
Then I marked for the tapping holes and just managed to stop myself in time, this was the wrong way to do it. I need to make the gland first and drill these holes after marking through the clearance hole in the gland. I filed these two marks off.
So the next job was into Mrs Harrison to make the gland.....

Then drill for the valve rod.
Then part it off after checking I had the diameter right by offering the steam chest up to it.
Here we are at knocking off time. Half way there with no cock ups. That was a good hour!
Then open the bore up to 1/4" for the packing and the gland.
Then I marked for the tapping holes and just managed to stop myself in time, this was the wrong way to do it. I need to make the gland first and drill these holes after marking through the clearance hole in the gland. I filed these two marks off.
So the next job was into Mrs Harrison to make the gland.....
Then drill for the valve rod.
Then part it off after checking I had the diameter right by offering the steam chest up to it.
Here we are at knocking off time. Half way there with no cock ups. That was a good hour!
Stanley Challenger Graham
Stanley's View
scg1936 at talktalk.net
"Beware of certitude" (Jimmy Reid)
The floggings will continue until morale improves!
Stanley's View
scg1936 at talktalk.net
"Beware of certitude" (Jimmy Reid)
The floggings will continue until morale improves!
-
Stanley
- Global Moderator
- Posts: 90344
- Joined: 23 Jan 2012, 12:01
- Location: Barnoldswick. Nearer to Heaven than Gloria.
Re: Shed Matters 3
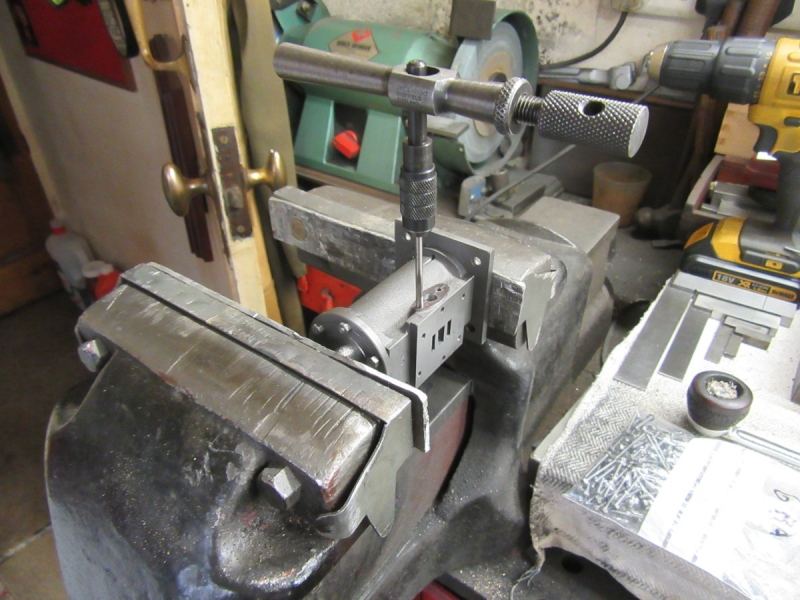
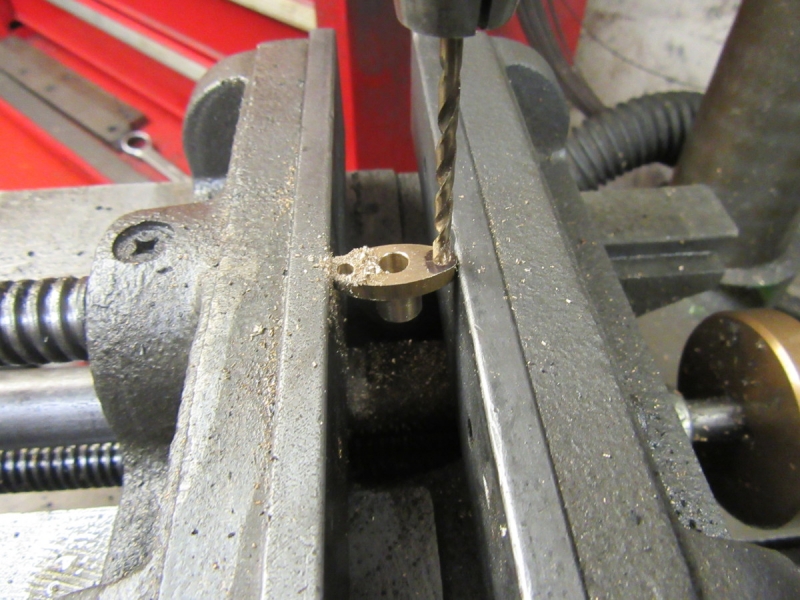
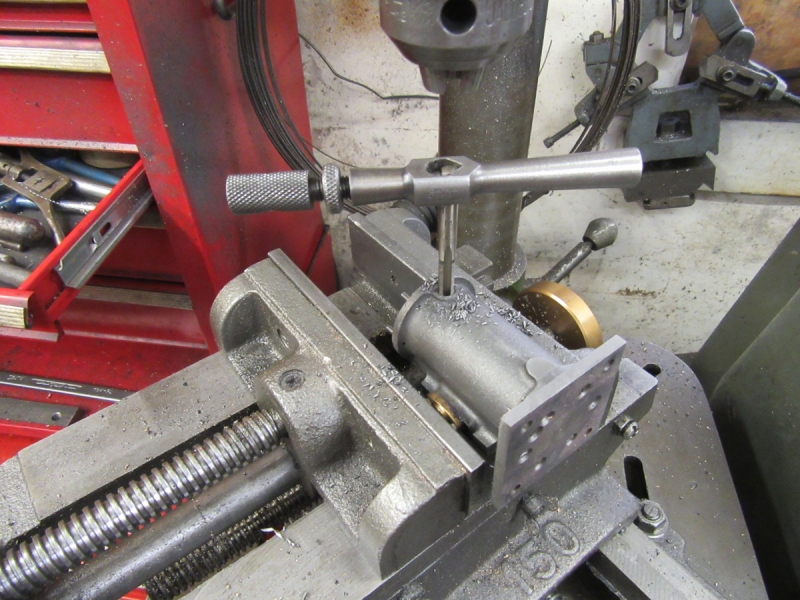
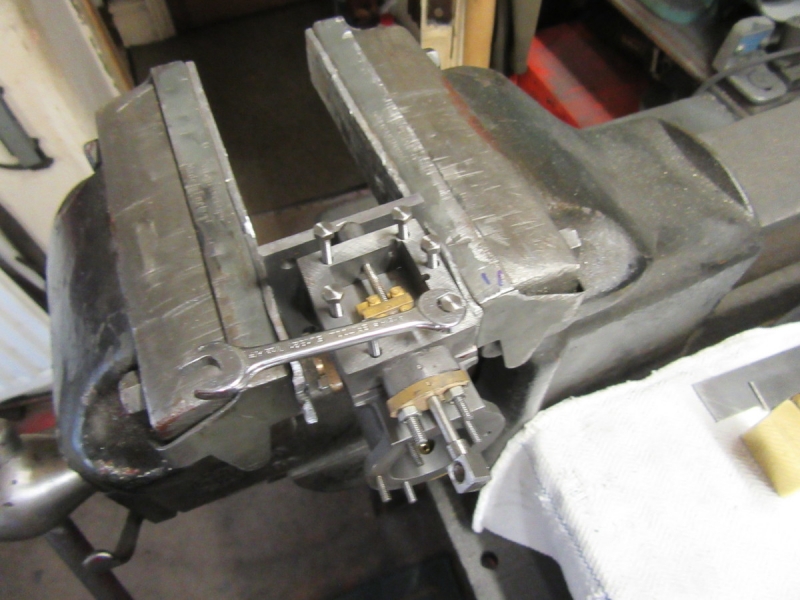
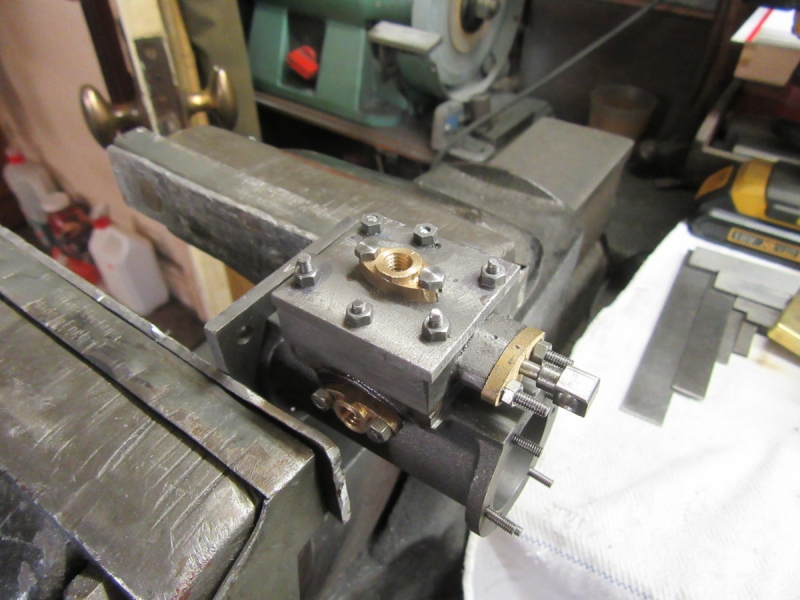
This morning's task is more fiddly work! I want to get the valve rod gland finished and fitted to the steam chest. Then measure and mark it ready for drilling clearance size for 6BA, 2.8mm.
Then under the pillar drill and two careful drillings because you can't grip a small bronze part like this very hard, if you do you'll distort it. Then I marked the valve chest using the gland as a template and drilled it tapping size for 6BA, 2.3mm.
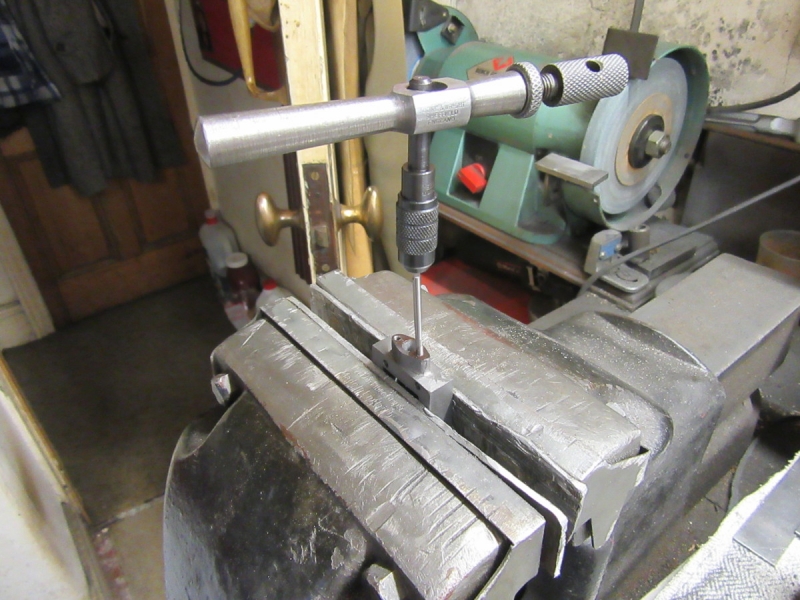
Then into the vice and some very careful tapping, last thing I want is a broken tap. I'm glad I got these expensive HSS taps, I have a lot more confidence in them.
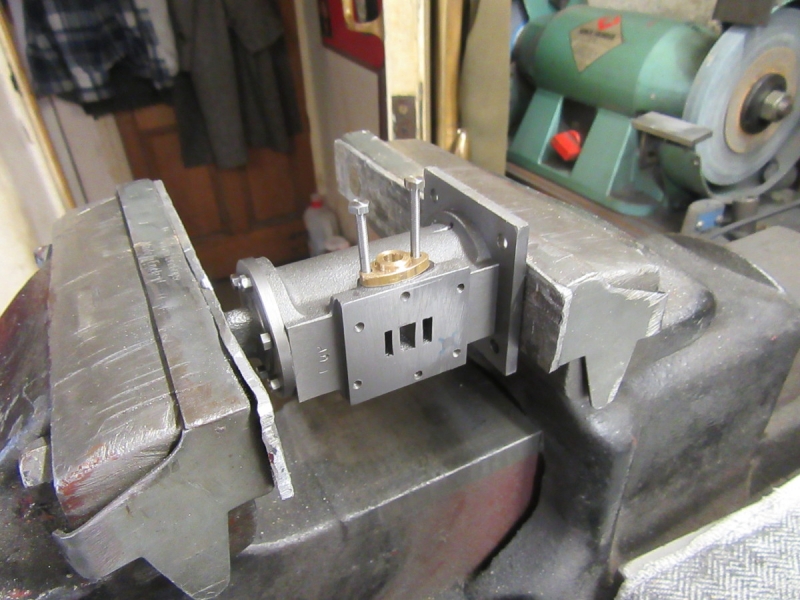
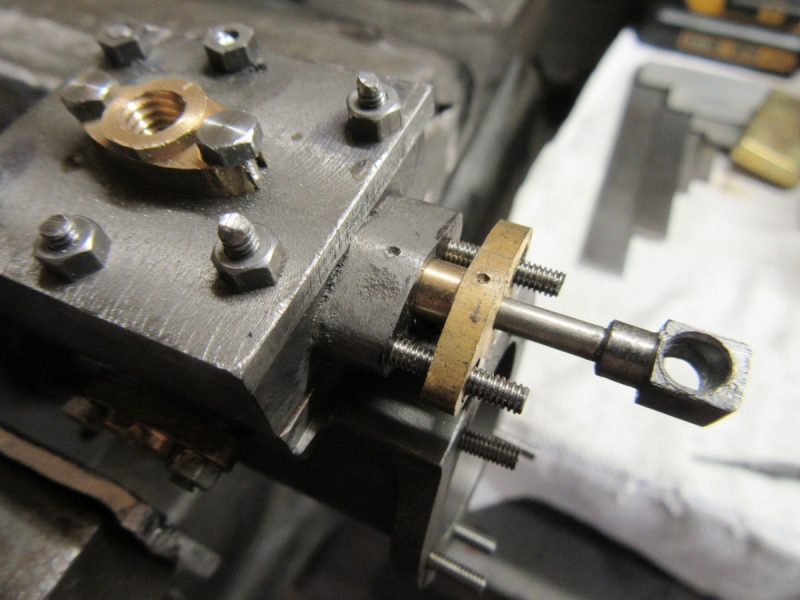
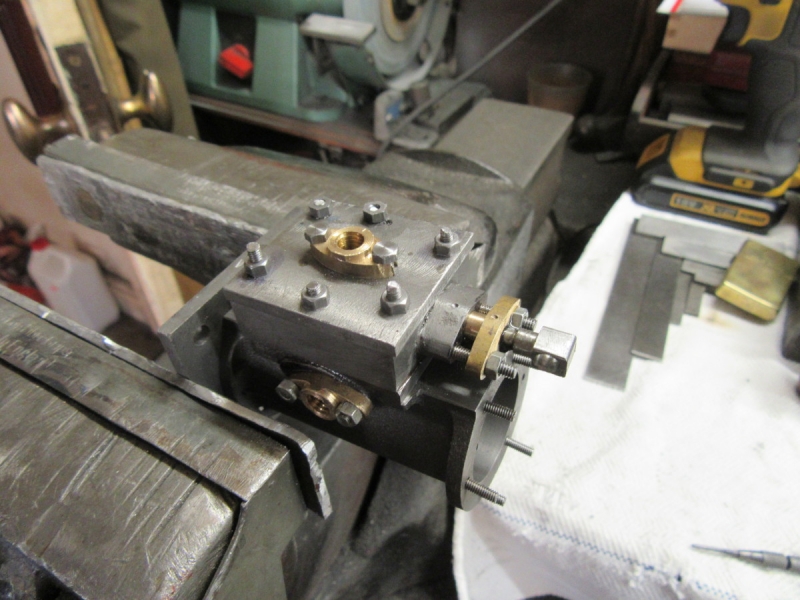
I fitted the gland using two 6BA set screws and if I tell the truth had to do quite a bit of adjustment to the clearance holes in the gland, the penalty you pay for not being able to see straight. Here I have got a fit and cut the set screws off, they are studs now!
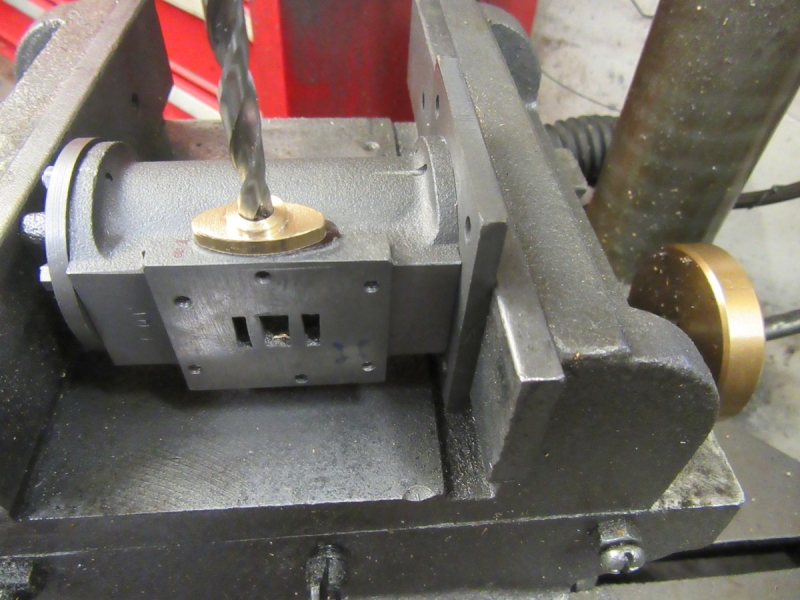
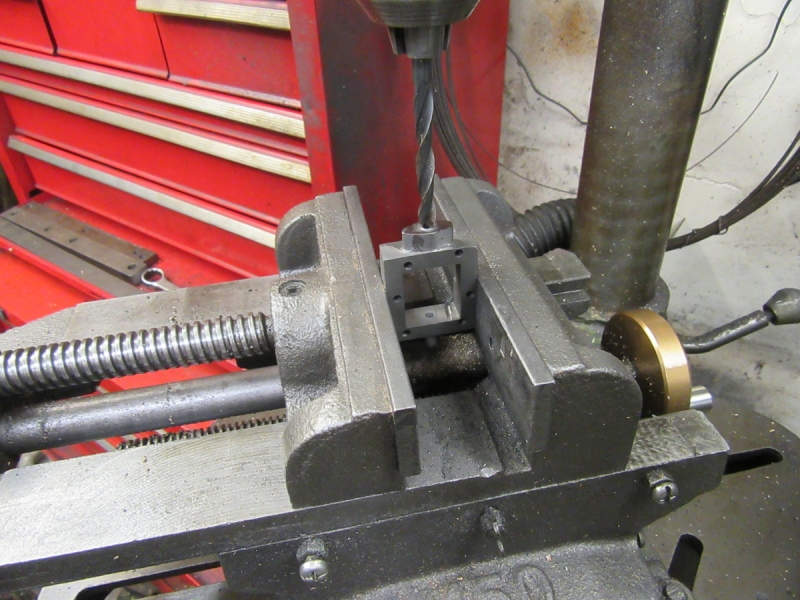
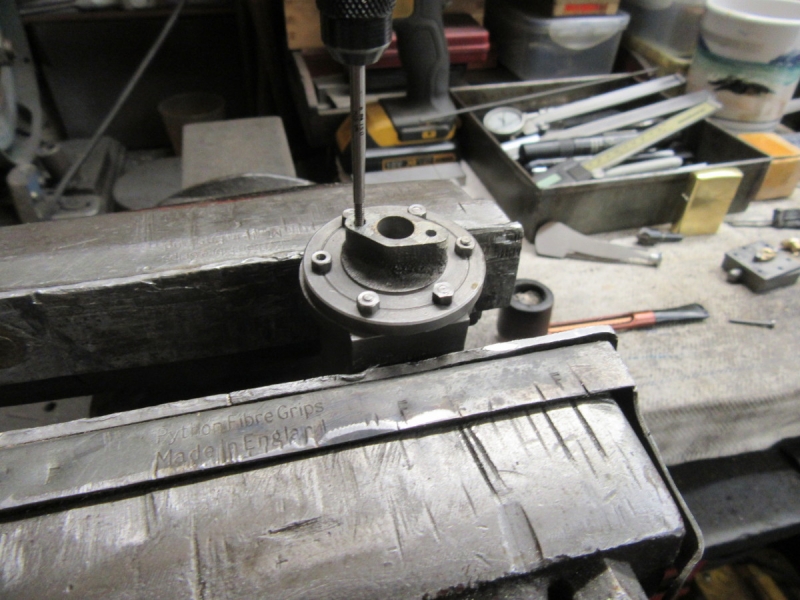
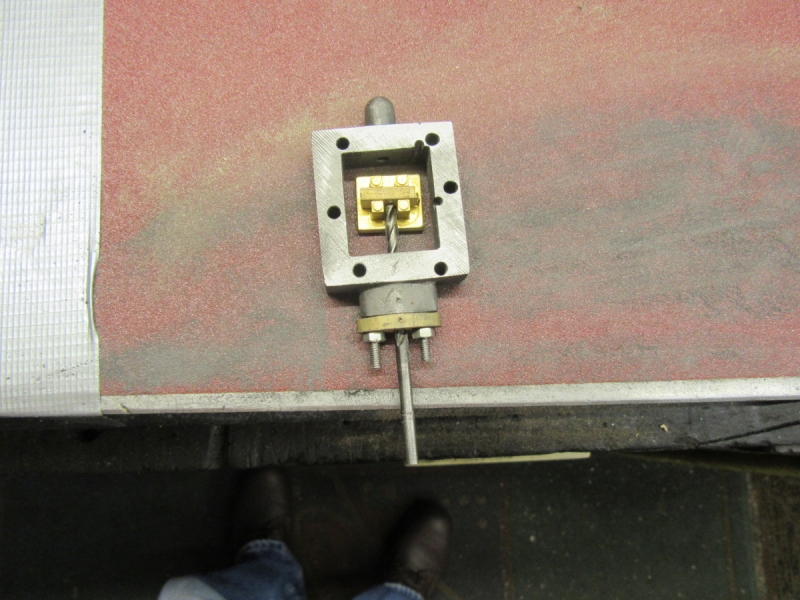
Here we have the gland fitted with nuts and the 1/8" drill is in there to prove to me that the hole in the gland coincides with the two drillings in the steam chest. It's a nice sliding fit so that's all right.
Knocking off time. We're making progress, tomorrow I have to make the gland for the piston rod and fit it. Once that's done I can move on to making the steam valve and rod and the piston and rod. I'll leave the piston until last, it will feel enormous after these bits!
Stanley Challenger Graham
Stanley's View
scg1936 at talktalk.net
"Beware of certitude" (Jimmy Reid)
The floggings will continue until morale improves!
Stanley's View
scg1936 at talktalk.net
"Beware of certitude" (Jimmy Reid)
The floggings will continue until morale improves!
-
Stanley
- Global Moderator
- Posts: 90344
- Joined: 23 Jan 2012, 12:01
- Location: Barnoldswick. Nearer to Heaven than Gloria.
Re: Shed Matters 3
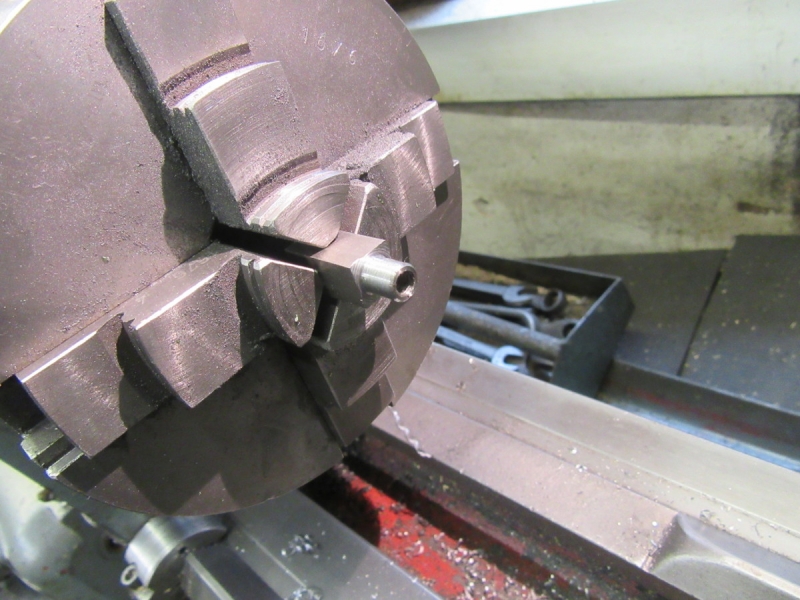
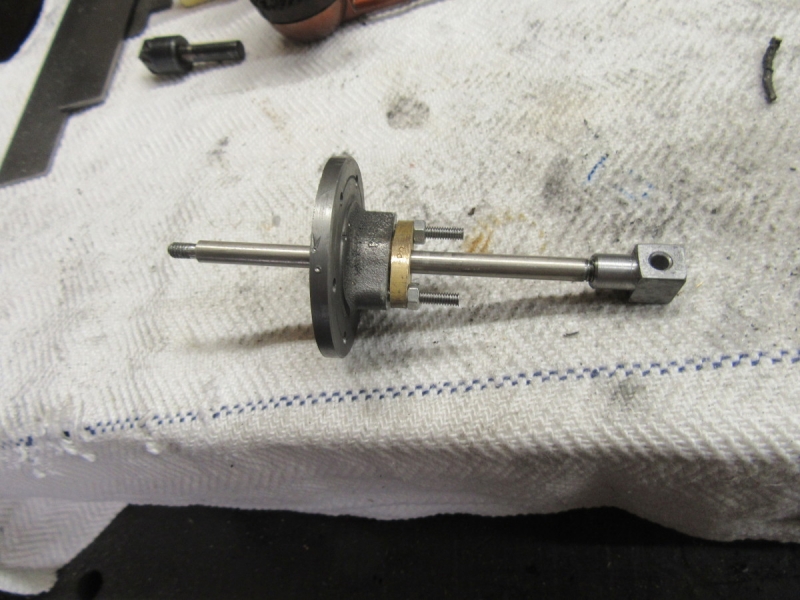
Today is the piston rod gland. Here I am making sure the spigot fits the lid of the cylinder.
Then under the pillar drill and some careful work on the clearance holes for the studs.
Next a careful transfer of the holes in the gland onto the lid of the cylinder.
Then drill the tapping holes in the lid.
Then some careful tapping.
I was surprised the find I had got it right! I screwed two set screws in tight and then cut them back to studs. I've left them too long, I can adjust the length during the final fitting.
I nearly forgot this check, a 3/16" drill slides nicely through the gland and the lid.
That all went well and I'm pleased, I think the new readers are helping and I'm seeing a bit better but not much.
Now I can have a look at the valve and the piston with their rods.... That'll be a nice change!
That was a good 90 minutes and nice progress. I am tired but happy.
Stanley Challenger Graham
Stanley's View
scg1936 at talktalk.net
"Beware of certitude" (Jimmy Reid)
The floggings will continue until morale improves!
Stanley's View
scg1936 at talktalk.net
"Beware of certitude" (Jimmy Reid)
The floggings will continue until morale improves!
-
Stanley
- Global Moderator
- Posts: 90344
- Joined: 23 Jan 2012, 12:01
- Location: Barnoldswick. Nearer to Heaven than Gloria.
Re: Shed Matters 3
Various matters got in the way this morning but I was determined to keep the ball rolling. As you know I am out of glands and into different but just as fiddle work making and fitting the steam valve.
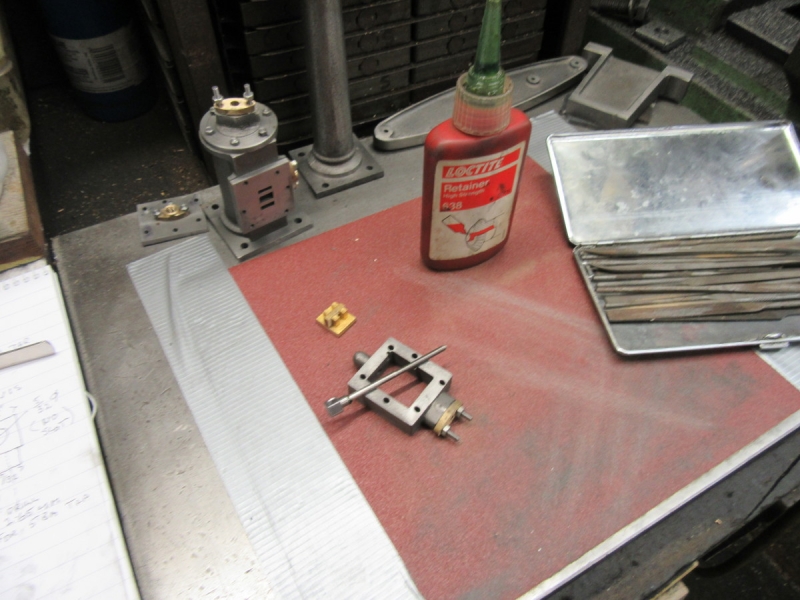
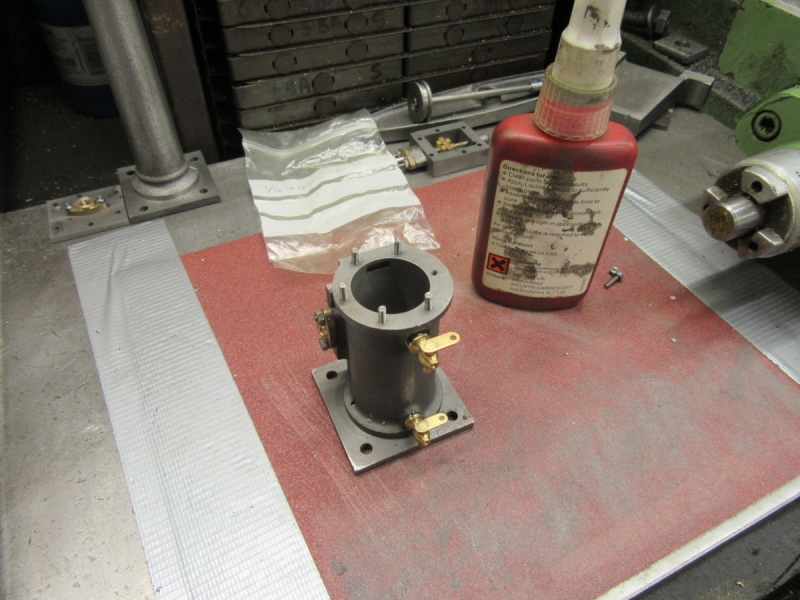
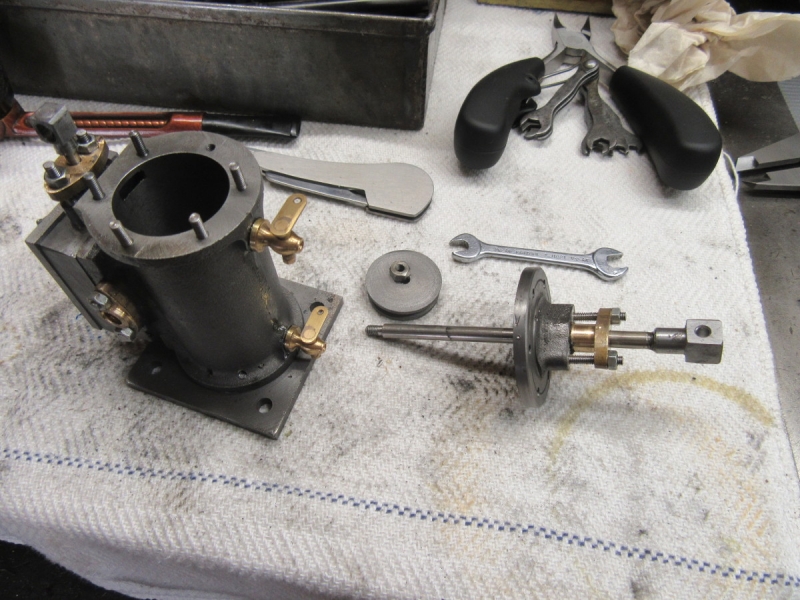
I decided we had to have a tidy up and put some tools away, the bench is far too cluttered. Here's what was facing me...

Mrs Harrison deserved a bit of attention as well so I had a quick clean up.
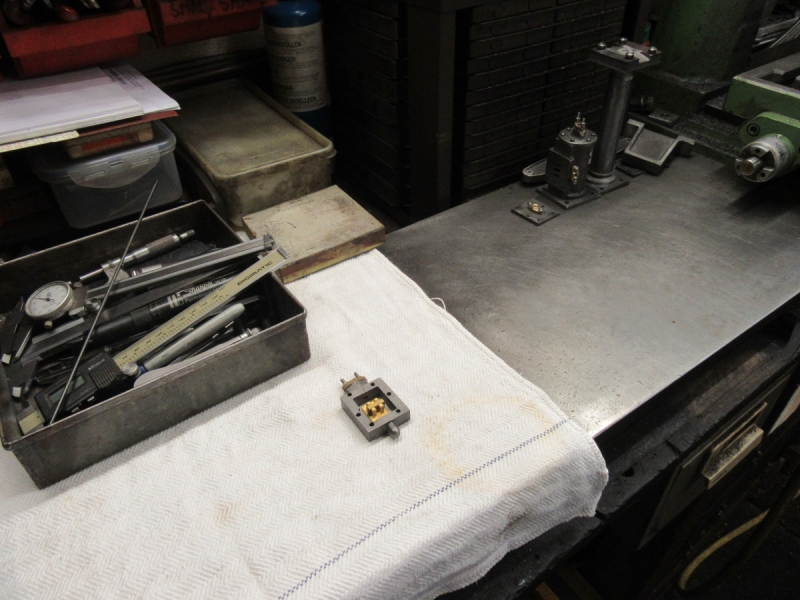
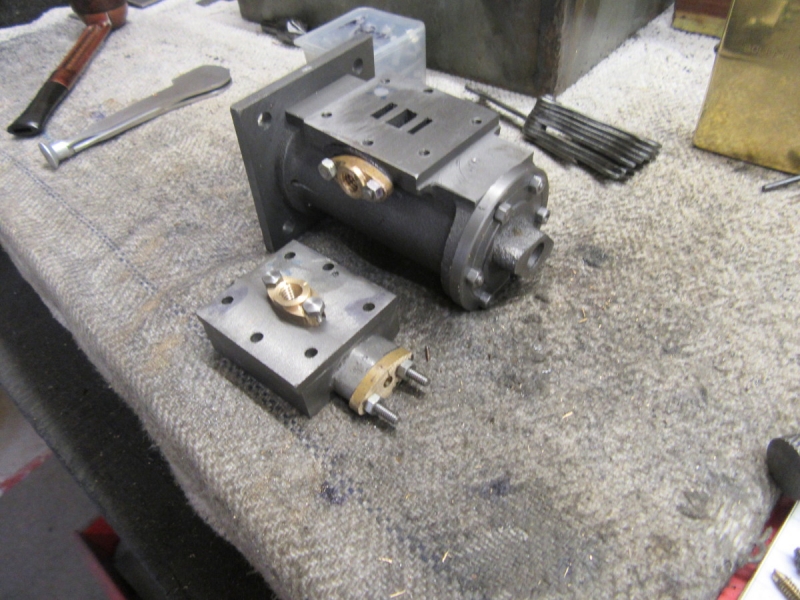
Here's where I ended up, all the tools tidied, surface plates protected with WD40 and a clean tablecloth. If you look carefully you'll see the steam valve inside the steam chest casting. The nice thing is that it's a tidy casting and already has the recess in the bottom, that was bothering me, milling out something that small with a 2hp motor driving the small cutter is a chancy business! So I am happy. We are ready to get straight into some fresh work tomorrow!
I decided we had to have a tidy up and put some tools away, the bench is far too cluttered. Here's what was facing me...
Mrs Harrison deserved a bit of attention as well so I had a quick clean up.
Here's where I ended up, all the tools tidied, surface plates protected with WD40 and a clean tablecloth. If you look carefully you'll see the steam valve inside the steam chest casting. The nice thing is that it's a tidy casting and already has the recess in the bottom, that was bothering me, milling out something that small with a 2hp motor driving the small cutter is a chancy business! So I am happy. We are ready to get straight into some fresh work tomorrow!
Stanley Challenger Graham
Stanley's View
scg1936 at talktalk.net
"Beware of certitude" (Jimmy Reid)
The floggings will continue until morale improves!
Stanley's View
scg1936 at talktalk.net
"Beware of certitude" (Jimmy Reid)
The floggings will continue until morale improves!
-
Stanley
- Global Moderator
- Posts: 90344
- Joined: 23 Jan 2012, 12:01
- Location: Barnoldswick. Nearer to Heaven than Gloria.
Re: Shed Matters 3
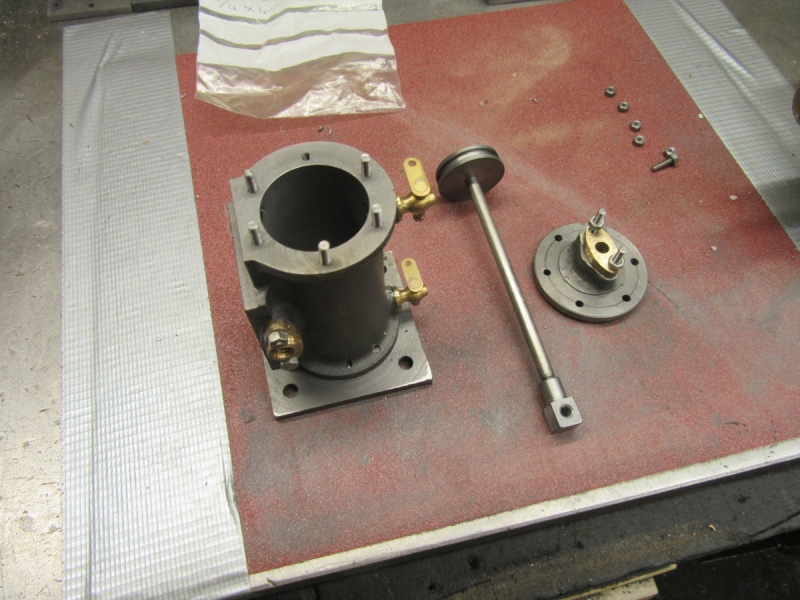
Today thank god I can go onto something else. The task is to fit the steam valve in the steam chest and equip it with a valve rod and clevis.
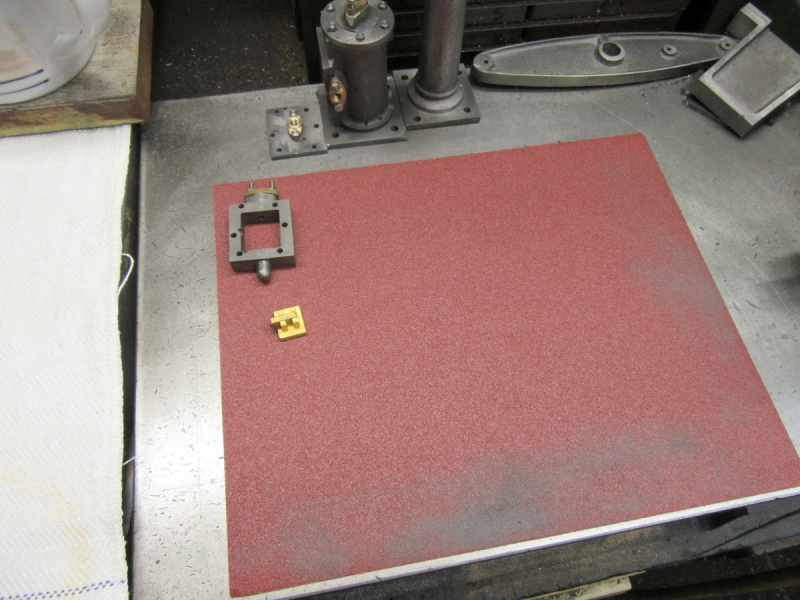
The first job was to fix some good abrasive on the surface plate and get some semblance of finish into the parts. Notice that the valve itself is a tidy little casting that doesn't need and machining, just fitting, it even has the recess for the exhaust steam cast into it.
Here's how to mark the driving plate in the valve with the position for the valve rod. Simply put the valve in place and insert a 1/8" drill instead of the valve rod and put a mark on the dog.
Under the pillar drill, a light hold so as not to distort it and drill tapping size for 5BA which is the thread that will be on the valve rod.
Then tap it by hand with the tap in the valve chuck without moving it after drilling.
Then check that the tapping is good by using the tap as you did the drill. Luckily the shank of the tap is 1/8".
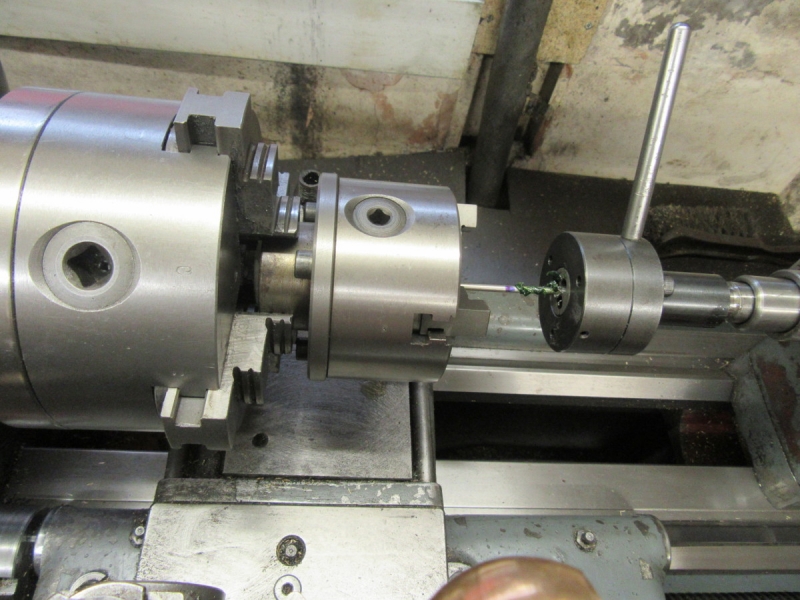
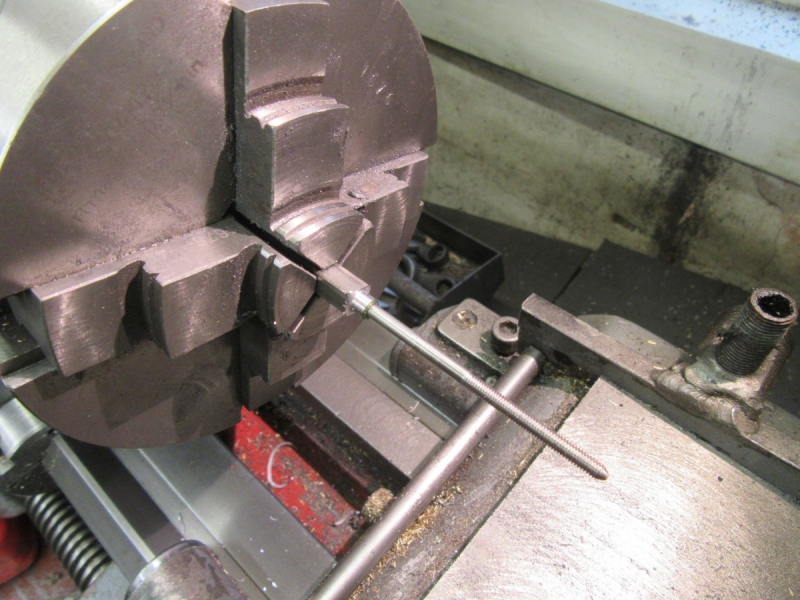
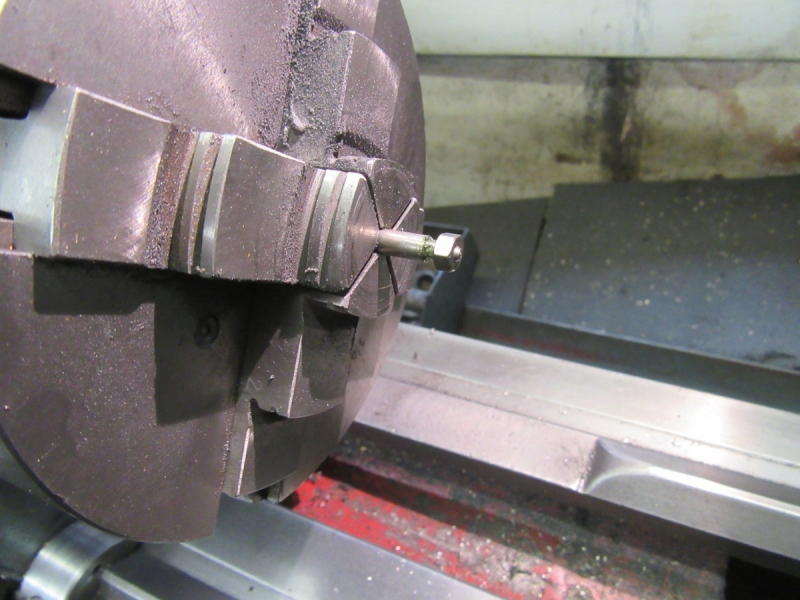
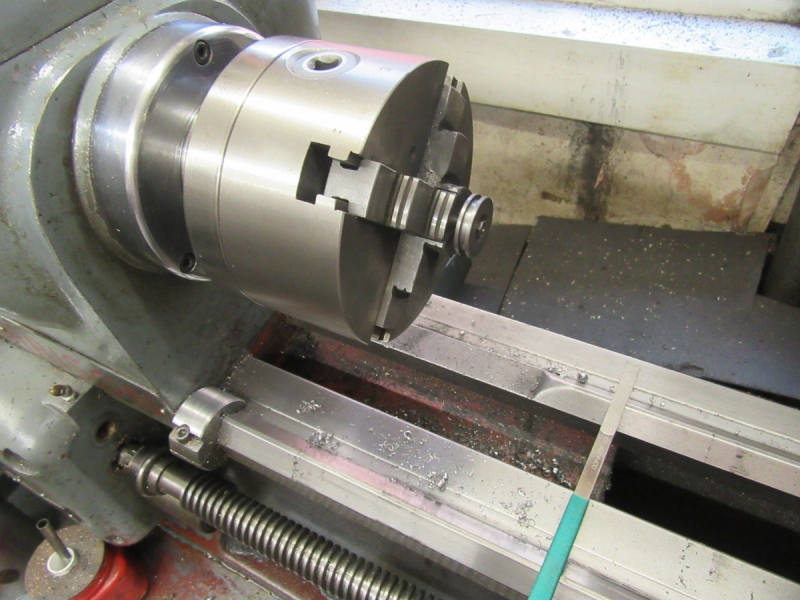
I needed the four jaw on as that will be needed for machining the square stock for the clevis. But here I hit a problem, the jaws don't close enough to grip 1/8" rod. Lots of ways round this but the one I chose was to get the three jaw of Johnny's 1927 lathe in the front room and put that in the 4 jaw. In case you're wondering why I didn't use that lathe, I want to use my tailstock die holder and it won't fit the 1927 lathe. I can do the job this way but that's for tomorrow. Melvyn Bragg and 'In Our Time' beckons. A good hour, a good start and I am still happy!
Stanley Challenger Graham
Stanley's View
scg1936 at talktalk.net
"Beware of certitude" (Jimmy Reid)
The floggings will continue until morale improves!
Stanley's View
scg1936 at talktalk.net
"Beware of certitude" (Jimmy Reid)
The floggings will continue until morale improves!
-
Stanley
- Global Moderator
- Posts: 90344
- Joined: 23 Jan 2012, 12:01
- Location: Barnoldswick. Nearer to Heaven than Gloria.
Re: Shed Matters 3
This set up worked, nice true threads. But can anyone tell me why it is that the last die I came to in my drawer was the one I wanted, 5BA?
Nice little result. Now to test it.
Near perfect! Then a short interlude of putting stuff away and replacing the 3 jaw on Johnny's 1927 lathe.

Now a look at the drawings and do a fag packet drawing of the clevis, then into the stock and find my material.
Knocking off time. I am all set up for another small step forwards tomorrow..... Nice little bit of progress with no mistakes....
Stanley Challenger Graham
Stanley's View
scg1936 at talktalk.net
"Beware of certitude" (Jimmy Reid)
The floggings will continue until morale improves!
Stanley's View
scg1936 at talktalk.net
"Beware of certitude" (Jimmy Reid)
The floggings will continue until morale improves!
-
Stanley
- Global Moderator
- Posts: 90344
- Joined: 23 Jan 2012, 12:01
- Location: Barnoldswick. Nearer to Heaven than Gloria.
Re: Shed Matters 3
We're making the clevis for the valve rod. Getting on here and I am trying out the valve rod in the clevis.
Once I had it parted off I marked it and got under the pillar drill. Too bloody small, I wish I could see straight!
Then a clean up and Loctite it into the clevis.
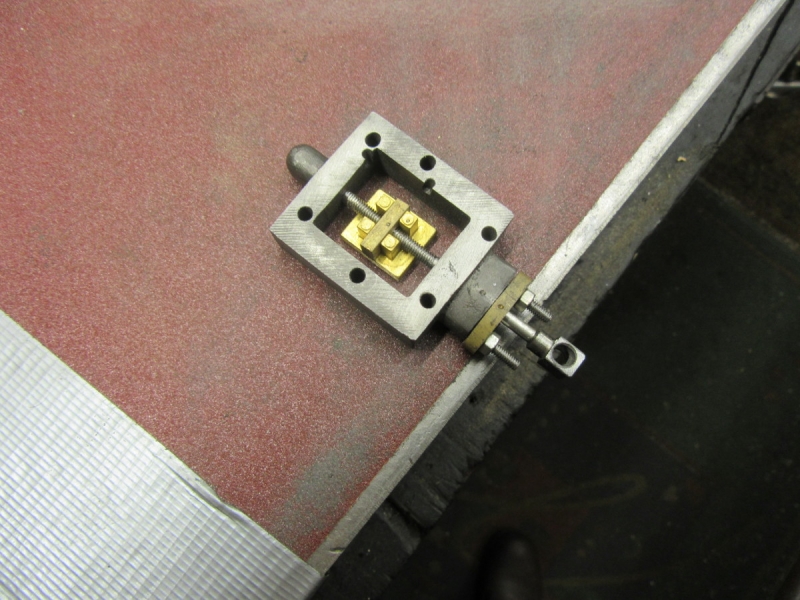

A bit more cleaning up and checking and we have the valve rod fitted and ready for fitting to the cylinder.
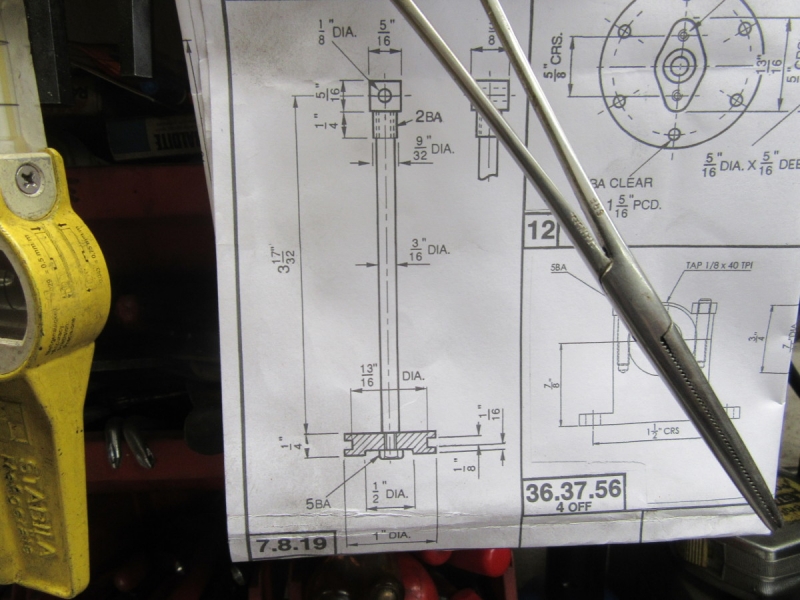
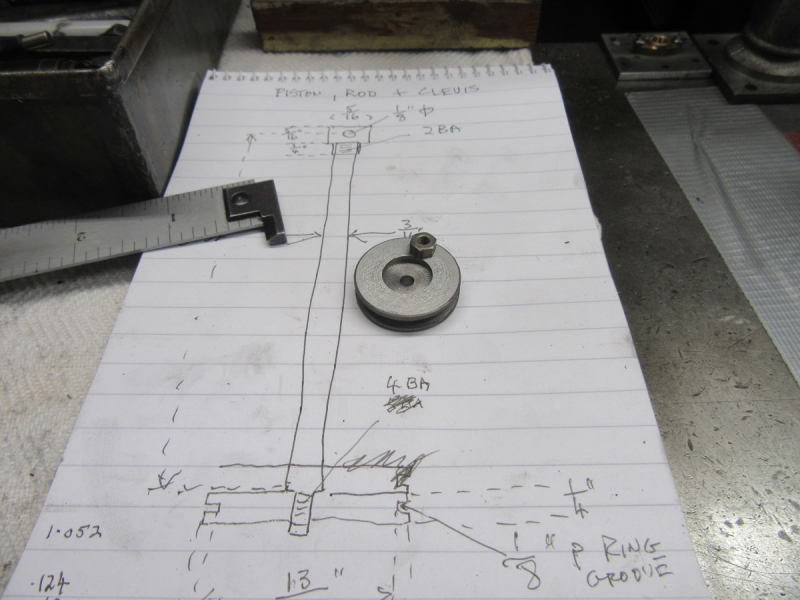
However, no point getting into fitting until I have a piston with it's rod and clevis fitted so back to the drawings.
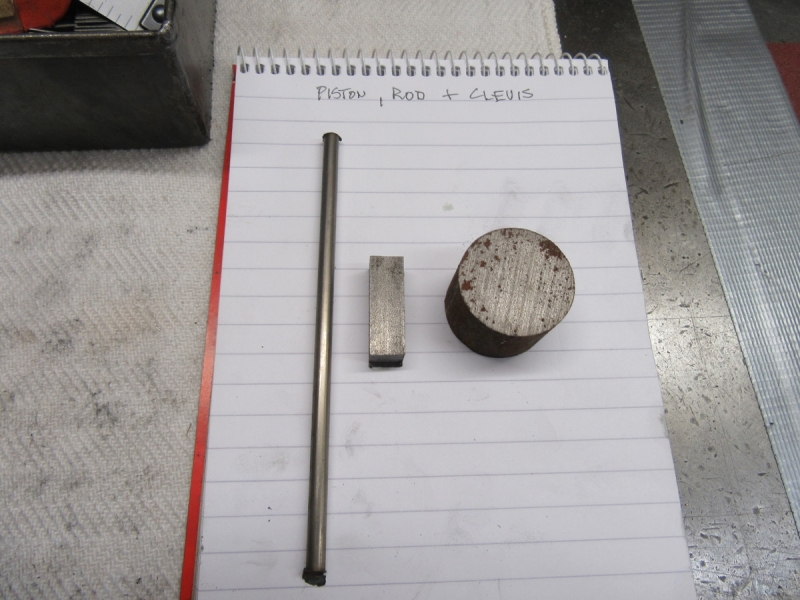
Then into the parts and find my stock. The piston rod is stainless which is good, the square stock is bog standard and the blank for the piston is cast iron. I had been contemplating making the piston out of bronze as usual but cast iron should be OK so I'll go with it! Nice morning, no mistakes and I know what I am doing tomorrow!
Stanley Challenger Graham
Stanley's View
scg1936 at talktalk.net
"Beware of certitude" (Jimmy Reid)
The floggings will continue until morale improves!
Stanley's View
scg1936 at talktalk.net
"Beware of certitude" (Jimmy Reid)
The floggings will continue until morale improves!
-
Stanley
- Global Moderator
- Posts: 90344
- Joined: 23 Jan 2012, 12:01
- Location: Barnoldswick. Nearer to Heaven than Gloria.
Re: Shed Matters 3
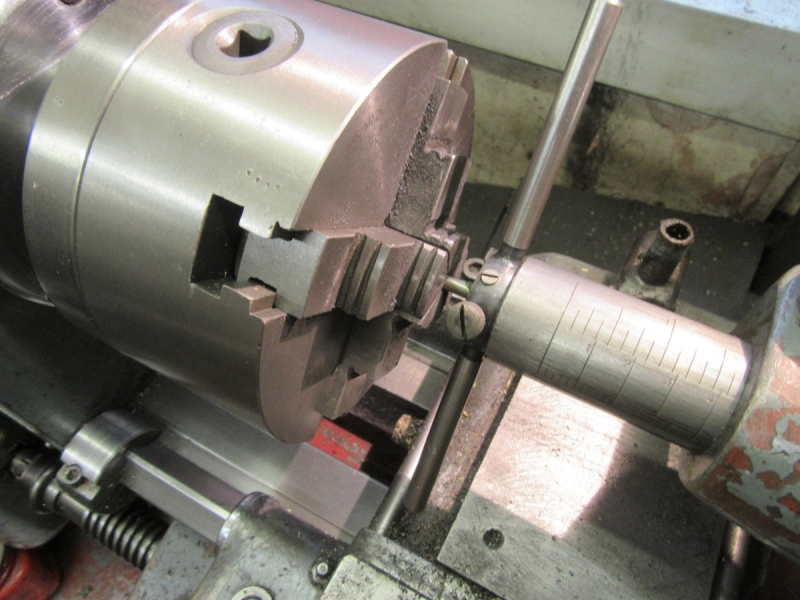
Piston making today! First thing to do was fag packet drawing with my modifications. I needed to open the cylinder up and measure it because I knew I had bored it a touch oversize. So a bit of careful measuring and thought before I started making chips.
Ready to start. I've made sure the slug of cast iron is somewhere near straight in the jaws by using the ball bearing pusher.

Once I had the diameter right, I cut the groove for the 'O' ring or whatever I use to seal it.
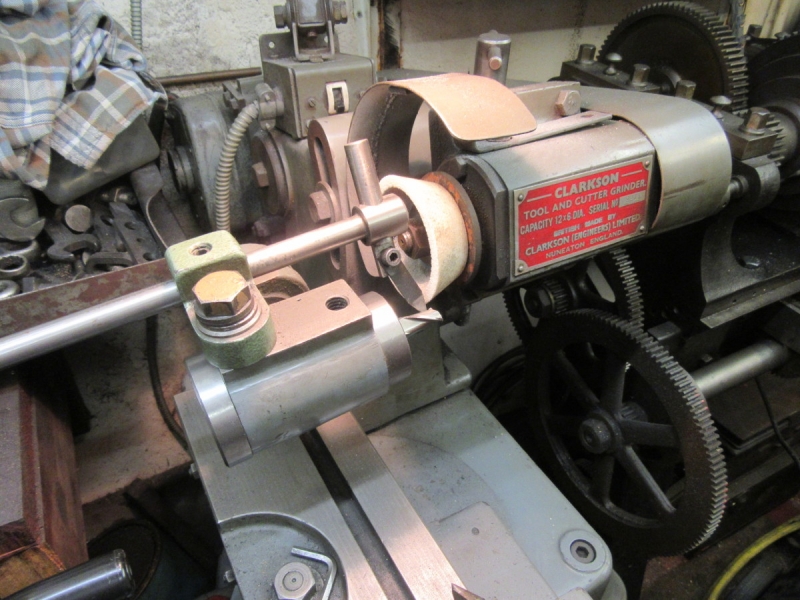
I've found a centre and drilled for the threaded end of the rod, now I need a 1/2" diameter pocket in the end for the piston rod nut. This slot drill was dull so into the T&C grinder to put an edge on it.
Milling cutters don't like to cut with the work revolving for some reason so you want the most powerful, accurate and rigid set up you can achieve. So I used my biggest and most accurate chuck, The Jacobs ball bearing chuck. Slow speed and cut the pocket.
Then part it off after breaking all the edges. Here we are at knocking off time. It's taken me an hour and a half to do this but don't be too hard on me, I have to check everything more than once! It works, because I have had another morning with no errors. That'll do me......
Stanley Challenger Graham
Stanley's View
scg1936 at talktalk.net
"Beware of certitude" (Jimmy Reid)
The floggings will continue until morale improves!
Stanley's View
scg1936 at talktalk.net
"Beware of certitude" (Jimmy Reid)
The floggings will continue until morale improves!
-
Stanley
- Global Moderator
- Posts: 90344
- Joined: 23 Jan 2012, 12:01
- Location: Barnoldswick. Nearer to Heaven than Gloria.
Re: Shed Matters 3
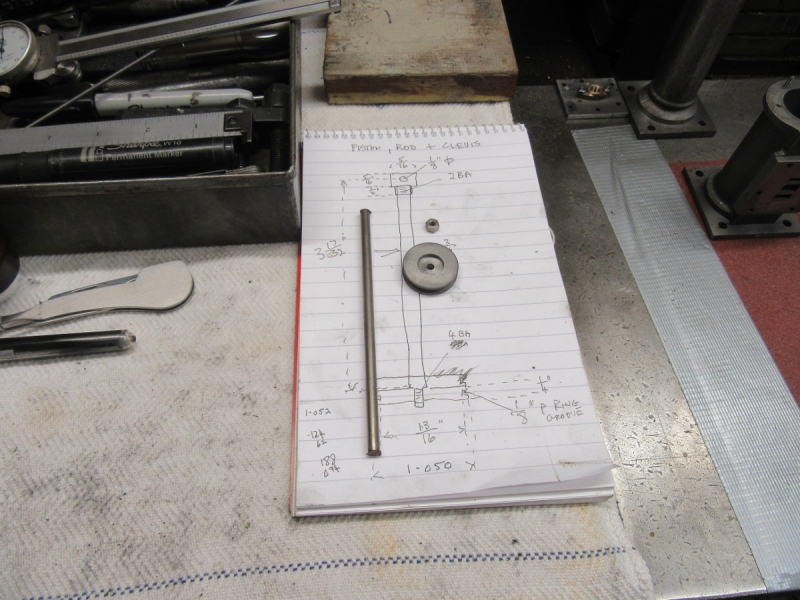
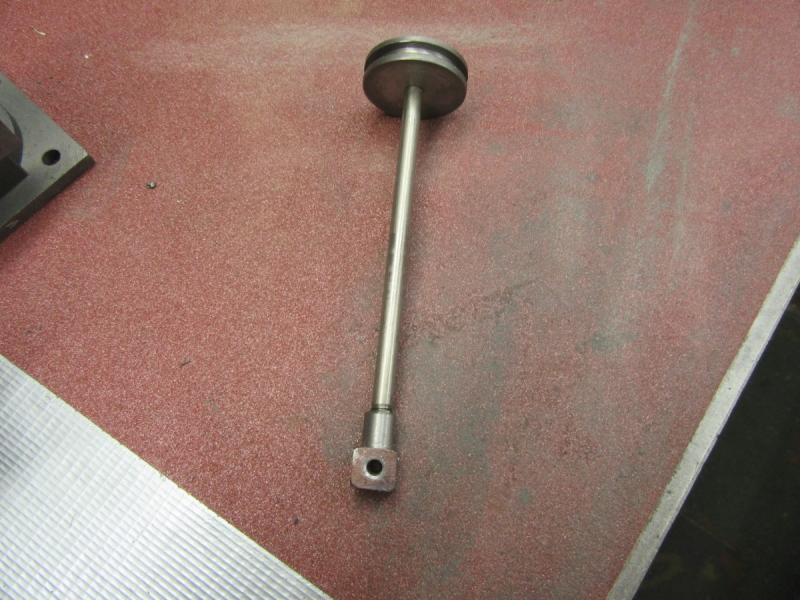
We have the stock, all we need now is to make the piston rod and clevis.
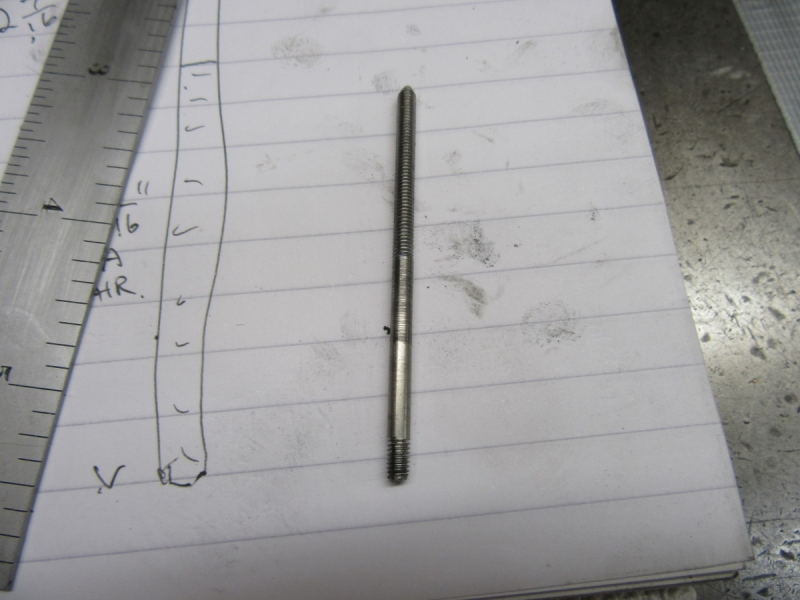
First job was to thread the end that goes in the clevis 2BA. Then a lot of measuring and cutting the rod to length.
Then reverse it, turn the end down to the necessary diameter and thread it 4BA.
Then the clevis, I've turned the boss, drilled it and tapped it for the rod.
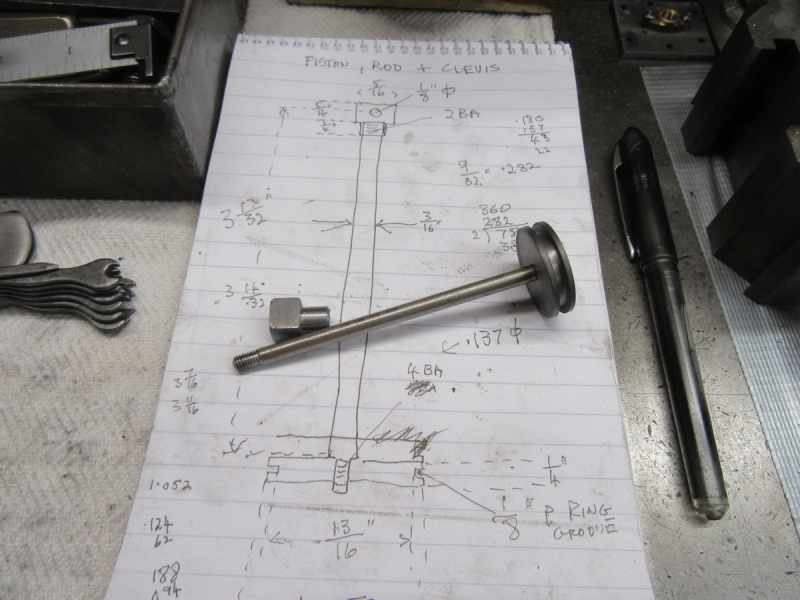
After parting it off I did a bit of finishing on it and now all I have to do is reduce the width of the clevis and drill it for the pin. That will do tomorrow. I enjoyed that!
Stanley Challenger Graham
Stanley's View
scg1936 at talktalk.net
"Beware of certitude" (Jimmy Reid)
The floggings will continue until morale improves!
Stanley's View
scg1936 at talktalk.net
"Beware of certitude" (Jimmy Reid)
The floggings will continue until morale improves!
-
Stanley
- Global Moderator
- Posts: 90344
- Joined: 23 Jan 2012, 12:01
- Location: Barnoldswick. Nearer to Heaven than Gloria.
Re: Shed Matters 3
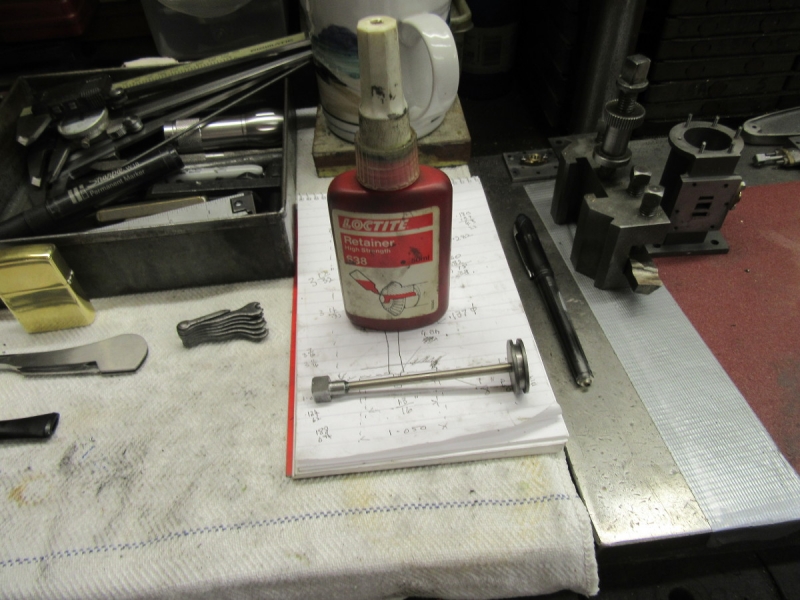
Today's job is finishing the piston rod. I was lax when I drilled the clevis for the rod and got it crooked! So the first thing to do was fix the clevis permanently and securely on the rod. I can still do my fitting without disturbing it again. So I Loctited it and tightened it up. Then I popped it into the chuck and made sure it was running true.
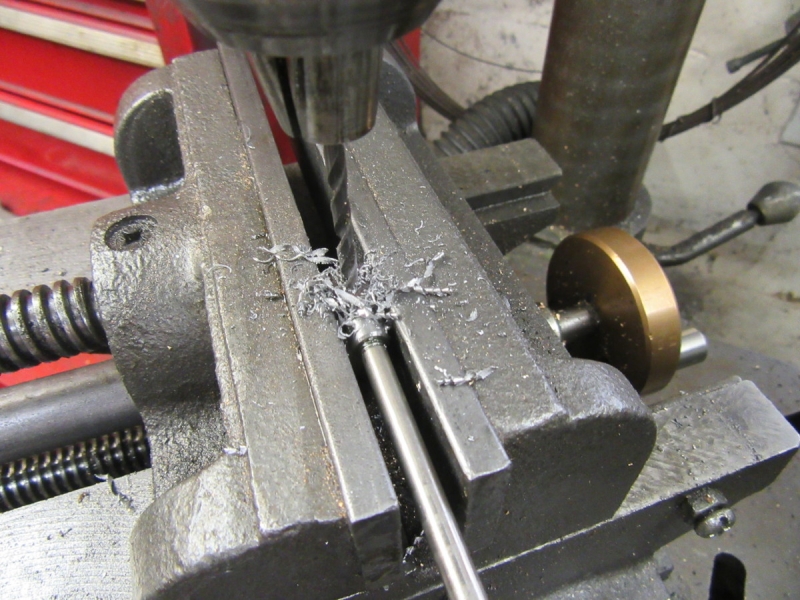
Then I marked it for the hole for the pin and got it under the pillar drill. I got it as near true as my eyes allow, drilled it and broke the edges of the hole with a countersink.
So far so good. Now I have to reduce the thickness in one plane by a sixteenth of an inch. So into the vice again and some marking up.
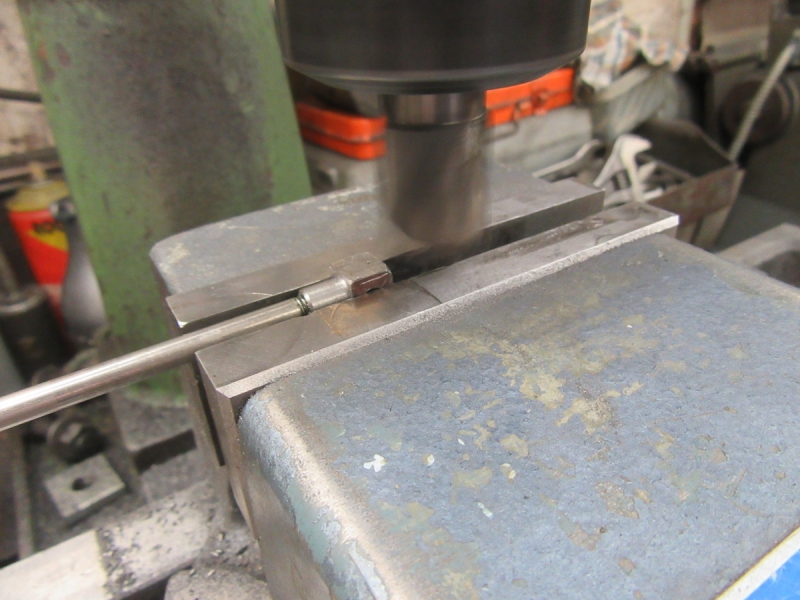
Then under the El Cheapo mill and some very careful milling.
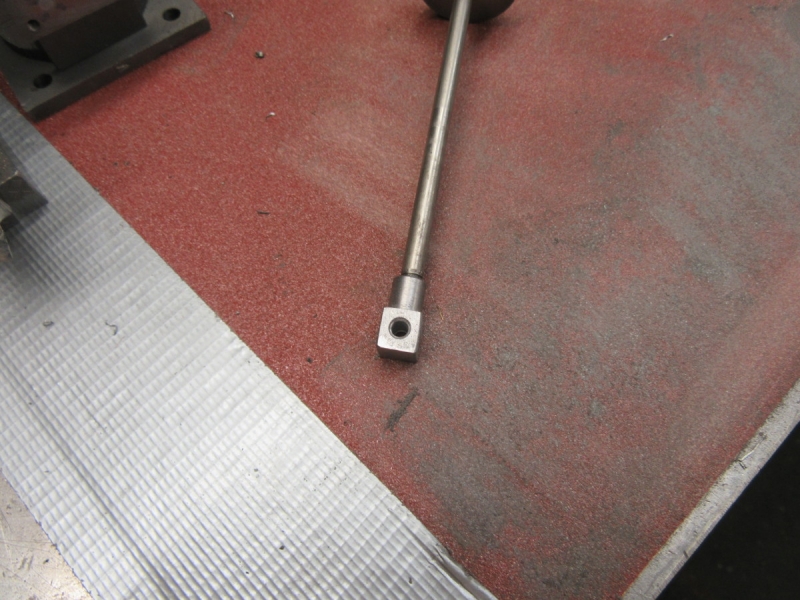
I took the last fractions off by rubbing it down on the sheet of abrasive on the surface plate and measuring it carefully. Here's the result, it will do nicely.
Then into the chuck and reduce the piston diameter until it was an easy fit in the cylinder.
Here we are at knocking off time, the piston is an easy fit in the cylinder. I tried the 'O' ring that comes with the kit and it's far too thick. No sweat because I wasn't thinking of using it, I shall make my packing as usual from graphited asbestos string, perfectly safe, no asbestos dust comes off that! Tomorrow I shall fit the piston and rod in the cylinder. It can be done permanently. But before I do that I have to make a decision about drain cocks! That will do tomorrow....
Stanley Challenger Graham
Stanley's View
scg1936 at talktalk.net
"Beware of certitude" (Jimmy Reid)
The floggings will continue until morale improves!
Stanley's View
scg1936 at talktalk.net
"Beware of certitude" (Jimmy Reid)
The floggings will continue until morale improves!
-
Stanley
- Global Moderator
- Posts: 90344
- Joined: 23 Jan 2012, 12:01
- Location: Barnoldswick. Nearer to Heaven than Gloria.
Re: Shed Matters 3
I started the day by looking for two small valves I knew I had. Here they are, just the thing for drain cocks on the cylinder.
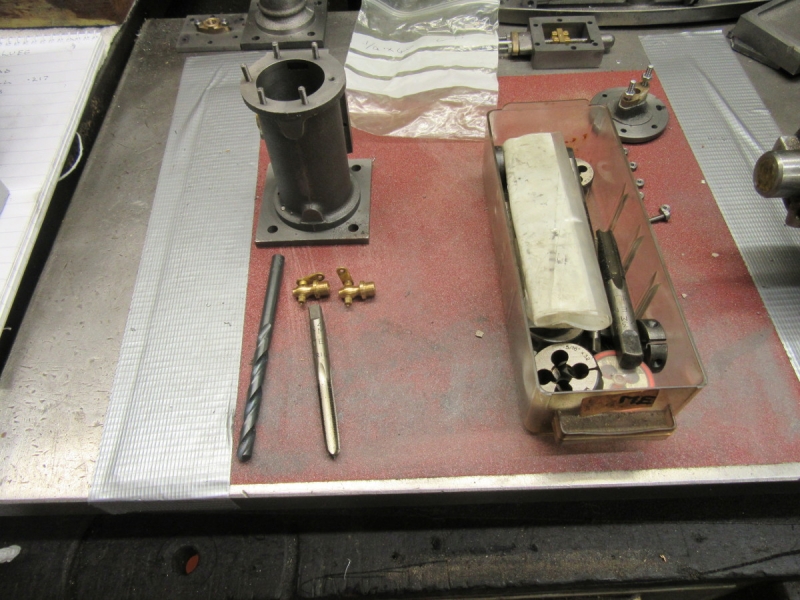
I found this stage very satisfying.... The drain cocks are 1/4" X 40tpi. This an unusual size and relates to an old and just about defunct thread system, Model Engineer. Now (and this is the satisfying bit for me) I have a complete set of taps and dies for ME so I looked out the tap. The drill size in old money is a Number 1 which I also have, the modern recommendation is 5.5mm. (Buying all those unusual sets of taps and dies in the good old days has paid off again!)

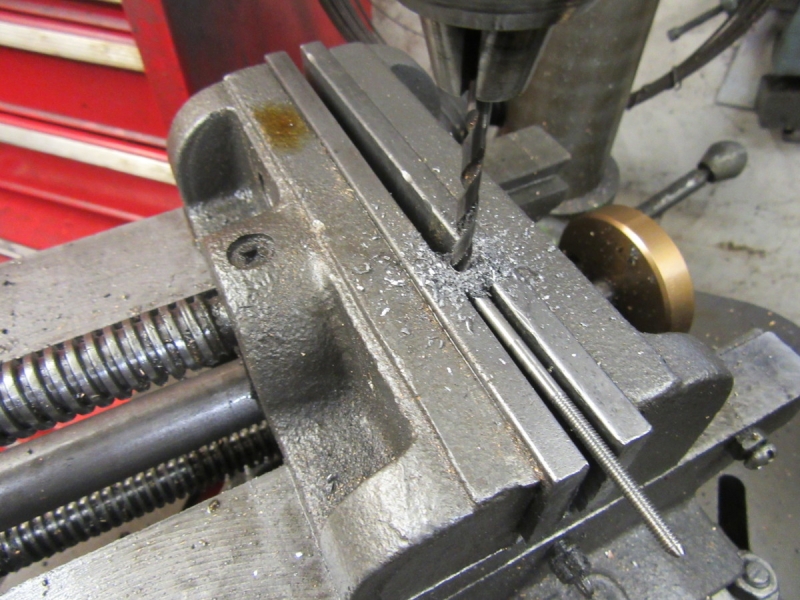
Set up under the pillar drill. I drilled the first with the number drill and tapped it on the same setting, a good fit but a shade sloppy so I drilled the second with the 5.5mm drill which is 17 thou smaller. It made a better fit.
I fitted both cocks using Loctite shaft fit.
Knocking off time after a very satisfying and successful morning. I've checked that no burrs were raised in the bore by drilling for the cocks. All is ready for the definitive fitting of the piston tomorrow, remember I already have the valve made. We are getting very close to a finished cylinder ready to go! Small steps, but they add up.
Stanley Challenger Graham
Stanley's View
scg1936 at talktalk.net
"Beware of certitude" (Jimmy Reid)
The floggings will continue until morale improves!
Stanley's View
scg1936 at talktalk.net
"Beware of certitude" (Jimmy Reid)
The floggings will continue until morale improves!
-
Stanley
- Global Moderator
- Posts: 90344
- Joined: 23 Jan 2012, 12:01
- Location: Barnoldswick. Nearer to Heaven than Gloria.
Re: Shed Matters 3
I need to fit the valve before the piston. I have some 6BA studding but using set screws is best as I can use the heads to seat them tight in the casting and then cut the heads off.
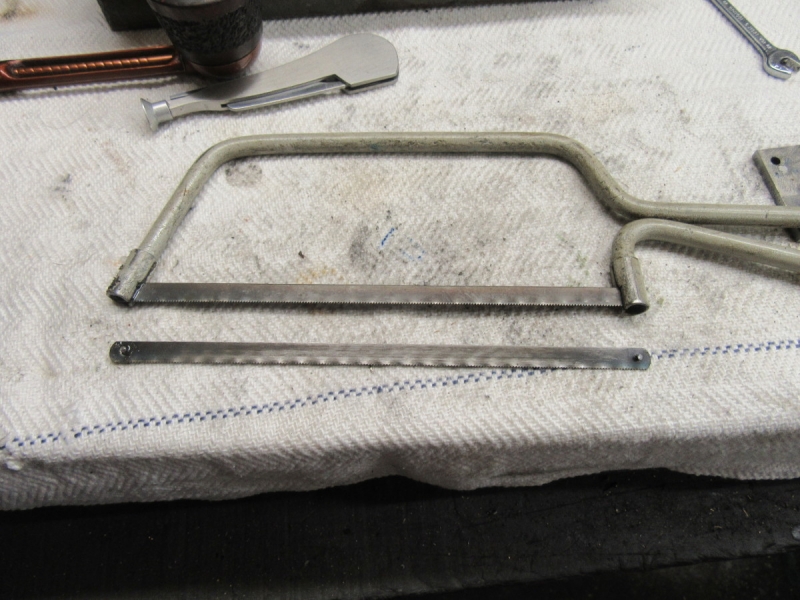
I decided I am not going to live forever so I treated myself to a new Eclipse Junior hacksaw blade.

I put plastic gasket in the bottom joint because once fixed now there is no need for it to move again. The set screws have been cut off, now all I have to do is get the nuts on...
You wouldn't believe how long it took me to get the nuts on! But hare we are, fitted and the valve moves freely.
It was an incredible fiddle but the next job was to pack the valve rod gland. Patience won out in the end.
It's looking like a cylinder now! We must address the Piston.
The rod is nominally 3/16" but is a few thou oversize so I ran a number 11 drill through the gland and lid to give the rod clearance. The packing was again very frustrating!
Knocking off time, ready for fitting the piston, packing it and installing it in the cylinder.
A nice hour and a half.....
Stanley Challenger Graham
Stanley's View
scg1936 at talktalk.net
"Beware of certitude" (Jimmy Reid)
The floggings will continue until morale improves!
Stanley's View
scg1936 at talktalk.net
"Beware of certitude" (Jimmy Reid)
The floggings will continue until morale improves!
-
Stanley
- Global Moderator
- Posts: 90344
- Joined: 23 Jan 2012, 12:01
- Location: Barnoldswick. Nearer to Heaven than Gloria.
Re: Shed Matters 3

The first job was to fix the piston on the end of the rod, Loctited and tightened up. Then install the packing, graphited asbestos string, oil the bore, fit the piston and make sure that though steam tight it is free all the way through it's stroke.

Then put some plastic gasket on the top face and fasten the lid down tight, no need for it to come off again!
Then I went over the cylinder, cleaning excess packing off and filing the cylinder lid studs down. I checked on the thread of the exhaust and steam connections because these are next on the agenda. Also checked that both the valve and piston rods are free for the length of their travel.
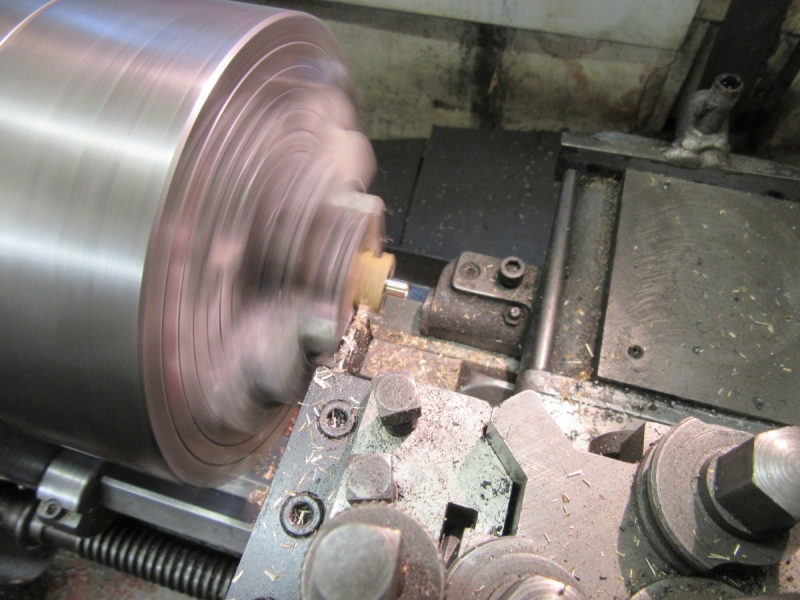
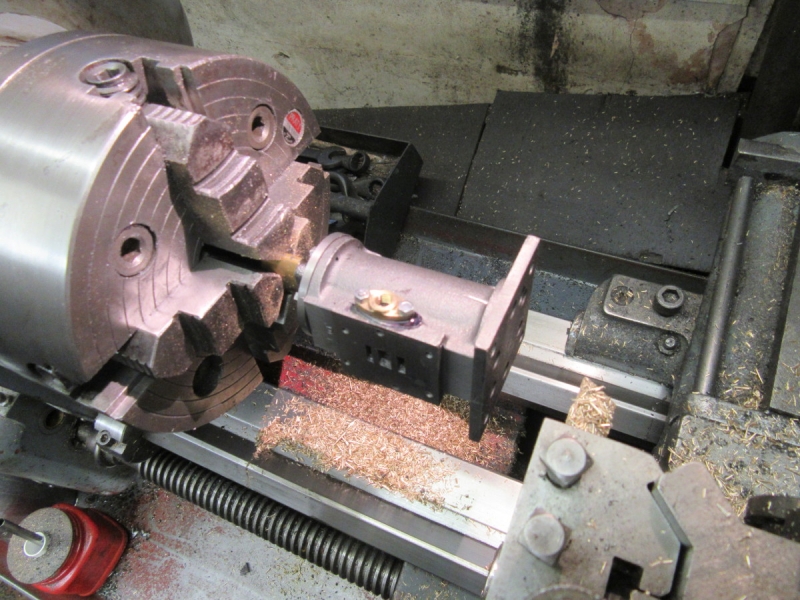
Then into one of the treasure chests for some 5/16" brass rod. I need to make a couple of small pipes 1/4" X 26TPI.
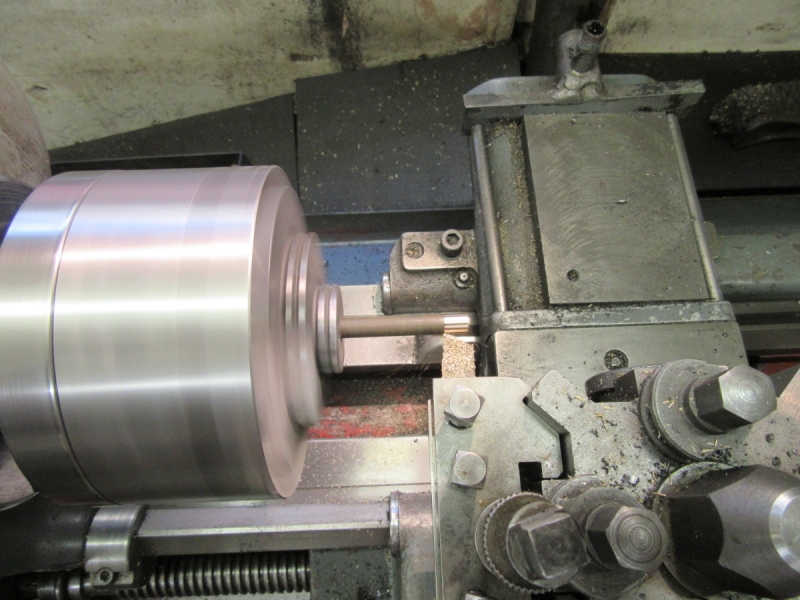
We need to reduce the diameter to 1/4".

Knocking off time, we have a piece of 1/4" brass stock and tomorrow will make that into two short pipes, one for the steam and the other for the exhaust.
Stanley Challenger Graham
Stanley's View
scg1936 at talktalk.net
"Beware of certitude" (Jimmy Reid)
The floggings will continue until morale improves!
Stanley's View
scg1936 at talktalk.net
"Beware of certitude" (Jimmy Reid)
The floggings will continue until morale improves!
-
Stanley
- Global Moderator
- Posts: 90344
- Joined: 23 Jan 2012, 12:01
- Location: Barnoldswick. Nearer to Heaven than Gloria.
Re: Shed Matters 3
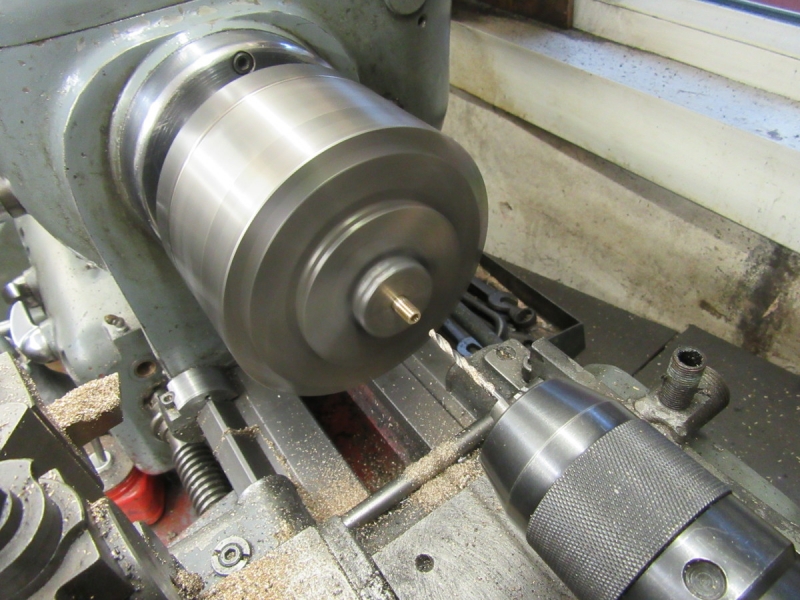
Some finishing touches to the cylinder. The first is to make and fit two short pipes, one for the steam supply and one for the exhaust. Both 1/4" , threaded 26TPI and 1/8" bore.
I've no doubt that I have made the pipes longer than they need be. It's not clear from the drawings, I can cut them down later if necessary.
I remembered while I was working on the piston that I hadn't installed a gasket at the bottom of the cylinder.

A good clean up and degrease and a coat of Loctite Plastic gasket. Pop the base casting back on and tighten down.
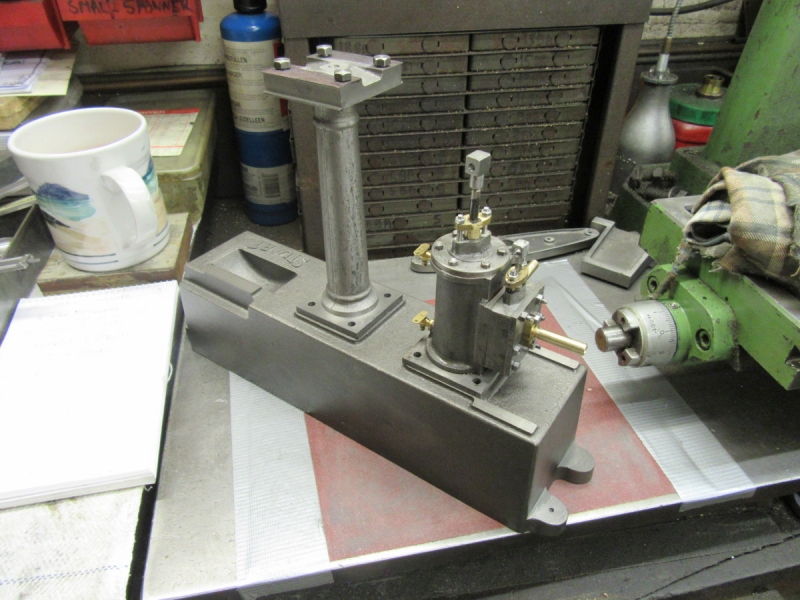
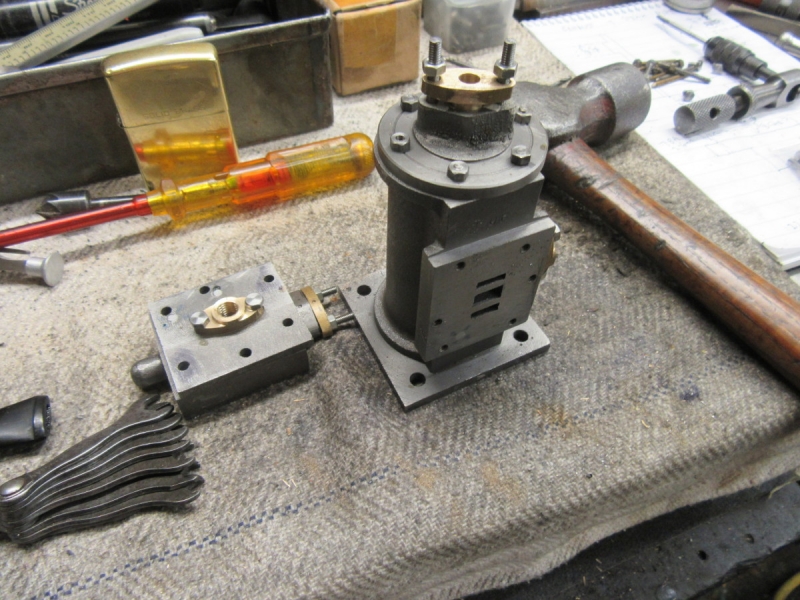
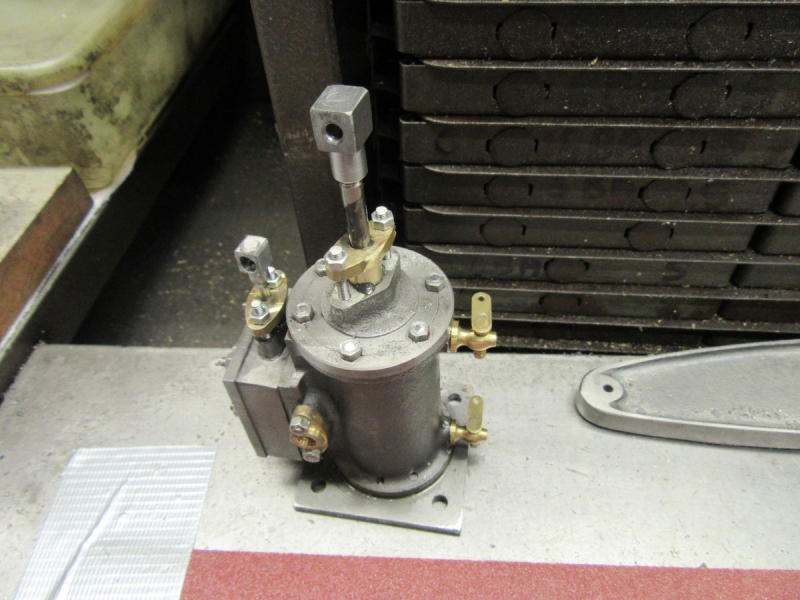
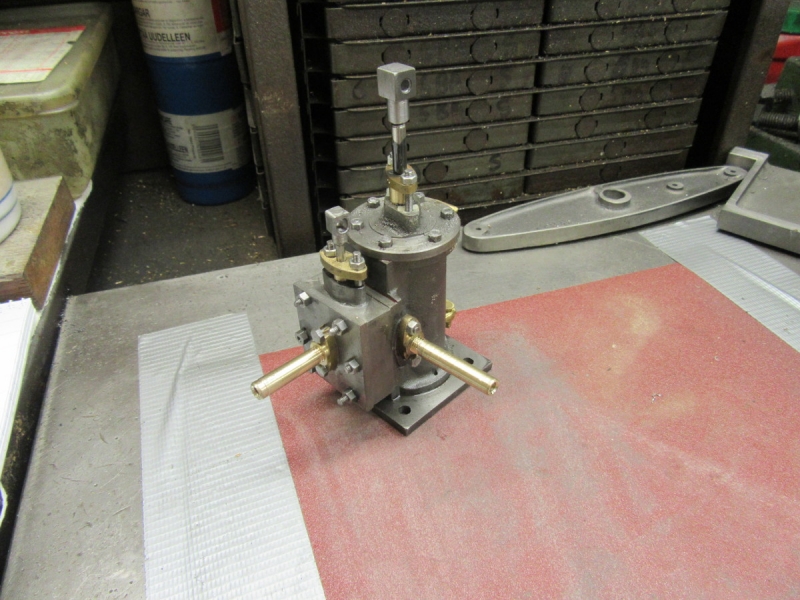
Knocking off time. I offered the cylinder up on the base plate with the column to give me a sense of the whole and a starting point for deciding what we do next. I shall have to have a think......
Stanley Challenger Graham
Stanley's View
scg1936 at talktalk.net
"Beware of certitude" (Jimmy Reid)
The floggings will continue until morale improves!
Stanley's View
scg1936 at talktalk.net
"Beware of certitude" (Jimmy Reid)
The floggings will continue until morale improves!
-
Stanley
- Global Moderator
- Posts: 90344
- Joined: 23 Jan 2012, 12:01
- Location: Barnoldswick. Nearer to Heaven than Gloria.
Re: Shed Matters 3
Not a bull morning in the shed. A lot of thinking needs to done and decisions made. Where to go next?
The route is to fit the bearing on the bed for the crankshaft. As the crankshaft bearings are the same as the trunnion bearings we'll do all four of these and the crankshaft and the trunnion shaft come out of the same stock so we might as well do them together. Once I have all those processed I shall consider the next move.
Stanley Challenger Graham
Stanley's View
scg1936 at talktalk.net
"Beware of certitude" (Jimmy Reid)
The floggings will continue until morale improves!
Stanley's View
scg1936 at talktalk.net
"Beware of certitude" (Jimmy Reid)
The floggings will continue until morale improves!
-
Stanley
- Global Moderator
- Posts: 90344
- Joined: 23 Jan 2012, 12:01
- Location: Barnoldswick. Nearer to Heaven than Gloria.
Re: Shed Matters 3
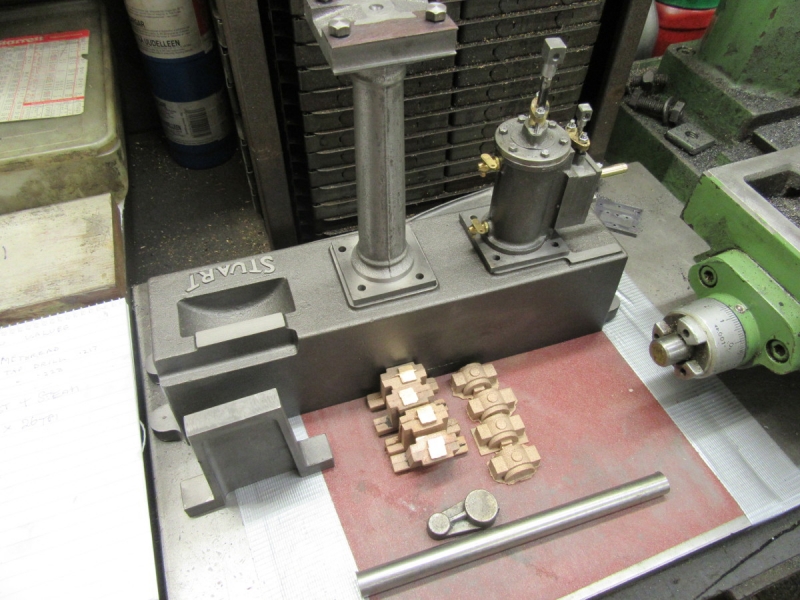
The bronze castings are quite tidy but before I could put them in the vice I needed to grind some flash off one side. Then under the mill and cut the top side down. I left the cutter on the same setting and did all four of the castings for the bottom half of the bearings.
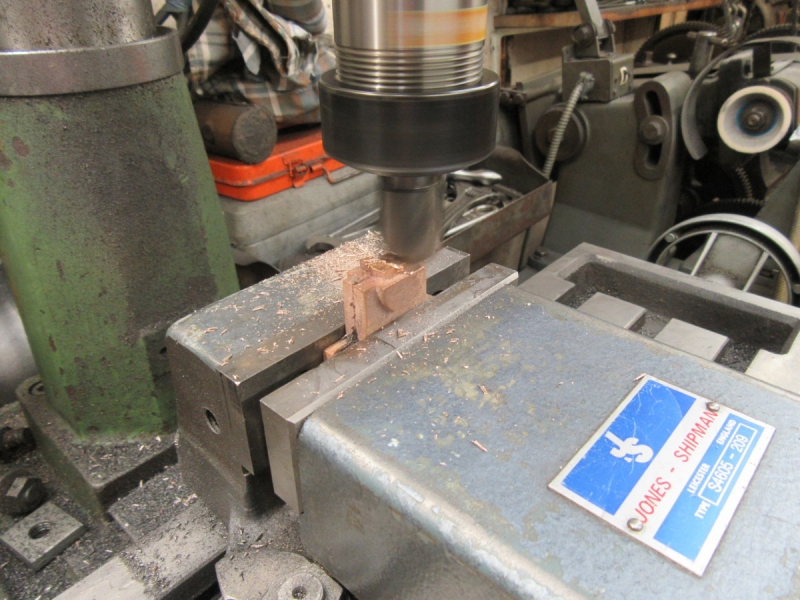
Next, reverse the castings and mill the base to give 7/8" overall to the top face.

Then I spent about twenty minutes breaking the edges of the faces I have cut. Next I have to clean all the other faces and the best way to do them will be by hand with a good file, accuracy doesn't matter, we need them to be square and tidy.
Stanley Challenger Graham
Stanley's View
scg1936 at talktalk.net
"Beware of certitude" (Jimmy Reid)
The floggings will continue until morale improves!
Stanley's View
scg1936 at talktalk.net
"Beware of certitude" (Jimmy Reid)
The floggings will continue until morale improves!