Shed Matters 3

Re: Shed Matters 3
I've seen magnesium alloys burn but never aluminium. The biggest metal fire hazard is wire wool., It only needs a spark and its off.
-
Stanley

- Global Moderator

- Posts: 90699
- Joined: 23 Jan 2012, 12:01
- Location: Barnoldswick. Nearer to Heaven than Gloria.
Re: Shed Matters 3
I agree about Magnesium, I've seen it melt lathe beds. Best to treat all finely divided metals as dangerous for one reason or another and treat them with care!
Stanley Challenger Graham
Stanley's View
scg1936 at talktalk.net
"Beware of certitude" (Jimmy Reid)
The floggings will continue until morale improves!
Stanley's View
scg1936 at talktalk.net
"Beware of certitude" (Jimmy Reid)
The floggings will continue until morale improves!
-
Stanley
- Global Moderator
- Posts: 90699
- Joined: 23 Jan 2012, 12:01
- Location: Barnoldswick. Nearer to Heaven than Gloria.
Re: Shed Matters 3
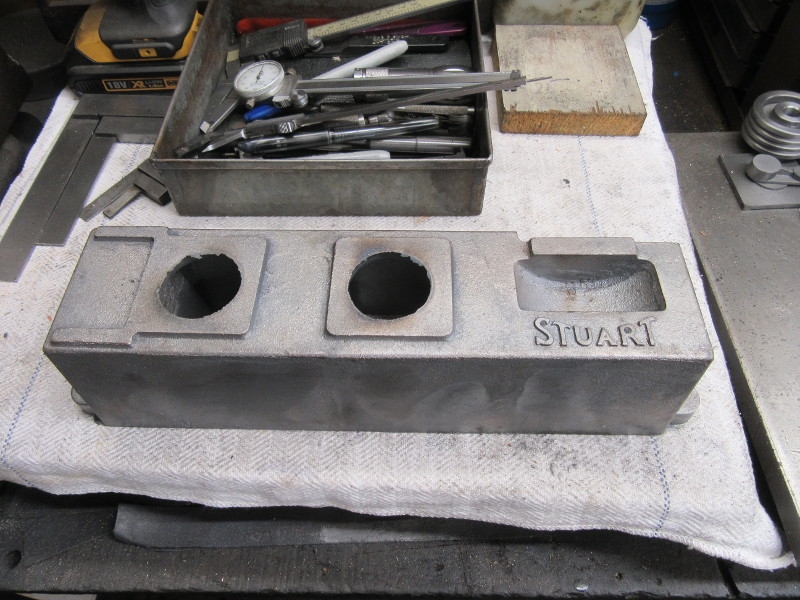
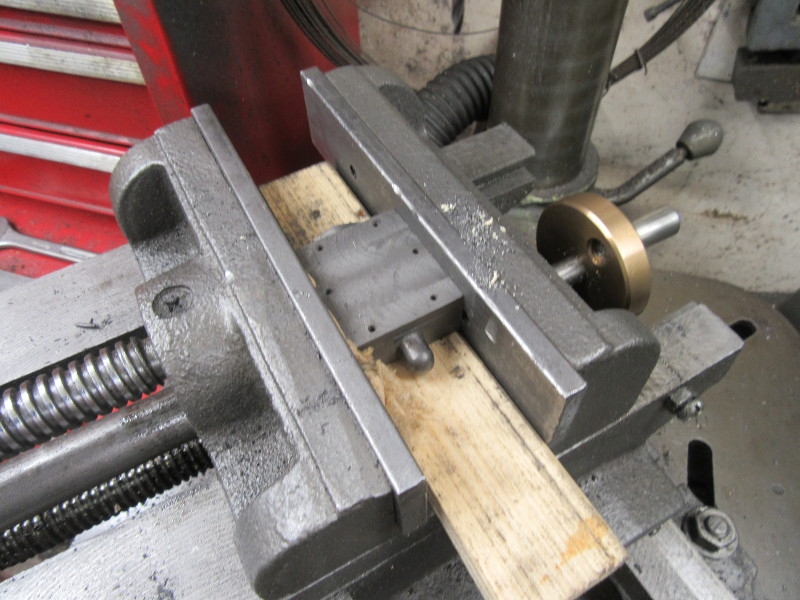
Today the focus is on the base. The first thing was to get it into the vise and attack it with the biggest files I have to get rid of the flash and obvious nasty little bits!
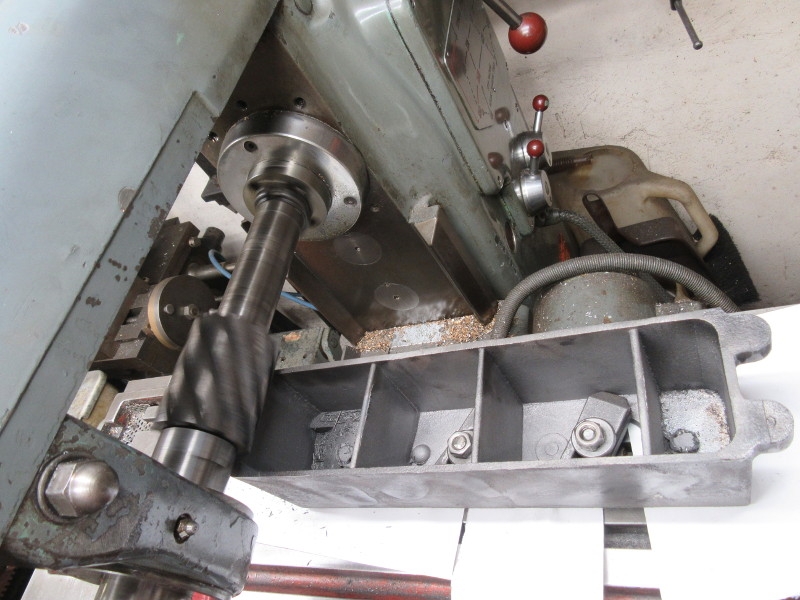
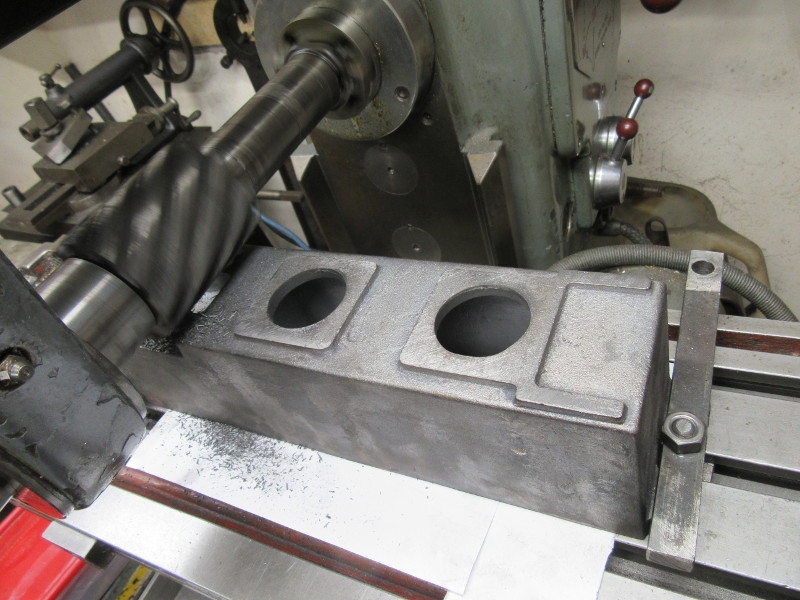
The Horizontal mill and a big slabbing cutter are the ideal combination. Two good confident cuts. The paper is to help the casting grip the table.
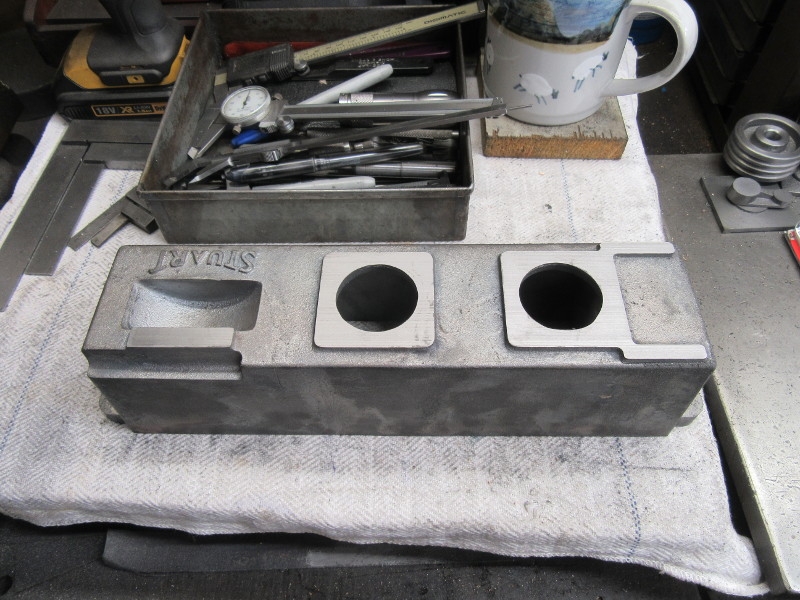
Knocking off time. The base is ready for progress like all the other castings. Nice morning and good progress.
Stanley Challenger Graham
Stanley's View
scg1936 at talktalk.net
"Beware of certitude" (Jimmy Reid)
The floggings will continue until morale improves!
Stanley's View
scg1936 at talktalk.net
"Beware of certitude" (Jimmy Reid)
The floggings will continue until morale improves!
-
Stanley
- Global Moderator
- Posts: 90699
- Joined: 23 Jan 2012, 12:01
- Location: Barnoldswick. Nearer to Heaven than Gloria.
Re: Shed Matters 3
A nice hour in the shed. I started by drilling the two holes in the crank and then lost the pic so you'll have to take my word for it!
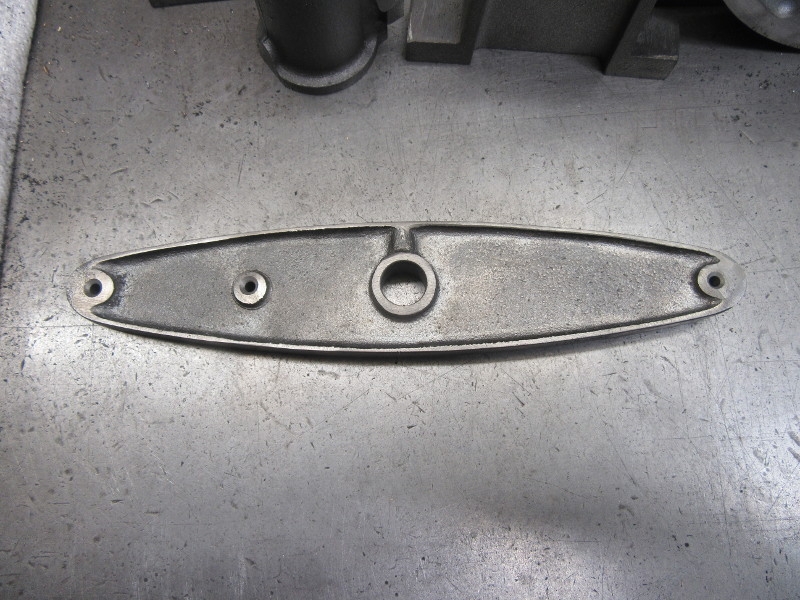
Then I did the beam, a lot of very careful measuring and getting the holes in the right place!
That's it, I know my limits!
Then I did the beam, a lot of very careful measuring and getting the holes in the right place!
That's it, I know my limits!
Stanley Challenger Graham
Stanley's View
scg1936 at talktalk.net
"Beware of certitude" (Jimmy Reid)
The floggings will continue until morale improves!
Stanley's View
scg1936 at talktalk.net
"Beware of certitude" (Jimmy Reid)
The floggings will continue until morale improves!
Re: Shed Matters 3
Turbine rotor setup to machine the cups.
You do not have the required permissions to view the files attached to this post.
-
Stanley
- Global Moderator
- Posts: 90699
- Joined: 23 Jan 2012, 12:01
- Location: Barnoldswick. Nearer to Heaven than Gloria.
Re: Shed Matters 3
Impressive set up Bob. Beyond my pay grade these days I think! 
Stanley Challenger Graham
Stanley's View
scg1936 at talktalk.net
"Beware of certitude" (Jimmy Reid)
The floggings will continue until morale improves!
Stanley's View
scg1936 at talktalk.net
"Beware of certitude" (Jimmy Reid)
The floggings will continue until morale improves!
Re: Shed Matters 3
I bought parts of this setup 3 or 4 years ago when we ran the Manchester Model Engineering Exhibition. One of the exhibitors did me a very good deal though when I came to put it all together I found that I needed another adaptor plate and that had to be machined and drilled to fit. What I had Previously gathered together couldn’t be assembled because whichever part went onto the adaptor first covered the bolt holes to mount anything on the other side. A bit of lateral thinking was required and I suspect the original dealer knew this, hence a good price.
-
Stanley
- Global Moderator
- Posts: 90699
- Joined: 23 Jan 2012, 12:01
- Location: Barnoldswick. Nearer to Heaven than Gloria.
Re: Shed Matters 3
I noticed those bolt heads peeping out straight away Bob and thought hello.... there's a story here!

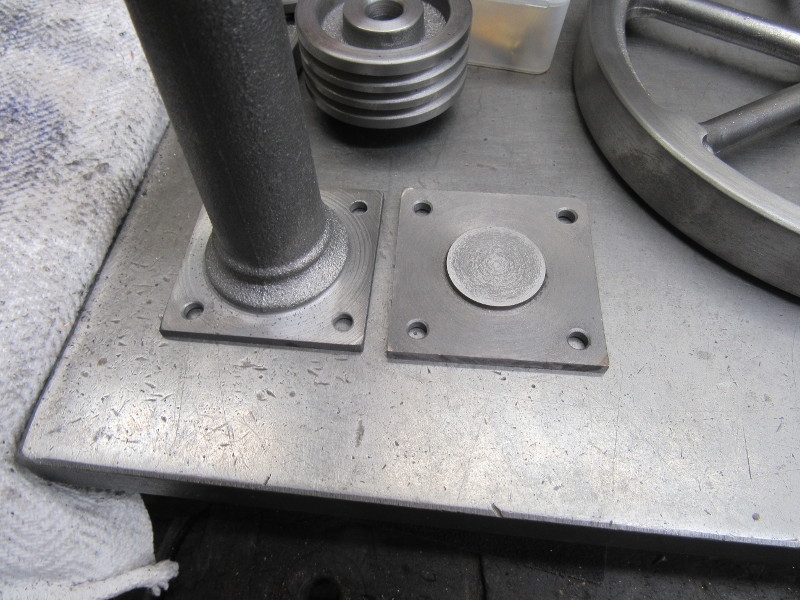
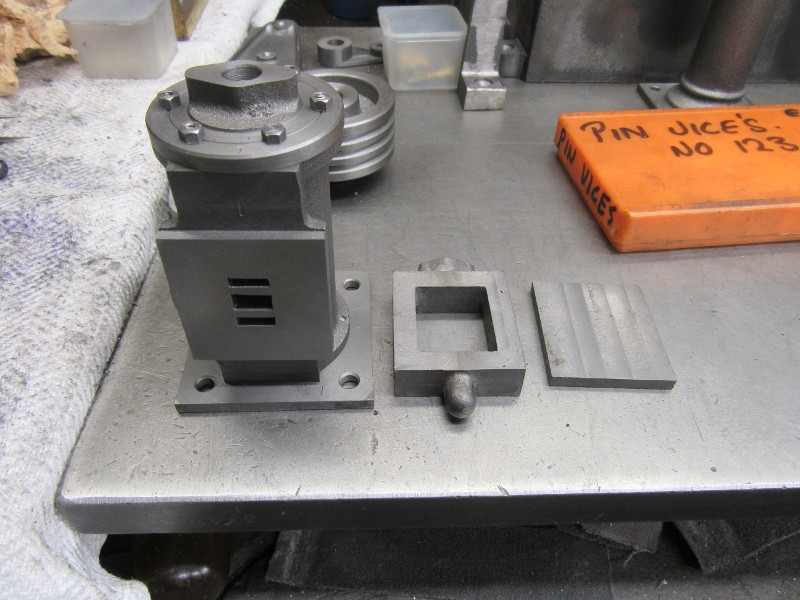
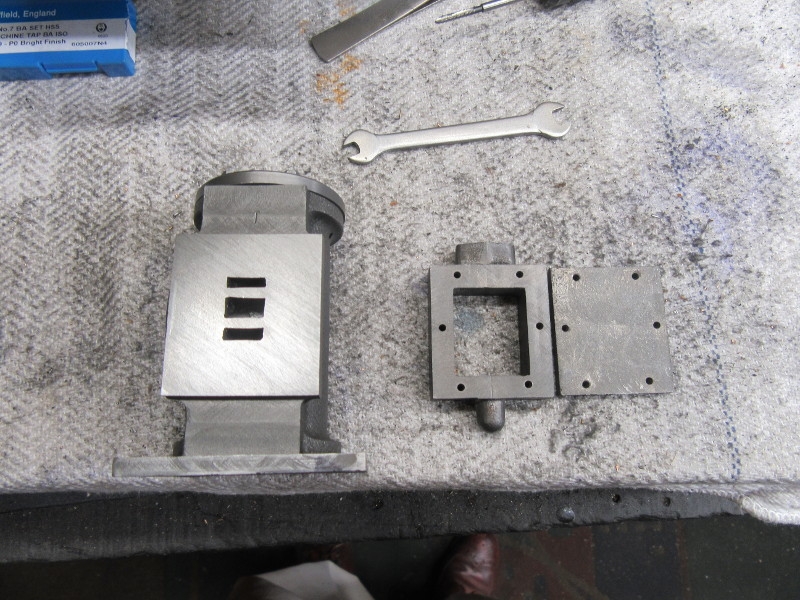
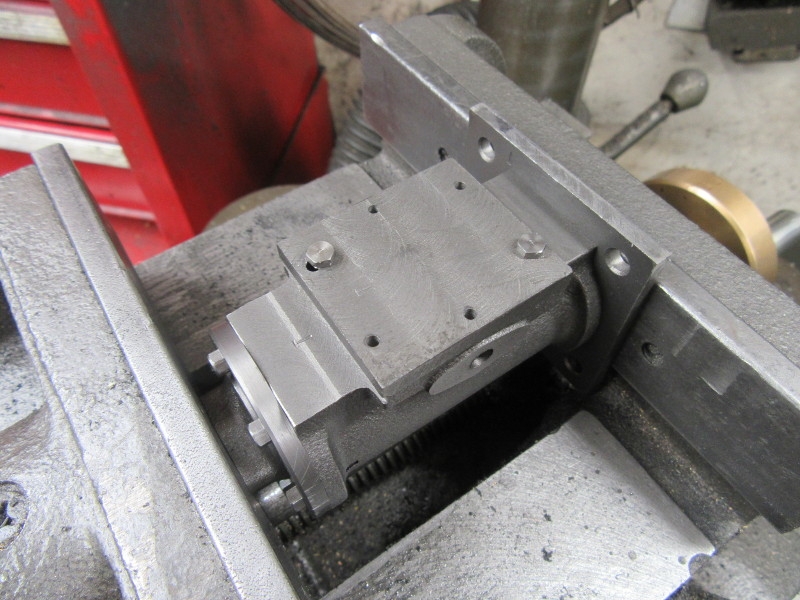
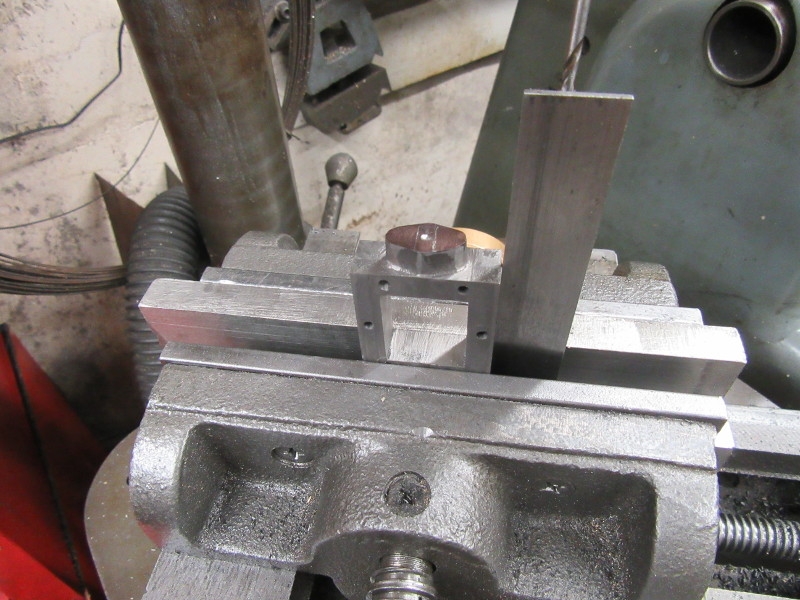
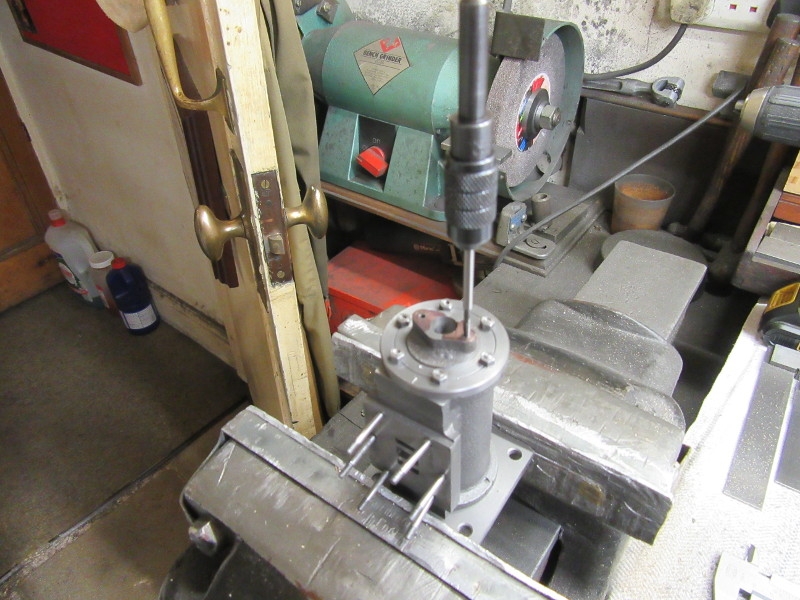
More massaging of the castings.... First I set up the column so that I could turn the top face of the foot.
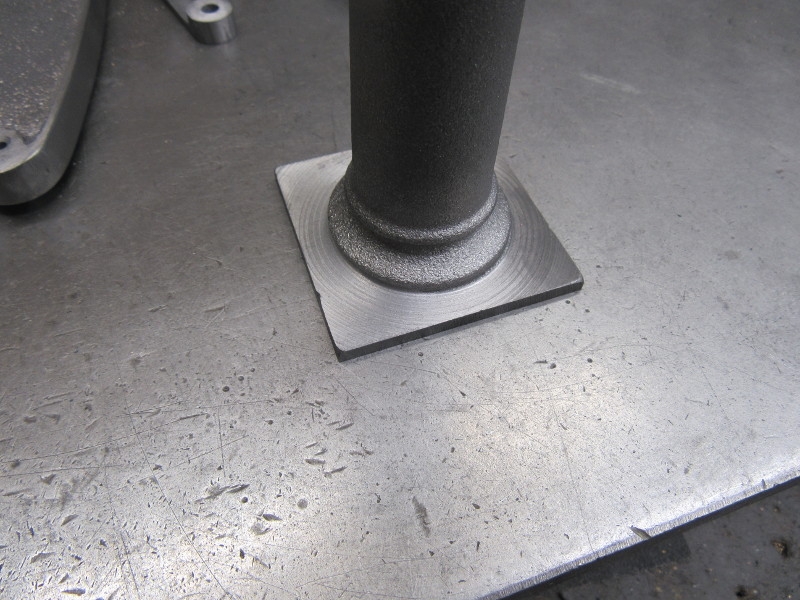
That's better!
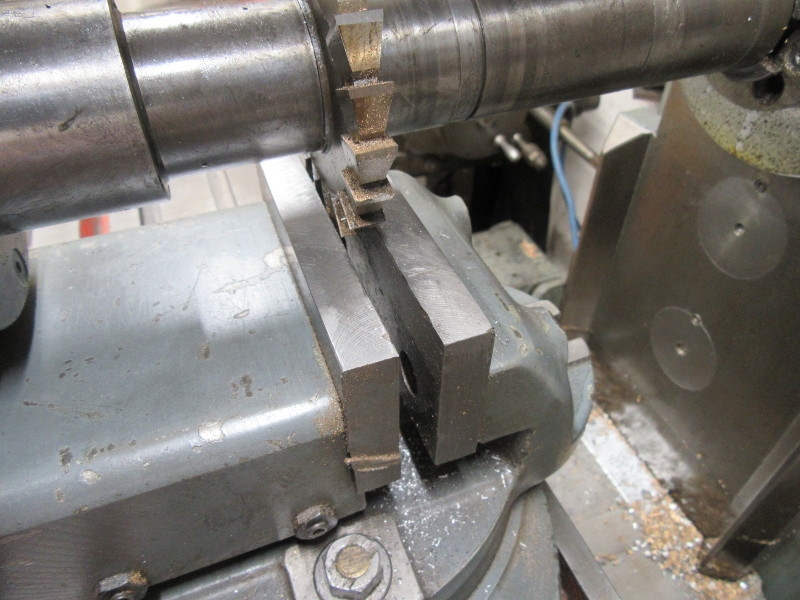
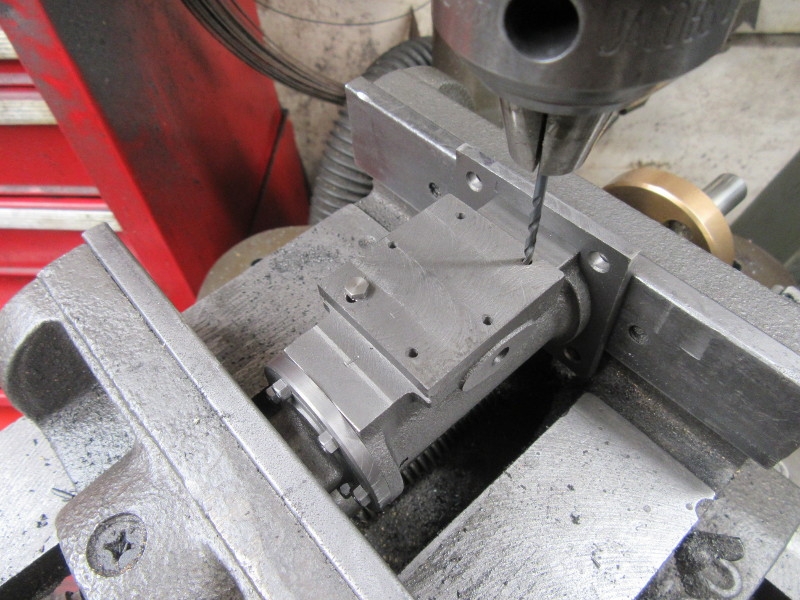
I am going to play with the HM. This is the easiest way of tramming the vise to the 3/8" cutter.

Then cut the slots in the head that take the bars that support the parallel motion. The HM is the ideal tool for this. Note the perfect chips from the cutter, I wasn't wasting my time when I sharpened all my cutters!
Nice job!
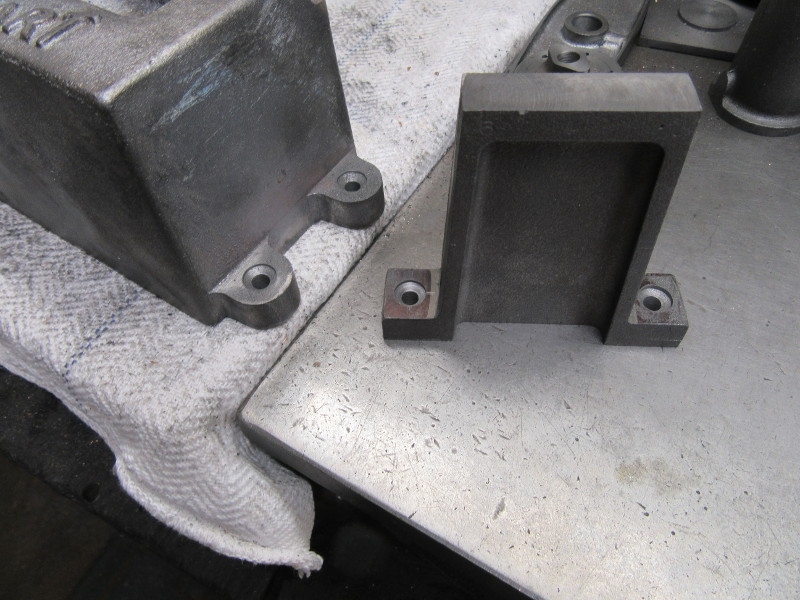
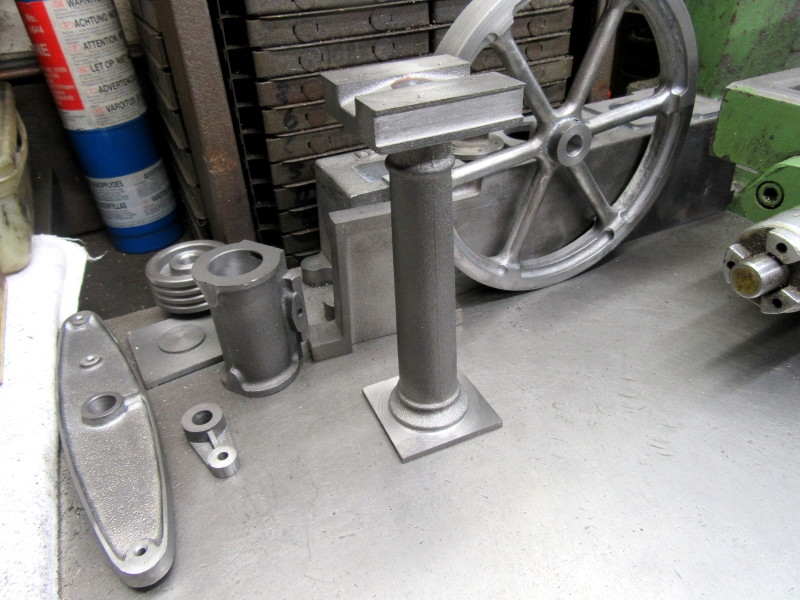
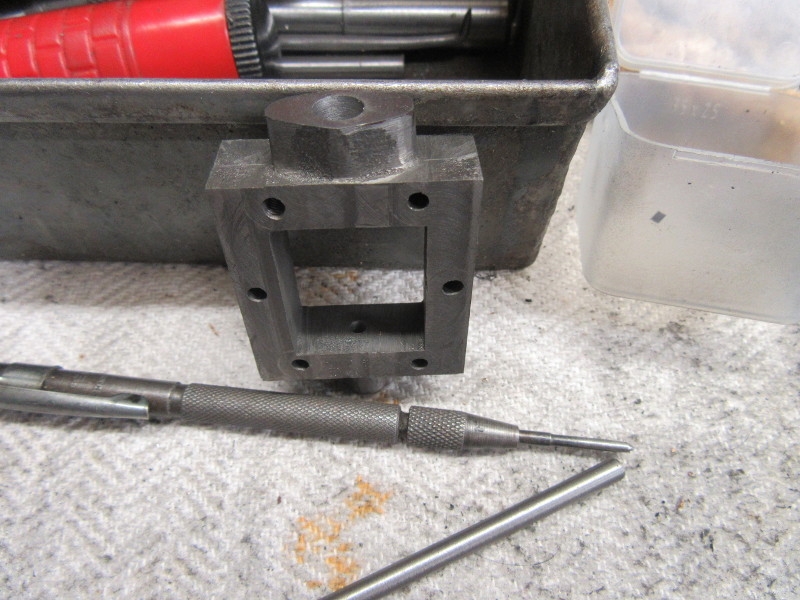
This was knocking off time. I have drilled all the holes in the base and the outrigger foot that will eventually hold the engine on its base. All small jobs but all needing doing before we can move on. Nice morning......
More massaging of the castings.... First I set up the column so that I could turn the top face of the foot.
That's better!
I am going to play with the HM. This is the easiest way of tramming the vise to the 3/8" cutter.
Then cut the slots in the head that take the bars that support the parallel motion. The HM is the ideal tool for this. Note the perfect chips from the cutter, I wasn't wasting my time when I sharpened all my cutters!
Nice job!
This was knocking off time. I have drilled all the holes in the base and the outrigger foot that will eventually hold the engine on its base. All small jobs but all needing doing before we can move on. Nice morning......
Stanley Challenger Graham
Stanley's View
scg1936 at talktalk.net
"Beware of certitude" (Jimmy Reid)
The floggings will continue until morale improves!
Stanley's View
scg1936 at talktalk.net
"Beware of certitude" (Jimmy Reid)
The floggings will continue until morale improves!
Re: Shed Matters 3
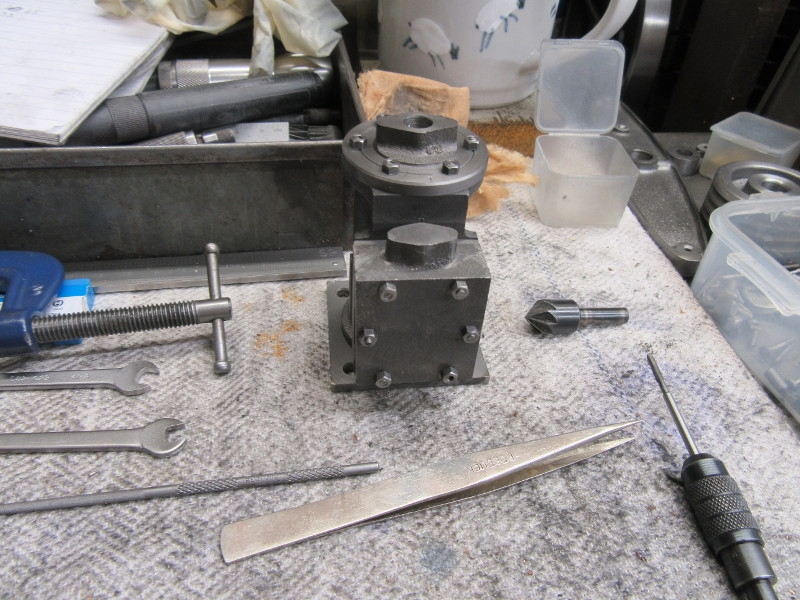
You were correct about the bolt heads, Stanley. I even had to skim the knurling off for a better fit.
Trial assembly of the little turbine this afternoon. It spins well on 15psi. Next Action is to paint It, I wonder what colour?
Trial assembly of the little turbine this afternoon. It spins well on 15psi. Next Action is to paint It, I wonder what colour?
You do not have the required permissions to view the files attached to this post.
-
Stanley
- Global Moderator
- Posts: 90699
- Joined: 23 Jan 2012, 12:01
- Location: Barnoldswick. Nearer to Heaven than Gloria.
Re: Shed Matters 3
Morning Bob. Tell Sue it's going on the sideboard and ask her what colour she prefers! Put 80psi on it and see if it screams!
Stanley Challenger Graham
Stanley's View
scg1936 at talktalk.net
"Beware of certitude" (Jimmy Reid)
The floggings will continue until morale improves!
Stanley's View
scg1936 at talktalk.net
"Beware of certitude" (Jimmy Reid)
The floggings will continue until morale improves!
-
Stanley
- Global Moderator
- Posts: 90699
- Joined: 23 Jan 2012, 12:01
- Location: Barnoldswick. Nearer to Heaven than Gloria.
Re: Shed Matters 3
I feel a bit of a fraud this morning, things got in the way and I was only in the shed for just over half an hour. But, as you can see above, I did manage to mark and drill eight holes. (And cleaned Mrs Harrison as well but I can hardly count that.)
Next I have to get serious and start drilling and tapping all the holes in the cylinder assembly. I think actually I have been buggering about putting this off. I promise you this procrastination will end!
Stanley Challenger Graham
Stanley's View
scg1936 at talktalk.net
"Beware of certitude" (Jimmy Reid)
The floggings will continue until morale improves!
Stanley's View
scg1936 at talktalk.net
"Beware of certitude" (Jimmy Reid)
The floggings will continue until morale improves!
-
Stanley
- Global Moderator
- Posts: 90699
- Joined: 23 Jan 2012, 12:01
- Location: Barnoldswick. Nearer to Heaven than Gloria.
Re: Shed Matters 3
Later. A small parcel from the NE Mafia. 5 end mills! They will see me out! I shall sharpen them tomorrow. Nice to have friends.....
Stanley Challenger Graham
Stanley's View
scg1936 at talktalk.net
"Beware of certitude" (Jimmy Reid)
The floggings will continue until morale improves!
Stanley's View
scg1936 at talktalk.net
"Beware of certitude" (Jimmy Reid)
The floggings will continue until morale improves!
-
Stanley
- Global Moderator
- Posts: 90699
- Joined: 23 Jan 2012, 12:01
- Location: Barnoldswick. Nearer to Heaven than Gloria.
Re: Shed Matters 3
I thought I might have mentioned but I did sharpen the end mills that Mick and John sent me.
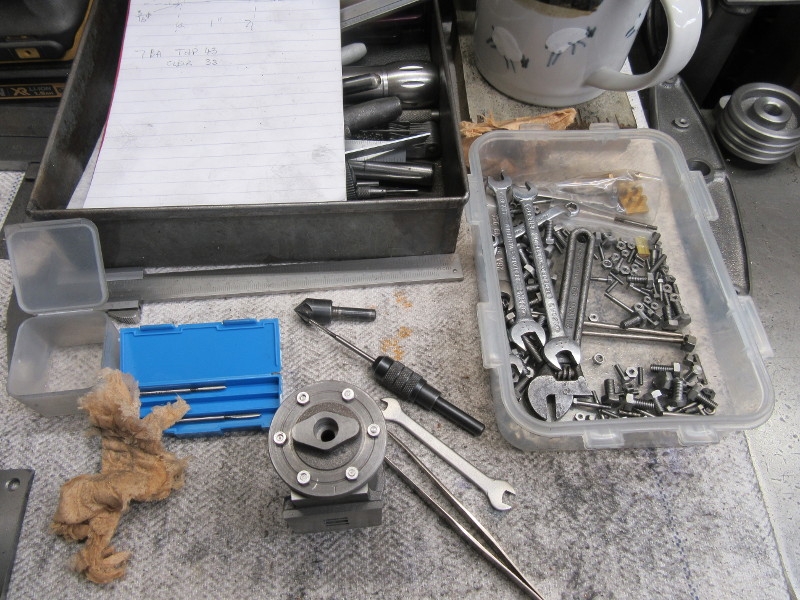
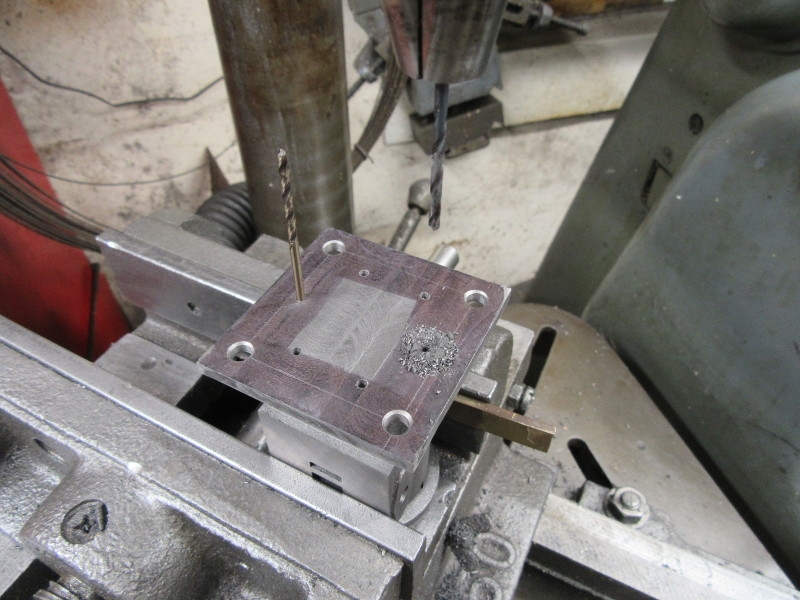
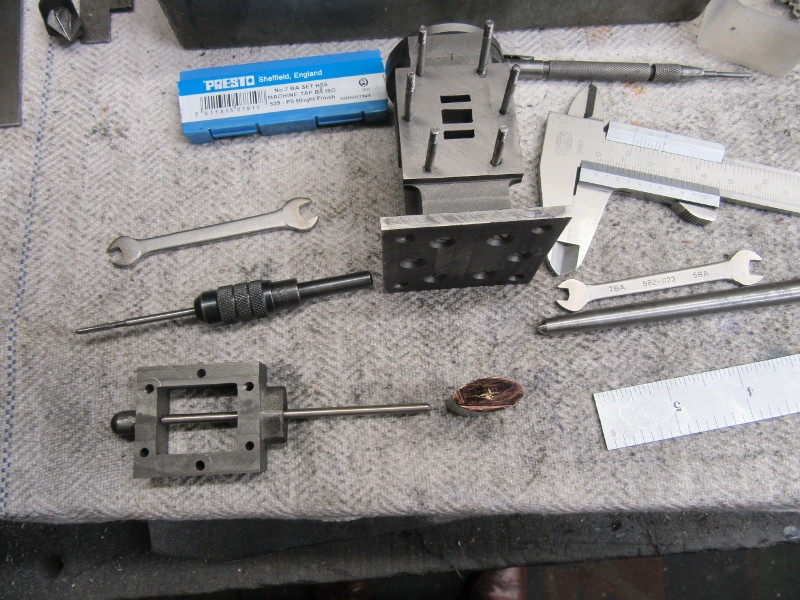
Only one pic today. I've broken my duck and started on drilling and tapping all the holes needed in the cylinder. I found I had to use a smaller tap drill for these sharp HSS taps. I'm now producing proper 7BA tapped holes and the wonderful thing is that it is so easy, the taps are so sharp no effort is needed. This means I have to be even more careful. You break taps by bending them when you lose concentration! I shall be on my guard.
I only did just over an hour. I knocked off when I had sorted the top lid. Tomorrow is the base, a bit more complicated.
Stanley Challenger Graham
Stanley's View
scg1936 at talktalk.net
"Beware of certitude" (Jimmy Reid)
The floggings will continue until morale improves!
Stanley's View
scg1936 at talktalk.net
"Beware of certitude" (Jimmy Reid)
The floggings will continue until morale improves!
-
Stanley
- Global Moderator
- Posts: 90699
- Joined: 23 Jan 2012, 12:01
- Location: Barnoldswick. Nearer to Heaven than Gloria.
Re: Shed Matters 3
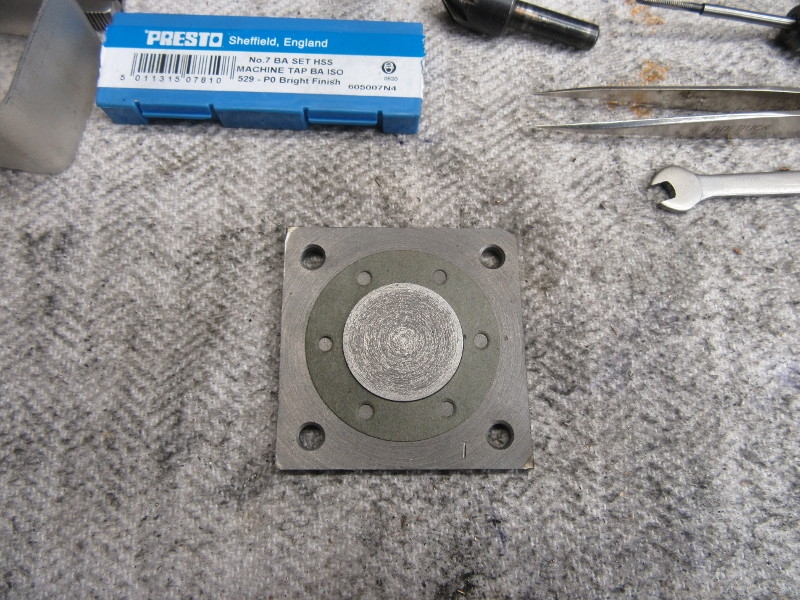
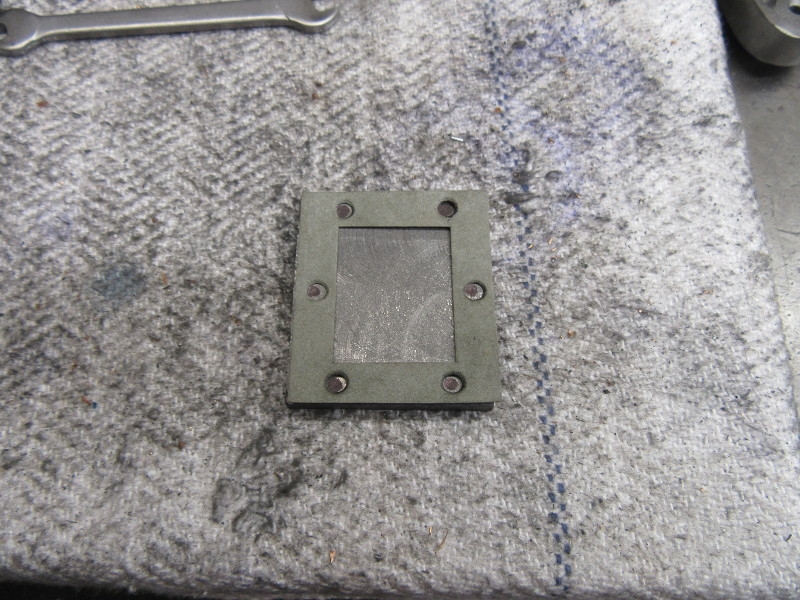
Today I want to attend to the fastening of the base on the cylinder. I chucked out all complicated schemes for using the lid as a template and simply installed the gasket and used that as a template. Then I simply went through drilling tapping size in the base, transferring that to the cylinder then finishing off the base by taking the holes to clearance size and countersinking them. The actual tapping was dead easy, such a difference with sharp new HSS taps! Worth all the money they cost!

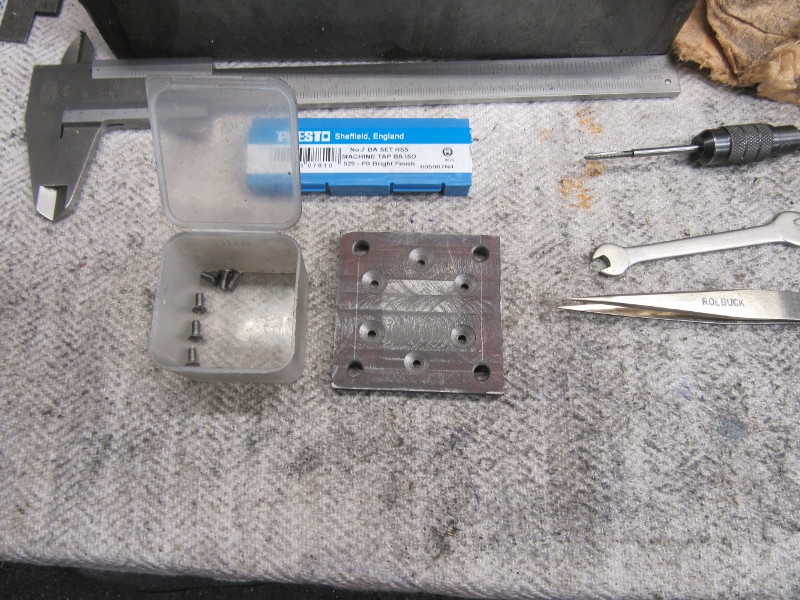

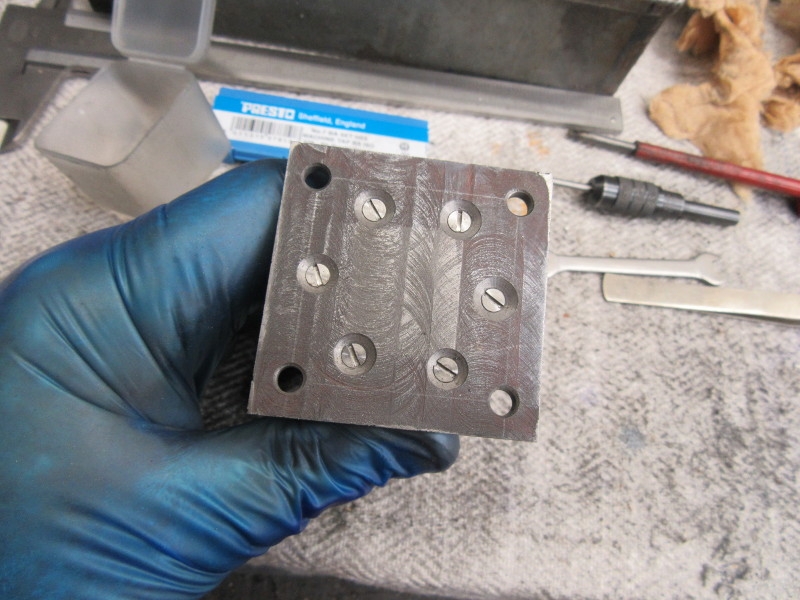
I think those pics give you the picture. No problems at all.
Knocking off time. Ready for tomorrow, the steam chest. Nice morning I enjoyed it.
Stanley Challenger Graham
Stanley's View
scg1936 at talktalk.net
"Beware of certitude" (Jimmy Reid)
The floggings will continue until morale improves!
Stanley's View
scg1936 at talktalk.net
"Beware of certitude" (Jimmy Reid)
The floggings will continue until morale improves!
-
Stanley
- Global Moderator
- Posts: 90699
- Joined: 23 Jan 2012, 12:01
- Location: Barnoldswick. Nearer to Heaven than Gloria.
Re: Shed Matters 3
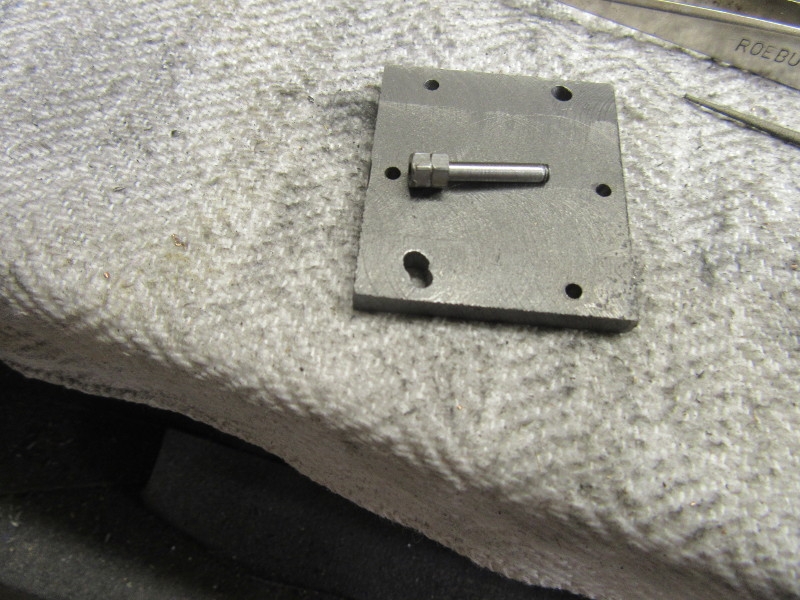
Again, I used the packing for a template and marked the lid ready to drill tapping size.
Once I had the holes in the lid I transferred them to the steam chest.
Now I have to transfer the same hole pattern from the lid onto the cylinder face.
A bit later.... The eagle eyed will see that there has been a problem. I drilled the left hand hole and tapped it and found I had it wrong so I had to elongate the hole until the lid was in the right position then drill for the hole on the opposite corner. I have the lid in the right place now and can tap this hole.
I opened that hole to clearance and now I have two studs in place, I shall come back tomorrow and drill and tap the rest of the holes. Still puzzling how I got that first hole wrong!
Stanley Challenger Graham
Stanley's View
scg1936 at talktalk.net
"Beware of certitude" (Jimmy Reid)
The floggings will continue until morale improves!
Stanley's View
scg1936 at talktalk.net
"Beware of certitude" (Jimmy Reid)
The floggings will continue until morale improves!
-
Stanley
- Global Moderator
- Posts: 90699
- Joined: 23 Jan 2012, 12:01
- Location: Barnoldswick. Nearer to Heaven than Gloria.
Re: Shed Matters 3

I spent a bit longer cooking this morning than I intended but got in the shed to carry on with fitting the steam chest. I drilled the holes and tapped them and then overtightened this stud and sheared it off. I shan't go on about it, I just got on with it until after an hour and a half this is where I was, all the studs installed and fitted. Tomorrow I can move on....
Stanley Challenger Graham
Stanley's View
scg1936 at talktalk.net
"Beware of certitude" (Jimmy Reid)
The floggings will continue until morale improves!
Stanley's View
scg1936 at talktalk.net
"Beware of certitude" (Jimmy Reid)
The floggings will continue until morale improves!
Re: Shed Matters 3
Tiny nuts require tiny spanners, Been there done that. Hard luck Stanley.
-
Stanley
- Global Moderator
- Posts: 90699
- Joined: 23 Jan 2012, 12:01
- Location: Barnoldswick. Nearer to Heaven than Gloria.
Re: Shed Matters 3
Yup! I have to take my plastic gloves off Ken so my hands get dirty as well! But the new HSS ground taps are a great improvement!
Stanley Challenger Graham
Stanley's View
scg1936 at talktalk.net
"Beware of certitude" (Jimmy Reid)
The floggings will continue until morale improves!
Stanley's View
scg1936 at talktalk.net
"Beware of certitude" (Jimmy Reid)
The floggings will continue until morale improves!
-
Stanley
- Global Moderator
- Posts: 90699
- Joined: 23 Jan 2012, 12:01
- Location: Barnoldswick. Nearer to Heaven than Gloria.
Re: Shed Matters 3
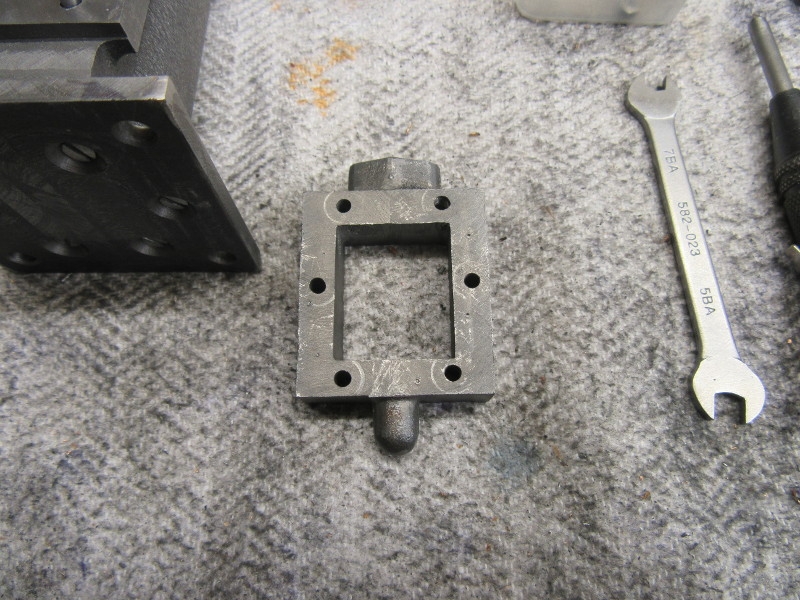
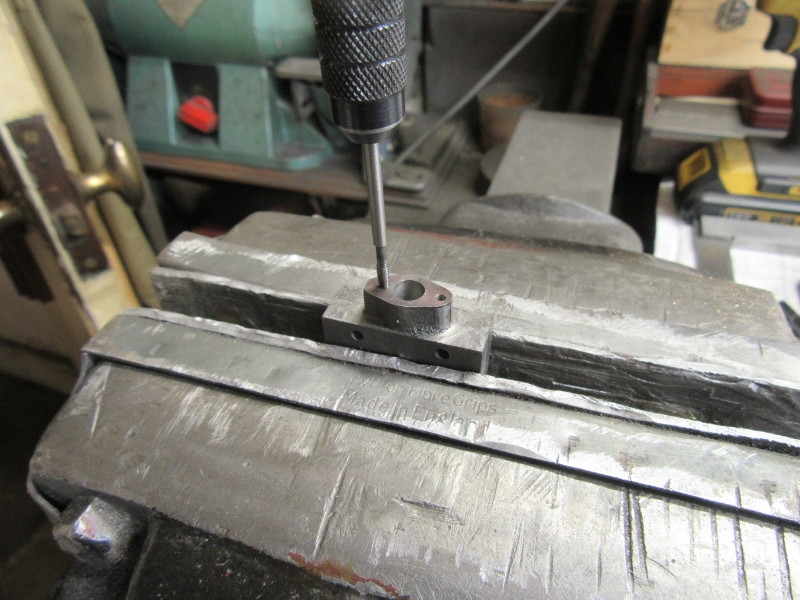
Typical, first thing you do when you have got the steam chest fastened to the cylinder is take it off. We need three different diameters of holes, a valve rod and a gland fitted to the chest.
Measured, marked and set up ready for drilling.
Right, we have our three flavours of holes drilled and checked.
Then a coat of looking at and more measuring and marking. We need two glands, one for the valve rod and one for the piston rod. I shall make them both at the same time because they need their own set up on Johnny's 1927 lathe in the front room. I shall do that morrow. Quiet progress with no mistakes. Good.
Stanley Challenger Graham
Stanley's View
scg1936 at talktalk.net
"Beware of certitude" (Jimmy Reid)
The floggings will continue until morale improves!
Stanley's View
scg1936 at talktalk.net
"Beware of certitude" (Jimmy Reid)
The floggings will continue until morale improves!
-
Stanley
- Global Moderator
- Posts: 90699
- Joined: 23 Jan 2012, 12:01
- Location: Barnoldswick. Nearer to Heaven than Gloria.
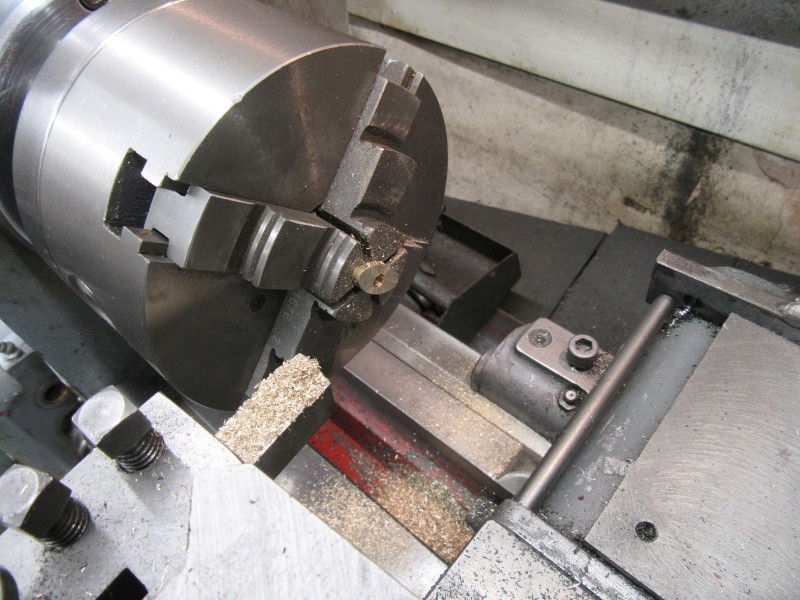
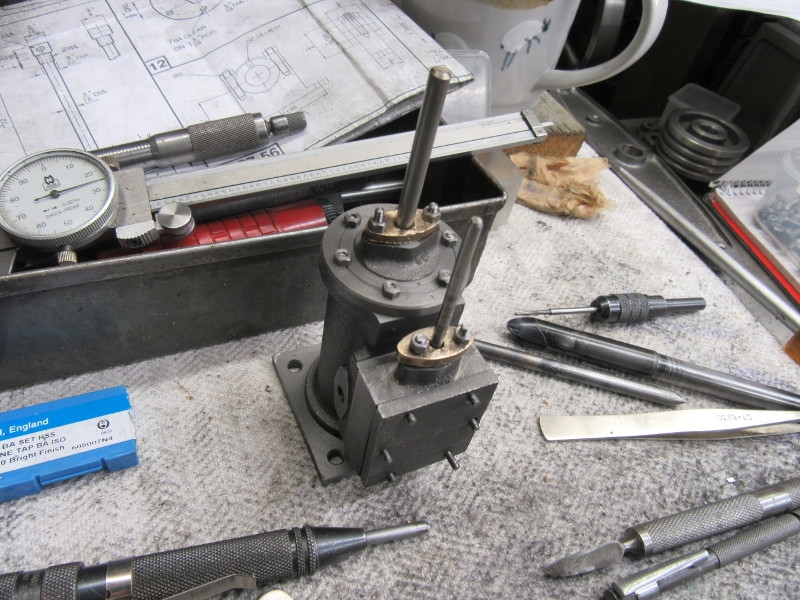
Re: Shed Matters 3
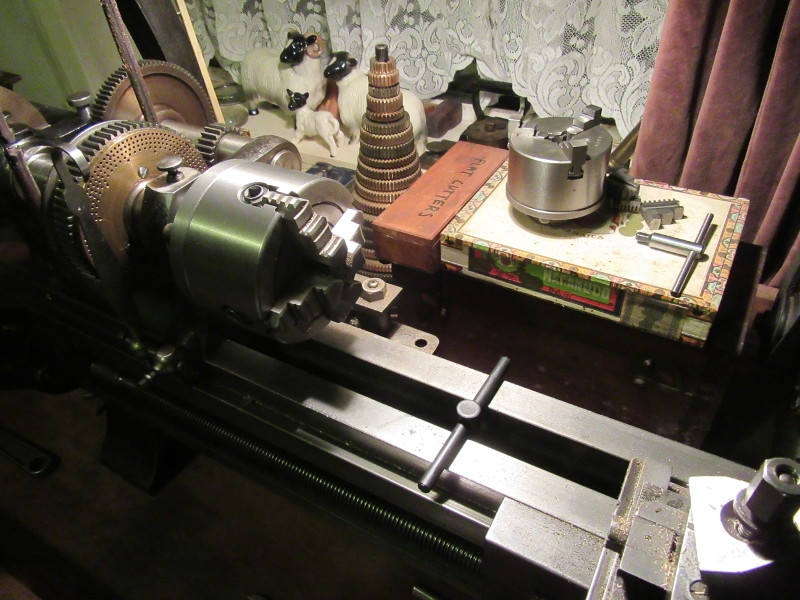
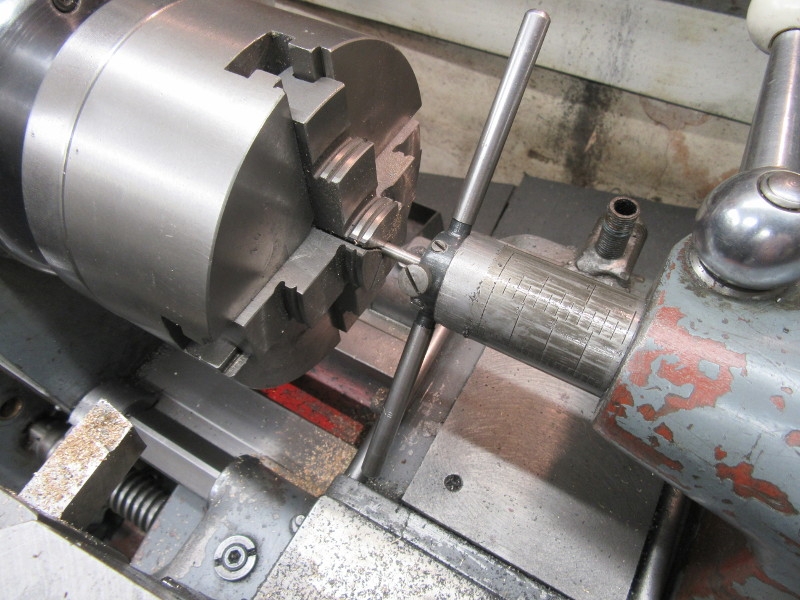
The 1927 lathe was set up for dividing and so had to be set up with the 4 jaw chuck on as we need a very small chuck for a couple of small parts.

Here's what we are after, I took this out and cut it off the stock with the hacksaw in the vice and set up for the piston gland.
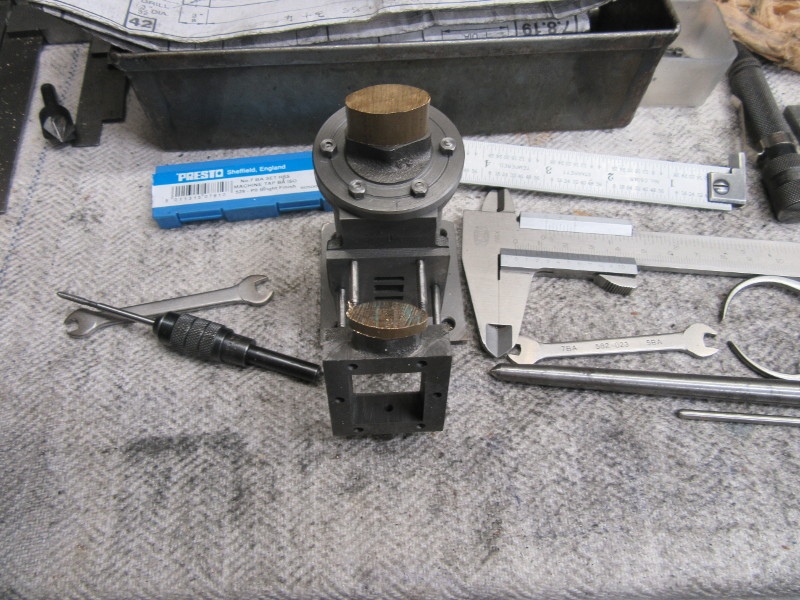
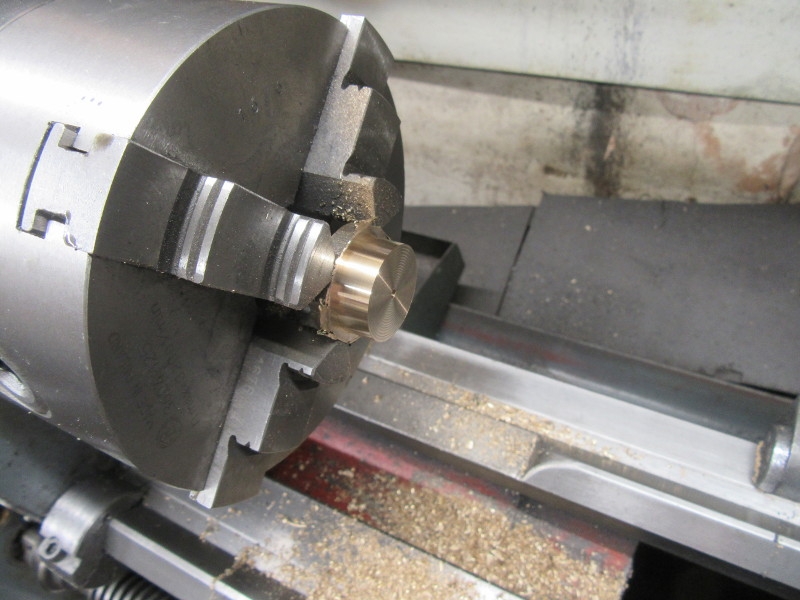
Here we are, we have two blanks the right shape. I can get them to the right size and drilled in the 4 jaw SC chuck.
Both glands finished to the right size for the casting and drilled the right size for the rods.

Knocking off time. I am ready for finishing the glands but might make the two rods, the piston and the valve first. That's for tomorrow..
Stanley Challenger Graham
Stanley's View
scg1936 at talktalk.net
"Beware of certitude" (Jimmy Reid)
The floggings will continue until morale improves!
Stanley's View
scg1936 at talktalk.net
"Beware of certitude" (Jimmy Reid)
The floggings will continue until morale improves!
Re: Shed Matters 3
Nice progress Stanley,Sue asks if you have a good vacuum cleaner
 .
.

 .
.
Re: Shed Matters 3
I never vacuum anyway but it surprisingly gets done, a bit like my car being washed 
If you keep searching you will find it
-
Stanley
- Global Moderator
- Posts: 90699
- Joined: 23 Jan 2012, 12:01
- Location: Barnoldswick. Nearer to Heaven than Gloria.
Re: Shed Matters 3
I find the Dyson hand held does for getting the spray of brass chips that get on the carpet Bob.
Lovely little lathe to use.....
Lovely little lathe to use.....
Stanley Challenger Graham
Stanley's View
scg1936 at talktalk.net
"Beware of certitude" (Jimmy Reid)
The floggings will continue until morale improves!
Stanley's View
scg1936 at talktalk.net
"Beware of certitude" (Jimmy Reid)
The floggings will continue until morale improves!
-
Stanley
- Global Moderator
- Posts: 90699
- Joined: 23 Jan 2012, 12:01
- Location: Barnoldswick. Nearer to Heaven than Gloria.
Re: Shed Matters 3

We have to finish the glands before we can address the valve and piston fitting. I won't overload you with lots of pics, first we have to measure and mark the glands, then transfer those hole positions to the casting and then drill and tap for the studs.
Once I had done the valve gland I moved on to the Piston rod.
Here I am after a couple of hours. The glands fit, the bores line up and accept the valve and piston rods and I can lace everything up if I want to. Next I have to make and fit the valve and the piston. Then the pads which will accept the the steam and exhaust pipes. But that's for another day..... This morning's work wasn't top quality but it's achieved the goal, that will do!
Stanley Challenger Graham
Stanley's View
scg1936 at talktalk.net
"Beware of certitude" (Jimmy Reid)
The floggings will continue until morale improves!
Stanley's View
scg1936 at talktalk.net
"Beware of certitude" (Jimmy Reid)
The floggings will continue until morale improves!
-
Stanley
- Global Moderator
- Posts: 90699
- Joined: 23 Jan 2012, 12:01
- Location: Barnoldswick. Nearer to Heaven than Gloria.
Re: Shed Matters 3

This morning I started into making the piston rod, piston and crosshead. I think the three pics tell the story. I have made the rod and started on the piston which I am making out of some cast bronze I happened to have in my box, just the right stuff. I knocked off at 07:00 to do my weekly Co-op shop before it gets busy. I know exactly what I shall be doing tomorrow!
Stanley Challenger Graham
Stanley's View
scg1936 at talktalk.net
"Beware of certitude" (Jimmy Reid)
The floggings will continue until morale improves!
Stanley's View
scg1936 at talktalk.net
"Beware of certitude" (Jimmy Reid)
The floggings will continue until morale improves!