Shed Matters 3

User avatar
Stanley
Global Moderator
Global Moderator
Posts: 90300
Joined: 23 Jan 2012, 12:01
Location: Barnoldswick. Nearer to Heaven than Gloria.

Re: Shed Matters 3

Post by Stanley »

Image

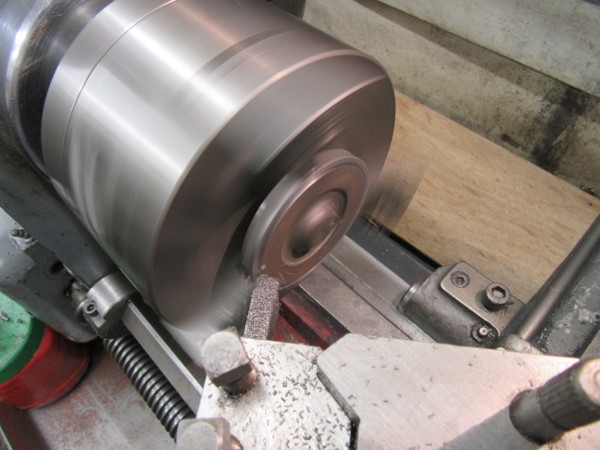
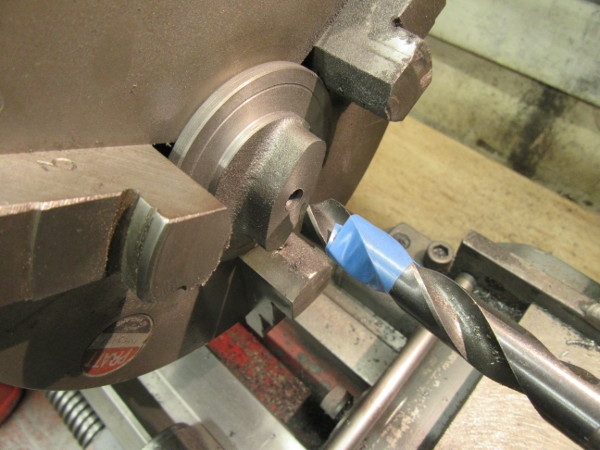
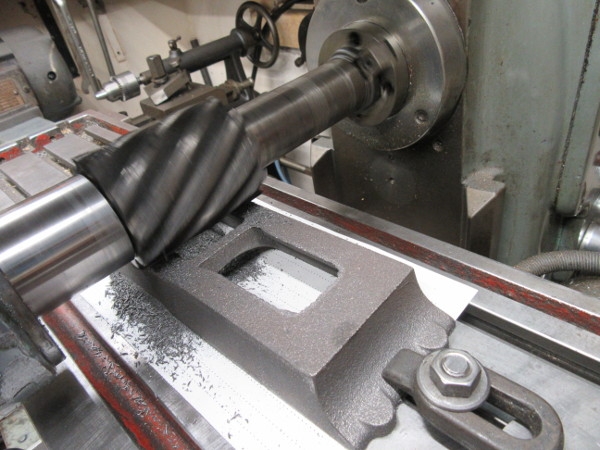
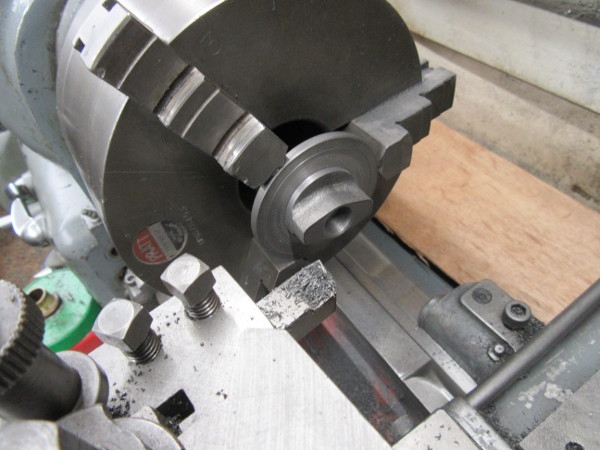
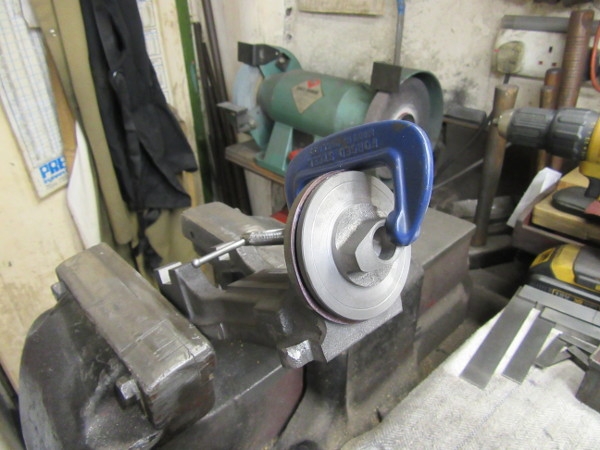
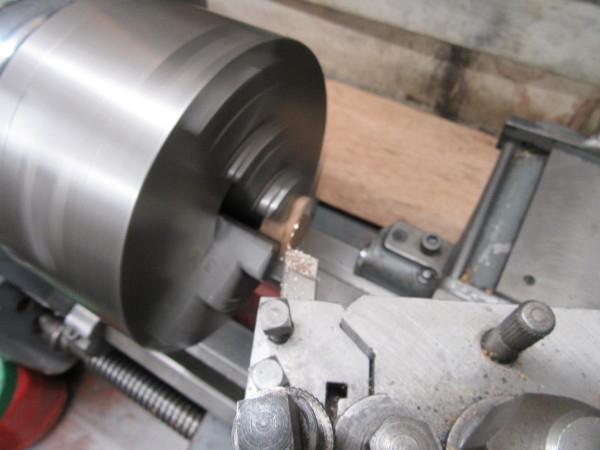
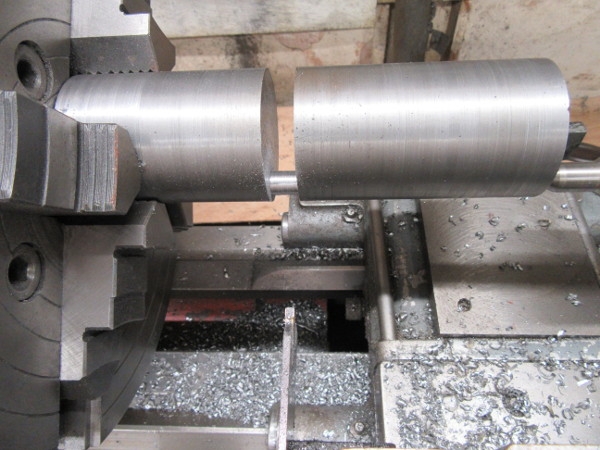
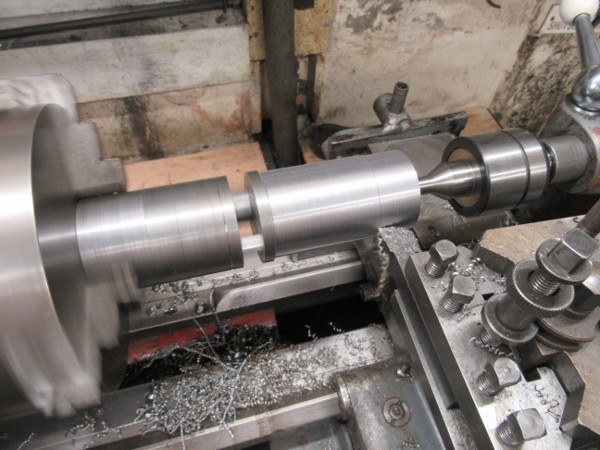
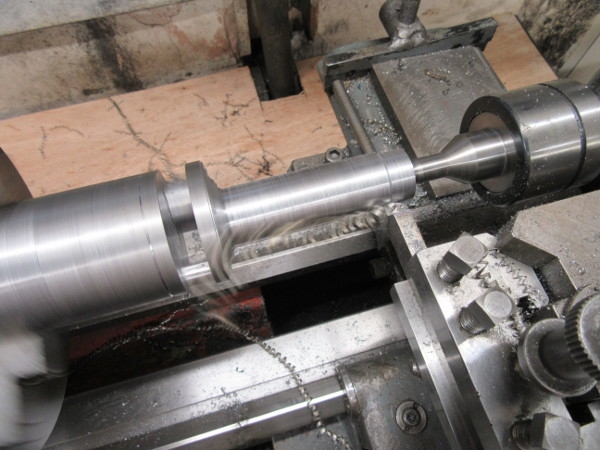
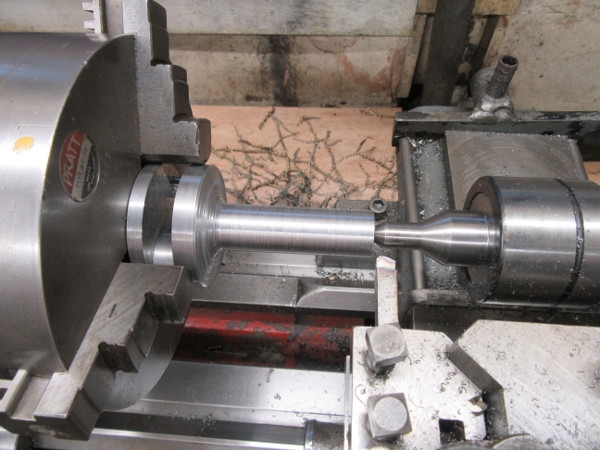
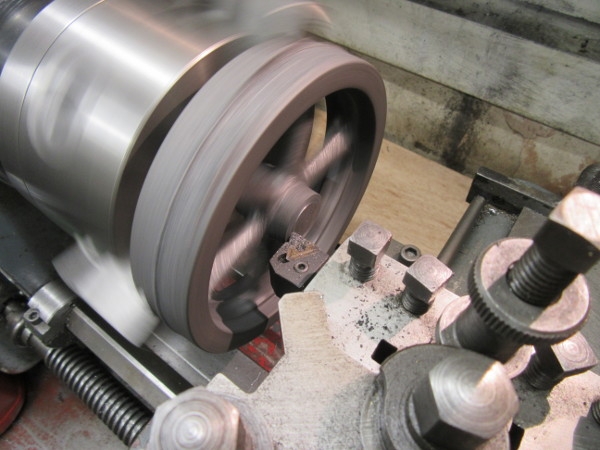
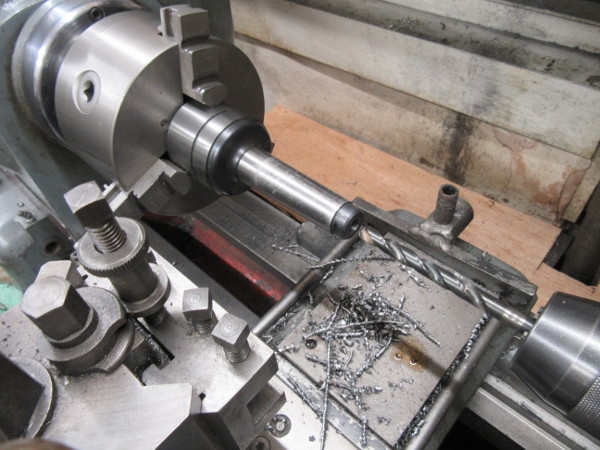
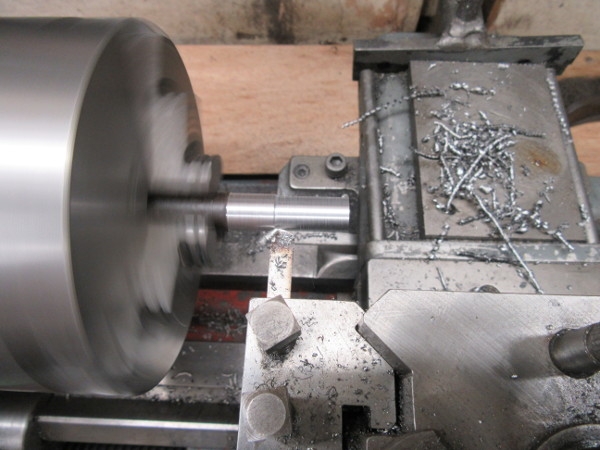
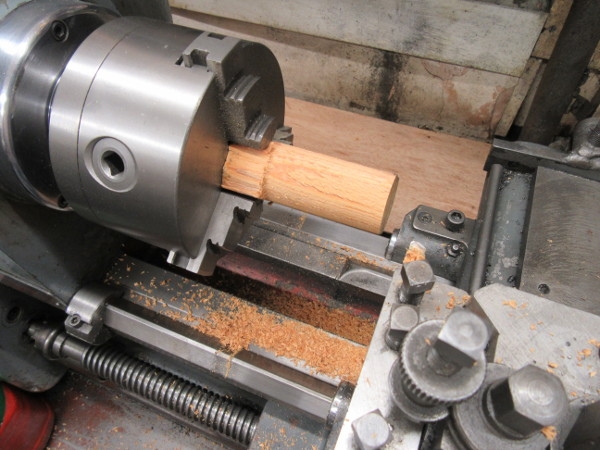
I considered using a different cutter but in the end carried on with the parting tool. You can see it has a quite ridiculous amount of stick out!

Image

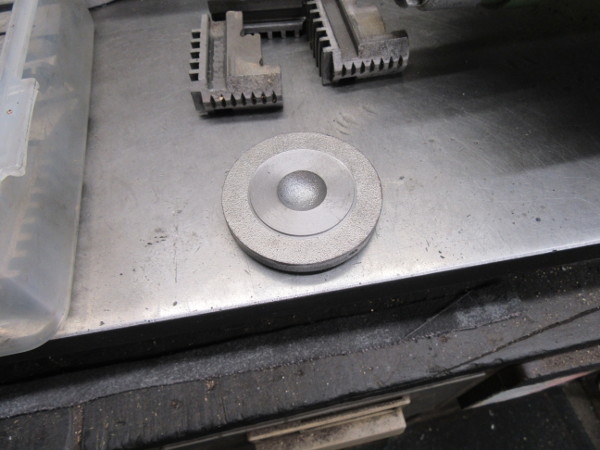
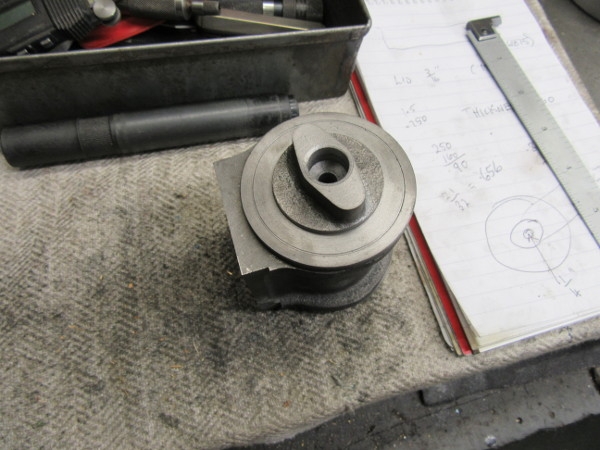
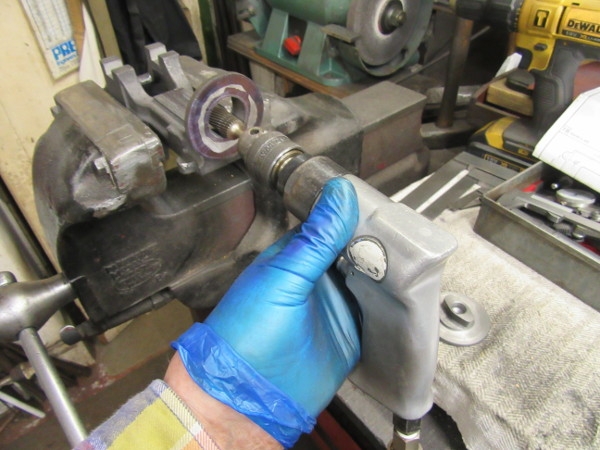
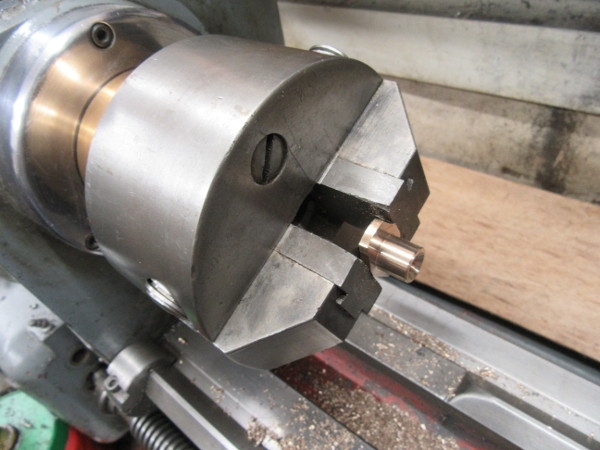
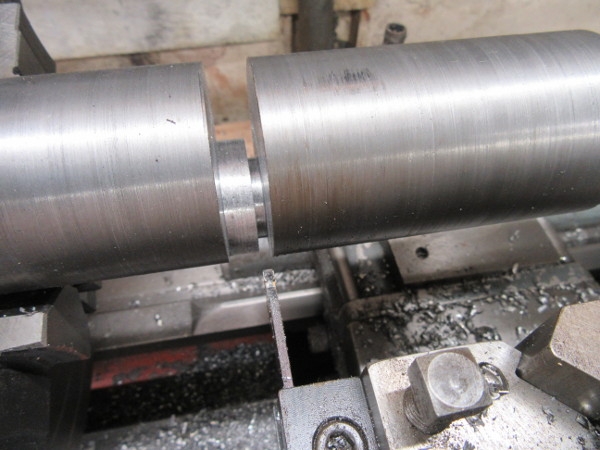
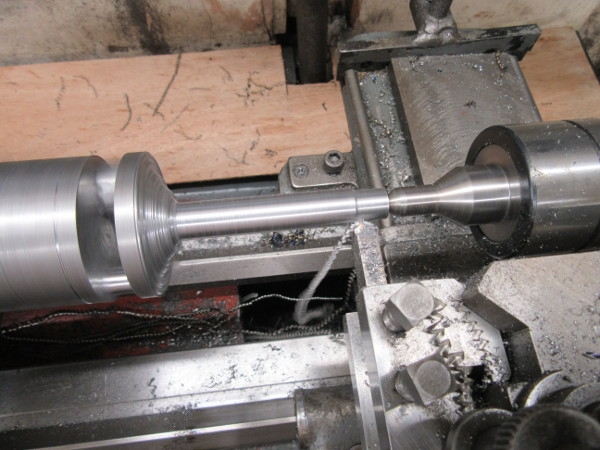
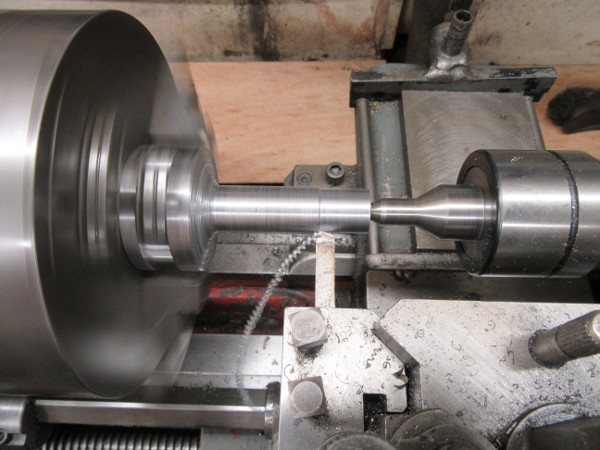
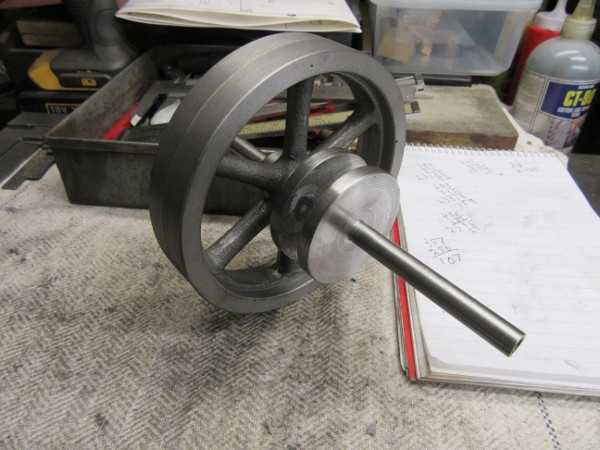
Another hour of very careful turning and I have a crank pin. I polished it with emery cloth. It's actually 10 thou over size but I had reached the limit of my stick out and so left it at that, no problem accommodating that in the con rod.

Image

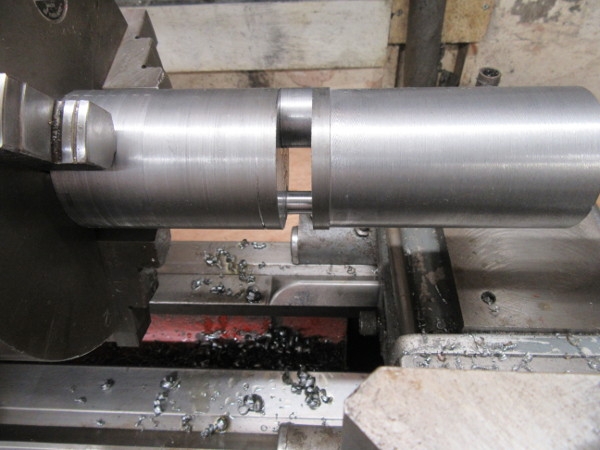
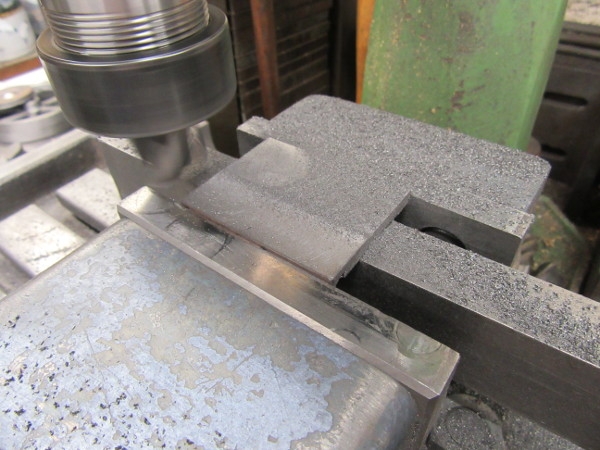
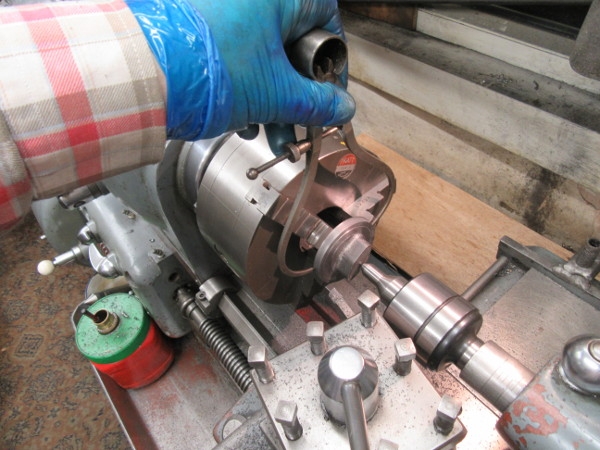
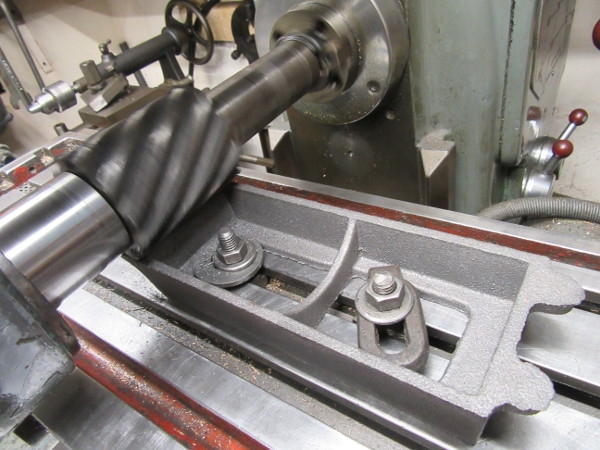
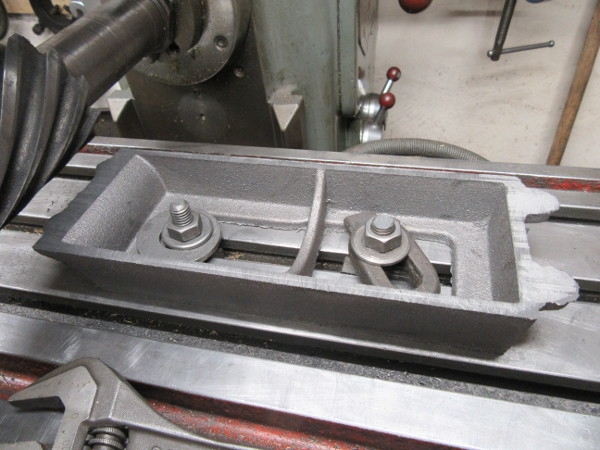
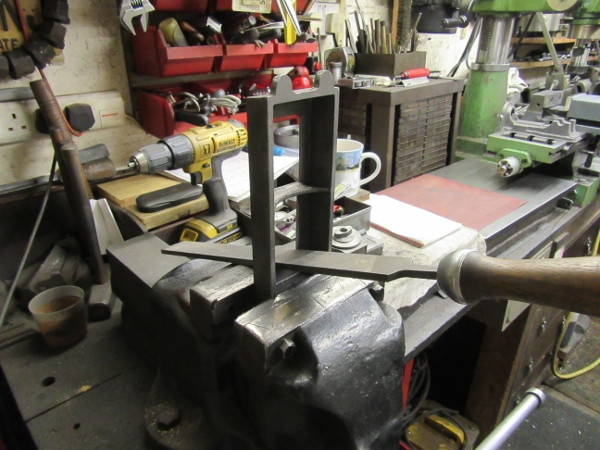
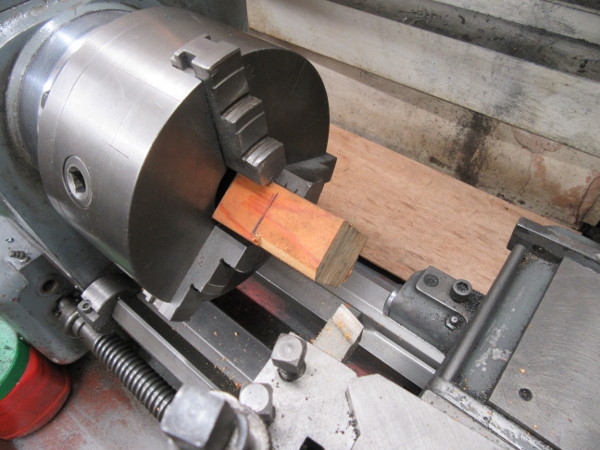
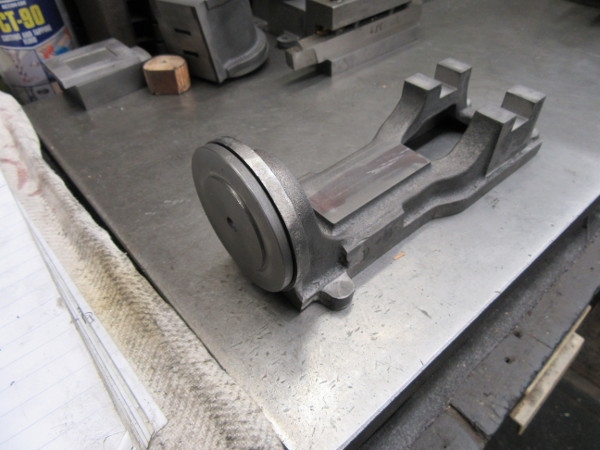
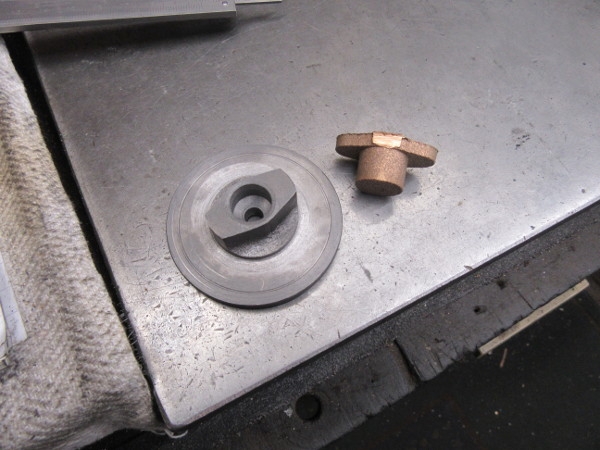
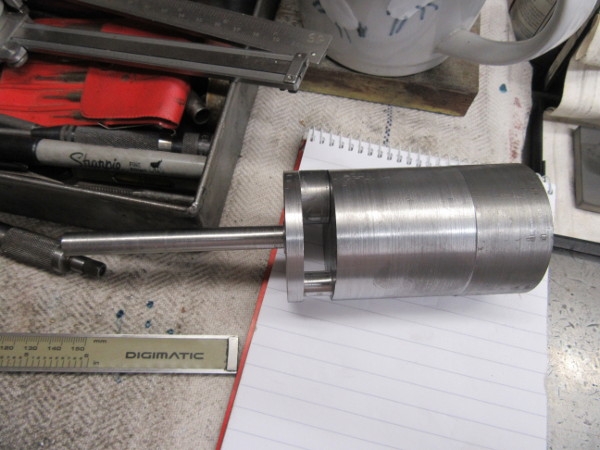
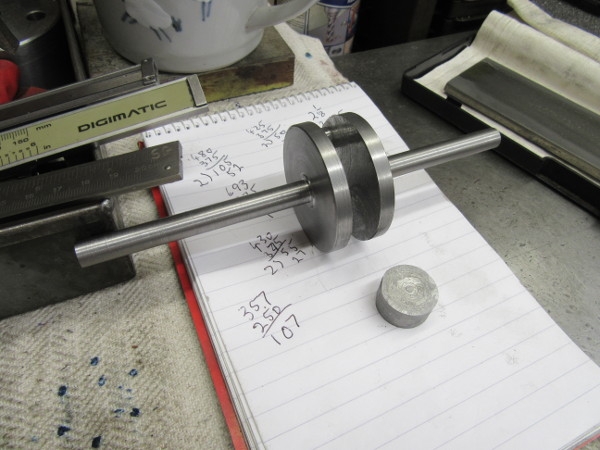
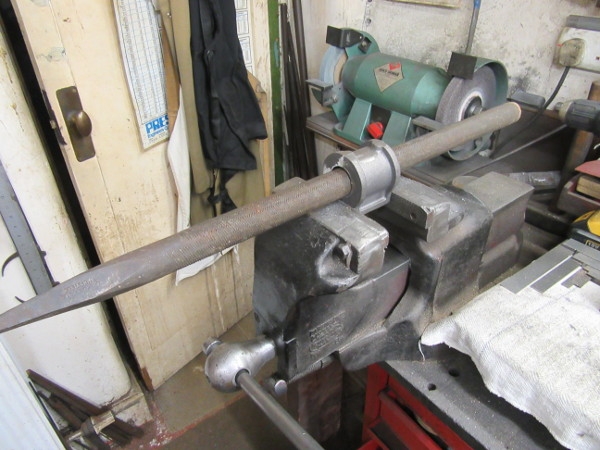
Closing time, I've put the big 3 jaw SC chuck on again, cleaned Mrs Harrison and marked the 1/4" flanks of the crankshaft webs and made a small slug which I have put in the gap in the shaft to take the pressure from the Centre. It's got a bit of superglue on it but didn't really need it. Tomorrow I can go muck-shifting again.
Stanley Challenger Graham
Stanley's View
scg1936 at talktalk.net

"Beware of certitude" (Jimmy Reid)
The floggings will continue until morale improves!
User avatar
Stanley
Global Moderator
Global Moderator
Posts: 90300
Joined: 23 Jan 2012, 12:01
Location: Barnoldswick. Nearer to Heaven than Gloria.

Re: Shed Matters 3

Post by Stanley »

Image

Here's the task and the start. I need to reduce the right hand side to 3/8". The slug I made for the gap to take the weight of the centre is fine and I started using an indexed carbide tool.

Image

But I soon made an alteration because it was cutting so hot. I ground a muck shifting HSS cutter and set to, much better and I ended up taking 50thou cuts.

Image

I stopped before I got down to size. I want the stock to cool down so I can get an accurate measurement. I've been cleaning up the swarf as I went on so it doesn't get in the way. This is good progress, everything according to plan so far.
Stanley Challenger Graham
Stanley's View
scg1936 at talktalk.net

"Beware of certitude" (Jimmy Reid)
The floggings will continue until morale improves!
User avatar
Stanley
Global Moderator
Global Moderator
Posts: 90300
Joined: 23 Jan 2012, 12:01
Location: Barnoldswick. Nearer to Heaven than Gloria.

Re: Shed Matters 3

Post by Stanley »

Image

Image

First job was to put the finishing touches to this end of the shaft and that includes a light skim right down to the chuck and breaking the edges of the webs. It sits on the bench while I resharpen cutters and get set up for some more muck-shifting.

Image

This was closing time, very close to a crankshaft. As was the case yesterday, it needs to cool so I can get an accurate measurement. Another good morning, quietly away and good results. Nice.... :biggrin2:
Stanley Challenger Graham
Stanley's View
scg1936 at talktalk.net

"Beware of certitude" (Jimmy Reid)
The floggings will continue until morale improves!
User avatar
Stanley
Global Moderator
Global Moderator
Posts: 90300
Joined: 23 Jan 2012, 12:01
Location: Barnoldswick. Nearer to Heaven than Gloria.

Re: Shed Matters 3

Post by Stanley »

Image

A quick hone of the cutter and back into careful turning.

Image

About an hour later we have a near perfect crankshaft. The shaft outside the webs is a bit longer than the drawing but reducing them is a simple matter if necessary. Then a big clean up and when I had a clean start I went into the front room and brought some bits out.

Image

That's it, I have unpacked the casting set for the engine. here we have the parts in a tidy box and the castings sat there waiting for some attention.

Image

Here are the castings, I shall start on them. Just one thing I noticed, the steam ports are cast into the cylinder but not the exhaust. I've never seen Stuarts do that before. No problem, I can soon cut one when we get to that point.

Image

My last blow was to put the smaller 3 jaw on the lathe because I have an idea that the jaws will fit in the spokes of the flywheel and make a good way of holding it for the first cut after fettling. But first we have to get the castings cleaned up. So I know exactly where I am starting tomorrow.
Stanley Challenger Graham
Stanley's View
scg1936 at talktalk.net

"Beware of certitude" (Jimmy Reid)
The floggings will continue until morale improves!
User avatar
Stanley
Global Moderator
Global Moderator
Posts: 90300
Joined: 23 Jan 2012, 12:01
Location: Barnoldswick. Nearer to Heaven than Gloria.

Re: Shed Matters 3

Post by Stanley »

Image

My first job was the old fashioned job of 'fettling' a casting, getting the worst of the flash and gates off before machining. There are also the bits that can't be touched on the lathe like the spokes and the rim between them, all parts that eventually will be painted. I was going to do all the castings before machining them but decided that would be too hard on me, I want a bit of a rest from filing!

Image

I tried various ways of holding the castings, what I was after was the one that held the wheel securely and the boss as central as possible. This was with the outside jaws on the rim.

Image

Image

After that it was just careful and thoughtful cutting until I got to the stage where one side was done, then I reversed it and did the same operations on the other side.

Image

This was closing time. The flywheel is not finished, it needs polishing and finishing but all the crucial machining is done. I can move to the next one now.....
Stanley Challenger Graham
Stanley's View
scg1936 at talktalk.net

"Beware of certitude" (Jimmy Reid)
The floggings will continue until morale improves!
User avatar
Stanley
Global Moderator
Global Moderator
Posts: 90300
Joined: 23 Jan 2012, 12:01
Location: Barnoldswick. Nearer to Heaven than Gloria.

Re: Shed Matters 3

Post by Stanley »

Image

This needs a bit of explanation.... This is the new 4MT live centre I bought recently. It had a fault, It did not sit deep enough in the tailstock for the ejector to push it out of the taper. I did a temporary fix with a 1/2" Unbrako set screw but it started to bend. I decided I had to do better and so here I'm drilling the end out ready for making an interference fit peg and driving it in.

Image

Image

I knocked a peg out and fitted it. That's better, a proper job that will last the life of the centre.

Image

Here's the real business of the morning, the cylinder. The first job was to knock the flash off the exterior using the pedestal grinder.

Image

I doubt if you'll ever see anyone using one of these again. I'm cleaning the flash out of the bore with a 24" X 1 1/4" round file. Those were the days! I'll admit I don't use it every day.

Image

Here we are after a bit of fettling, we have the worst of the crust off it, now I need to get into the mill and start looking to get the first layer of crust off and at the same time get the faces somewhere near square. This isn't to finished measurements, that will come later.

Image

Image

Once I had the worst of the scale off I sharpened the cutter and here we are at closing time. Ready for some serious measuring to finished size.

Image

A good morning.....
Stanley Challenger Graham
Stanley's View
scg1936 at talktalk.net

"Beware of certitude" (Jimmy Reid)
The floggings will continue until morale improves!
User avatar
Stanley
Global Moderator
Global Moderator
Posts: 90300
Joined: 23 Jan 2012, 12:01
Location: Barnoldswick. Nearer to Heaven than Gloria.

Re: Shed Matters 3

Post by Stanley »

Image

We start the day with a bit of woodworking. The bore in the casting is never accurate and so my way of dealing with this is to plug the bore with wood so that I can accurately measure and mark the centre and use that as a reference for marking the other essential measurements before I start cutting.

Image

Image

I think you get the picture, I can make some accurate measurements.

Image

Image

Image

And then do some cutting, the cylinder is a good casting and is cutting nicely. We now have the external measurements right. Next we get set up for boring.

Image

At this stage you look to be a mile out, that's how much the core was out for the bore. Trust your measurements set up on the centre you have marked on the plug, Drill a hole through to make room for the boring bar and get stuck in!

Image

Two hours is enough! I have almost taken the wooden core out and if you look carefully you'll see that the bore was slightly displaced. I'm ready now for boring accurately to size tomorrow. I think it's been a good morning. I'll know for certain when I finish boring and can inspect the cylinder.
Stanley Challenger Graham
Stanley's View
scg1936 at talktalk.net

"Beware of certitude" (Jimmy Reid)
The floggings will continue until morale improves!
BobH
Regular User
Posts: 133
Joined: 15 Nov 2019, 18:09
Location: Rochdale

Re: Shed Matters 3

Post by BobH »

IMG_1023.MP4
At first glance it looks as if you are making a wood sleeved cylinder, Stanley. I love the thought even if I am being silly🤪.

We steam tested the Duchess today and I am glad to say that 2 years on the bench has seen a good result, she passed without problems. Even though it was getting lateI managed 4 laps of the Rochdale track.
IMG_1023.MP4
IMG_1023.MP4
IMG_1023.MP4
Ooops! I seem to have done multiple attachment downloads - sorry folks
You do not have the required permissions to view the files attached to this post.
User avatar
Stanley
Global Moderator
Global Moderator
Posts: 90300
Joined: 23 Jan 2012, 12:01
Location: Barnoldswick. Nearer to Heaven than Gloria.

Re: Shed Matters 3

Post by Stanley »

That thought struck me as well. Good insulation!
That video of the Duchess is brilliant Bob. Going like the clappers as well. You must have felt so good belting round the circuit. Well done!
Stanley Challenger Graham
Stanley's View
scg1936 at talktalk.net

"Beware of certitude" (Jimmy Reid)
The floggings will continue until morale improves!
User avatar
Stanley
Global Moderator
Global Moderator
Posts: 90300
Joined: 23 Jan 2012, 12:01
Location: Barnoldswick. Nearer to Heaven than Gloria.

Re: Shed Matters 3

Post by Stanley »

Image

Image

These two pics cover the first hour. We have a nice bore and it's near enough the correct size. It isn't quite central in the bore but that's not so much any fault of the boring, it's a reflection of the shape of the casting. Castings are never accurate. They have to be worked around in the fitting.

Image

I'm going to be milling the valve chest next so I gave the cutter a good going over including backing it off. Thank God for Mrs Clarkson. :biggrin2:

Image

Next for shaving.

Image

Knocking off time, I have the Steam chest cleaned up and square, I need to adjust its thickness to 11/16" now but that's for tomorrow.
Stanley Challenger Graham
Stanley's View
scg1936 at talktalk.net

"Beware of certitude" (Jimmy Reid)
The floggings will continue until morale improves!
User avatar
Stanley
Global Moderator
Global Moderator
Posts: 90300
Joined: 23 Jan 2012, 12:01
Location: Barnoldswick. Nearer to Heaven than Gloria.

Re: Shed Matters 3

Post by Stanley »

Image

The first task was to get the depth of the steam chest to the required 11/16"

Image

Then I did what had to be done to get the steam chest lid to the right size. The casting was hardly big enough so I took the bare minimum off to square it up.

Image

Next I had a look at the back lid. It would have been nice if Stuarts had given us a boss to grab hold of. I shall have to be inventive.

Image

Image

I did what I could and tomorrow I shall have to work miracles.... :biggrin2:
Stanley Challenger Graham
Stanley's View
scg1936 at talktalk.net

"Beware of certitude" (Jimmy Reid)
The floggings will continue until morale improves!
User avatar
Stanley
Global Moderator
Global Moderator
Posts: 90300
Joined: 23 Jan 2012, 12:01
Location: Barnoldswick. Nearer to Heaven than Gloria.

Re: Shed Matters 3

Post by Stanley »

Image

I did a bit of work on my lids and hare I have two lids that have been cleaned up a bit and marked with the PCD of the eventual fastenings.

Image

I can't show all the steps, there were too many. My problem is holding the lids to machine them. I have had to change to the larger 3 jaw chuck to give me room for the gland. My hold on the lid is only the 1/16" register and so it has to have pressure on the centre to hold it. Then cut carefully!

Image

There is still room for old fashioned things like calipers when you're turning the periphery of lids!

Image

I was going to stop here. Two lids that are largely finished.

Image

But then I decided to reduce the depth of the gland as I am set up for this.
Not a bad morning, lots of progress. I shall be having a day off tomorrow, weekly shopping and Clitheroe market with Susan and perhaps Jess as well. I have a nice straight edge..... :biggrin2:
Stanley Challenger Graham
Stanley's View
scg1936 at talktalk.net

"Beware of certitude" (Jimmy Reid)
The floggings will continue until morale improves!
User avatar
Stanley
Global Moderator
Global Moderator
Posts: 90300
Joined: 23 Jan 2012, 12:01
Location: Barnoldswick. Nearer to Heaven than Gloria.

Re: Shed Matters 3

Post by Stanley »

Image

Image

Image

The first job was to bore the front lid for the piston rod and the gland. Note the high tech depth gauge.... :biggrin2:

Image

Image

Image

The next job was to start on the base. I think you can work out how I did it, you can't beat the slabbing cutter for this job. No need to have this good a finish on the bottom of course but the reason I do it is so that when I turn it over and mill the top side I can be absolutely certain that it is parallel with the base. But that's for tomorrow, I am having breakfast before going for the eye test I forgot!
Stanley Challenger Graham
Stanley's View
scg1936 at talktalk.net

"Beware of certitude" (Jimmy Reid)
The floggings will continue until morale improves!
User avatar
Stanley
Global Moderator
Global Moderator
Posts: 90300
Joined: 23 Jan 2012, 12:01
Location: Barnoldswick. Nearer to Heaven than Gloria.

Re: Shed Matters 3

Post by Stanley »

Image

The first move was to flip the bed over and mill the top surface that the bed mounts on smooth and parallel with the bottom.

Image

then I spent a while on it with an 18" flat file and a small round one for the corners.

Image

Then I took the back jaw off the vise so that I could get the base in it so that I can mill the tops of the lugs for the holding down bolts.

Image

Then across to the pillar drill to drill the lugs 3/16", clearance for 2BA bolts.

Image

This was knocking off time. I am ready to start on the bed. Note I haven't drilled the base for the connecting bolts, I shall mark for them via the holes in the bed, that way I shall get them right!
A good morning, quietly away, careful but accurate work. :biggrin2:
Stanley Challenger Graham
Stanley's View
scg1936 at talktalk.net

"Beware of certitude" (Jimmy Reid)
The floggings will continue until morale improves!
User avatar
Stanley
Global Moderator
Global Moderator
Posts: 90300
Joined: 23 Jan 2012, 12:01
Location: Barnoldswick. Nearer to Heaven than Gloria.

Re: Shed Matters 3

Post by Stanley »

Image

Image

I think these two pics sum up the first half hour with grinder and files. We now have a much cleaner casting. Lots more to do but a good start.

Image

We have to do some milling now for the next stage so off with the vise and nail the casting to the bed getting it as near central and square as possible. There's nothing straight to use as a reference so a lot of this is guesswork.

Image

I found a 5/8" slot drill for the bearing pockets and gave it a good sharpening before I started.

Image

Good to go. Some careful milling.

Image

Knocking off time, the pads for the holding down bolts, the pedestal pockets and the crosshead slide bed are all milled and the dimensions are right. Next job is the target face, that's tomorrow's job!
Stanley Challenger Graham
Stanley's View
scg1936 at talktalk.net

"Beware of certitude" (Jimmy Reid)
The floggings will continue until morale improves!
User avatar
Stanley
Global Moderator
Global Moderator
Posts: 90300
Joined: 23 Jan 2012, 12:01
Location: Barnoldswick. Nearer to Heaven than Gloria.

Re: Shed Matters 3

Post by Stanley »

Image

Not often my big depth gauge comes out but I thought it might be just the thing for checking my set up but immediately slipped up by letting the Stem escape from its bed and so I had to pull it to bits to get the small copper protector back in to its bed, this blew away almost 30 minutes .....

Image

and proved to be a waste of time because it was too big. I have another good depth gauge and it's smaller. Here it is, a lovely fit. Then I got on with a lot of checks prior to the next operation I want to do, mill the face of the target on the bed.

Image

Some time later.... All is set up as accurately as I can. The bar in the bearing beds is just a piece of 5/8" steel that will serve as a measuring point...

Image

Here's the bar being used with the depth gauge. I need a measurement of five and five sixteenths from the face of the target to the front side of the bearing pocket.

Image

Next I reinstated the vise on the VM using this piece of ground tool steel to magnify the measurement with the dial indicator that I have just taken off the mill. Then I put my everyday cutter in.

Image

Here's the bed casting, all I have done this morning is mill the face of the target on the bed. No apologies, it's been done accurately and you can't rush that. (Especially when you're an old fart!)
Stanley Challenger Graham
Stanley's View
scg1936 at talktalk.net

"Beware of certitude" (Jimmy Reid)
The floggings will continue until morale improves!
User avatar
Stanley
Global Moderator
Global Moderator
Posts: 90300
Joined: 23 Jan 2012, 12:01
Location: Barnoldswick. Nearer to Heaven than Gloria.

Re: Shed Matters 3

Post by Stanley »

Image

Here's today's task. I've checked the orientation of the target face and now need to open out the hole in it to take the Gland on the front of the cylinder lid. It would be dead easy if I could mount the casting in such a way that I could get at it with the boring head. Unfortunately I can't so a lot of thinking went into it....

Image

The first thing I did was make sure the gland casting on the lid was the size specified on the drawing.

Image

Next I have to make sure I can mark the target face accurately. I went the same route I take with cylinders, plug the hole with wood so I have a place to mark a centre.

Image

Then I clamped the cylinder lid on the face and used it to mark the casting. Once I had the periphery marked I could set a centre and mark to bore.

Image

I decided the best way to enlarge the bore (and give it some finish) was to enlarge it to the limits I have marked on the face. This was working but it was obvious that I was going to be at it for a long time, my cutters are all secondhand and old! I had a think and decided I could get away with making the gland casting smaller so it fits the bore I have reached.

Image

So I put the lid back in the lathe and made it small enough to fit the bore. I can sort out the gland later. Here we are at knocking off time, the front lid fits the bore and is central. We are on track and this morning is good, no mistakes and problems overcome. :biggrin2:
Stanley Challenger Graham
Stanley's View
scg1936 at talktalk.net

"Beware of certitude" (Jimmy Reid)
The floggings will continue until morale improves!
User avatar
MickBrett
Donor
Posts: 536
Joined: 02 Oct 2021, 00:50
Location: Oklahoma

Re: Shed Matters 3

Post by MickBrett »

Good work, Stanley.
I really enjoy watching along.

I've always been good at watching others work :biggrin2:
User avatar
Stanley
Global Moderator
Global Moderator
Posts: 90300
Joined: 23 Jan 2012, 12:01
Location: Barnoldswick. Nearer to Heaven than Gloria.

Re: Shed Matters 3

Post by Stanley »

Thanks Mick. It keeps me active and thinking...... God knows I need all the help I can get.
Stanley Challenger Graham
Stanley's View
scg1936 at talktalk.net

"Beware of certitude" (Jimmy Reid)
The floggings will continue until morale improves!
User avatar
Stanley
Global Moderator
Global Moderator
Posts: 90300
Joined: 23 Jan 2012, 12:01
Location: Barnoldswick. Nearer to Heaven than Gloria.

Re: Shed Matters 3

Post by Stanley »

Image

Here's this morning's small task, make a gland out of this small casting and fit it to the lid..... Nowt to it. :biggrin2:

Image

Out of focus but this is the easy bit, I can hold the casting by the round stub that eventually becomes the business end of the gland.

Image

This is a very rare beast. It's a two jaw brass finisher's chuck and is just right for this application. Not a very good hold, I shall have to go steady!

Image

A bit later and I have got a result.

Image

Notice I have put the PCD of the stud holes on the gland. Now I have to mark it and the lid and drill and tap for the 5BA studs.

Image

Image

This was knocking off time, the gland fits and clears the bore in the bed. That's what I was after.....
Stanley Challenger Graham
Stanley's View
scg1936 at talktalk.net

"Beware of certitude" (Jimmy Reid)
The floggings will continue until morale improves!
User avatar
Stanley
Global Moderator
Global Moderator
Posts: 90300
Joined: 23 Jan 2012, 12:01
Location: Barnoldswick. Nearer to Heaven than Gloria.

Re: Shed Matters 3

Post by Stanley »

Image

A bit later. I was doing a hot wash so I changed the tablecloth, oiled the big surface plate and remembered to show you these two useful little tools. First is my vest pocket level which gets a lot of use and the second is a woman's diamond nail file. They work just as well on tool steel and are perfect for touching the edge of a cutting tool.
Stanley Challenger Graham
Stanley's View
scg1936 at talktalk.net

"Beware of certitude" (Jimmy Reid)
The floggings will continue until morale improves!
User avatar
Stanley
Global Moderator
Global Moderator
Posts: 90300
Joined: 23 Jan 2012, 12:01
Location: Barnoldswick. Nearer to Heaven than Gloria.

Re: Shed Matters 3

Post by Stanley »

No shed today.... I'm off to Skipton with Susan.... :biggrin2:
The engine can wait.
Stanley Challenger Graham
Stanley's View
scg1936 at talktalk.net

"Beware of certitude" (Jimmy Reid)
The floggings will continue until morale improves!
User avatar
Stanley
Global Moderator
Global Moderator
Posts: 90300
Joined: 23 Jan 2012, 12:01
Location: Barnoldswick. Nearer to Heaven than Gloria.

Re: Shed Matters 3

Post by Stanley »

Image

When I was in Skipton I bought a couple of cans of black spray paint. That'll make painting easier when we get to it.

Image

Then I addressed something I noticed the other day. Now that I have the front lid and the gland near to fitting the piston rod makes a good indicator for how well I have finished the face of the target.

Image

So a few minutes work with a big flat file and I adjusted the face. The piston rod is now dead on centre.

Image

Image

Image

Image

Then I got into woodwork. I wanted to make an aid for accurate dressing of my grinder wheels and getting the angle of drills right each time. I think the pics tell the story. Not engine related but its something I have been thinking about for a while.... I tried it and it works. We all think we are the bees knees at freehand sharpening but in reality, if you're like me you need all the help you can get!
Stanley Challenger Graham
Stanley's View
scg1936 at talktalk.net

"Beware of certitude" (Jimmy Reid)
The floggings will continue until morale improves!
User avatar
MickBrett
Donor
Posts: 536
Joined: 02 Oct 2021, 00:50
Location: Oklahoma

Re: Shed Matters 3

Post by MickBrett »

Yes, it's surprising how much accumulative error builds up with each re sharpening.

That little wood jig you made looks just the thing!
User avatar
Stanley
Global Moderator
Global Moderator
Posts: 90300
Joined: 23 Jan 2012, 12:01
Location: Barnoldswick. Nearer to Heaven than Gloria.

Re: Shed Matters 3

Post by Stanley »

I don't know if I am doing it right but I use it to set the initial angle and rake and finish off the clearance angle by hand.
Stanley Challenger Graham
Stanley's View
scg1936 at talktalk.net

"Beware of certitude" (Jimmy Reid)
The floggings will continue until morale improves!
Post Reply

Return to “Crafts”