Shed Matters 3

Re: Shed Matters 3
Polishing spindles generate mountains of dust that gets everywhere. Dirty little beasts they are. An old vacuum cleaner with the sucker placed near the wheel helps but the noise tends to put you off.
-
Stanley

- Global Moderator

- Posts: 90439
- Joined: 23 Jan 2012, 12:01
- Location: Barnoldswick. Nearer to Heaven than Gloria.
Re: Shed Matters 3
You're right Ken. That's why I avoid doing it wherever possible.
Stanley Challenger Graham
Stanley's View
scg1936 at talktalk.net
"Beware of certitude" (Jimmy Reid)
The floggings will continue until morale improves!
Stanley's View
scg1936 at talktalk.net
"Beware of certitude" (Jimmy Reid)
The floggings will continue until morale improves!
-
Stanley
- Global Moderator
- Posts: 90439
- Joined: 23 Jan 2012, 12:01
- Location: Barnoldswick. Nearer to Heaven than Gloria.
Re: Shed Matters 3
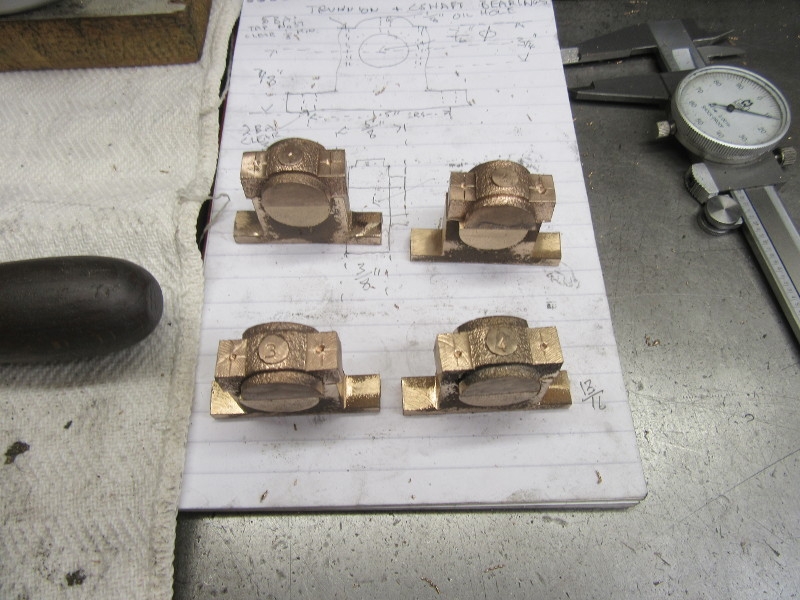
Still working on the main bearings. The object is to get them square and matching, actual dimensions can wait until later when we are further into the process of fitting. First task this morning was to finish the bases by machining the ends of the bosses.
I'm matching the castings as I work and the witness marks I put on yesterday aren't big enough so I have re-marked them with 3mm number punches. I have also matched bearings to application and have marked the drawings with the dedicated bearings in each case. The idea is to make them as close to the required sizes as possible and that can only be done by matching them to the functions and the individual shafts.

Next I moved on to the caps. Once again, the aim is to get all four as even as possible and do them in pairs so I can match them.
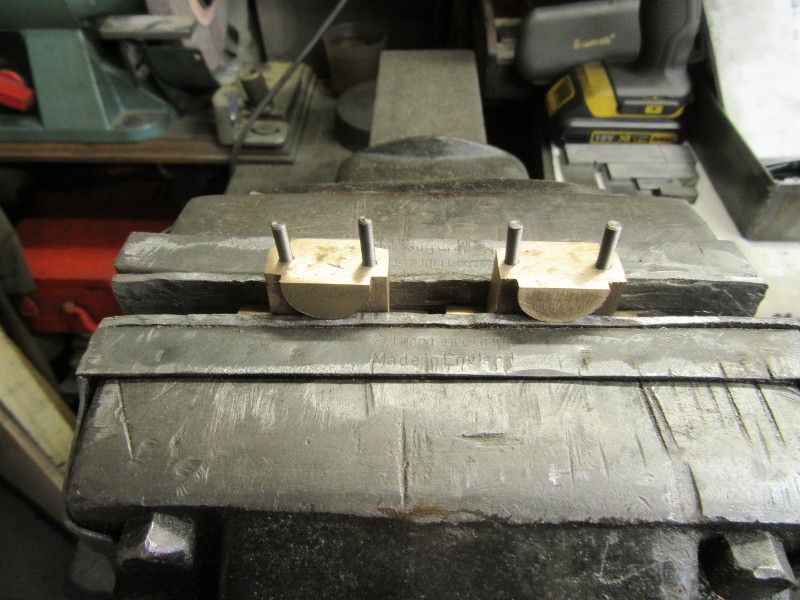
Here we are at knocking off time, the caps are numbered to match the bases. The eagle eyed might notice that the caps are wider than the bases. The next job is to install the cap bolts making sure that the bosses match. Once they are firmly bolted on I can make the width exactly right for each base. Then I can adjust the bases where necessary to get the shaft height exactly right, make the matching shafts and bore the bearings to suit them. This ensures that any slight variations are allowed for and bearings are a good fit. This route is dictated by the nistakes I made with the first engine. Hopefully this one will be a stage better!
Stanley Challenger Graham
Stanley's View
scg1936 at talktalk.net
"Beware of certitude" (Jimmy Reid)
The floggings will continue until morale improves!
Stanley's View
scg1936 at talktalk.net
"Beware of certitude" (Jimmy Reid)
The floggings will continue until morale improves!
-
Stanley
- Global Moderator
- Posts: 90439
- Joined: 23 Jan 2012, 12:01
- Location: Barnoldswick. Nearer to Heaven than Gloria.
Re: Shed Matters 3
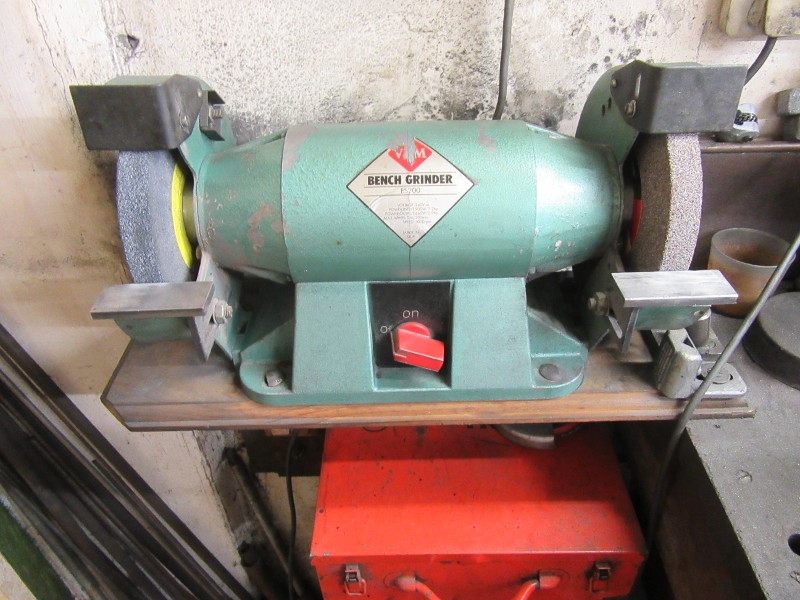
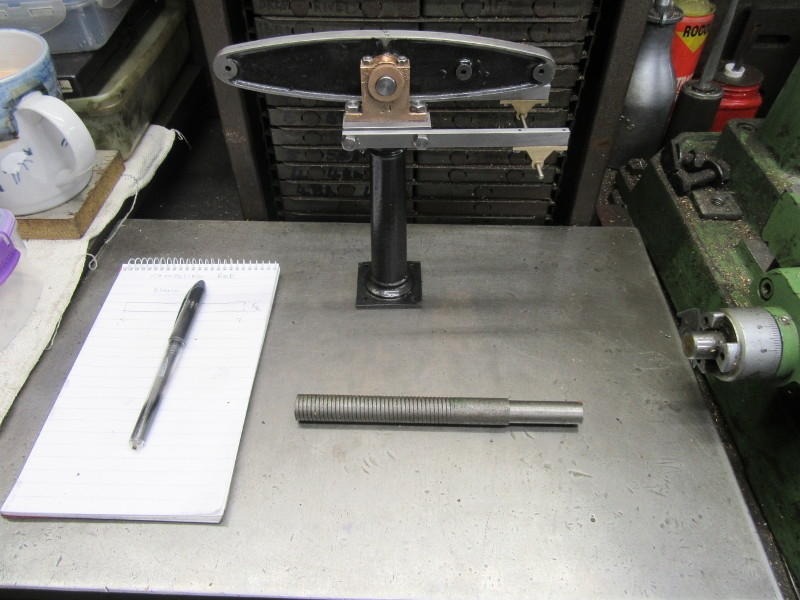
You may remember me saying I had bitten the bullet and thrown out the 'warped' grinding wheel and ordered a new one. I may have to fish it out of the bin. I got this Norton wheel which I sure is straight and when I installed it I still had vibration. I fear I may not have made a good enough job of truing up the mounting discs. This will be the first task this morning in the shed, getting to the bottom of this puzzle!
Stanley Challenger Graham
Stanley's View
scg1936 at talktalk.net
"Beware of certitude" (Jimmy Reid)
The floggings will continue until morale improves!
Stanley's View
scg1936 at talktalk.net
"Beware of certitude" (Jimmy Reid)
The floggings will continue until morale improves!
-
Stanley
- Global Moderator
- Posts: 90439
- Joined: 23 Jan 2012, 12:01
- Location: Barnoldswick. Nearer to Heaven than Gloria.
Re: Shed Matters 3
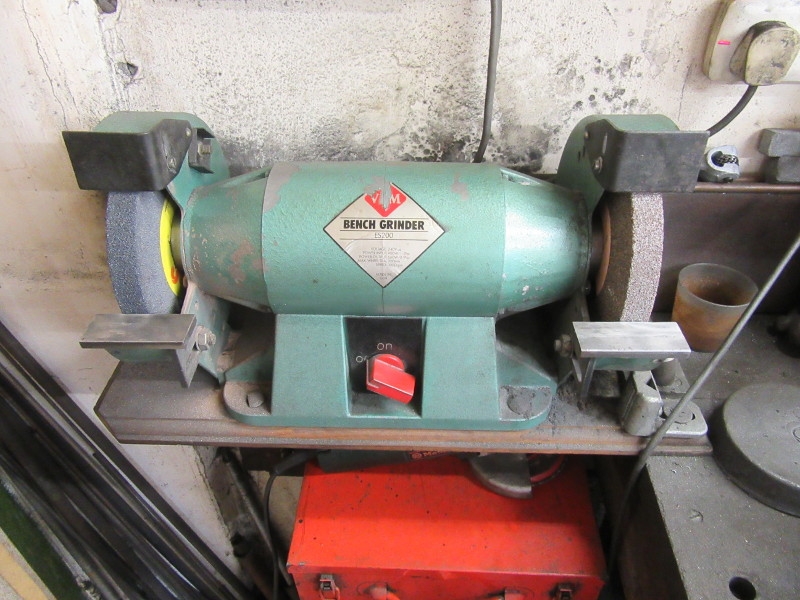
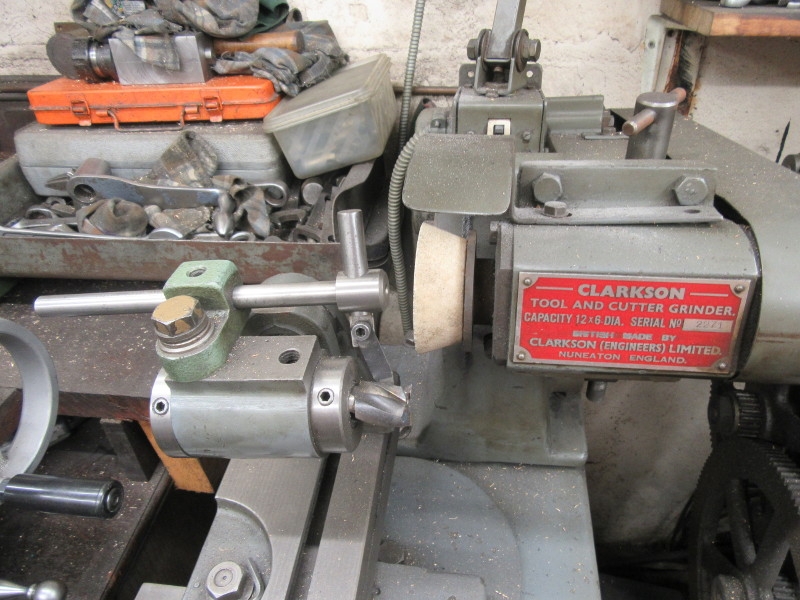
As promised (or threatened) I gave the grinder one more chance. The first thing I did was run it with the right hand wheel assembly off to check If I was right and the problem was in that end. It ran perfectly with no vibration so I was confident I was working on the right area. As you can see above I skimmed both retaining plates back and front.

Then I faced the nut and made a washer to go under it. All this was done as accurately as possible. Then I reassembled it, dressed both wheels and tried it. It's marginally better but still not perfect and I have come to the conclusion that the residual vibration is down to the grinder itself and there is no more I can do.
The last thing I did after 2 hours of honest endeavour was give the grinder and its surrounds a good clean and while I was at it I chip chased the mill and the bench. That's quite enough for this morning. Oh, and by the way, I rescued the grinding wheel I threw in the bin. It might have been better than I thought.
Stanley Challenger Graham
Stanley's View
scg1936 at talktalk.net
"Beware of certitude" (Jimmy Reid)
The floggings will continue until morale improves!
Stanley's View
scg1936 at talktalk.net
"Beware of certitude" (Jimmy Reid)
The floggings will continue until morale improves!
-
Stanley
- Global Moderator
- Posts: 90439
- Joined: 23 Jan 2012, 12:01
- Location: Barnoldswick. Nearer to Heaven than Gloria.
Re: Shed Matters 3
The shed missed today. I have had a rough week and perhaps done too much cleaning up. So I gave myself an easy day. Normal service tomorrow I hope. 
Stanley Challenger Graham
Stanley's View
scg1936 at talktalk.net
"Beware of certitude" (Jimmy Reid)
The floggings will continue until morale improves!
Stanley's View
scg1936 at talktalk.net
"Beware of certitude" (Jimmy Reid)
The floggings will continue until morale improves!
Re: Shed Matters 3
I set up a new belt sander this morning, that may need similar work to your grinder Stanley though I shall see how it goes after first serious use, perhaps next week. I finished putting the edging round the base for the vertical boiler and have left the glue to set. This is where the new sander comes in. It will be used to get each tile to close on the same size. I have made a little wooden test jig to try them in as I go. It will need close on 200 tiles. Id morning I went withLarry, chairman f Rochdale Model Engineering Soc. to Bacup to see some miniature locomotive chassis. There is a mix of 3 1/2” and 5” gauge models and some assorted castings which need matching to their chassis.
You do not have the required permissions to view the files attached to this post.
-
Stanley
- Global Moderator
- Posts: 90439
- Joined: 23 Jan 2012, 12:01
- Location: Barnoldswick. Nearer to Heaven than Gloria.
Re: Shed Matters 3
I like puzzles like the mixed parts Bob, good luck with it, it took me 30 years to finally sort out the majority of the parts I inherited from Johnny Pickles! That boiler is going to be a work of art and in passing I would say that like me, you are at the limit of your shed's capacity.....
Stanley Challenger Graham
Stanley's View
scg1936 at talktalk.net
"Beware of certitude" (Jimmy Reid)
The floggings will continue until morale improves!
Stanley's View
scg1936 at talktalk.net
"Beware of certitude" (Jimmy Reid)
The floggings will continue until morale improves!
-
Stanley
- Global Moderator
- Posts: 90439
- Joined: 23 Jan 2012, 12:01
- Location: Barnoldswick. Nearer to Heaven than Gloria.
Re: Shed Matters 3

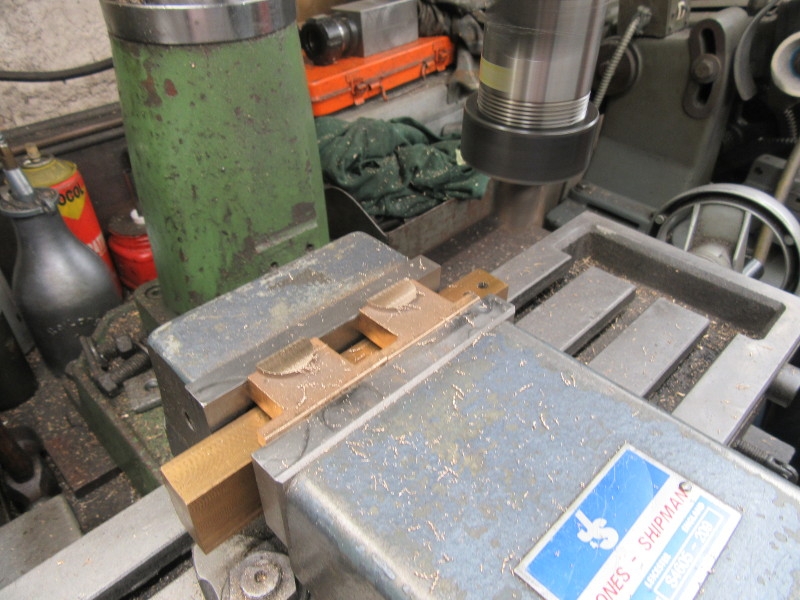
Back to the bearings today. It's going to involve some milling so the first job was to sharpen the cutter. I'd noticed it was a bit dull last time I used it. Milling castings is always hard on cutters because the outside skin contains residues of casting medium and modified metal due to faster cooling on the outside of a casting. Always worth doing and as I say so many times I can't imagine running a mill on HSS cutters without a Mrs Clarkson!
The main focus as far as the milling is concerned is the wings of the caps because the next job is going to be drilling for the 5BA studs that will hold the caps down. All milled to match each other and then I spent over half an hour breaking edges and completing the prettification of the bearings. I'm not aiming for an overall polished finish, they are castings and I want them to look like that.
Here we are ready to start drilling. I'm not pushing myself after yesterdays experience so I have left it here. Small bites will help you eat an elephant! That's a big enough bite for this morning.
In case you're still wondering, I shall bolt the caps on with the bosses central and then mill the wings off to match the bases. That way they will be a perfect match.
Stanley Challenger Graham
Stanley's View
scg1936 at talktalk.net
"Beware of certitude" (Jimmy Reid)
The floggings will continue until morale improves!
Stanley's View
scg1936 at talktalk.net
"Beware of certitude" (Jimmy Reid)
The floggings will continue until morale improves!
Re: Shed Matters 3
You were certainly right there Stanley, there is only just room for me in the shed.
-
Stanley
- Global Moderator
- Posts: 90439
- Joined: 23 Jan 2012, 12:01
- Location: Barnoldswick. Nearer to Heaven than Gloria.
Re: Shed Matters 3
Snap!
Stanley Challenger Graham
Stanley's View
scg1936 at talktalk.net
"Beware of certitude" (Jimmy Reid)
The floggings will continue until morale improves!
Stanley's View
scg1936 at talktalk.net
"Beware of certitude" (Jimmy Reid)
The floggings will continue until morale improves!
-
Stanley
- Global Moderator
- Posts: 90439
- Joined: 23 Jan 2012, 12:01
- Location: Barnoldswick. Nearer to Heaven than Gloria.
Re: Shed Matters 3

Today's job was still bearings. The Design Committee have worked overnight to produce a procedure for dealing with the further operations on the trunnion and crankshaft bearings. The next job is to drill the cap and base for the 7BA studs and do it with the caps in exactly the right place so that the caps are central and the bosses match. I had been thinking in terms of small 'G' clamps but didn't like the idea as I knew the chances of a slip up were high. So what I did this morning is use super-glue to fix the caps in their correct position. I know super-glue sets 'immediately' according to the blurb but in my experience it's better to give it time to cure. So once I had satisfied myself they were all correctly positioned (And one thing about the layer of glue is that it can 'drift.) I set them on one side. They can have 24 hours to cure. In case you're wondering, I shall install the studs, lock the caps in place and then give the bearings their final milling so they match perfectly. No need to dismantle them to bore for the trunnion shafts and actually they could be installed and the engine run without ever breaking the seal.
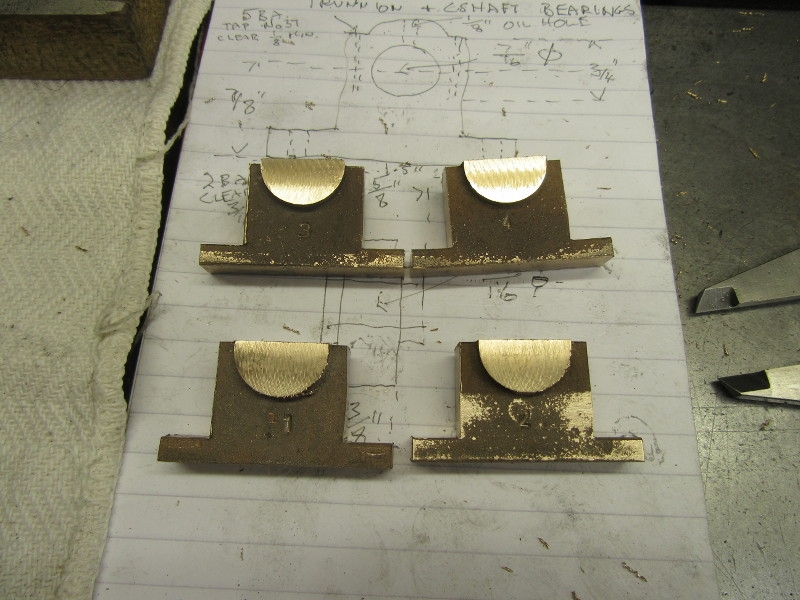
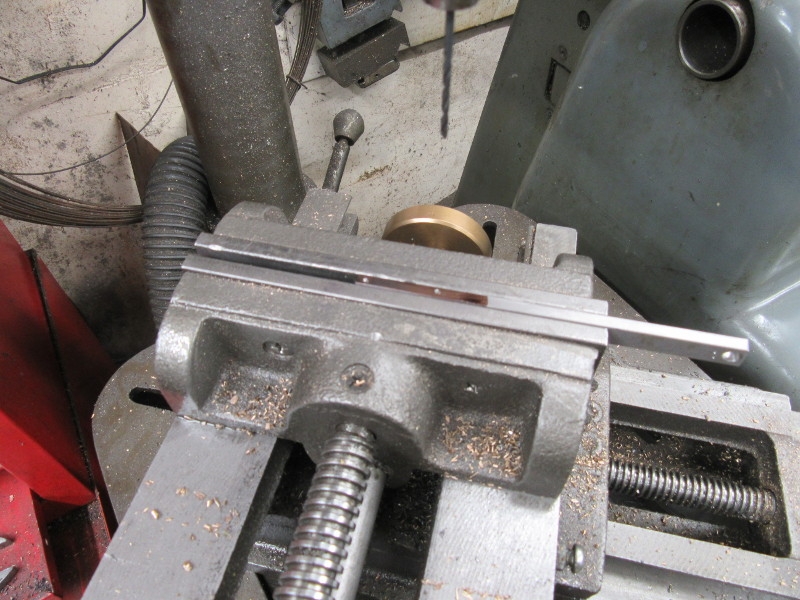
Then I moved on to the four small bearings I have to make as pivot points in the parallel motion and the valve gear. I set the stock up in the milling vise because it has dead square ends and that made sawing them to length easier. I used the stock left over from the last engine which turned out to be a bad decision.
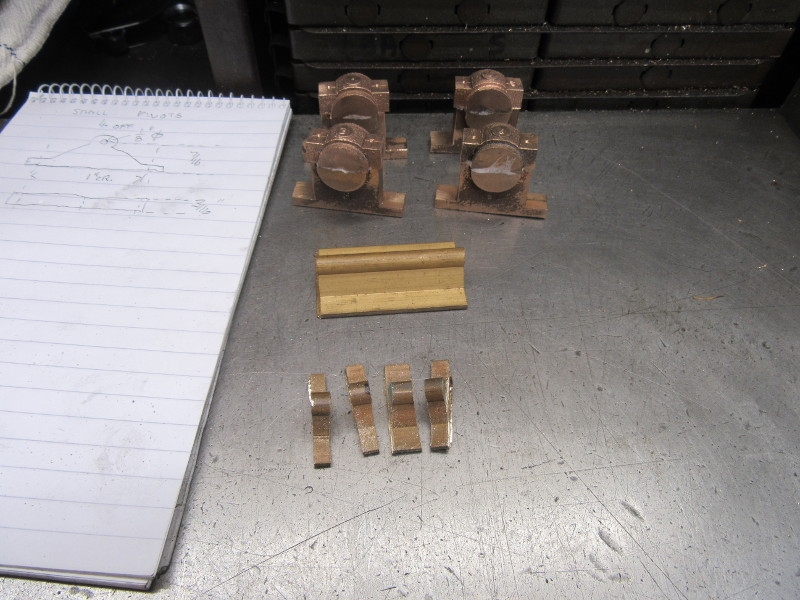
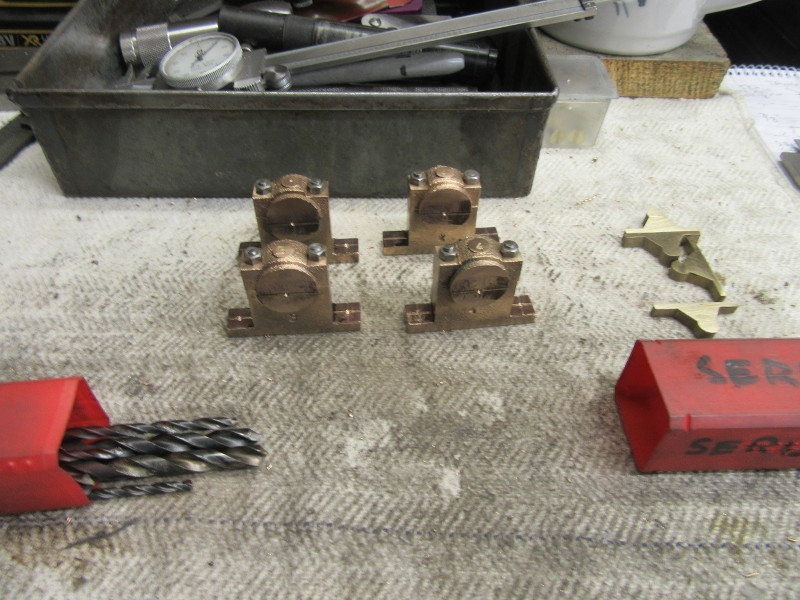
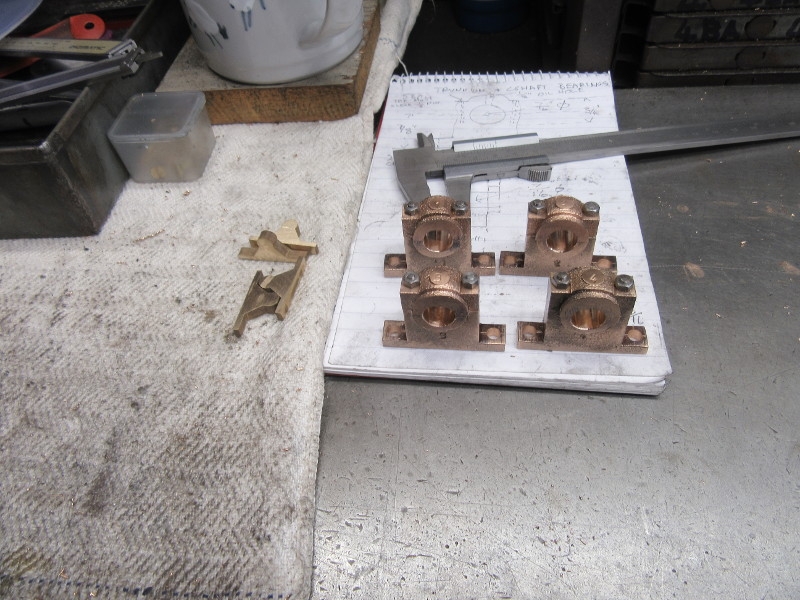
Here we are with four blanks cut out. The new stock is sat in the background. So far so good but when I finished the ends with file and sharp emery paper the last one I cut was undersize so I had to cut another out of the new stock and finish that.
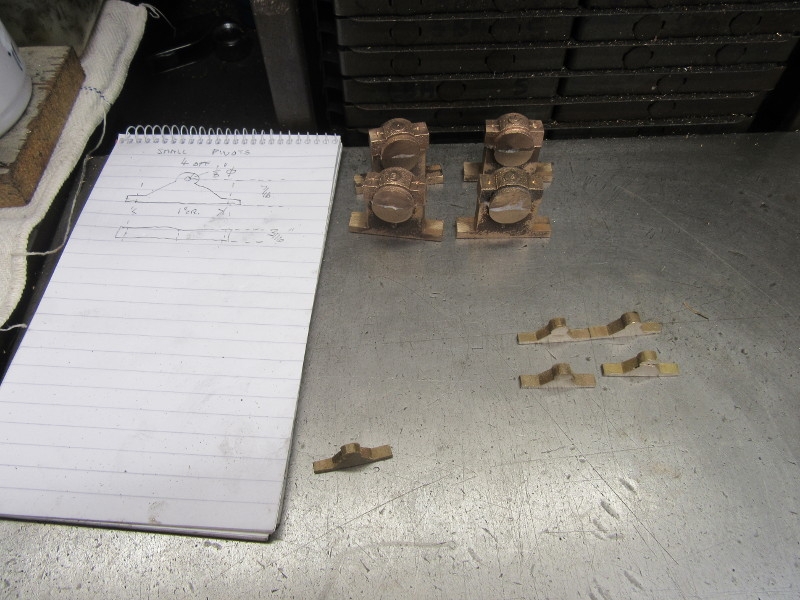
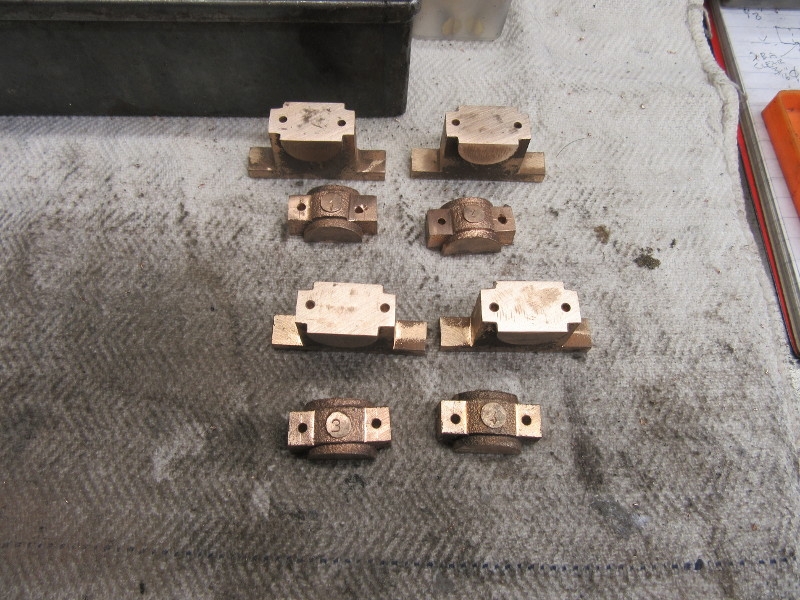
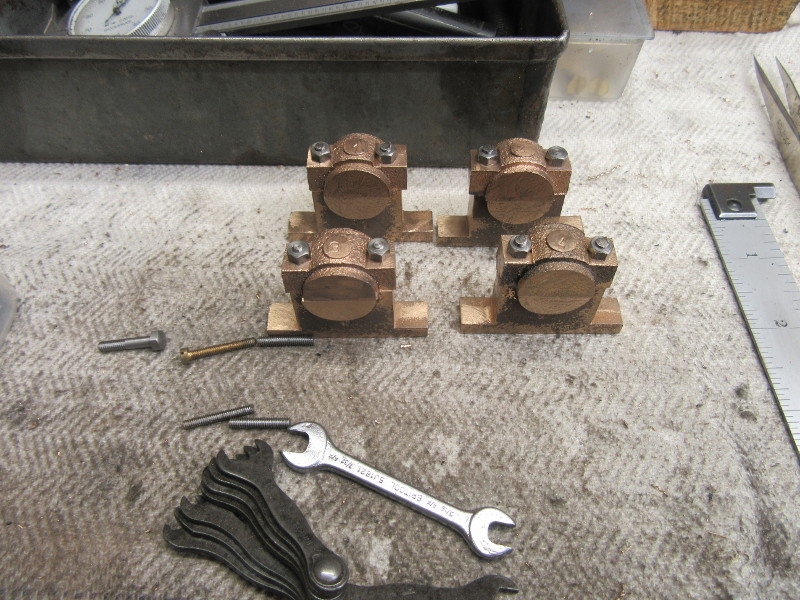
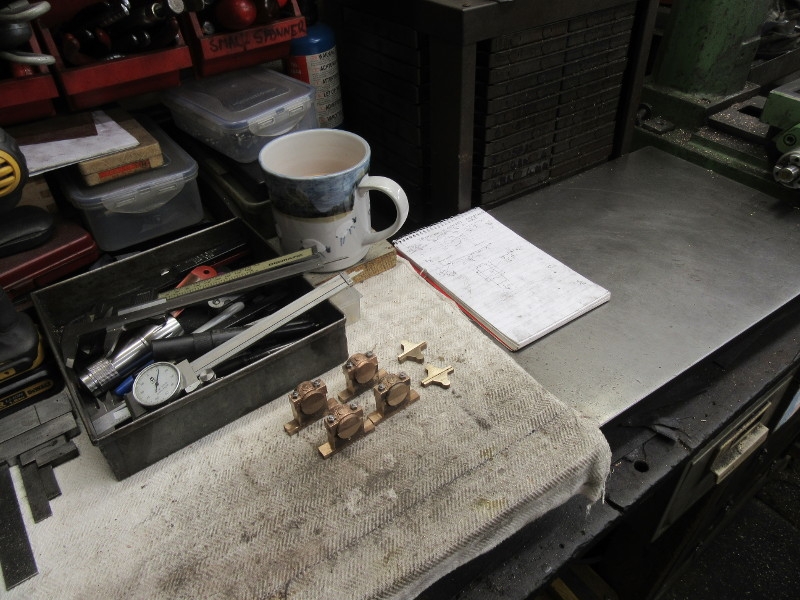
Here we are after two hours careful work. I have four good pivot points cut to size and finished apart from drilling. Note the reject on the left which is scrap. Also I have the four larger bearings curing and tomorrow it will be (hopefully!) relatively easy to accurately install the cap studs and drill for the holding down bolts before final milling to perfectly match them. I think I've done it the right way!
Stanley Challenger Graham
Stanley's View
scg1936 at talktalk.net
"Beware of certitude" (Jimmy Reid)
The floggings will continue until morale improves!
Stanley's View
scg1936 at talktalk.net
"Beware of certitude" (Jimmy Reid)
The floggings will continue until morale improves!
Re: Shed Matters 3
I must remember this method Stanley, you have a cunning plan there. I spent yesterday sanding small white tiles to be pretty much the same size, checking them in a little wooden jig. I don’t like sanding things like ceramic in the workshop as the dust goes everywhere and gets into everything. Thus I evicted Sue’s car from the garage and set the sander up on the workmate with my stool in front. I did wear my dust mask not against any nasty virus, you understand but I thought it best not to inhale too much dust. I must get a connection set up to connect the new sander to the workshop vacuum cleaner. I did all but 8 of the white tile so will finish them on the next session before doing the same with the black ones. Before I started that I did stain the edges of the wooden base a light mahogany colour and left it to dry. If I seal the wood with a coat of varnish before I fix the tiles it will make cleaning off any stray adhesive much easier.
-
Stanley
- Global Moderator
- Posts: 90439
- Joined: 23 Jan 2012, 12:01
- Location: Barnoldswick. Nearer to Heaven than Gloria.
Re: Shed Matters 3
It's down to the design committee Bob, I give them a problem as I lie down to sleep at night and as I wake in the morning the result of their deliberations is always there. Marvellous what goes on in that back room during the night!
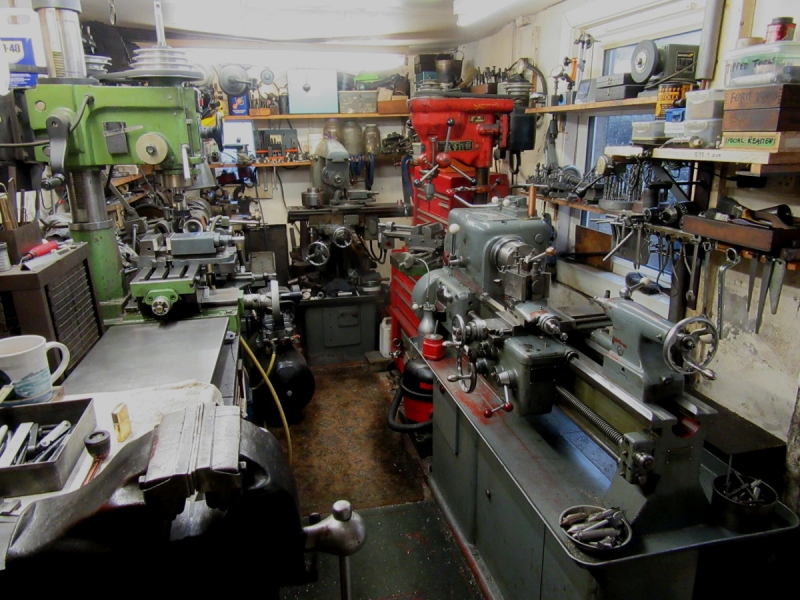
In passing, one of the main delights about shed work is looking at problems like that and the constant conundrum of how to do complicated jobs on less than adequate machinery both in size and quality. I am constantly amazed by how accurate my El Cheapo vertical mill/drill is if handled with care and sharp cutters. These men with the Bridgeports and Kearney and Treckers forget what us lesser fry have to contend with.
You do right to mitigate the ceramic dust, slow but insidious poison. When I had my big cutter sharpening blast on the Clarkson T&C grinder I made my chest bad for a fortnight!
Stanley Challenger Graham
Stanley's View
scg1936 at talktalk.net
"Beware of certitude" (Jimmy Reid)
The floggings will continue until morale improves!
Stanley's View
scg1936 at talktalk.net
"Beware of certitude" (Jimmy Reid)
The floggings will continue until morale improves!
-
Stanley
- Global Moderator
- Posts: 90439
- Joined: 23 Jan 2012, 12:01
- Location: Barnoldswick. Nearer to Heaven than Gloria.
Re: Shed Matters 3

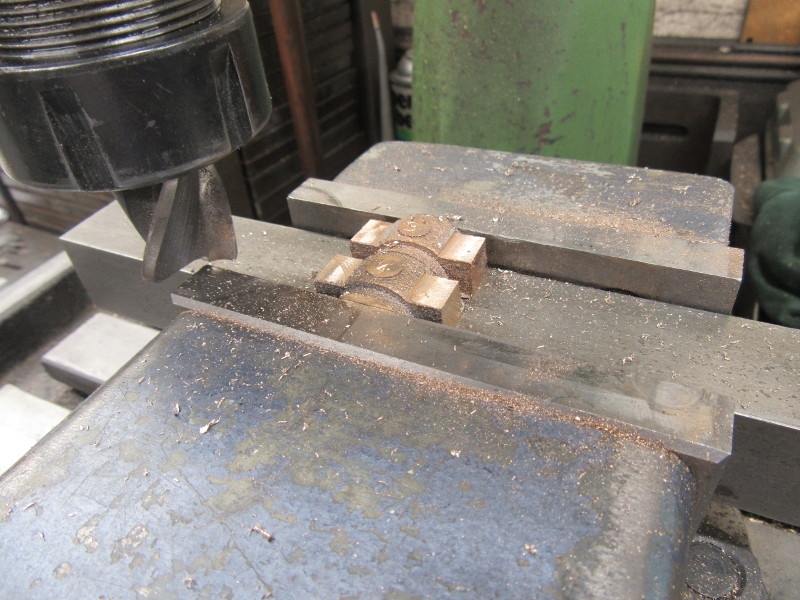
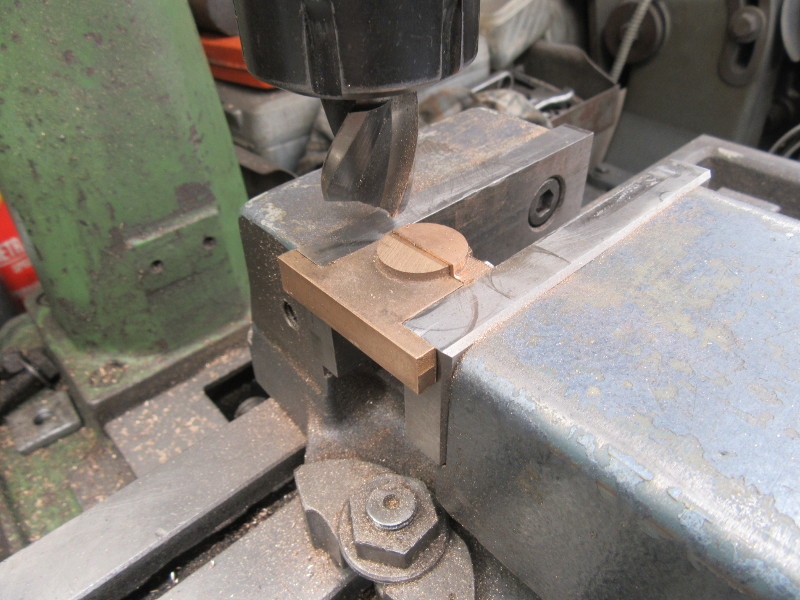
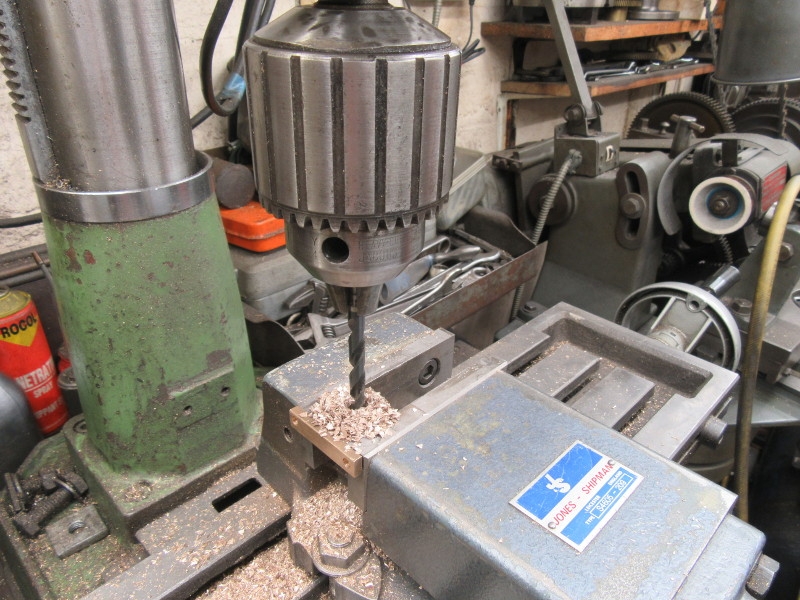
On with the bearings. First thing was to get my taps and tapping drill sorted out, 5BA and Number 37 drill.
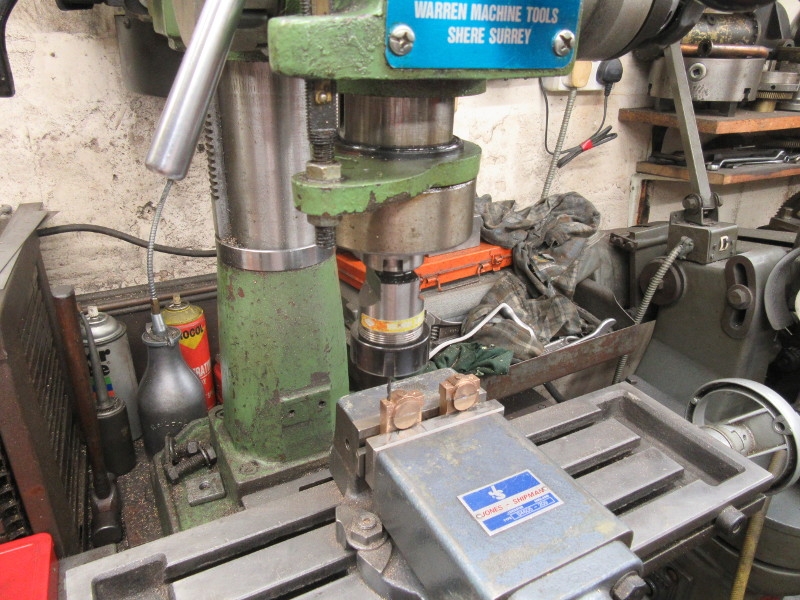
Then set up in the mill to drill the holes. I set the depth stop to take the guesswork out of the depth.

This pic illustrates the mistake I made but retrieved before I made a mess. I had centred the punch marks for the holes in the centre of the ears of the cap but of course that isn't necessarily central as the castings aren't 100% accurate. Adjustments had to be made!
The super glue wasn't all that super. A couple of the caps broke loose but I dealt with them and when I'd finished separated all the castings and cleaned the glue off the faces.
Then some careful hand tapping, finger and thumb only! Then search for the studs.

One little gripe. I am a couple of 5BA studs short and you wouldn't believe how long it took to find these two which can be made to fit. This is where I stopped, I shall tap the last two holes, drill the clearance holes in the caps and fit the caps. But that's for tomorrow!
Stanley Challenger Graham
Stanley's View
scg1936 at talktalk.net
"Beware of certitude" (Jimmy Reid)
The floggings will continue until morale improves!
Stanley's View
scg1936 at talktalk.net
"Beware of certitude" (Jimmy Reid)
The floggings will continue until morale improves!
-
Stanley
- Global Moderator
- Posts: 90439
- Joined: 23 Jan 2012, 12:01
- Location: Barnoldswick. Nearer to Heaven than Gloria.
Re: Shed Matters 3
Remember yesterday when I was scrabbling round for 5BA studding? The search went on this morning and I don't have any. I shall order some today but in the meantime I had to set to and make some studs, a boring occupation but needs must. I won't bore you with how long I spent or how many sidetracks I went down, like finding a stash of 4BA nuts in a drawer I haven't looked for for a long time. I had to find a place for them with the other BA nuts.
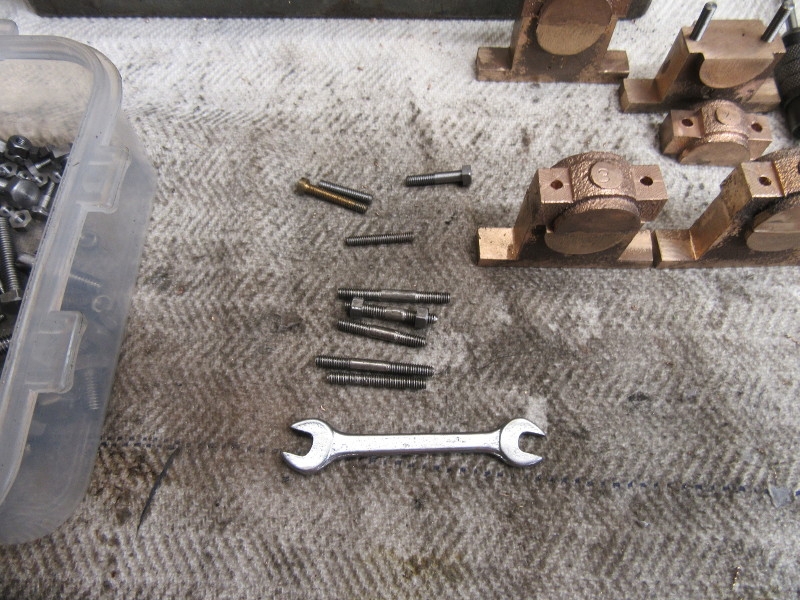
Here's where I am at knocking off time, I have enough studs for the time being. I shall make sure I don't finish up in this position again! I did manage one bit of engineering, I drilled the caps of the two bearings I am working on to open them out to 1/8", the clearance size for 5BA. Onwards and upwards, it's another day tomorrow. Now to order that studding!
Stanley Challenger Graham
Stanley's View
scg1936 at talktalk.net
"Beware of certitude" (Jimmy Reid)
The floggings will continue until morale improves!
Stanley's View
scg1936 at talktalk.net
"Beware of certitude" (Jimmy Reid)
The floggings will continue until morale improves!
-
Stanley
- Global Moderator
- Posts: 90439
- Joined: 23 Jan 2012, 12:01
- Location: Barnoldswick. Nearer to Heaven than Gloria.
Re: Shed Matters 3
I started the day realising that I wasn't really satisfied with work so far on the bearings. So I stripped them back and started from essentials. The first thing I did was actually take notice of the drawings and stick to the measurements! The height from the base to the centre line of the shaft is 7/8" so that's what The height of the base to the top surface should be, so I blued all the bases up, marked them on the surface plate and set about making them the right size.

That involved popping them under the VM, taking them down to size and cleaning up the faces and breaking the edges afterwards.

Then followed an hour of re-working all of the bearings and assembling them securely. One thing was to open up the clearance holes in all the caps from 1/8" to 9/64" as my new studs wouldn't pass through them. I realised later that the reason for this is that the 5BA studs supplied by Stuarts, besides being deficient in number are undersize. I don't like saying it but I suspect they have been sourced from the cheapest source and are not the finest quality. I can tighten my studs properly whereas the others didn't inspire confidence.
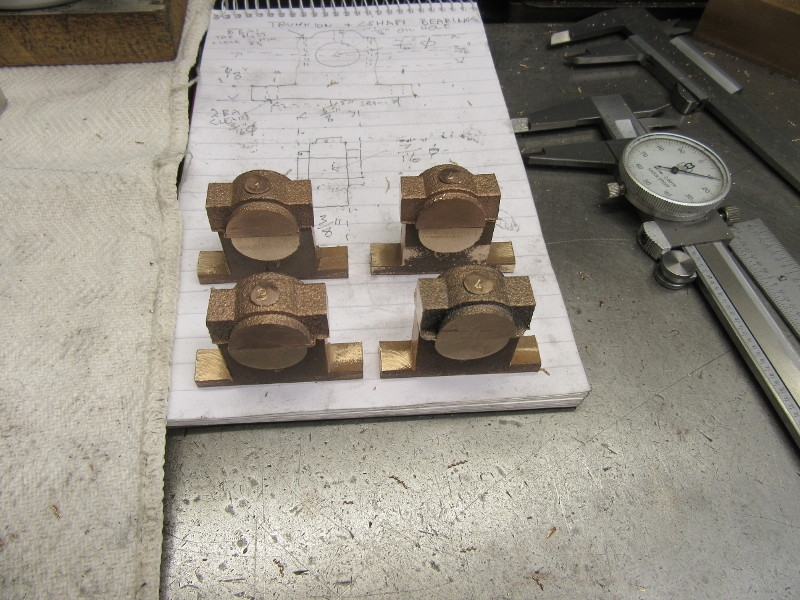
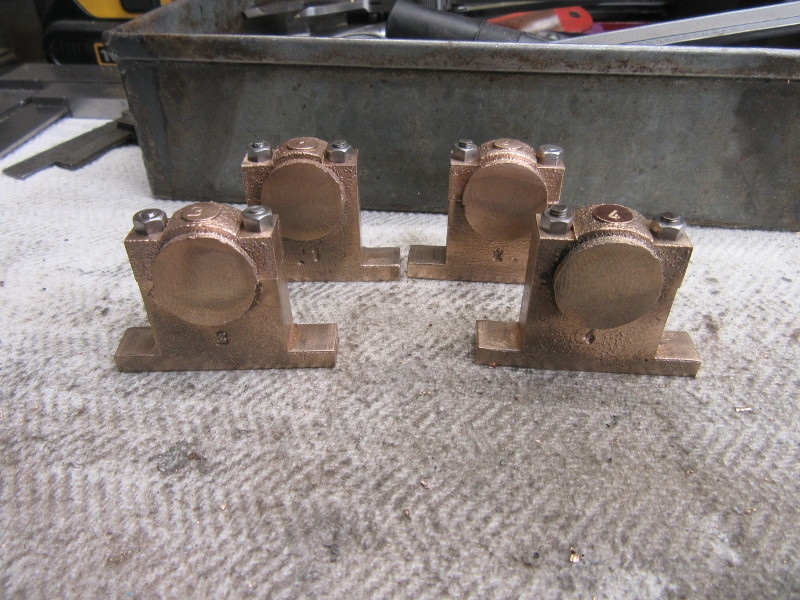
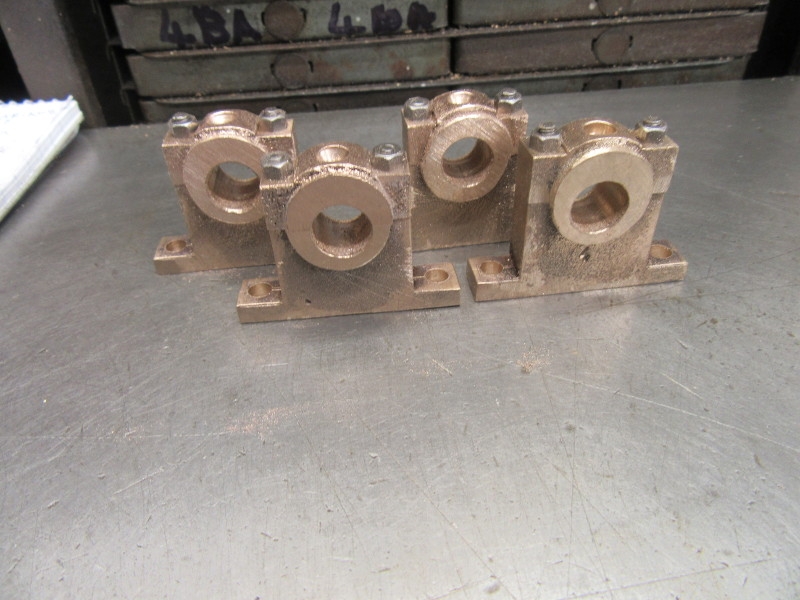
Here's where I finished up, I have 4 bearing assemblies that I am confident in. There is no reason why the caps ever have to come off again actually. I am ready to do the final milling on them to square them up and make them look nice. Then I can drill for the 2BA holding down bolts and bore them. I shall match the trunnion shaft and the crankshaft to the bearings. Oh, and one last thing, I tidied up and put all my tackle away.
Stanley Challenger Graham
Stanley's View
scg1936 at talktalk.net
"Beware of certitude" (Jimmy Reid)
The floggings will continue until morale improves!
Stanley's View
scg1936 at talktalk.net
"Beware of certitude" (Jimmy Reid)
The floggings will continue until morale improves!
-
Stanley
- Global Moderator
- Posts: 90439
- Joined: 23 Jan 2012, 12:01
- Location: Barnoldswick. Nearer to Heaven than Gloria.
Re: Shed Matters 3
Today is more work on the bearings but I wasn't satisfied with the way my end mill was cutting the other day. You can go on 'touching' cutters up for a while but eventually you have to address gulleting them and backing the cutting edges off. There was another thing on my mind, all my cutters came out of the scrap yard as discarded worn out cutters and as I tend to use the same one all the time I suspected that as I shortened it I was getting into an area where the temper wasn't quite right so I dug another 'worn-out' cutter out and gulleted and backed both of them before sharpening them. I put the 1" cutter in as a change.
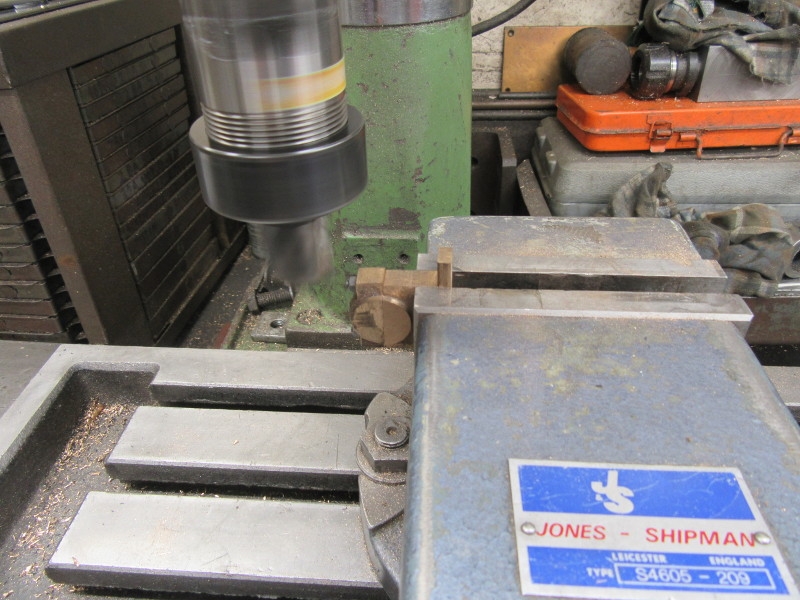
First I milled all the caps off square with the side of the base and at the same time took a skim down the flank and across the face of the base where I shall be drilling them for the holding down 2BA bolts.
Once I had them square I could grab them like this and mill the faces of the bosses off so they are square and they match. The bosses don't match perfectly in the original castings but doing this ensures that they are as close a match as possible.
Then I wire brushed the castings to get the sharp edges off. Tomorrow I shall do a bit more titivating with a file and then drill for the holding down bolts and bore them for the shafts. I shall make the shafts to exactly fit the bearings. The last job will be to drill oil holes in the caps. The drawings call for oil cups but they aren't necessary, the engine isn't running 300 looms 12 hours a day!
Another small step forwards! You can see why it takes so long to build an engine.
Stanley Challenger Graham
Stanley's View
scg1936 at talktalk.net
"Beware of certitude" (Jimmy Reid)
The floggings will continue until morale improves!
Stanley's View
scg1936 at talktalk.net
"Beware of certitude" (Jimmy Reid)
The floggings will continue until morale improves!
-
Stanley
- Global Moderator
- Posts: 90439
- Joined: 23 Jan 2012, 12:01
- Location: Barnoldswick. Nearer to Heaven than Gloria.
Re: Shed Matters 3
First job was to measure up and mark all four bearings for the drillings for the holding down bolts and to mark the centres of the Bores for the shafts.

The easy bit, eight 3/16" holes drilled for the 2BA bolts.
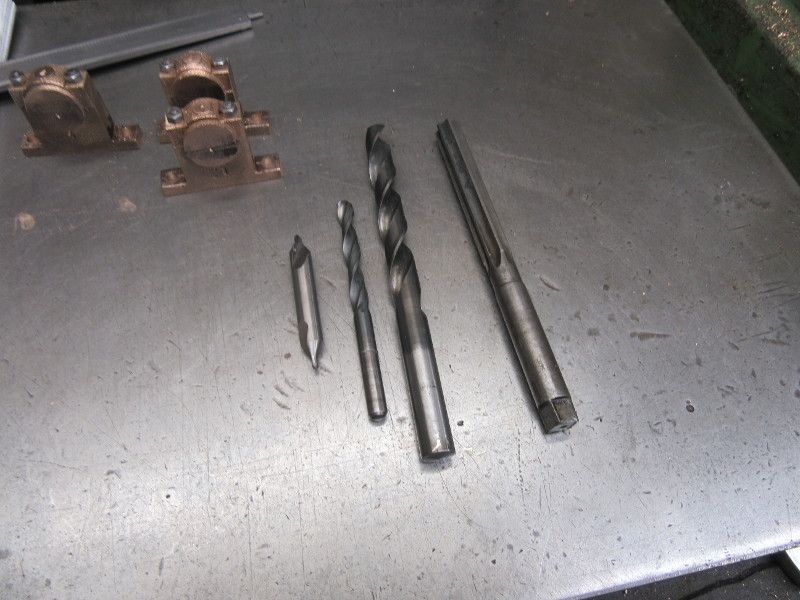
The drills and the reamer sorted out. I shall drill 1/64" under the 7/16" target and finish off with the reamer. That way, all the bores will be exactly the same size and somewhere near accurate. I shall make the shafts to fit the bores.
I used my best chuck and quietly got on with getting the bores finished. One interruption of half an hour to do essential Co-op shopping as soon as they are open and still quiet.
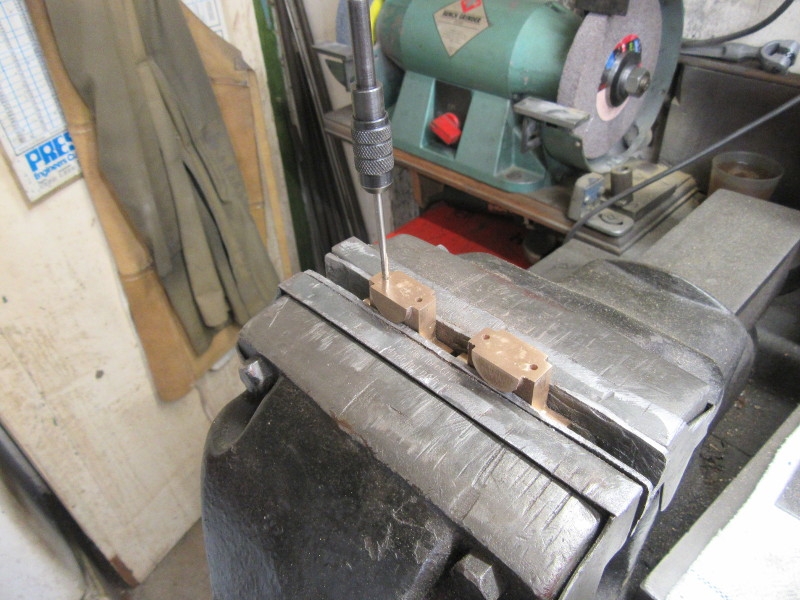
Closing time. All the drilling and the bores finished and de-burred. A bit of polishing needed to make them pretty but then we can move on to drilling the small brass bearings for the motion and parallel motion.
[I've just remembered, I have to drill the oil holes as well!]
Stanley Challenger Graham
Stanley's View
scg1936 at talktalk.net
"Beware of certitude" (Jimmy Reid)
The floggings will continue until morale improves!
Stanley's View
scg1936 at talktalk.net
"Beware of certitude" (Jimmy Reid)
The floggings will continue until morale improves!
-
Stanley
- Global Moderator
- Posts: 90439
- Joined: 23 Jan 2012, 12:01
- Location: Barnoldswick. Nearer to Heaven than Gloria.
Re: Shed Matters 3
I started this morning by drilling the oil holes, then I reamed the bores again by hand to get the burrs out.
A last spell of polishing and edge breaking and I called the bearings finished.

Next I addressed the small pivot bearings that are part of the parallel motion and the valve gear. That's all the brass bearings finished and ready for fitting, but we have other matters to attend to before that happens.
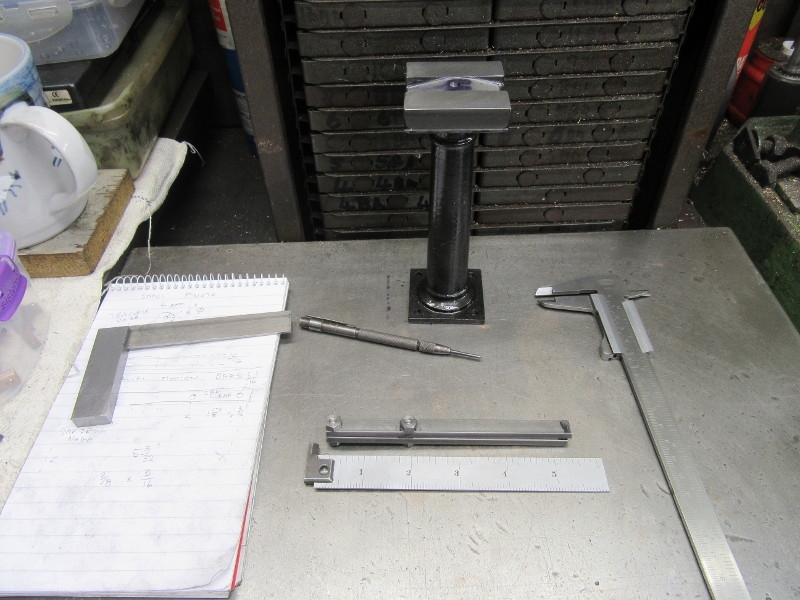
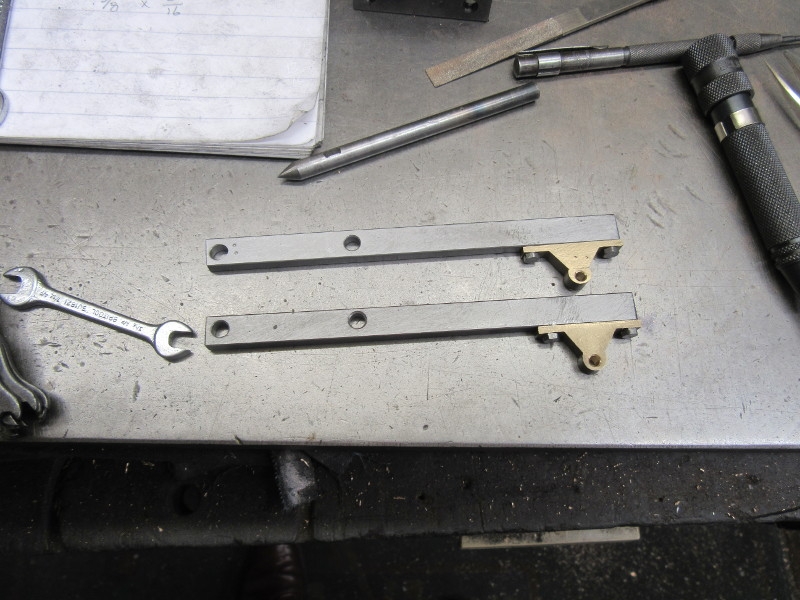
Next I started on the bars that support the parallel motion and are attached to the top of the column. I cut the stock and bolted them together so I had could square the end and get an accurate measure of the overall length. That's the stage I knocked off on, tomorrow I'll finish the matched bars and fit them complete with brass pivots.
Stanley Challenger Graham
Stanley's View
scg1936 at talktalk.net
"Beware of certitude" (Jimmy Reid)
The floggings will continue until morale improves!
Stanley's View
scg1936 at talktalk.net
"Beware of certitude" (Jimmy Reid)
The floggings will continue until morale improves!
-
Stanley
- Global Moderator
- Posts: 90439
- Joined: 23 Jan 2012, 12:01
- Location: Barnoldswick. Nearer to Heaven than Gloria.
Re: Shed Matters 3
2X 12" lengths of 5BA studding have arrived and are in the treasure chest.
Stanley Challenger Graham
Stanley's View
scg1936 at talktalk.net
"Beware of certitude" (Jimmy Reid)
The floggings will continue until morale improves!
Stanley's View
scg1936 at talktalk.net
"Beware of certitude" (Jimmy Reid)
The floggings will continue until morale improves!
-
Stanley
- Global Moderator
- Posts: 90439
- Joined: 23 Jan 2012, 12:01
- Location: Barnoldswick. Nearer to Heaven than Gloria.
Re: Shed Matters 3
We are working on the basis for the parallel motion. First job was to cut the bars to exactly 5 3/32" long with square ends. Easiest way to do this was under the mill.

A good start, we have two bars that are exactly the right length and all the sharp edges broken.Then I clamped them in place on the head of the column and marked the 2BA holes by popping the 3/16" drill in each hole.
Then I sorted out the two pivot bearings I needed to fix. I marked both the bars and the bearings with witness marks so they stay in the same relationship. I used the bearing to mark the bar where I need to drill and tap for the 7BA bolts that will be used to fix them.

As you may know I hate 7BA, it is too small for my eroded talents and eyesight but it has to be done. The very worst thing that can happen is to break a tap in the hole and so of course I did exactly that. Luckily there was enough poking out of the hole for me to get hold of it and extract it. I went up two sizes in my tapping drill to make the tapping easier. A good decision!
First one finished!
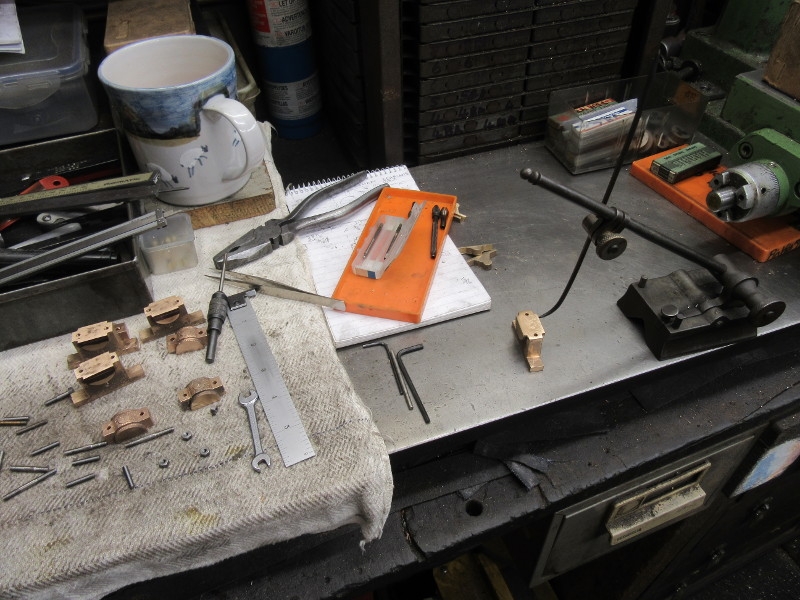
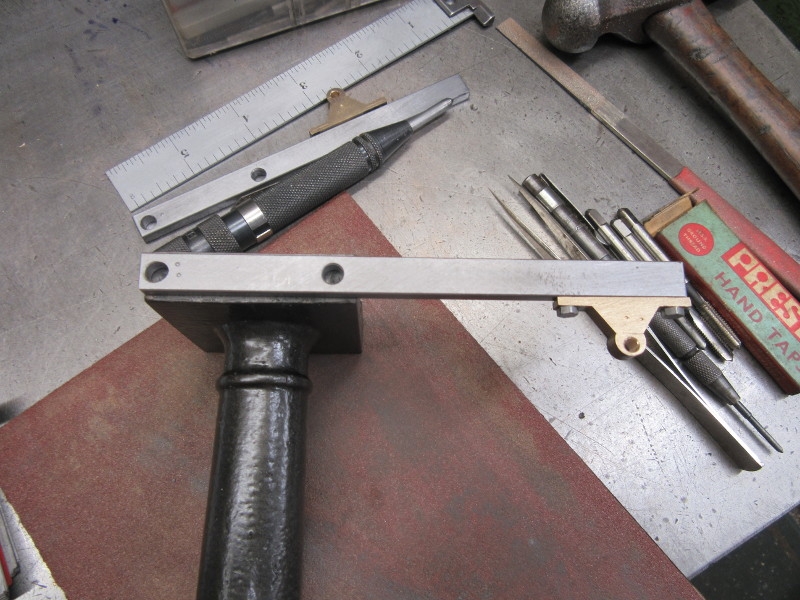
Some time later.... I have them both finished and ready for fastening to the head of the column.

This gives you the overall idea. No problem about tomorrow's 2BA, compared with 7BA they are enormous. Thank God.
Stanley Challenger Graham
Stanley's View
scg1936 at talktalk.net
"Beware of certitude" (Jimmy Reid)
The floggings will continue until morale improves!
Stanley's View
scg1936 at talktalk.net
"Beware of certitude" (Jimmy Reid)
The floggings will continue until morale improves!
-
Stanley
- Global Moderator
- Posts: 90439
- Joined: 23 Jan 2012, 12:01
- Location: Barnoldswick. Nearer to Heaven than Gloria.
Re: Shed Matters 3
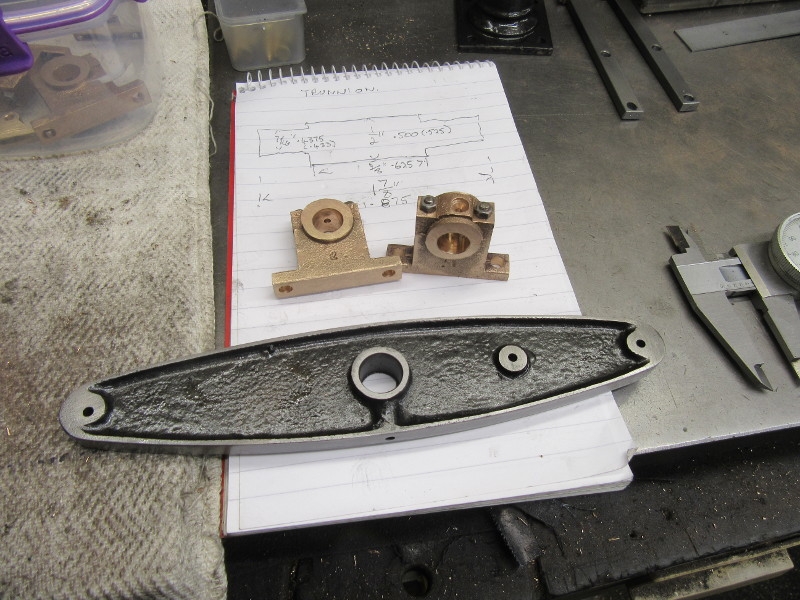
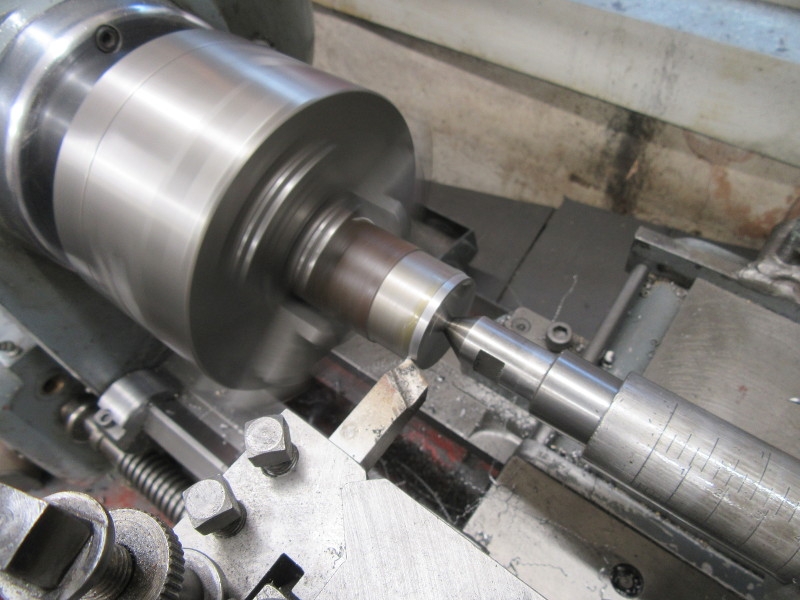
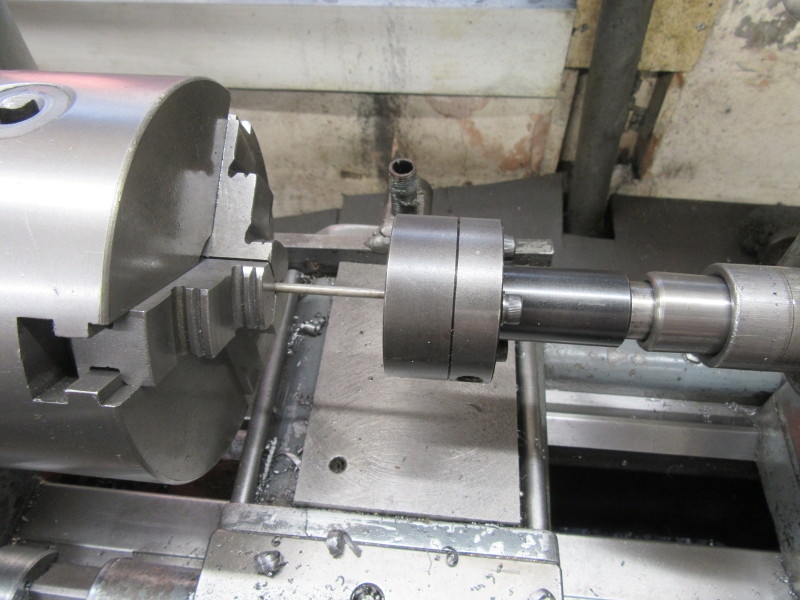
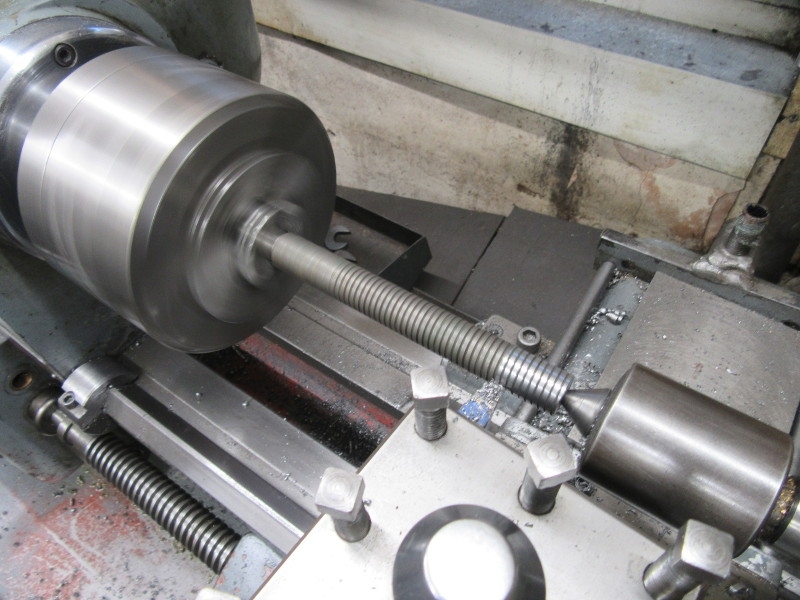
Things are looking a bit more manageable this morning. I have to make and fit the trunnion shaft to the beam and fit the ends to the bearings. Plain but accurate turning as I am not going by the measurements on the drawing but the actual sizes of the bore in the beam and the bearings. The two bearings are matched and the ones that I designated for the beam.
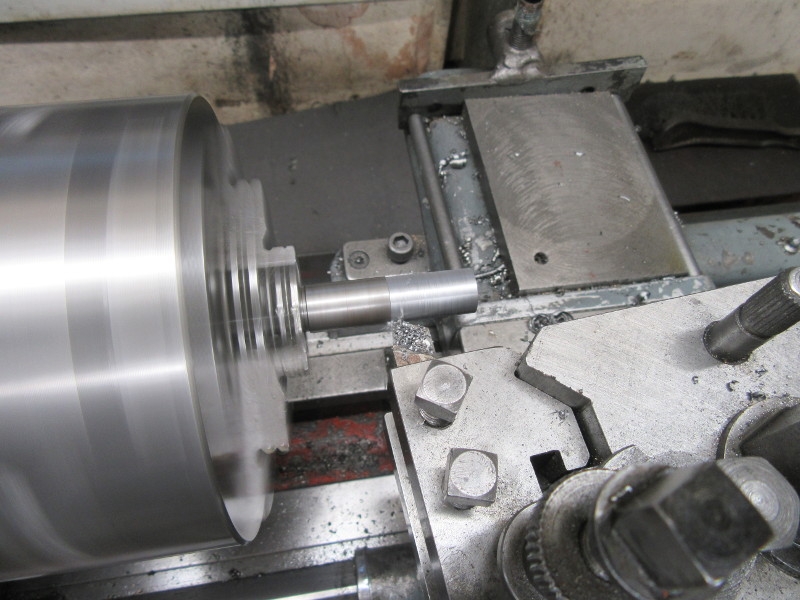
The stock supplied is under size so I sorted out a piece of scrap, sharpened my cutter, checked the height and got on with it.
First stage, the beam is a perfect but easy fit on the shaft, no chance of bursting the casting with interference fits!
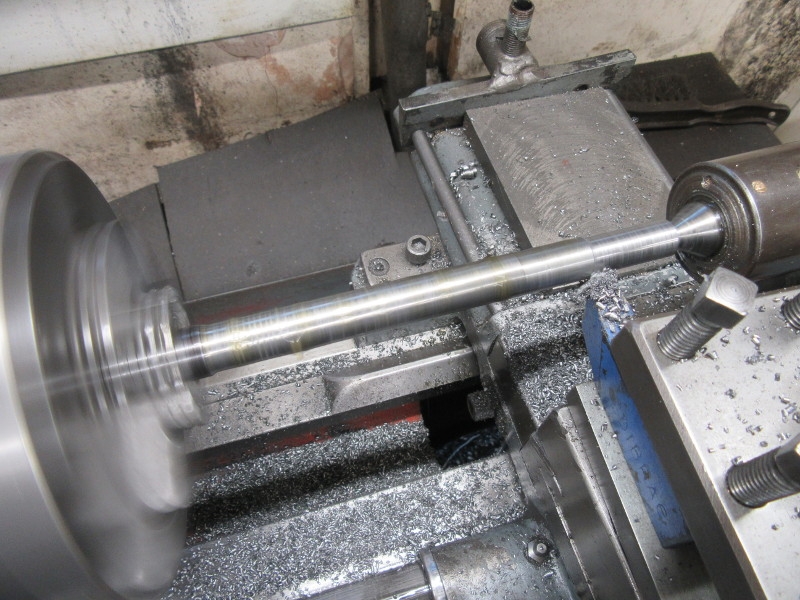
Next stage, the trunnions are a perfect running fit in the bearings.

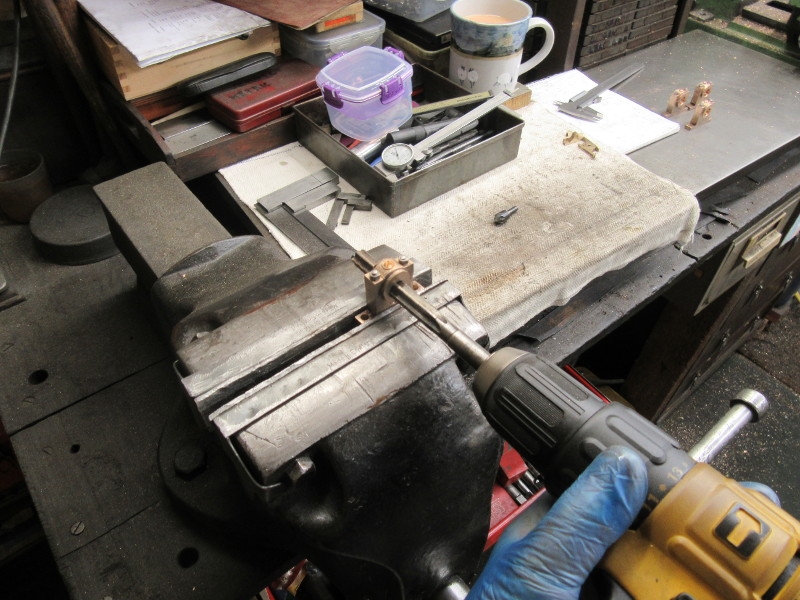
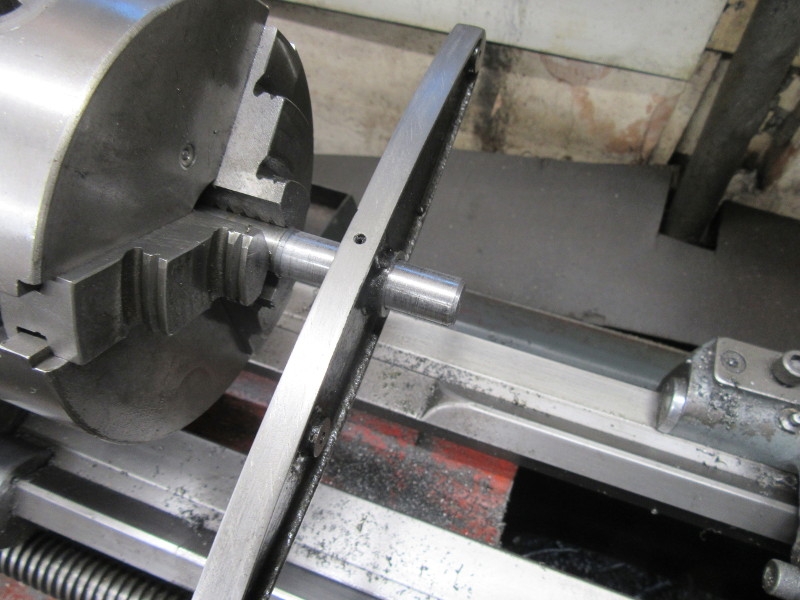
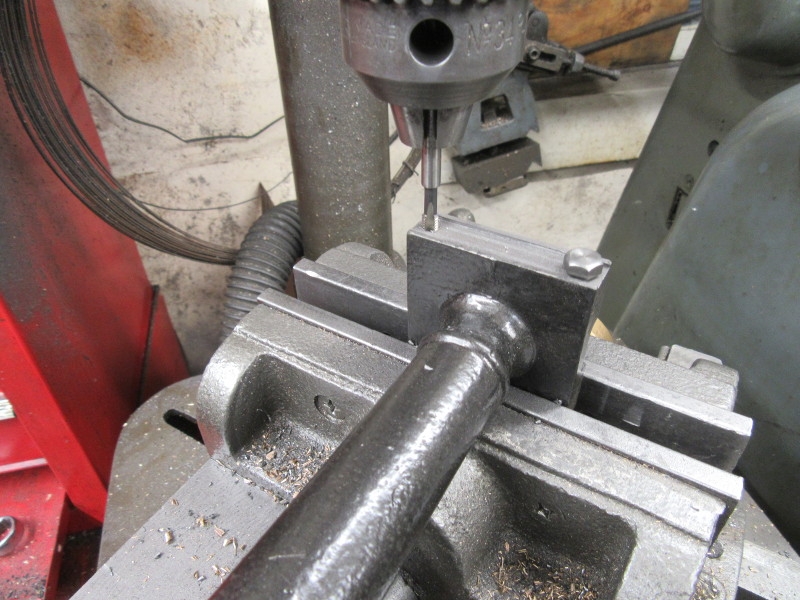
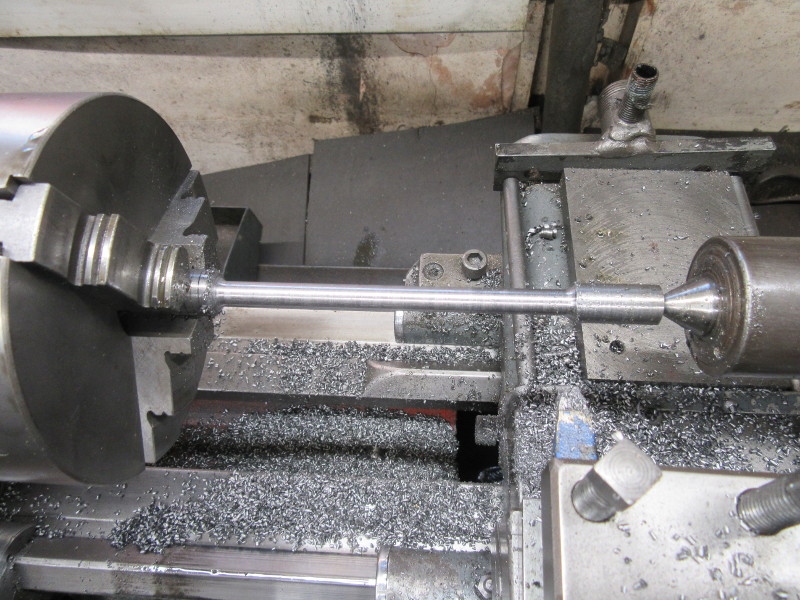
Then under the pillar drill after Loctiting the shaft and drill for the 3/32" oin that will anchor the shaft in the beam. Then drive the pin home and cut it off flush with the beam.

Here's what I am aiming for. I needed to know how the drillings for the bars and the bearings match up. It's going to be all right.

Knocking off time. Tomorrow we mark drill and fit first the bars and then the bearings with 2BA bolts. They are a sensible size. Nice morning with good progress. I like small steps.
Stanley Challenger Graham
Stanley's View
scg1936 at talktalk.net
"Beware of certitude" (Jimmy Reid)
The floggings will continue until morale improves!
Stanley's View
scg1936 at talktalk.net
"Beware of certitude" (Jimmy Reid)
The floggings will continue until morale improves!
-
Stanley
- Global Moderator
- Posts: 90439
- Joined: 23 Jan 2012, 12:01
- Location: Barnoldswick. Nearer to Heaven than Gloria.
Re: Shed Matters 3
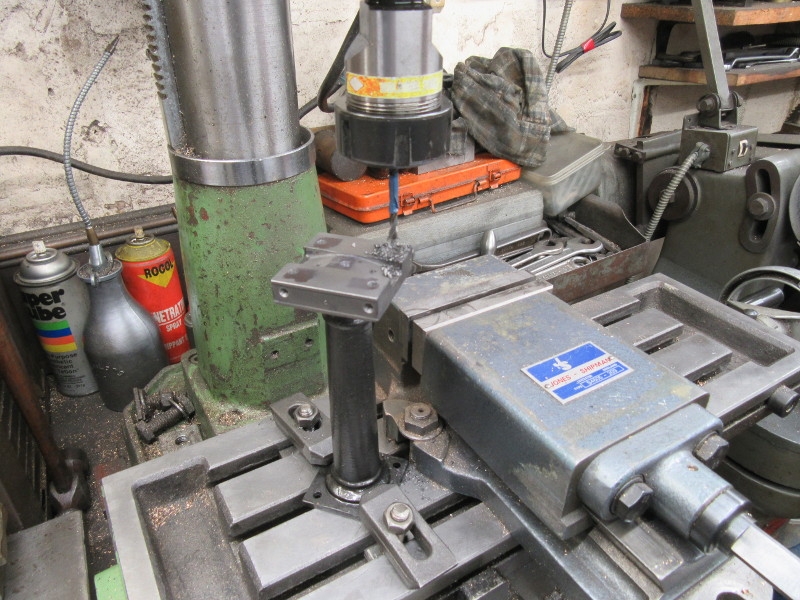
Today's task is to permanently fix the bars for the parallel motion and the beam on the column. This involves accurately drilling and tapping eight holes, nowt to it. Here I am tapping the holes for fitting the bars that support the anchor for the Watt motion.
Exactly the same process for the four drillings in the head of the column which locate and fix the beam trunnions in their bearings. All the drillings were dead accurate apart from one which was ever so slightly out and I had to pop the 2BA tap in the hole in the bearing, that cured it.

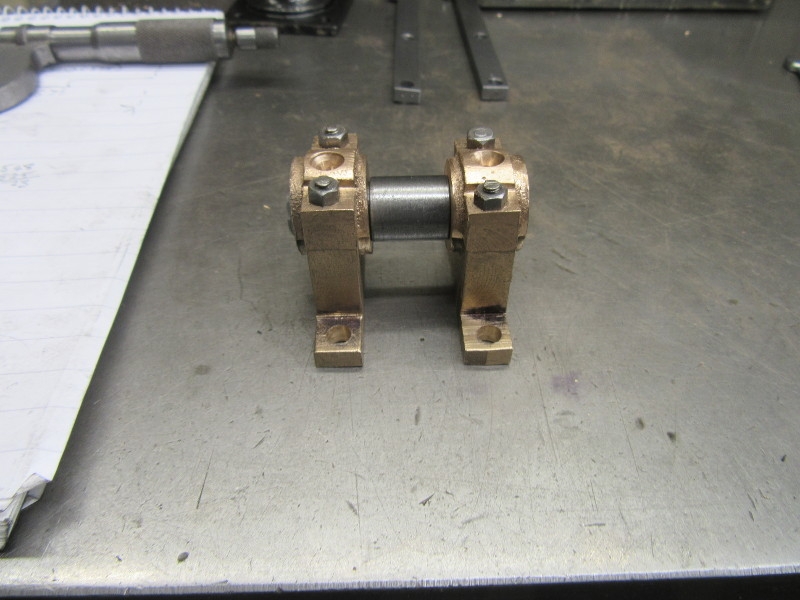
Here we are at knocking off time after two hours of careful work. The fits are very good, too good in the case of the beam. I had the bearings that close that when I tightened them down onto the head the beam was too stiff so I popped some oil in the bearings and slackened the bearing caps back slightly. That worked and as the engine is run and bedded in the caps can be tightened down fully and end up as a perfect fit. Notice that I have put a 1/8" bar in the pivot bearings to make sure they are perfectly in line. It's not been oiled but you can rotate it with your fingers so It's OK. A nice morning, quietly away and a very good result. I am pleased.
Stanley Challenger Graham
Stanley's View
scg1936 at talktalk.net
"Beware of certitude" (Jimmy Reid)
The floggings will continue until morale improves!
Stanley's View
scg1936 at talktalk.net
"Beware of certitude" (Jimmy Reid)
The floggings will continue until morale improves!
-
Stanley
- Global Moderator
- Posts: 90439
- Joined: 23 Jan 2012, 12:01
- Location: Barnoldswick. Nearer to Heaven than Gloria.
Re: Shed Matters 3
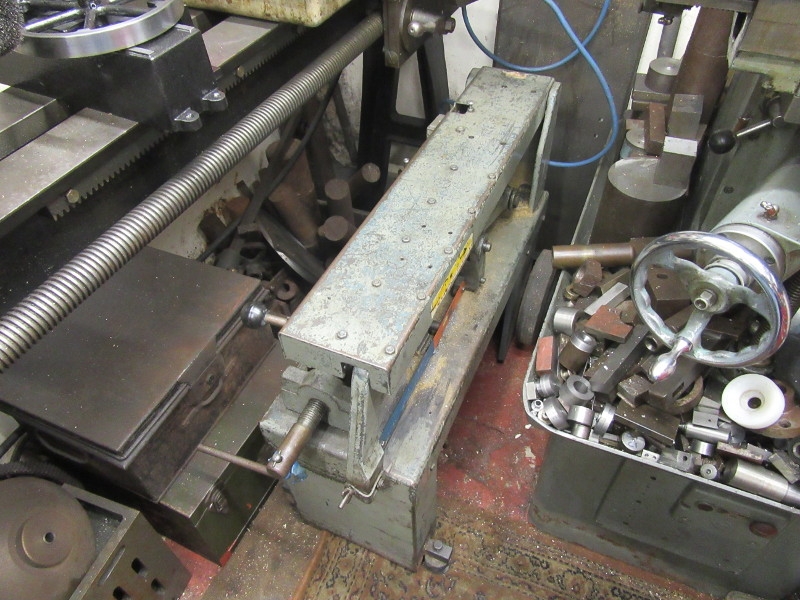
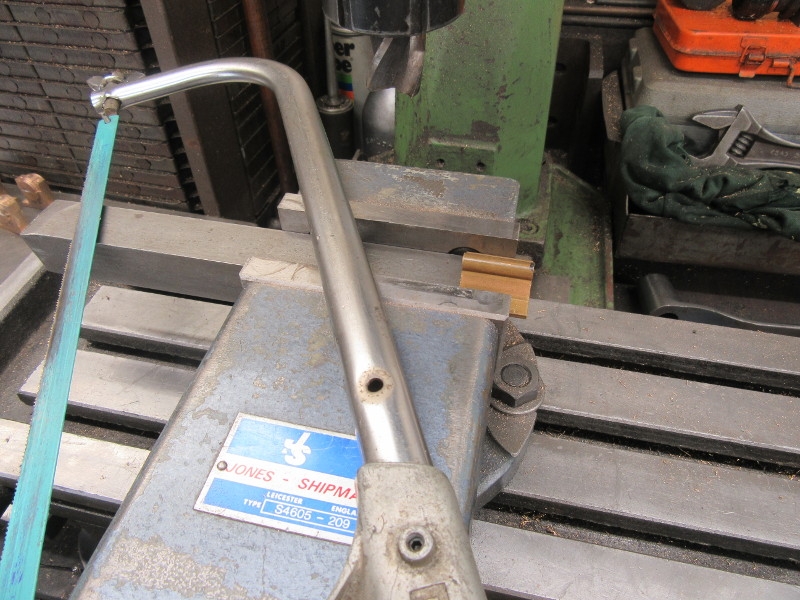
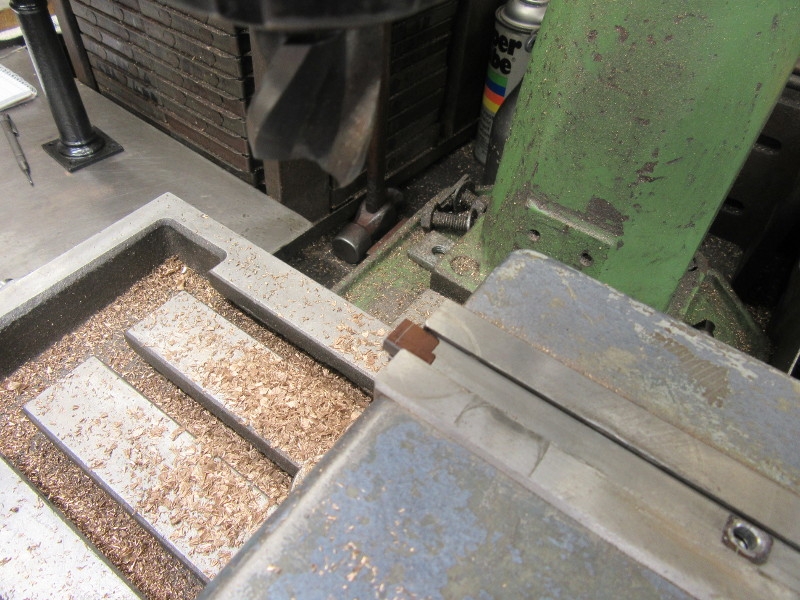
The design committee have decided on the connecting rod as the next target. I couldn't find any stock in the kit I got so I went in the scrap box and found a rough old bit of scrap that will do. I love making silk purses out of sow's ears! I needed to cut the chewed off ends of it and so Mrs McMaster was the obvious solution. I ran into a problem here that cost me half an hour. When I set the saw on the motor cut out straight away. I soon found the reason. I haven't used her for a long time and a block of square stock had fallen on the bed of the saw and was just in the right place to jam the crank. Problem was I couldn't remember where the reset button was and so had to rear the saw on end to find it. No easy matter but quietly away I got to it, reinstated the saw in its right place and cut the stock. That wasted half an hour!
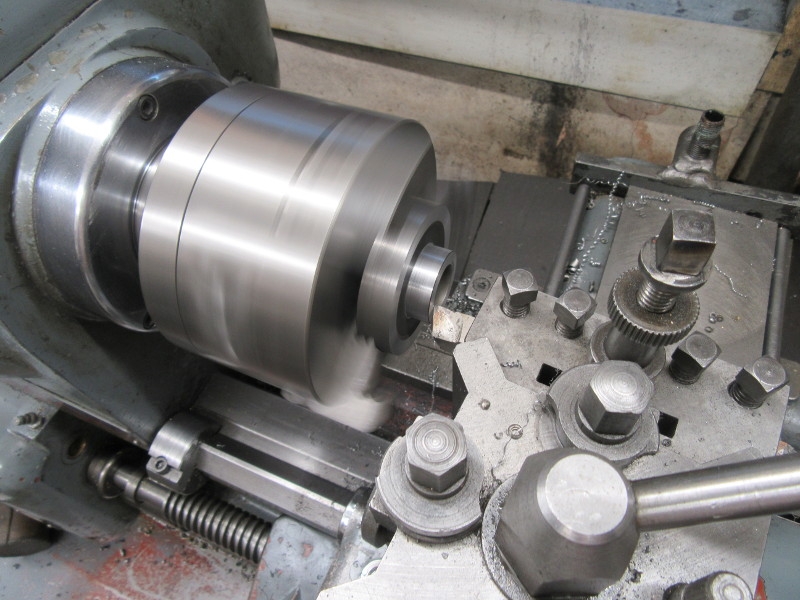
As you can see it didn't look very promising and was only just large enough. I got it set up in the lathe and started knocking it into shape.
I won't bore you with the details but here's where I ended up, I have the length right and the basic shape of the ends and am mulling over whether to put some shape in the body. Not decided yet but I rather favour the plain shank. I'll decide tomorrow. From scrap to what will be useful and quite presentable. I like that.
Stanley Challenger Graham
Stanley's View
scg1936 at talktalk.net
"Beware of certitude" (Jimmy Reid)
The floggings will continue until morale improves!
Stanley's View
scg1936 at talktalk.net
"Beware of certitude" (Jimmy Reid)
The floggings will continue until morale improves!