Shed Matters 3
- Stanley
- Global Moderator
- Posts: 90678
- Joined: 23 Jan 2012, 12:01
- Location: Barnoldswick. Nearer to Heaven than Gloria.
Re: Shed Matters 3
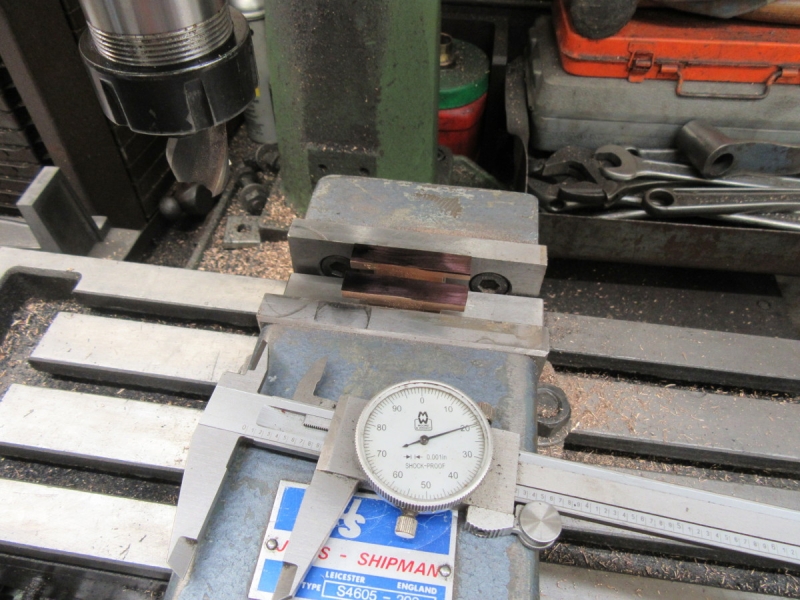
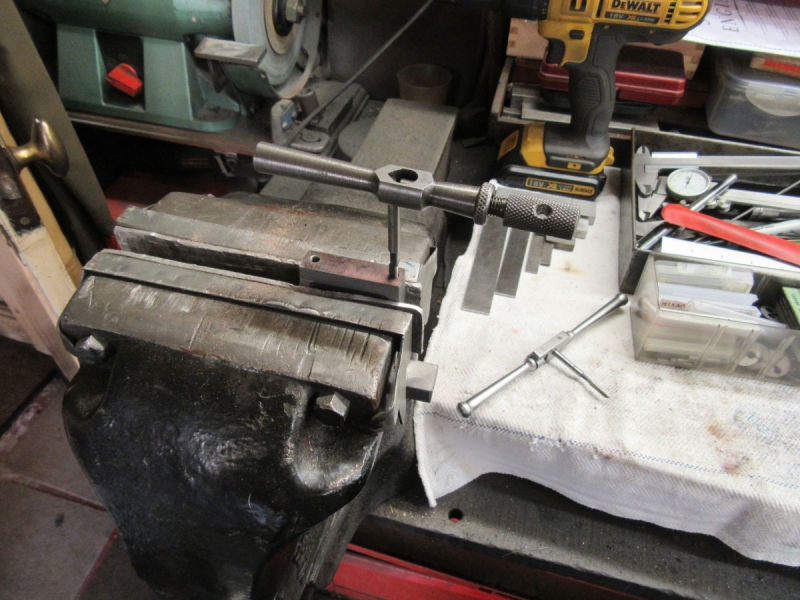
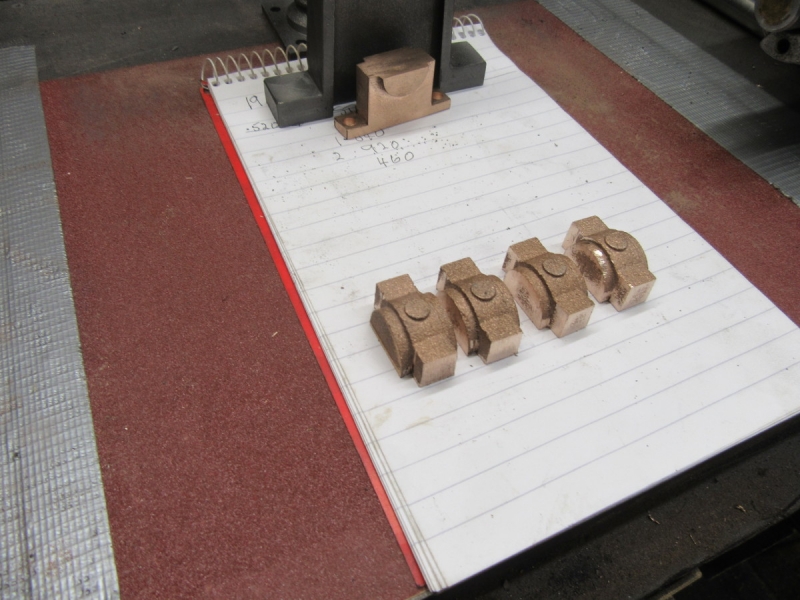
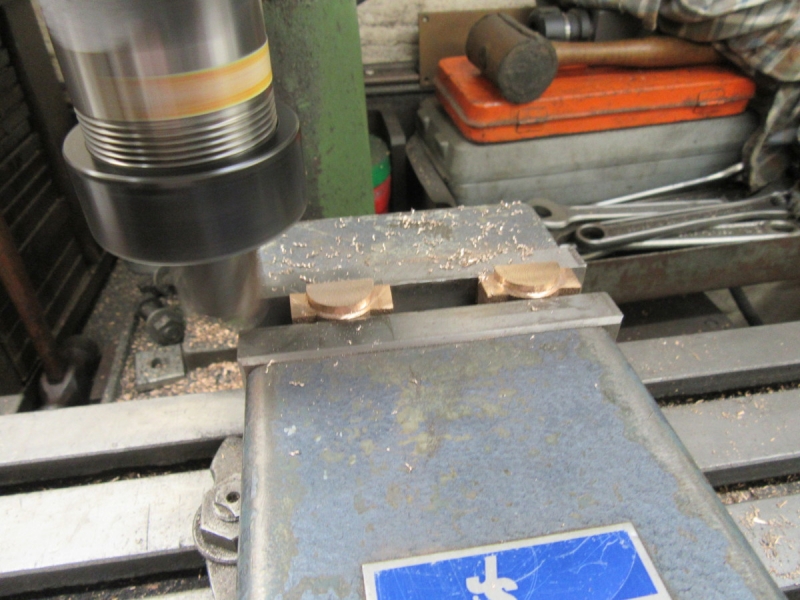
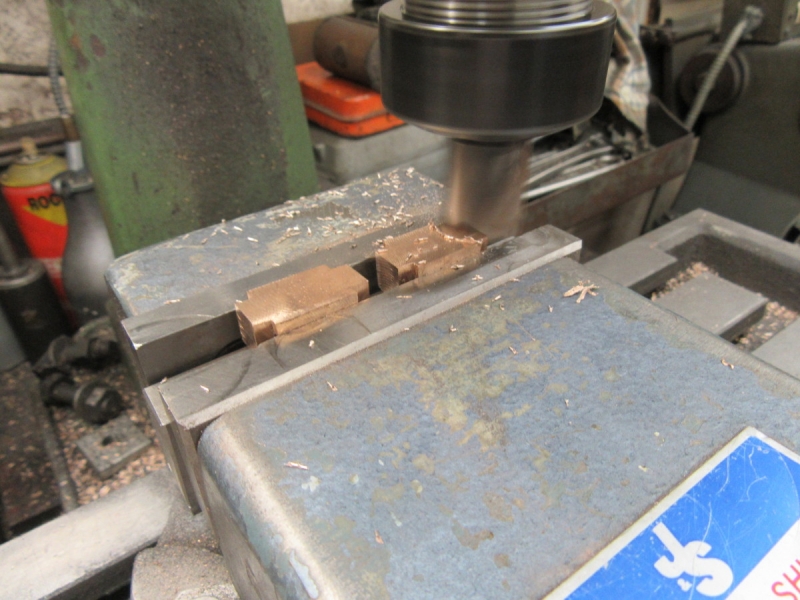
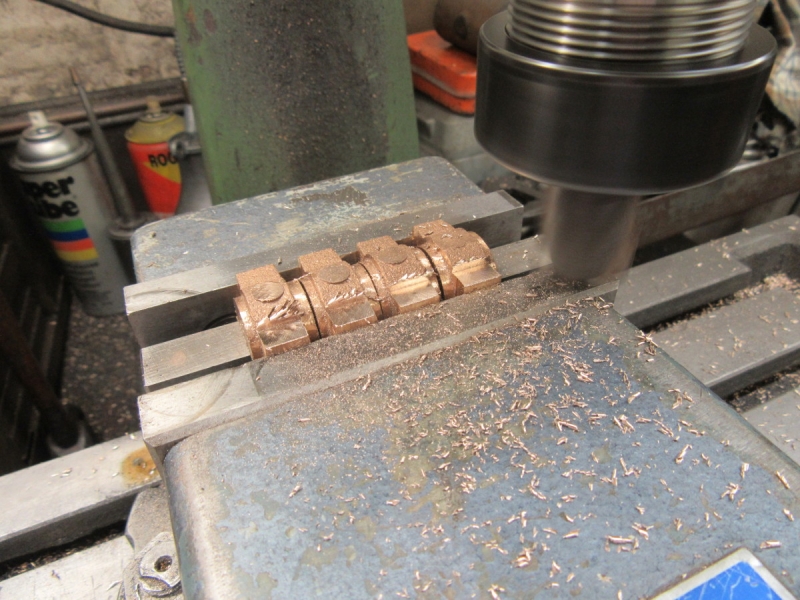
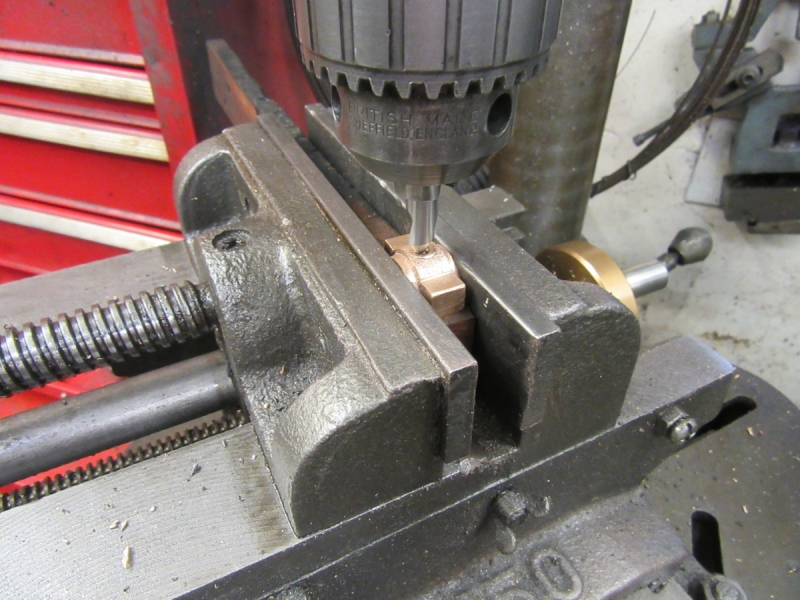
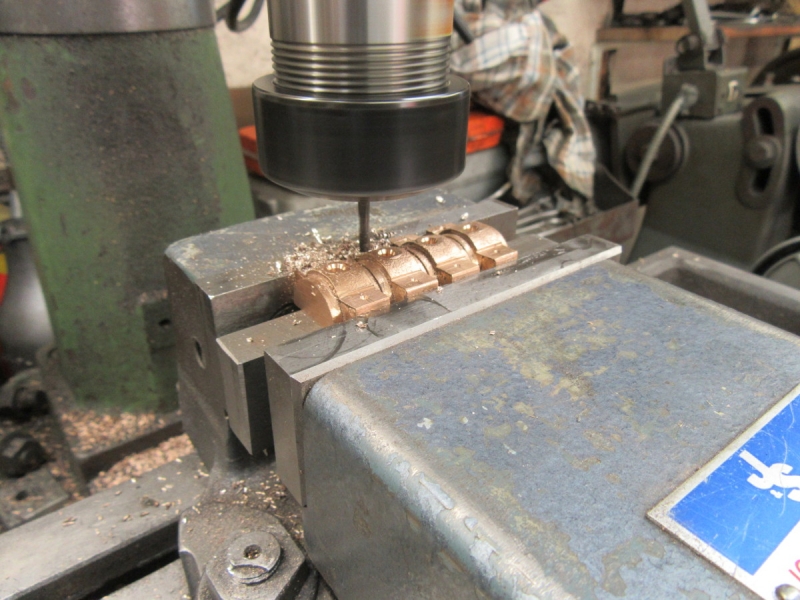
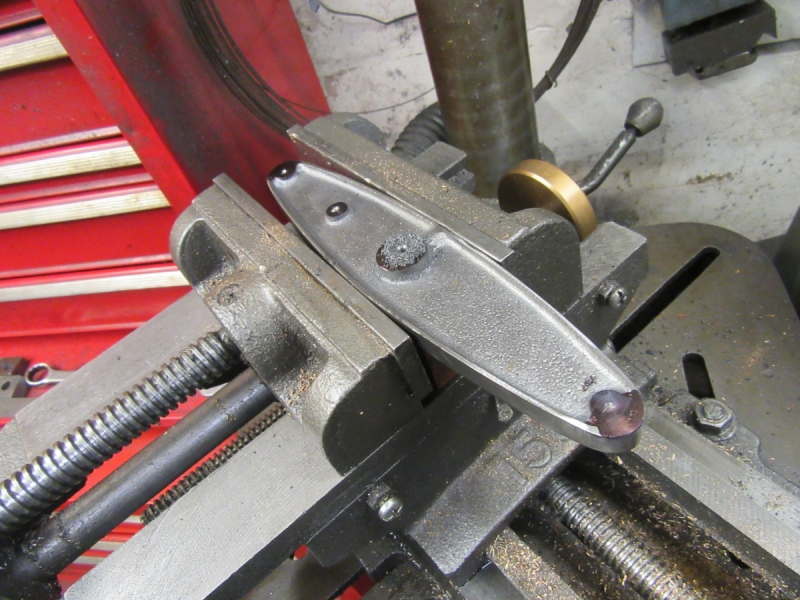
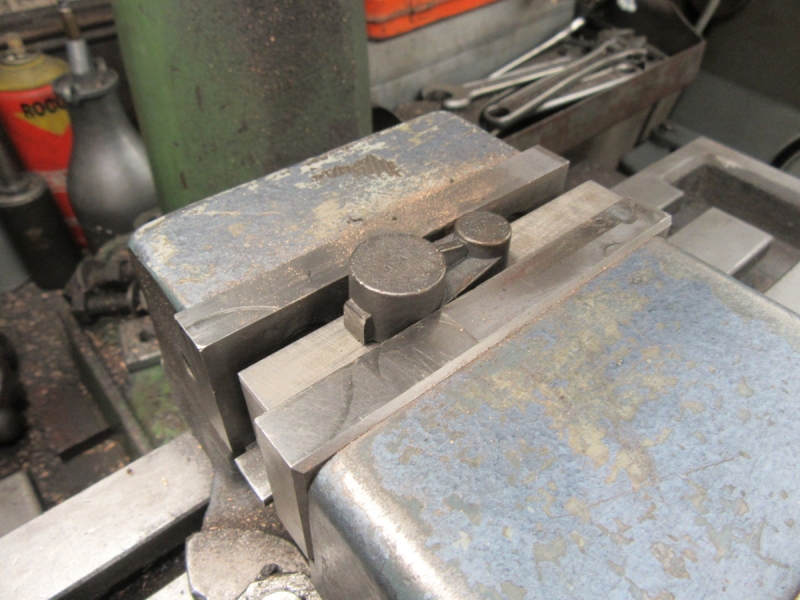
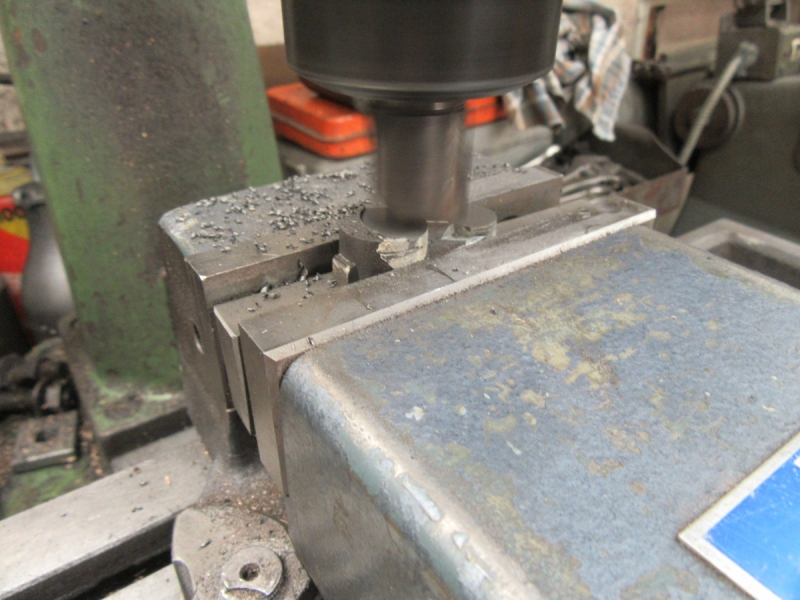
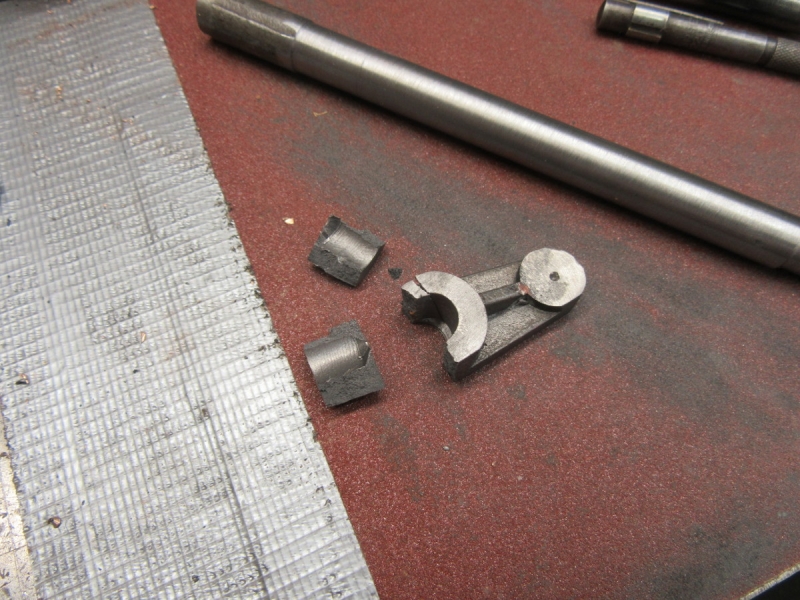
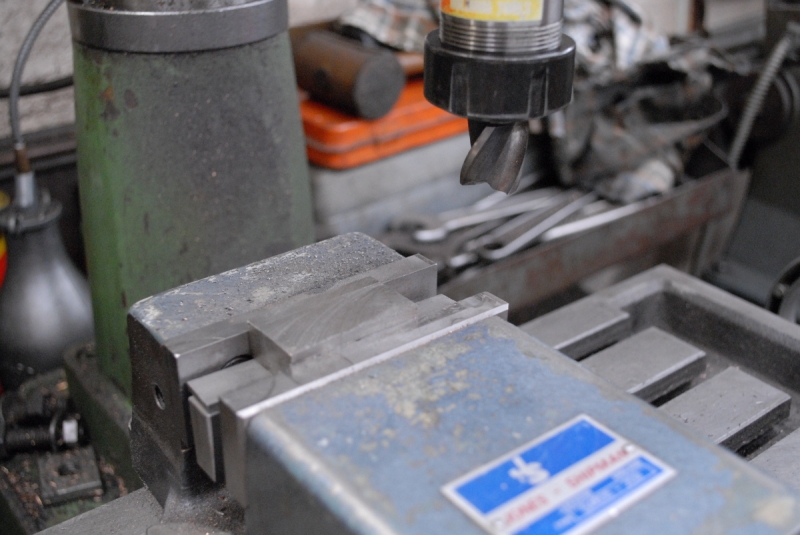
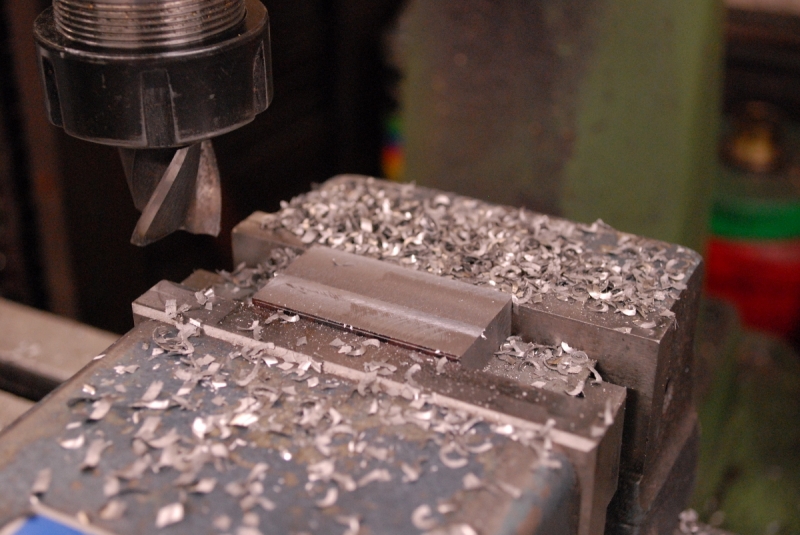
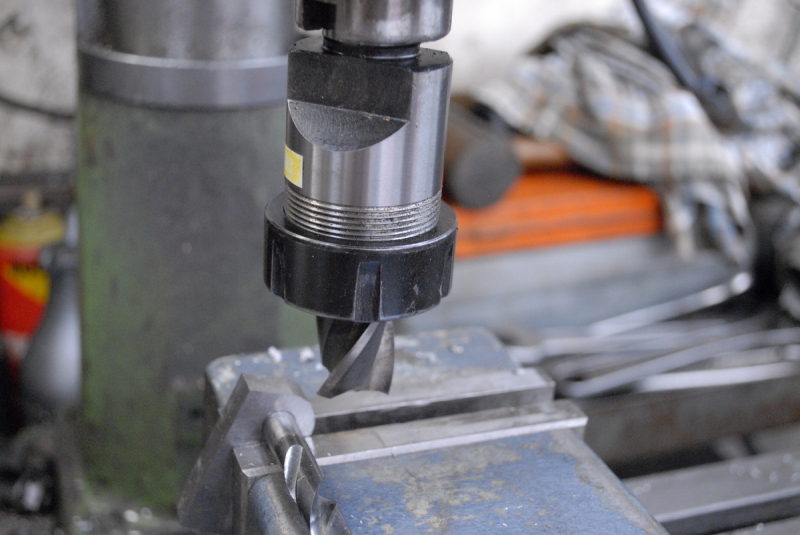
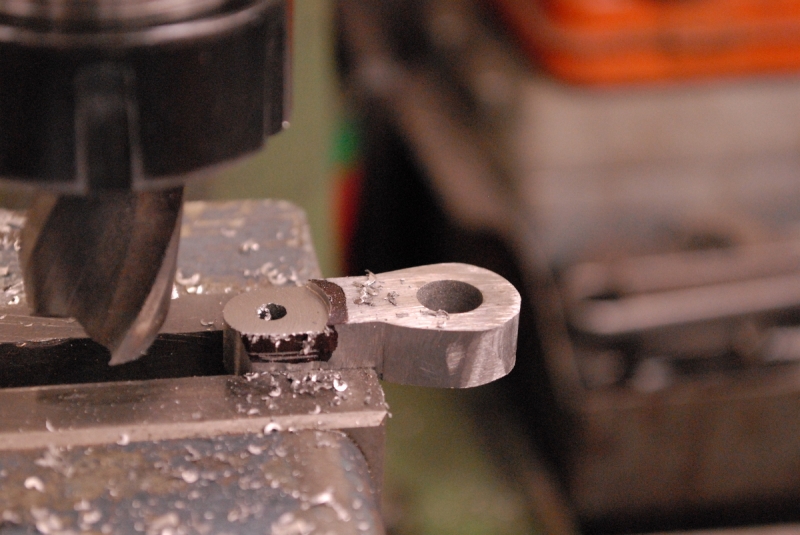
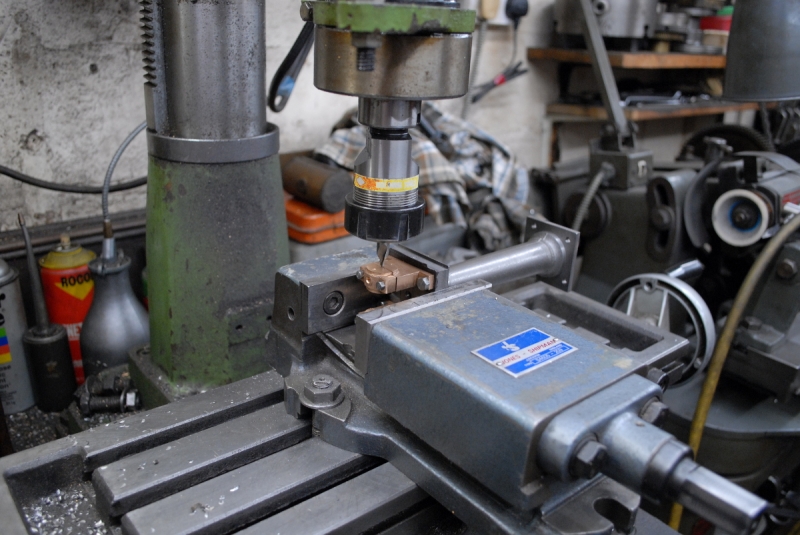
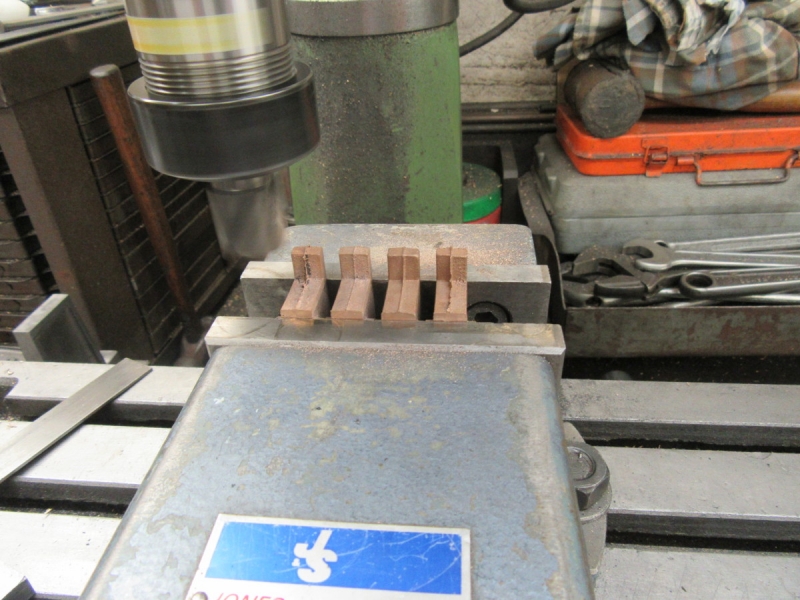
I decided that the castings are best squared up under the mill.
A bit of very careful milling, taking off as little metal as possible.
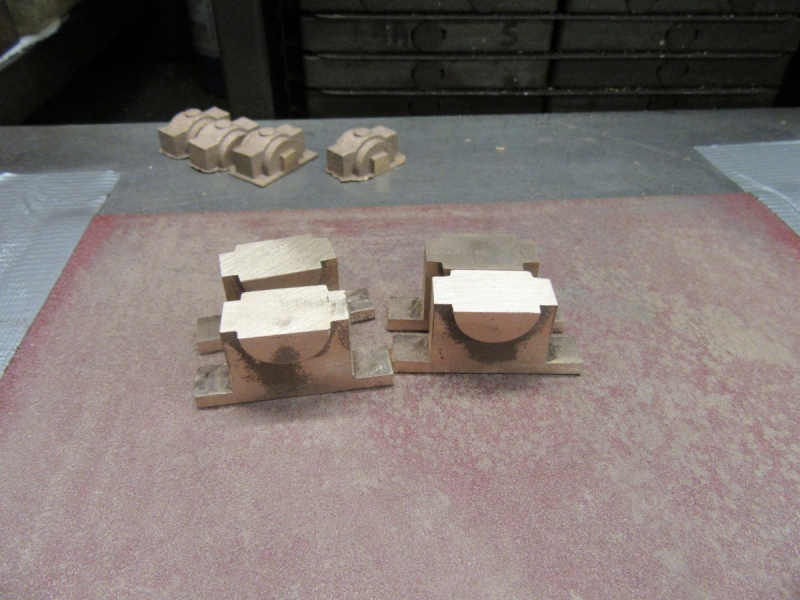
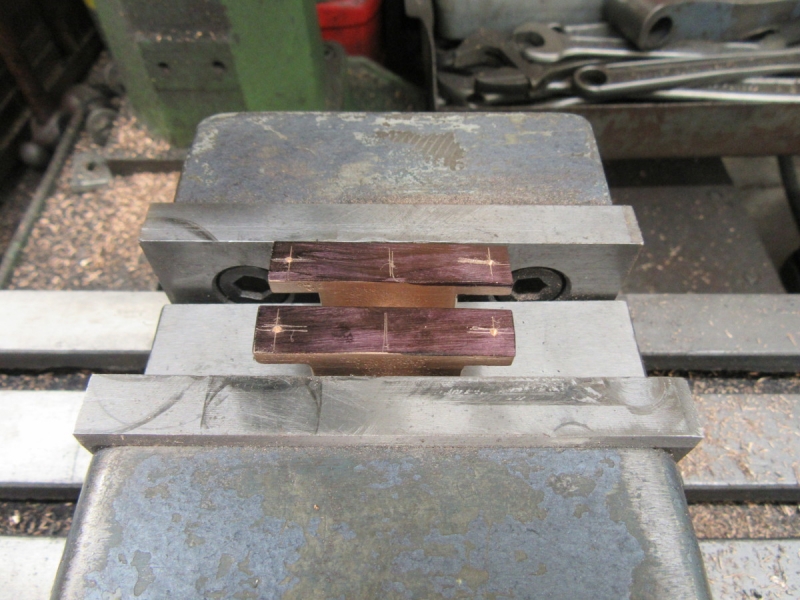
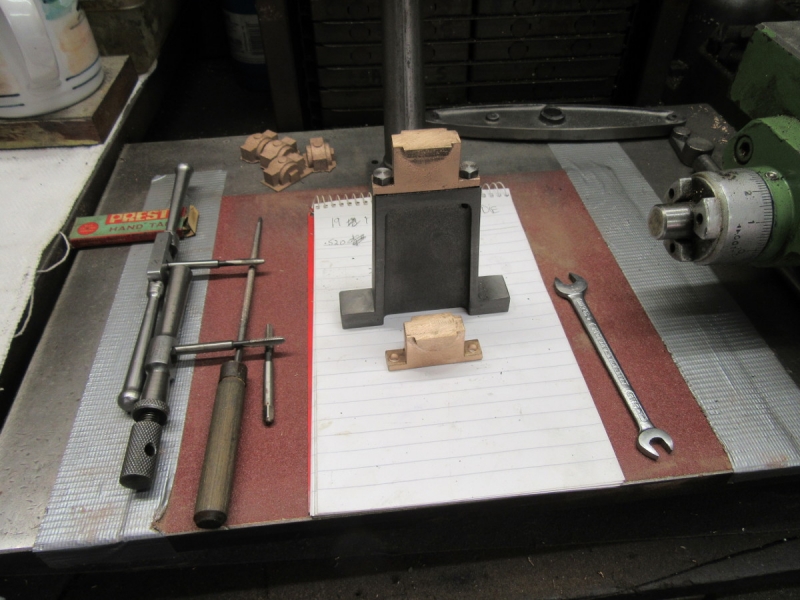
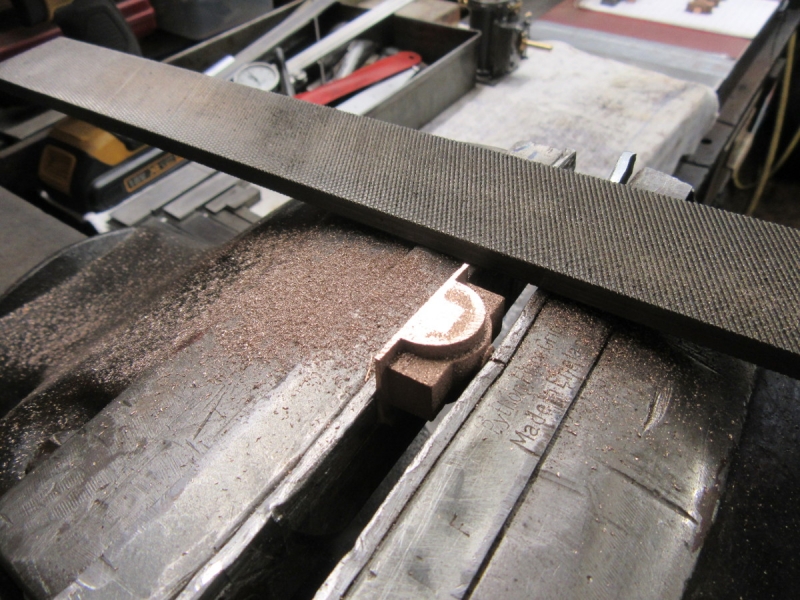
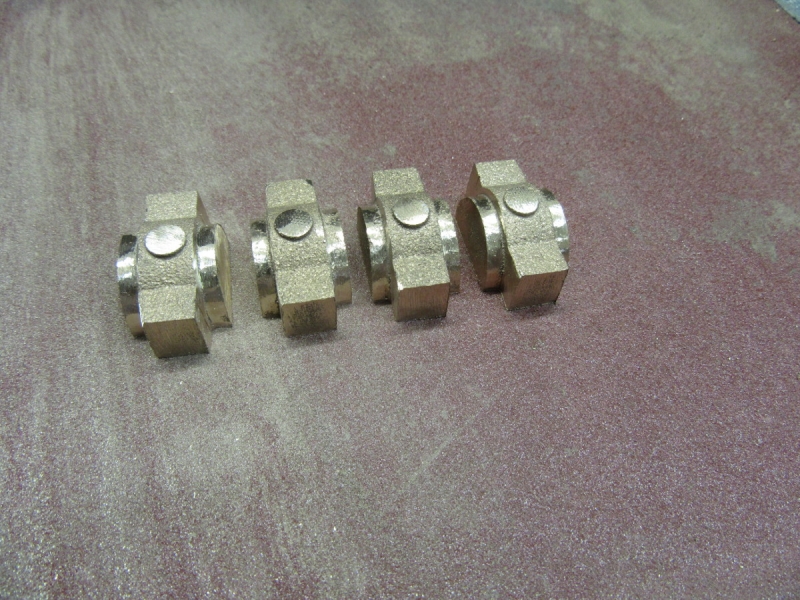
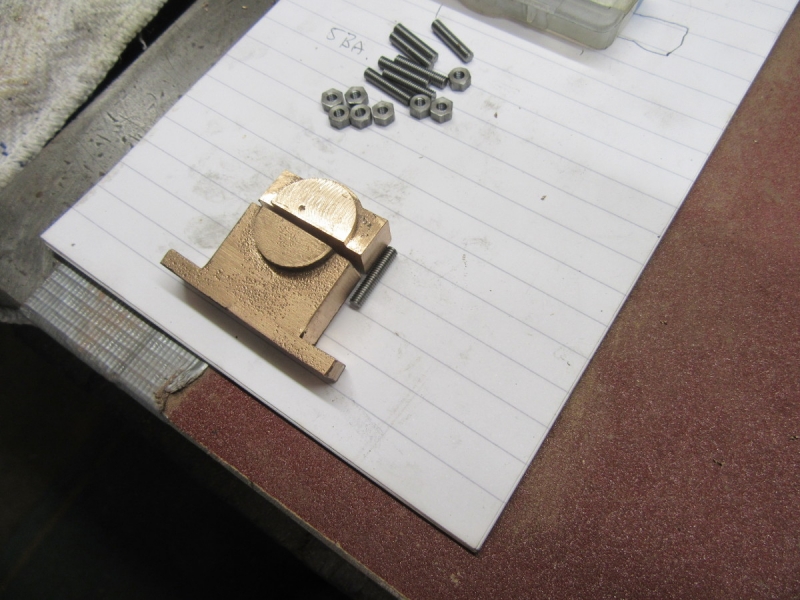
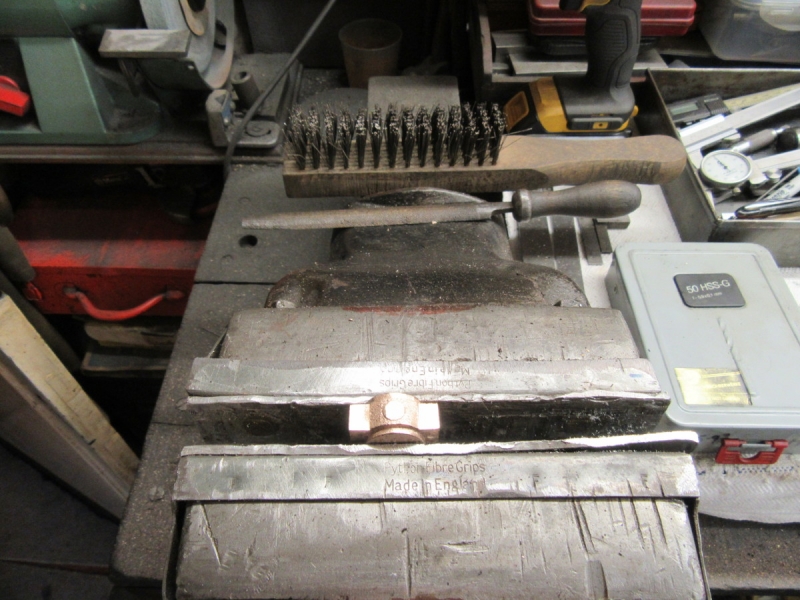
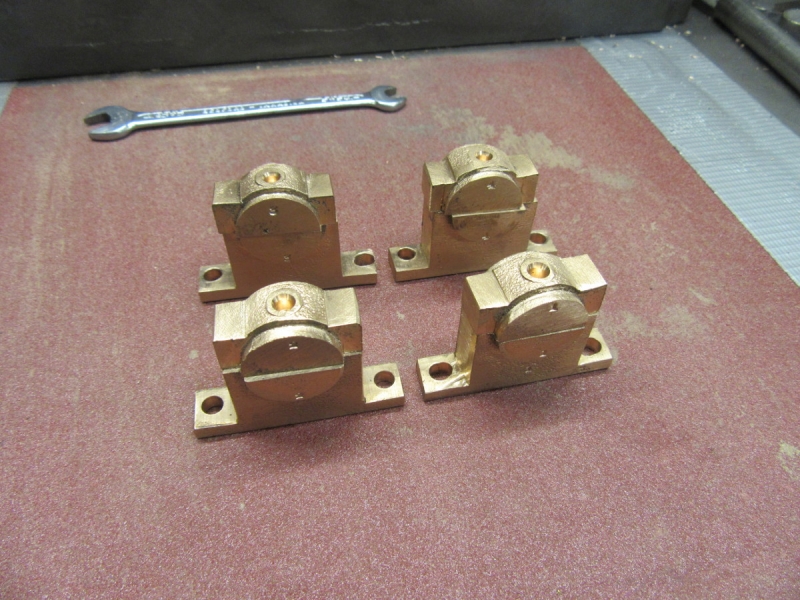
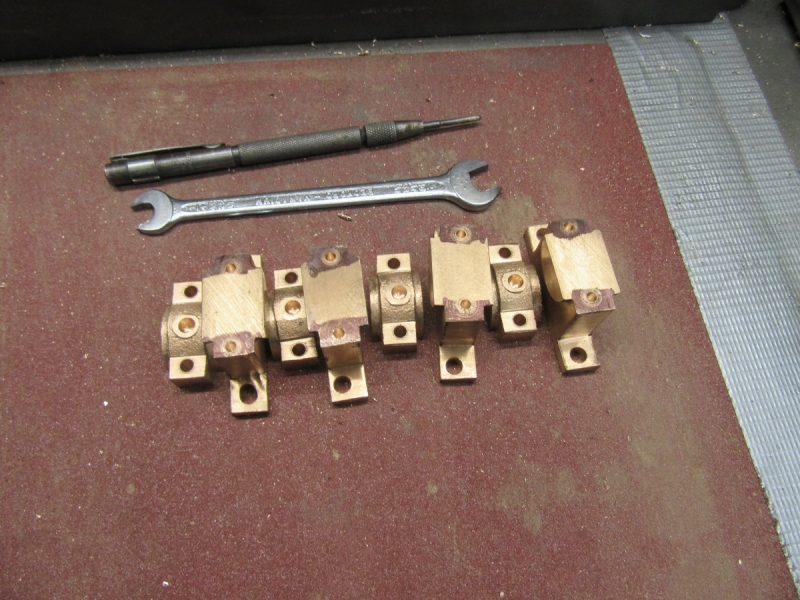
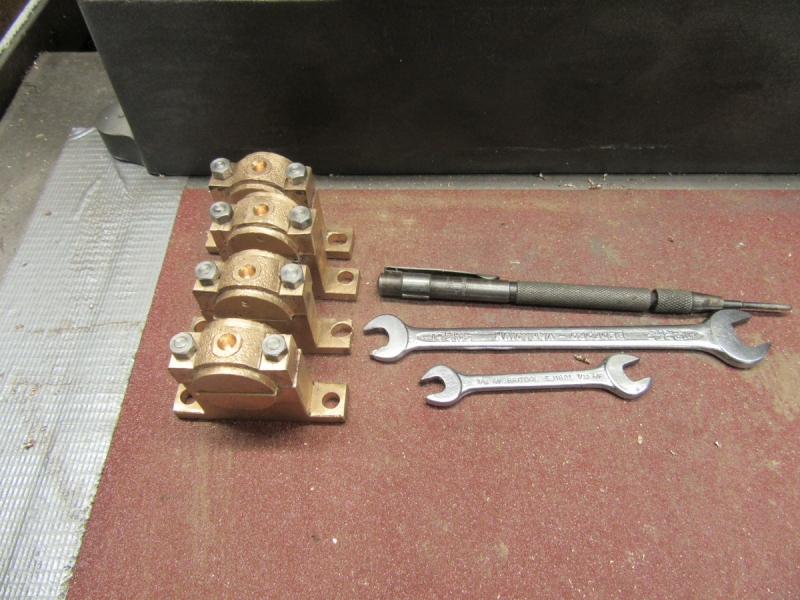
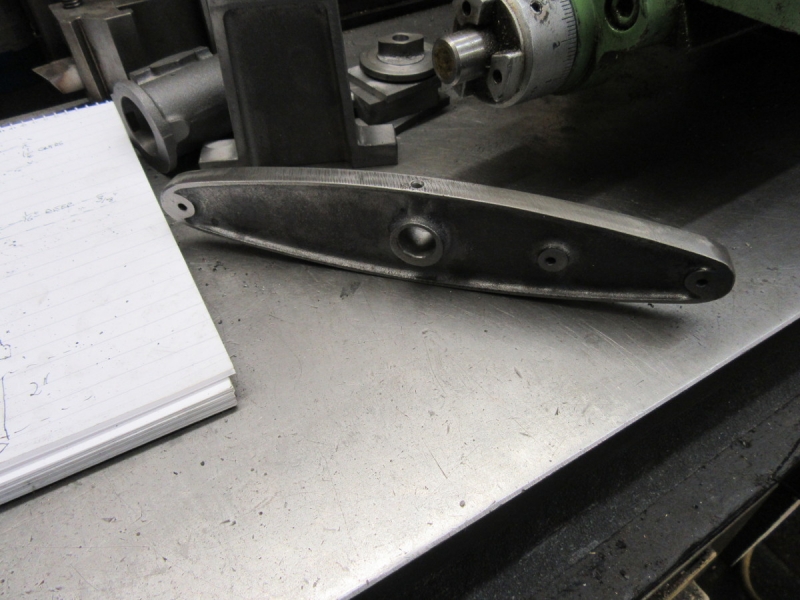
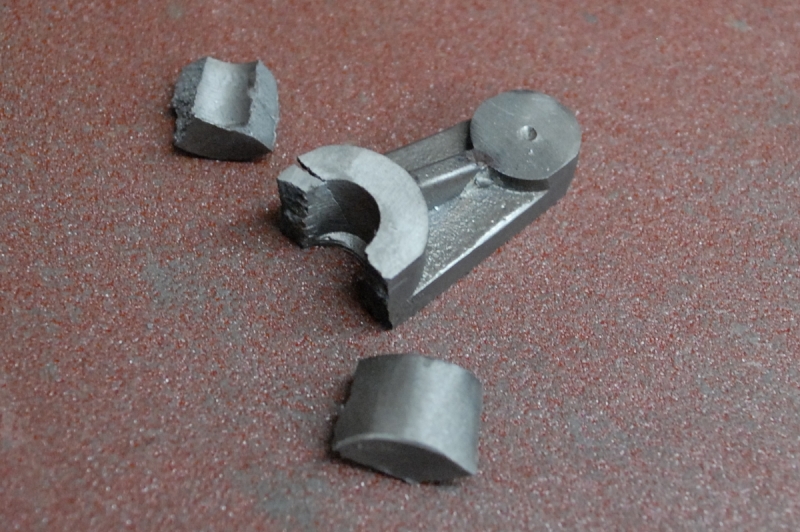
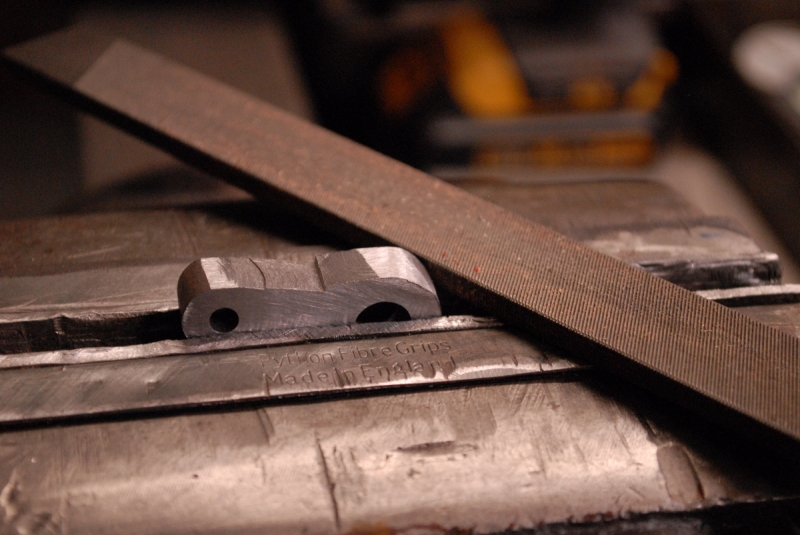
I used the 120 grit paper taped to the surface plate to clean up the unimportant faces and break all the sharp corners.
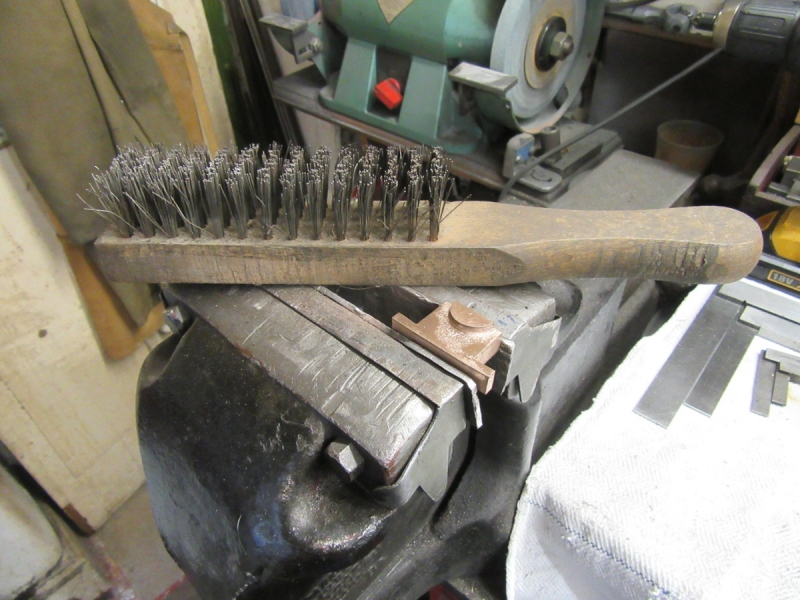
My last blow was to sharpen a wire brush and give them all a good brushing. This cleaned up what the mill and the 120 grit paper had missed.
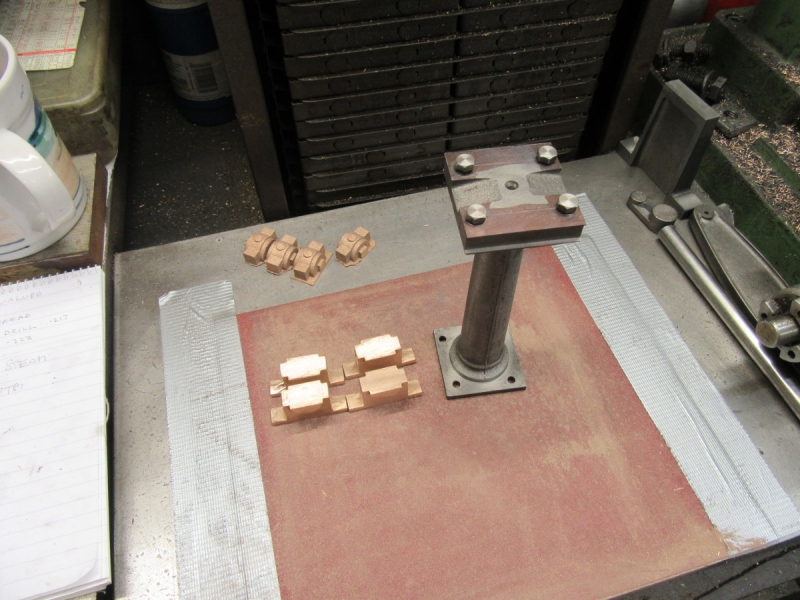
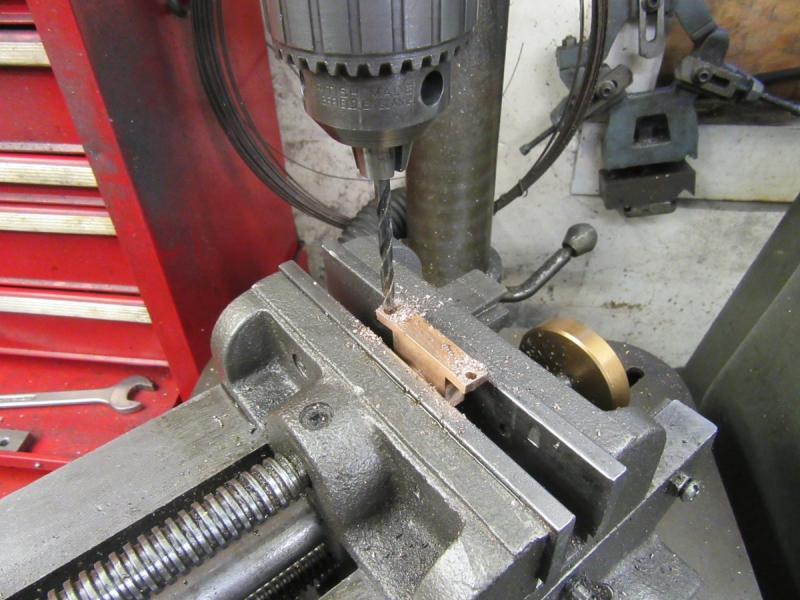
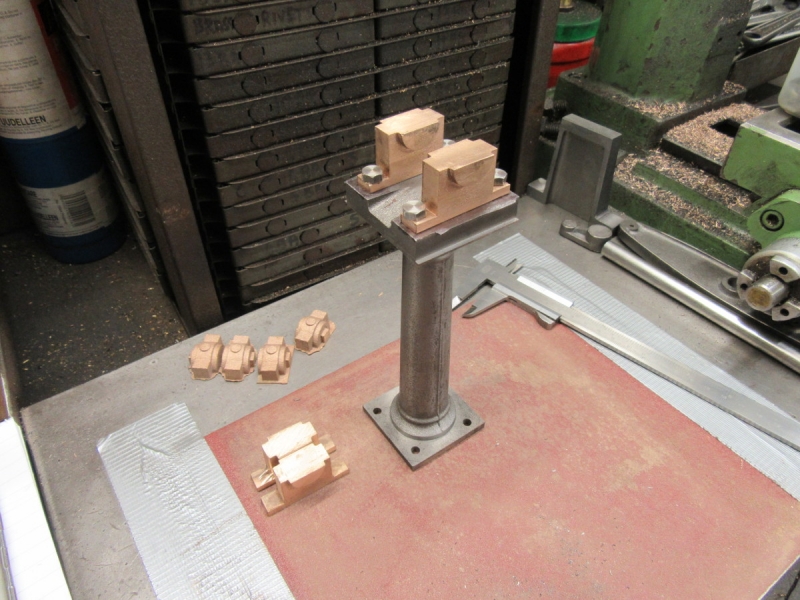
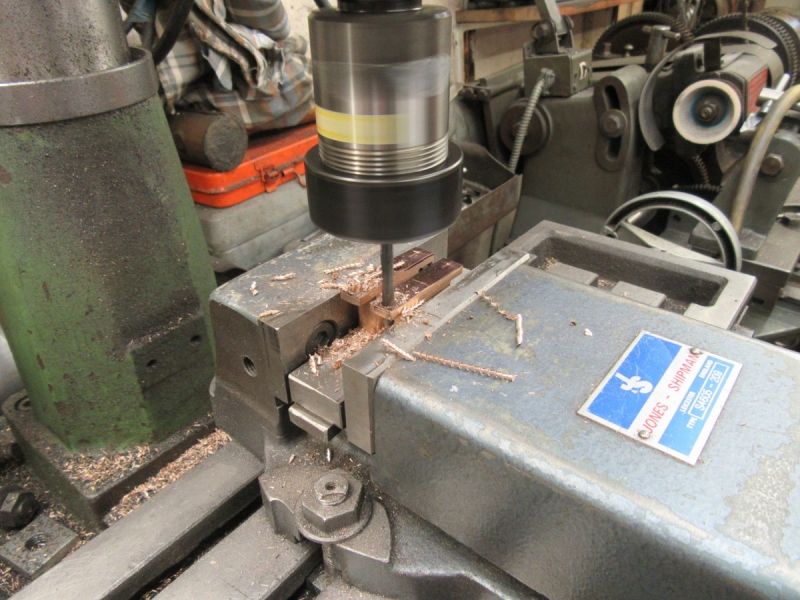
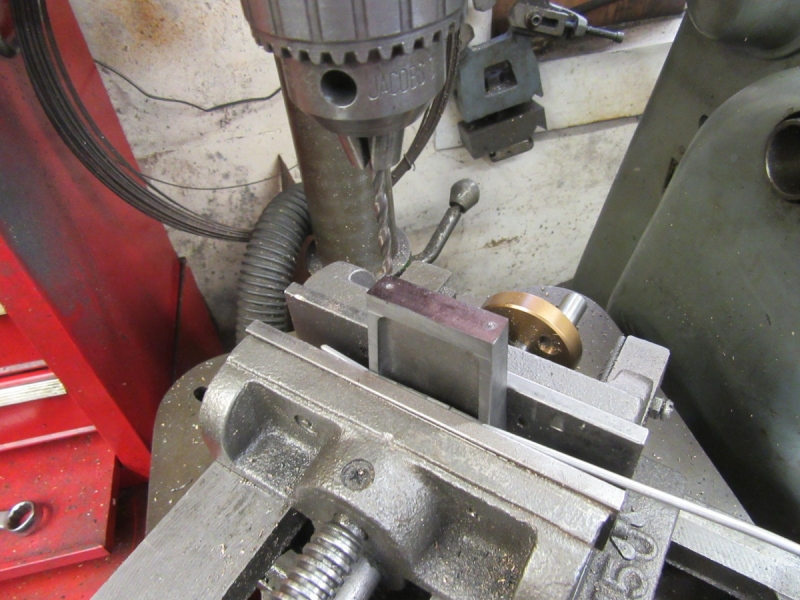
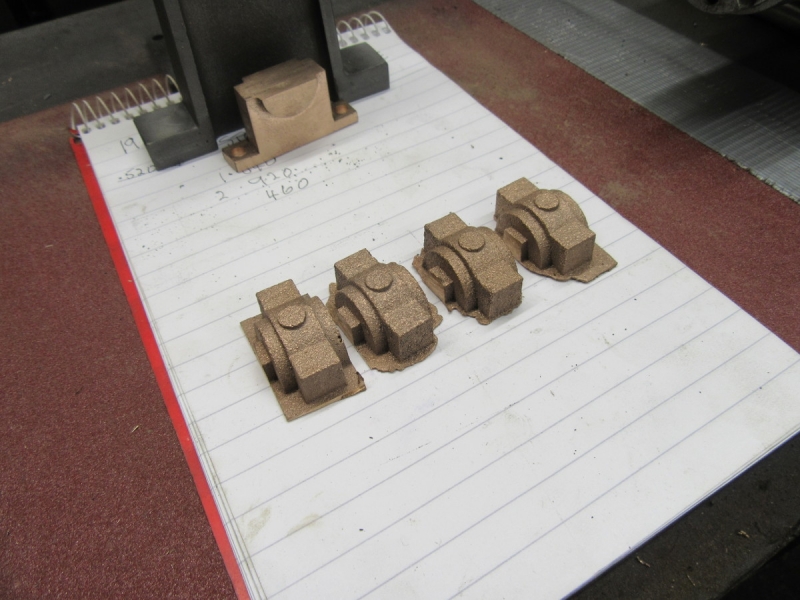
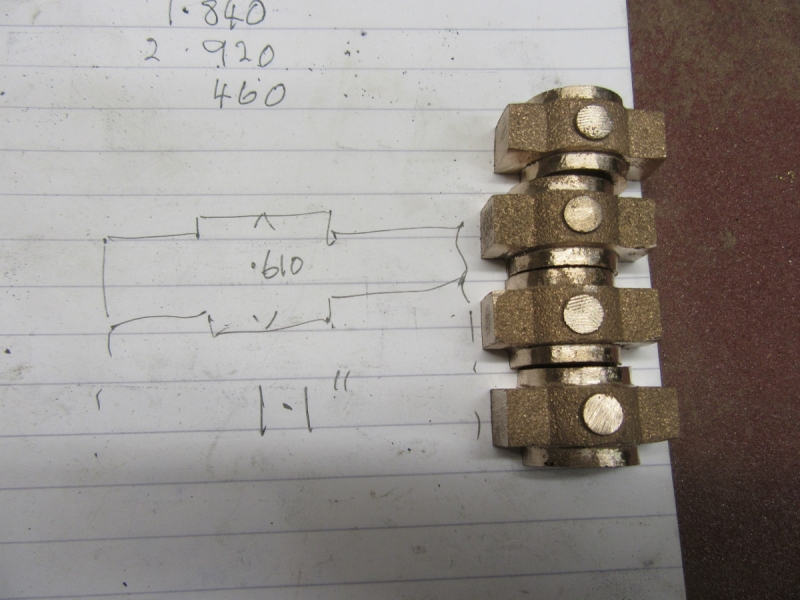
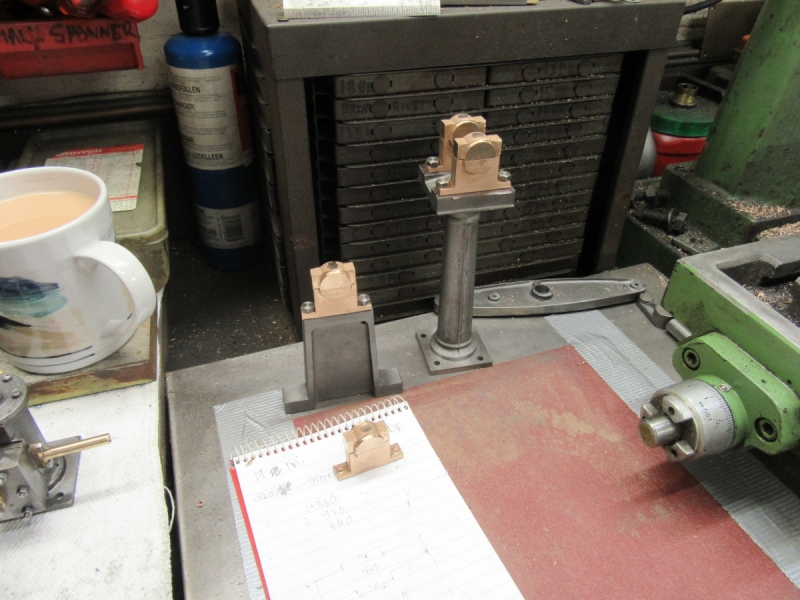
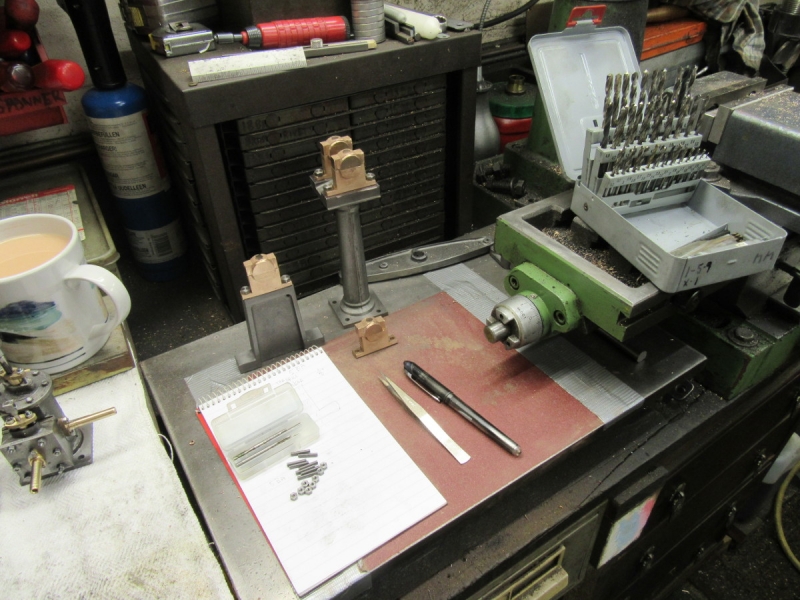
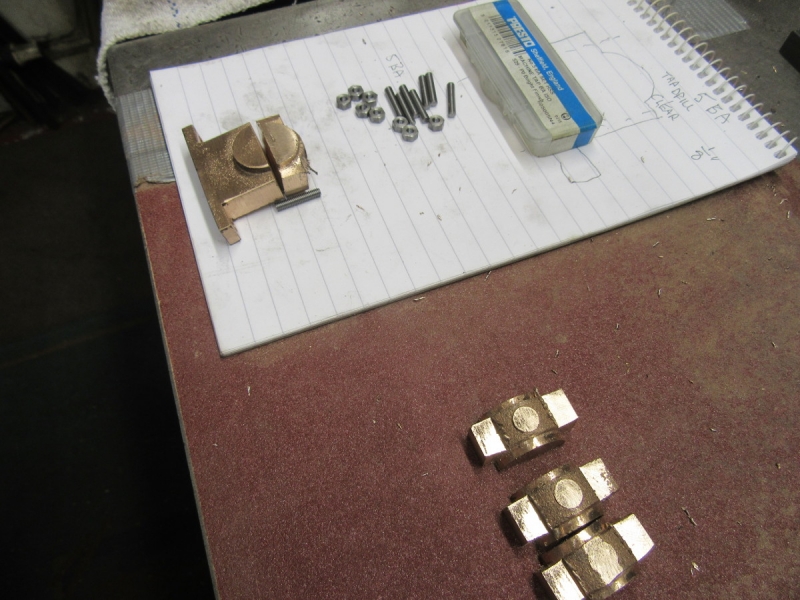
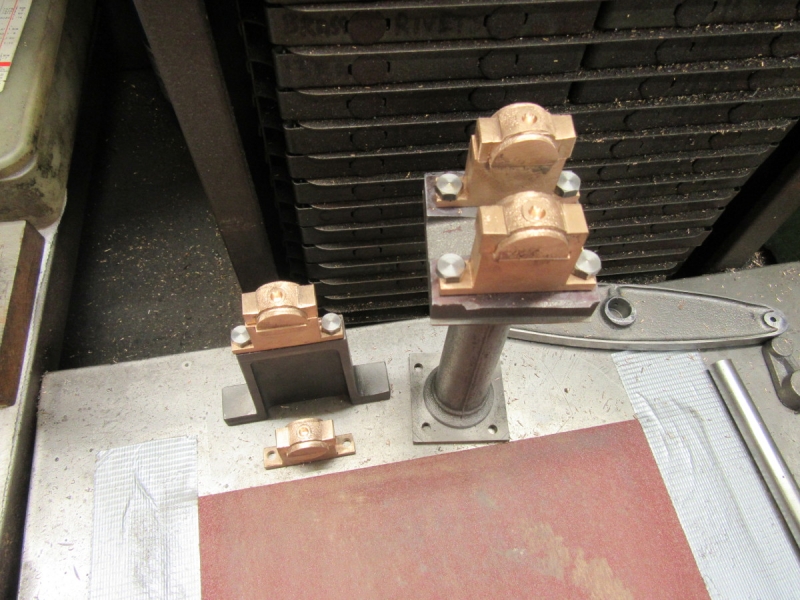
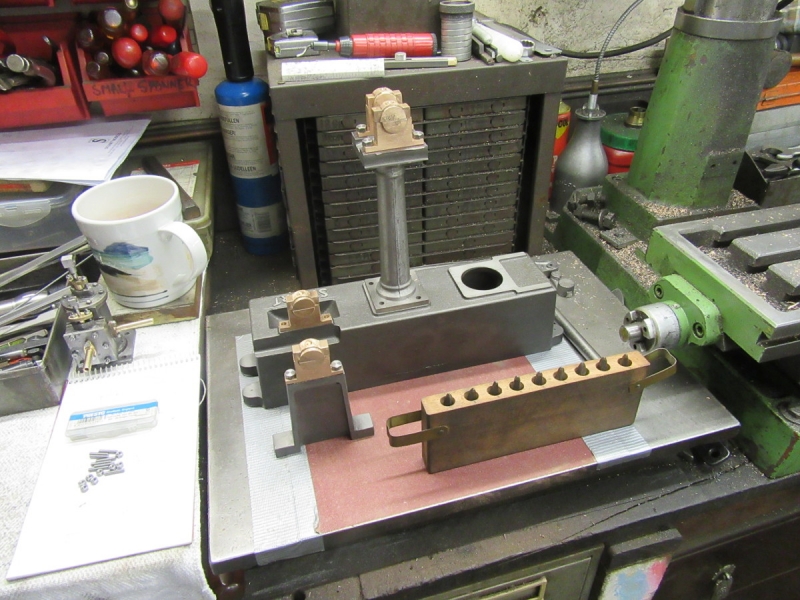
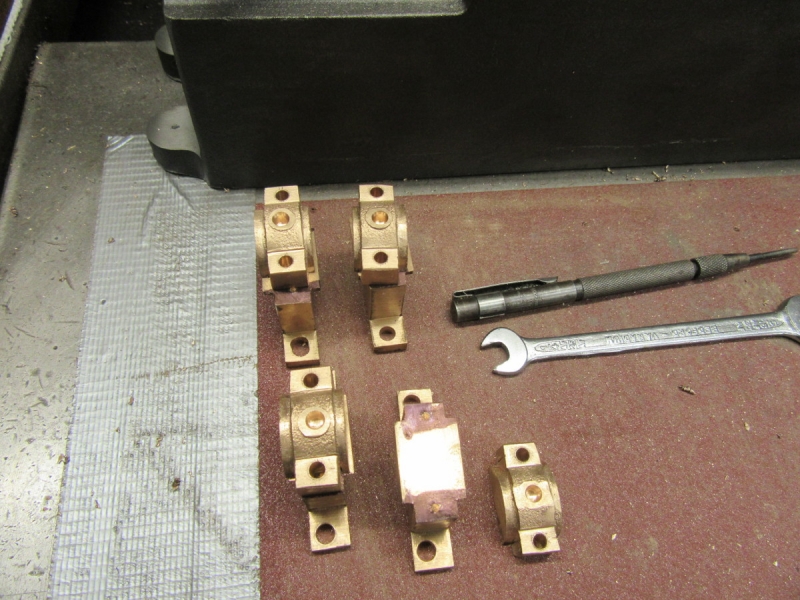
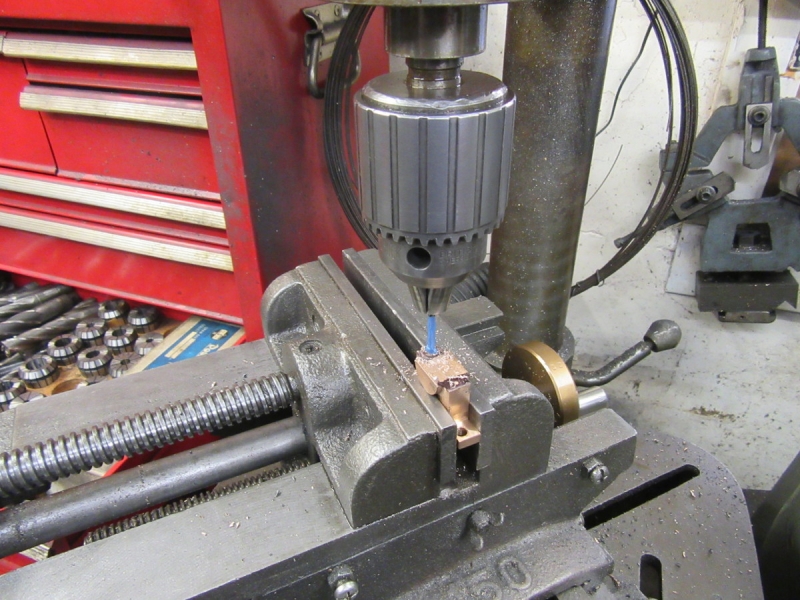
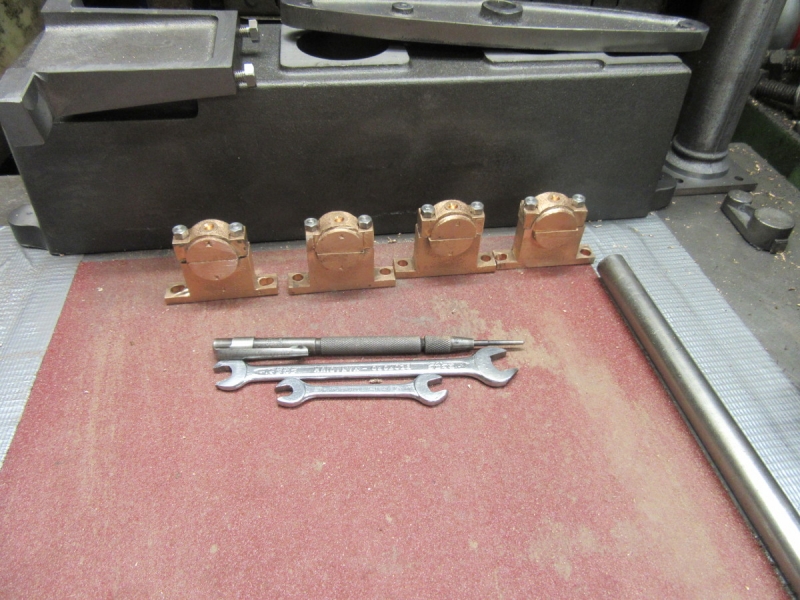
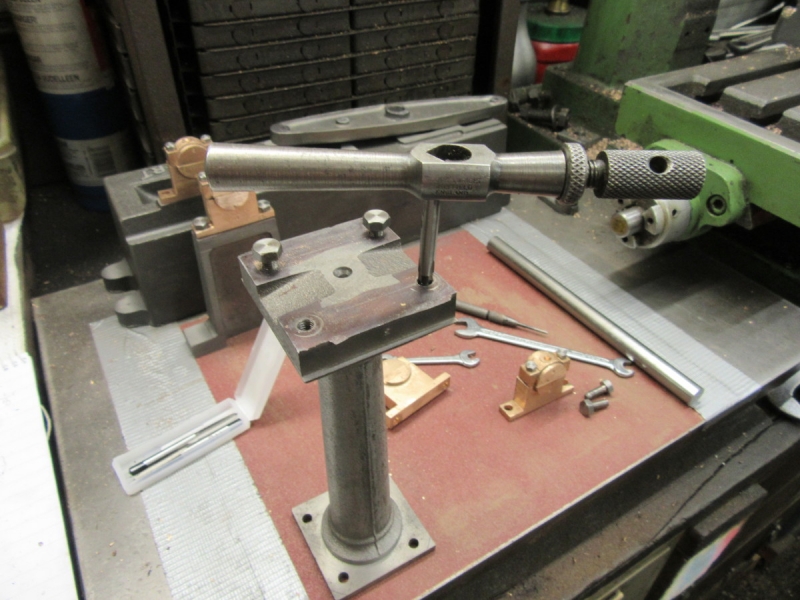
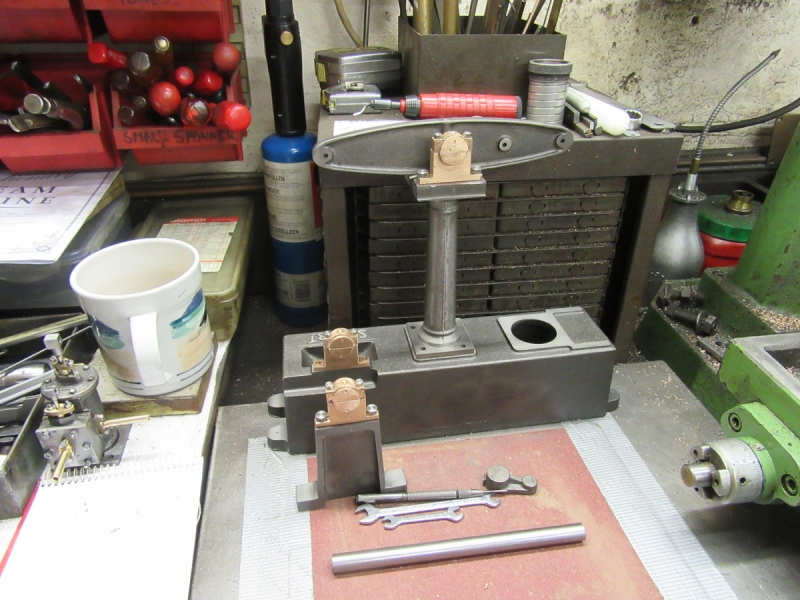
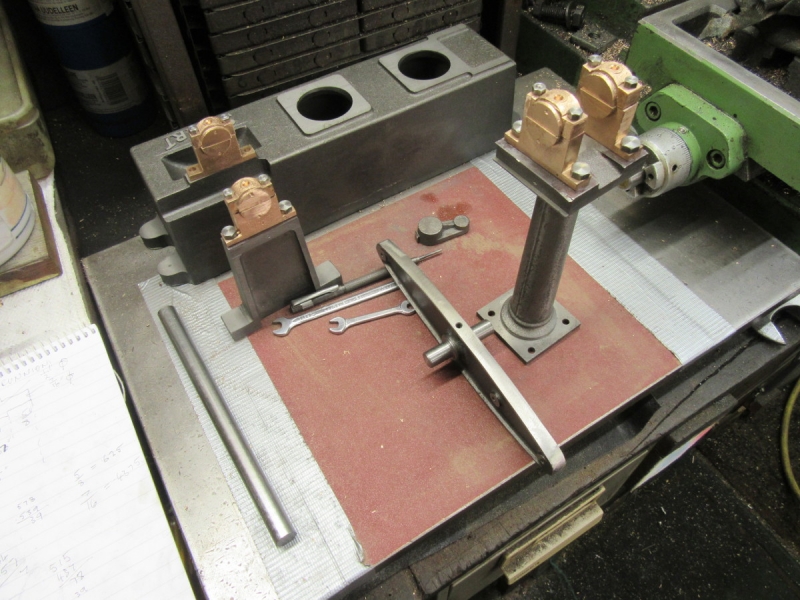
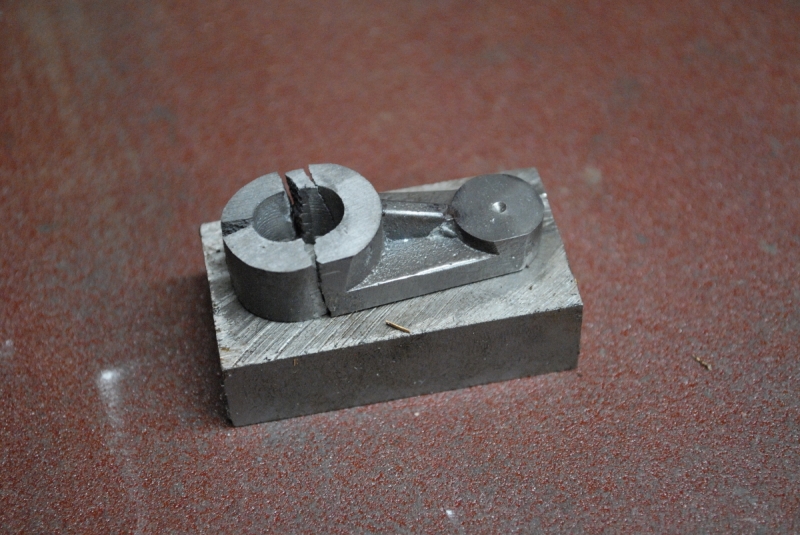
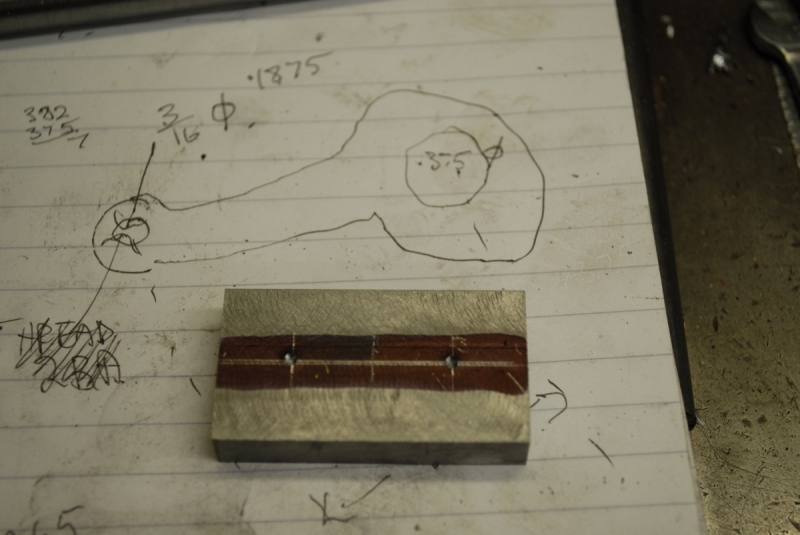
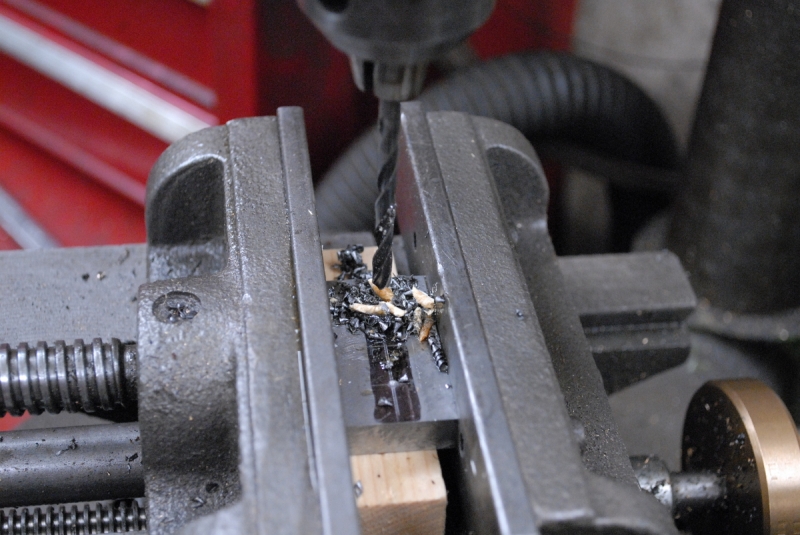
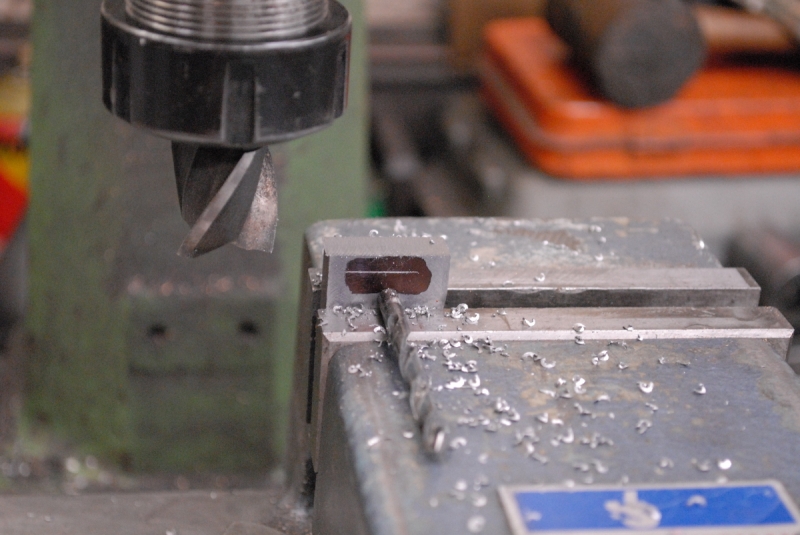
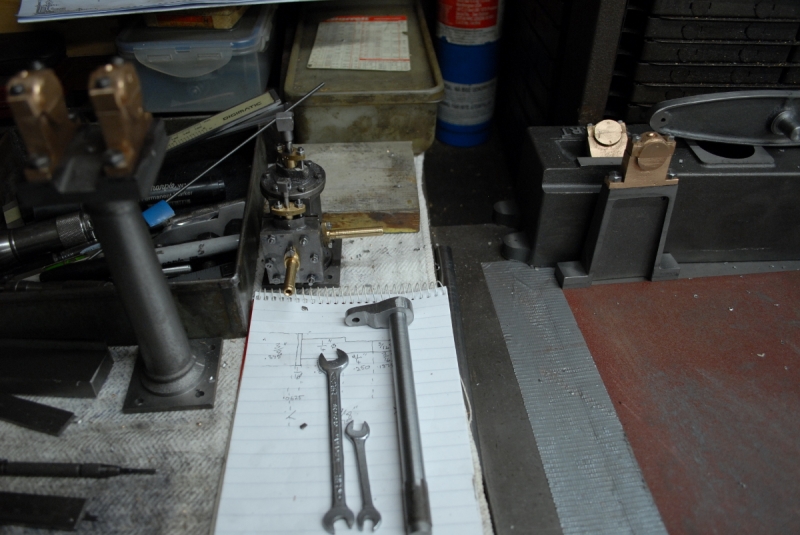
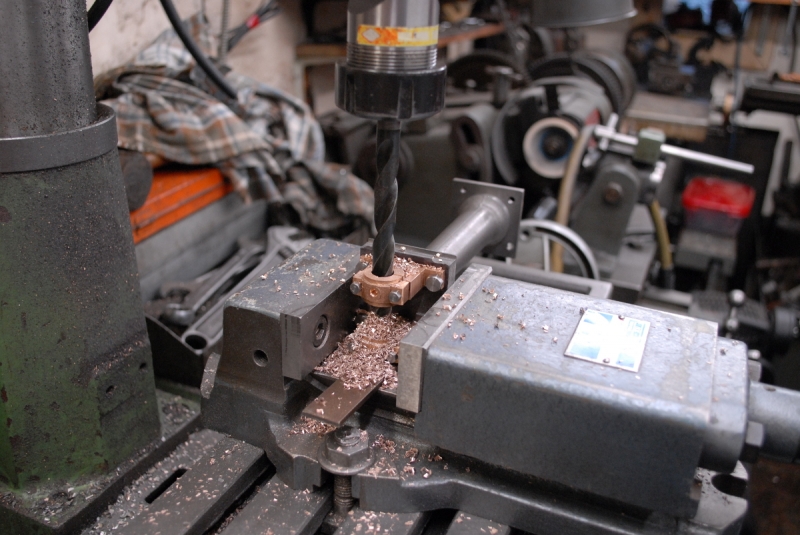
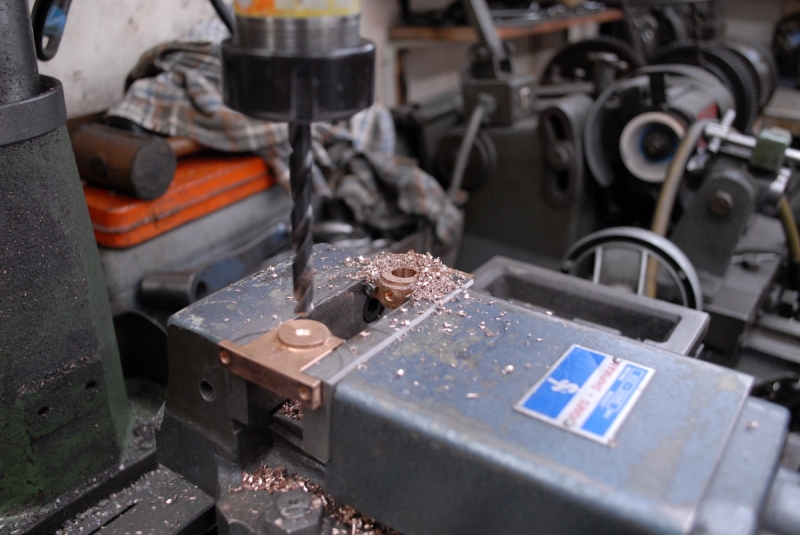
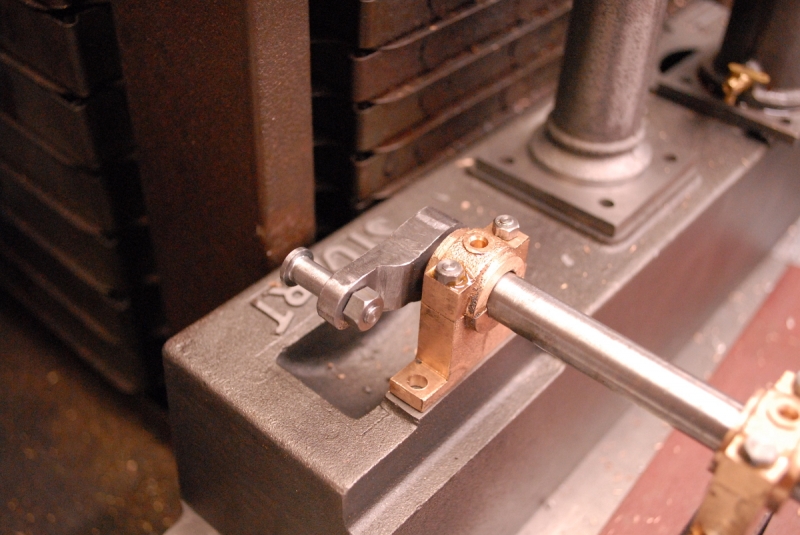
Knocking off time. Two of these bearings are for the beam trunnions and I have already drilled and tapped for the bolts. The drillings for the other two haven't been done yet so I'll drill all the bearing bodies to fit these studs on the column and make the other fastenings to suit.
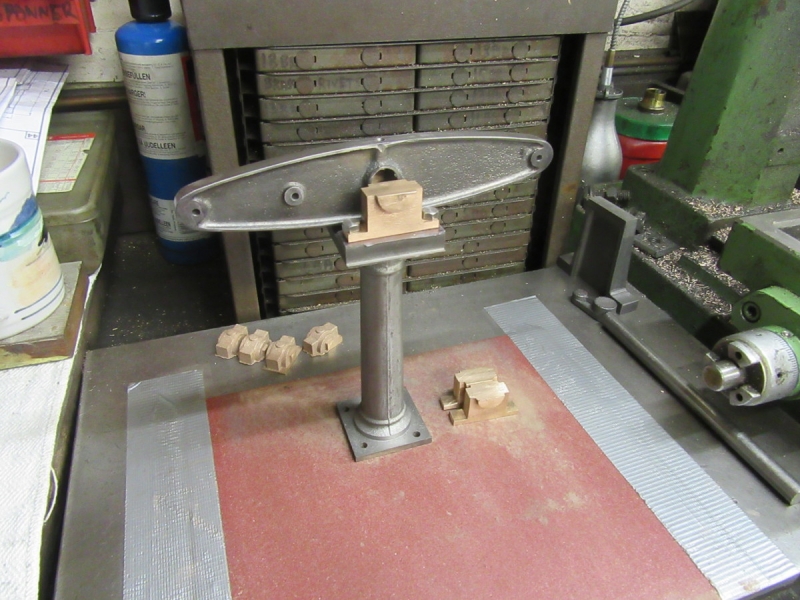
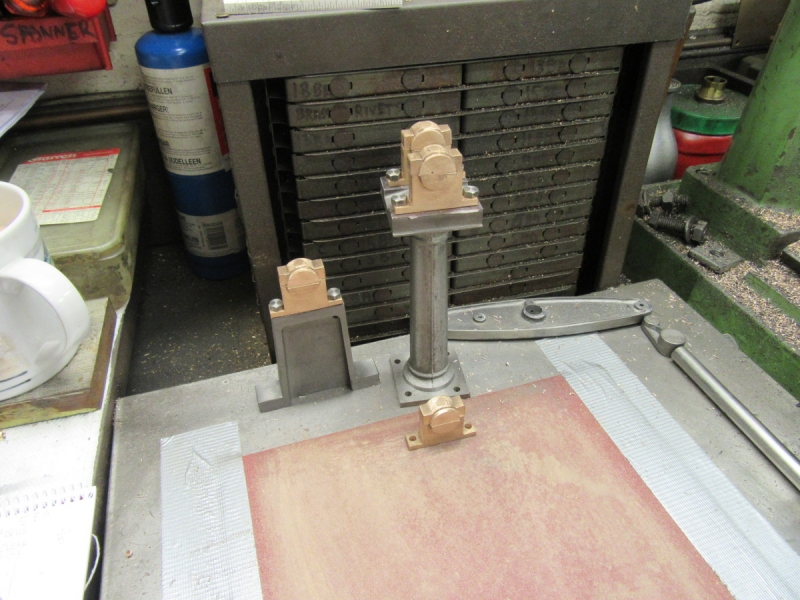
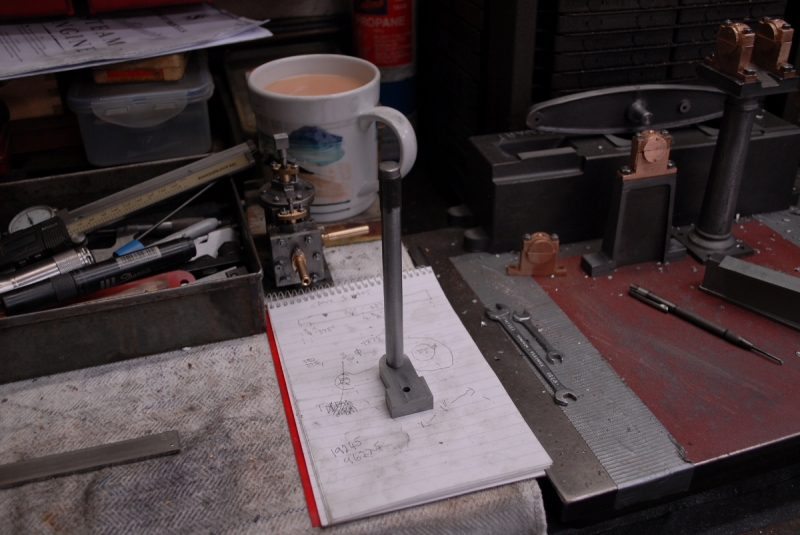
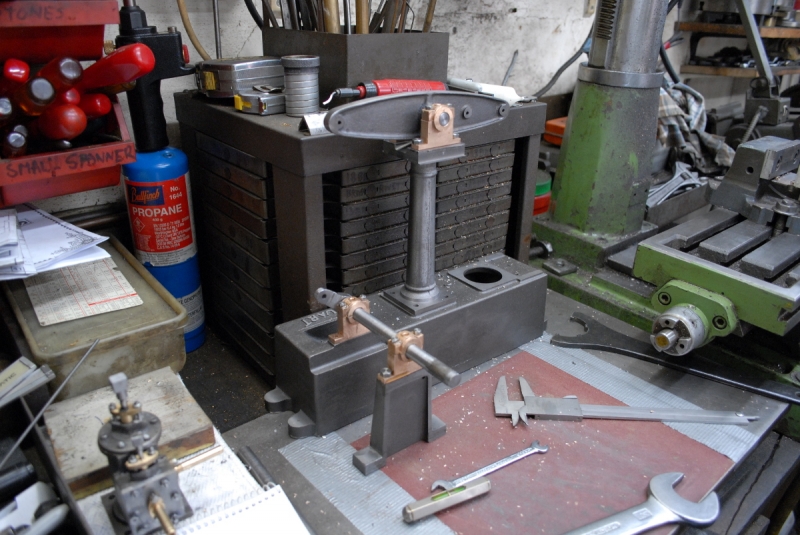
That's enough for this morning. I shall decide tomorrow where I go next. At the moment I am favouring cleaning the bearing caps up ready for fitting. Then they need boring to suit their respective shafts and all this has to be done before they are bolted down.....
Stanley Challenger Graham
Stanley's View
scg1936 at talktalk.net
"Beware of certitude" (Jimmy Reid)
The floggings will continue until morale improves!
Stanley's View
scg1936 at talktalk.net
"Beware of certitude" (Jimmy Reid)
The floggings will continue until morale improves!
- Stanley
- Global Moderator
- Posts: 90678
- Joined: 23 Jan 2012, 12:01
- Location: Barnoldswick. Nearer to Heaven than Gloria.
Re: Shed Matters 3
Two of the castings are the beam trunnion bearings and I have already set these drillings and tappings which was a mistake, I should have drilled the pillar to suit the bearings. So this makes things a bit more difficult. That's why my first move was to make templates for the hole centres and use them to mark these two castings.
I drilled the two trunnion bearings and also ran a new 2BA tap through the tappings in the pillar.
After a bit of stressful fitting I have both bearing bodies mounted on the pillar. I popped the beam in just to give a glimpse of what is to come. Slow but steady progress and these were the two difficult ones!
Stanley Challenger Graham
Stanley's View
scg1936 at talktalk.net
"Beware of certitude" (Jimmy Reid)
The floggings will continue until morale improves!
Stanley's View
scg1936 at talktalk.net
"Beware of certitude" (Jimmy Reid)
The floggings will continue until morale improves!
- Stanley
- Global Moderator
- Posts: 90678
- Joined: 23 Jan 2012, 12:01
- Location: Barnoldswick. Nearer to Heaven than Gloria.
Re: Shed Matters 3
I want to drill the next two bearings for their mounting brackets. So I got them under the mill and did some careful measuring.
Here we are with some good marks.
A bit of careful drilling and we have the holes central on the bearing pedestals.
Then transfer the hole positions to the top of the outrigger. Not as easy to set up as it looks because this side of it slopes in and the back is perpendicular. This has to be allowed for in the setting up.
Then tap 2BA.
Knocking off time. The first outrigger is mounted, the second is drilled ready for mounting but it's correct position can't be worked out accurately until we are ready for fitting. Tomorrow we address the top halves of the bearings and the mounting holes on the outrigger base.
Stanley Challenger Graham
Stanley's View
scg1936 at talktalk.net
"Beware of certitude" (Jimmy Reid)
The floggings will continue until morale improves!
Stanley's View
scg1936 at talktalk.net
"Beware of certitude" (Jimmy Reid)
The floggings will continue until morale improves!
- Stanley
- Global Moderator
- Posts: 90678
- Joined: 23 Jan 2012, 12:01
- Location: Barnoldswick. Nearer to Heaven than Gloria.
Re: Shed Matters 3
We start with these rough castings. The job is to get a bit of finish on them and get them to the right size to fit the pedestals.
The only way to do this is use hand tools. The most effective of which was this 18" flat coarse file.
Most of the rough off now.
Getting close.
Some careful measuring up and now we need to adjust the sizes. I shall have to think about this.... I think I have to do it under the mill.
There was a lot of fiddly hand work there, don't be too hard on me...
Stanley Challenger Graham
Stanley's View
scg1936 at talktalk.net
"Beware of certitude" (Jimmy Reid)
The floggings will continue until morale improves!
Stanley's View
scg1936 at talktalk.net
"Beware of certitude" (Jimmy Reid)
The floggings will continue until morale improves!
- Stanley
- Global Moderator
- Posts: 90678
- Joined: 23 Jan 2012, 12:01
- Location: Barnoldswick. Nearer to Heaven than Gloria.
Re: Shed Matters 3
More fiddly work this morning. We need to make the top halves of the bearings match the bottom. A lot of repetition to get all the sides square and somewhere near a fit.
Eventually I got here, still some cutting back to do but before I decide on that I need to learn more about the fit and the way to that is to sort out the 5BA studs, nuts, tapping drill and clearance drill.
Here we are. The studs are only 5/8" and so I need to take some of the face of the bearing caps and reduce the shoulders a little as well. That's for tomorrow..... Nice little bit of progress again....
Stanley Challenger Graham
Stanley's View
scg1936 at talktalk.net
"Beware of certitude" (Jimmy Reid)
The floggings will continue until morale improves!
Stanley's View
scg1936 at talktalk.net
"Beware of certitude" (Jimmy Reid)
The floggings will continue until morale improves!
- Stanley
- Global Moderator
- Posts: 90678
- Joined: 23 Jan 2012, 12:01
- Location: Barnoldswick. Nearer to Heaven than Gloria.
Re: Shed Matters 3
We are still on with these small castings! I think you can see the problem. Look at the 5BA stud laid next to the castings. I think you can see that as things stand it is not long enough. I can't stretch the stud so I shall have to shorten the distance. We need to do some milling.
Amazing how complicated these little castings are. I think you can see from the last pic that my studs are now of an adequate length. Furthermore, because of the way I have milled them they are all identical.
Then a session with the wire brush, file and the abrasive sheet to break all the edges, clean up the castings and make them look as though someone cares.
We're ready to drill, tap and fit the castings together. Once that's done I can bore the bearings for their respective shafts. It struck me that there was one more job I could do, drill the oil passages in the bearing caps. The drawings talk about threaded holes for small lubrication cups but I think that's overkill. Kahara will have to make do with hand oiling. The engine isn't driving 300 looms! A nice morning with more progress, tomorrow we can fit the studs......
Stanley Challenger Graham
Stanley's View
scg1936 at talktalk.net
"Beware of certitude" (Jimmy Reid)
The floggings will continue until morale improves!
Stanley's View
scg1936 at talktalk.net
"Beware of certitude" (Jimmy Reid)
The floggings will continue until morale improves!
- Stanley
- Global Moderator
- Posts: 90678
- Joined: 23 Jan 2012, 12:01
- Location: Barnoldswick. Nearer to Heaven than Gloria.
Re: Shed Matters 3
Still hard at it on these little castings. Amazing how much work there is in them. Where we are at is fitting the caps to the pedestals so that I can bore the bearings to suit the shafts they carry. The first job was to put witness marks on the bearings so that I can keep them together and know where each one fits and in what orientation.
All marked up and ready for the next stage, drilling the caps 1/8" clearance for the studs.
Set up in the mill, all the holes marked and some careful drilling.
Knocking off time. All the caps drilled. We are ready now for matching the caps with the pedestals and marking for the tapping drill for 5BA. That's going to be even more careful work. Never mind, we are quietly moving forward.....
Stanley Challenger Graham
Stanley's View
scg1936 at talktalk.net
"Beware of certitude" (Jimmy Reid)
The floggings will continue until morale improves!
Stanley's View
scg1936 at talktalk.net
"Beware of certitude" (Jimmy Reid)
The floggings will continue until morale improves!
- Stanley
- Global Moderator
- Posts: 90678
- Joined: 23 Jan 2012, 12:01
- Location: Barnoldswick. Nearer to Heaven than Gloria.
Re: Shed Matters 3
I think it's all self explanatory. We were looking for studs fitted to all the bearing pedestals and the caps fitted.
Here we are at knocking of time.
All the studs fitted but the pedestals not necessarily lining up perfectly so tomorrow we'll go through them and tidy them up. More quiet progress......
Stanley Challenger Graham
Stanley's View
scg1936 at talktalk.net
"Beware of certitude" (Jimmy Reid)
The floggings will continue until morale improves!
Stanley's View
scg1936 at talktalk.net
"Beware of certitude" (Jimmy Reid)
The floggings will continue until morale improves!
- Stanley
- Global Moderator
- Posts: 90678
- Joined: 23 Jan 2012, 12:01
- Location: Barnoldswick. Nearer to Heaven than Gloria.
Re: Shed Matters 3
I spent about half an hour tidying the castings up and as far as I could, straightening the fit of the two halves of each bearing. I couldn't make them perfect but I definitely improved them.
Part of the job was to run the tap through all the threaded holes and make sure that there was good clearance for the set screws.
Knocking off time. I have checked the fit of all the castings and how they line up. I am ready for boring them but before I do that I want to make the Beam trunnion shaft and the crankshaft so I sorted that out in my head and got ready for going into that tomorrow. Quite a good morning..... quietly forwards again.
Stanley Challenger Graham
Stanley's View
scg1936 at talktalk.net
"Beware of certitude" (Jimmy Reid)
The floggings will continue until morale improves!
Stanley's View
scg1936 at talktalk.net
"Beware of certitude" (Jimmy Reid)
The floggings will continue until morale improves!
- Stanley
- Global Moderator
- Posts: 90678
- Joined: 23 Jan 2012, 12:01
- Location: Barnoldswick. Nearer to Heaven than Gloria.
Re: Shed Matters 3
It all started so sensibly....
I had a piece of 1/2" stock and had to make two shafts, a short one for the beam trunnion and a longer one for the crankshaft. Into the chuck and face the end but before I do that check some measurements..... This was where the morning started to judder a bit.
The first problem arose when I looked at the beam and found that the hole in it was a) bigger than 1/2" and b) not the same size at each end. Don't ask me how this happened, I simply don't know. I have no memory of drilling the holes at all. I had a problem.
I sorted the hole in the beam and found a piece of stock that I could turn down to fit the beam. (First I re-sharpened and honed my HSS cutter) Then got stuck into turning it to size.
I made a lovely job of it except for one thing. I turned it ten thou too small! Bugger!!
So this was knocking off time, I've found another piece of stock and can start all over again tomorrow. Don't ask me what went wrong, I don't know. Something to do with my eyes I suspect. Here's hoping I can do a bit better tomorrow.
Stanley Challenger Graham
Stanley's View
scg1936 at talktalk.net
"Beware of certitude" (Jimmy Reid)
The floggings will continue until morale improves!
Stanley's View
scg1936 at talktalk.net
"Beware of certitude" (Jimmy Reid)
The floggings will continue until morale improves!
- Stanley
- Global Moderator
- Posts: 90678
- Joined: 23 Jan 2012, 12:01
- Location: Barnoldswick. Nearer to Heaven than Gloria.
Re: Shed Matters 3
Here's where the design committee sent me.
This is where the real problem is, the hole in the beam for the trunnion is a total cock up, don't ask me how it got so bad! So the plan is to bore the hole out central and make a trunnion shaft to fit the hole. Simples!!¬
First job is to bore the beam. I tried it out, just grabbed in the 4 jaw SC chuck and it worked like a charm.
Straightforward boring with a small bar until I was cutting all the way round in the boss.
The new bore size is bigger than the design but that's no matter. I found a piece of stock and started into it.
Awhile later and we have a perfect fit in the beam.
Parted off and the other end finished.
Knocking off time. We are in good order now, the trunnion shaft is an interference fit in the beam and ready for the locking pin that will secure it permanently. Next we have to make the crankshaft and Bore the bearings.....
Stanley Challenger Graham
Stanley's View
scg1936 at talktalk.net
"Beware of certitude" (Jimmy Reid)
The floggings will continue until morale improves!
Stanley's View
scg1936 at talktalk.net
"Beware of certitude" (Jimmy Reid)
The floggings will continue until morale improves!
Re: Shed Matters 3
It was a while ago when you drilled the beam!Stanley wrote: ↑09 Dec 2019, 10:09
Today I address the beam. It's the wrong shape to be easily cleaned up in the mill so the first thing was a bit of handwork to clean the casting up, break all the edges and polish the pads where it has to be drilled.
Blacked up ready for marking. There was immediately a bit of a problem as the pads don't agree accurately with the centres of the drillings. The result was a compromise but it will be OK.
Here we are starting drilling. As I say, it was a compromise.
Here we are at knocking off time. Note I have also drilled the oilway for the trunnion bearing. Not sure where I go next, I shall take a view tomorrow....
- Stanley
- Global Moderator
- Posts: 90678
- Joined: 23 Jan 2012, 12:01
- Location: Barnoldswick. Nearer to Heaven than Gloria.
Re: Shed Matters 3
I knew I'd done it China and Ian but couldn't understand how I'd got it so wrong. But that doesn't really matter, what matters is how you retrieve the mistake. The beam and its trunnions are fine now.
(And it's not an oilway, it's for a peg to lock the trunnion shaft in the beam.)
Stanley Challenger Graham
Stanley's View
scg1936 at talktalk.net
"Beware of certitude" (Jimmy Reid)
The floggings will continue until morale improves!
Stanley's View
scg1936 at talktalk.net
"Beware of certitude" (Jimmy Reid)
The floggings will continue until morale improves!
- Stanley
- Global Moderator
- Posts: 90678
- Joined: 23 Jan 2012, 12:01
- Location: Barnoldswick. Nearer to Heaven than Gloria.
Re: Shed Matters 3
First job was to drill the trunnion shaft and install the 3/32"peg using some Loctite Shaft fit.
I had a piece of 1/2" stock in the kit but couldn't see the point in turning this down to 7/16" when I had scrap stock that would do just as well.
I turned it down to a good light interference fit in the flywheel. It will get Loctited in place when we come to final fitting and will run true.
Knocking off time. We have the shaft ready for the flywheel and the end ready for accepting the crank. I shall decide tomorrow which of these things I do. I have still to bore the bearings yet of course.....
A nice morning, I liked that!
Stanley Challenger Graham
Stanley's View
scg1936 at talktalk.net
"Beware of certitude" (Jimmy Reid)
The floggings will continue until morale improves!
Stanley's View
scg1936 at talktalk.net
"Beware of certitude" (Jimmy Reid)
The floggings will continue until morale improves!
- Stanley
- Global Moderator
- Posts: 90678
- Joined: 23 Jan 2012, 12:01
- Location: Barnoldswick. Nearer to Heaven than Gloria.
Re: Shed Matters 3
I want to have a look at the crank this morning but first I gave Mrs Harrison a good clean up, can't do with a shed full of mess!
I needed some square faces first and once I had them, I had to reduce the casting to the correct thickness.
Once I had the thickness right it was a matter of work with the file to get some shape and finish into the casting. As usual, this takes time.
Knocking off time. The dimensions are correct, the edges have been broken and I am ready for some centre finding and drilling for the fit on the shaft. I'll leave the crank pin until I know exactly what I am doing, I haven't looked at the drawing yet.
Another quiet morning but good progress.
Stanley Challenger Graham
Stanley's View
scg1936 at talktalk.net
"Beware of certitude" (Jimmy Reid)
The floggings will continue until morale improves!
Stanley's View
scg1936 at talktalk.net
"Beware of certitude" (Jimmy Reid)
The floggings will continue until morale improves!
- Stanley
- Global Moderator
- Posts: 90678
- Joined: 23 Jan 2012, 12:01
- Location: Barnoldswick. Nearer to Heaven than Gloria.
Re: Shed Matters 3
After a good look at the drawings I got it clear what I was doing and as a start I got the centres marked on the crank. Then under the pillar drill to pop the holes in.
These two pics tell you all you need to know. Entirely unexpected, I had drilled a 3/16" pilot hole. I had almost got through when the casting shattered. No Idea why, it wasn't me honest! That's knocked the steam out of me. I shan't send off for another casting, I'll just make a new one from solid..... Let's hope putting the new lights in goes better!
Stanley Challenger Graham
Stanley's View
scg1936 at talktalk.net
"Beware of certitude" (Jimmy Reid)
The floggings will continue until morale improves!
Stanley's View
scg1936 at talktalk.net
"Beware of certitude" (Jimmy Reid)
The floggings will continue until morale improves!
Re: Shed Matters 3
Tough luck. May I suggest you gripped it on the outer diameter so when you drilled the hole there wasn't enough wall section left to withstand the gripping load. it then collapsed under the stress. Moral... Don't do it again.
Re: Shed Matters 3
Hard lines. I'm sure that it will be a better and stronger part when you make it from solid. More work for you but more fun also!
- Stanley
- Global Moderator
- Posts: 90678
- Joined: 23 Jan 2012, 12:01
- Location: Barnoldswick. Nearer to Heaven than Gloria.
Re: Shed Matters 3
I think you have put your finger on the reason P. I hadn't thought of that. Just goes to show, you live and learn! You're right China, the new crank carved from solid will be much stronger.
It's always a bugger when something breaks after you have put a lot of work in it.
Stanley Challenger Graham
Stanley's View
scg1936 at talktalk.net
"Beware of certitude" (Jimmy Reid)
The floggings will continue until morale improves!
Stanley's View
scg1936 at talktalk.net
"Beware of certitude" (Jimmy Reid)
The floggings will continue until morale improves!
- Stanley
- Global Moderator
- Posts: 90678
- Joined: 23 Jan 2012, 12:01
- Location: Barnoldswick. Nearer to Heaven than Gloria.
Re: Shed Matters 3
Not really in the shed today but one or two little jobs done.
Here's what we have to rectify...
A bit of a furtle through the material ends pile.... This piece of mild steel will do nicely.
Here's what we have to rectify...
A bit of a furtle through the material ends pile.... This piece of mild steel will do nicely.
Stanley Challenger Graham
Stanley's View
scg1936 at talktalk.net
"Beware of certitude" (Jimmy Reid)
The floggings will continue until morale improves!
Stanley's View
scg1936 at talktalk.net
"Beware of certitude" (Jimmy Reid)
The floggings will continue until morale improves!
- Stanley
- Global Moderator
- Posts: 90678
- Joined: 23 Jan 2012, 12:01
- Location: Barnoldswick. Nearer to Heaven than Gloria.
Re: Shed Matters 3
We are looking for a crank and it's buried in this slug of mild steel. First thing to do is get two parallel faces 3/8" apart.
Once I had a face I marked it up for 3/8" and got it under the mill again. Notice that these are respectable chips for an El Cheapo mill/drill. It's amazing what can be done with a sharp cutter!
Then some careful measuring and marking for the two drillings.
One drilling is 3/16" the clearance for a 2BA Crank pin. Then drill a pilot for the shaft, 1/4" followed by the finished size, 3/8"
Here we are, the shaft end is a nice fit.
Here we are using the drilling as a location radius and making repeated cuts which automatically buid to an accurate radius.
Here we are at knocking off time, tomorrow I shall put a radius on the 3/16" end and this will set the shape of the crank in between the two ends. In other words, it will have drawn itself.
[By the way...the new lighting in the shed is fantastic. It makes up partially for the deficiencies in my eyes. Not completely but a definite improvement.]
Stanley Challenger Graham
Stanley's View
scg1936 at talktalk.net
"Beware of certitude" (Jimmy Reid)
The floggings will continue until morale improves!
Stanley's View
scg1936 at talktalk.net
"Beware of certitude" (Jimmy Reid)
The floggings will continue until morale improves!
- Stanley
- Global Moderator
- Posts: 90678
- Joined: 23 Jan 2012, 12:01
- Location: Barnoldswick. Nearer to Heaven than Gloria.
Re: Shed Matters 3
First job was to clean the two tubes in the fitting we left in place over the bench because it is in exactly the right place. I've related elsewhere how I dropped one of the tubes and it bounced! Mugs for luck!
I'm shaping the smaller, crank pin end of the crank using a 3/16" drill as a pivot. I decided on a wall thickness, marked the crank up and started by milling down to that level and at that point I locked the height of the cutter and carried on at varying angles.
Once I had most of the profile milled I swapped to old fashioned hand work with files in the vise.
Next I had to reduce the crank pin end to 3/16" thick.
Then the transition between the two ends had to be achieved by hand. Here we are at knocking off time, not perfectly finished or symmetrical but accurate and it will work. Now, we can do what we were going to do and look at the bearings. That's for tomorrow....
Stanley Challenger Graham
Stanley's View
scg1936 at talktalk.net
"Beware of certitude" (Jimmy Reid)
The floggings will continue until morale improves!
Stanley's View
scg1936 at talktalk.net
"Beware of certitude" (Jimmy Reid)
The floggings will continue until morale improves!
- Stanley
- Global Moderator
- Posts: 90678
- Joined: 23 Jan 2012, 12:01
- Location: Barnoldswick. Nearer to Heaven than Gloria.
Re: Shed Matters 3
Today we look at bearings... I am going to bore the beam trunnion bearings in situ and in line in their position when fitted, I can't guarantee their position so this way I know they will be at right angles and in the right position. I spent a lot of time setting it up and bored first with the centre drill, then a 5/16" drill and then 7/16" which is the finished size and all on the same setting of course.
Then I bored the two crankshaft bearings, same approach, centre drill, 5/16" and then 7/16". I drilled the oil passages out in the cap and broke the edges.
Here's where we finished up. I am very pleased with the morning's work!
One last job, before putting the cutter back in the mill, a quick touch up in the T&C grinder. I don't know how anyone runs a mill without a T&C grinder!
Nice morning......
Stanley Challenger Graham
Stanley's View
scg1936 at talktalk.net
"Beware of certitude" (Jimmy Reid)
The floggings will continue until morale improves!
Stanley's View
scg1936 at talktalk.net
"Beware of certitude" (Jimmy Reid)
The floggings will continue until morale improves!
- Stanley
- Global Moderator
- Posts: 90678
- Joined: 23 Jan 2012, 12:01
- Location: Barnoldswick. Nearer to Heaven than Gloria.
Re: Shed Matters 3
Nice little job this morning, self explanatory I think...
In case you haven't worked out what I was doing....
We have a crank pin now, a small thing but another essential step towards the engine. A nice morning....
In case you haven't worked out what I was doing....
We have a crank pin now, a small thing but another essential step towards the engine. A nice morning....
Stanley Challenger Graham
Stanley's View
scg1936 at talktalk.net
"Beware of certitude" (Jimmy Reid)
The floggings will continue until morale improves!
Stanley's View
scg1936 at talktalk.net
"Beware of certitude" (Jimmy Reid)
The floggings will continue until morale improves!