SHED MATTERS 2

User avatar
Stanley
Global Moderator
Global Moderator
Posts: 90301
Joined: 23 Jan 2012, 12:01
Location: Barnoldswick. Nearer to Heaven than Gloria.

Re: SHED MATTERS 2

Post by Stanley »

Bodge,Dean Smith and Grace at Keighley made some concrete lathes after WW2 but they never superseded CI ones.

Image

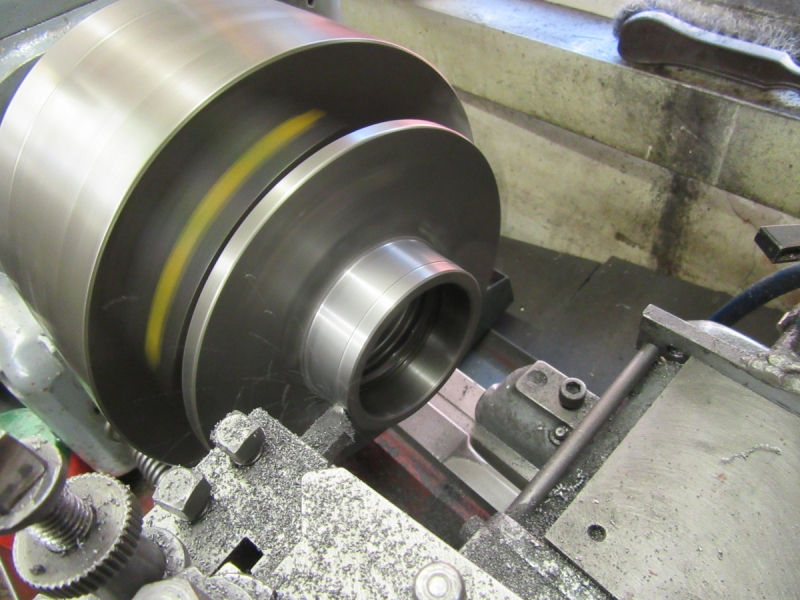
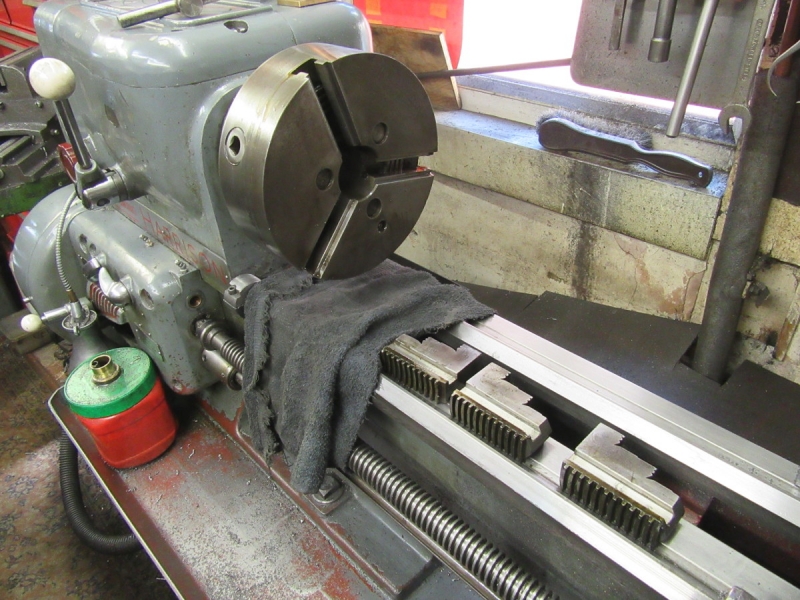
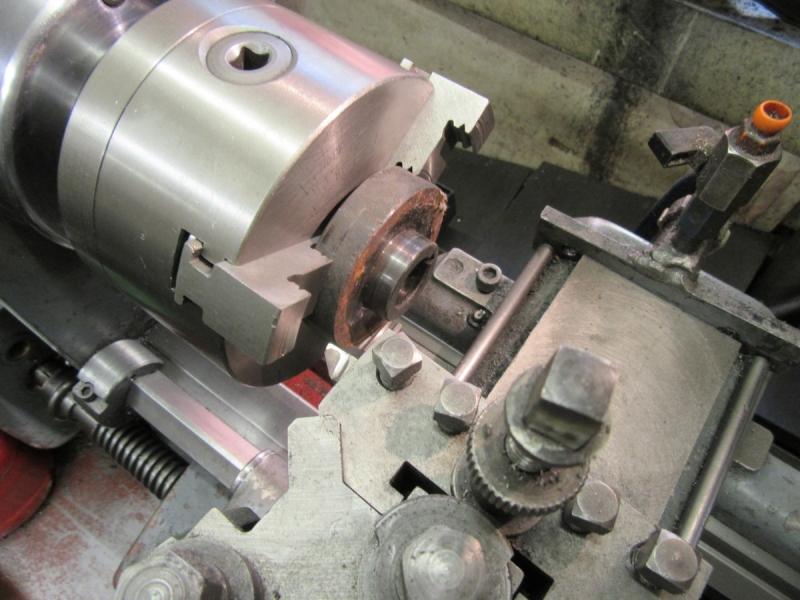
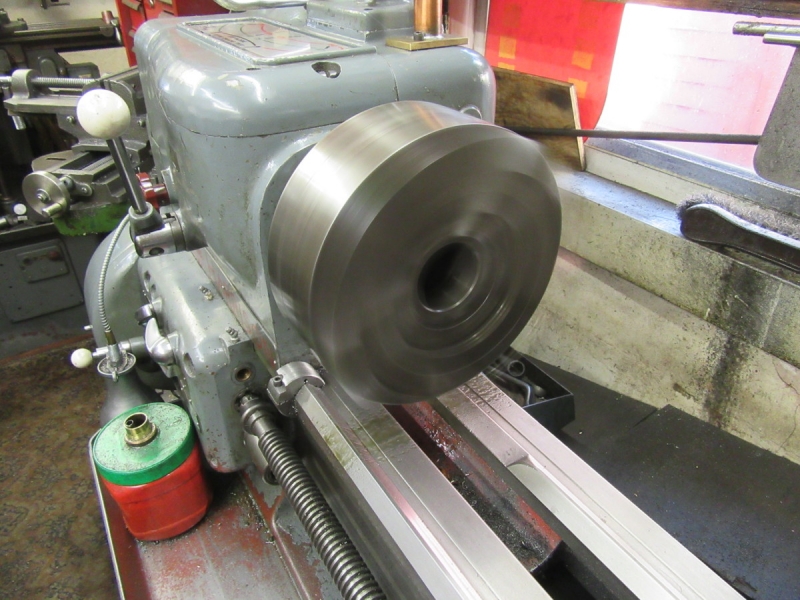
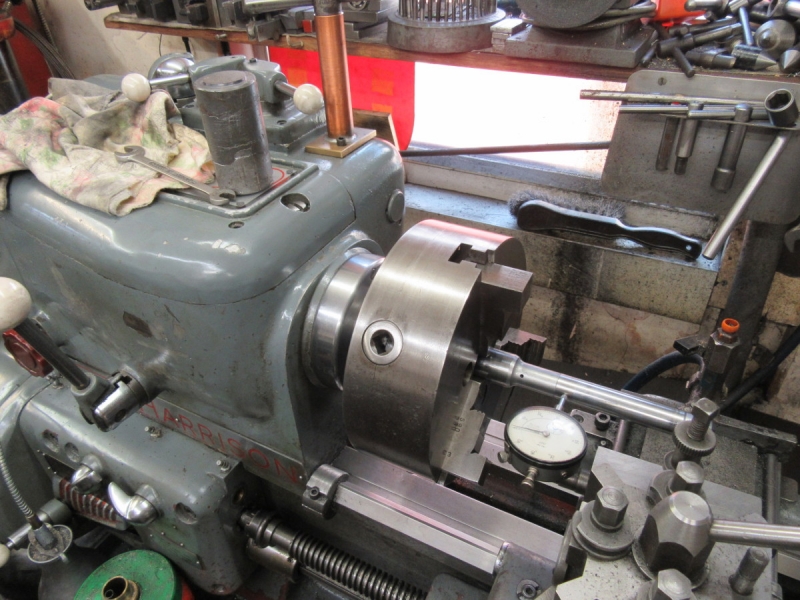
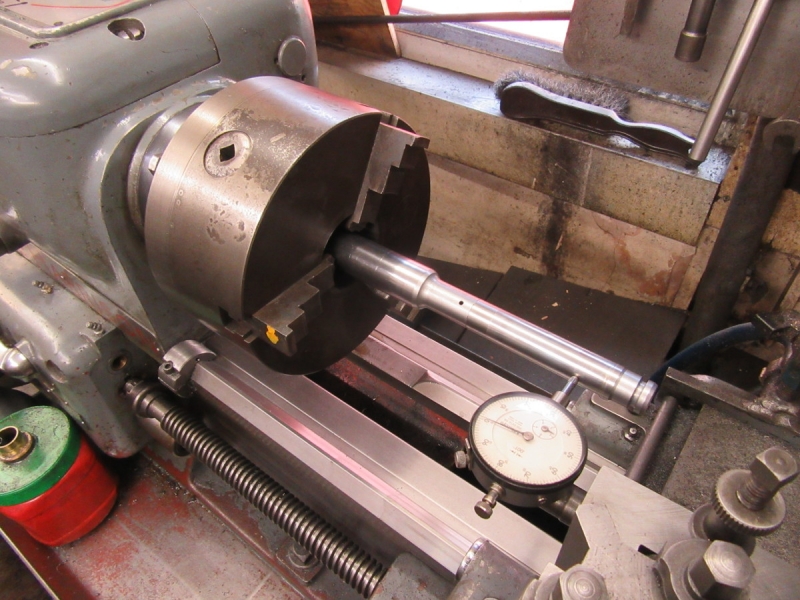
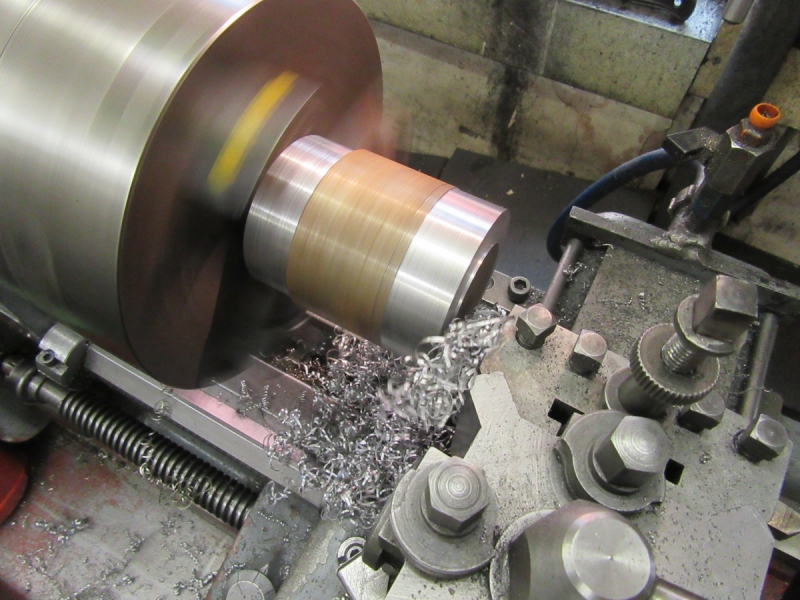
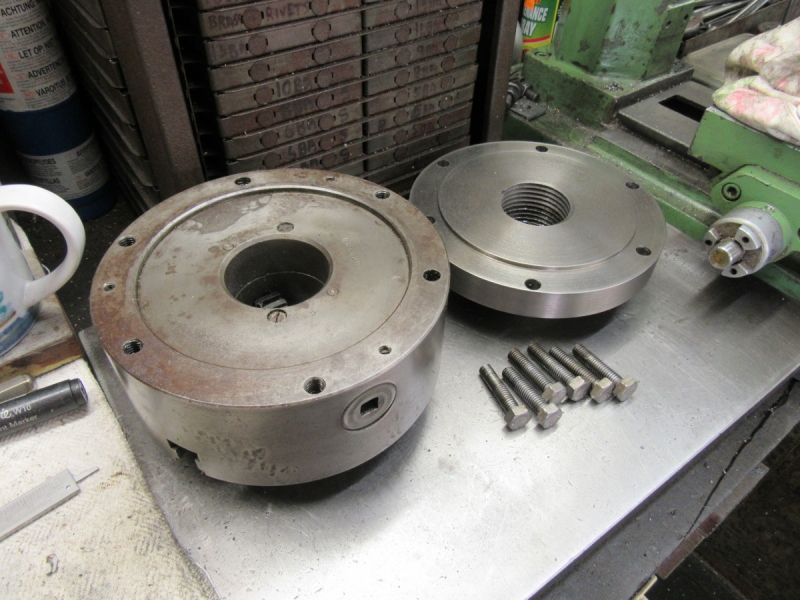
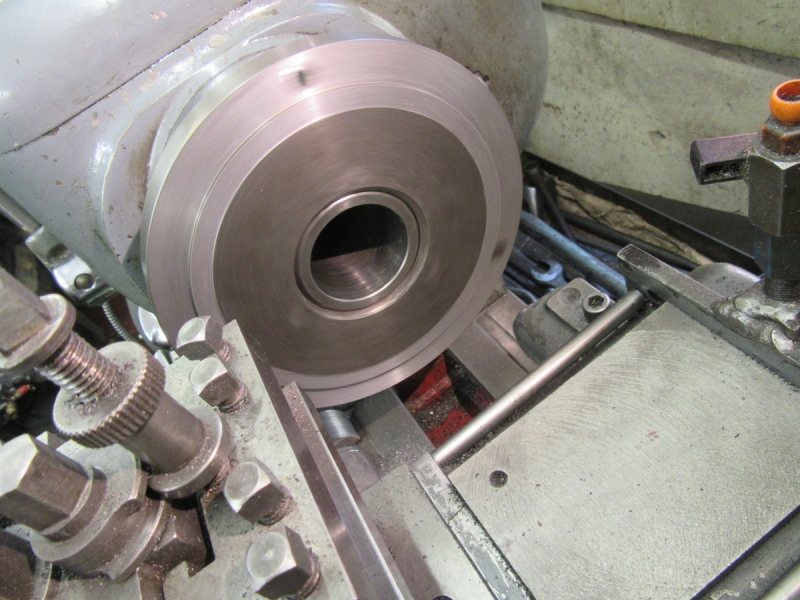
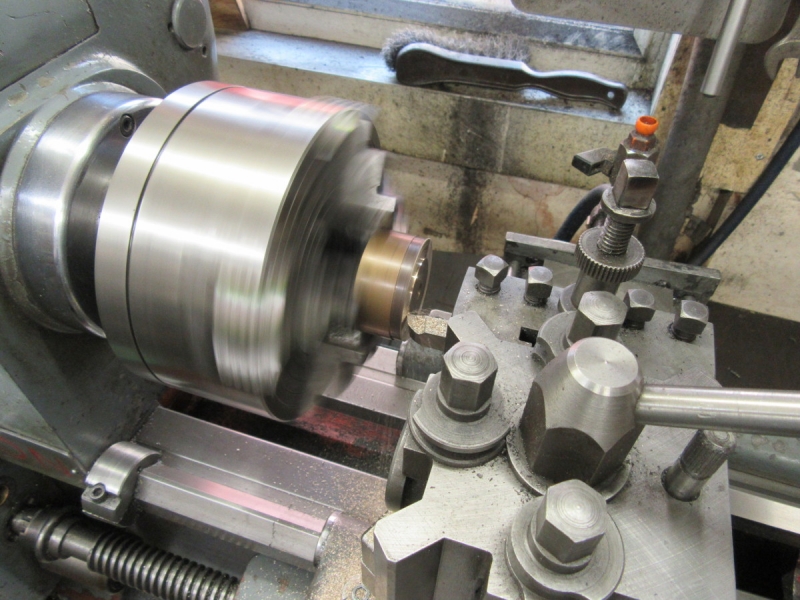
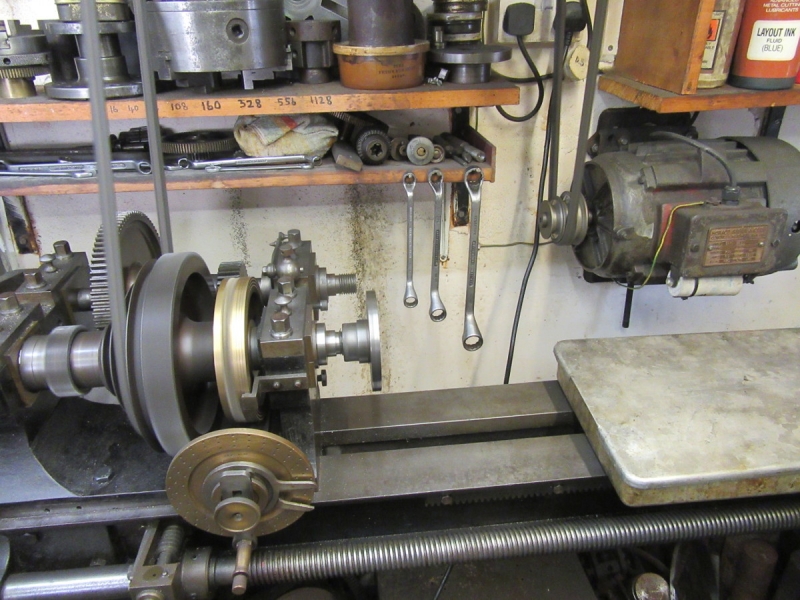
A rare event this morning, I fired up Johnny's big lathe because it was the easiest way to clean the original back plate to get an accurate measurement. It also gave me an excuse to oil the lineshaft and headstock. One thing that surprised me was that the backing plate doesn't run concentric on the spindle. Very surprising on anything to do with Johnny.... Then I repeated my measurements....

Image

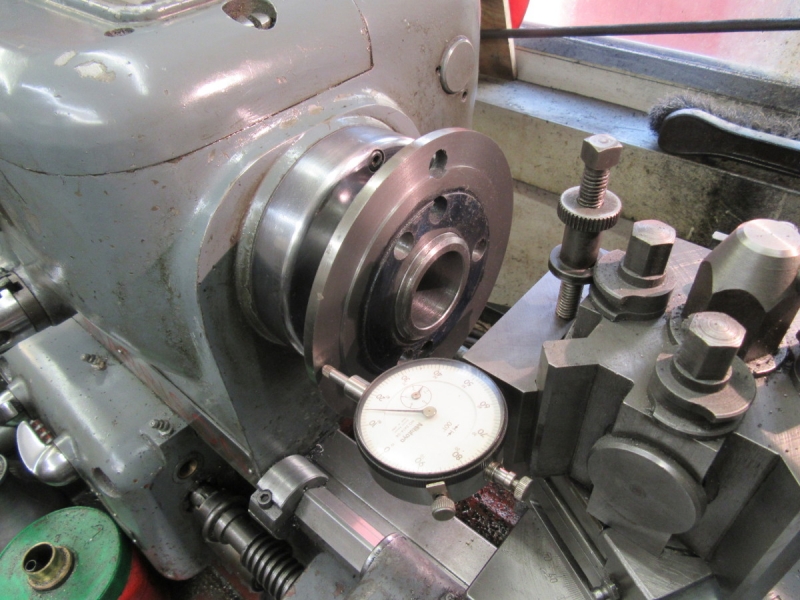
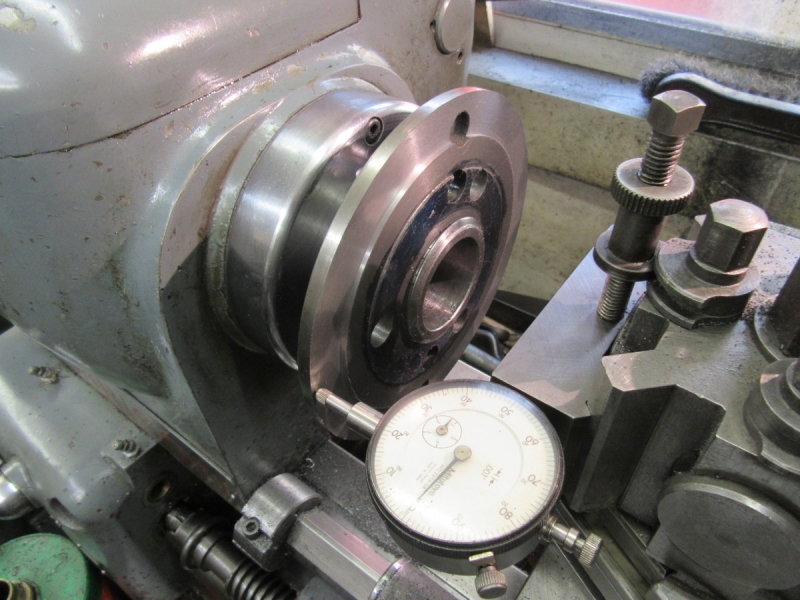
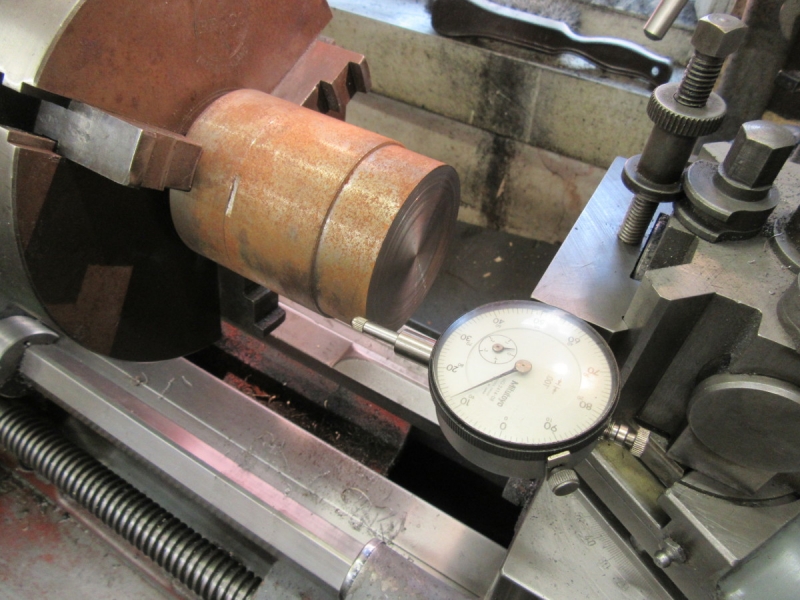
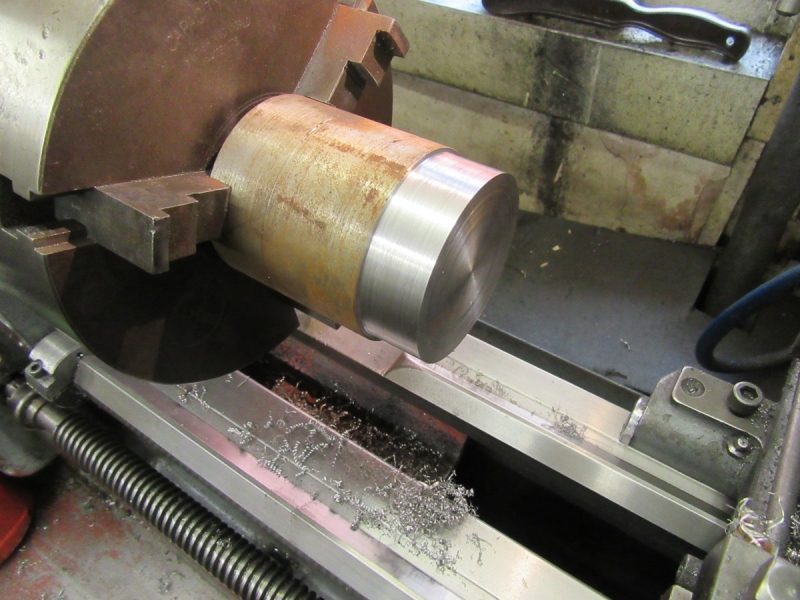
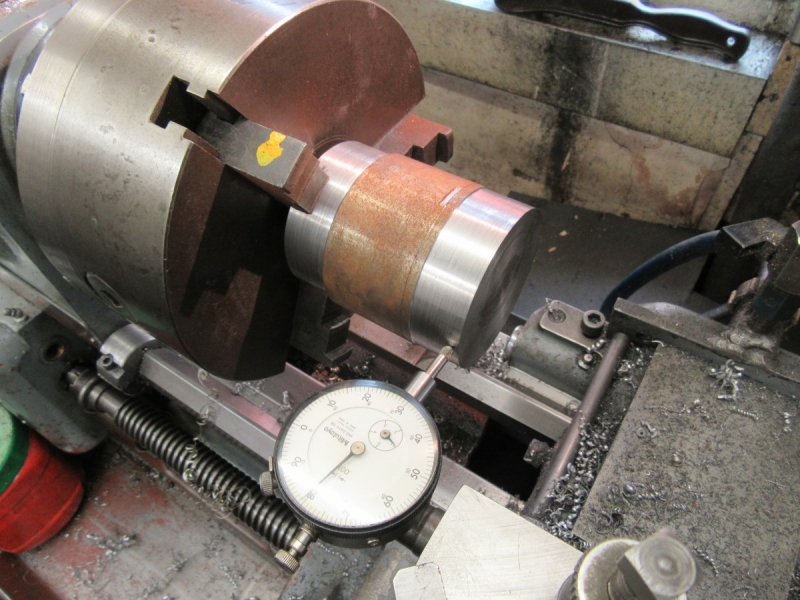
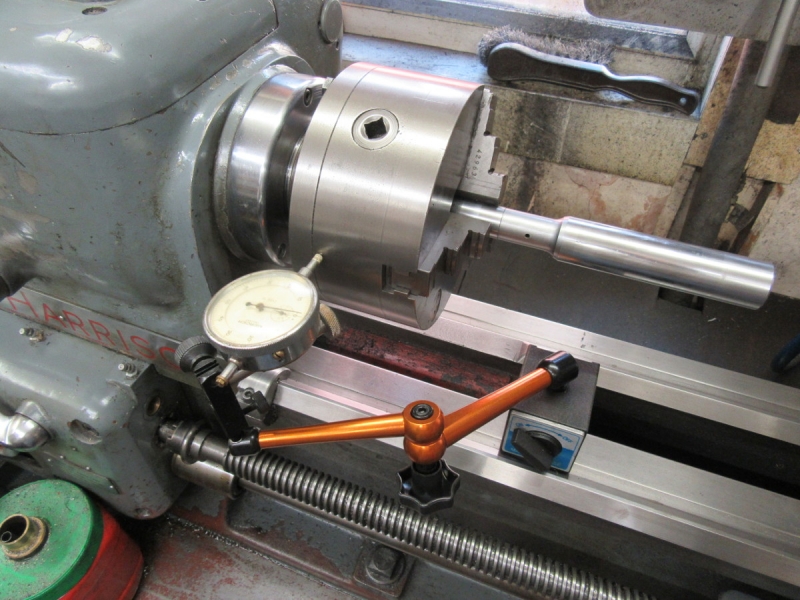
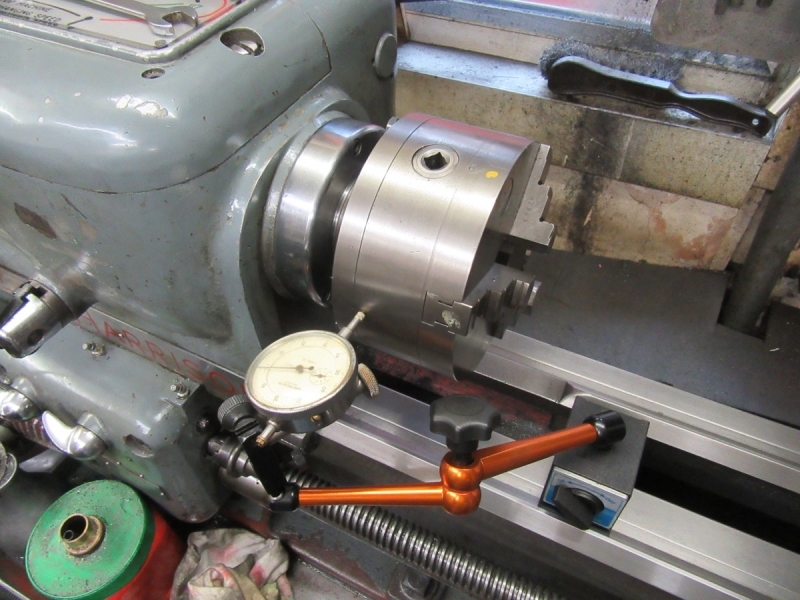
I made the first cut according to the calculations but before I took the last two thou off I checked it with the callipers, still the best way of checking. As it happened the original measurements were spot on.

Image

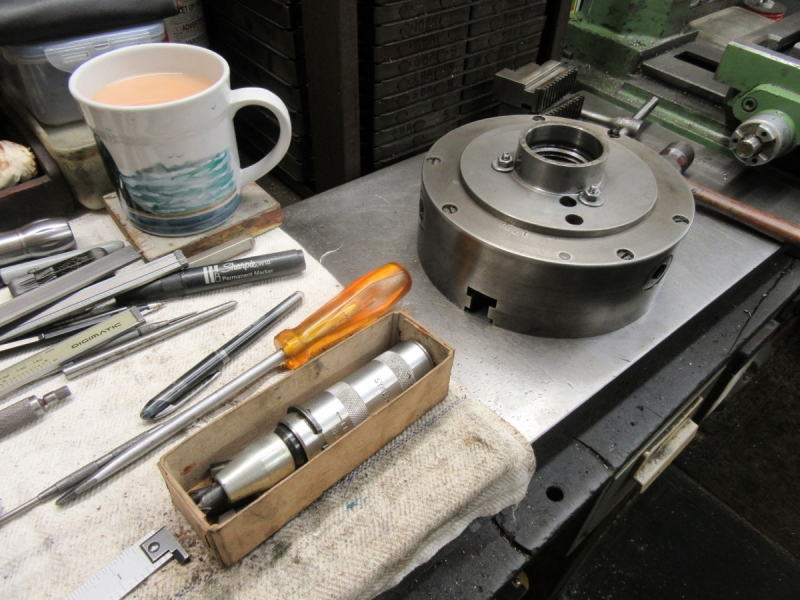
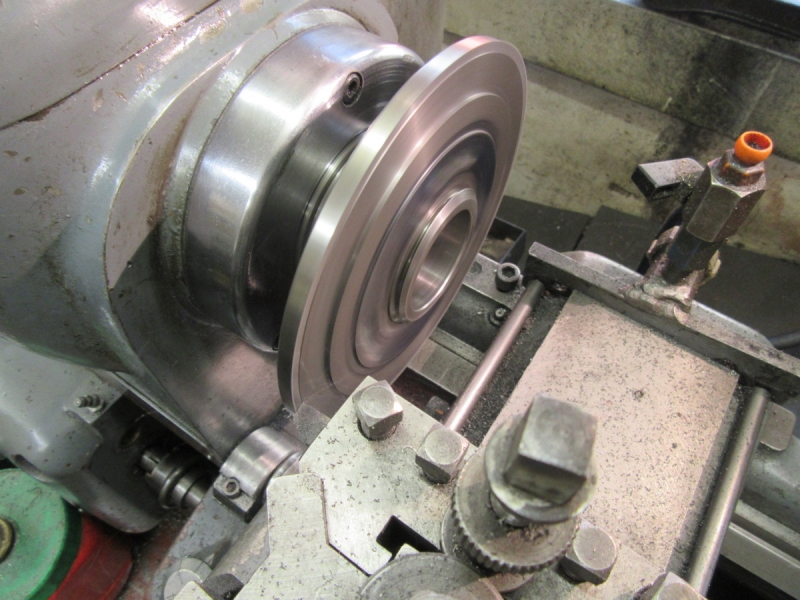
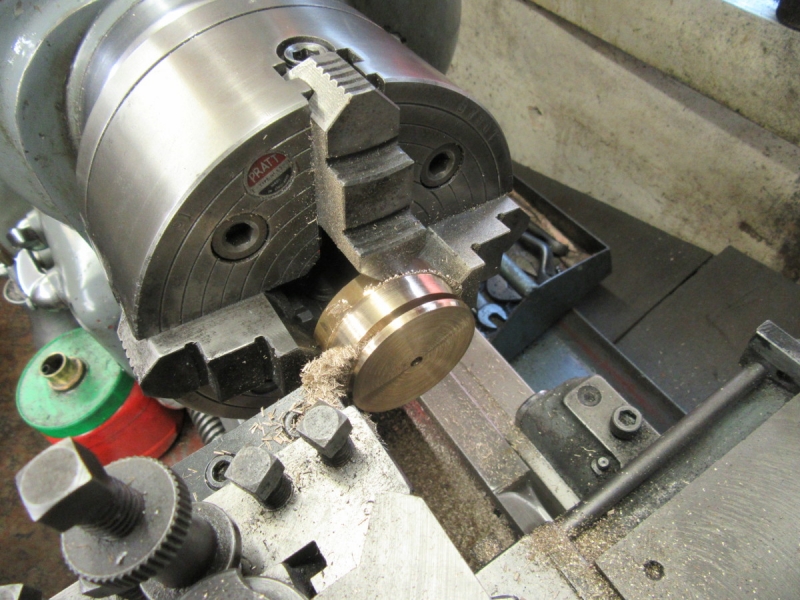
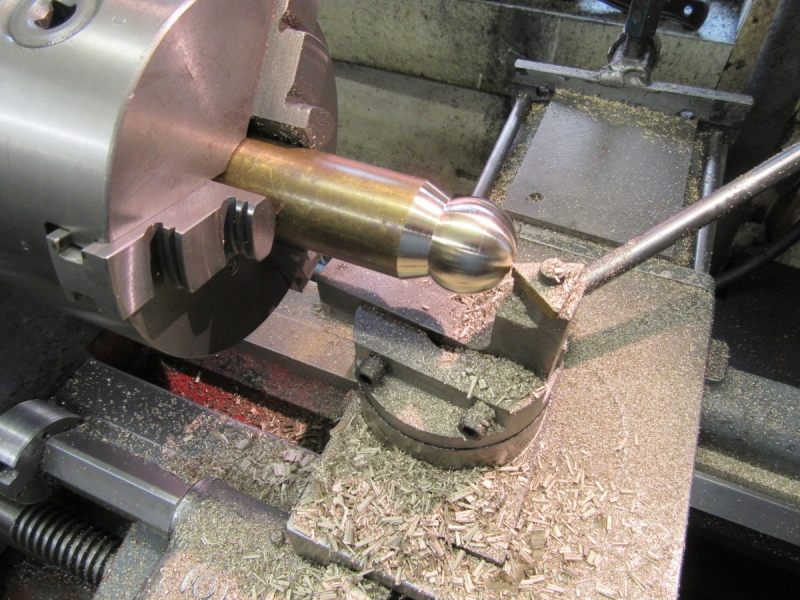
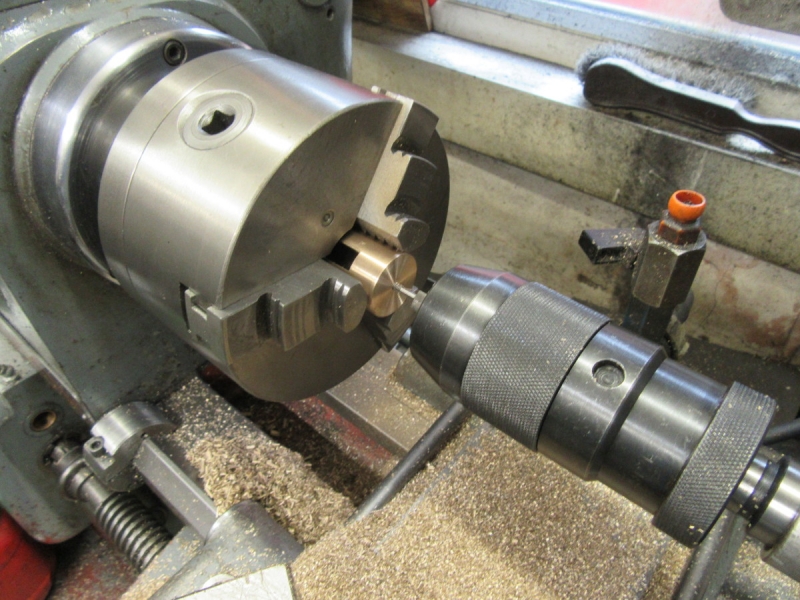
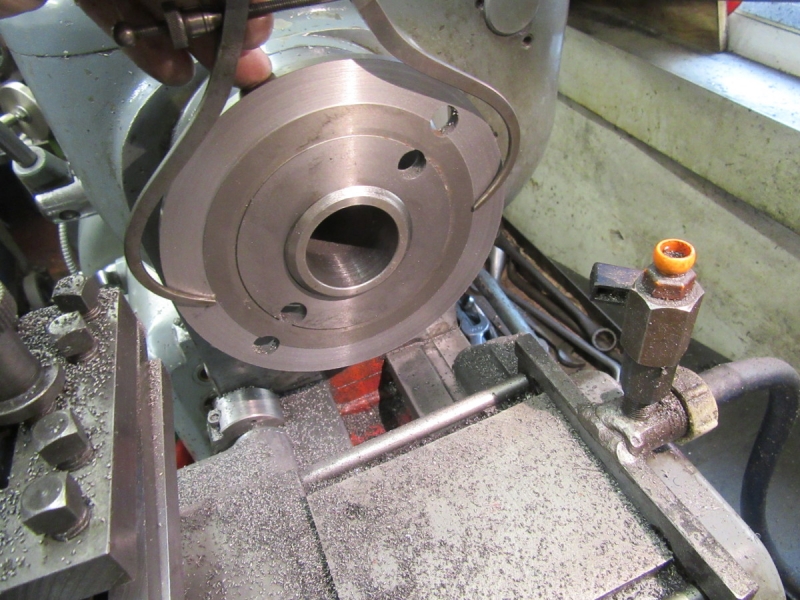
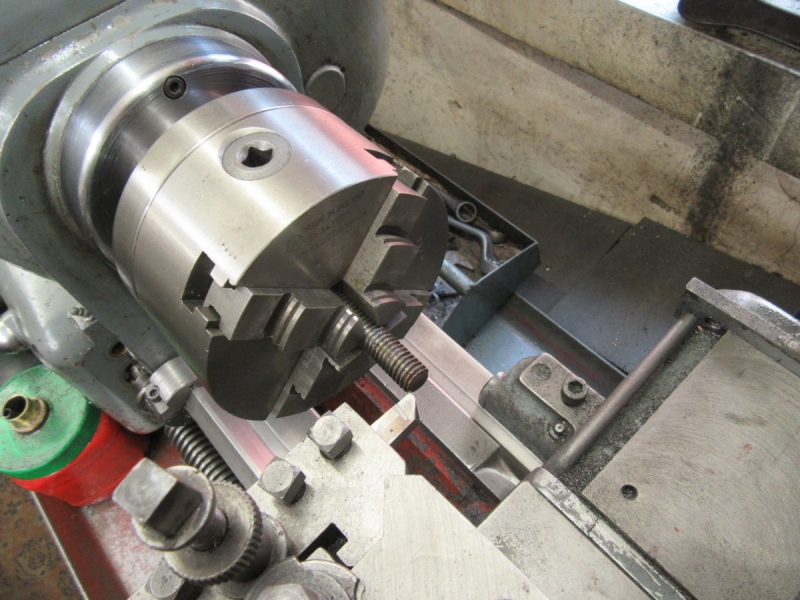
Taking the final cut to make sure we have the enough entry......

Image

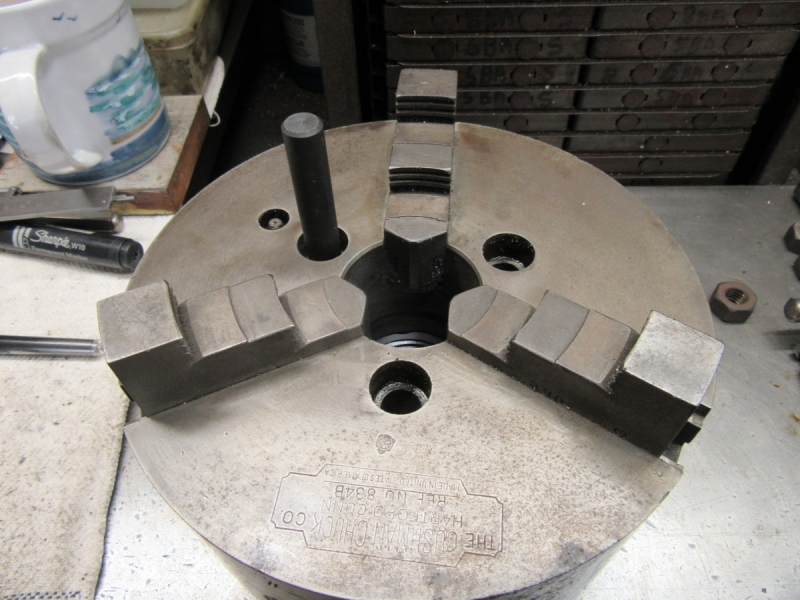
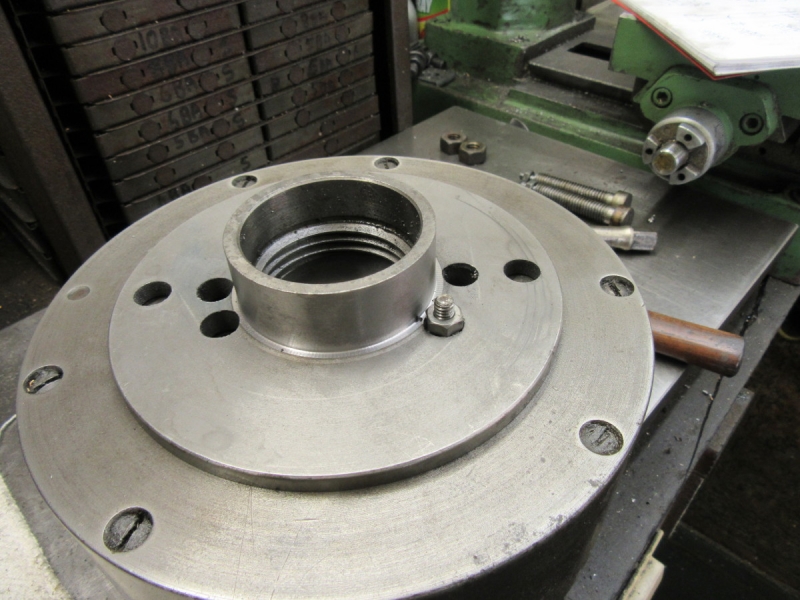
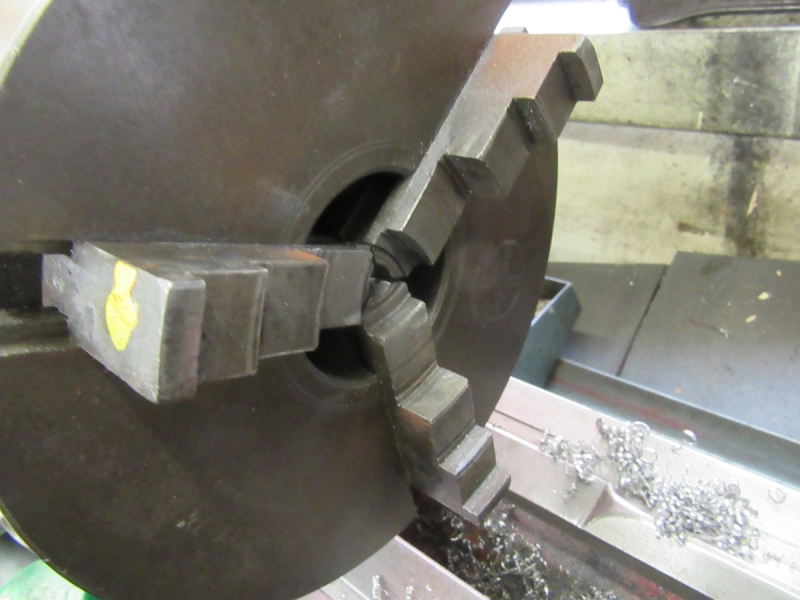
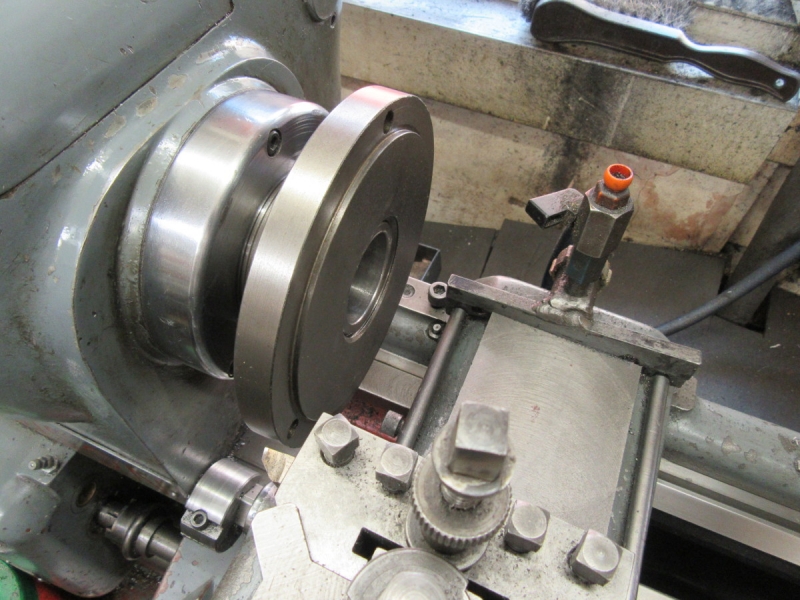
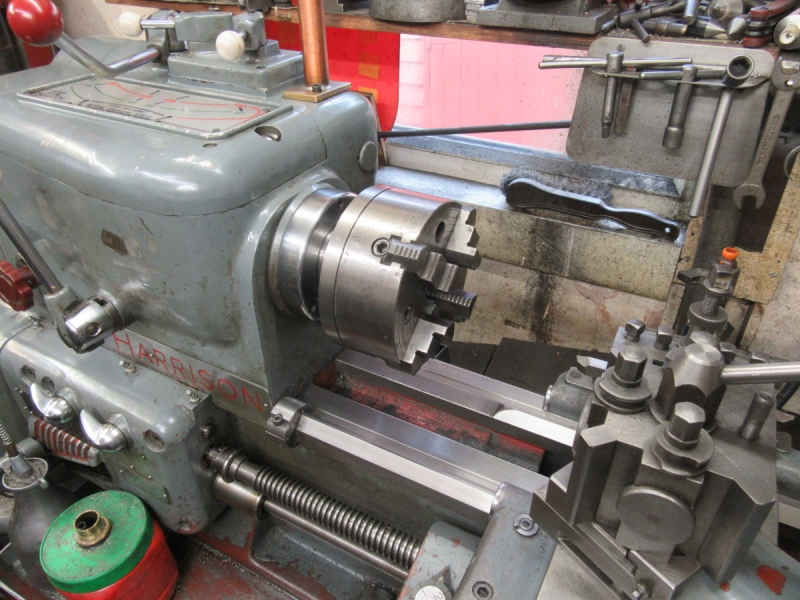
I had to temporarily put the catch pegs back in to give me grip to get the plate off the nose.

Image

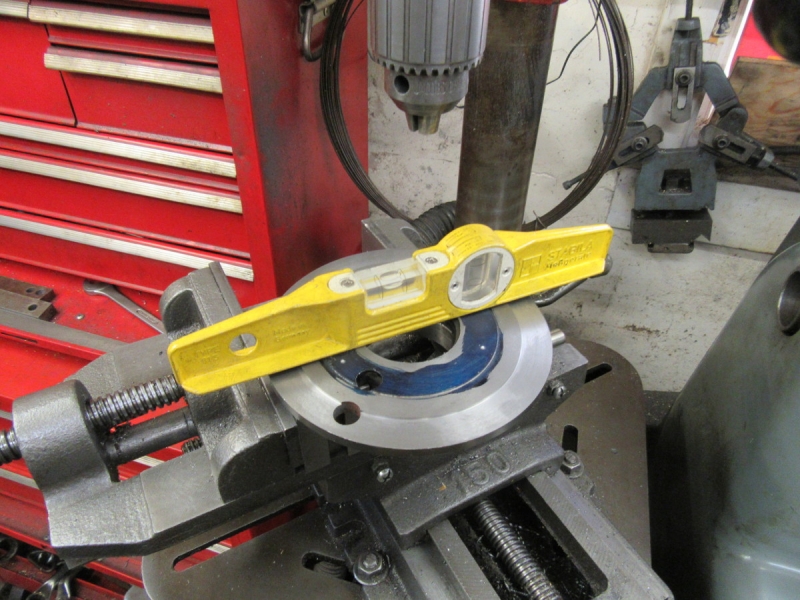
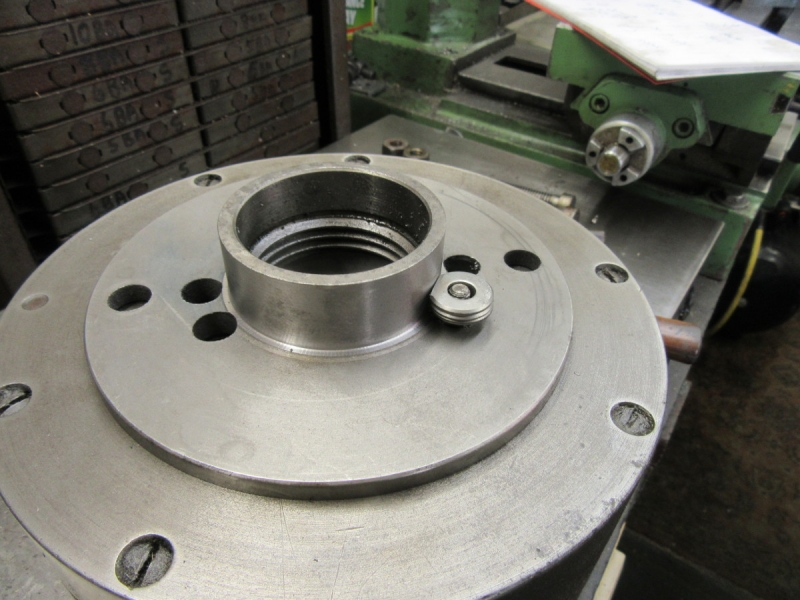
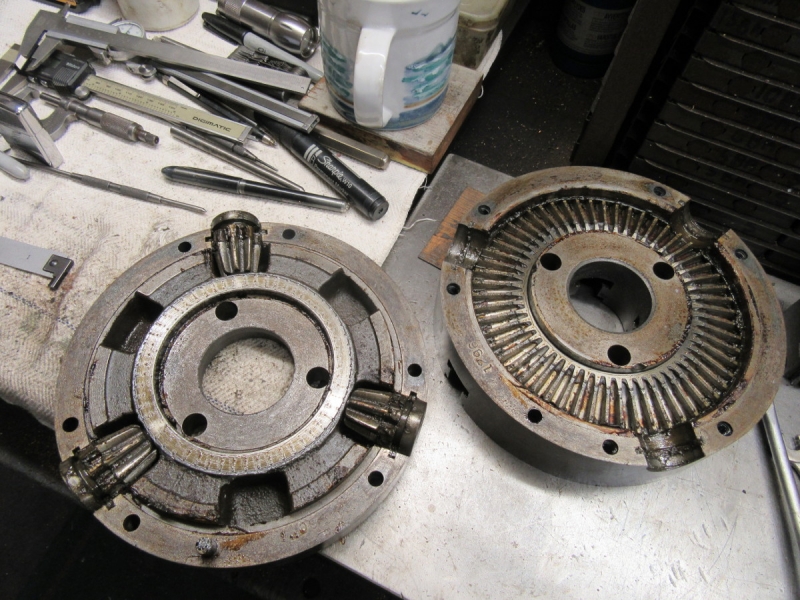
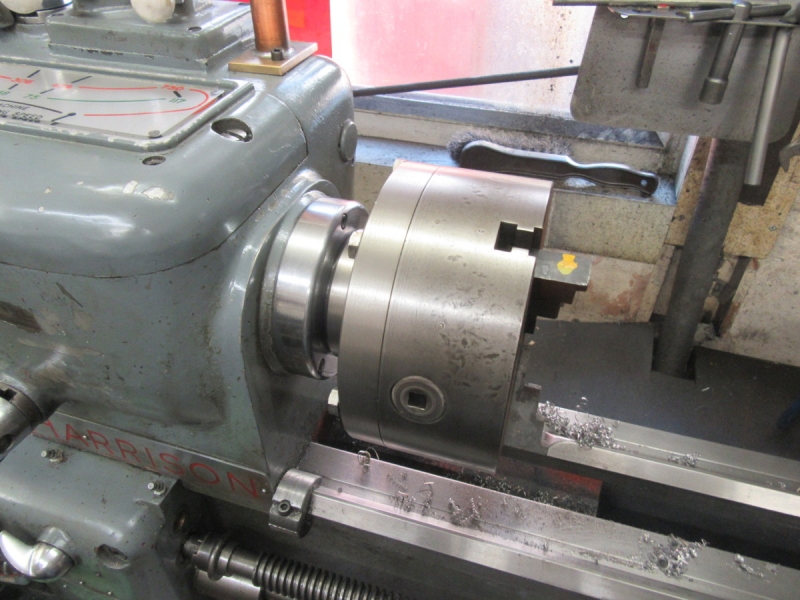
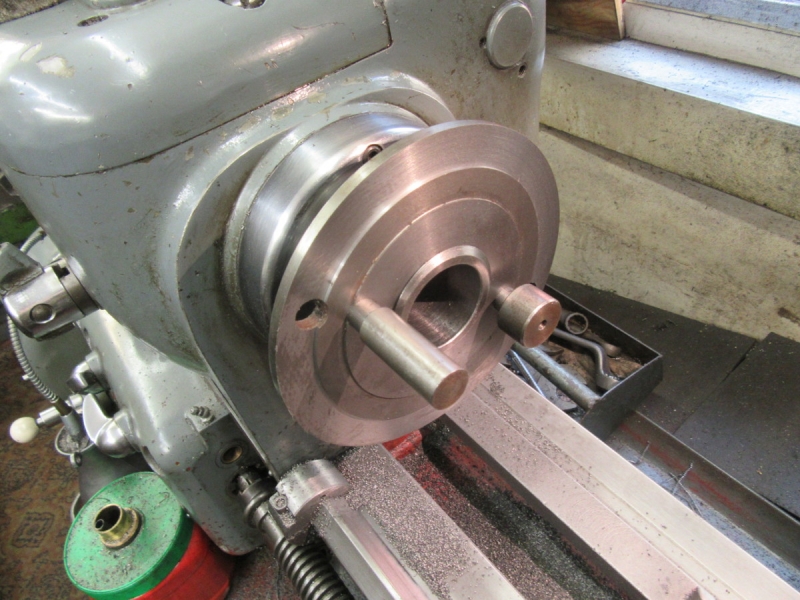
Then I had a trial fit, it's lovely, just right. By chance one of the holes coincides with one of the original bolts and I didn't see this one coming! I have been concentrating so much on getting a good fit it never entered my head. A bit of thought needed so I cleaned Mrs Harrison while I cogitated.

Image

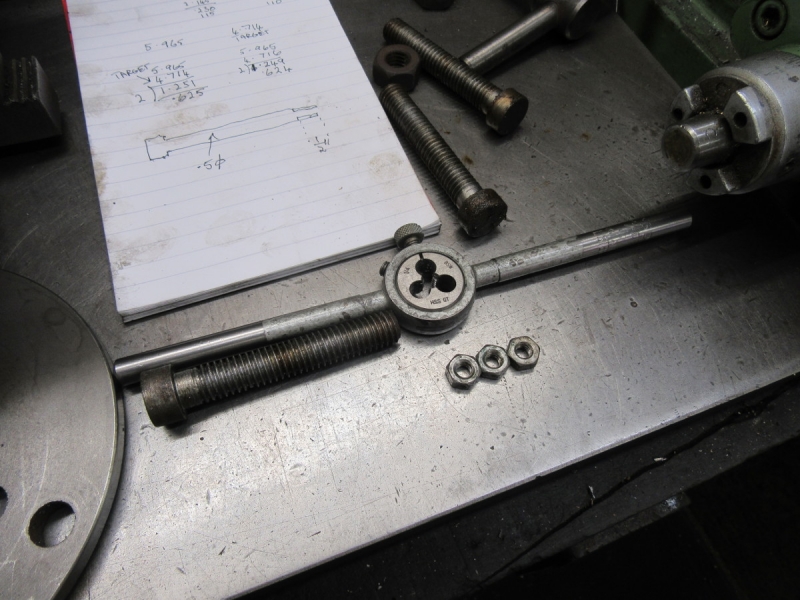
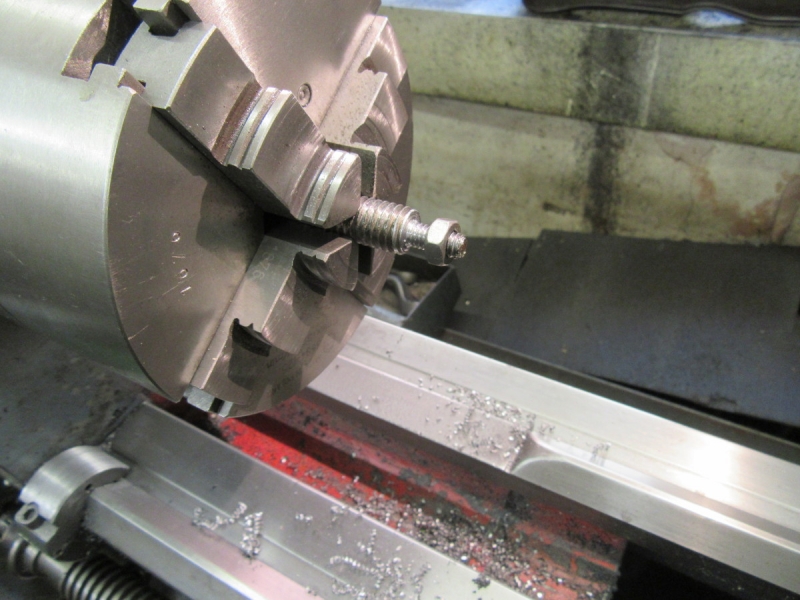
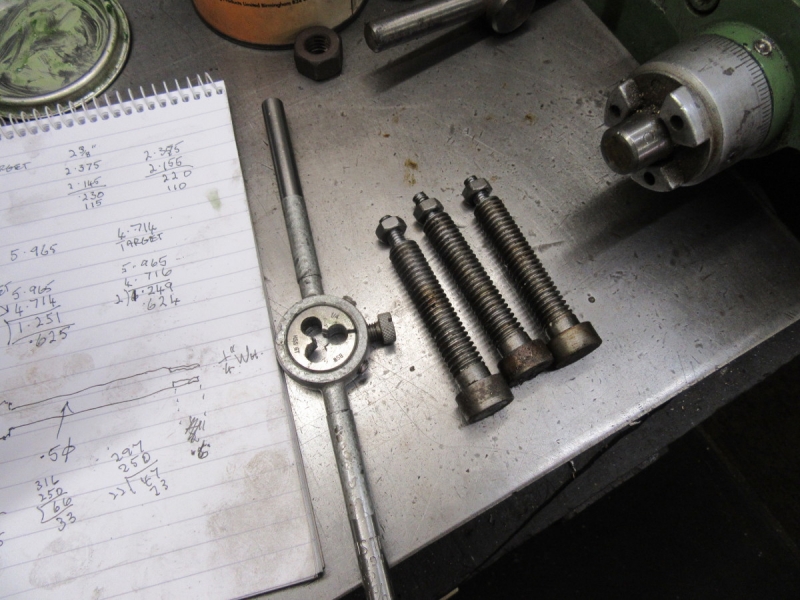
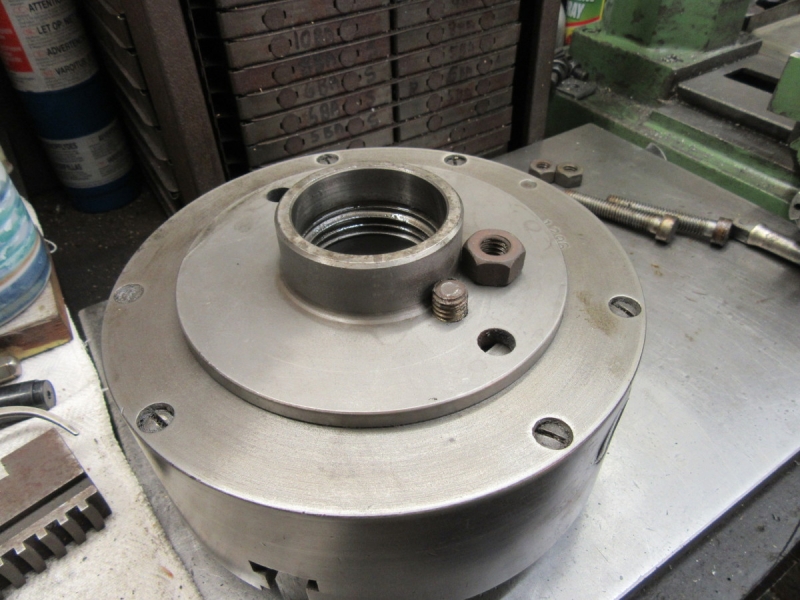
I have decided that this is the way out, turn the 1/2" bolts down to 1/4" and use a washer under each. 1/4" doesn't sound much but all they are doing is clamping the back plate in place. The good fit and the fact that the original bolt diameter is in the chuck and back plate is the main source of stability.

Image

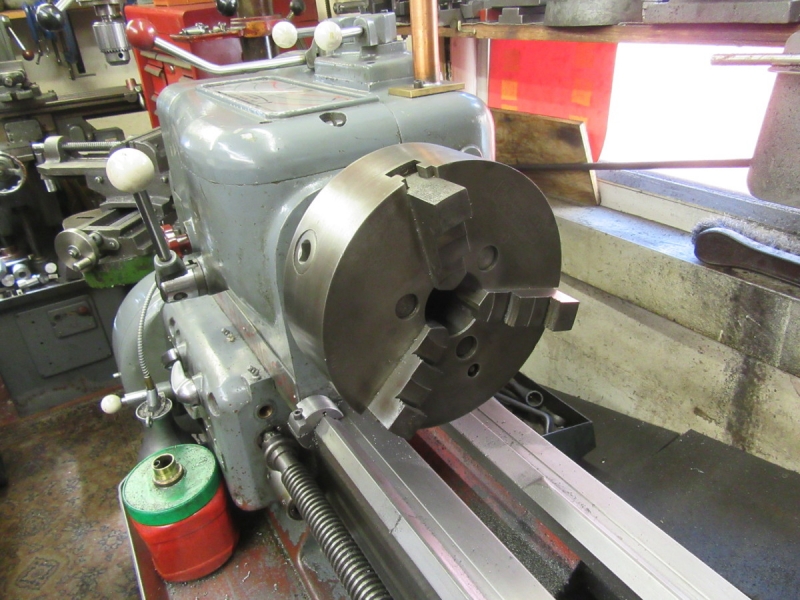
I got set up for tomorrow and took Jack out!
Stanley Challenger Graham
Stanley's View
scg1936 at talktalk.net

"Beware of certitude" (Jimmy Reid)
The floggings will continue until morale improves!
User avatar
Stanley
Global Moderator
Global Moderator
Posts: 90301
Joined: 23 Jan 2012, 12:01
Location: Barnoldswick. Nearer to Heaven than Gloria.

Re: SHED MATTERS 2

Post by Stanley »

Image

Modify the three bolts.

Image

That didn't take long....

Image

Blue the back plate and mark with a transfer punch.

Image

Then under the drill and open the holes at 1/2". I discarded the one that was nearly aligned, it would only have caused trouble, three fresh holes. BTW, I used a 'V'block to hold it.

Image

I needed a bit more clearance for the nuts so I skimmed enough off the boss to give me room. In case you're wondering, this is another old chuck, a 7 1/2" 3 jaw but the jaws are a lot smaller and more worn than the one I am working on now. Remember, you can never have too many chucks!

Image

That's better, now for some washers.

Image

I ground flats on 3 heavy 1/4" washers so they'd sit on the back.

Image

The 1/4" nuts were plenty powerful enough to pull the backing plate into the register, it's a tight fit, it clicked as I was tightening it down. Then I used the oil nipple on the front of the chuck to get some oil on the scroll, the jaws are very tight. Notice that they are a good chunky size.

Image

At knocking off time I had the jaws out and soaked the inside of the chuck with penetrating oil. It can soak all night and I'll work on the scroll and the jaws tomorrow. The interior is quite dry and sticky. Notice that despite the jaws being beefy, the scroll is relatively fine. This means that the chuck will have a very powerful grip. From what I can see this chuck hasn't had much wear.....
Stanley Challenger Graham
Stanley's View
scg1936 at talktalk.net

"Beware of certitude" (Jimmy Reid)
The floggings will continue until morale improves!
User avatar
Stanley
Global Moderator
Global Moderator
Posts: 90301
Joined: 23 Jan 2012, 12:01
Location: Barnoldswick. Nearer to Heaven than Gloria.

Re: SHED MATTERS 2

Post by Stanley »

Image

Yes I know, you're thinking what the hell has this to do with the Cushman chuck? Good question, I didn't expect anything that happened this morning. The start was when I decided that instead of doing a cosmetic job on the chuck I'm going to do it properly, it's in new condition under the muck and the rust and deserves it even though it only has one set of jaws. This got me onto something that's been on my mind for a while, changing the green grit wheel for a wire brush. So into the abrasives drawer to fish out the wire wheel I knew I had. So that explains the mess!

Image

Here's a good tip for you. For a start off never over-tighten the nuts that secure the grinding wheels on, all they need is a nip. Second remember that the right hand spindle is right hand thread and the left hand is Left. Third treat the wheels carefully, it's easy to crack them and make them dangerous. That raises the question of how you break the nuts loose, here's how, pop a wooden wedge between the grinding rest and the wheel and it will tighten gently on the wheel and jam it safely. (Reverse the direction of the wedge when you're nipping them up.) Bleeding obvious but many don't know it.

Image

Now for something entirely different! This one crept up on me out of left field. One of the things I had to do was swap the Cushman chuck out of Mrs Harrison and pop the three jaw on because one of the spacers on the grinder was rusted and needed cleaning up and truing. I went to clean the CI dust off the lathe and Mr Henry, the shop vac, got a stoppage. I usually manage to clear blockages by squeezing the tube and persuading it to shift under vacuum but this didn't happen. I had to get the tube off and poke a length of plastic hosepipe down to shift it. Here's where it ended up and I eventually picked it out.

Image

Then I cleaned up the spacer.

Image

Next came one of those episodes that can be so annoying. I decided (wrongly as it turned out) that I needed to be opened out to 13/16" and went to look for my blacksmth's drill. Needless to say I found the box but not the drill. In the end I found a big masonry drill so I had to but the green grit wheel back on the grinder to sharpen it. I made a horrible mess of the hole in the wire wheel and even then it didn't fit so I gave up on that one in disgust. The grinding wheel I have been using is a coarse one but I've always managed. I had a medium grit wheel for it so I decided to fit that one. In case you're wondering I have a small grinder with a green grit wheel on and green grit wheels for the Clarkson T&G grinder so I won't be fast. So a good tidy up, dress both the grinding wheels and adjust the rests, at least one thing in the shed shows an improvement! Tomorrow I'll get back to the chuck and strip it completely. BTW, I have wire-wheels for the Metabo angle grinder so I shall still be able to do a good job of burnishing the chuck.
Stanley Challenger Graham
Stanley's View
scg1936 at talktalk.net

"Beware of certitude" (Jimmy Reid)
The floggings will continue until morale improves!
User avatar
Stanley
Global Moderator
Global Moderator
Posts: 90301
Joined: 23 Jan 2012, 12:01
Location: Barnoldswick. Nearer to Heaven than Gloria.

Re: SHED MATTERS 2

Post by Stanley »

Image

The first job this morning was to dismantle the chuck and part of that was removing the six screws on the face which hold the body together once the back plate is removed. Not surprisingly they were solid. They haven't been moved for over 100 years. So out came the impact driver, one of the best tools Sykes Pickavant ever made! If you haven't got one remedy the deficiency! It doesn't come out very often but when it does it's magic!

Image

Once it was opened up it was obvious that it's been greased through the nipple on the front and it's clogged with grease that has gone hard and trapped chips that have been fine enough to get into the gearing. One puzzle, I couldn't see what was retaining the pinions which drive the scroll.

Image

A bit of investigation and if you look carefully you'll see the half circle that fits in the slot and retains the pinion in place. All you had to do was push on one end until it was free from the slot.

Image

Now all I have to do is clean the parts......

Image

I think you can see a difference! Now for a good clean and polish and then a rebuild.

Image

A bit later after a careful rebuild with plenty of clean oil. It wasn't easy to reassemble because the components are so close fitting. As far as I can see there is almost no wear anywhere. The scroll gear was so close fitting that you can't turn it by hand but it's OK using the chuck key. The jaws have no wear at all on them, they are very snug in the ways but the scroll is so low geared it feels OK. I'll mount it on Mrs Harrison tomorrow and find out how it performs.
Stanley Challenger Graham
Stanley's View
scg1936 at talktalk.net

"Beware of certitude" (Jimmy Reid)
The floggings will continue until morale improves!
User avatar
Stanley
Global Moderator
Global Moderator
Posts: 90301
Joined: 23 Jan 2012, 12:01
Location: Barnoldswick. Nearer to Heaven than Gloria.

Re: SHED MATTERS 2

Post by Stanley »

Image

Chuck testing this morning. First job was to take the small 3 jaw off and put the big Cushman on the lathe. Then run it at top speed to 'spin dry' it, get the excess oil from reassembly out of it. I let it run for about five minutes and a lot of oil sprayed out! Then I ran it at a slow speed and could see immediately that all was not well. I could see that the body wasn't running concentric. I have to assume that Cushman knew what they were doing so it must be a fault with the backing plate.

Image

I took the chuck off and found that the back plate was running two and a half thou out. The only thing I can think is that taking so much off the catch plate to make it fit has released stresses in the casting. I can't see how my turning can be at fault unless I didn't have it screwed down tight on the register.

Image

I sharpened my cutter (the grindstone is a lot better since I gave it attention), honed it and took a .01" cut off it and just touched the register to give it a slight taper and make it a gnat's hair smaller.

Image

That's better, spot on!

Image

I put the chuck back on and tightened the bolts, the body was running much better but still not where I thought it should be. I put my test bar in and checked and it was still running about 4 thou out at 2.5" from the jaw so I slackened the bolts, put an indicator on the body and used the lead bumper to knock it within less than a thou of truth. Then I gradually nipped the bolts and swapped to indicating the test bar. I did a bit more bumping and adjusting while progressively tightening the bolts and ended up with the reading at 2.5" at slightly under a thou. That'll do me it's as good as my best modern chuck.
So I've finished up with a big 3 jaw chuck with very substantial jaws in good nick which has hardly any wear. It's an improvement on my other 7.5" antique chuck.
There's one on the web priced at $350........

Image
Stanley Challenger Graham
Stanley's View
scg1936 at talktalk.net

"Beware of certitude" (Jimmy Reid)
The floggings will continue until morale improves!
User avatar
Stanley
Global Moderator
Global Moderator
Posts: 90301
Joined: 23 Jan 2012, 12:01
Location: Barnoldswick. Nearer to Heaven than Gloria.

Re: SHED MATTERS 2

Post by Stanley »

despite getting a good result with the Cushman chuck I am not happy. My solution to the attaching bolts was cheap and cheerful and not up to standard. I am going to replace them with 1/2" UNF stainless steel cap head bolts. I have just ordered a box of 4 at enormous expense! About £6 a bolt! But I shall be happy and that's what counts.....
Stanley Challenger Graham
Stanley's View
scg1936 at talktalk.net

"Beware of certitude" (Jimmy Reid)
The floggings will continue until morale improves!
User avatar
Stanley
Global Moderator
Global Moderator
Posts: 90301
Joined: 23 Jan 2012, 12:01
Location: Barnoldswick. Nearer to Heaven than Gloria.

Re: SHED MATTERS 2

Post by Stanley »

Image

Having settled my mind about the Cushman chuck I thought I'd check the other old chuck out that only has a set of outside jaws, the 7.5" Belco. So I mounted it and tried to get a measurement on the test bar. The centre jaws were so bad I couldn't even get a good grip on the bar. When I did it was a mile out.

Image

What I really needed now was a large ball bearing race that I could test in the other jaws but I hadn't got one so I chucked a piece of scrap and after making sure I had hold of it I set to to face it and turn it true.

Image

I did the same thing at the other end. The theory is that if the chuck was perfect, I could reverse the piece and get a reasonable measurement off it. I have to say I wasn't very optimistic!

Image

Image

I faced the end and reversed it and then tried it with the indicator.... It didn't matter what I did, the best reading I got was 30 thou out. No big surprise!

Image

The jaws are loose, badly worn and weren't well proportioned when they were new, not a parch on the Cushman chuck. I shall scrap this one, it's useless. At least I get a good back plate out of it!
Stanley Challenger Graham
Stanley's View
scg1936 at talktalk.net

"Beware of certitude" (Jimmy Reid)
The floggings will continue until morale improves!
User avatar
Stanley
Global Moderator
Global Moderator
Posts: 90301
Joined: 23 Jan 2012, 12:01
Location: Barnoldswick. Nearer to Heaven than Gloria.

Re: SHED MATTERS 2

Post by Stanley »

Image

I was a bit late in the shed for various reasons but got there in the end. Here's the condemned Belco 7.5" 3 jaw. It has to come off and be stripped down.

Image

Here we are. Look on the bright side! I have won a good backplate with lots of meat in it which can be adapted to any use on Mrs Harrison. I also have six good Whitworth set screws.... I'm not knocking Belco, there's nothing wrong with the way they built this chuck about 100 years ago, it's just worn out after a hard life, no shame and my mind has been working round re-using it as a holding device perhaps on a rotary table or something similar so it's not being scrapped.

That's done so I gave Mrs Harrison a good clean and retired to post this and do a bit of thinking. I am looking for cheap ways of keeping me occupied, I am not flush with cash at the moment so my mind is tending towards shed maintenance, for instance it wouldn't be a bad idea to go through my other chucks and test them. I( have little doubt that I can improve some of them if only because CI backplates move over time as the stresses come out of them. Besides, I am a lot more knowledgeable now with ongoing experience.) Mrs Harrison in herself is so accurate that it would be a mistake to neglect the chucks.... I will never get to perfection but could get close and it will be reflected in everything I do. Onwards and upwards!

Image

I finished up by putting the 4 jaw back on and tidying up. Worth repeating of course the fact that this chuck, and it's big brother are the most accurate chucks I possess. Never forget that!
Stanley Challenger Graham
Stanley's View
scg1936 at talktalk.net

"Beware of certitude" (Jimmy Reid)
The floggings will continue until morale improves!
User avatar
Stanley
Global Moderator
Global Moderator
Posts: 90301
Joined: 23 Jan 2012, 12:01
Location: Barnoldswick. Nearer to Heaven than Gloria.

Re: SHED MATTERS 2

Post by Stanley »

Image

Chuck checking..... I decided to start with the original Pratt 3 jaw that was supplied with the lathe 50 or 60 years ago. I checked the body and found it was running about a thou out of concentricity and the test bar at 6" out from the face is over 5thou out. Sounds terrible but it isn't, remember no 3 jaw is ever accurate even when brand new. 60 years on it's no wonder there is wear!

Image

I took the back plate off, cleaned it and put it back on the nose, it was over a thou out of true on the face. No criticism of the fitters at Heckmondwyke, castings move over the years and I am certain that that is what this is down to.

Image

Funny how much more careful I am being adjusting this chuck compared to fitting a new one. I took a very careful 3 thou cut and then after checking the depth of the recess I realised that the face of the register was very close to the chuck body so I gave that a good skim as well.

Image

Here we are at closing time. That's as good a job as I can make and I'll leave it until tomorrow to reassemble it and have another check. According to cocker, even with the wear, there ought to be a slight improvement. This is time well spent. By the way, I think it's the first time the chuck has ever been opened up and the screws that hold the interior plate on to the scroll were loose. I don't think it made much difference but everything counts.
Stanley Challenger Graham
Stanley's View
scg1936 at talktalk.net

"Beware of certitude" (Jimmy Reid)
The floggings will continue until morale improves!
User avatar
Stanley
Global Moderator
Global Moderator
Posts: 90301
Joined: 23 Jan 2012, 12:01
Location: Barnoldswick. Nearer to Heaven than Gloria.

Re: SHED MATTERS 2

Post by Stanley »

Image

Back to the original 3 jaw chuck.... I started the morning by making sure that the register was exactly the right size and that the leading edge had a slight bevel. Than I reinstalled it with the back bolts snugged up but not dead tight. Then I checked the body for concentricity and bumped it with the lead thumper to get it as close to truth as possible. Allowing for the marks on the body resulting from 60 years wear it's improved and is spot on. I checked the face and that is better as well. Then I tightened the back bolts dead tight and did a final check, nothing had moved. Then I put the test bar in and checked that. I had gained a slight improvement but nothing worth writing home about. The conclusion is that this is an old chuck and the wear is in the scroll and the teeth on the jaw.

Image

I checked a couple of the other chucks and wasn't surprised to find that all the 'self-centring' chucks are inaccurate so I put my most accurate chuck back on and tidied up.
So what have I learned? Apart from the fact that I know the back plate of the original 3 jaw is dead accurate now, or at least as accurate as I can make it, not a lot I didn't know before. It has reminded me that 'centring' chucks are never accurate and if you want to do good work you should accept this. This doen't mean that they aren't handy for chucking stock and once you have started cutting, if the rest of your lathe is adjusted properly, your work will be accurate as long as you leave it in the chuck. That's a good reason for having as many chucks as possible, there is one way of making sure that a 3 jaw is repeatable, take the chuck off with the workpiece still in it and use another chuck! Your best friend is the 4 jaw independent and an indicator.
Stanley Challenger Graham
Stanley's View
scg1936 at talktalk.net

"Beware of certitude" (Jimmy Reid)
The floggings will continue until morale improves!
User avatar
Stanley
Global Moderator
Global Moderator
Posts: 90301
Joined: 23 Jan 2012, 12:01
Location: Barnoldswick. Nearer to Heaven than Gloria.

Re: SHED MATTERS 2

Post by Stanley »

Nothing definite planned for this morning and I have an appointment at the surgery this morning. What's going through my mind is reversing gear for engines. I have never got into the subject but am considering dipping my foot in the water! Valve gears are strange wee beasties and not used on mill engines....... so I have no practical experience.
Stanley Challenger Graham
Stanley's View
scg1936 at talktalk.net

"Beware of certitude" (Jimmy Reid)
The floggings will continue until morale improves!
User avatar
Stanley
Global Moderator
Global Moderator
Posts: 90301
Joined: 23 Jan 2012, 12:01
Location: Barnoldswick. Nearer to Heaven than Gloria.

Re: SHED MATTERS 2

Post by Stanley »

Sorry lads, I am writing articles. Amazing how fast the weeks go past and the stock pile shrinks......
Stanley Challenger Graham
Stanley's View
scg1936 at talktalk.net

"Beware of certitude" (Jimmy Reid)
The floggings will continue until morale improves!
User avatar
Stanley
Global Moderator
Global Moderator
Posts: 90301
Joined: 23 Jan 2012, 12:01
Location: Barnoldswick. Nearer to Heaven than Gloria.

Re: SHED MATTERS 2

Post by Stanley »

I've written my articles but am feeling idle.... Don't worry, my mojo will revive shortly!
Stanley Challenger Graham
Stanley's View
scg1936 at talktalk.net

"Beware of certitude" (Jimmy Reid)
The floggings will continue until morale improves!
User avatar
Stanley
Global Moderator
Global Moderator
Posts: 90301
Joined: 23 Jan 2012, 12:01
Location: Barnoldswick. Nearer to Heaven than Gloria.

Re: SHED MATTERS 2

Post by Stanley »

Image

I was in half a mind to have another lazy day but braced up! I reckon this new blood pressure prescription is slowing me down a bit and decided a bit of discipline was in order.
What I have in mind is something I've toyed with for a long time, a door-knocker for the back door. So I did a fag packet drawing and dived into the non-ferocious treasure chests to sort out some stock. All that collecting over the years has paid off, metal like this is ridiculously expensive these days.....

Image

A bit of dialling in practice with the four Jaw and then into some straight turning.

Image

This, parting off, used to be a source of terror for me. Now I have mastered it it's a piece of cake. This was done on a slow crossfeed. No problem at all.

Image

At closing time I had the two pads and the hinge support. I had cleaned up the stock for the knocker itself and the next job is to turn a ball on the end. The ball-turning attachment I made doesn't come out very often so I want to take my time setting it up. I shall come fresh to it tomorrow, at least we have broken the log jam!
Stanley Challenger Graham
Stanley's View
scg1936 at talktalk.net

"Beware of certitude" (Jimmy Reid)
The floggings will continue until morale improves!
User avatar
chinatyke
Donor
Posts: 3831
Joined: 21 Apr 2012, 13:14
Location: Pingguo, Guangxi, China

Re: SHED MATTERS 2

Post by chinatyke »

Stanley wrote: 28 May 2018, 09:13 What I have in mind is something I've toyed with for a long time, a door-knocker for the back door.
'Ey up lad, tha's getting posh!
User avatar
Stanley
Global Moderator
Global Moderator
Posts: 90301
Joined: 23 Jan 2012, 12:01
Location: Barnoldswick. Nearer to Heaven than Gloria.

Re: SHED MATTERS 2

Post by Stanley »

It'll be polished brass as well!
Stanley Challenger Graham
Stanley's View
scg1936 at talktalk.net

"Beware of certitude" (Jimmy Reid)
The floggings will continue until morale improves!
User avatar
Stanley
Global Moderator
Global Moderator
Posts: 90301
Joined: 23 Jan 2012, 12:01
Location: Barnoldswick. Nearer to Heaven than Gloria.

Re: SHED MATTERS 2

Post by Stanley »

Image

First job was to set the cutter for the diameter of ball I wanted. The cast iron angle plate is by no means a precision item but it's useful for jobs like this. Come to think it would benefit from a skim to get it square.... I'll keep it in mind...

Image

Then set the ball turner up on the lathe. I'm struck by what a good job I did when I made it, not bad at all!

Image

Not long afterwards. Dead easy to use once it's set up and does a good job......

Image

Then a new set up to get the shape into it.....

Image

Closing time..... things are going well! I only had just over an hour, there was cooking to do!
Stanley Challenger Graham
Stanley's View
scg1936 at talktalk.net

"Beware of certitude" (Jimmy Reid)
The floggings will continue until morale improves!
User avatar
Big Kev
Site Administrator
Site Administrator
Posts: 10956
Joined: 23 Jan 2012, 20:15
Location: Foulridge

Re: SHED MATTERS 2

Post by Big Kev »

It's looking good. :good:
Kev

Stylish Fashion Icon.
🍹
User avatar
Stanley
Global Moderator
Global Moderator
Posts: 90301
Joined: 23 Jan 2012, 12:01
Location: Barnoldswick. Nearer to Heaven than Gloria.

Re: SHED MATTERS 2

Post by Stanley »

Thanks Kev......
Stanley Challenger Graham
Stanley's View
scg1936 at talktalk.net

"Beware of certitude" (Jimmy Reid)
The floggings will continue until morale improves!
User avatar
Stanley
Global Moderator
Global Moderator
Posts: 90301
Joined: 23 Jan 2012, 12:01
Location: Barnoldswick. Nearer to Heaven than Gloria.

Re: SHED MATTERS 2

Post by Stanley »

Image

First thing was to put a chamfer on the hinge end of the knocker.

Image

I broke all the edges with a diamond hone and then addressed putting two flats on it. I can't hold it in the vise on the VM or the HM so even though it's against my religion I had to cut them in the big vise with the hacksaw. Ignore the number 18 on the frame, this is a 24 tooth blade. Then clean the flats with the grindstone and a smooth file.

Image

Now I need a slot in the hinge. I set up in the HM and took 3/4" out in one pass.

Image

I had to take an extra skim off one side to get a perfect fit but it all worked out OK. But this pic is about showing off! Look at the chips..... Those are perfect chips for an HM cutter. I wasn't wasting my time when I had that sharpening orgy and tried to cut my finger off!

Image

I have to fasten the hinge block to the base and decided that a good start would be a 5BA countersunk screw. I shall sweat some solder into the joint when I finally assemble it. Drill and tap.... Brand new HS 5BA tap. Cost an arm and a leg but well worth it!

Image

That will do. Solder later.

Image

Getting there. A few little jobs to do yet but I think you can see where I'm going.

Image

Then the postie came..... Remember me saying I wasn't satisfied with the bolts I made for the 8" three jaw chuck back? I ordered these 1/2" socket cap bolts. They had to order them specially as Imperial sizes in the thread I had a tap for, UNF, are not stocked these days. Would you believe a total of £27 for four? But I was determined to have the right ones...... (stubborn old bugger, I know.....)
Stanley Challenger Graham
Stanley's View
scg1936 at talktalk.net

"Beware of certitude" (Jimmy Reid)
The floggings will continue until morale improves!
User avatar
Stanley
Global Moderator
Global Moderator
Posts: 90301
Joined: 23 Jan 2012, 12:01
Location: Barnoldswick. Nearer to Heaven than Gloria.

Re: SHED MATTERS 2

Post by Stanley »

Image

Image

Less than an hour in the shed, busy morning. Not a lot to tell, only one item on the agenda, drilling the hinge and the knocker for the 5/16" hinge pin that is going to be the pivot. The best way to mark it is poke a small hole through first. I wanted it fairly close fitting and so that made life difficult for me! Still, after a lot of fiddling and adjusting I have it done and witness marks on the hinge and knocker so I know which way it fits.... A small step but in the right direction!
Stanley Challenger Graham
Stanley's View
scg1936 at talktalk.net

"Beware of certitude" (Jimmy Reid)
The floggings will continue until morale improves!
User avatar
Stanley
Global Moderator
Global Moderator
Posts: 90301
Joined: 23 Jan 2012, 12:01
Location: Barnoldswick. Nearer to Heaven than Gloria.

Re: SHED MATTERS 2

Post by Stanley »

Image

I started by making a hinge pin and making sure it was a light interference fit. Then I cleaned the faces up applied some flux, bolted it together, put a ring of solder wire round it and heated it slowly until the solder flowed. Lovely! I'm getting better at soldering! I gave it a good brushing with a wire brush but no other finishing....

Image

Then I sorted some brass round head screws out and drilled the patresses in the right place. Once I had that done I drove the hinge pin in. Have you tried buying small brass screws like this lately? Apart from the fact thay are not round head and slotted they cost an arm and a leg. These are out of the treasure chest..... I have enough to last me out!

Image

Then I filed the excess off leaving the pin a little proud and lightly riveted it at each end. It will not work out!

Image

I didn't do any more finishing. I am not famous for it. I want it to weather naturally to whatever colour it wants. It's solid brass and so will not rot away. We have a doorknocker and that was the object of the exercise. The really nice thing is that I made it........
Stanley Challenger Graham
Stanley's View
scg1936 at talktalk.net

"Beware of certitude" (Jimmy Reid)
The floggings will continue until morale improves!
User avatar
Big Kev
Site Administrator
Site Administrator
Posts: 10956
Joined: 23 Jan 2012, 20:15
Location: Foulridge

Re: SHED MATTERS 2

Post by Big Kev »

That looks good, you just need people to use it now. I have a perfectly serviceable knocker but, apart from the window cleaner, everyone taps on the glass :confused:
Kev

Stylish Fashion Icon.
🍹
User avatar
chinatyke
Donor
Posts: 3831
Joined: 21 Apr 2012, 13:14
Location: Pingguo, Guangxi, China

Re: SHED MATTERS 2

Post by chinatyke »

Very nice. :good: But how can you do that and then put up with the door bell switch being out of true? Or is it just the way it looks in the picture?
User avatar
Stanley
Global Moderator
Global Moderator
Posts: 90301
Joined: 23 Jan 2012, 12:01
Location: Barnoldswick. Nearer to Heaven than Gloria.

Re: SHED MATTERS 2

Post by Stanley »

You're right China and it needs taking off! I must have been having a bad day!
Stanley Challenger Graham
Stanley's View
scg1936 at talktalk.net

"Beware of certitude" (Jimmy Reid)
The floggings will continue until morale improves!
Locked

Return to “Crafts”