Shed Matters 3
-
Stanley

- Global Moderator

- Posts: 90301
- Joined: 23 Jan 2012, 12:01
- Location: Barnoldswick. Nearer to Heaven than Gloria.
Re: Shed Matters 3
Look for a cheap old fashioned 6" Vernier on the web Ian. They go for nowt these days when everyone is using digital. I'll finish it this morning God willing. 
Stanley Challenger Graham
Stanley's View
scg1936 at talktalk.net
"Beware of certitude" (Jimmy Reid)
The floggings will continue until morale improves!
Stanley's View
scg1936 at talktalk.net
"Beware of certitude" (Jimmy Reid)
The floggings will continue until morale improves!
-
Stanley
- Global Moderator
- Posts: 90301
- Joined: 23 Jan 2012, 12:01
- Location: Barnoldswick. Nearer to Heaven than Gloria.
Re: Shed Matters 3
Back into drilling and deep tapping. After some careful and concentrated work I had them done and tested.
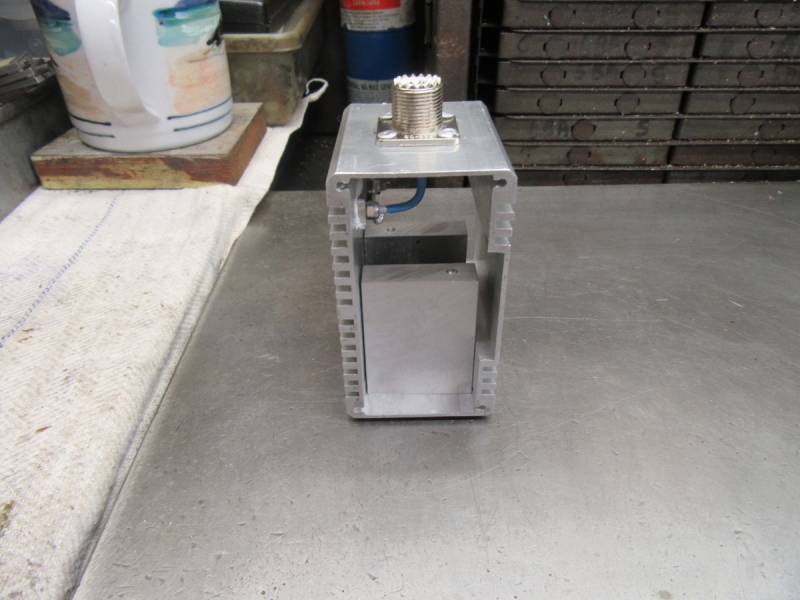
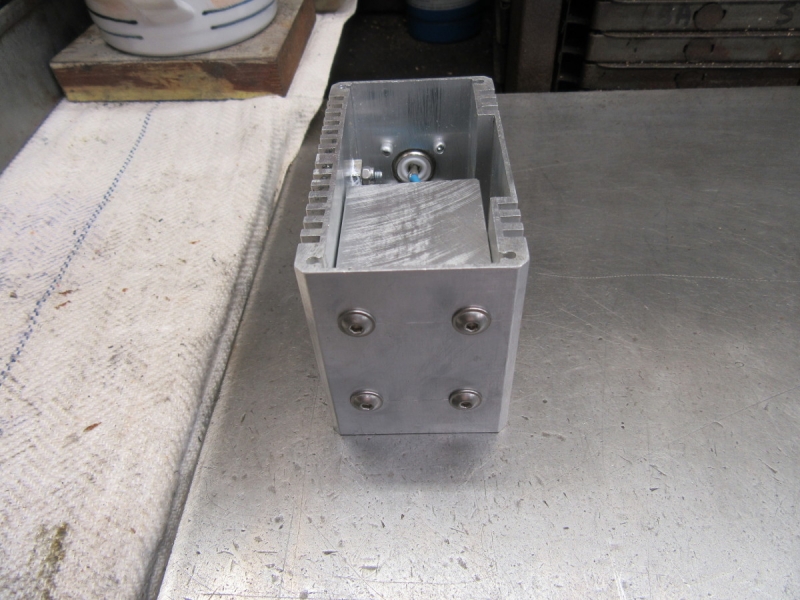
I must have got my measurements right. No problem fixing the slabs in. So Ian's heat sink is finished and ready for collection. I think this is what he wanted.... If not, tough!
Then a chip chase, put all the tackle away, bring the engine back from exile and most important, resharpen my milling cutter. I wasn't pleased with how it was cutting, it needed backing off, gulleting and a new grind. It'll be all right now, I've been a bit lax with it. Now I am ready to attack the valve gear, but that's enough for this morning.
Stanley Challenger Graham
Stanley's View
scg1936 at talktalk.net
"Beware of certitude" (Jimmy Reid)
The floggings will continue until morale improves!
Stanley's View
scg1936 at talktalk.net
"Beware of certitude" (Jimmy Reid)
The floggings will continue until morale improves!
-
PanBiker

- Site Administrator

- Posts: 16447
- Joined: 23 Jan 2012, 13:07
- Location: Barnoldswick - In the West Riding of Yorkshire, always was, always will be.
Re: Shed Matters 3
No complaints Stanley, it's bob on.
Ian
-
Stanley
- Global Moderator
- Posts: 90301
- Joined: 23 Jan 2012, 12:01
- Location: Barnoldswick. Nearer to Heaven than Gloria.
Re: Shed Matters 3
I'll be in bed. I have put it in the green bin on the floor under the outside bench.
Stanley Challenger Graham
Stanley's View
scg1936 at talktalk.net
"Beware of certitude" (Jimmy Reid)
The floggings will continue until morale improves!
Stanley's View
scg1936 at talktalk.net
"Beware of certitude" (Jimmy Reid)
The floggings will continue until morale improves!
-
Stanley
- Global Moderator
- Posts: 90301
- Joined: 23 Jan 2012, 12:01
- Location: Barnoldswick. Nearer to Heaven than Gloria.
Re: Shed Matters 3
You're welcome Ian.
Nice to be useful still....
Nice to be useful still....
Stanley Challenger Graham
Stanley's View
scg1936 at talktalk.net
"Beware of certitude" (Jimmy Reid)
The floggings will continue until morale improves!
Stanley's View
scg1936 at talktalk.net
"Beware of certitude" (Jimmy Reid)
The floggings will continue until morale improves!
-
Stanley
- Global Moderator
- Posts: 90301
- Joined: 23 Jan 2012, 12:01
- Location: Barnoldswick. Nearer to Heaven than Gloria.
Re: Shed Matters 3
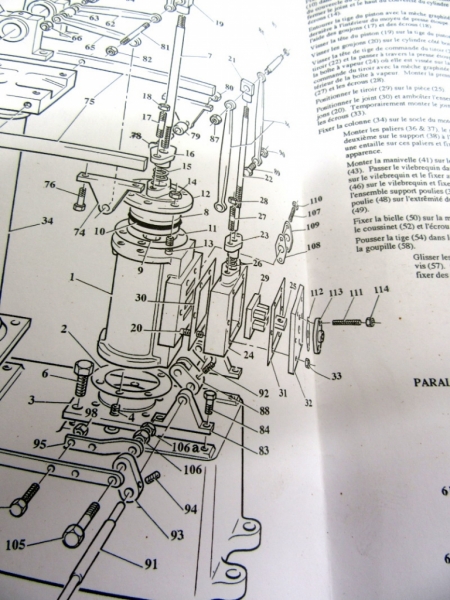
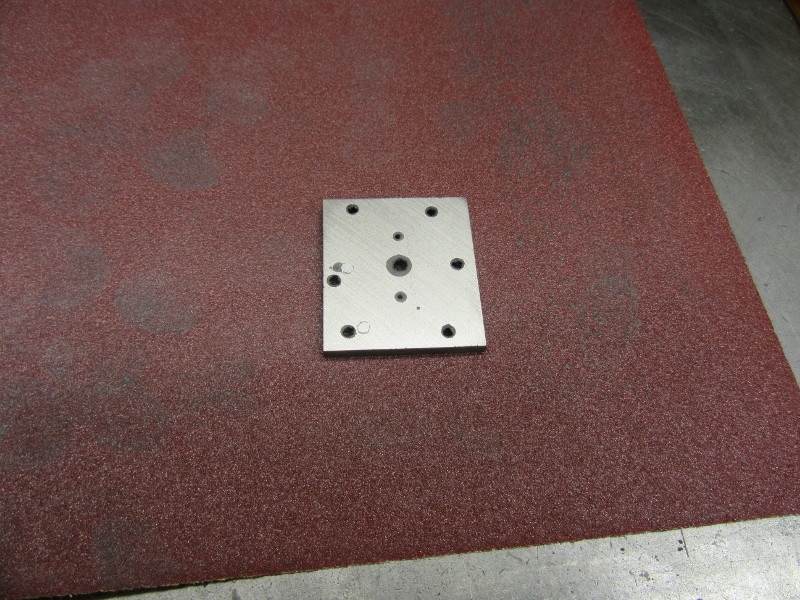
I've got as much out of this exploded drawing as possible. I know how it works and I've decided that the best way to proceed is to make all the parts and then do a jigsaw!
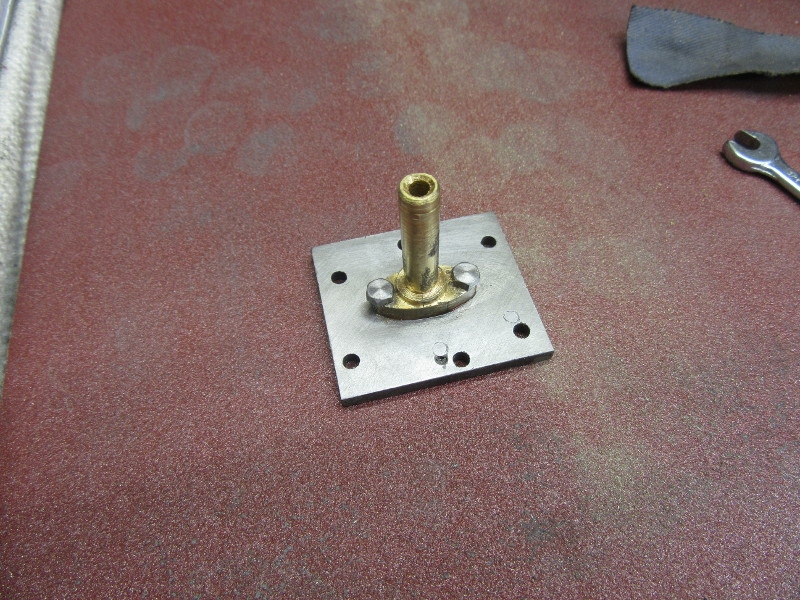
This is the scale we are working at. Not difficult, just fiddly. Anyway here's the first part ready for fitting. Press on!
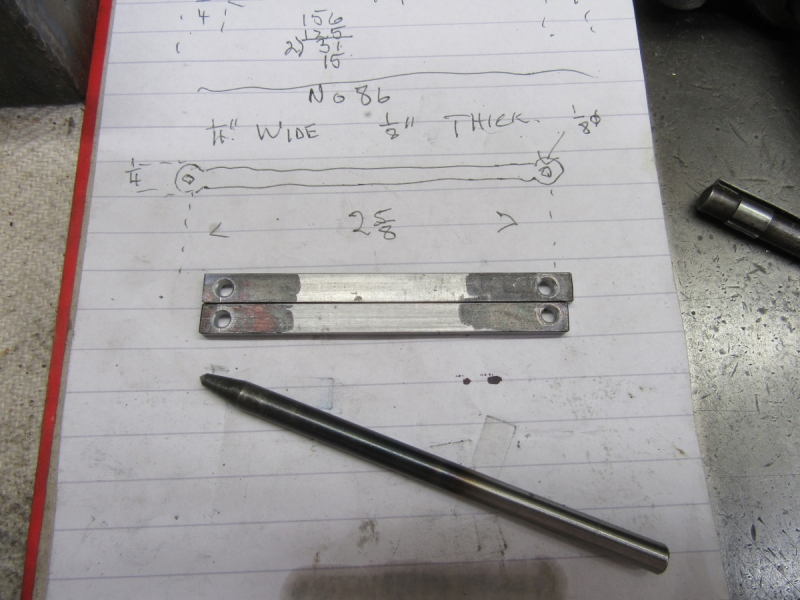
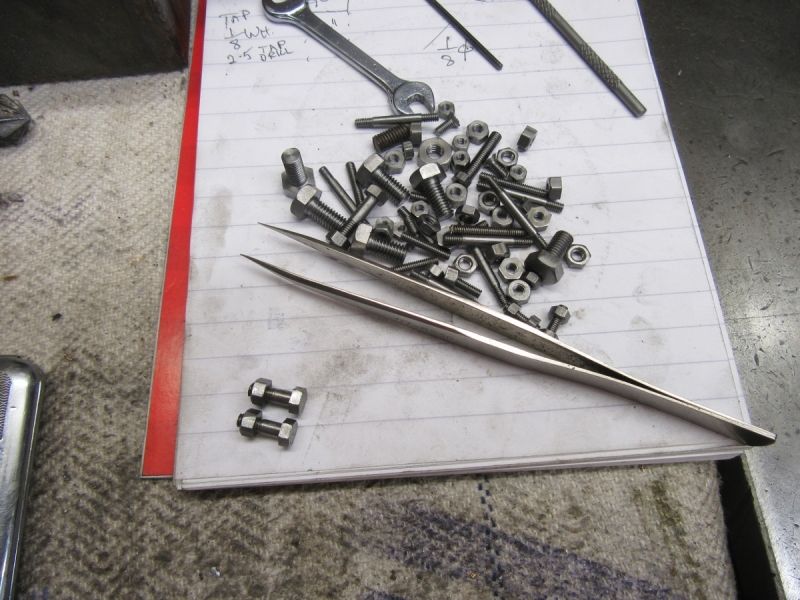
Two off this one. Ready for shaping and making pretty but I've been on me feet long enough! That's for tomorrow.
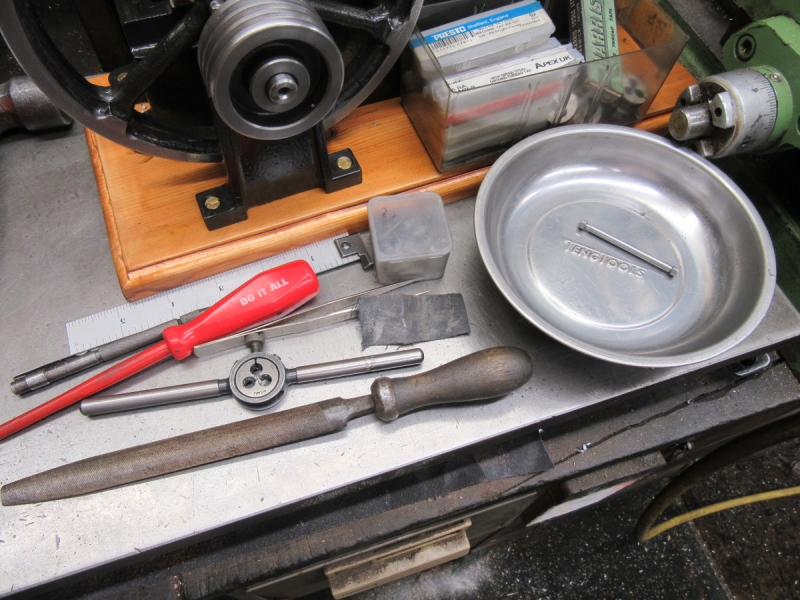
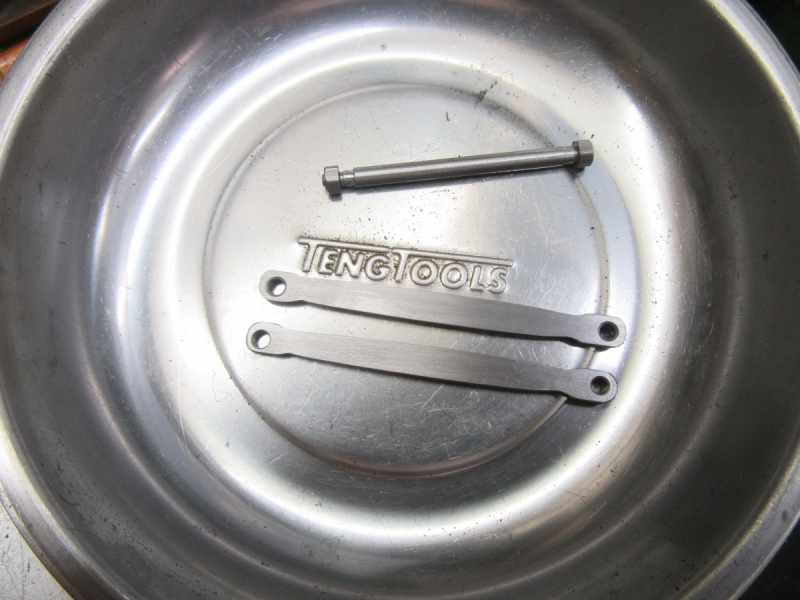
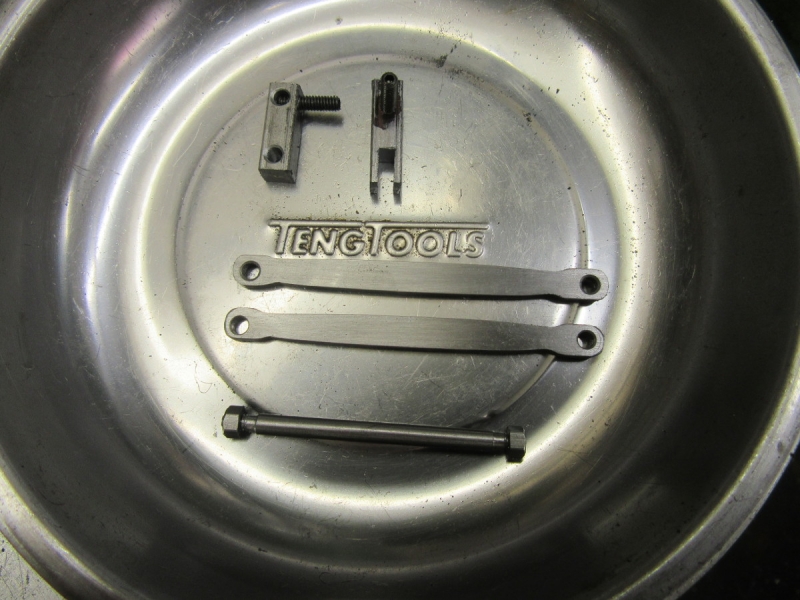
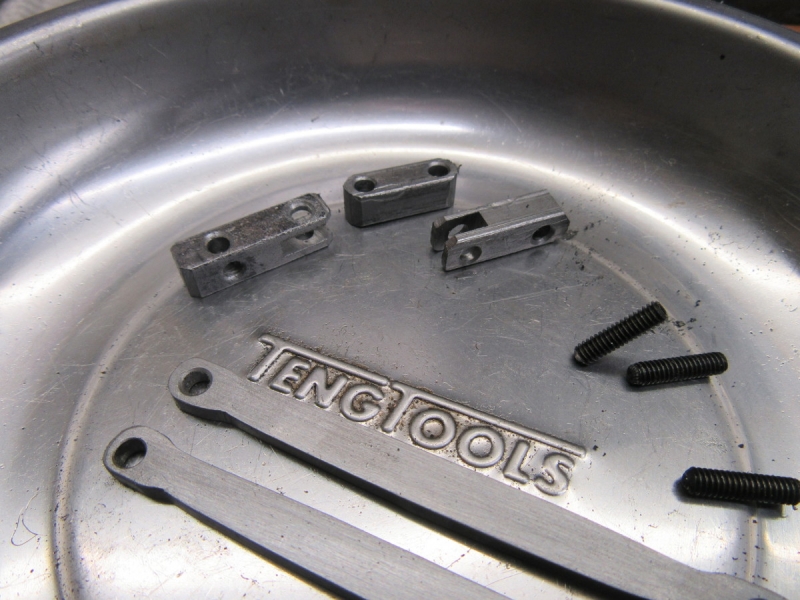
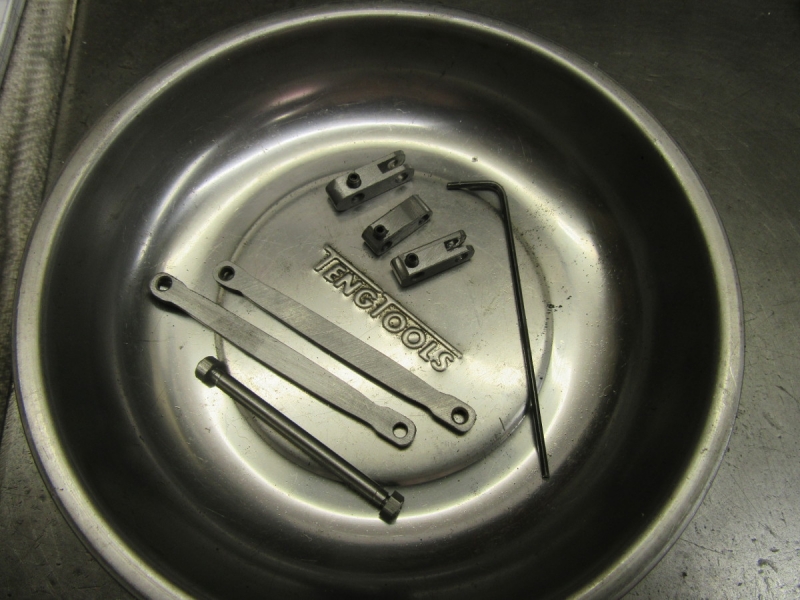
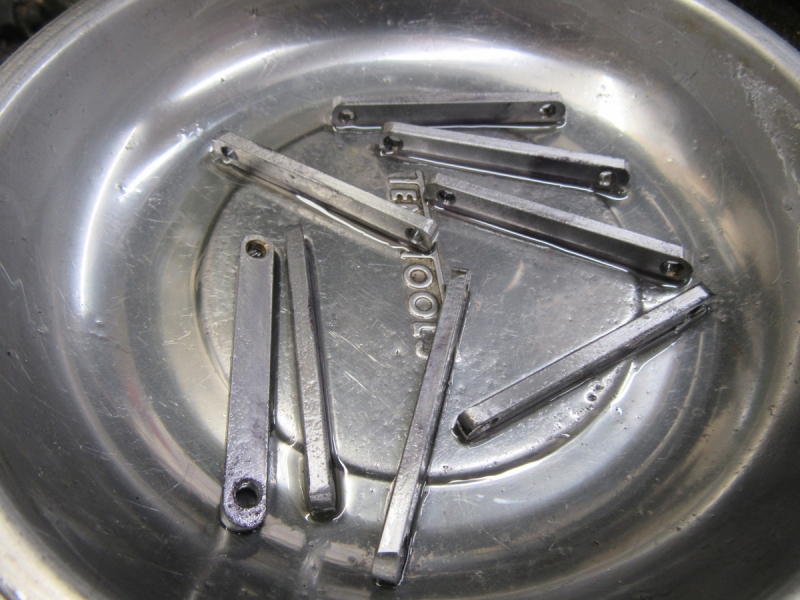
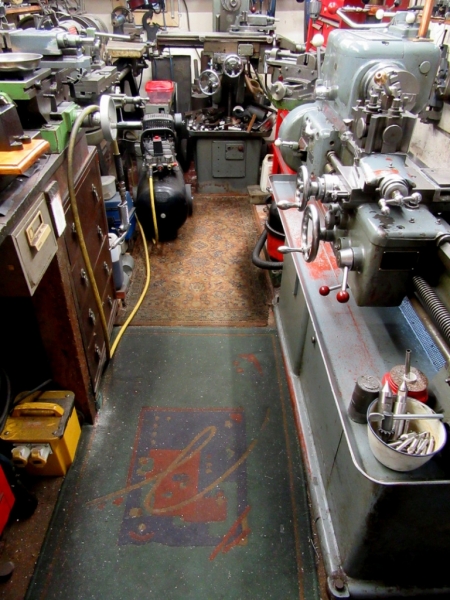
Amazing how all the tackle starts moving out of its place and down onto the bench! But this pic is really to illustrate something else. The Teng Tool bowl is magnetic and very useful, if you put a ferrous part in there is stays! It sticks to the bench as well. For years this has been sat on the lathe bed full of centres and centre drills and gathering swarf. I have replaced it with a plain enamelled bowl and promoted the cleaned up Teng bowl to the bench. It will stay cleaner and serve a useful purpose.
Stanley Challenger Graham
Stanley's View
scg1936 at talktalk.net
"Beware of certitude" (Jimmy Reid)
The floggings will continue until morale improves!
Stanley's View
scg1936 at talktalk.net
"Beware of certitude" (Jimmy Reid)
The floggings will continue until morale improves!
-
Stanley
- Global Moderator
- Posts: 90301
- Joined: 23 Jan 2012, 12:01
- Location: Barnoldswick. Nearer to Heaven than Gloria.
Re: Shed Matters 3
I've been in the shed for just short of three hours and got stuff done.
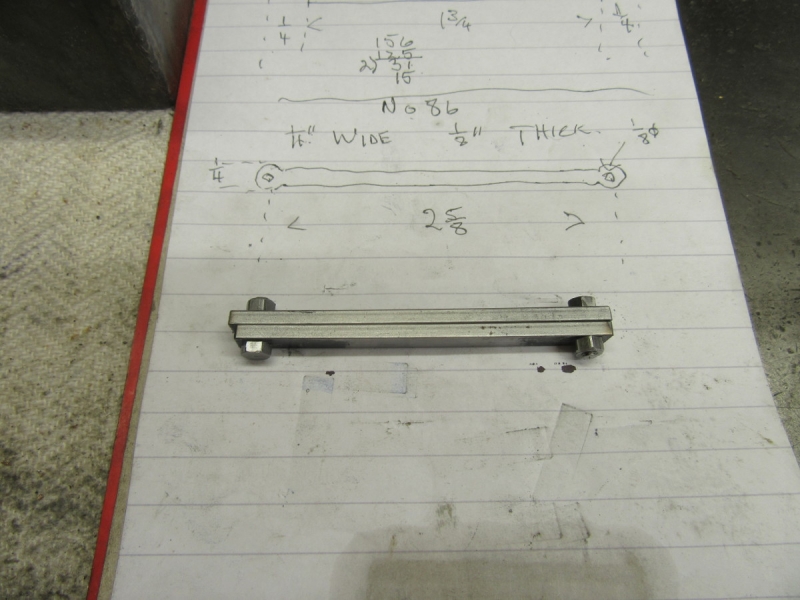
These two links have to be identical so it made sense to bolt them together.
How long do you spend on something like this. Remember I can't see straight.... I gave it an hour and here's the result of a lot of grinding, filing and polishing.
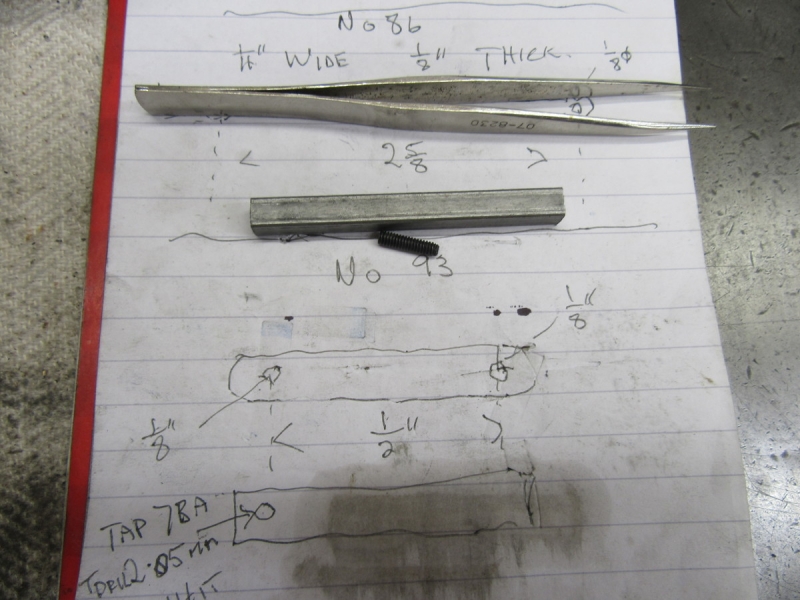
Next part is one of two links. First find the stock. Notice that I'm not using their silly little grub screws but proper Unbrako screws.
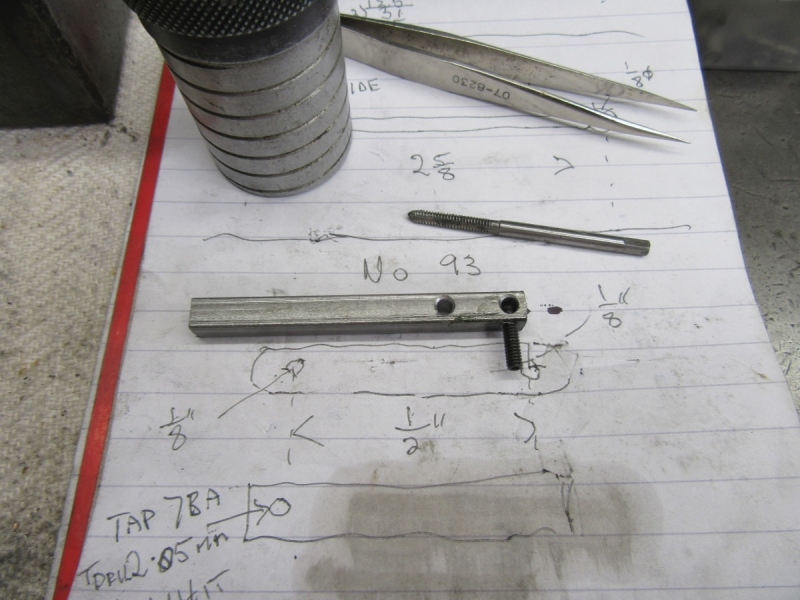
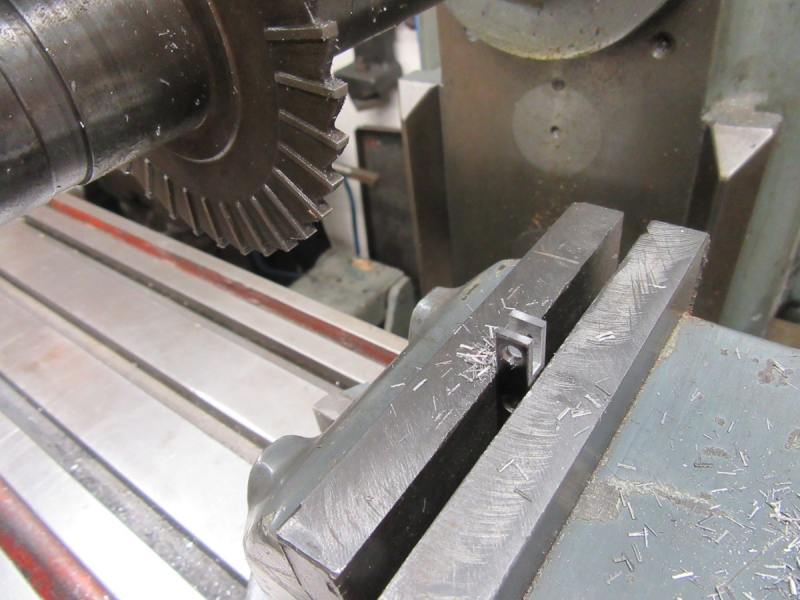
First one was relatively easy but the second was complicated by needing a slot cutting in the end. Only one sensible way to do it even though it looks like overkill.
Here's where I finished up. The two links are done but need finishing and making pretty. That's for tomorrow!
Later, after a sleep. I have just realised that I need two of the last one I made.... That'll be the first job tomorrow.
These two links have to be identical so it made sense to bolt them together.
How long do you spend on something like this. Remember I can't see straight.... I gave it an hour and here's the result of a lot of grinding, filing and polishing.
Next part is one of two links. First find the stock. Notice that I'm not using their silly little grub screws but proper Unbrako screws.
First one was relatively easy but the second was complicated by needing a slot cutting in the end. Only one sensible way to do it even though it looks like overkill.
Here's where I finished up. The two links are done but need finishing and making pretty. That's for tomorrow!
Later, after a sleep. I have just realised that I need two of the last one I made.... That'll be the first job tomorrow.
Stanley Challenger Graham
Stanley's View
scg1936 at talktalk.net
"Beware of certitude" (Jimmy Reid)
The floggings will continue until morale improves!
Stanley's View
scg1936 at talktalk.net
"Beware of certitude" (Jimmy Reid)
The floggings will continue until morale improves!
-
Whyperion

- Senior Member
- Posts: 3073
- Joined: 23 Jan 2012, 22:13
- Location: Stockport, after some time in Burnley , After leaving Barnoldswick , except when I am in London
Re: Shed Matters 3
Is there a reason for the reduction in width /height? of the connecting parts. For full size machines these would have been cast not machined? and so a reduction in size would save raw material - and possibly excess unwanted weight ?
-
Stanley
- Global Moderator
- Posts: 90301
- Joined: 23 Jan 2012, 12:01
- Location: Barnoldswick. Nearer to Heaven than Gloria.
Re: Shed Matters 3
The old engine makers never bothered about saving material or weight, that's a modern concept, they overbuilt.
Stanley Challenger Graham
Stanley's View
scg1936 at talktalk.net
"Beware of certitude" (Jimmy Reid)
The floggings will continue until morale improves!
Stanley's View
scg1936 at talktalk.net
"Beware of certitude" (Jimmy Reid)
The floggings will continue until morale improves!
-
Stanley
- Global Moderator
- Posts: 90301
- Joined: 23 Jan 2012, 12:01
- Location: Barnoldswick. Nearer to Heaven than Gloria.
Re: Shed Matters 3
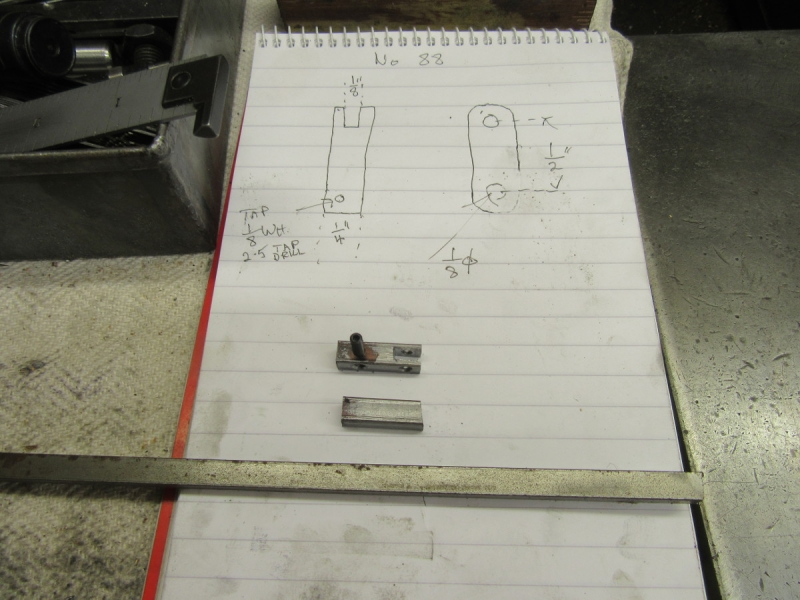
What was left of the 1/4" supplied with the kit was too short so into the key steel treasure chest, it didn't disappoint.
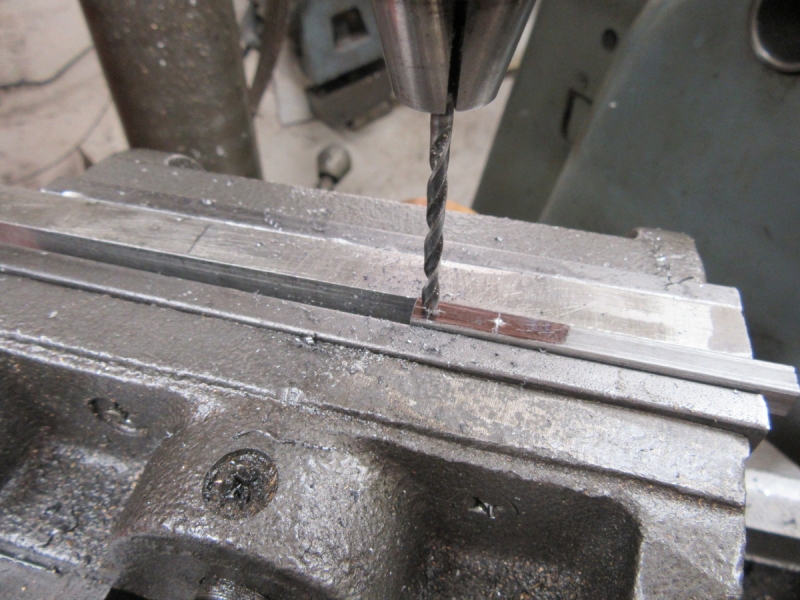
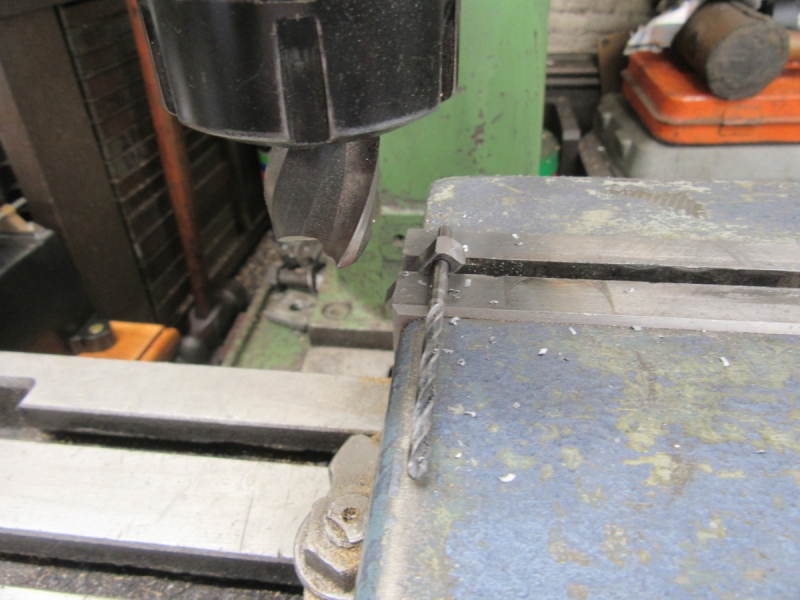
All the usual steps to get a blank prepared, mark it up, drill and tap it and last operation, under the cutter on the HM to cut the slot in the end.
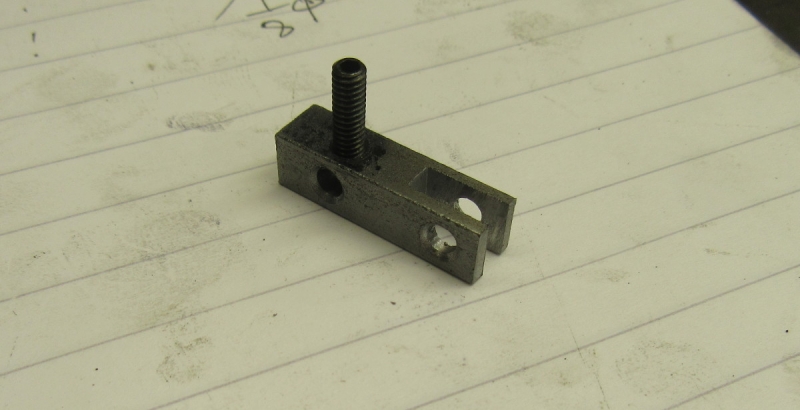
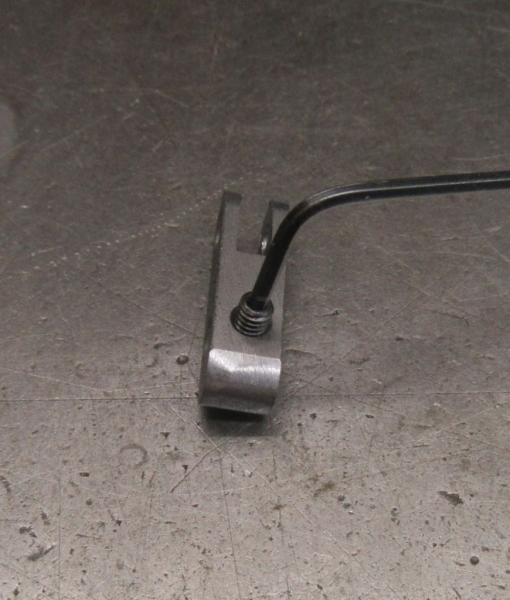
Here's the result. Now for a bit of prettying up.
Then under the mill for the pivoted cut trick to round the ends but it didn't work out because of the small size, Variations in hole placement aren't as important in larger pieces as these so I just took the corners off, I'll round them off by hand tomorrow.
Here's where we finished up. It's progress! I am satisfied.
Stanley Challenger Graham
Stanley's View
scg1936 at talktalk.net
"Beware of certitude" (Jimmy Reid)
The floggings will continue until morale improves!
Stanley's View
scg1936 at talktalk.net
"Beware of certitude" (Jimmy Reid)
The floggings will continue until morale improves!
-
Stanley
- Global Moderator
- Posts: 90301
- Joined: 23 Jan 2012, 12:01
- Location: Barnoldswick. Nearer to Heaven than Gloria.
Re: Shed Matters 3
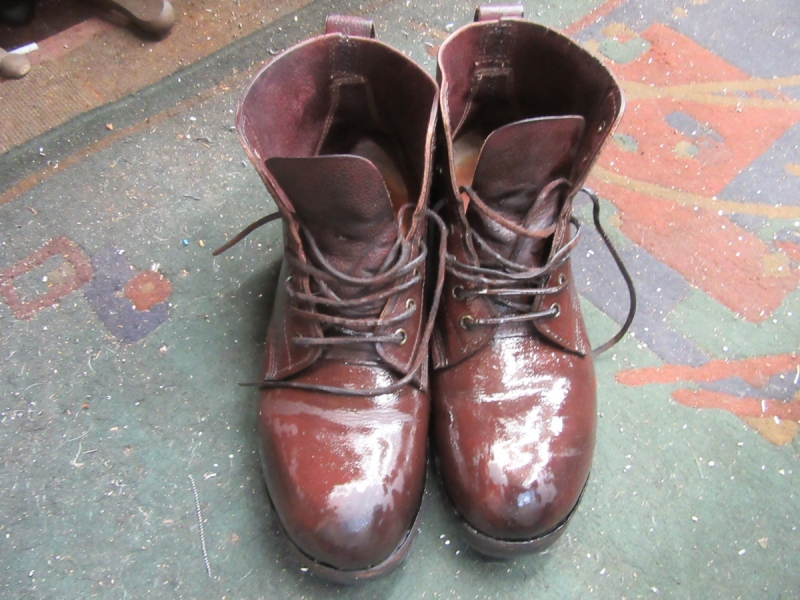
So I can hear you saying what the hell is a pair of boots doing here? Good question and the answer is nothing apart from the fact that it was a job that needed doing and so it held the job up a bit. I have gone into shoes for the summer so my fell boots needed oiling before I put them away.

This was actually half an hour into the valve gear. I started by making them pretty, rounding the ends and polishing them. The next job was to shorten the 1/8" Unbrako grub screws I have substituted for the puny little things Stewart's supplied. If I just put them into the vise and sawed them off they would be too short to hold while I ground a bevel on the end so the thread would engage. So I want into the front room and Johnny's 1927 lathe and held the screws in the chuck while I filed a groove in them with a sharp saw file, that way the bevel is on the end before I saw them to length.
It worked like a charm.
Here we are at knocking off time, the parts are ready and I think I can start fitting the valve gear. But, there was one more matter.
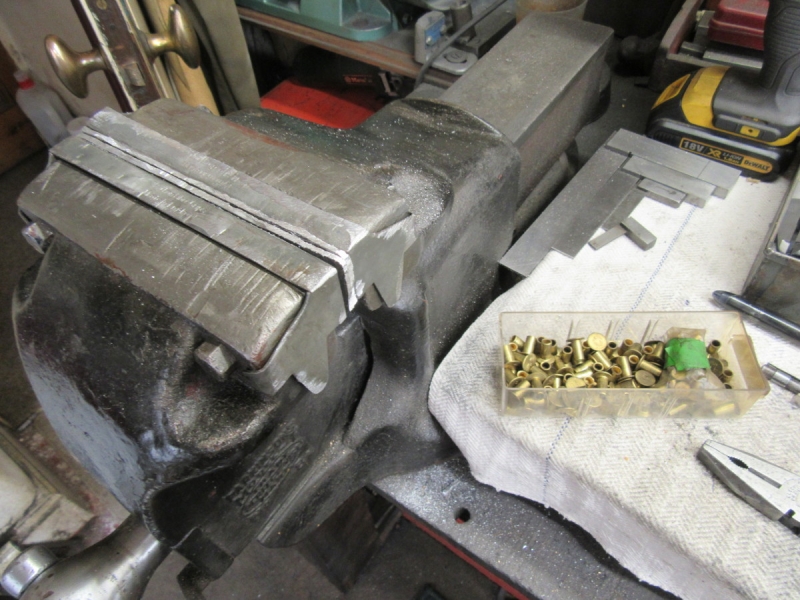
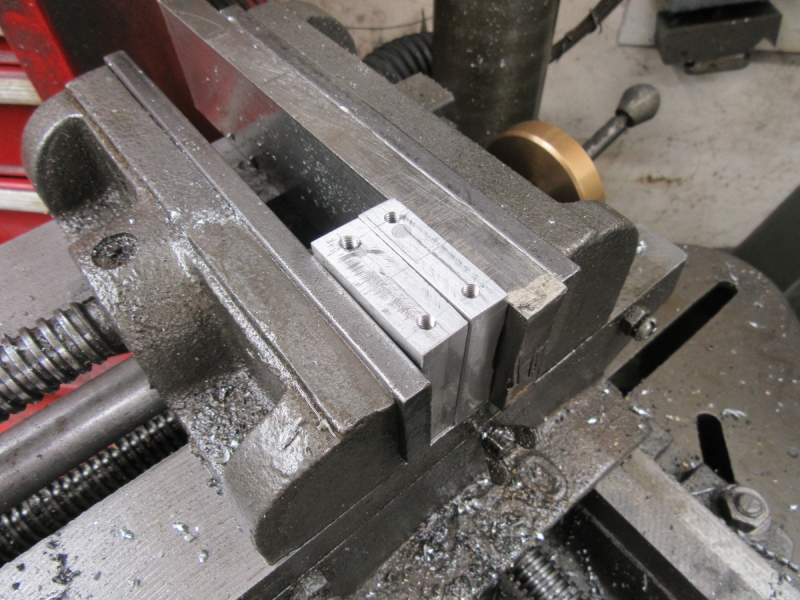
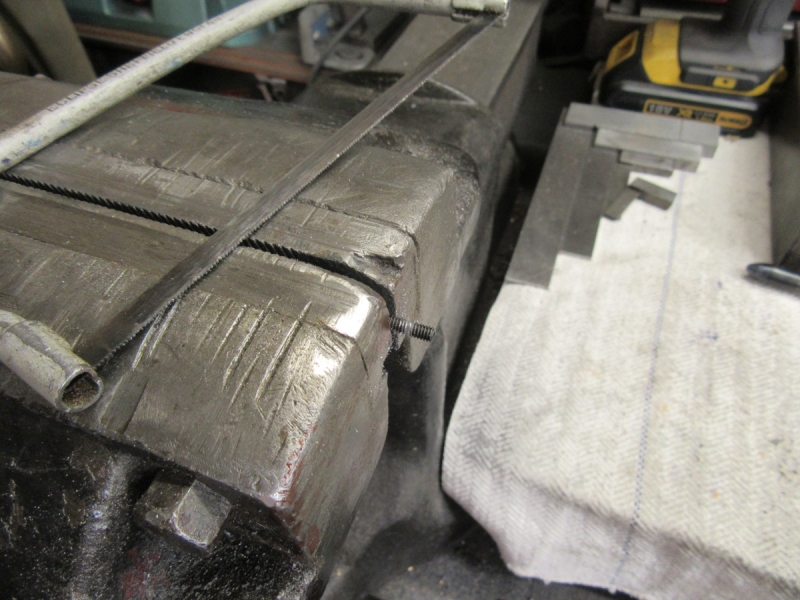
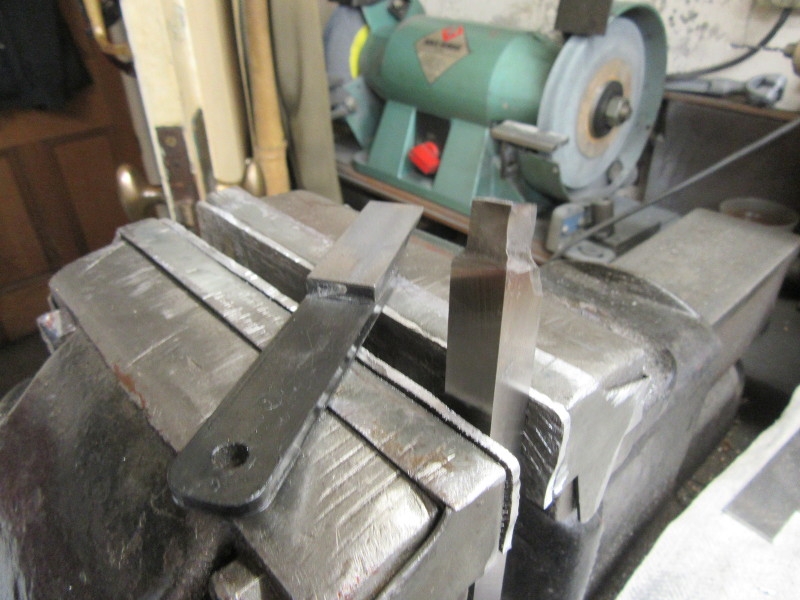
The vise is the most used tool in the shed. I do most of my work on the right hand side of the jaws and you might have noticed of late that the soft jaws were getting beaten up and one rivet had fallen out. I used to use a lot of brass rivets relining wagon brake shoes and have a wide selection of rivets. They came out to play this morning because I needed one for the soft jaws. What you see here is the vise after the jaw had been re-riveted, the soft jaws trimmed and the general fit tightened up. Much better and a small but useful improvement.
One last 'get them off the page' image. I'm ready to fit the valve gear now and that's going to be the next job. Then I'll tackle the parallel motion!
Stanley Challenger Graham
Stanley's View
scg1936 at talktalk.net
"Beware of certitude" (Jimmy Reid)
The floggings will continue until morale improves!
Stanley's View
scg1936 at talktalk.net
"Beware of certitude" (Jimmy Reid)
The floggings will continue until morale improves!
-
Stanley
- Global Moderator
- Posts: 90301
- Joined: 23 Jan 2012, 12:01
- Location: Barnoldswick. Nearer to Heaven than Gloria.
Re: Shed Matters 3
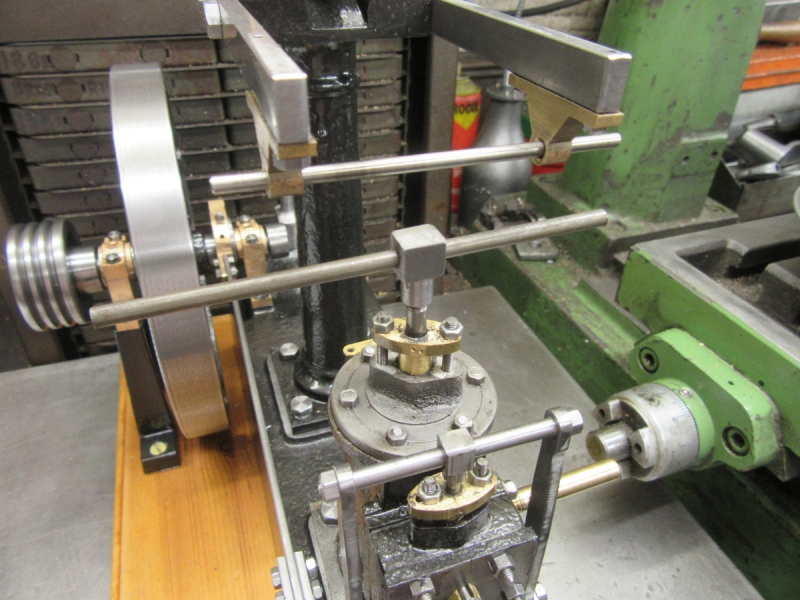
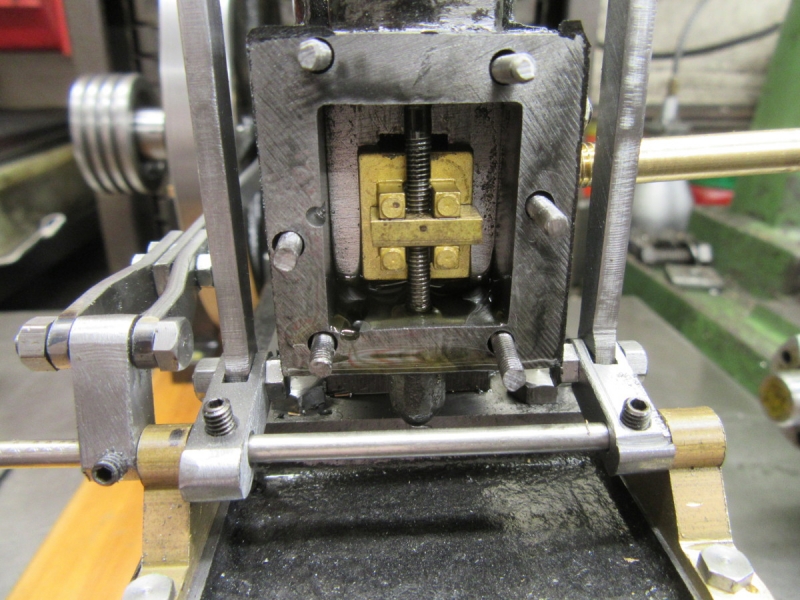
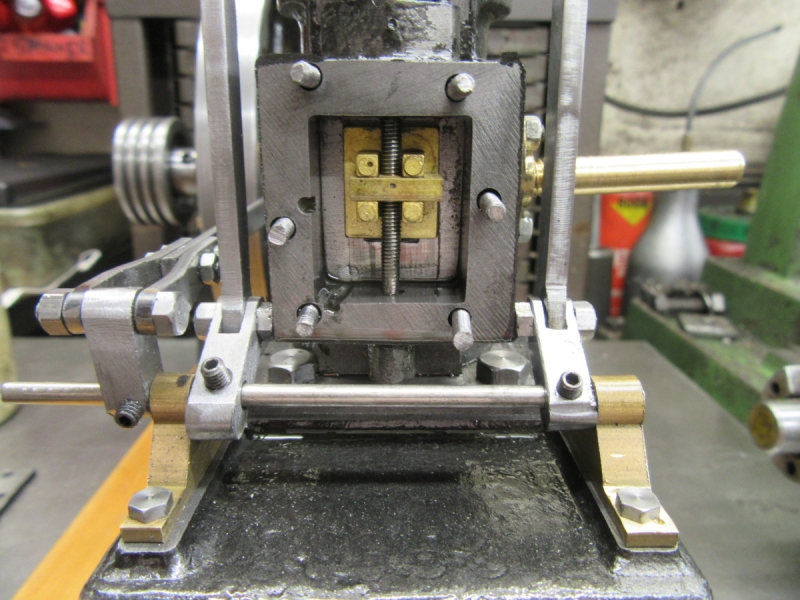
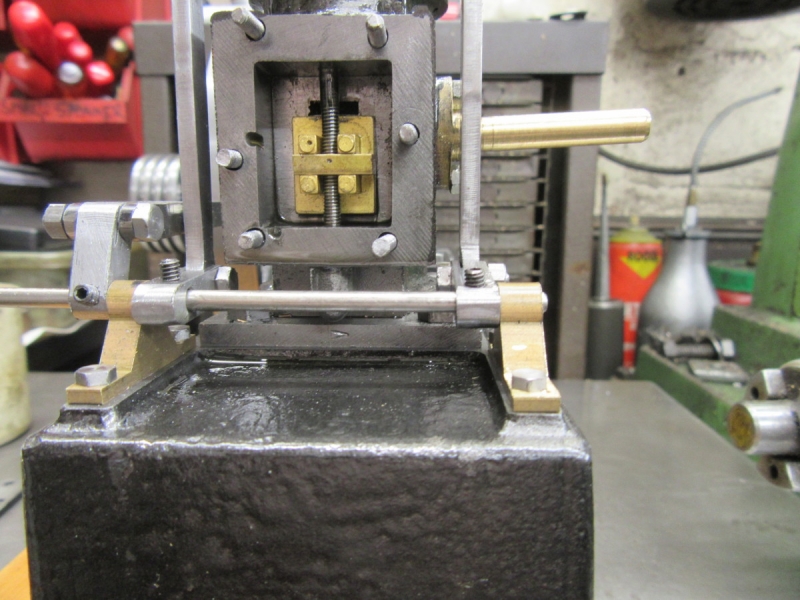
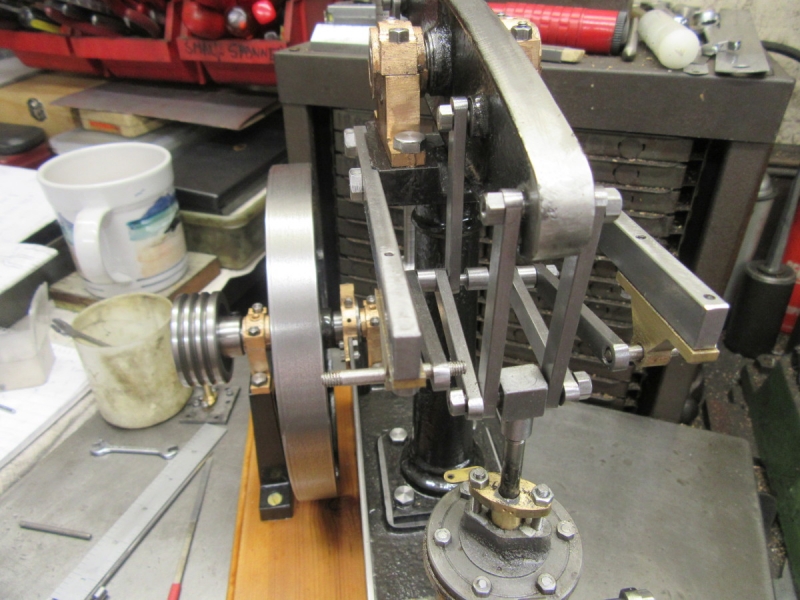
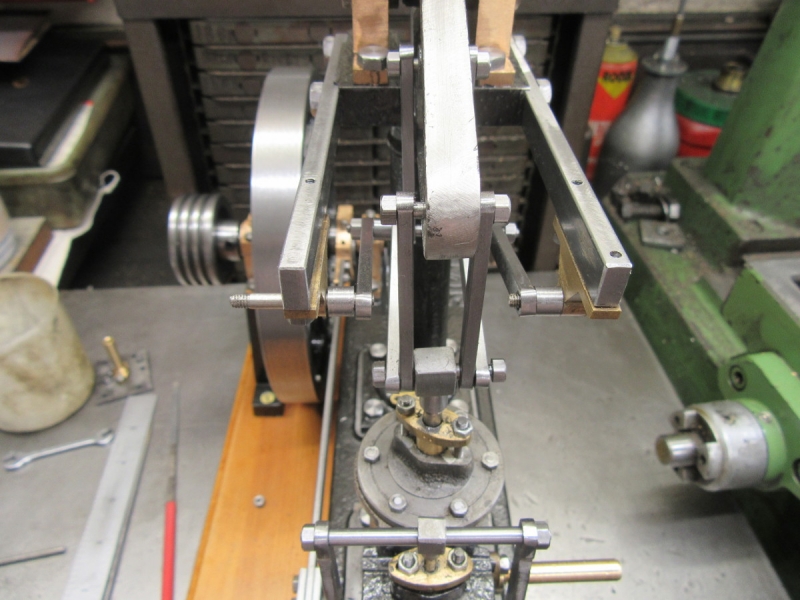
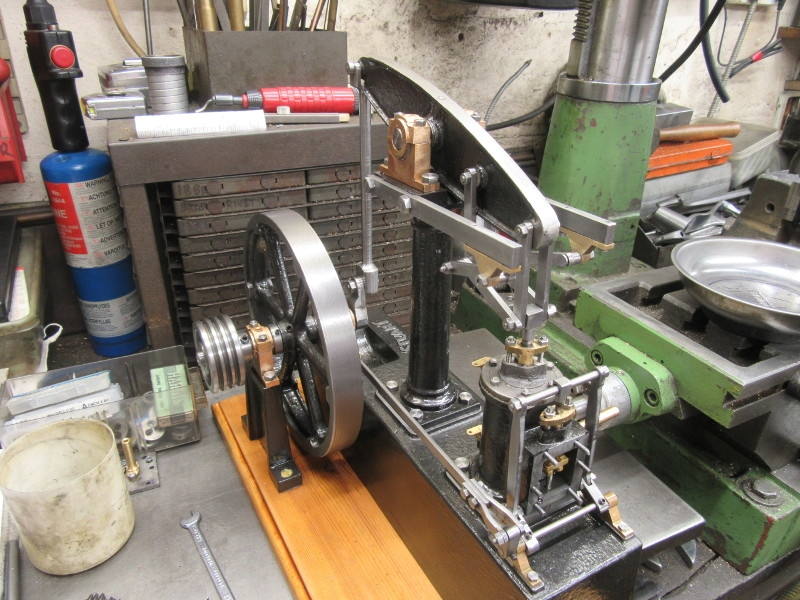
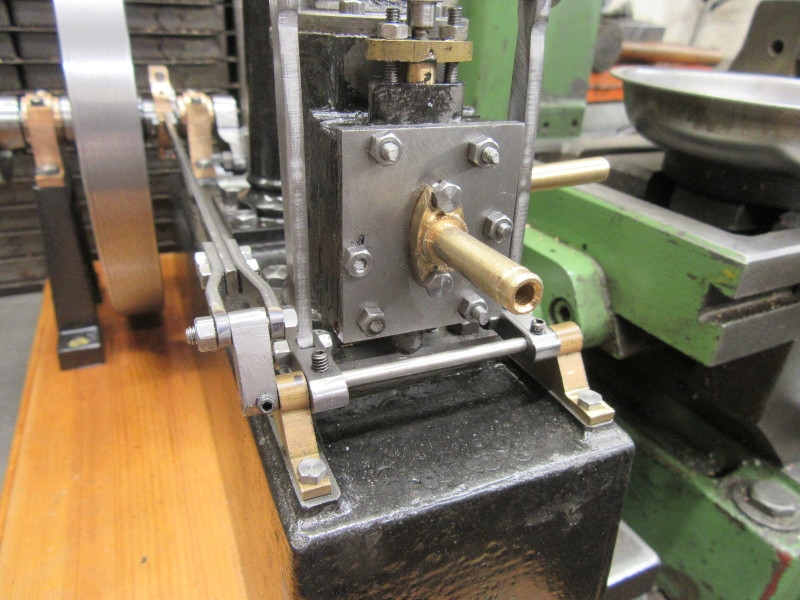
Today has been fitting the valve gear. I think the pictures tell the story....
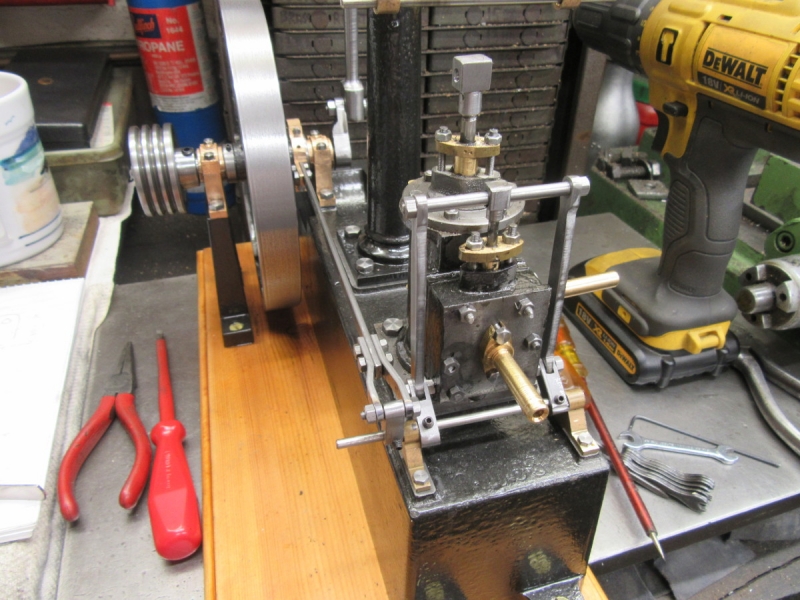
Fitting is just what it says, making different parts fit with each other. Hence the diamond and rat tailed files. The last pic is where I finished up at knocking off time. It works but is tight. If you turn the flywheel it wags convincingly but the acid test will come when I set the valve and see if it will run! But for the time being, we can report progress with no cock-ups.
Fitting is just what it says, making different parts fit with each other. Hence the diamond and rat tailed files. The last pic is where I finished up at knocking off time. It works but is tight. If you turn the flywheel it wags convincingly but the acid test will come when I set the valve and see if it will run! But for the time being, we can report progress with no cock-ups.
Stanley Challenger Graham
Stanley's View
scg1936 at talktalk.net
"Beware of certitude" (Jimmy Reid)
The floggings will continue until morale improves!
Stanley's View
scg1936 at talktalk.net
"Beware of certitude" (Jimmy Reid)
The floggings will continue until morale improves!
-
Stanley
- Global Moderator
- Posts: 90301
- Joined: 23 Jan 2012, 12:01
- Location: Barnoldswick. Nearer to Heaven than Gloria.
Re: Shed Matters 3
Too hot for shed work yesterday and it could be the same today. No point pushing, I am not on piece work!
Stanley Challenger Graham
Stanley's View
scg1936 at talktalk.net
"Beware of certitude" (Jimmy Reid)
The floggings will continue until morale improves!
Stanley's View
scg1936 at talktalk.net
"Beware of certitude" (Jimmy Reid)
The floggings will continue until morale improves!
-
Stanley
- Global Moderator
- Posts: 90301
- Joined: 23 Jan 2012, 12:01
- Location: Barnoldswick. Nearer to Heaven than Gloria.
Re: Shed Matters 3
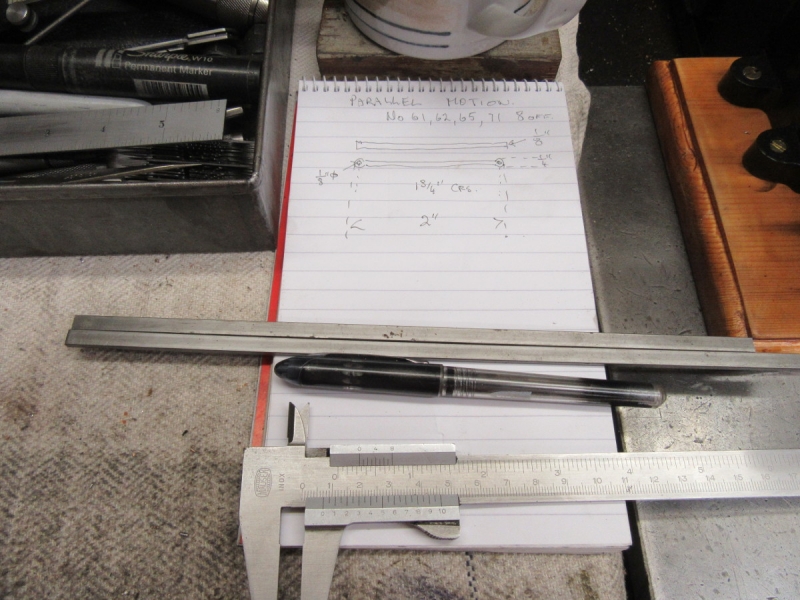
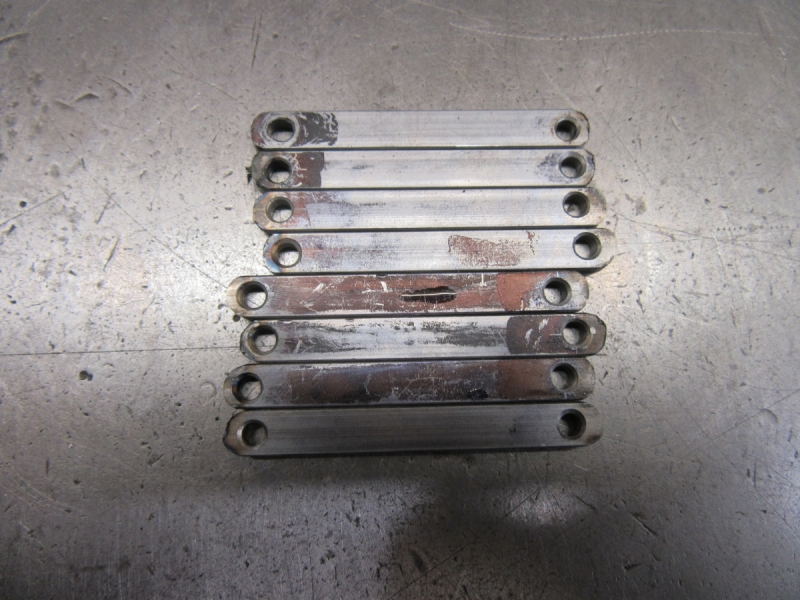
We start on the parallel motion. I understand this one before I start, I've built them before on full size engines. I shall do what I did with the valve gear, make the parts first and then do the fitting. So the first job was to look at the drawings and we need 8 off these links so it's an obvious place to start. Do a fag packet drawing to get the measurements in my head then find the stock.

First I cut eight blanks a shade over 2" in length.

Then mark one end up for the 1/8" hole, punch, drill and deburr them.
Next I carefully measured to give me the 1.75" distance between centres and punch bore and deburr that end also. Here's where I am at knocking off time, eight links needing some shape. That's going to be tomorrow's task. A good hour and I am happy, it's progress. By the way, I couldn't resist spinning the flywheel and admiring the valve gear! I'm already thinking about timing......
Stanley Challenger Graham
Stanley's View
scg1936 at talktalk.net
"Beware of certitude" (Jimmy Reid)
The floggings will continue until morale improves!
Stanley's View
scg1936 at talktalk.net
"Beware of certitude" (Jimmy Reid)
The floggings will continue until morale improves!
-
Stanley
- Global Moderator
- Posts: 90301
- Joined: 23 Jan 2012, 12:01
- Location: Barnoldswick. Nearer to Heaven than Gloria.
Re: Shed Matters 3
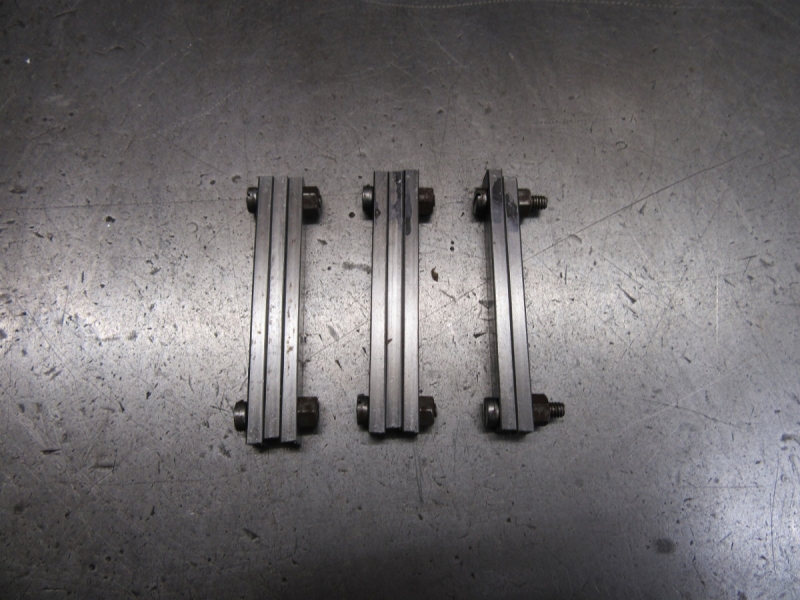
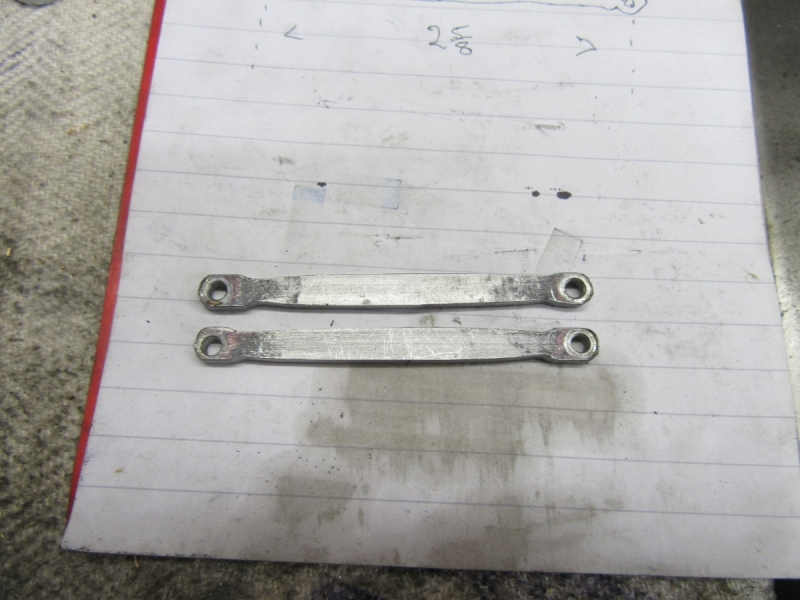
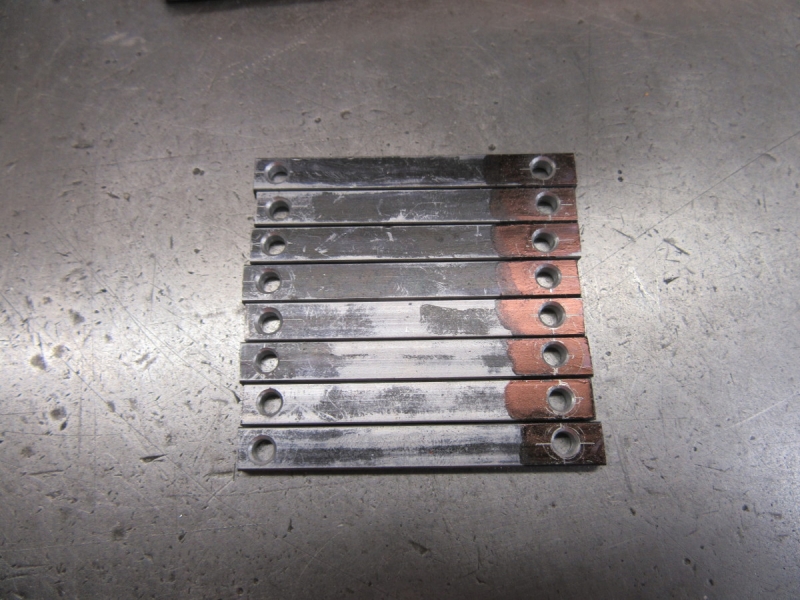
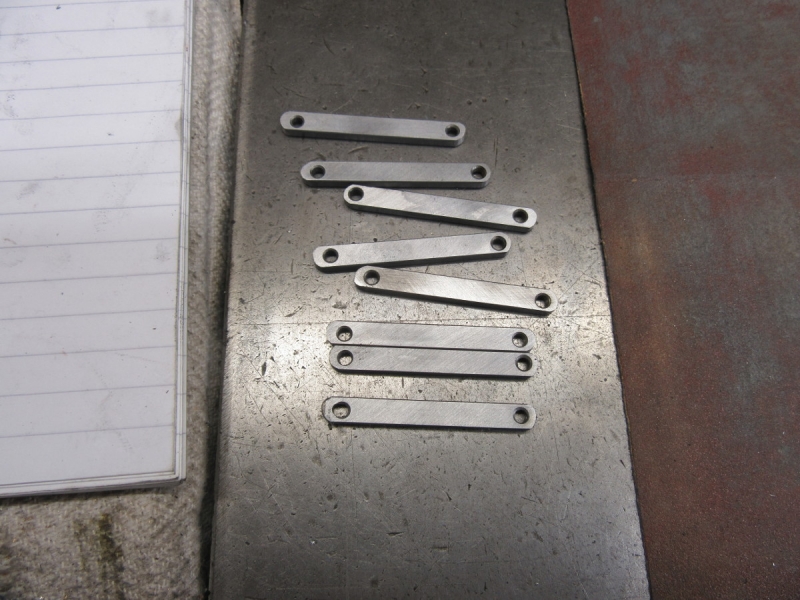
Today we make the links look pretty! First job was to bolt them together for grinding the ends. This ensured some uniformity!
Cheap and cheerful but we have roughly rounded ends. I had made an executive decision, the drawing calls for a fish belly shape but the only way I can do that is by hand and knowing my eyes I know they'll be a dog's breakfast so I decided they would be better if they were shiny and had parallel sides. So abrasive paper stuck to the durface plate with gaffer tape and a bit of patient polishing.
Some time later I had the links polished and put in the bowl with a coat of WD40. Then I got the drawings out.
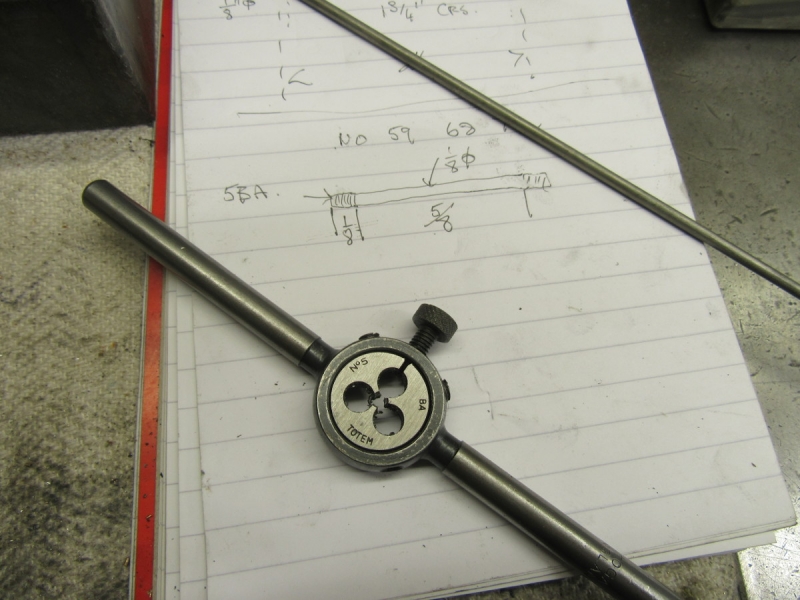
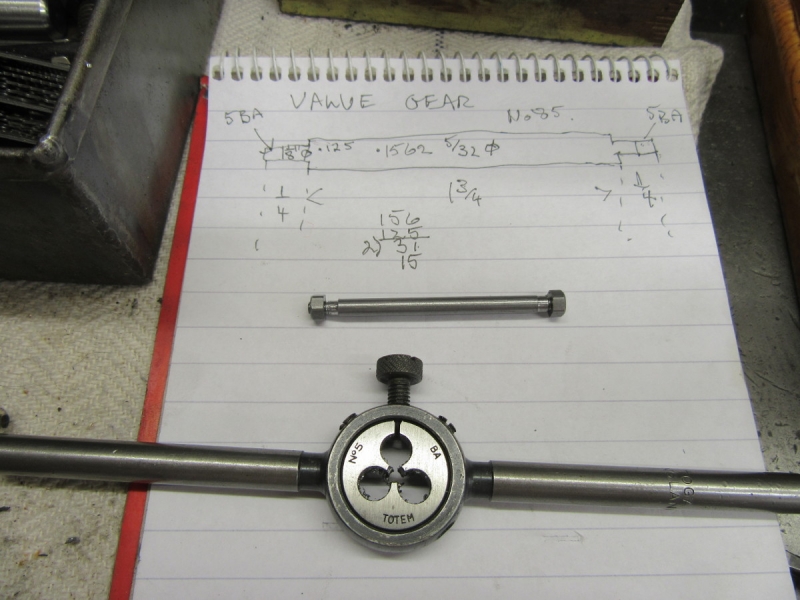
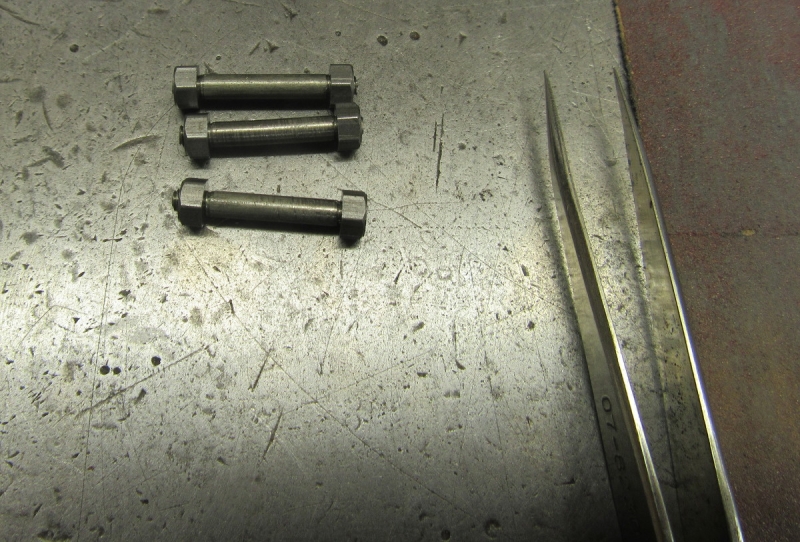
I need three of these threaded rods, so do a fag packet drawing, find the stock and a 5BA die. Ready for action tomorrow.... Nice quiet morning and more progress!
Stanley Challenger Graham
Stanley's View
scg1936 at talktalk.net
"Beware of certitude" (Jimmy Reid)
The floggings will continue until morale improves!
Stanley's View
scg1936 at talktalk.net
"Beware of certitude" (Jimmy Reid)
The floggings will continue until morale improves!
-
Stanley
- Global Moderator
- Posts: 90301
- Joined: 23 Jan 2012, 12:01
- Location: Barnoldswick. Nearer to Heaven than Gloria.
Re: Shed Matters 3
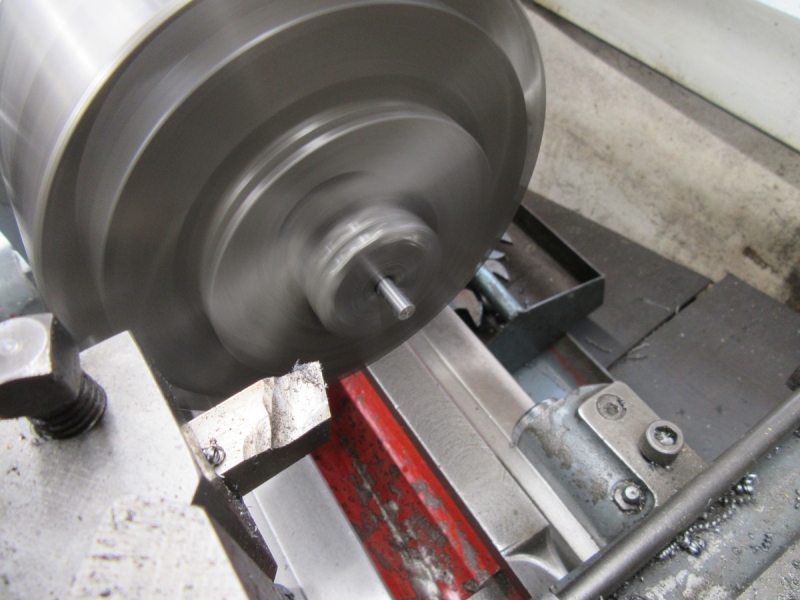
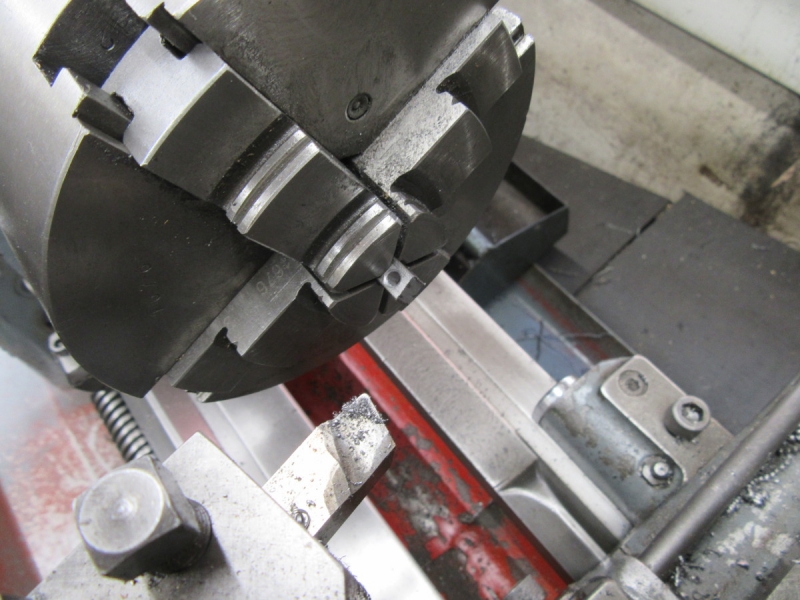
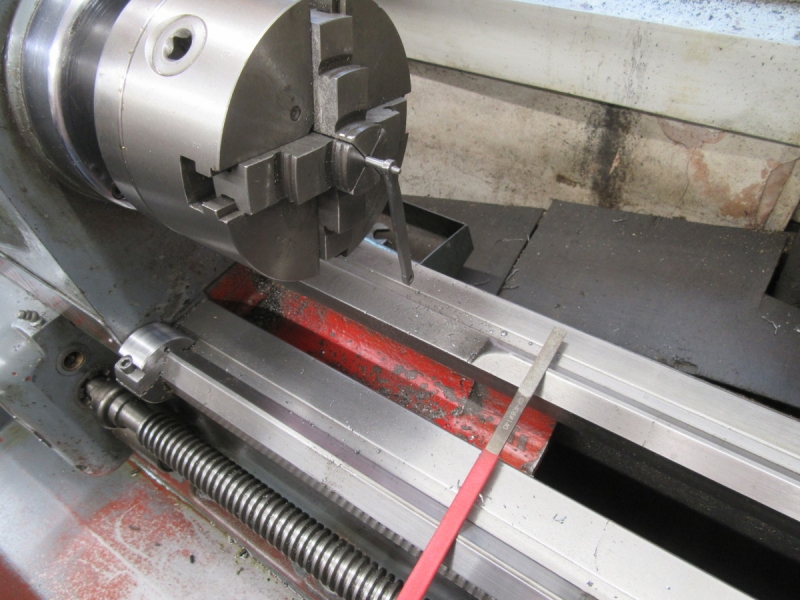
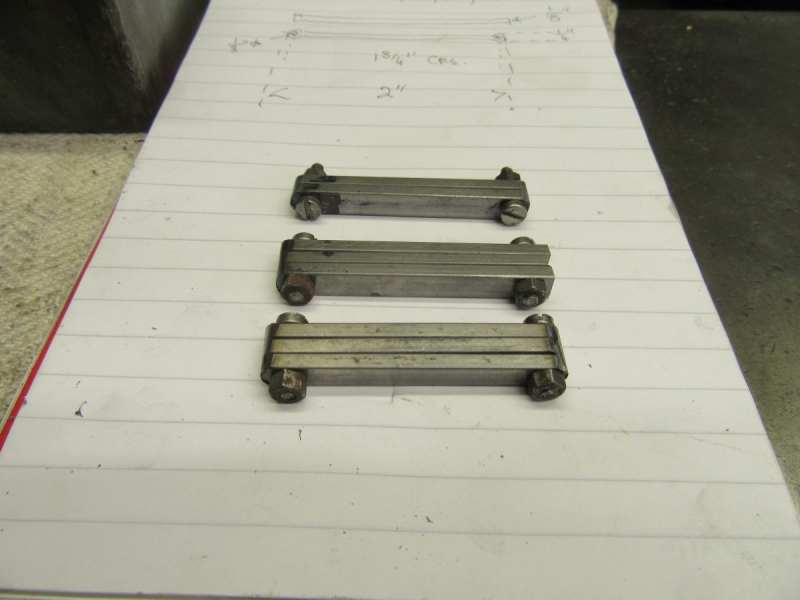
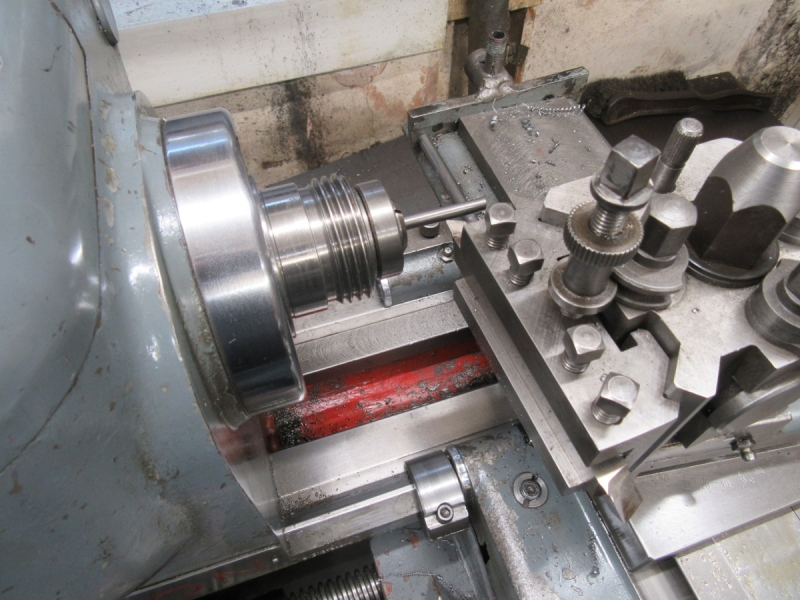
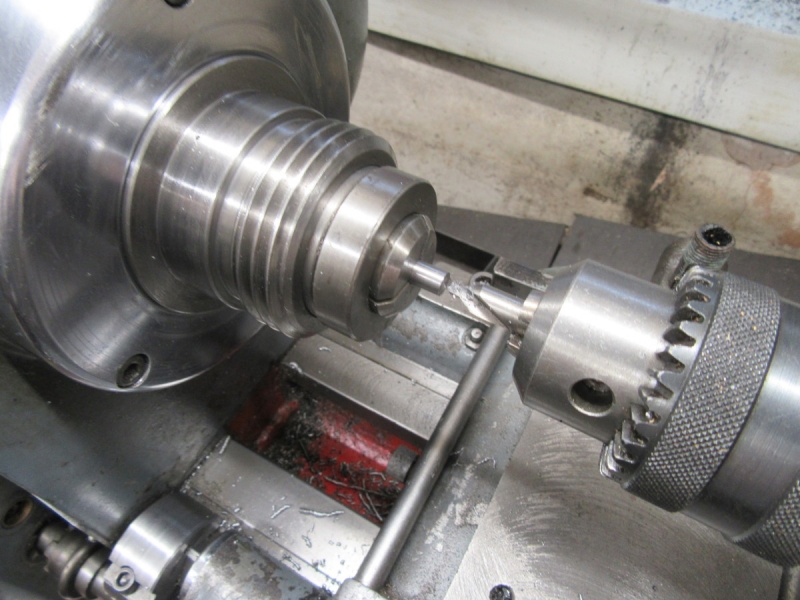
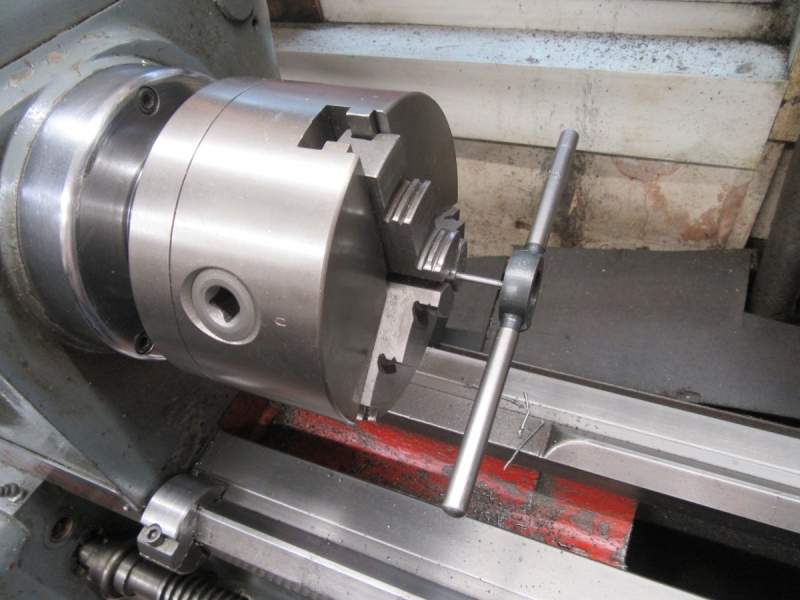
This morning I have to work with 1/8" rod and my four jaw won't grip it. Rather than change to another chuck I popped my square block with the collet holder in and it's running near enough true.
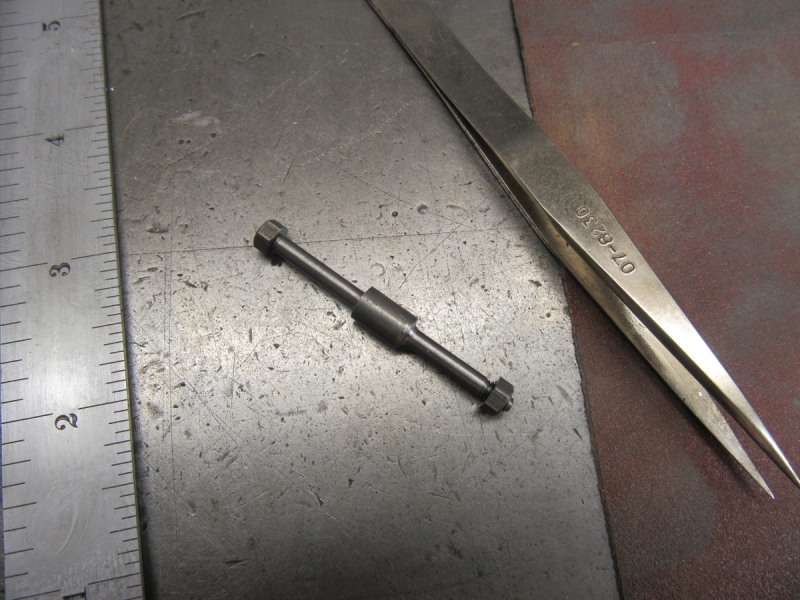
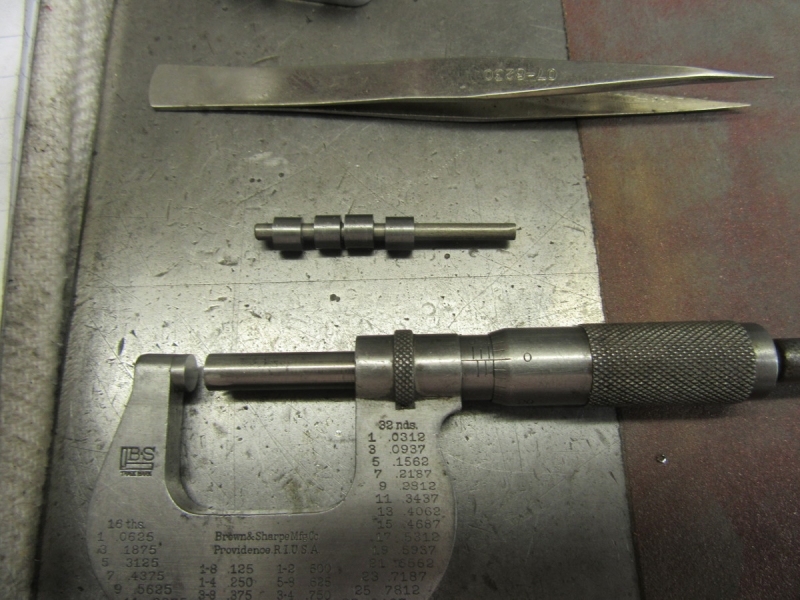
A bit later I had the first three pins, then back to the drawing and I made a second longer one.
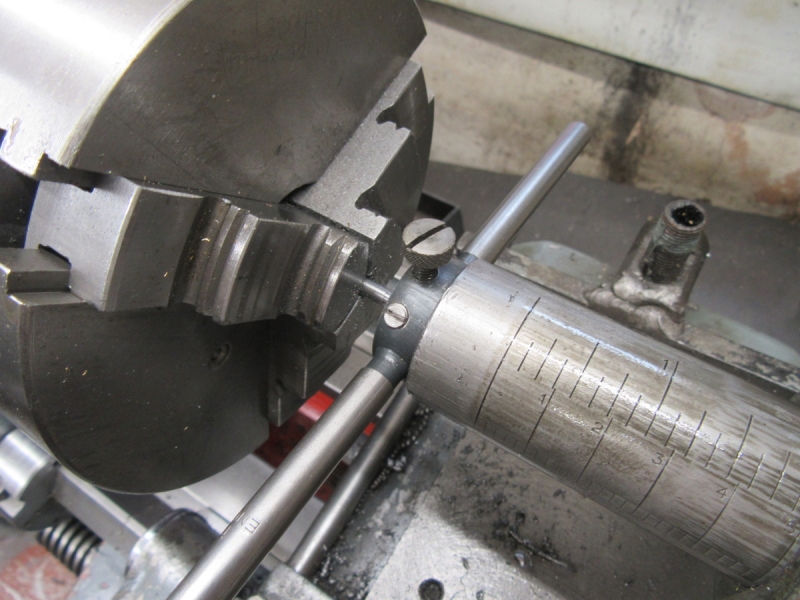
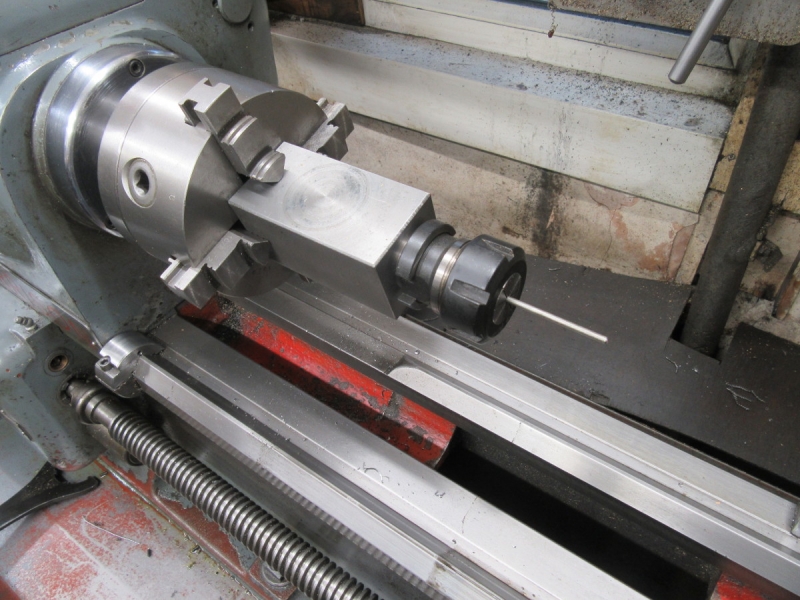
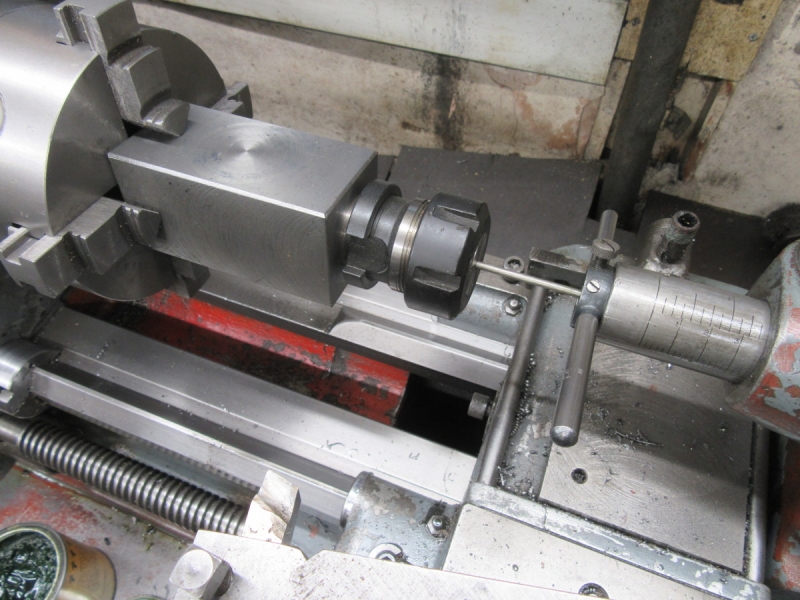
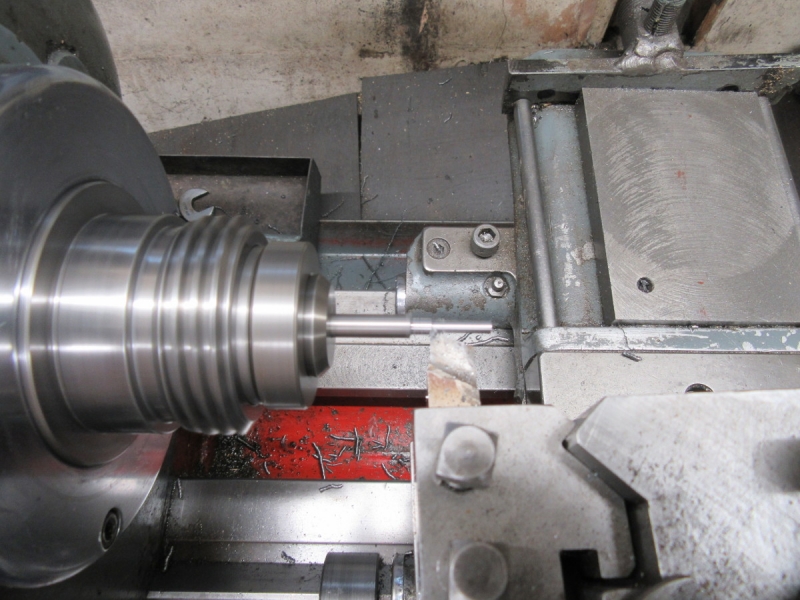
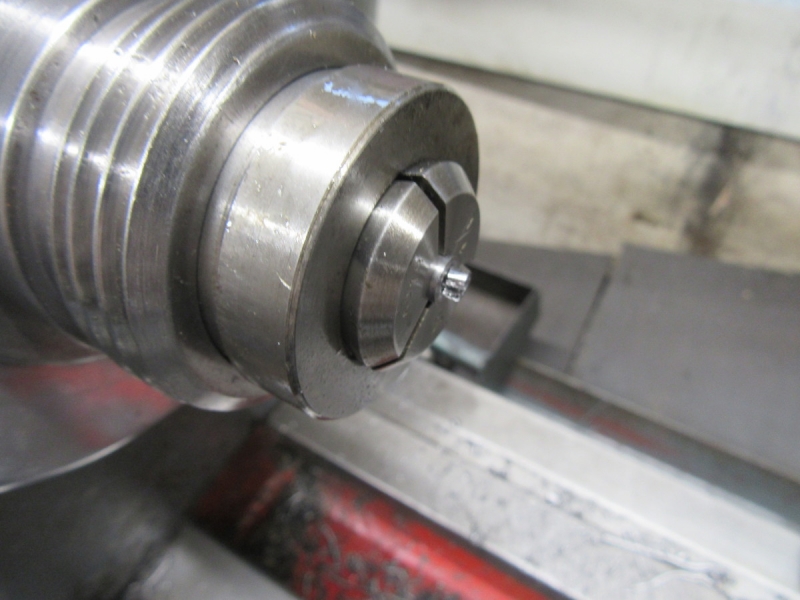
Then I addressed the next one that needs 1/4" stock. I could have simply done it in the 4 jaw but just for a laugh, and because I don't use them enough, I fitted the Harrison collet holder that came with the lathe. I've set the carriage stop and now I'm ready to start on this one.
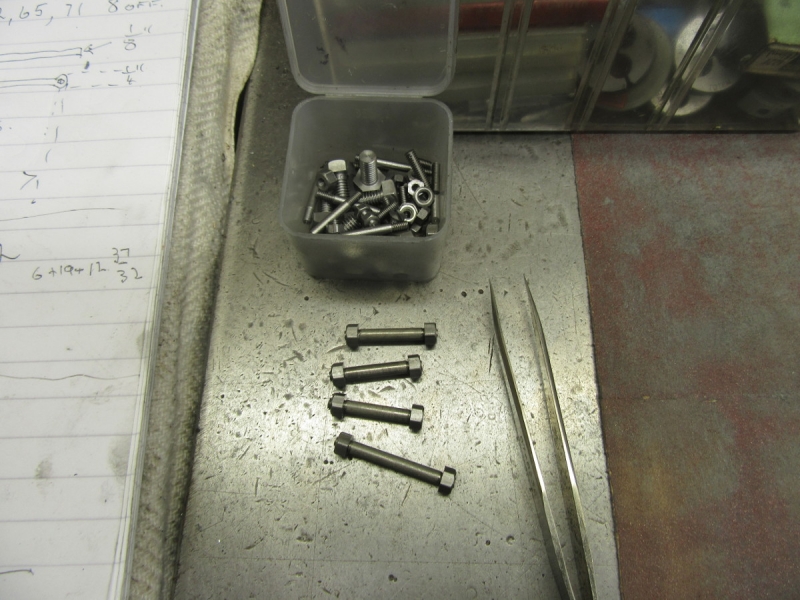
So, in terms of actual production, here it is but I have also done all I need to do to get straight into the next one tomorrow. Just under an hour and a half. No mistakes and another small step forwards.
Stanley Challenger Graham
Stanley's View
scg1936 at talktalk.net
"Beware of certitude" (Jimmy Reid)
The floggings will continue until morale improves!
Stanley's View
scg1936 at talktalk.net
"Beware of certitude" (Jimmy Reid)
The floggings will continue until morale improves!
-
Stanley
- Global Moderator
- Posts: 90301
- Joined: 23 Jan 2012, 12:01
- Location: Barnoldswick. Nearer to Heaven than Gloria.
Re: Shed Matters 3
Straight into making the part I set up for yesterday.
A bit later we have it, box on!
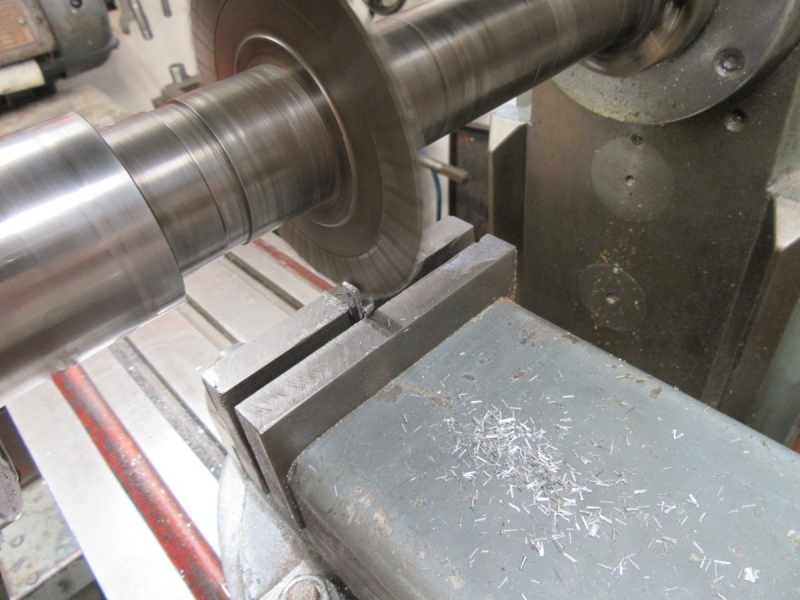
Now I have to make 4 collars...
Having made them I needed to face the end where they had been parted off. They are only 3/16" long so no way could a chuck have held them. The collets are ideal and I soon had them cleaned up.
Knocking off time, I have four collars. I had a look at the drawings and as far as I can see these are the last parts I have to make. (I'll probably find something I've missed.) So put tackle away and tidied up, tomorrow I'll clean Mrs Harrison and then go forward. I have already worked out the proper order of march!
Stanley Challenger Graham
Stanley's View
scg1936 at talktalk.net
"Beware of certitude" (Jimmy Reid)
The floggings will continue until morale improves!
Stanley's View
scg1936 at talktalk.net
"Beware of certitude" (Jimmy Reid)
The floggings will continue until morale improves!
-
Stanley
- Global Moderator
- Posts: 90301
- Joined: 23 Jan 2012, 12:01
- Location: Barnoldswick. Nearer to Heaven than Gloria.
Re: Shed Matters 3
I started the day by having a good clean up and about time too! I was intending to plunge straight into valve setting because I really enjoy that but the pin that goes through the crosshead of the piston rod was nagging me. I know that I have made it 1/8" and it should be 3/16". I decided to get it out of the way and found a piece of 3/16" stock. Then I realised that I hadn't got a 3/16" collet in the Harrison set.
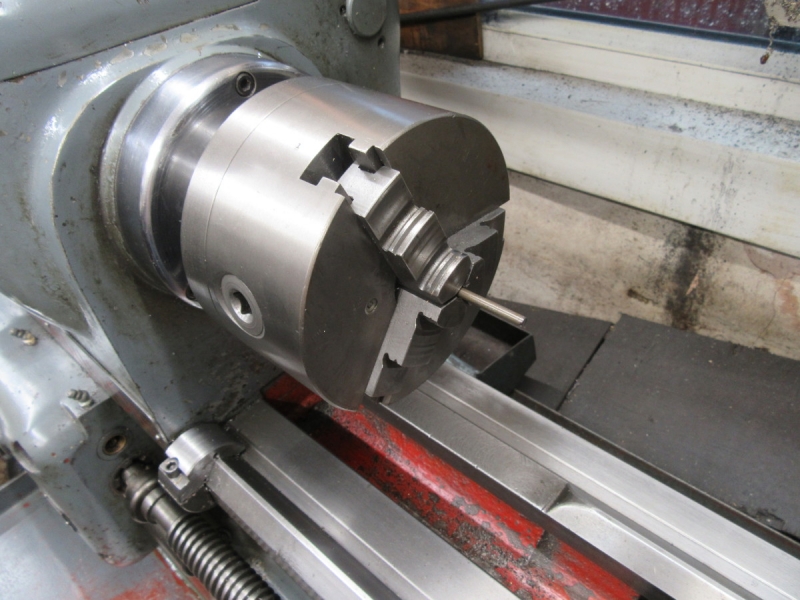
So I changed over to a 3 jaw SC chuck that I knew would grip it.
A bit of simple turning and threading and that problem was solved.
Then I took the lid off the valve chest and had a look at the rabbit. Not bad actually it's almost running equidistantly which is what I want. By that time I had done over an hour and so I'll leave setting it until tomorrow because unlike a horizontal engine I have to disconnect the links in the motion in order to adjust the valve. Couldn't help noticing how badly I went wrong when I spaced my lid holding down bolts. Never mind, it'll seal!
I thought I'd prove to you that I did do a pretty thorough clean up. I was treading chips all over the house!
Looking forward to tomorrow...... I love valve setting!
Stanley Challenger Graham
Stanley's View
scg1936 at talktalk.net
"Beware of certitude" (Jimmy Reid)
The floggings will continue until morale improves!
Stanley's View
scg1936 at talktalk.net
"Beware of certitude" (Jimmy Reid)
The floggings will continue until morale improves!
-
Stanley
- Global Moderator
- Posts: 90301
- Joined: 23 Jan 2012, 12:01
- Location: Barnoldswick. Nearer to Heaven than Gloria.
Re: Shed Matters 3
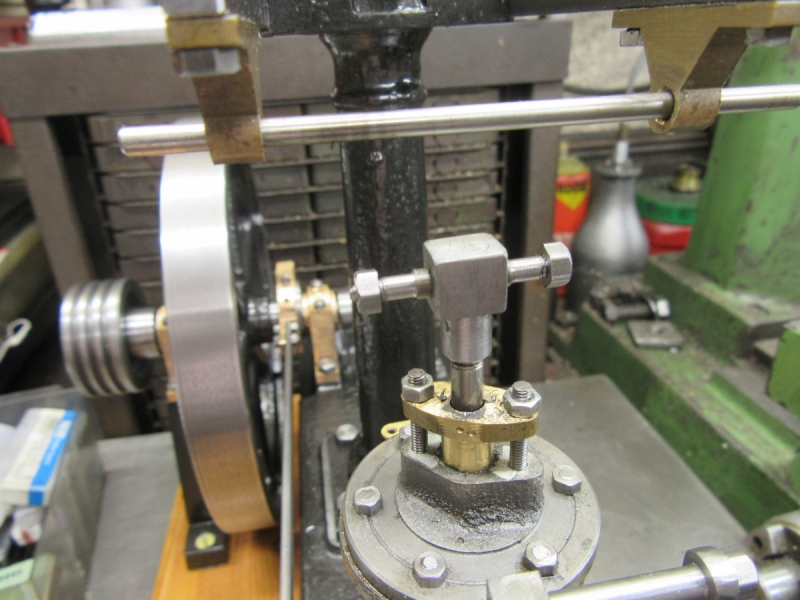
Two pics of the valve at each end of its travel. Obvious that it wants lifting up a bit to balance them out.

Here's the problem, in order to screw the valve rod in to shorten it you have to take the linkage to bits. Soon done and an adjustment made. Lace the valve gear together and that's this bit done.

Then into fitting the parallel motion, I could have taken lots of pic but just take it as read that it was about 2 hours of small adjustments by hand and in the lathe with constant backtracking, taking it all to bits again because everything is interconnected. Quietly and patiently away until....
I started connecting the anchor links and found there wasn't room for the head of a bolt. Puzzled, I went to the drawing and eventually found a very obscure drawing of the part I had missed making. I told you there would be one!
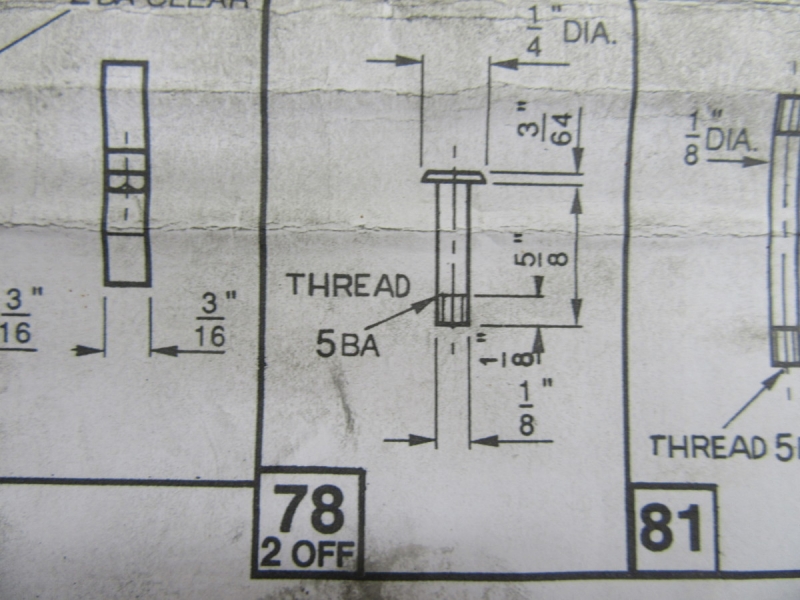
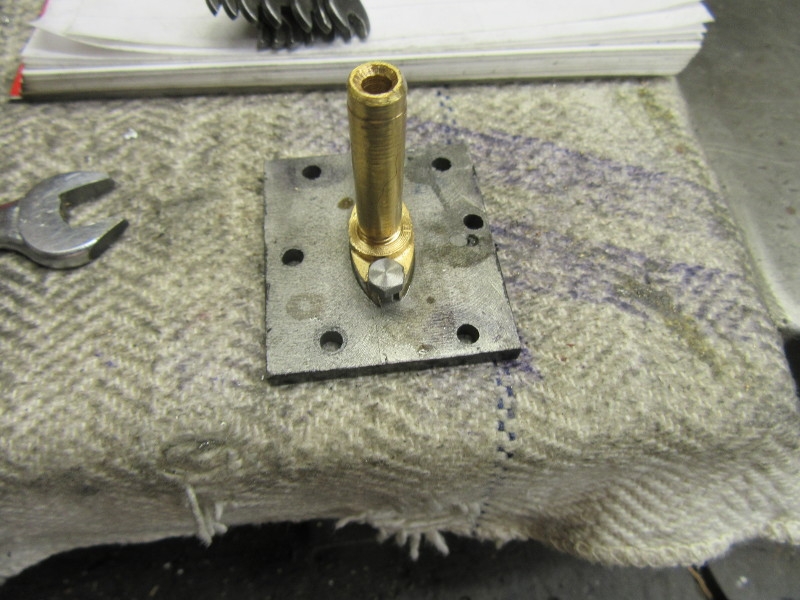
Here it is, number 78, I need two off.
Here we are at knocking off time. I shall make the pins with the skinny heads tomorrow, fit them and tighten everything up, everything is loose and finger tight at the moment.
That was a good morning but a bit too long for me! I shall have a rest. Good progress and easier than I thought.
By the way, the steam chest lid is still off as the last part of the valve timing is to synchronise the valve events with the piston travel and I need to see the valve to do that.
Stanley Challenger Graham
Stanley's View
scg1936 at talktalk.net
"Beware of certitude" (Jimmy Reid)
The floggings will continue until morale improves!
Stanley's View
scg1936 at talktalk.net
"Beware of certitude" (Jimmy Reid)
The floggings will continue until morale improves!
-
Stanley
- Global Moderator
- Posts: 90301
- Joined: 23 Jan 2012, 12:01
- Location: Barnoldswick. Nearer to Heaven than Gloria.
Re: Shed Matters 3
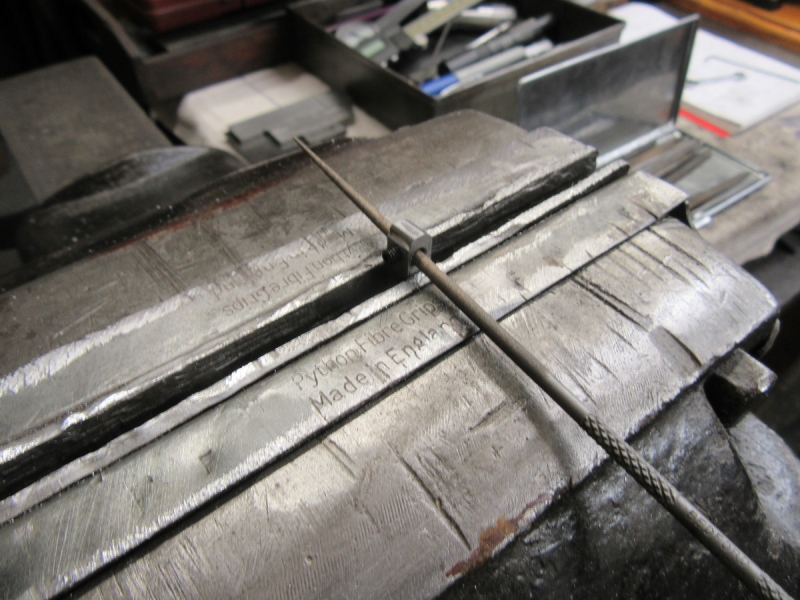
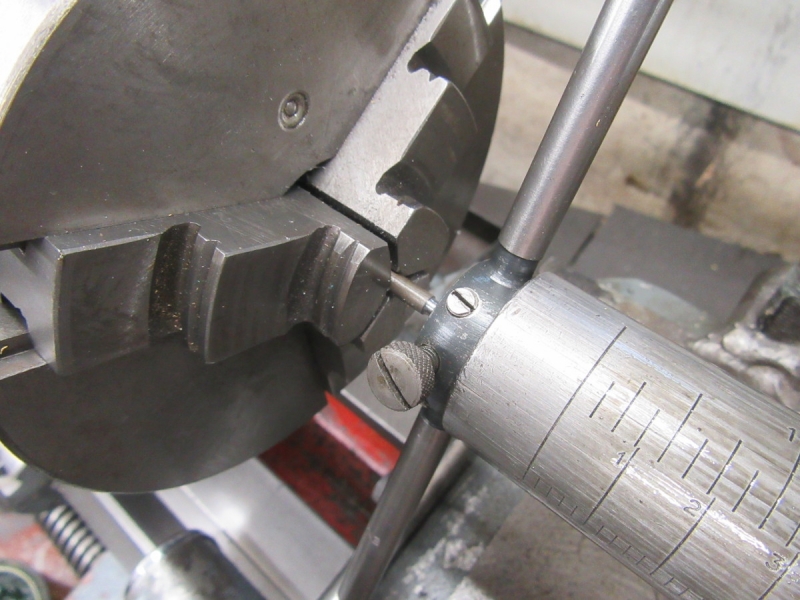
Today I need to make the two small pins I identified yesterday. They're small and so I started by sharpening my favourite HSS cutter and honing it.
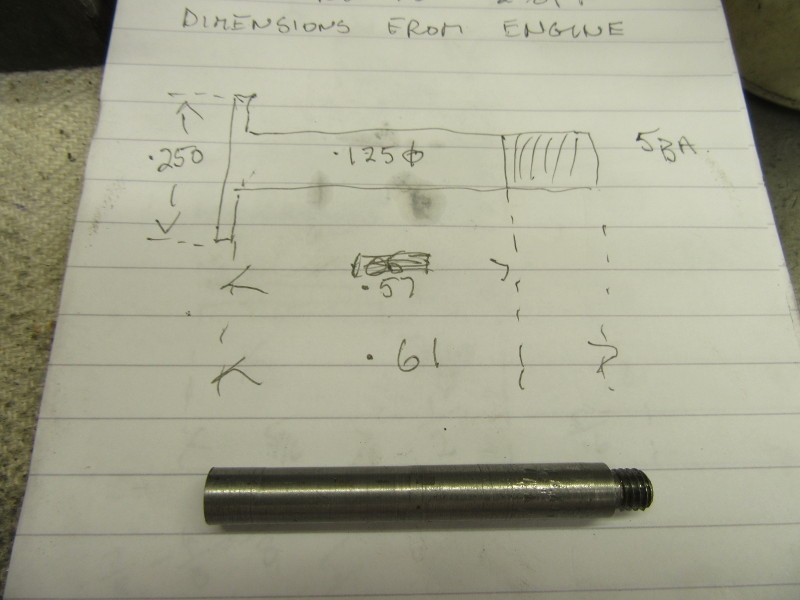
I did my usual fag packet drawing but didn't use the measurements on the drawing, the clearances are so small a couple of thou can make all the difference so I took my dimensions from the engine. I found a piece of scrap that will do in my stock box.
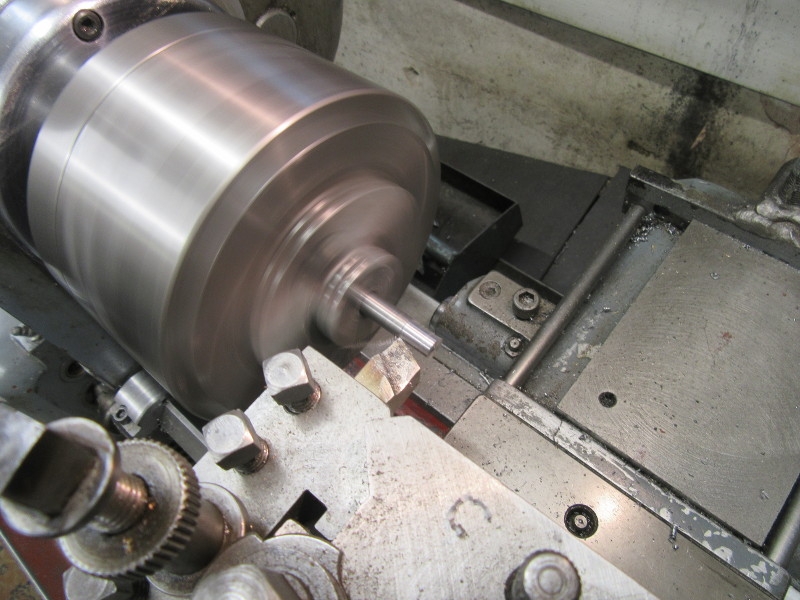
Some careful accurate work in the lathe.
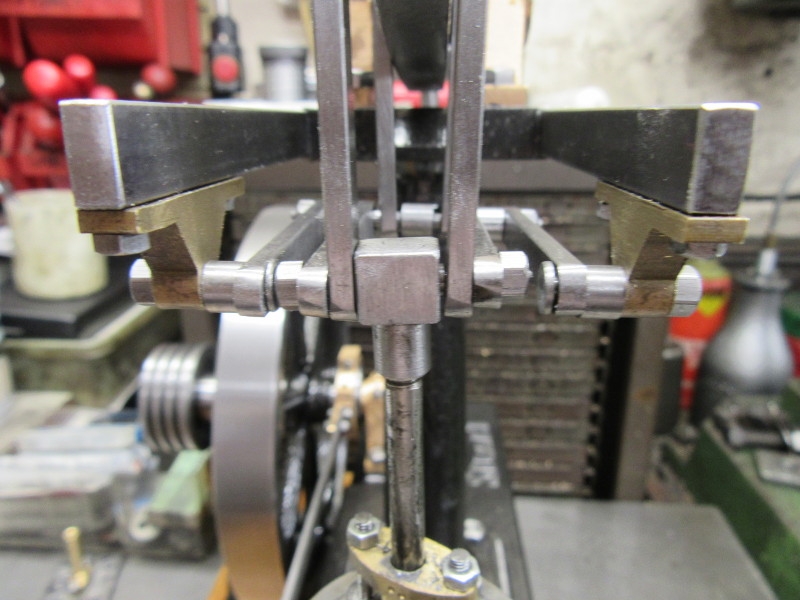
I forgot to do a pic of the two tiny pins. Here they are fitted but not tightened and they have done the job. The parts of the motion clear but only just!
Knocking off time. By then I had spent a lot of time making small adjustments, checking the throw of the valve again and finding it had altered when I tightened the valve linkage so I adjusted it again. Lots of little fitting jobs and adjustments and we now have an engine that is ready for final timing of the valve to the piston travel. It's going to be OK. Once that is done the steam chest lid will have to be refitted and the studs tidied up, at the moment they vary in length. Then, Guess what! We can put steam on it and run it. Best part of the build, I am enjoying it.
Stanley Challenger Graham
Stanley's View
scg1936 at talktalk.net
"Beware of certitude" (Jimmy Reid)
The floggings will continue until morale improves!
Stanley's View
scg1936 at talktalk.net
"Beware of certitude" (Jimmy Reid)
The floggings will continue until morale improves!
-
Stanley
- Global Moderator
- Posts: 90301
- Joined: 23 Jan 2012, 12:01
- Location: Barnoldswick. Nearer to Heaven than Gloria.
Re: Shed Matters 3
One last check of the valve and then into today's phase, synchronise the valve events with the position of the piston and this is done by adjusting the position of the eccentric on the crankshaft.
The valve timing has been adjusted and the eccentric locked down. Progress! The next job is to put the lid back on the steam chest.
The lid is not up to standard so I stripped it down and set about making it pretty.
I invested in a new sheet of 120 paper and spent some time on it.
That looks better!
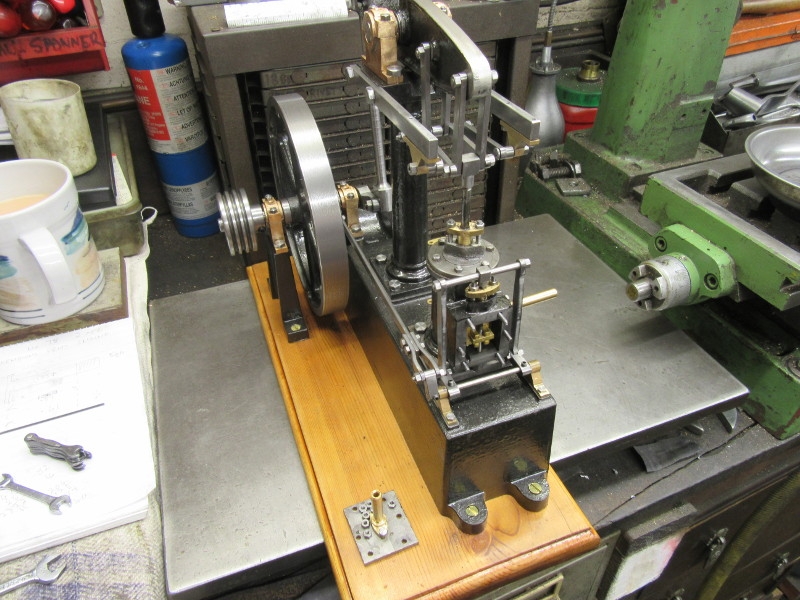
The steam chest lid is back in place bedded down in Loctite plastic gasket. It's ready to run but I held myself in check, got the Dremel out and tidied the steam chest studs up.
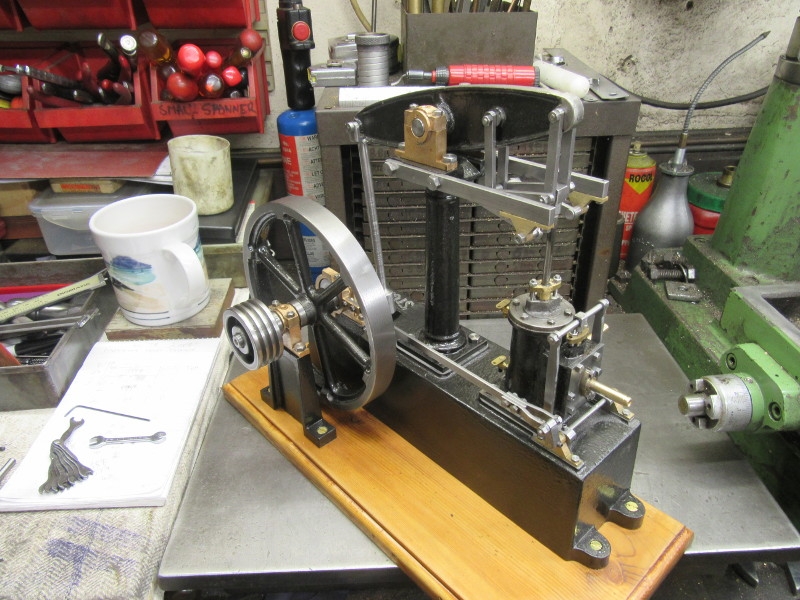
That looks better. Then I went through all the fastenings checking everything was tightened up. Now we are ready for a trial run. Blow the compressor up and away we go.
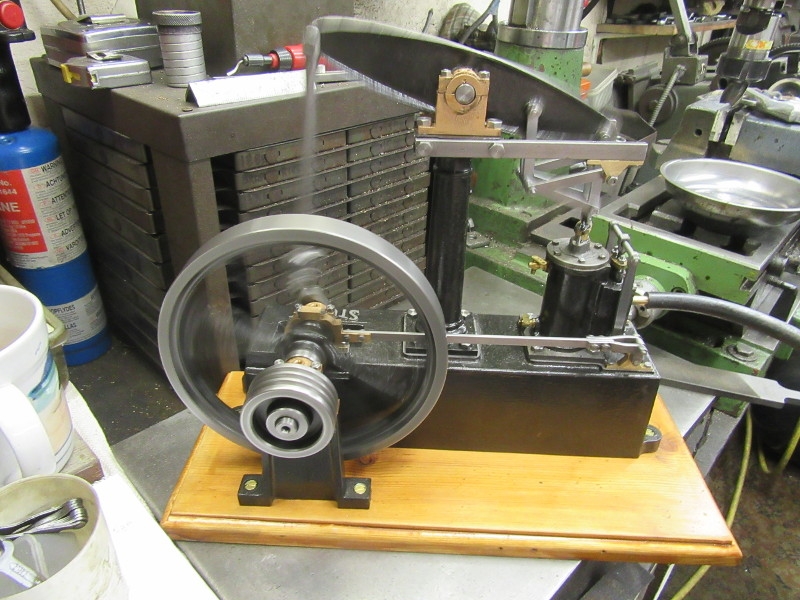
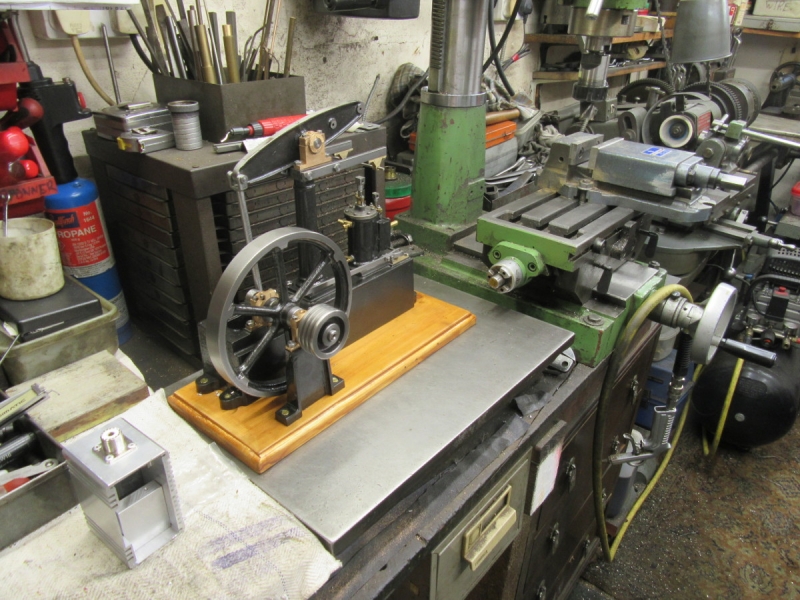
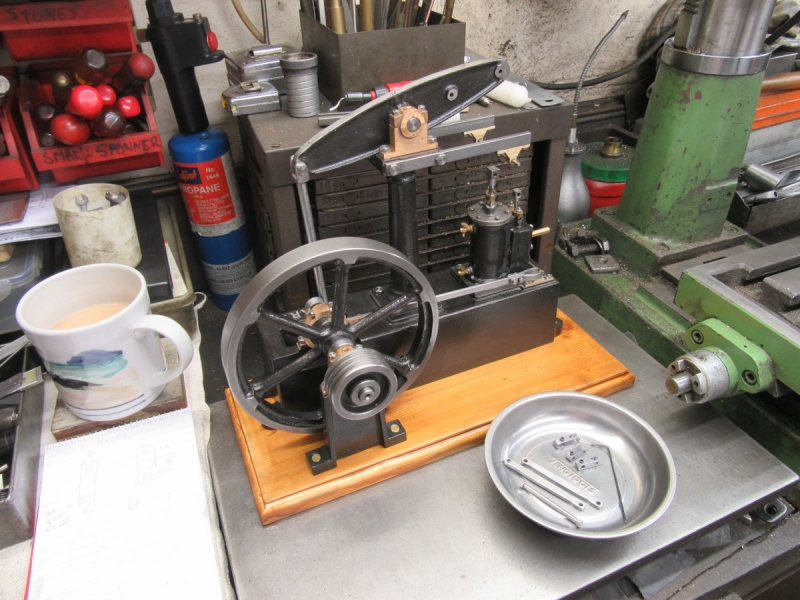
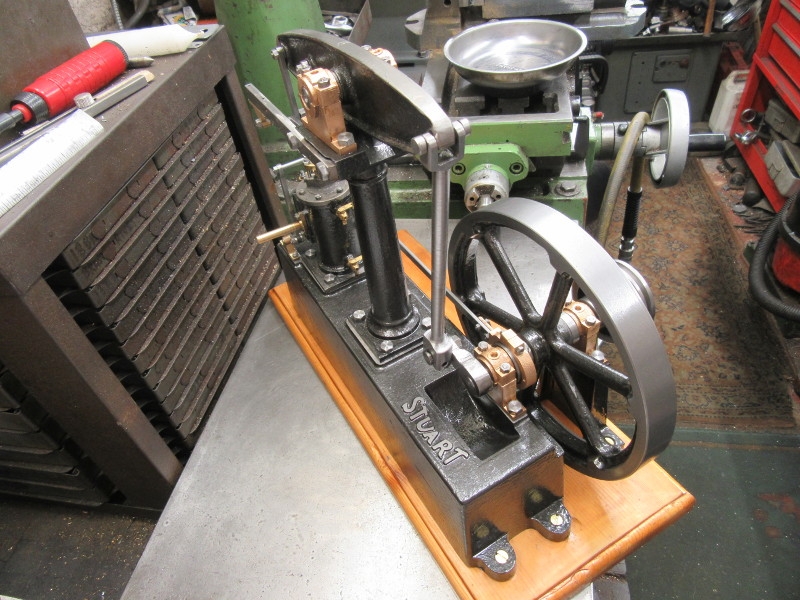
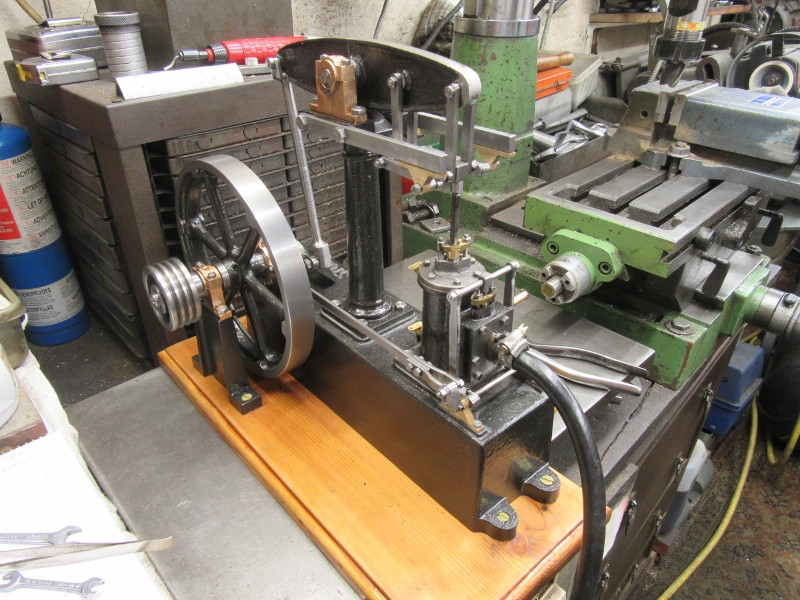
Here we are after 6 months work, the nicest sight in the world for any engine builder. You know it's right but the acid test is what happens when you turn the steam on. It's a bit tight but you expect that of a new build. All that matters is it goes like hell!
I noticed that during the run some of the nuts on the parallel motion had come loose so I went through them all cleaning them with brake fluid and reassembling using some shaft fit Loctite to make sure they were not coming loose again. Than another trial and (Bob will like this) it wouldn't run. This sounds like disaster but it isn't, remember when I first tightened the parallel motion up it altered the valve setting? We know the engine is a runner, it's not all that tight and so it's almost certain that all the tightening up has altered the valve timing again. The cure is to take the steam chest lid off and check the valve timing again, readjusting where necessary. But I've been at it for two and a half hours and there's always tomorrow! It's just an engineering problem.
Stanley Challenger Graham
Stanley's View
scg1936 at talktalk.net
"Beware of certitude" (Jimmy Reid)
The floggings will continue until morale improves!
Stanley's View
scg1936 at talktalk.net
"Beware of certitude" (Jimmy Reid)
The floggings will continue until morale improves!
-
Stanley
- Global Moderator
- Posts: 90301
- Joined: 23 Jan 2012, 12:01
- Location: Barnoldswick. Nearer to Heaven than Gloria.
Re: Shed Matters 3
The design committee contacted me first thing this morning and suggested that instead of plunging straight into ripping the valve open I first identify the tight joint in the linkage and cure that first. That makes sense and is the way I shall go.
Stanley Challenger Graham
Stanley's View
scg1936 at talktalk.net
"Beware of certitude" (Jimmy Reid)
The floggings will continue until morale improves!
Stanley's View
scg1936 at talktalk.net
"Beware of certitude" (Jimmy Reid)
The floggings will continue until morale improves!
-
Stanley
- Global Moderator
- Posts: 90301
- Joined: 23 Jan 2012, 12:01
- Location: Barnoldswick. Nearer to Heaven than Gloria.
Re: Shed Matters 3
I've had almost two hours in the shed split by having to do half an hour on essential shopping at the Co-op while it was quiet. But here's where I started, following the committee's advice and chasing the tight spot in the linkage. I didn't find it but slackened joints back a touch where I could and eventually made a very small improvement, there are so many joints in the linkage! I put steam on it and it ran but not well, nowhere near how it ran yesterday so I decided that the problem is in the valve. (I was right all along!)

So, off with the lid and a really good examination. I made adjustments and popped the lid back on twice for a trial but I couldn't get the improvement I am after. I can make it run but not as well as it is capable of. These repeated tests were valuable because I realised that there were two areas where I needed to improve.
I need to do a bit of bleeding obvious now, old hands forgive me, the younger end might learn something.
The basic theory behind the simple slide valve is that it floats in its mounting and the steam pressure in the chest forces it onto the face of the valve. This isn't happening consistently, which suggests the valve isn't floating freely on the driving bar that the valve rod is screwed into. So what I have to do is strip the valve out and ease the fit of the driving bar in the valve. There is a problem here, this valve has a very short throw and any play in the fit of the driving bar will further reduce this which is a bad thing. I've already noted another area of improvement in that the valve is a shade on the large size, it can stand being reduced a bit at either end. So tomorrow I'll strip the valve rod and the valve out. Check the fit on the face, reduce the length a touch and ease to driving bar in the valve so I am sure it's floating. Then I'll lace it up, set the valve again and keep trying!
Stanley Challenger Graham
Stanley's View
scg1936 at talktalk.net
"Beware of certitude" (Jimmy Reid)
The floggings will continue until morale improves!
Stanley's View
scg1936 at talktalk.net
"Beware of certitude" (Jimmy Reid)
The floggings will continue until morale improves!
Re: Shed Matters 3
The devil is in the detail as they say Stanley. This is the most difficult bit. I see you had problems with the clearance on the parallelogram of the watt’s linkage. It is a very tight spot. My French friend who is building the Model Engineer beam engine has noted that there is only a few thou clearance on this part though he hasn’t got that far yet.
I wonder what you have done to finish the valve faces? Did you lap them? I am currently working on a 3 1/2” gauge duchess locomotive left to me by a late model engineer friend. It has a slide valve regulator which was seized but then passed like it was open. I have cleaned it up and lapped the faces with metal polish on a piece of float glass. It is much improved though not perfect. I’ll watch your progress tomorrow once you have adjusted the valve length.
I wonder what you have done to finish the valve faces? Did you lap them? I am currently working on a 3 1/2” gauge duchess locomotive left to me by a late model engineer friend. It has a slide valve regulator which was seized but then passed like it was open. I have cleaned it up and lapped the faces with metal polish on a piece of float glass. It is much improved though not perfect. I’ll watch your progress tomorrow once you have adjusted the valve length.