Shed Matters 3

Re: Shed Matters 3
Thanks Ian. I didn't know the servers had to 'learn' all the pathways, I thought everything happened instantly. It may very well be the Chinese firewall that has to verify the new information sources.
-
PanBiker

- Site Administrator

- Posts: 16449
- Joined: 23 Jan 2012, 13:07
- Location: Barnoldswick - In the West Riding of Yorkshire, always was, always will be.
Re: Shed Matters 3
Its the routers as well China they have routing tables that sync with other connected nodes across the web. When one sees a change it passes it on to it's linked neighbours so the internet infrastructure is constantly learning and updating itself. The DNS servers are the ones that store and resolve domain names to the common denominator of the the web, IP addresses.They pass all their info around as well. There is a server hierarchy that covers the major continents first so a change gets a foot in the door so to speak. It then percolates down through the other multiple servers in each country. It all works a lot faster than it used to but they still reckon about 48 hours for full propagation around the globe.
Ian
Re: Shed Matters 3
0700 Beijing time: Loads like lightning again, the infrastructure must have done whatever it needed to do! Thanks for the explanations, Ian.
-
Stanley

- Global Moderator

- Posts: 90301
- Joined: 23 Jan 2012, 12:01
- Location: Barnoldswick. Nearer to Heaven than Gloria.
Re: Shed Matters 3
Just logged on for the first time in 3 days.... So far so good, I shall report later. I have not been idle in the shed, I shall be stretching the gallery later on. 
Stanley Challenger Graham
Stanley's View
scg1936 at talktalk.net
"Beware of certitude" (Jimmy Reid)
The floggings will continue until morale improves!
Stanley's View
scg1936 at talktalk.net
"Beware of certitude" (Jimmy Reid)
The floggings will continue until morale improves!
-
Stanley
- Global Moderator
- Posts: 90301
- Joined: 23 Jan 2012, 12:01
- Location: Barnoldswick. Nearer to Heaven than Gloria.
Re: Shed Matters 3
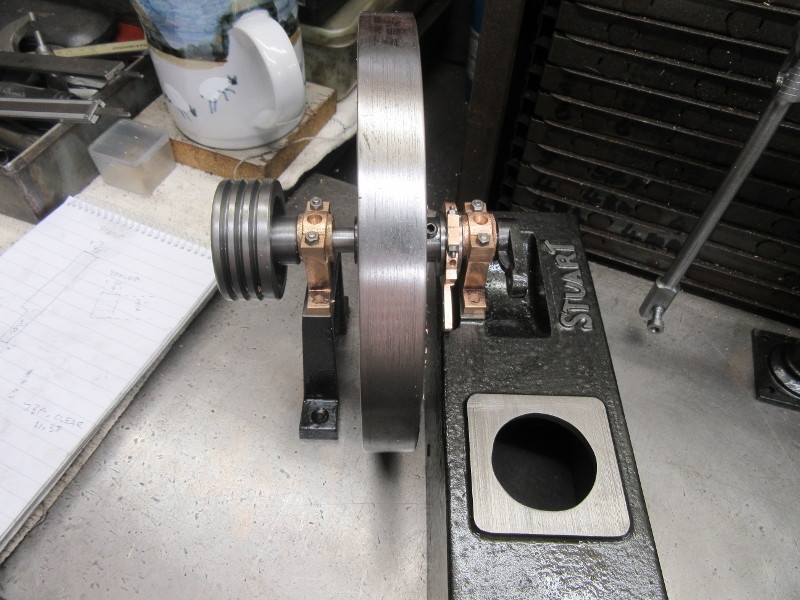
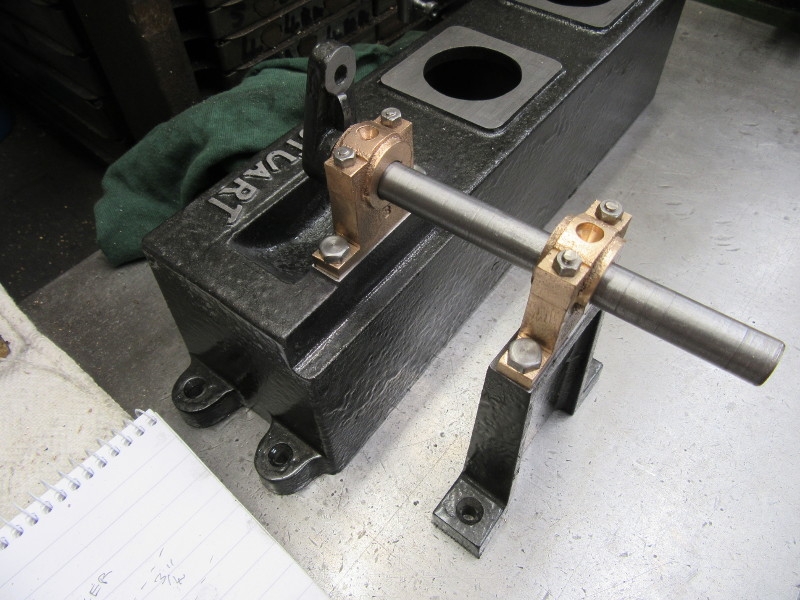
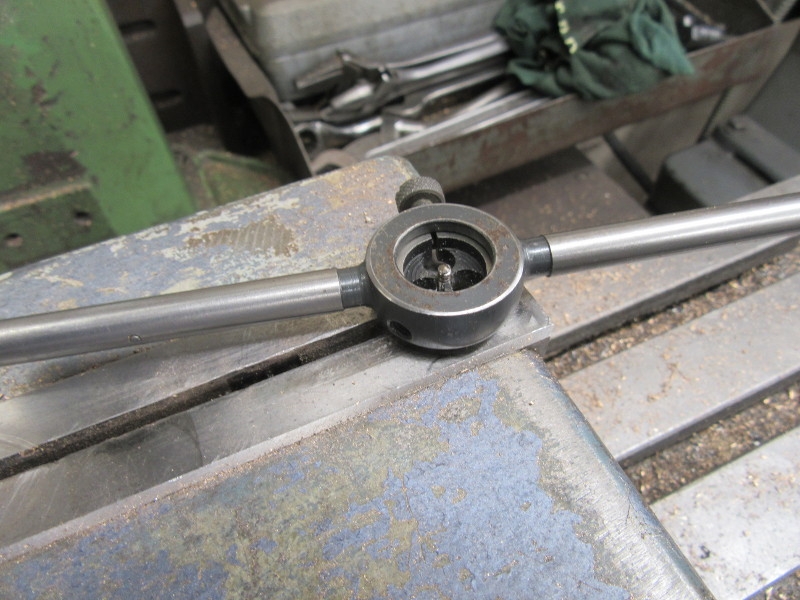
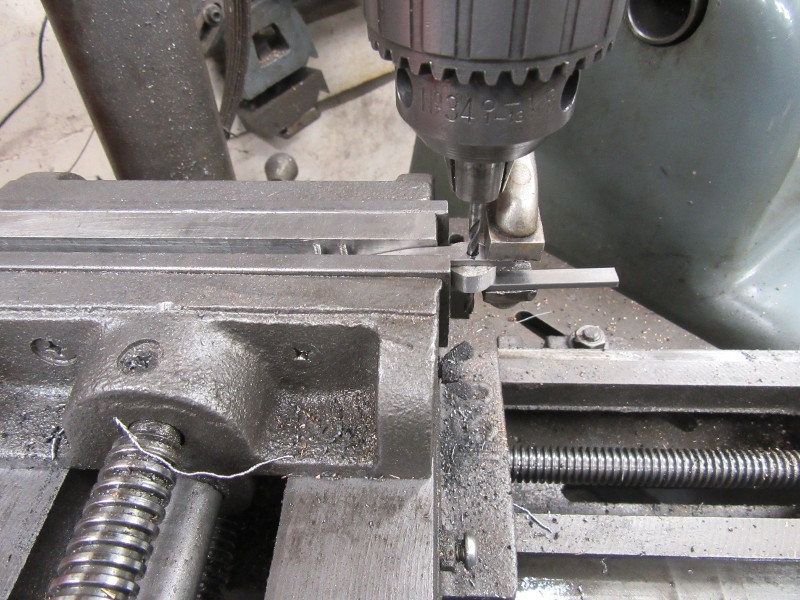
The crankshaft fitted with the eccentric in place, good fit but we need a collar to act as the locator for the shaft in the bearings. In the original design this is done by the eccentric and the crank on each side of the inboard bearing but I don't like that. So into the lathe and make a small collar.
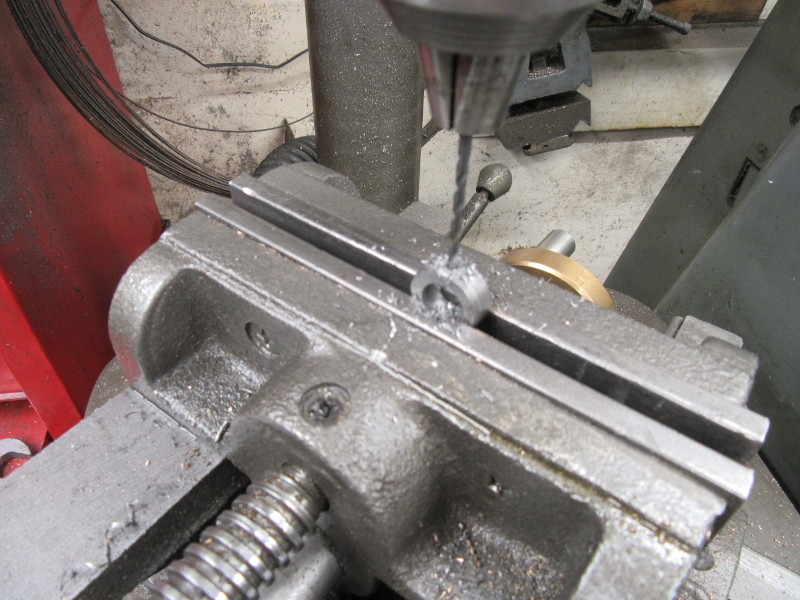
The collar is made and here I'm drilling for the set screw that will fasten it to the shaft.
The collar on the shaft. I shall reduce the length of the set screw at final fitting.
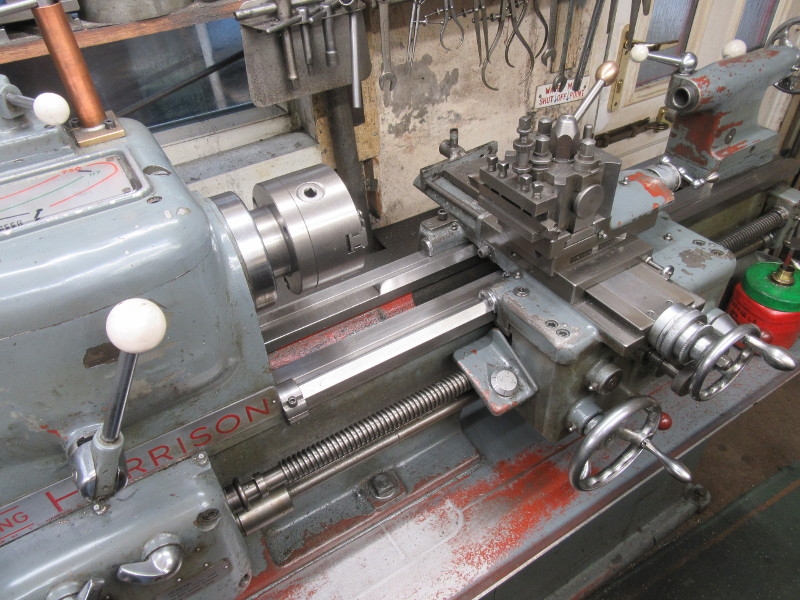
Then a quick clean for Mrs Harrison!
Stanley Challenger Graham
Stanley's View
scg1936 at talktalk.net
"Beware of certitude" (Jimmy Reid)
The floggings will continue until morale improves!
Stanley's View
scg1936 at talktalk.net
"Beware of certitude" (Jimmy Reid)
The floggings will continue until morale improves!
-
Stanley
- Global Moderator
- Posts: 90301
- Joined: 23 Jan 2012, 12:01
- Location: Barnoldswick. Nearer to Heaven than Gloria.
Re: Shed Matters 3
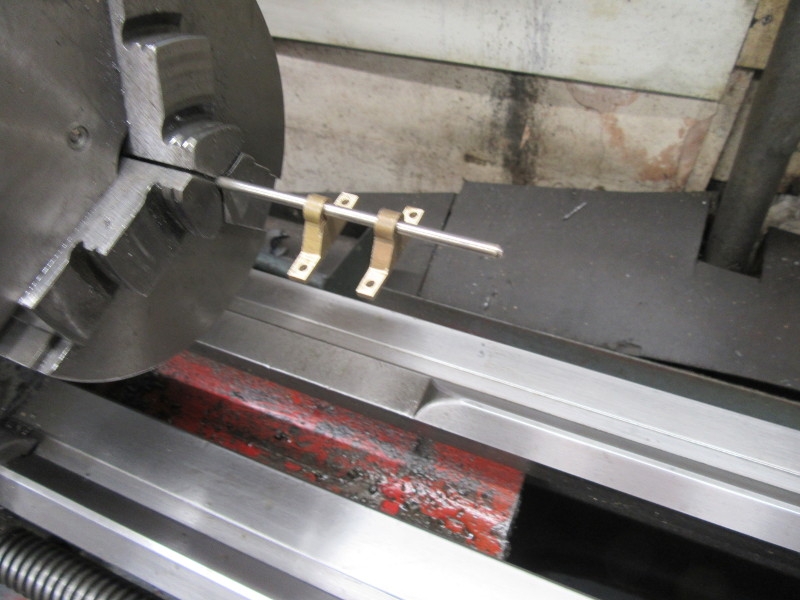
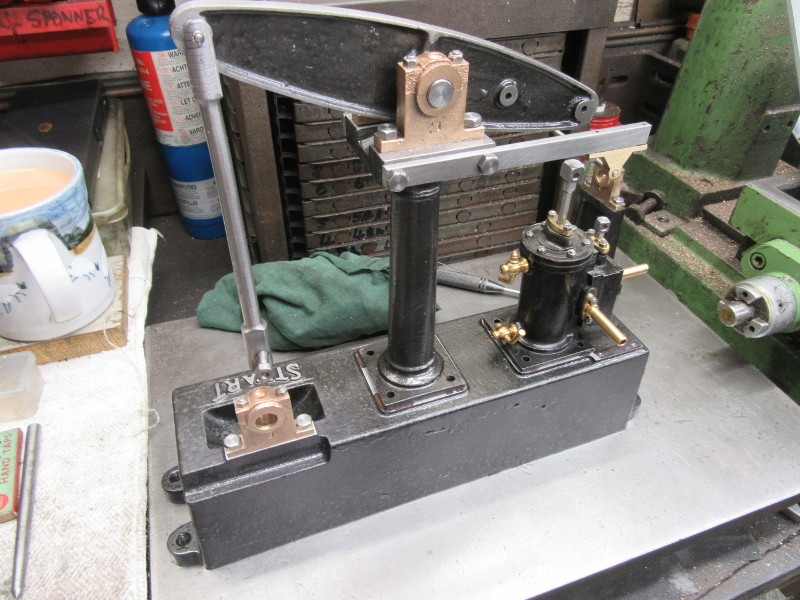
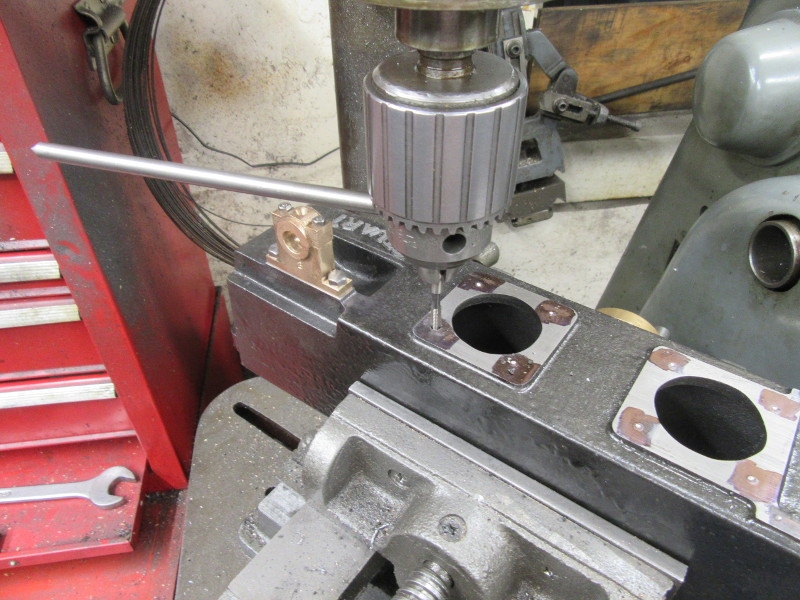
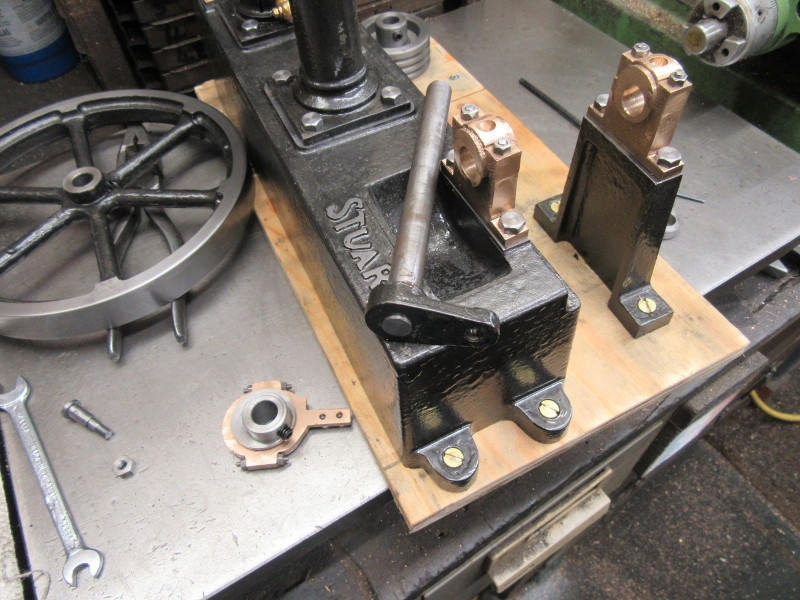
This morning's task was to fit the remaining bearings on the bed and the outrigger. I shall need a 1/8" shaft to ensure good alignment for the vale gear bearings so the first job was to make that.
Here's what we are after. Now we need to do some drilling and tapping.
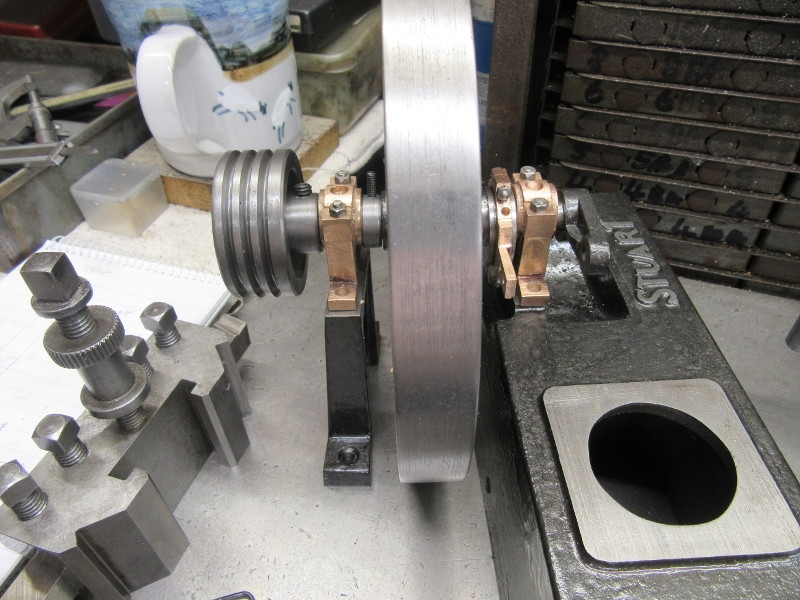
Here's the first part of what we are after, the crankshaft now has bearings on the bed and the outrigger.
Stanley Challenger Graham
Stanley's View
scg1936 at talktalk.net
"Beware of certitude" (Jimmy Reid)
The floggings will continue until morale improves!
Stanley's View
scg1936 at talktalk.net
"Beware of certitude" (Jimmy Reid)
The floggings will continue until morale improves!
-
Stanley
- Global Moderator
- Posts: 90301
- Joined: 23 Jan 2012, 12:01
- Location: Barnoldswick. Nearer to Heaven than Gloria.
Re: Shed Matters 3
Exciting times. We are getting closer to an engine. Today's job is to mark, drill and tap for the column. the cylinder and the valve motion bearings. The first two are easy, 2BA, enormous. The valve motion bearings are my least favourite ones, 7BA. I hate them!
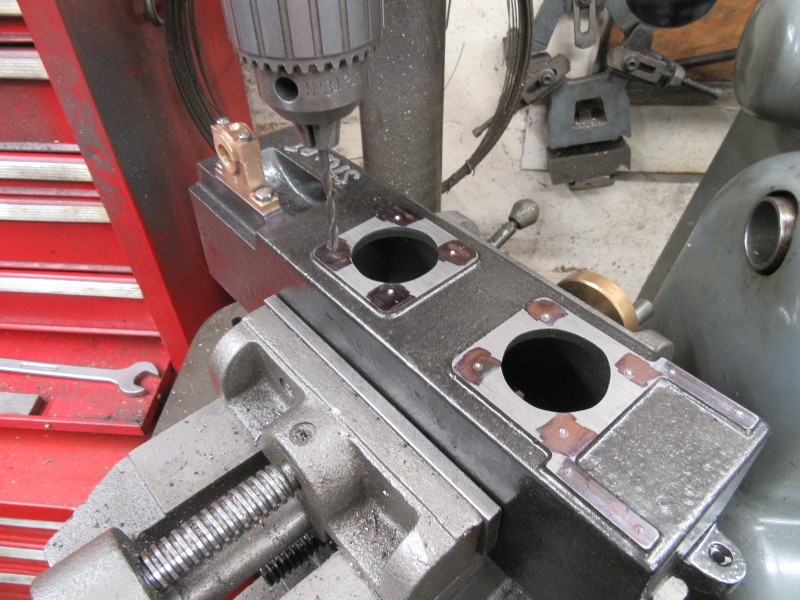
I think you get the picture. There was one bad moment with the 7BA bolts. Not the drilling and tapping but the fact that the 7BA bolts supplied are under size. I reduced the size of the tapping drill and managed to get a loose fit. There is no strain on these bearings that can't be accommodated by fitting the bolts in Loctite. So we have got away with it.
Stanley Challenger Graham
Stanley's View
scg1936 at talktalk.net
"Beware of certitude" (Jimmy Reid)
The floggings will continue until morale improves!
Stanley's View
scg1936 at talktalk.net
"Beware of certitude" (Jimmy Reid)
The floggings will continue until morale improves!
-
Stanley
- Global Moderator
- Posts: 90301
- Joined: 23 Jan 2012, 12:01
- Location: Barnoldswick. Nearer to Heaven than Gloria.
Re: Shed Matters 3

I stretched a point yesterday and went back into the shed for half an hour. I am into a full fit up and need to have the engine on a base board. I haven't got the hardwood ones and didn't have a piece of plywood big enough to I have pieced to smaller pieces together. This will do for the first fit, it can be replaced by the final hardwood plinth when I finally get them.
Stanley Challenger Graham
Stanley's View
scg1936 at talktalk.net
"Beware of certitude" (Jimmy Reid)
The floggings will continue until morale improves!
Stanley's View
scg1936 at talktalk.net
"Beware of certitude" (Jimmy Reid)
The floggings will continue until morale improves!
-
Stanley
- Global Moderator
- Posts: 90301
- Joined: 23 Jan 2012, 12:01
- Location: Barnoldswick. Nearer to Heaven than Gloria.
Re: Shed Matters 3
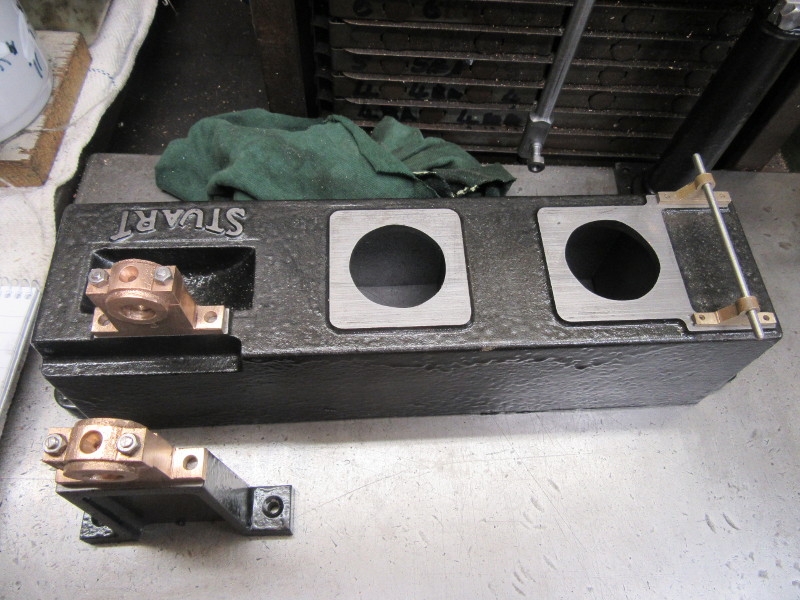
First job was to screw the bed down on the temporary plywood base. I didn't get it quite straight but that doesn't matter, this is for fitting purposes only. First job was to clean the marking ink off the mating surfaces.
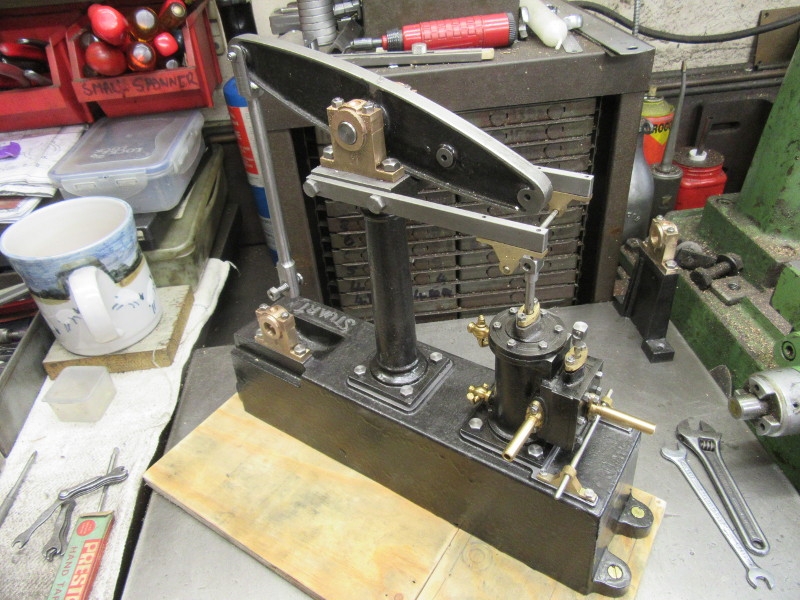
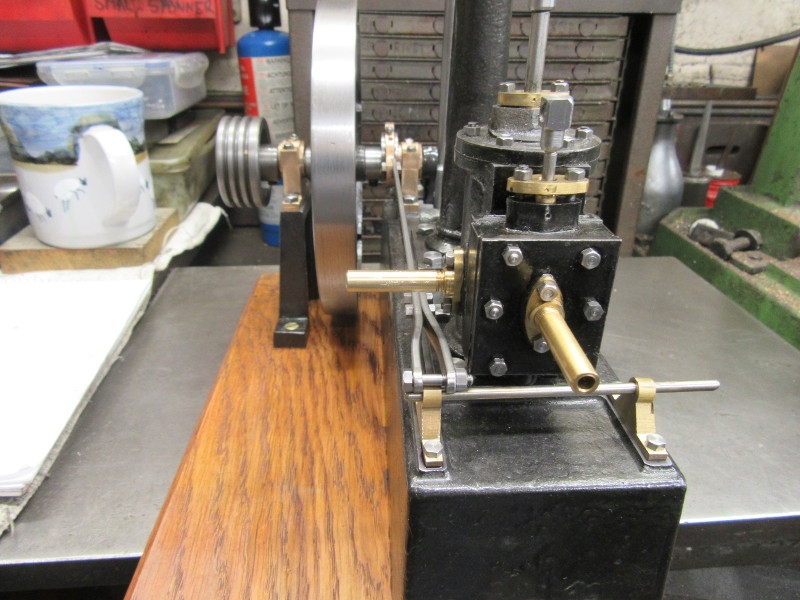
Quite a while afterwards, I have the column, cylinder and valve gear bearings mounted and they all line up.
Here's one problem that cropped up, the con rod end is fouling the end of the crankshaft protruding from the crank. This will need filing back but for the moment I don't want to be diverted.
Here's where we were at knocking off time. Everything is in place and it's all a lovely close fit, not too tight. The crankshaft end will be dealt with first tomorrow and then we are into making all the small parts for the parallel motion and the valve gear. Deep and unalloyed joy.... But we are getting close to a finished engine!
Stanley Challenger Graham
Stanley's View
scg1936 at talktalk.net
"Beware of certitude" (Jimmy Reid)
The floggings will continue until morale improves!
Stanley's View
scg1936 at talktalk.net
"Beware of certitude" (Jimmy Reid)
The floggings will continue until morale improves!
-
Stanley
- Global Moderator
- Posts: 90301
- Joined: 23 Jan 2012, 12:01
- Location: Barnoldswick. Nearer to Heaven than Gloria.
Re: Shed Matters 3
Thanks Ian, it feels good as well, it's going to be a nice runner. Now all I have to do is get the parallel motion and the valve gear right. Easy. Right? Onward and upward! (The bad news is that shortly I shall have to spend £500 I can't afford on another set of castings!)
Stanley Challenger Graham
Stanley's View
scg1936 at talktalk.net
"Beware of certitude" (Jimmy Reid)
The floggings will continue until morale improves!
Stanley's View
scg1936 at talktalk.net
"Beware of certitude" (Jimmy Reid)
The floggings will continue until morale improves!
-
Stanley
- Global Moderator
- Posts: 90301
- Joined: 23 Jan 2012, 12:01
- Location: Barnoldswick. Nearer to Heaven than Gloria.
Re: Shed Matters 3
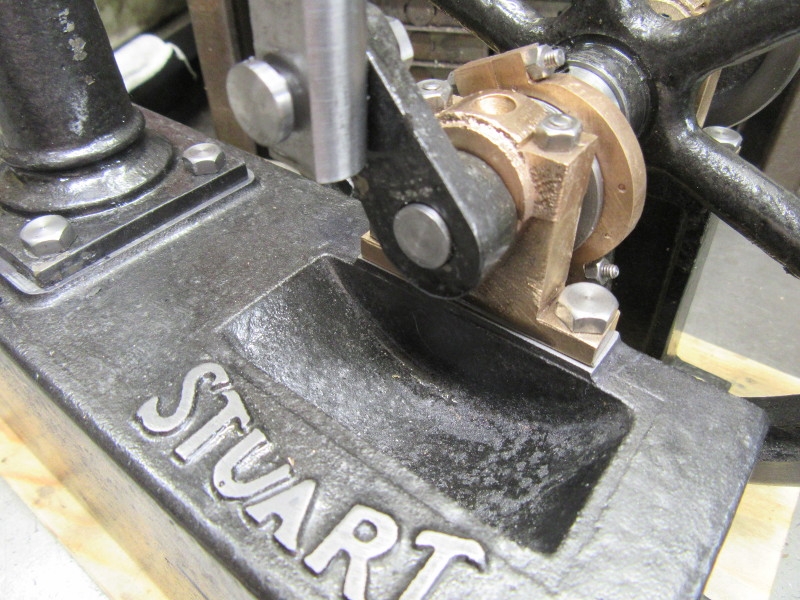
The first job was to put the crank right, the bit of shaft sticking out was fouling the con rod. I was going to simply file it off but I decided to do it the right way, get it in the lathe and clean it up properly. I'm glad I did.
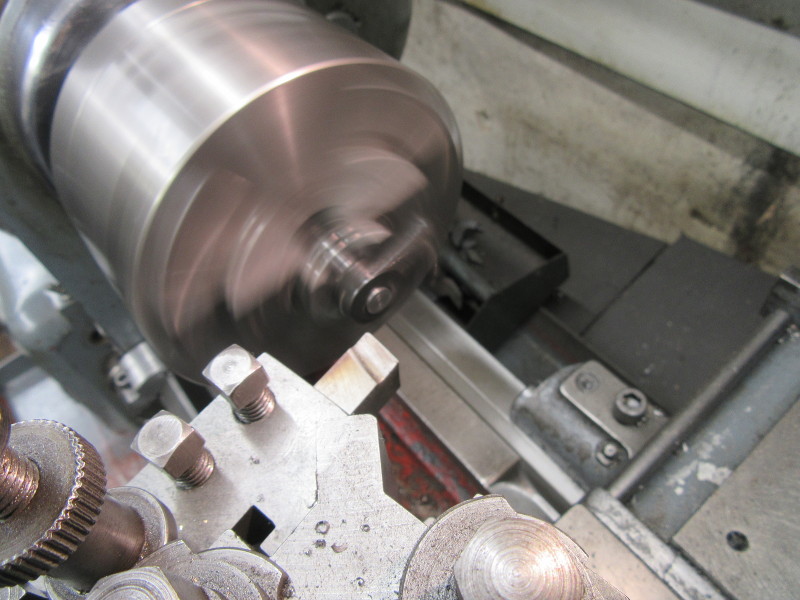

Back together and running perfectly, very little clearance but enough and it looks as though someone cares!
We almost have an engine.... It turns over beautifully, just the right amount of tightness and no play anywhere in the motion. It will run beautifully when it gets air on it.
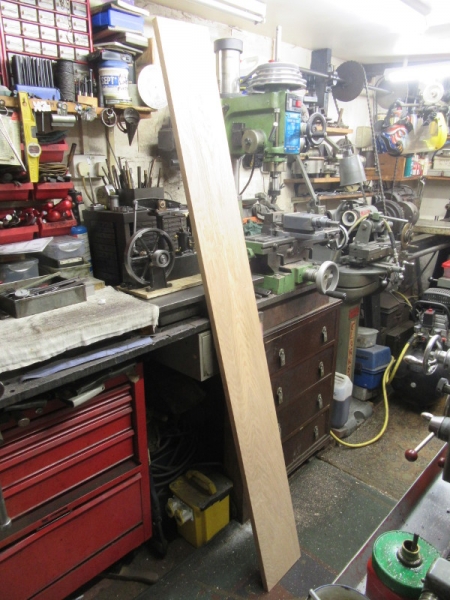
Last night Mick delivered this planed oak off-cut. 2 metres by eight inches for £20. Just right.
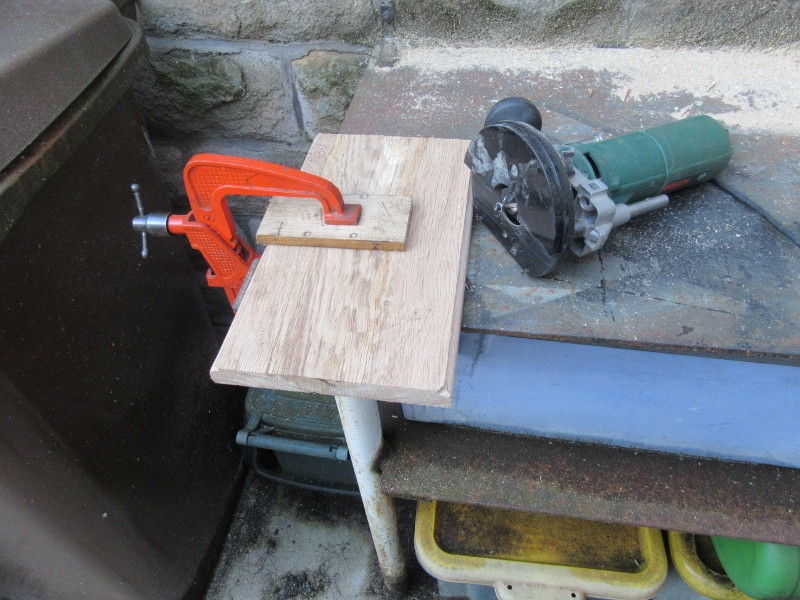
Dry outside so out in the yard to do my least favourite job, woodworking, it's so messy. I started with the chop saw and cut a piece to length, then put the O Gee moulding on the edges with the router. I hate routers! They are so violent and dangerous. I never feel in control. Then a sanded it and got my varnish out.
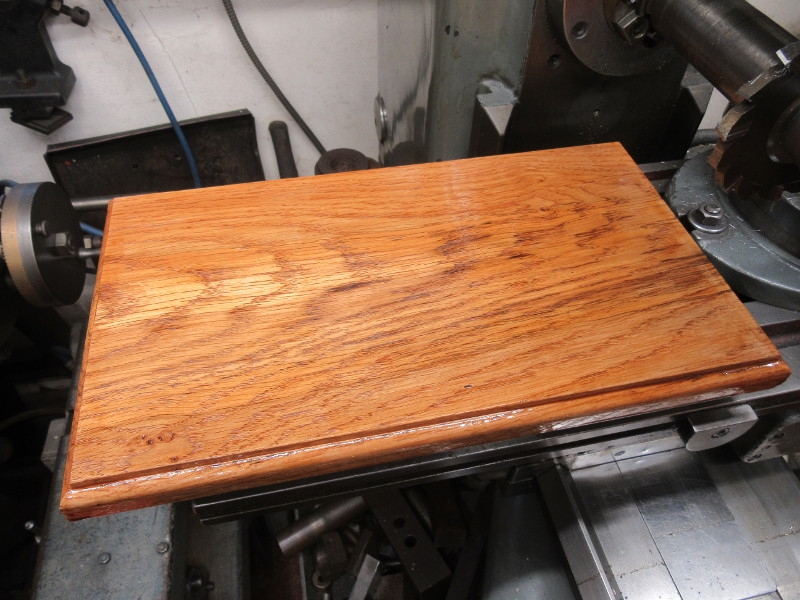
Knocking off time. A lovely piece of timber and all it needs now is time to dry properly. No problem, I have to start making lots of fiddly little parts for the valve gear and the parallel motion. Nice morning, no cock-ups!
Stanley Challenger Graham
Stanley's View
scg1936 at talktalk.net
"Beware of certitude" (Jimmy Reid)
The floggings will continue until morale improves!
Stanley's View
scg1936 at talktalk.net
"Beware of certitude" (Jimmy Reid)
The floggings will continue until morale improves!
-
Stanley
- Global Moderator
- Posts: 90301
- Joined: 23 Jan 2012, 12:01
- Location: Barnoldswick. Nearer to Heaven than Gloria.
Re: Shed Matters 3
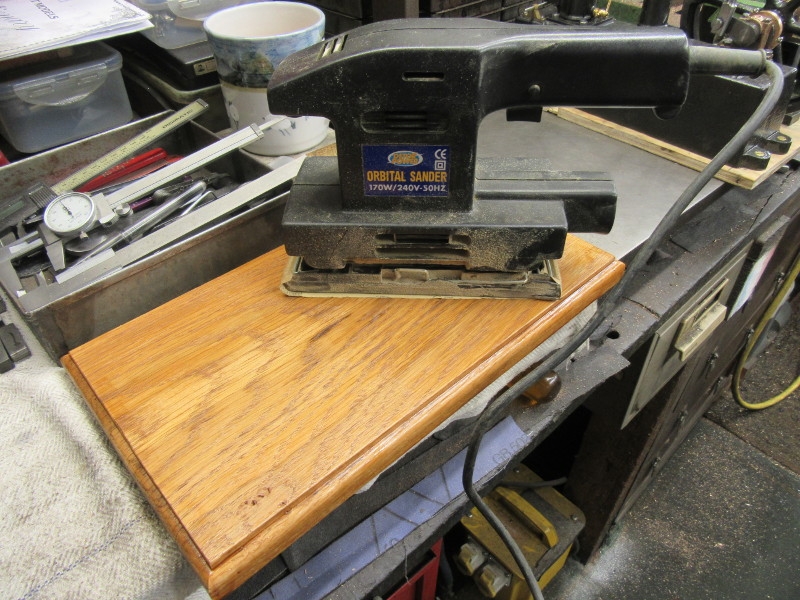
The weather has been kind and the varnish was set so I decided to have an easy day and finish the base. First job was to use very fine sandpaper and knock the varnish down flat. This destroys the shine of course but that's not the finish I am after, it shows every mark. So out with the orbital sander. A word about the sander. I used to have a very expensive top of the range Metabo sander but it burned out on me after very little service, certainly nothing like as durable as I expected. So I bought the cheapest sander I could find, I think it was about a fiver. That was over twenty years ago and it is still going strong and absolutely reliable. Expense doesn't always guarantee excellence.
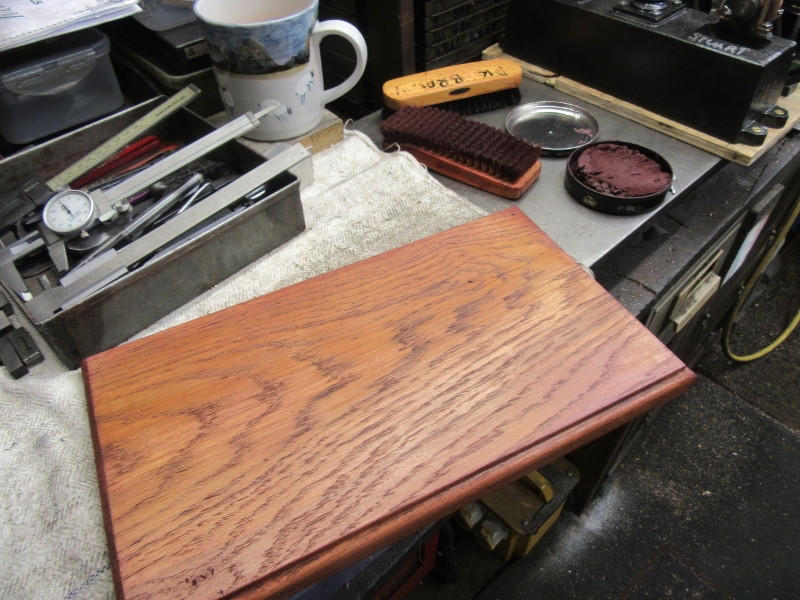
Once flattened and smoothed, the next step was bog standard Ox Blood shoe polish. Try it, it works like a charm. Once it had got a good polishing with a brush and a cloth I gave it a final polish with wax polish. The end result is a darker finish protected by wax and as such it resists marks and is easily re-polished.
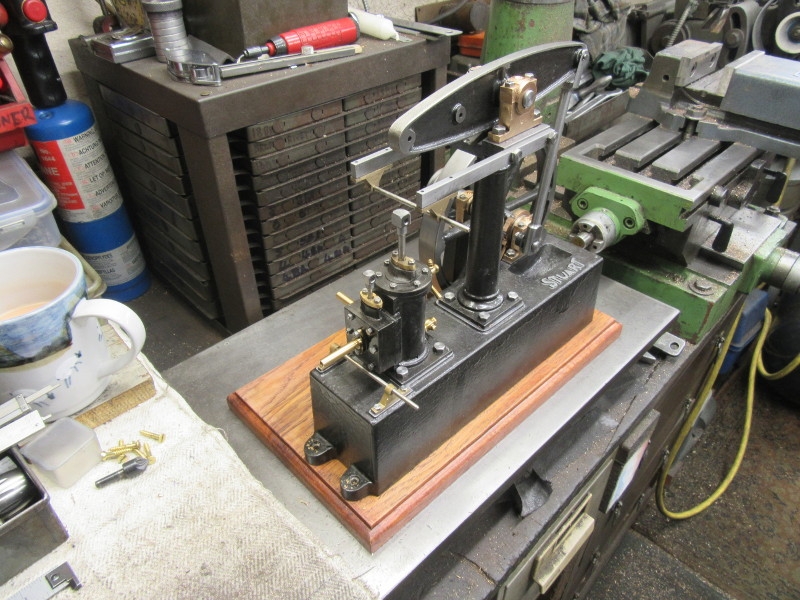
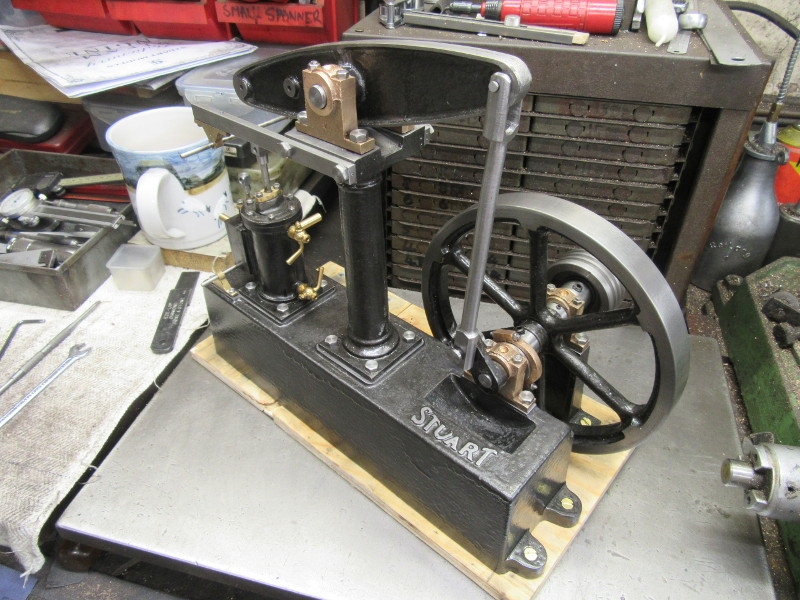
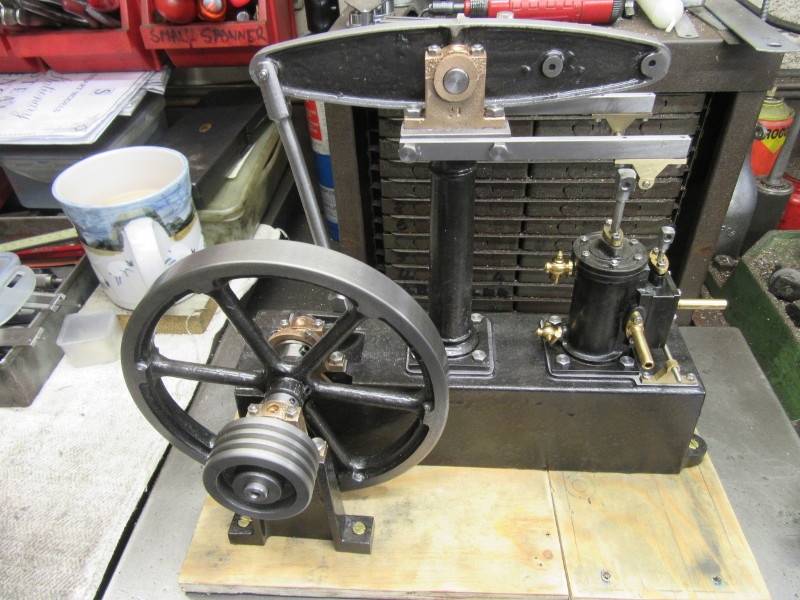
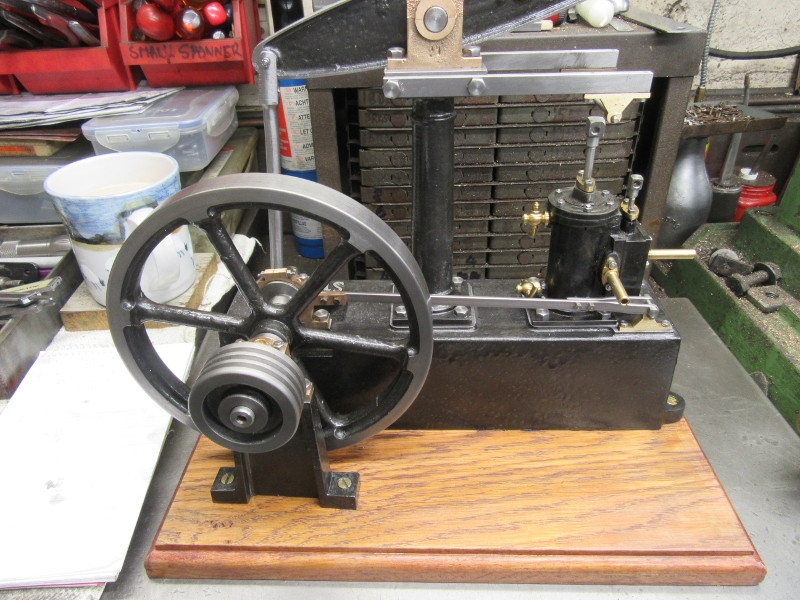
Next was some very careful measuring and positioning on the base. It's amazing how bad a slight discrepancy in alignment leaps out at the observer's eye. I want it to be right! First I screwed the bed down and then the outrigger. I rotated the flywheel and let the outrigger find its own location.
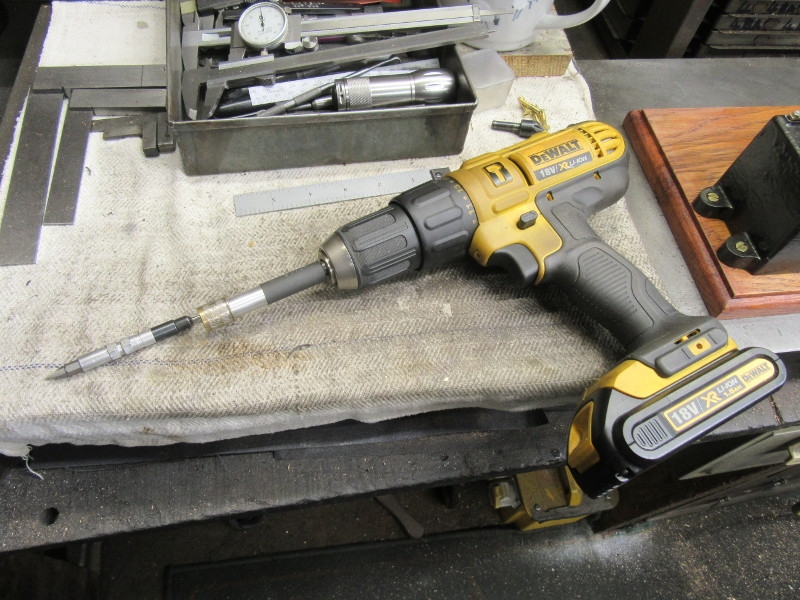
If you haven't already got this attachment I strongly recommend that you get one. It has a pilot drill on one end and the driver bit on the other, you can of course insert whatever bit suits the screws you are using. It's quick change to reverse it and works beautifully.
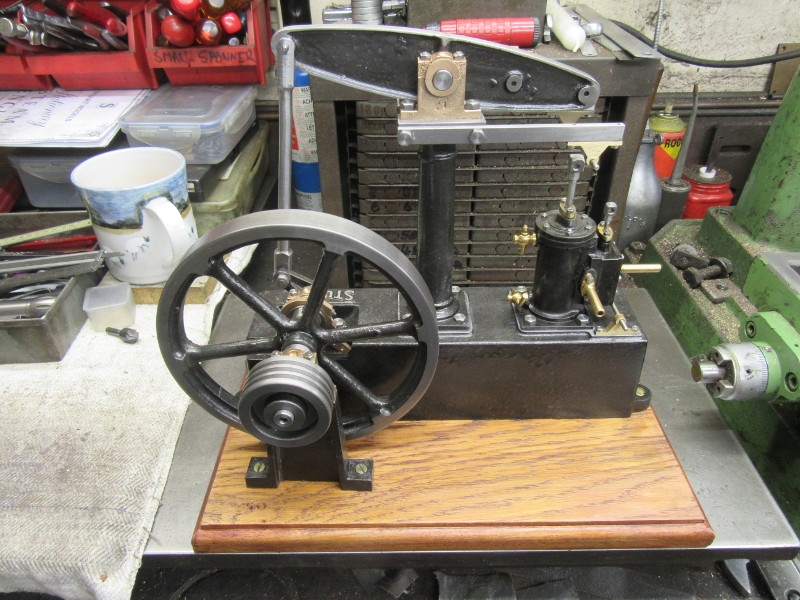
Knocking off time after an hour, I am having an easy day. We have an engine and all it needs is the fiddly bits of the parallel linkage and the valve gear which can't be made and fitted accurately until you get to this stage. It turns over beautifully, just the right tightness, no pinch points and no play anywhere. I'm very pleased with it.
Stanley Challenger Graham
Stanley's View
scg1936 at talktalk.net
"Beware of certitude" (Jimmy Reid)
The floggings will continue until morale improves!
Stanley's View
scg1936 at talktalk.net
"Beware of certitude" (Jimmy Reid)
The floggings will continue until morale improves!
-
Stanley
- Global Moderator
- Posts: 90301
- Joined: 23 Jan 2012, 12:01
- Location: Barnoldswick. Nearer to Heaven than Gloria.
Re: Shed Matters 3
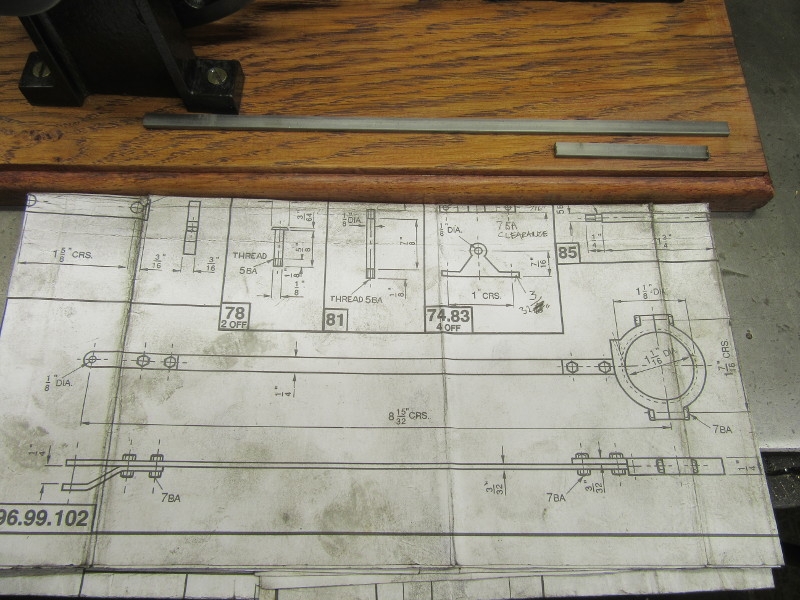
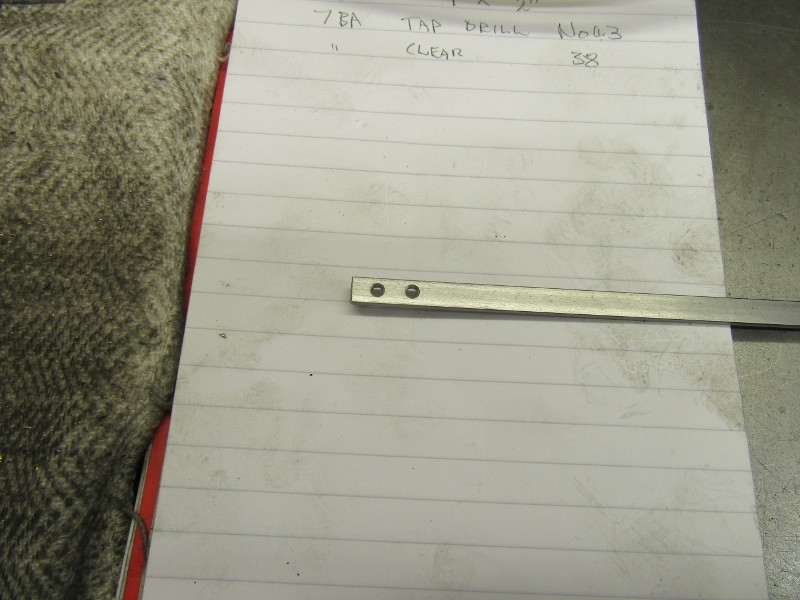
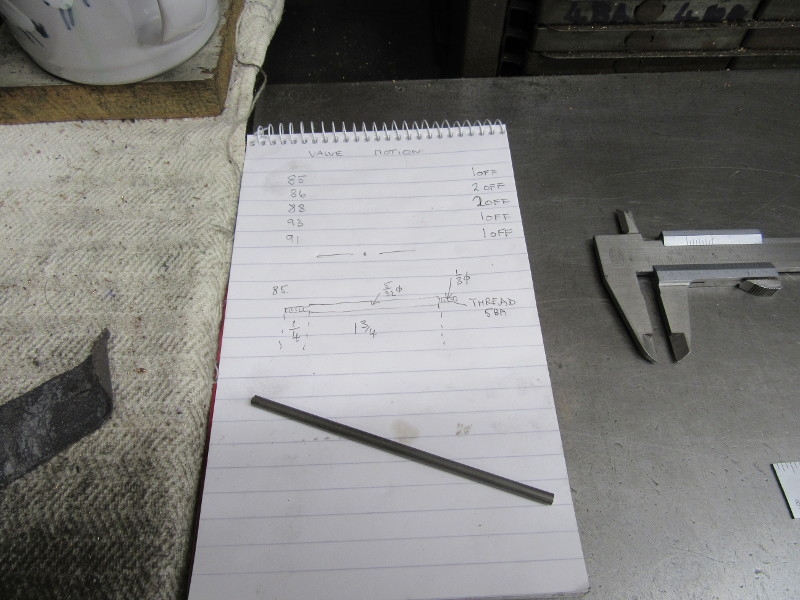
We are now into the fitting of the various motions on the engine and I am starting with the valve rod. First job was to take measurements off the drawing, find the stock and cut it to length. Then I marked the end that will be bolted to the eccentric itself and that got me into making a decision, did I go for a set screw threaded into the rod or a straight 7BA nut and bolt. I decided on the latter as it doesn't rely on only 3/32" of thread but a nut.
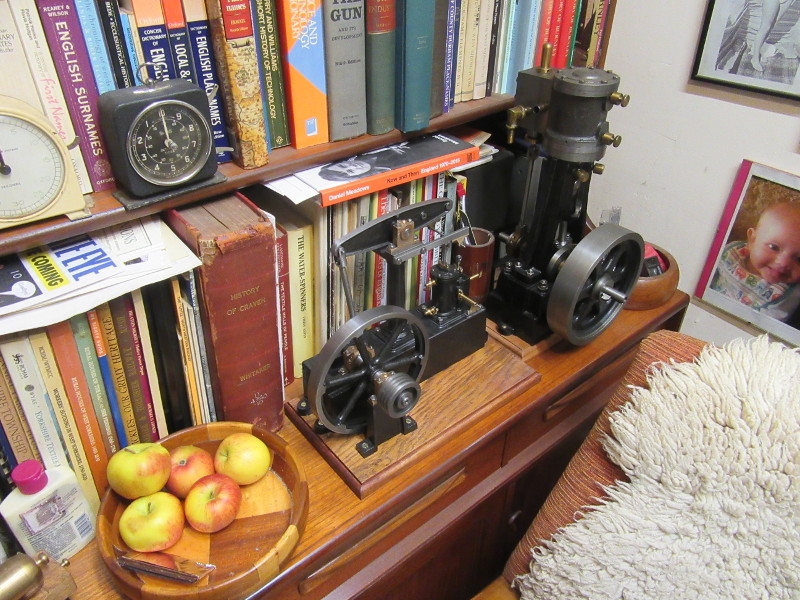
Once I had the measurements for the connection to the eccentric the engine could go on holiday into the kitchen. Eye candy to me but clutter to many!

As you may remember, the collection of fastenings that came with the kit is deficient. Luckily I have this storage cabinet which is full of many things but mainly BA nuts and bolts from 0BA to 18BA and a few even smaller. God knows what it would cost to restock it! Best not to worry about that.
I found what I was looking for and cleaned up the threads with a 7BA die.
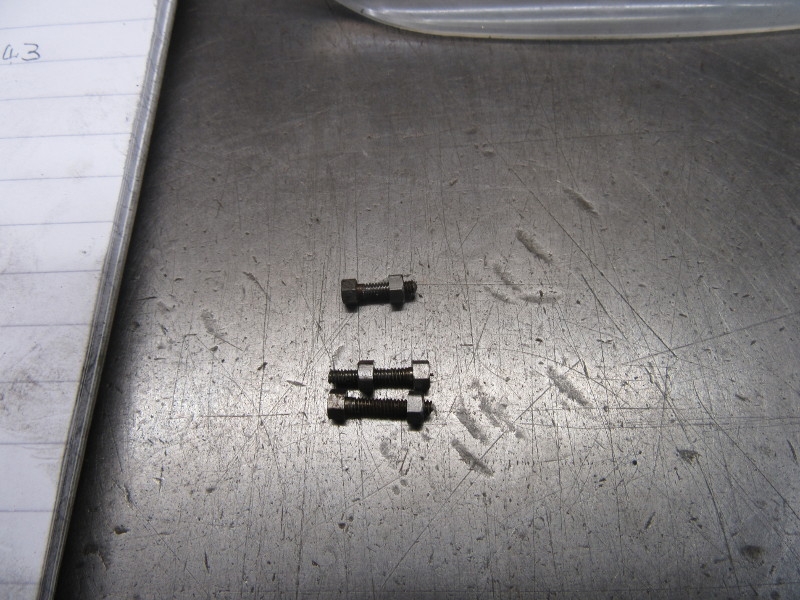
It took far too long but here's where I finished up. I have two nuts and bolts that will do for this end of the rod. Later I'll have to find two more but sufficient unto the day is the evil thereof!
Stanley Challenger Graham
Stanley's View
scg1936 at talktalk.net
"Beware of certitude" (Jimmy Reid)
The floggings will continue until morale improves!
Stanley's View
scg1936 at talktalk.net
"Beware of certitude" (Jimmy Reid)
The floggings will continue until morale improves!
Re: Shed Matters 3
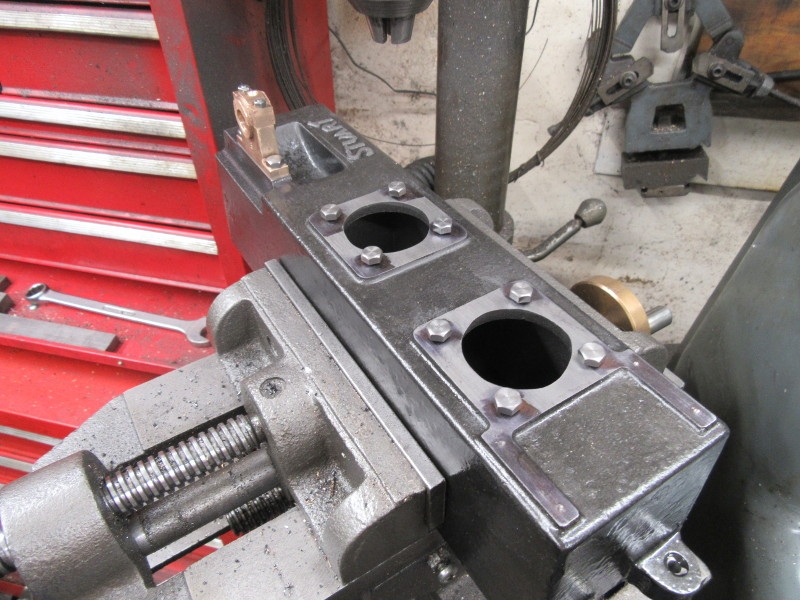
It might not look much Stanley but is is progress. I have had to buy a few BA nuts and screws this summer and, as you say, they are not cheap. My tiling is now drying nicely so I have grouted and cleaned it. I will leave tidying the boiler until I do the plumbing. This morning I have opened up the casting set for the horizontal engine.
You do not have the required permissions to view the files attached to this post.
-
Stanley
- Global Moderator
- Posts: 90301
- Joined: 23 Jan 2012, 12:01
- Location: Barnoldswick. Nearer to Heaven than Gloria.
Re: Shed Matters 3
Coming on nicely Bob!
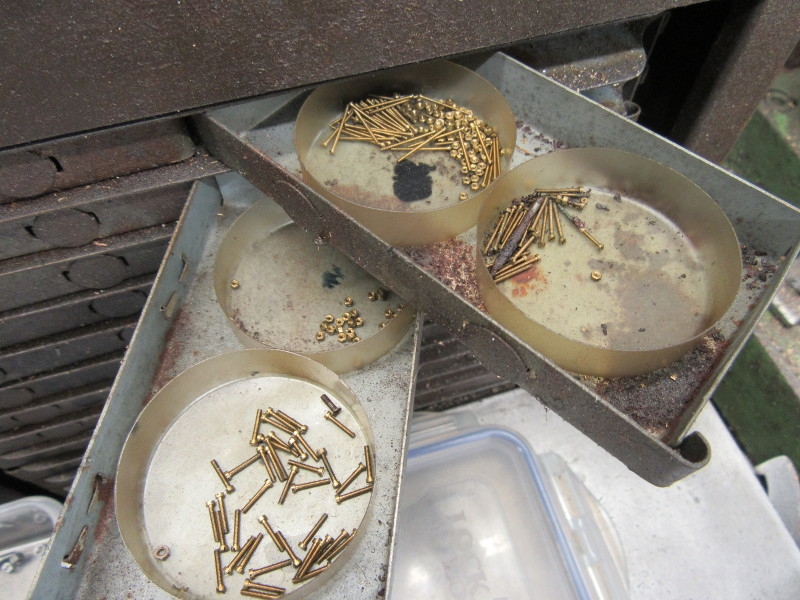
18BA and 16BA brass.
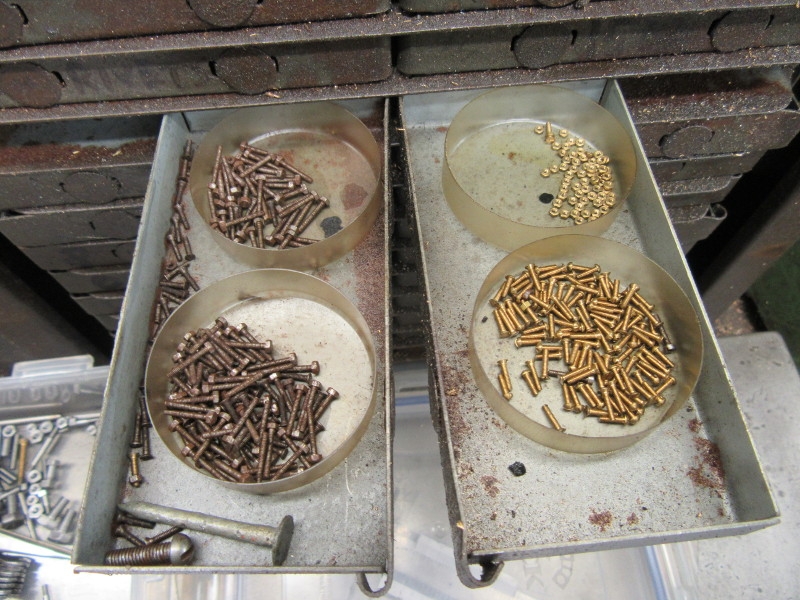
13BA brass and steel.
Just an example of what is in the drawers. From what I can see these are as rare as hen's teeth. I have some that are even smaller. All these came in when I bought a workshop that had been set up by a wealthy bloke and never used. As I say many times, I am a man of wealth but no money! The moral of the story is never walk past anything, if you get the chance, buy old stuff, amazing what you end up with.
Will I ever used these? God knows but that isn't the point, if I need one I have it and if someone else is stuck I can help.
18BA and 16BA brass.
13BA brass and steel.
Just an example of what is in the drawers. From what I can see these are as rare as hen's teeth. I have some that are even smaller. All these came in when I bought a workshop that had been set up by a wealthy bloke and never used. As I say many times, I am a man of wealth but no money! The moral of the story is never walk past anything, if you get the chance, buy old stuff, amazing what you end up with.
Will I ever used these? God knows but that isn't the point, if I need one I have it and if someone else is stuck I can help.
Stanley Challenger Graham
Stanley's View
scg1936 at talktalk.net
"Beware of certitude" (Jimmy Reid)
The floggings will continue until morale improves!
Stanley's View
scg1936 at talktalk.net
"Beware of certitude" (Jimmy Reid)
The floggings will continue until morale improves!
-
Stanley
- Global Moderator
- Posts: 90301
- Joined: 23 Jan 2012, 12:01
- Location: Barnoldswick. Nearer to Heaven than Gloria.
Re: Shed Matters 3
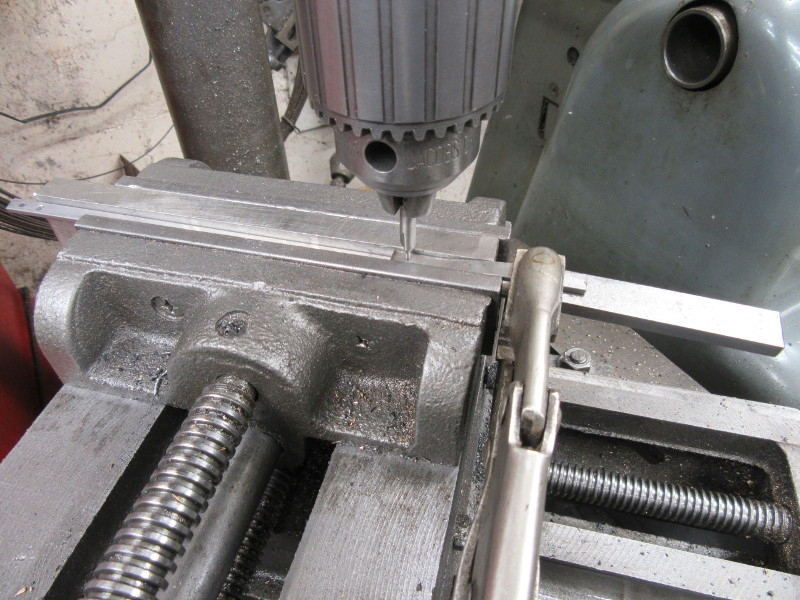
Forward with the valve rod. First job this morning was to drill the holes for attaching it to the eccentric. Needless to say, I did it very carefully and managed to get them dead central on the rod. I checked that the holes match and the bolts are a good fit.
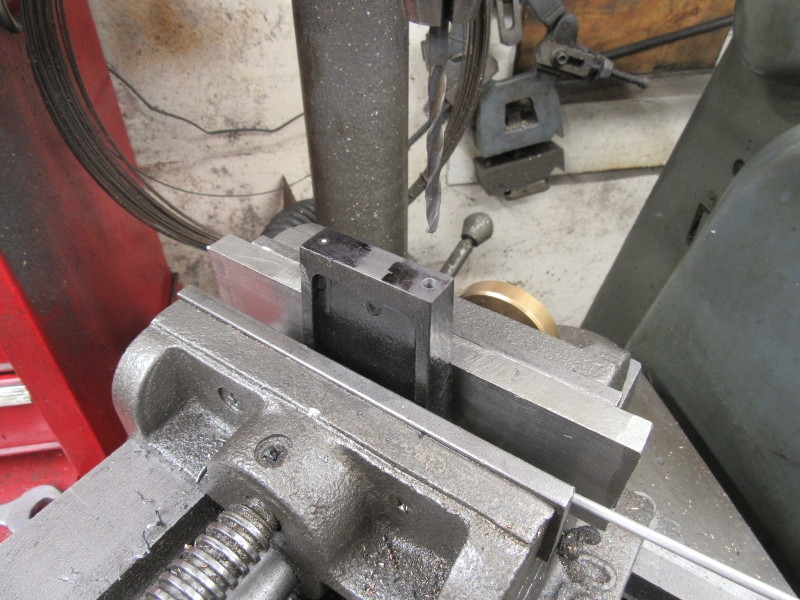
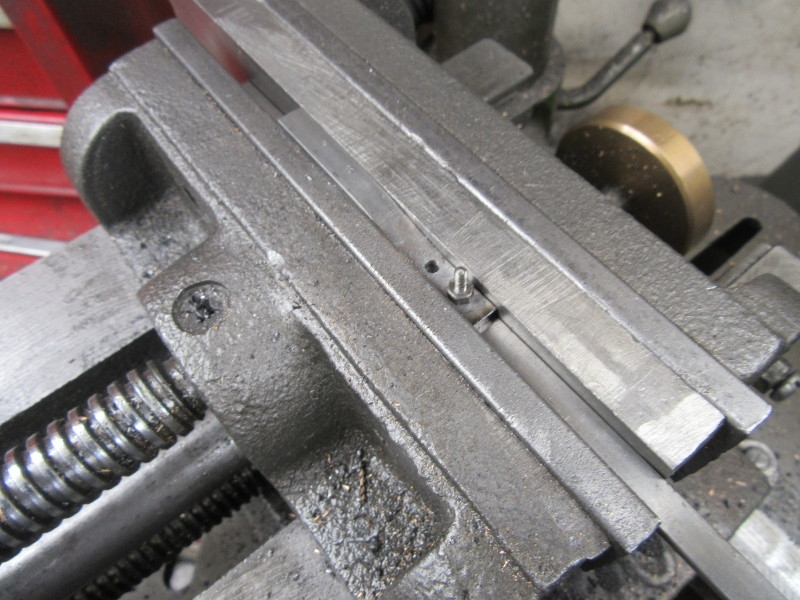
You may remember that we are now at a point where once more I depart from the drawings. They recommend that in making the jaw at the motion end should have all the bend needed in the piece that has to be added to make it. I share the bend between both sides so that the pivot point is centrally lined up with the rod. This complicates the job and here I have put the crank in each side and sandwiched a 1/4" piece of steel in the jaw so I can clamp it with the Mole grips while I drill for one of the bolts.
Once I had the first bolt in it was relatively easy to drill the other hole. And again, I managed to get both of them central!
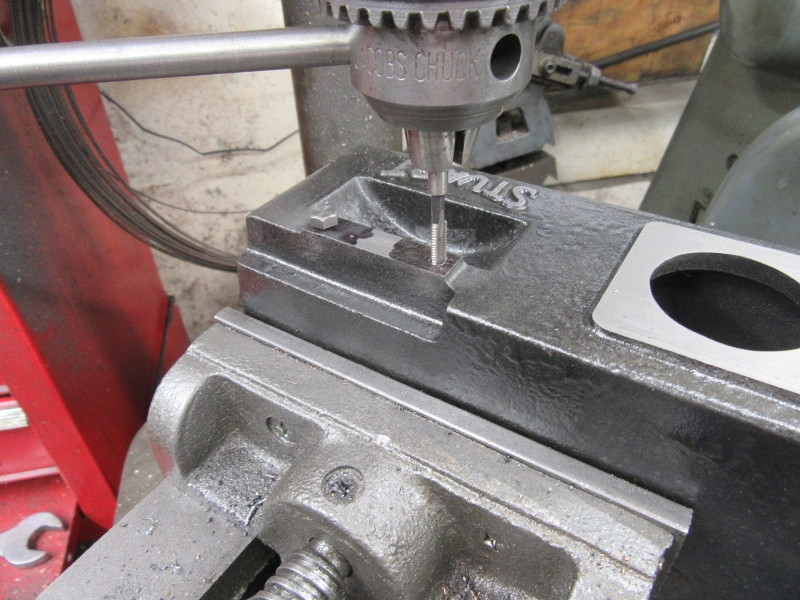
Looking good. The next stage was to do some more careful measuring and mark where the 1/8" hole for the pin that connects to the motion goes. I measured it three times!
Important that the sides of the jaw are parallel when drilling for the pin so I clamped a 1/4" piece of aluminium in the jaws and drilled with that pressure on it.
Knocking off time. The hole is OK and is checked by making sure the pin was a good fit. Next job is to cut the legs of the jaw back to length and rounding the end to make it look pretty. But that's for tomorrow. Nice hour and a half and I enjoyed it, once more, no cock-ups! That always makes for a nice day.
Stanley Challenger Graham
Stanley's View
scg1936 at talktalk.net
"Beware of certitude" (Jimmy Reid)
The floggings will continue until morale improves!
Stanley's View
scg1936 at talktalk.net
"Beware of certitude" (Jimmy Reid)
The floggings will continue until morale improves!
-
Stanley
- Global Moderator
- Posts: 90301
- Joined: 23 Jan 2012, 12:01
- Location: Barnoldswick. Nearer to Heaven than Gloria.
Re: Shed Matters 3
Looking again at your pics Bob. That boiler looks nice, did you or your deceased friend build it? Looking at the Stuart lit reminds me that I shall shortly have to spend £450 again. I shall call it an early Xmas present!
Stanley Challenger Graham
Stanley's View
scg1936 at talktalk.net
"Beware of certitude" (Jimmy Reid)
The floggings will continue until morale improves!
Stanley's View
scg1936 at talktalk.net
"Beware of certitude" (Jimmy Reid)
The floggings will continue until morale improves!
-
Stanley
- Global Moderator
- Posts: 90301
- Joined: 23 Jan 2012, 12:01
- Location: Barnoldswick. Nearer to Heaven than Gloria.
Re: Shed Matters 3
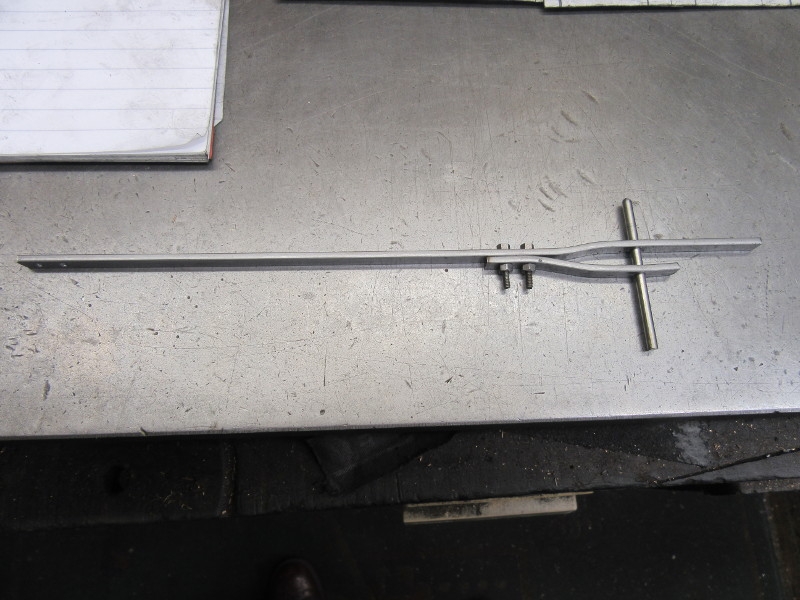
I did over an hour in the shed before doing my weekly Co-op shop. Most of the first hour was spent finishing the valve rod and fitting it.
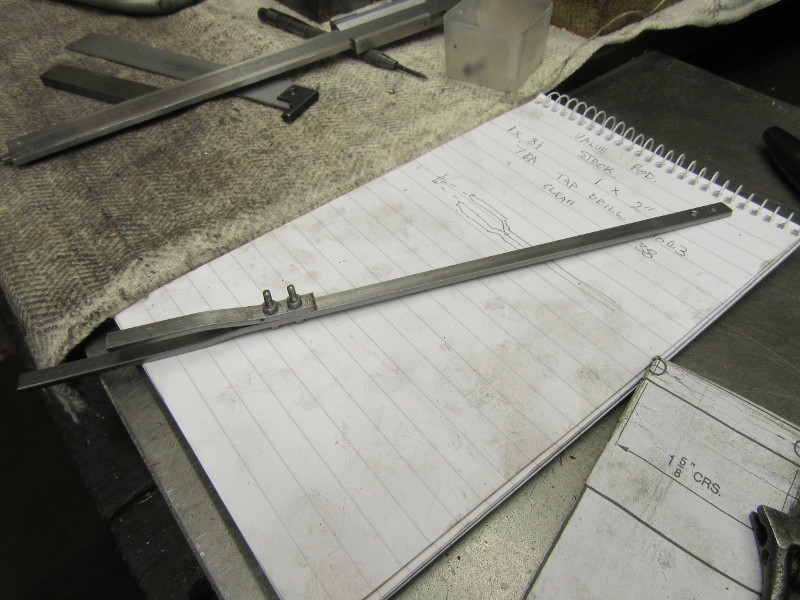
Here's the result and I am pleased, it is the right length and dead in line. I still think my version of the jaw is better than the offset design in the drawings.
Then I went into the drawings and identified the parts for the valve motion. I have them sorted and started on the first by finding the stock. That was closing time. Doesn't look like a lot but it's good steady progress and I know exactly what I have to start on tomorrow.
Stanley Challenger Graham
Stanley's View
scg1936 at talktalk.net
"Beware of certitude" (Jimmy Reid)
The floggings will continue until morale improves!
Stanley's View
scg1936 at talktalk.net
"Beware of certitude" (Jimmy Reid)
The floggings will continue until morale improves!
Re: Shed Matters 3
Nice progress Stanley. Yes, I have made the boiler, the shell has been tested to 120psi, twice working pressure. The top and bottom castings together with the firing door came from PM Research in the USA spoils from a visit to Sue’s cousin some years ago. Relatively straightforward to build but the safety valve has an American gas thread. I have sidetracked myself. I decided that it would be useful when making my next engine, to go with this boiler, to have the dividing head set up. I have had the parts for a couple of years but never assembled it. The box was sat under the box of Stuart castings so those have gone back on the shelf and the dividing head is on the bench. It needs an adaptor plate for front attachments including a 3 jaw chuck that I have. A blank for the adaptor should arrive from RGD at Mytholmroyd tomorrow. I also unearthed some casting for a steam turbine, I might make that first.
-
Stanley
- Global Moderator
- Posts: 90301
- Joined: 23 Jan 2012, 12:01
- Location: Barnoldswick. Nearer to Heaven than Gloria.
Re: Shed Matters 3
Well done, it looks very good! I've never made a boiler Bob and don't intend to start. Amongst the loot I acquired from Newton there is a piece of heavy wall copper pipe over 12" long and over 5" diameter that was obviously intended for a loco boiler. If you want that just shout and we'll find a way of transferring it. I shall never use it and I guess the cost new today would be horrendous. Free to a good home in your case.
I had an interesting but demanding evening and may give the shed a miss today. I need an easy day, I know my limitations!
I had an interesting but demanding evening and may give the shed a miss today. I need an easy day, I know my limitations!
Stanley Challenger Graham
Stanley's View
scg1936 at talktalk.net
"Beware of certitude" (Jimmy Reid)
The floggings will continue until morale improves!
Stanley's View
scg1936 at talktalk.net
"Beware of certitude" (Jimmy Reid)
The floggings will continue until morale improves!
Re: Shed Matters 3
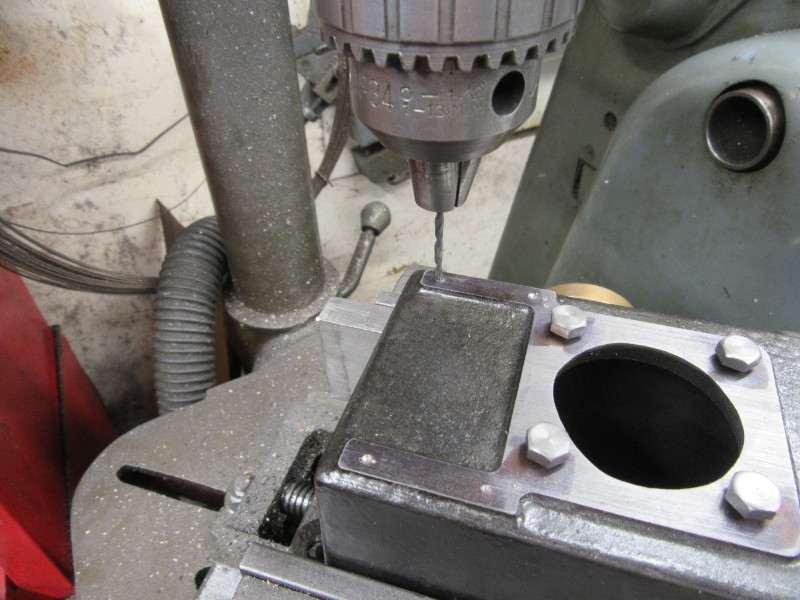
Many thanks for the offer of the copper tube Stanley, I certainly would like to put it to use. I will arrange with Sue to come and see you again when we are allowed. Meanwhile I have completely changed course as I described yesterday. The courier should be delivering the adaptor plate this afternoon meanwhile I have read through the drawings for the turbine and started on the main casing. I faced the bottom feet in the mill yesterday afternoon and then turned it over to get the inlet port parallel to the base. I have now mounted it in the lathe and pilot drilled the shaft hole to use as a reference, this will also take a mandrel for later machining and act as my reference to centre and square everything. Whilst it was still in the lathe I am skimming out the inside of the rotor chamber. The casting is aluminium and very nice to machine though a couple of very small voids have appeared they are not large or anywhere critical.
You do not have the required permissions to view the files attached to this post.
-
Stanley
- Global Moderator
- Posts: 90301
- Joined: 23 Jan 2012, 12:01
- Location: Barnoldswick. Nearer to Heaven than Gloria.
Re: Shed Matters 3
Lovely Bob and yes the copper pipe is yours, collect any time that suits you, we can do it over the wall, no different than a courier making a delivery, I can't see how that can be a risk.
Nice to see someone doing good work, I never went near the shed today and I think it was the correct decision even though I am fine now.
Nice to see someone doing good work, I never went near the shed today and I think it was the correct decision even though I am fine now.
Stanley Challenger Graham
Stanley's View
scg1936 at talktalk.net
"Beware of certitude" (Jimmy Reid)
The floggings will continue until morale improves!
Stanley's View
scg1936 at talktalk.net
"Beware of certitude" (Jimmy Reid)
The floggings will continue until morale improves!
Re: Shed Matters 3
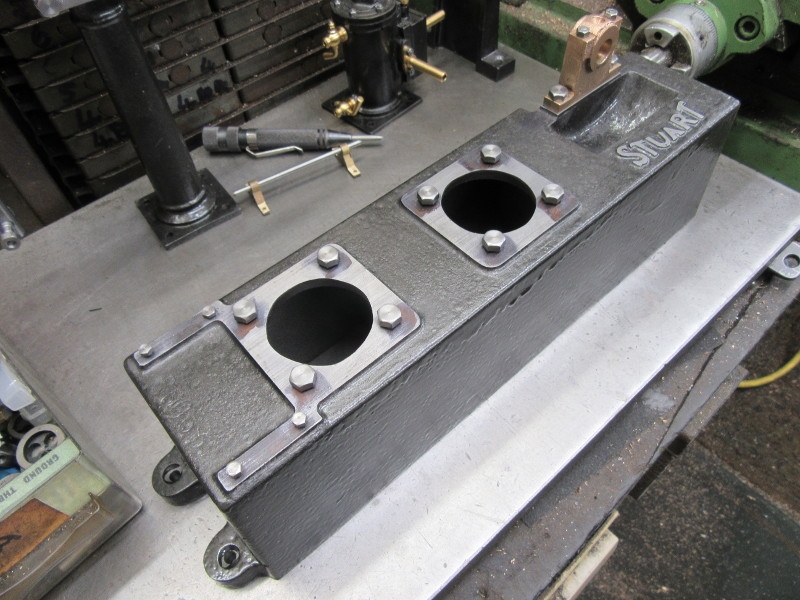
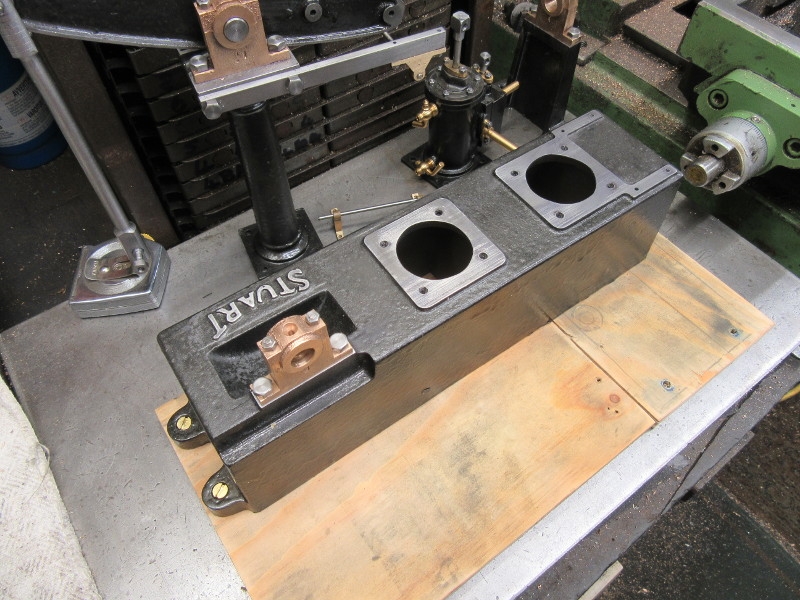
Yes, I expect you feel ok because you stayed out of the shed. Even I know that I have spent much of the day standing up. I am sure we can pick up the tube sometime over the next few weeks, Sue would probably enjoy an outing. I finished the inner face of the little turbine housing and took it out of the chuck. Late afternoon was spent studying the adaptor plate which has arrived. Those folk at RGD do well if the items are in stock. I didn’t expect the plate to be already drilled so that takes care of fitting the chuck. It is also very nicely finished. I will need to machine a recess in the plate to mate with the dividing head which will also need its own set of bolt holes. I have searched out the lathe face plate but the rest must wait for another day.
You do not have the required permissions to view the files attached to this post.
-
Stanley
- Global Moderator
- Posts: 90301
- Joined: 23 Jan 2012, 12:01
- Location: Barnoldswick. Nearer to Heaven than Gloria.
Re: Shed Matters 3
Clean and tidy Bob. Johnny Pickles solved the problem of dividing for his clock gears by building tangential dividing into the headstock of both the lathes he made.
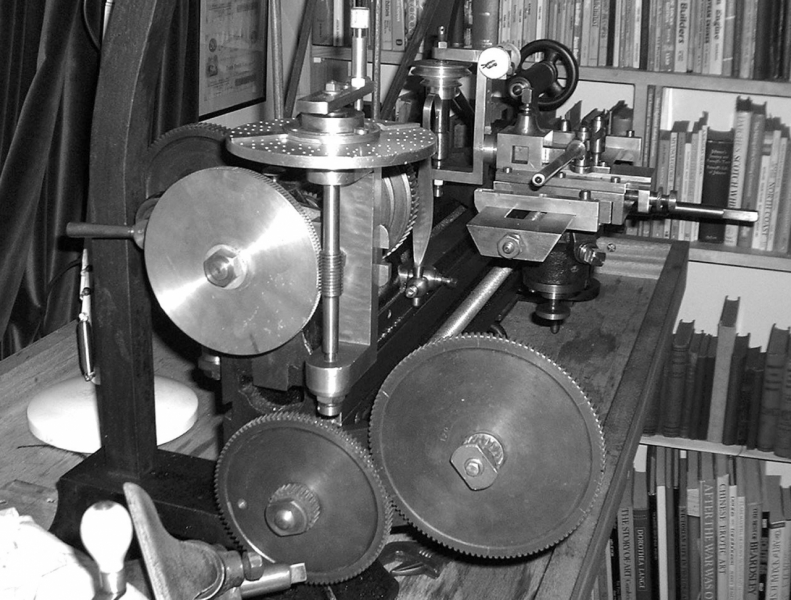
Here's how he did it on the small 1927 lathe in my front room.
Here's how he did it on the small 1927 lathe in my front room.
Stanley Challenger Graham
Stanley's View
scg1936 at talktalk.net
"Beware of certitude" (Jimmy Reid)
The floggings will continue until morale improves!
Stanley's View
scg1936 at talktalk.net
"Beware of certitude" (Jimmy Reid)
The floggings will continue until morale improves!