Page 43 of 125
Re: Shed Matters 3
Posted: 17 Mar 2021, 11:05
by PanBiker
No, it's the peculiar way that Apple products handles images. Wouldn't have one given.
Re: Shed Matters 3
Posted: 17 Mar 2021, 11:11
by Stanley
Re: Shed Matters 3
Posted: 17 Mar 2021, 11:25
by PanBiker
I think id Bob had posted them native from the "I whatever" they would display upside down but auto rotate the right way up when enlarged. Arse road about so to say.

Re: Shed Matters 3
Posted: 18 Mar 2021, 04:12
by Stanley
I prefer them the right way up all the time, but then I'm old fashioned!
Bob's pics did make me wonder, should I build a boiler to go with the wobbler? I doubt it, that would be a skill too far!
Re: Shed Matters 3
Posted: 18 Mar 2021, 08:07
by Stanley
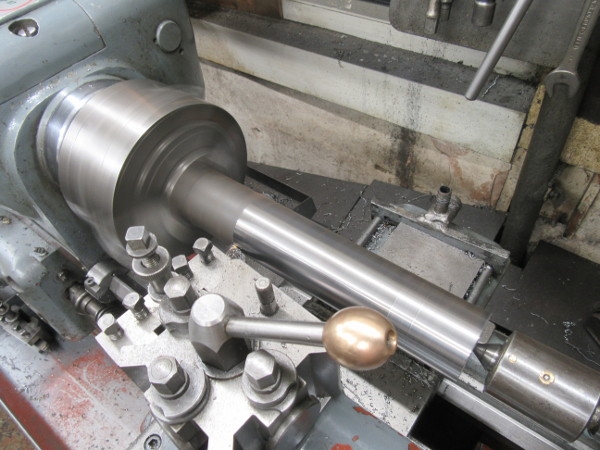
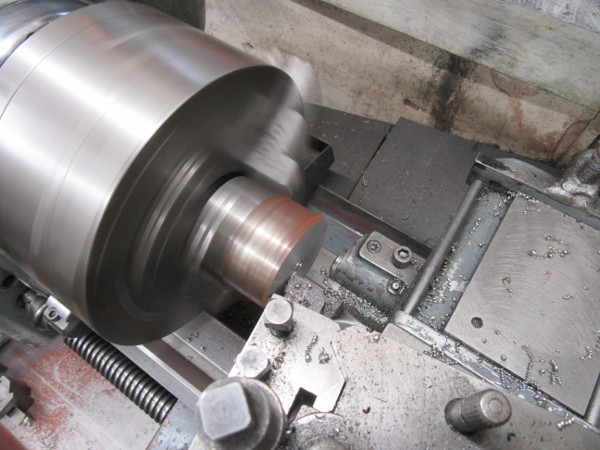
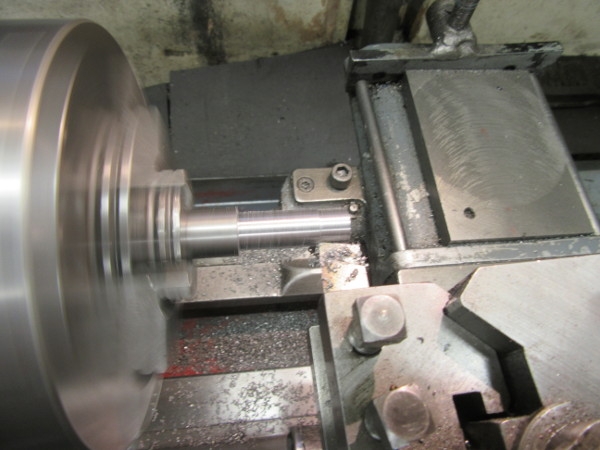
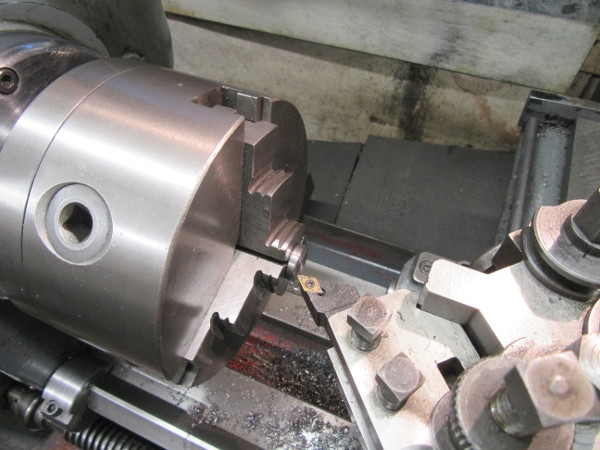
Today was another day of manufacturing reasons to make swarf in the shed to tide me over until the wobbler engine arrives. (It's been dispatched...) I am cleaning up a piece of rusty black bar.
I measured the finishing cut and in over 12" it was out less than half a thou. That'll do me!
Knocking off time. The eagle eyed will note jaw marks on the far end of the bar. Yup. I cocked up by skimping on the depth of the centre when I reversed it and it wouldn't stand a heavy cut and jumped. Broke the insert so I finished with HSS. So I need to address cutters tomorrow. All my own fault....
Re: Shed Matters 3
Posted: 18 Mar 2021, 12:17
by Stanley
Not bad service. The wobbler has arrived.
Re: Shed Matters 3
Posted: 19 Mar 2021, 08:13
by Stanley

First job today was to put right the faults from yesterday, A new indexable cutter and a full regrind of the HSS cutter followed by testing both of them and adjusting and then a full clean up of the lathe and the floor. I even emptied the shop vacuum cleaner.
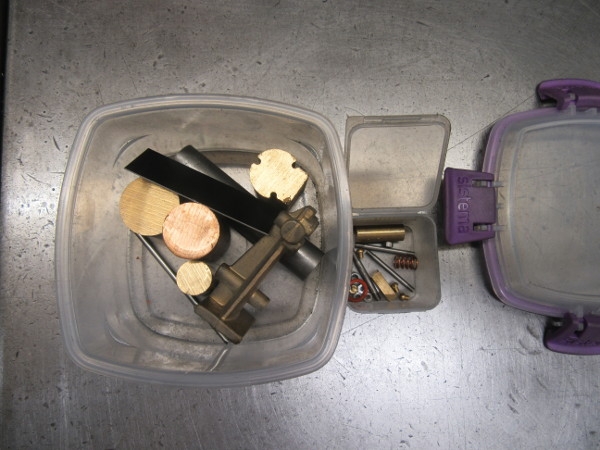
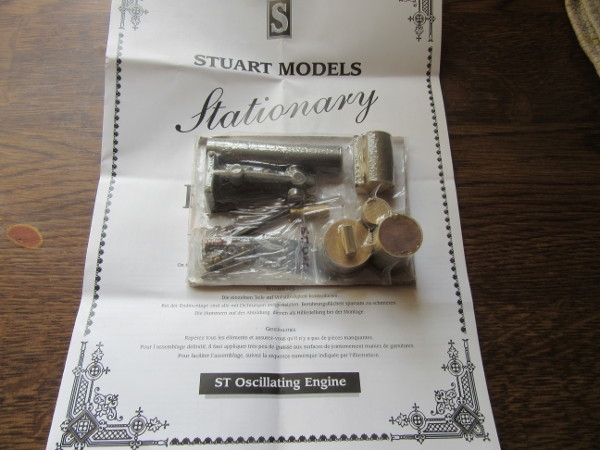
Then get the wobbler bits out of the shrink wrap packing and into more practical Plastic boxes.
I had some cooking to do so I didn't go any further. I shall have a fresh start in a clean shed tomorrow.
Re: Shed Matters 3
Posted: 20 Mar 2021, 07:53
by Stanley
Re: Shed Matters 3
Posted: 20 Mar 2021, 09:48
by BobH
Yes, Stanley, I am sure I started with the standard. It is the basis of the engine. Of course on any other we would probably start at the sole plate and work upwards, same thing really. Looks like a nice casting. I have seen lots of comments recently that the cast iron parts coming out of Stuart’s have a lot of flash to clean off.
Re: Shed Matters 3
Posted: 21 Mar 2021, 05:26
by Stanley
They often have, I've noticed that as well but then some are very good like flywheels and beds, its the small CI parts that have the flash. You're right about this casting but I'm sure you will have noted it's non ferocious.
I might look at the cylinder next......
Re: Shed Matters 3
Posted: 21 Mar 2021, 08:17
by Stanley
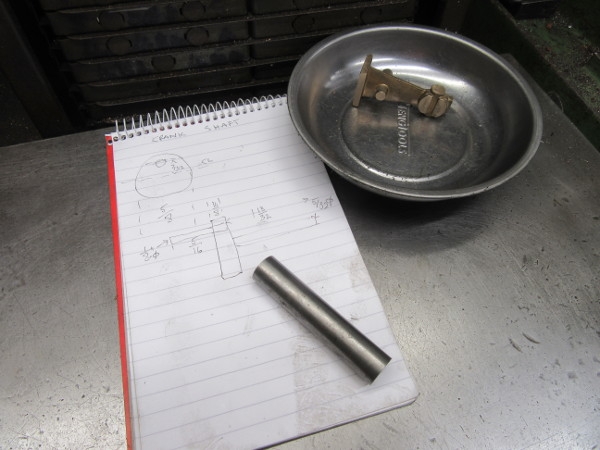
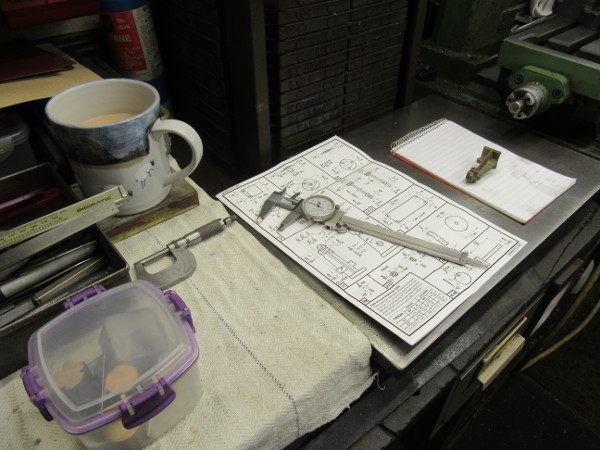
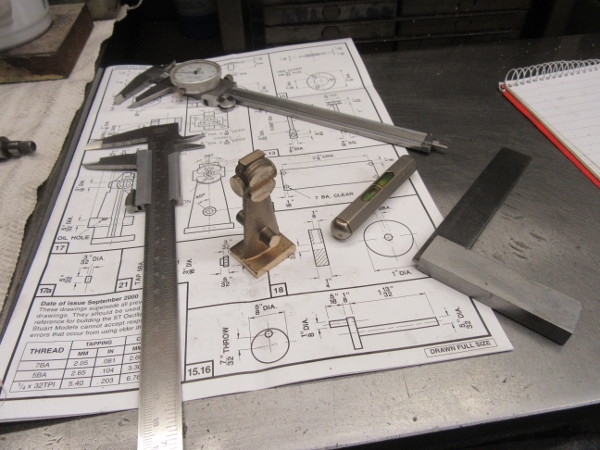
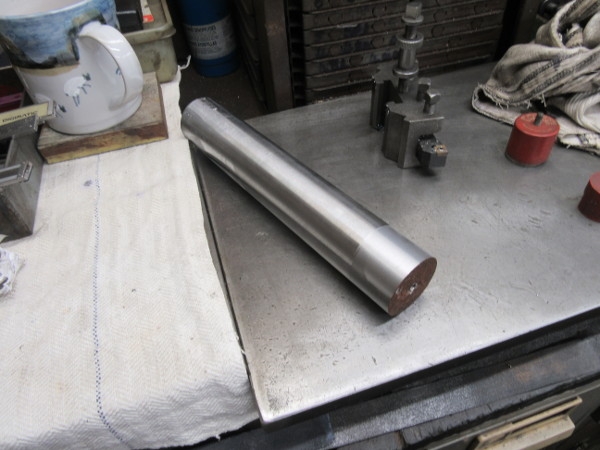
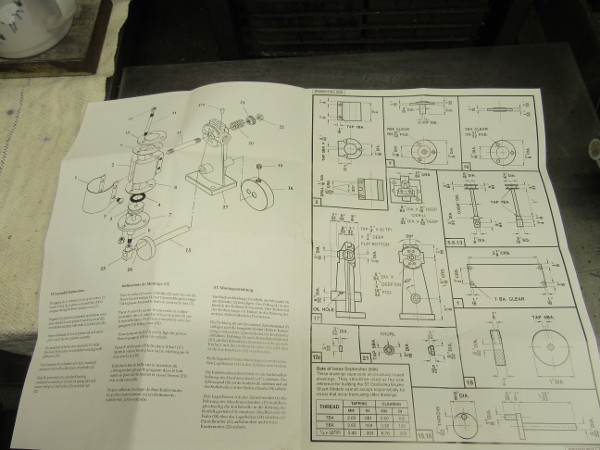
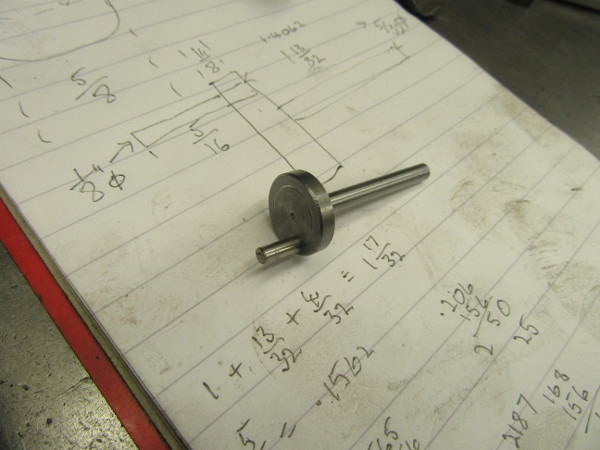
I changed my mind after looking at the drawings (not much to them, they give very little information and no advice.). I decided to make the crankshaft. My general approach is that I am not doing it the usual way I build engines, which is to start erecting them and make the parts as I need them. I'm going to make all the parts and then address the erecting. First thing was to find my stock....

Then change the chuck to the smaller 3 jaw SC, it's my newest and most accurate chuck and I need all the help I can get with these small parts.
Then cutting. I sharpened the HSS cutter and checked its level yesterday. Small cuts made after heavy measuring!
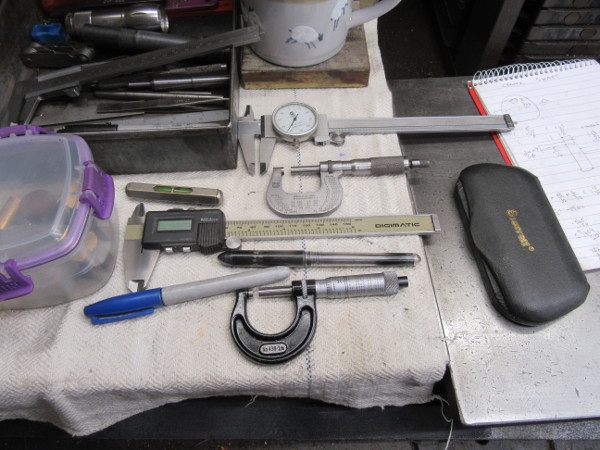
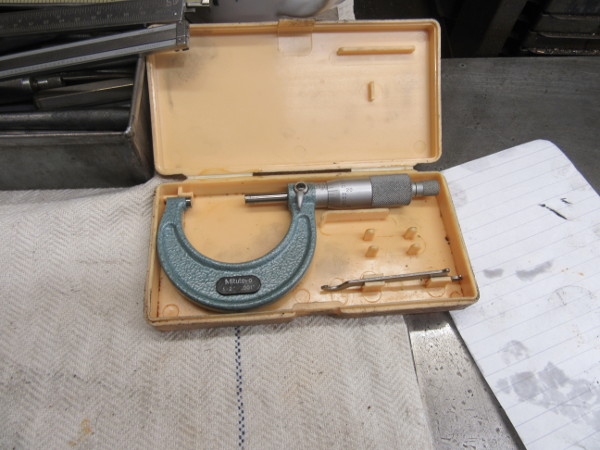
Mention of measuring..... I wanted to be very accurate. Problem is when I get down to measuring to less than thou I have to use the full monty and average things out. Not surprisingly, my newest micrometer, the Starrett is the most accurate.
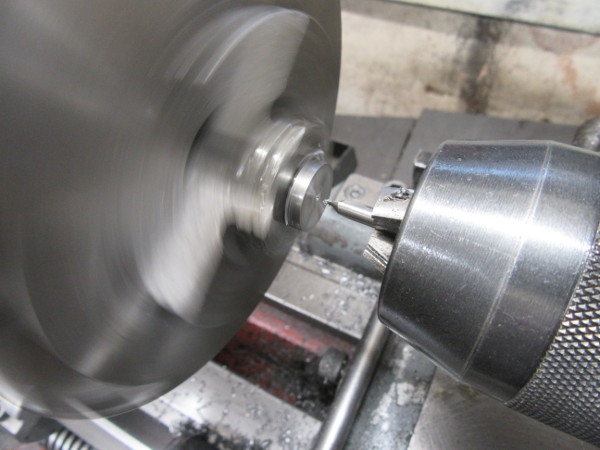
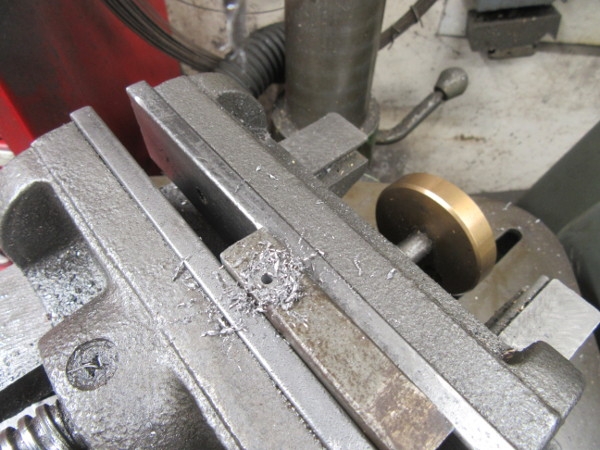
I centred the web using my smallest centre drill to aid the marking of the location of the crank pin tomorrow.
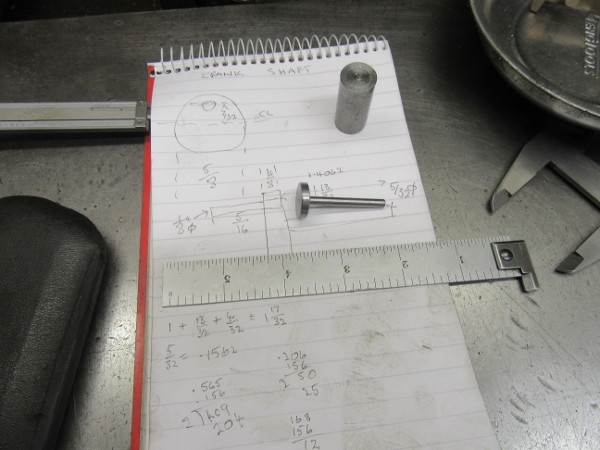
This is the sum total of today's honest endeavour. A tiny crankshaft made as accurately as I can manage. Tomorrow I shall fit the even smaller crank pin!
Re: Shed Matters 3
Posted: 21 Mar 2021, 08:35
by plaques
This engine looks very small compared to your previous engines. Have you thought of scaling it up and using stock material. Most of the larger pieces look as though they could be easily fabricated rather than rely on a single casting.
Re: Shed Matters 3
Posted: 21 Mar 2021, 08:48
by Stanley
You're quite right Ken and that's what I intend to attempt after I have made this one. This is a learning curve for me. Newton used to make these for light entertainment and give them away.
Re: Shed Matters 3
Posted: 22 Mar 2021, 08:15
by Stanley
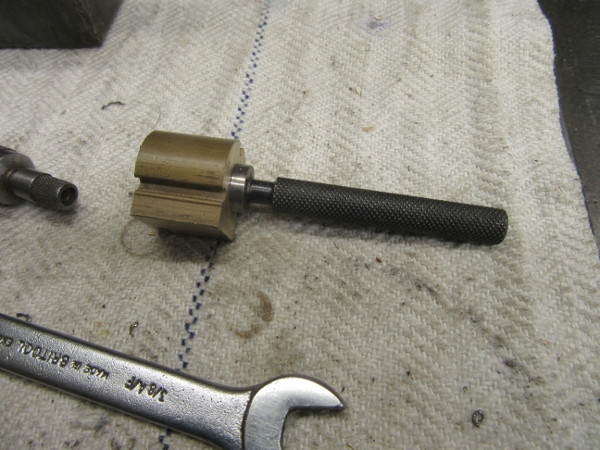
First job today was to inscribe the pitch circle on the disk of the crank. This morning I want to make and fit the crank pin to the disk. It is quite small.....
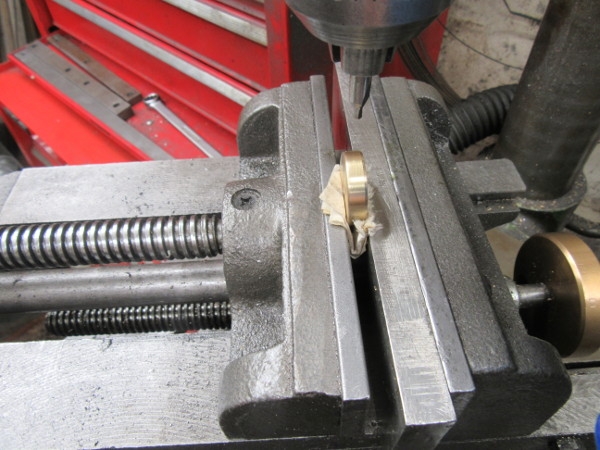
First thing I did was do some experimenting. I have to fit a 1/8" diameter crank pin in the disc, I want it to be an interference fit reinforced by some shaft grade Loctite. The usual method is to bore a slightly smaller hole to get the interference as a 1/8" drill always drills oversize. The closest 'next smaller drill' is 7/64", too small to allow the crank pin to enter.
So I decided to reduce the end of the crank pin until it was an interference fit in the 7/64" hole. I experimented with a piece of 1/8" steel and reduced it by turning until I could get it to start entering.
Then I drilled the crank disc 7/64" and put a piece of 1/8" material in the lathe and turned it on the same setting as the experiment. I had to adjust it slightly but got my fit.
Here is the end result. The crank pin is a good interference fit and is buttressed by shaft grade Loctite. It will not come loose. It has taken me an hour and a half to do this small job. I make no apologies because I got my result, a heavy interference fit. Box on!
Re: Shed Matters 3
Posted: 23 Mar 2021, 08:12
by Stanley
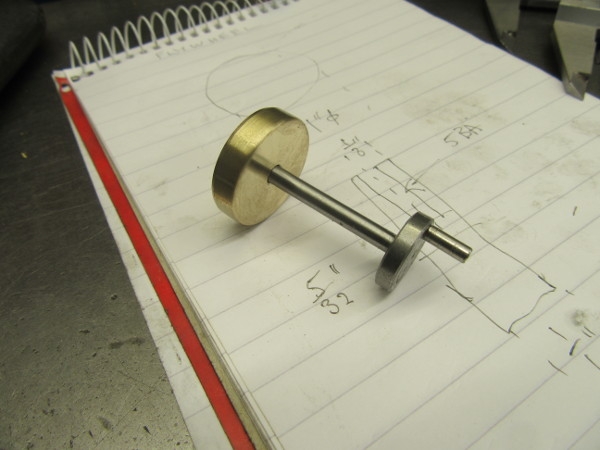
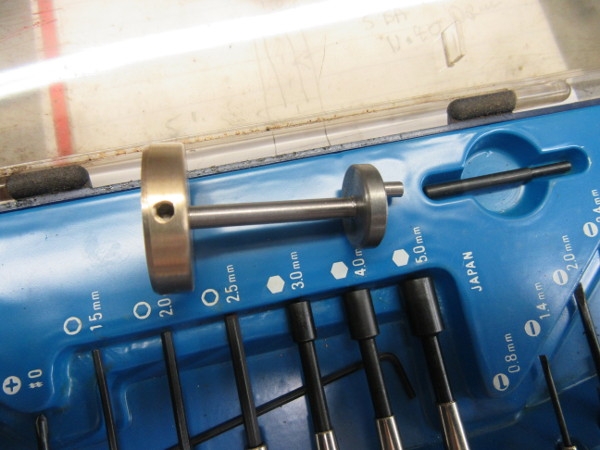
Another morning of small things done slowly. Largely because everything has to be checked repeatedly to make sure my eyes haven't deceived me. Add also the fact that I was late in the shed because domestic matters got in the way.What we have is a flywheel, it's a good fit on the shaft, I finished up using a 4mm drill as the hole it left was closest to the crankshaft size. Now I need to drill it and fit a 5BA setscrew. That thrill is for tomorrow....

Re: Shed Matters 3
Posted: 24 Mar 2021, 08:47
by Stanley
Re: Shed Matters 3
Posted: 25 Mar 2021, 06:58
by Stanley
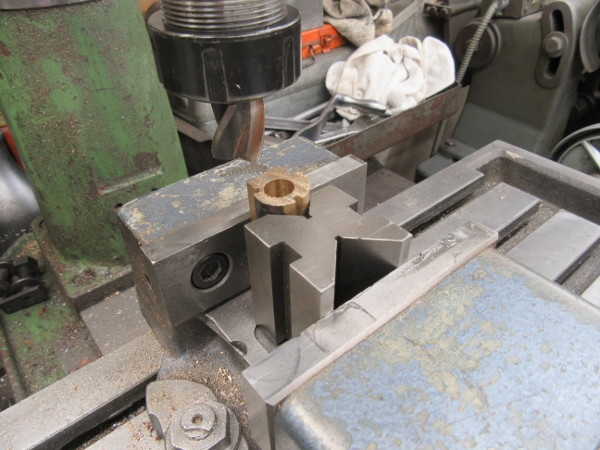
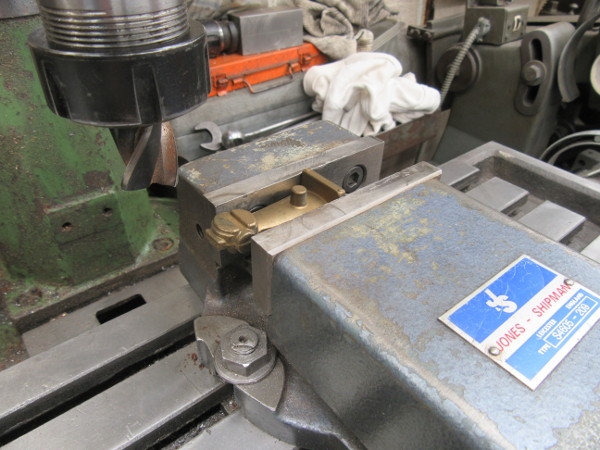
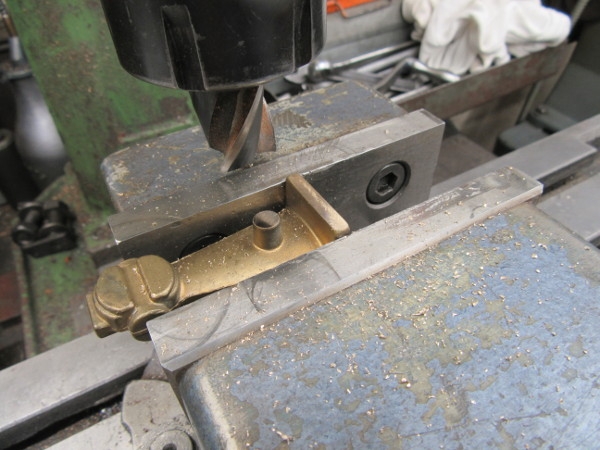
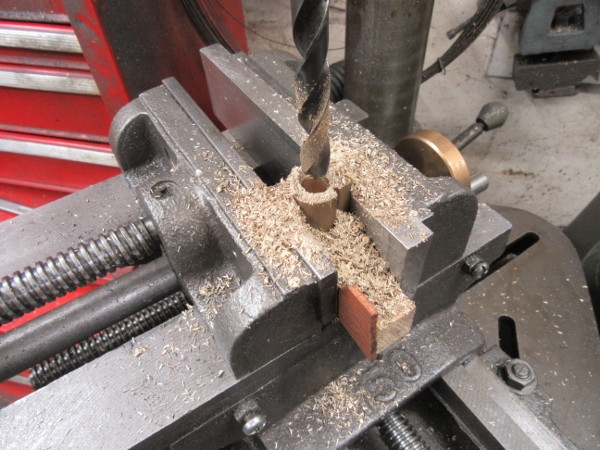
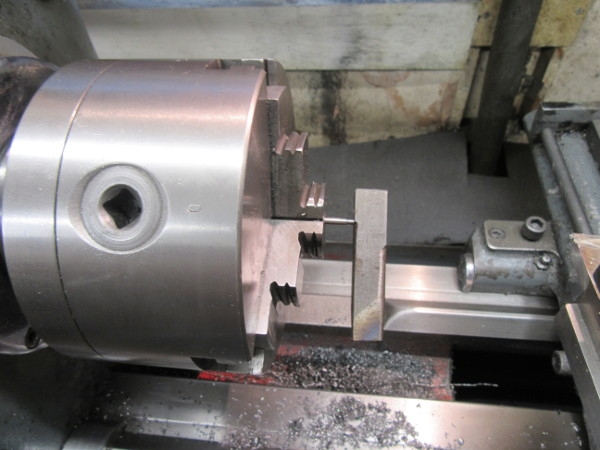
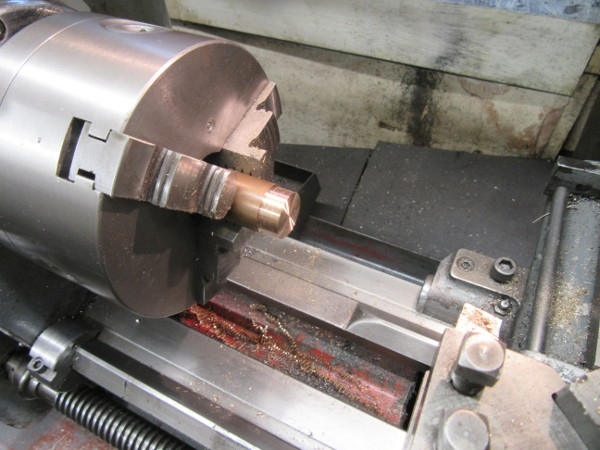
I sawed most of the excess off and then put the cylinder under the VM to cut the rest off dead level. (This is how I should have set the casting up yesterday to bore it.....

)
When I had it down to exactly .75" I ran the reamer through to get rid of any burrs.
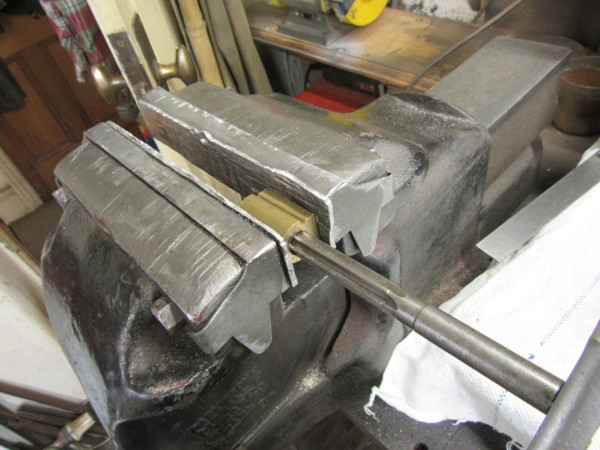
My last move this morning. Check the bore with the standard.
I was going to rebore the cylinder to get it central but larger. I have decided not to do that but build it and see what happens. I think it will be OK. If not I can bore it again and make a larger piston. Now for me shopping!
Re: Shed Matters 3
Posted: 25 Mar 2021, 11:07
by BobH
First kit for the traction engine has arrived. I’ll finish the 10H first. There will be plenty of work in this kit. The front wheels and hubs are here. Spokes are laser cut and will need all the edges breaking, not just for nice appearance but to get the paint to take evenly.
F7132A56-0AB6-4A4A-8AA2-B9BCF15B3D43.jpeg
Re: Shed Matters 3
Posted: 25 Mar 2021, 19:48
by BobH
First trial assembly of the 10H. It turns over OK if a bit stiff but that is fine. Now I’ll take it apart for painting. The fixings supplied don’t match the drawing, a bit more head scratching.
C312B83F-88CA-4573-9E4F-76316A8B7476.jpeg
Re: Shed Matters 3
Posted: 26 Mar 2021, 04:13
by Stanley
That traction engine is going to keep you busy Bob....
You've been quick with the 10H compared to me and my couple of hours a day. Well dine.
I dread that phrase, I’ll take it apart for painting.. Once I've finished them and they run I lose interest. Last thing I want to do is take them to bits and paint them..... I like to paint the castings early and let them get distressed while building. That way they look more like the engines I worked with in the end. Different folks, different strokes.
Re: Shed Matters 3
Posted: 26 Mar 2021, 08:56
by Stanley
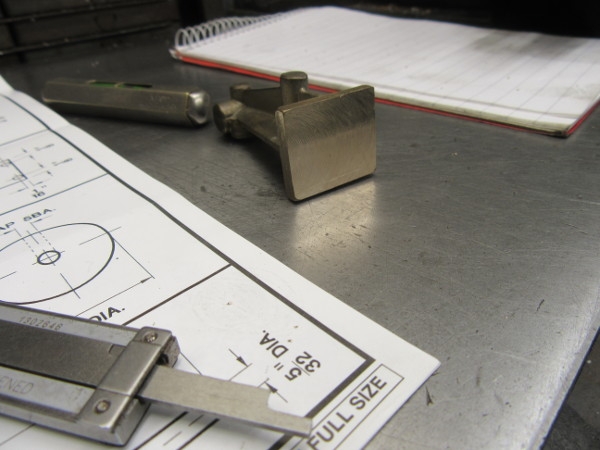
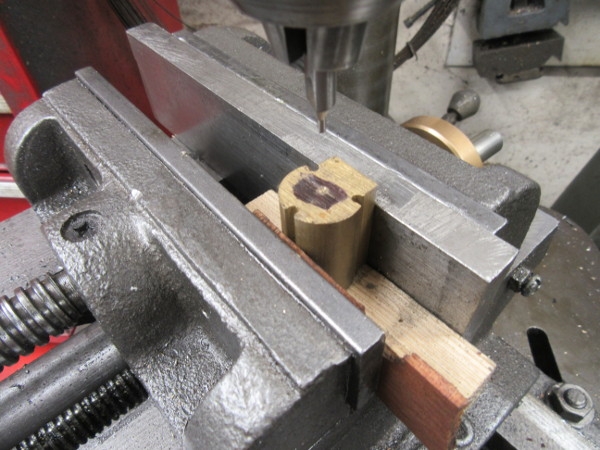
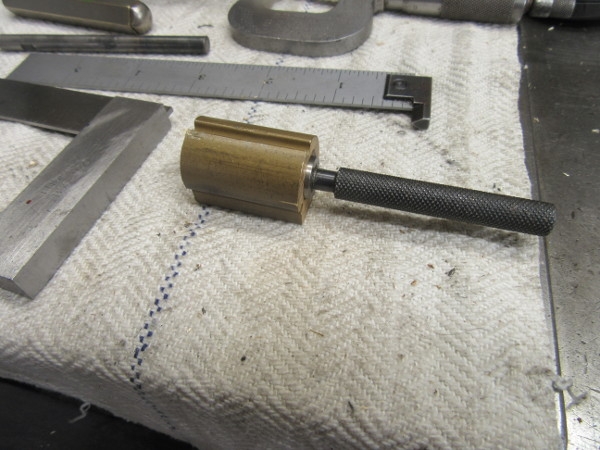
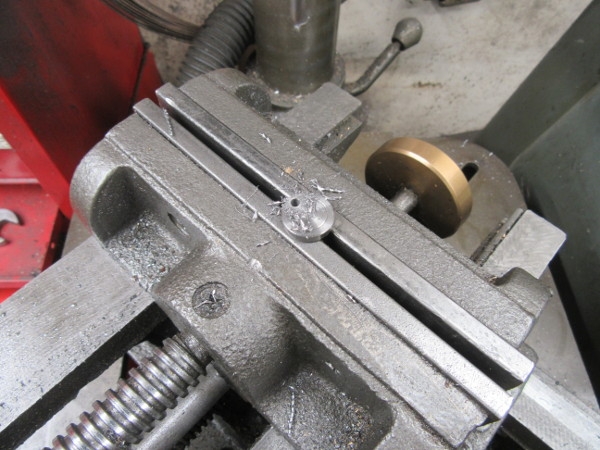
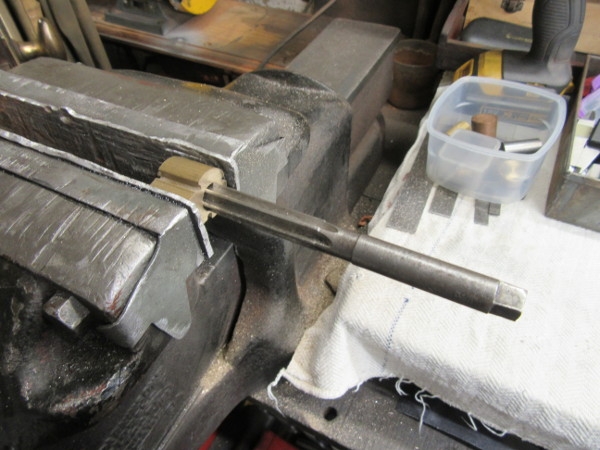
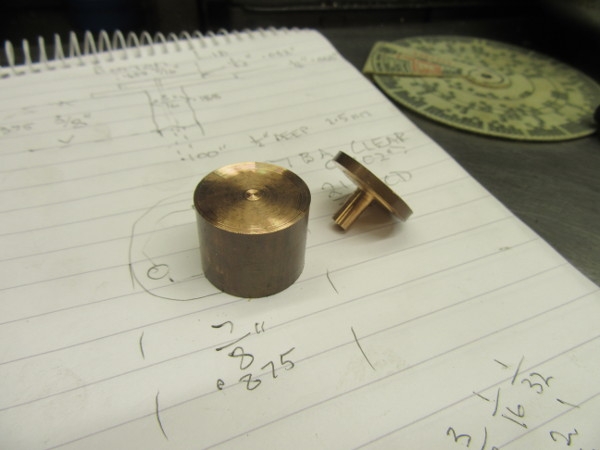
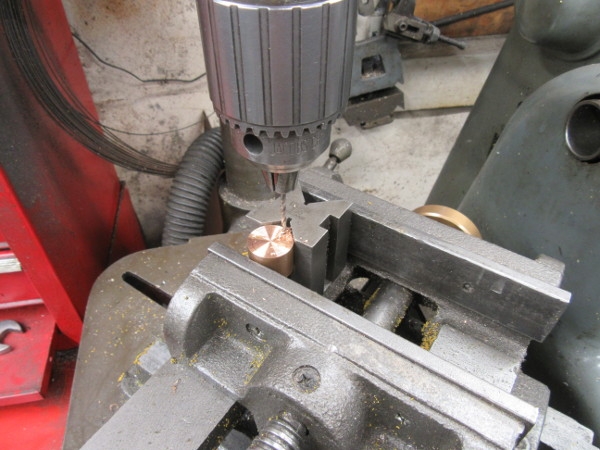
I decided to make the lids for the cylinder and started with the bottom one. For some reason that escapes me, the lids are made of Phosphor Bronze. But that's OK. I did a lot of measuring and converting fractional sizes to decimal for turning. First thing I found was that the stock was less than the 7/8" for the finished size. Than I noted that the size of the hole through the lid for the piston rod is 1/10" which is not a drill size I posses, all my drills are fractions of 1/64" so I found the metric equivalent, 2.5mm.
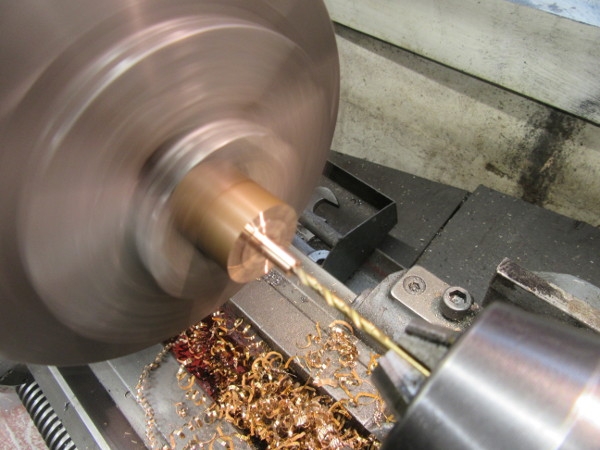
The 3/8" long spigot is to act as a gland and here I am drilling the 2.5mm hole.
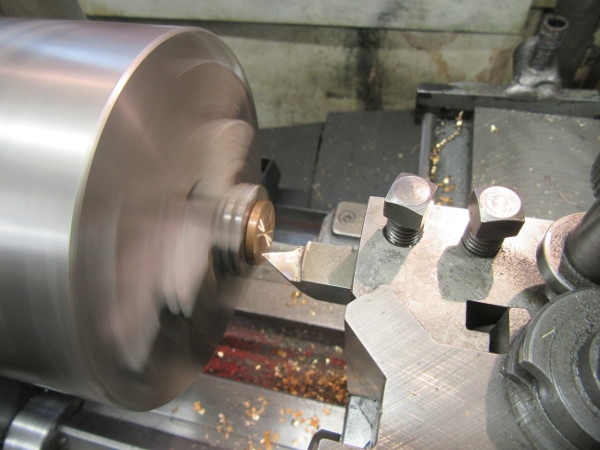
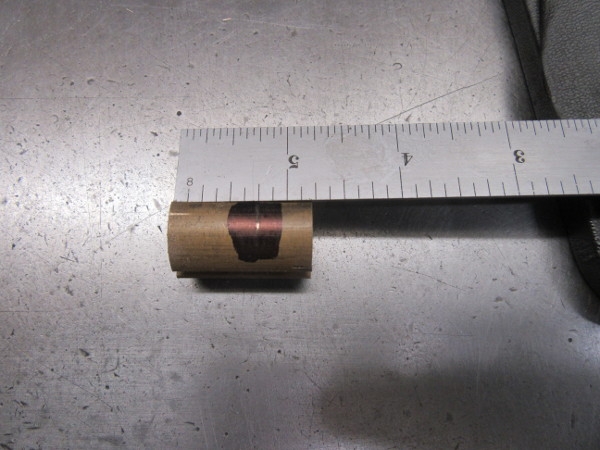
I've parted the lid off, reversed it and now I'm putting the pitch circle on for the three studs that attach it to the cylinder. It was while I was doing this that I realised I had a serious problem. I can't make the lid to fit the bore I have made because it is off centre. If I rebore the cylinder larger I shall reduce the wall thickness to the point where there won't be enough metal to anchor the studs.
These lids are tiny!
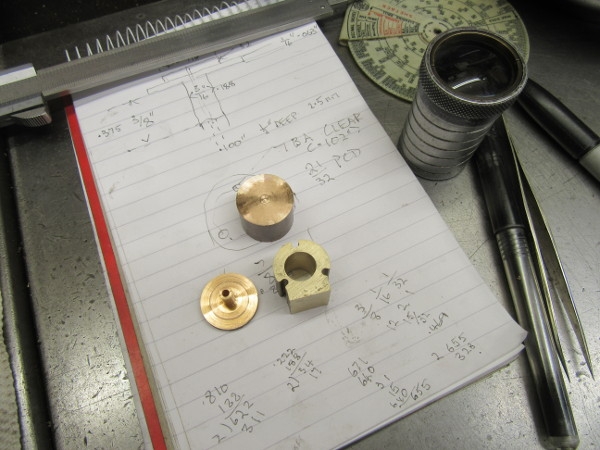
Knocking off time and the problem. What to do? I came straight into the kitchen and emailed Stuarts asking for another cylinder blank and a way of paying for it. I shall report when I get a reply.
PS. I shall bore it in the VM and spend a lot of time checking it is on centre!!!
Re: Shed Matters 3
Posted: 26 Mar 2021, 12:24
by Stanley
Replacement cylinder is in the post. That cost me £13!

Re: Shed Matters 3
Posted: 26 Mar 2021, 15:17
by chinatyke
Stanley wrote: ↑26 Mar 2021, 12:24
Replacement cylinder is in the post. That cost me £13!
That's not a bad price but couldn't you have used the old one as a pattern and cobbled one up from your treasure chest?
Re: Shed Matters 3
Posted: 27 Mar 2021, 04:02
by Stanley
I considered it China but it would be so complicated so I decided to just throw the money at it.....
Re: Shed Matters 3
Posted: 27 Mar 2021, 08:17
by Stanley
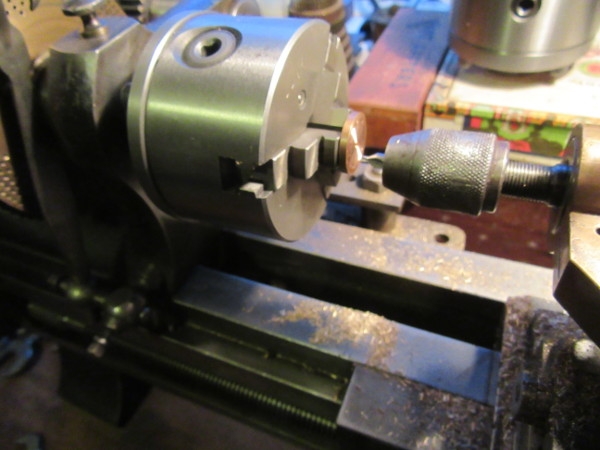
Sorry it's out of focus.... Always glad of an excuse to go and use Johnny's 1927 lathe in the front room! Still the best way to divide circles.
Here we are, I divided the top lid before I parted it off because it was easier to hold.
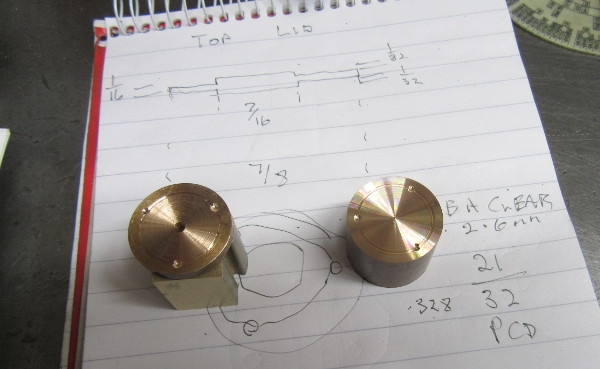
I drilled both lids 2.6mm, clearance for the 7BA bolts.
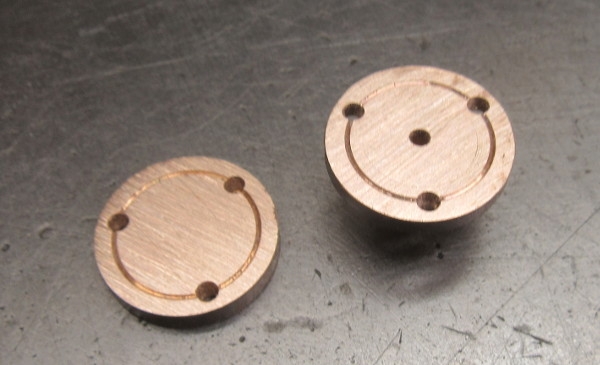
I parted the top lid off and here are the lids ready for fitting except that the 7/16" register for the bore can wait until I have done the bore.
I'm a bit slow sometimes....
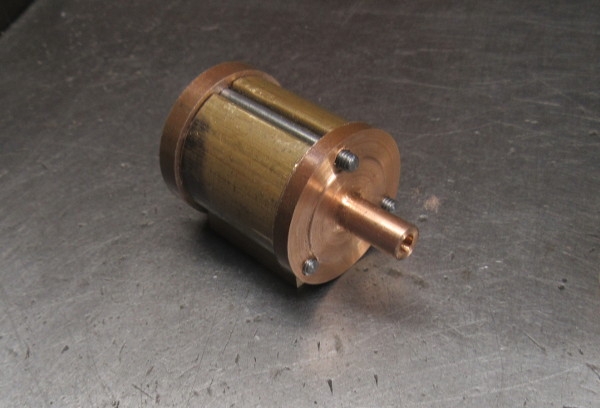
It was only when I had made the lids I realised that this is how they are fitted on the cylinder, no drilling and tapping of the cylinder. This is exactly how they will look when I make the good cylinder as this mistake cylinder is the right length.