Page 47 of 124
Re: Shed Matters 3
Posted: 13 May 2021, 06:48
by Stanley
As promised I started the day by tapping the five holes for the back lid of the cylinder.
The trial fit was OK. I can deal with the scarred hole later when I am finishing.
Then I did a trial fit of the cylinder on the bed. In a word horrible. The only thing that was good was that the studs line up. What really pissed me off was that after all the checking I got the exhaust port on top and the steam inlet on the bottom, not the way round I intended. It'll be OK but it's depressing!
Re: Shed Matters 3
Posted: 14 May 2021, 07:13
by Stanley
As you may have gathered I am not happy with the standard of my work and so today the object is to improve the quality and accuracy of the work so far.
So the first job was to dismantle what I had knitted together so far.
Then I made the gland nut for the front of the cylinder. I considered a lot of fancy ways of putting the serrations round the nut for adjusting it but eventually just put saw cuts in it while held in the vice....
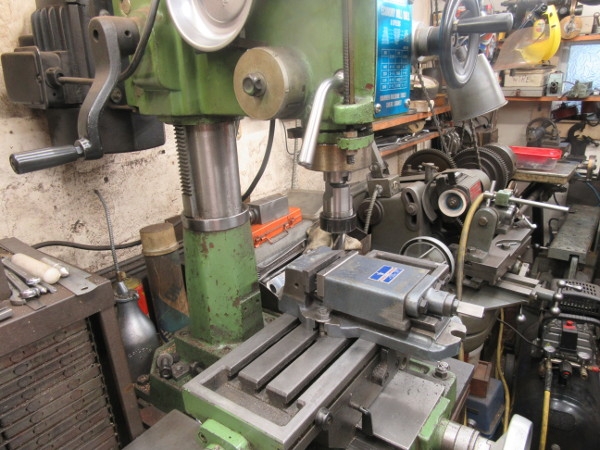
The target plate on the bed was too thick so I put it back under the mill and made it thinner.
Here we are at knocking off time after nearly two hours in the shed, Small improvements all round. It's still a pig's ear but a rather better pig's ear!

Re: Shed Matters 3
Posted: 15 May 2021, 07:20
by Stanley
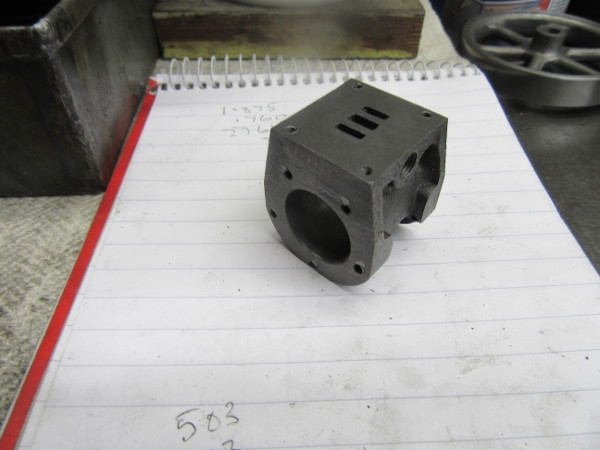
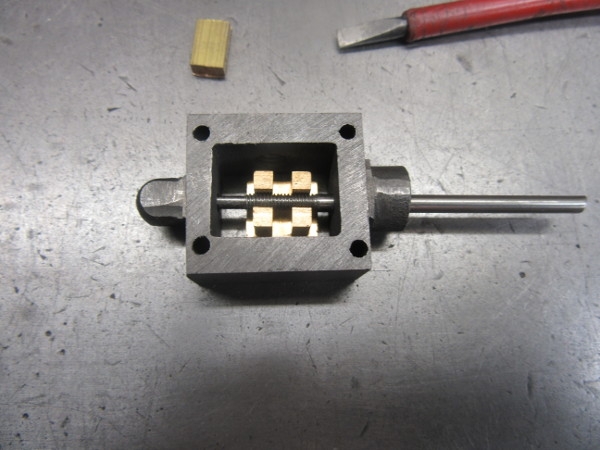
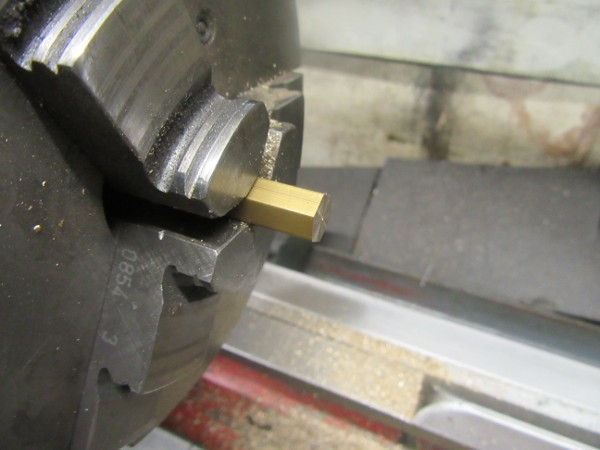
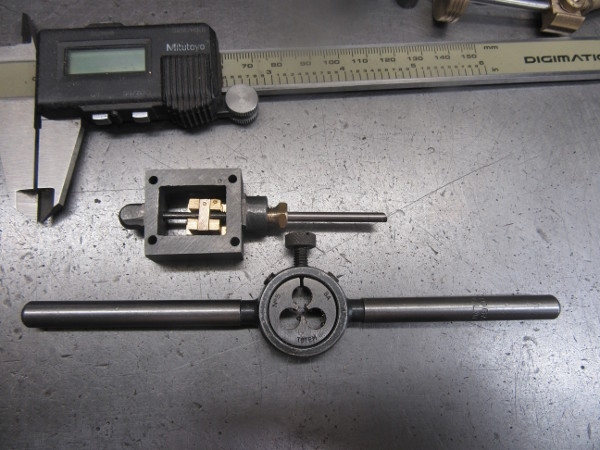
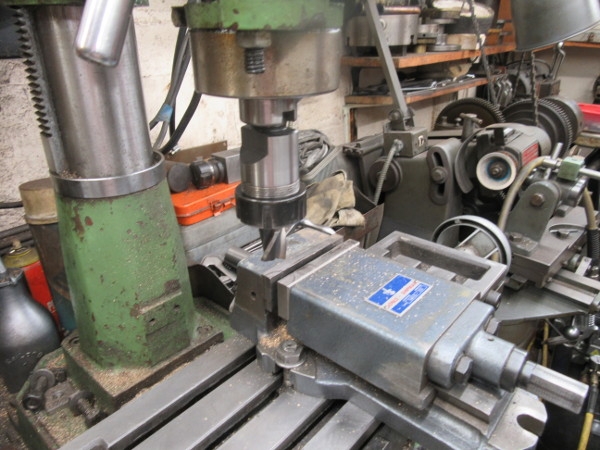
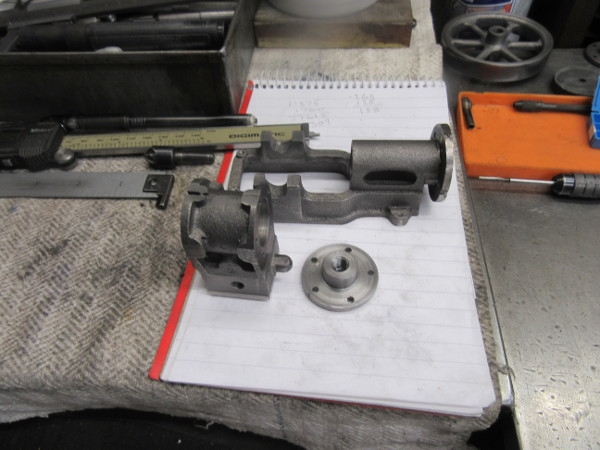
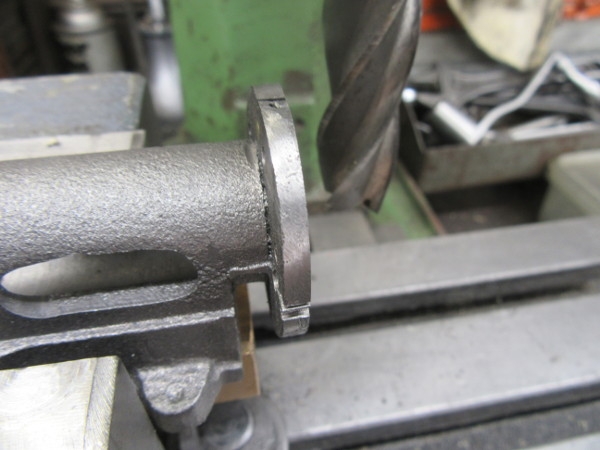
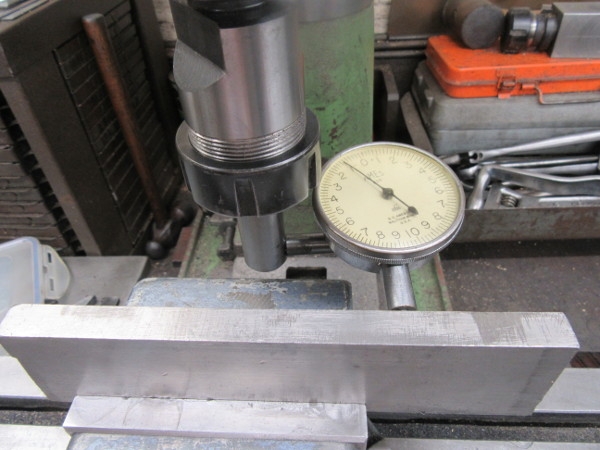
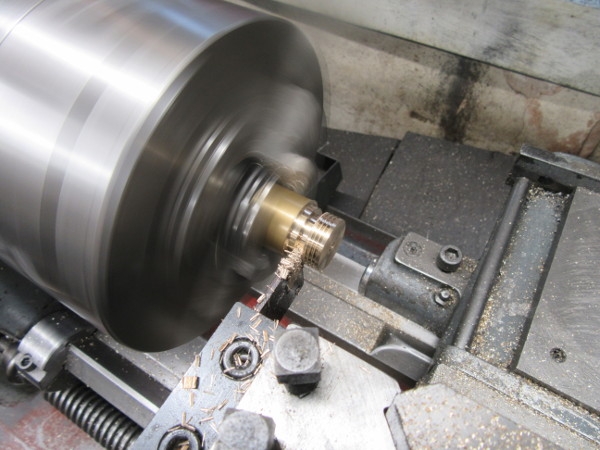
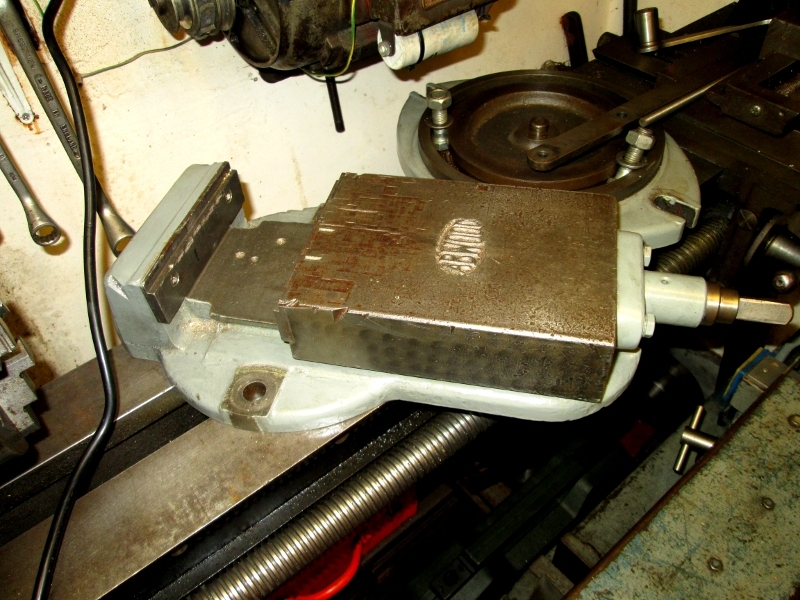
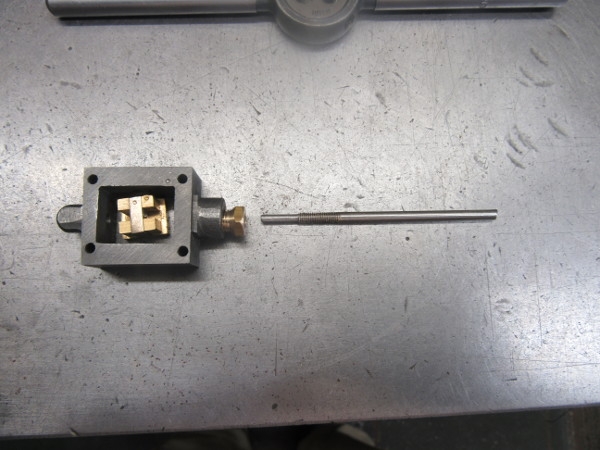
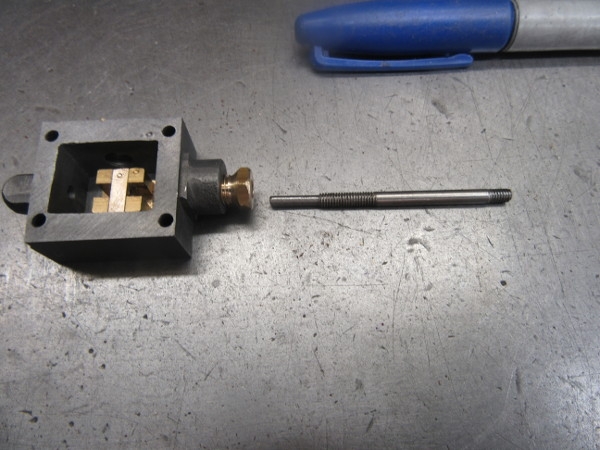
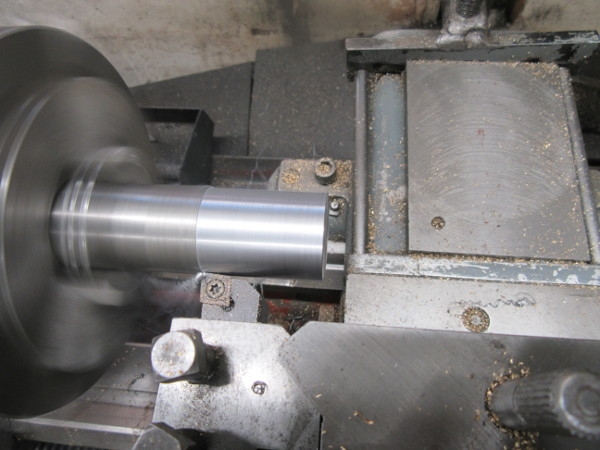
The first task this morning was to strip down the trial fit and isolate the cylinder. I have to drill the steam passage from the cylinder to the steam port. Needless to say this is not as easy as it looks. My method is to mark the exit point into the steam port on the outside of the cylinder and use that to set the vice at the right angle. It's always an educated guess and touch wood has always worked for me.
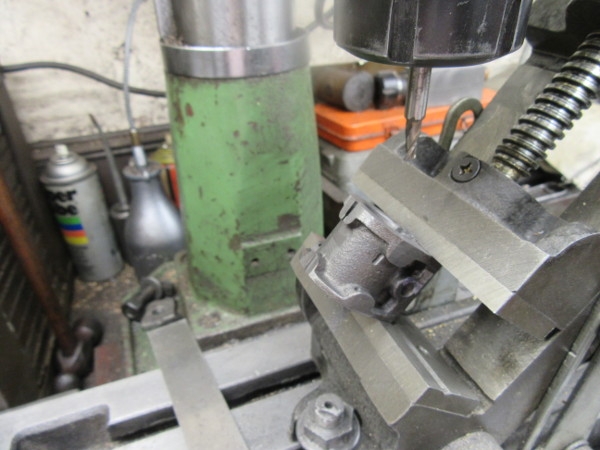
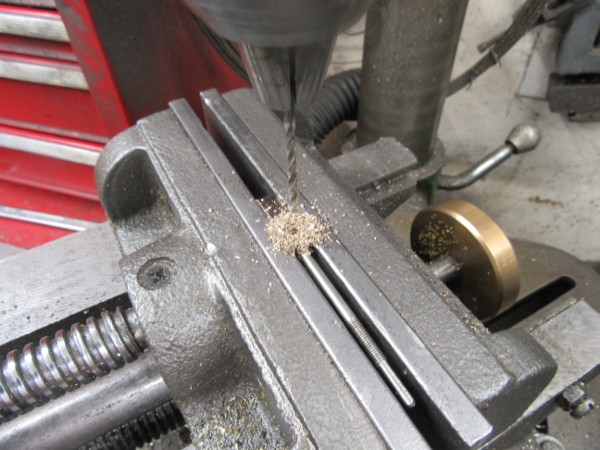
Here we are set up and ready to put a flat in the entry point so the N0 40 drill can enter straight.
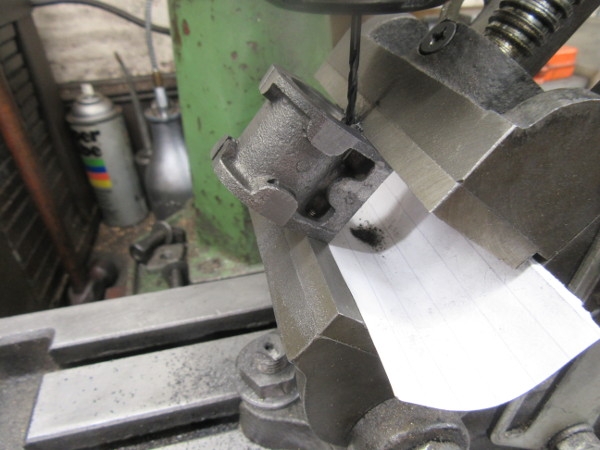
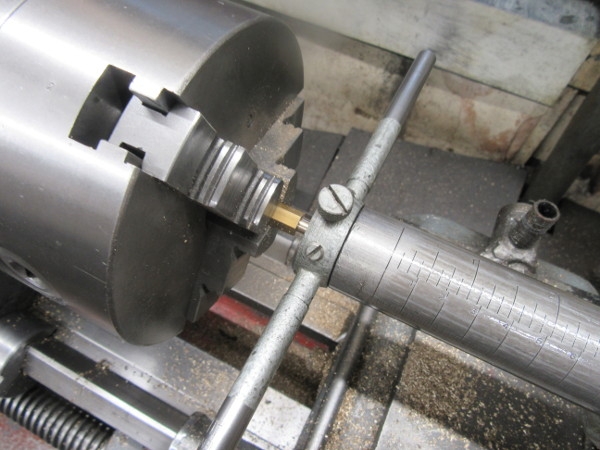
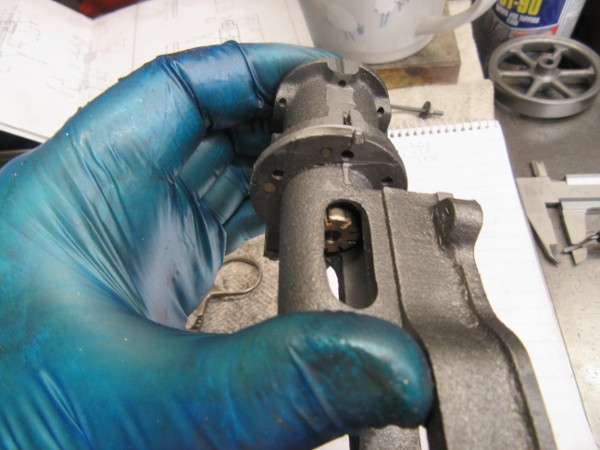
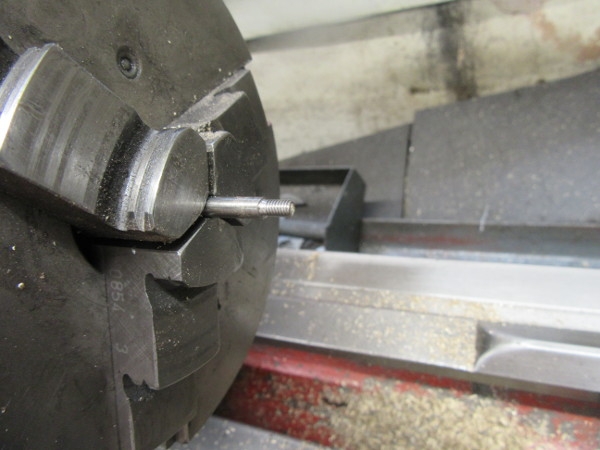
Here we are with the drill fitted and the hole is drilled. The piece of paper in the jaw of the vice is a tell tale. You can't see into the port but you want to stop drilling when your drill has entered the port. When you do cast iron dust drops on the paper and gives you an accurate warning of entry. (As long as you got the angle right in the first place and here we did.)
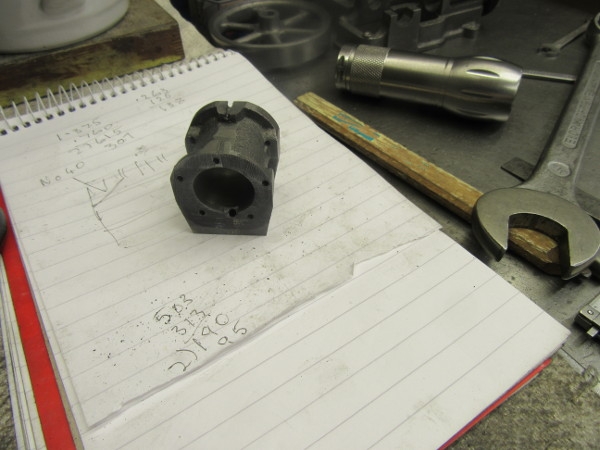
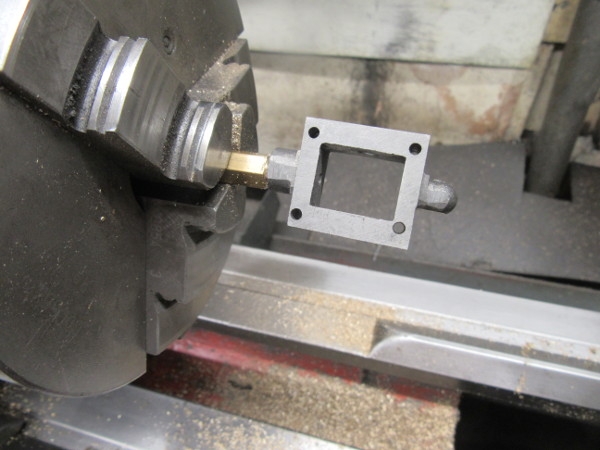
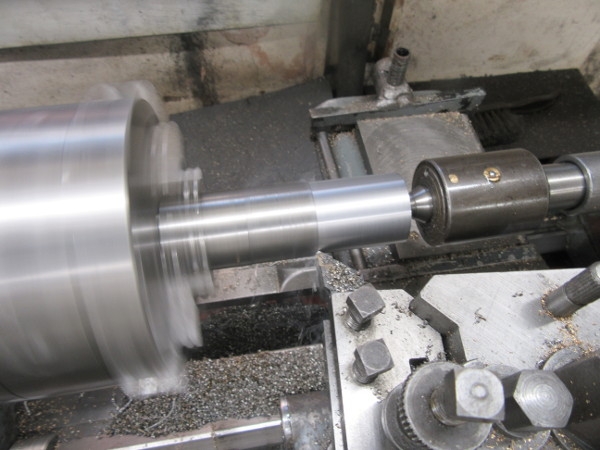
Here we are, both ports bored and as near dead accurate as makes no difference. Big sigh of relief.....
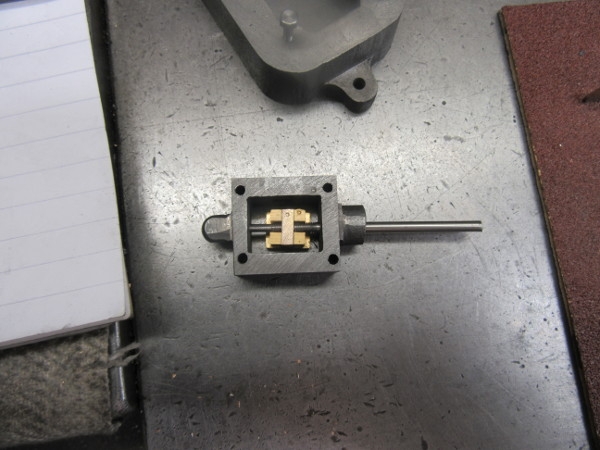
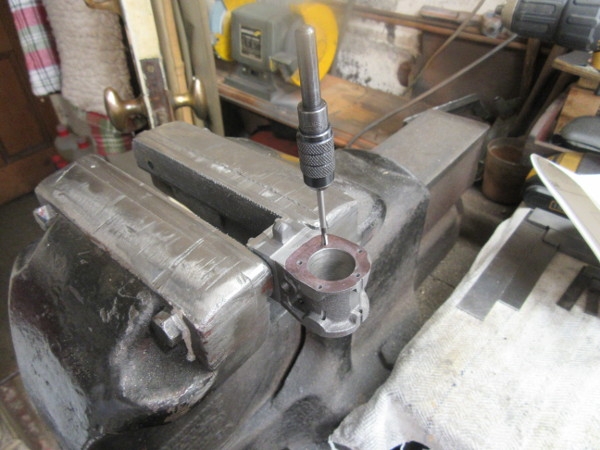
Then take the angle vise off, put the regular vise on the VM bed and tram it in.
Knocking off time, everything back to normal and ready for further progress. Slow careful work and a good outcome. That's a bit better!
Re: Shed Matters 3
Posted: 16 May 2021, 07:06
by Stanley
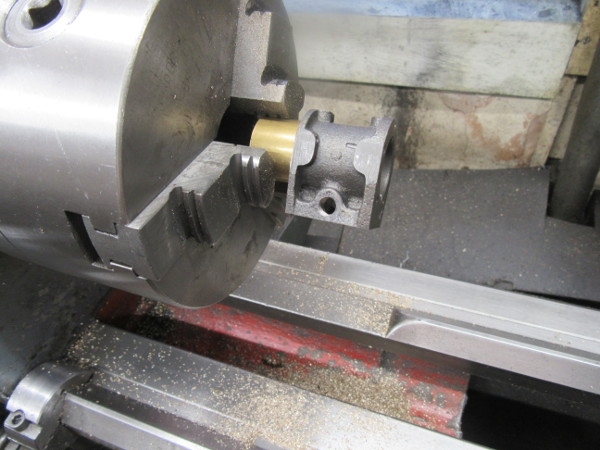
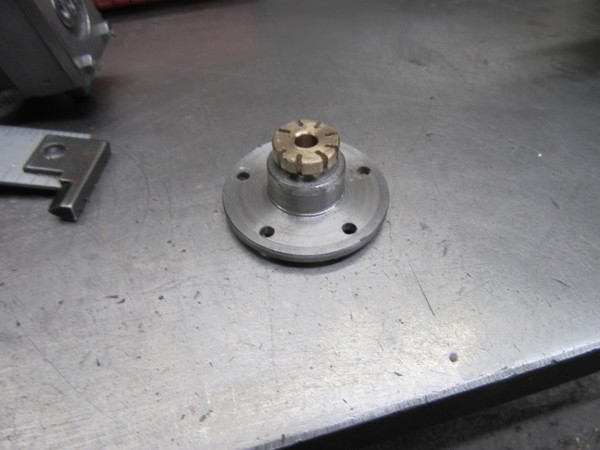
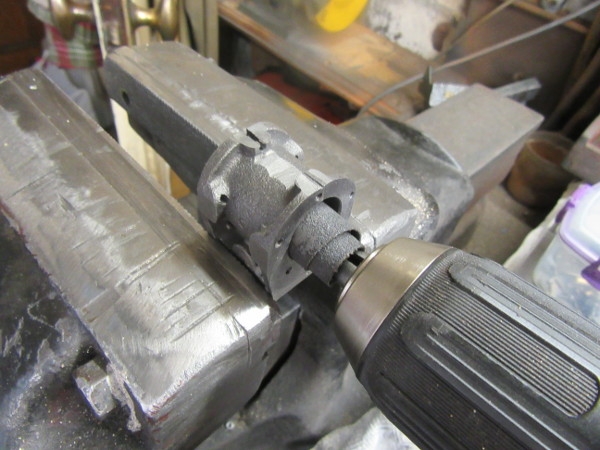
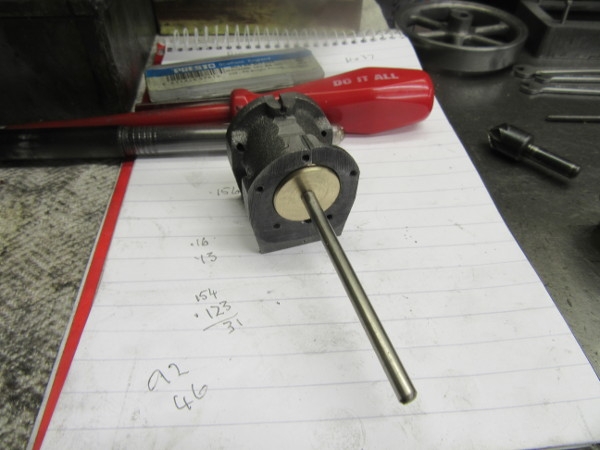
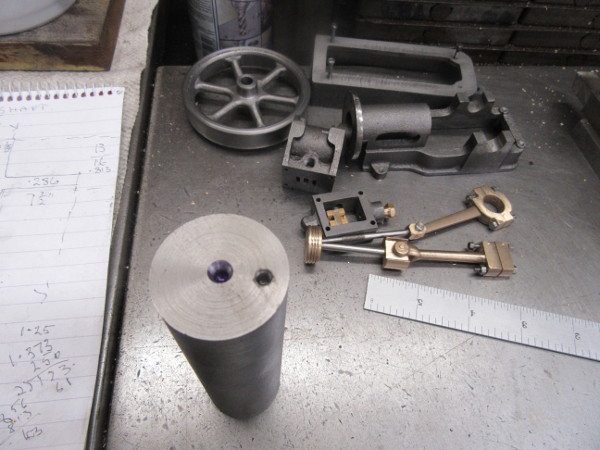
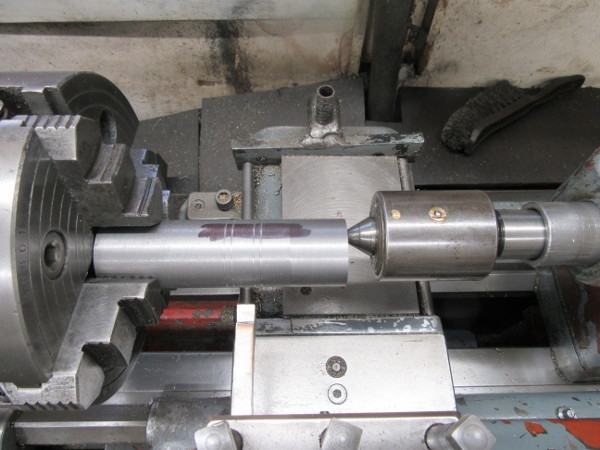
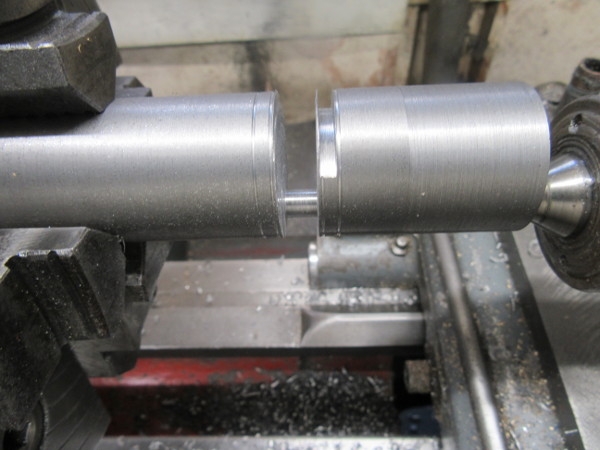
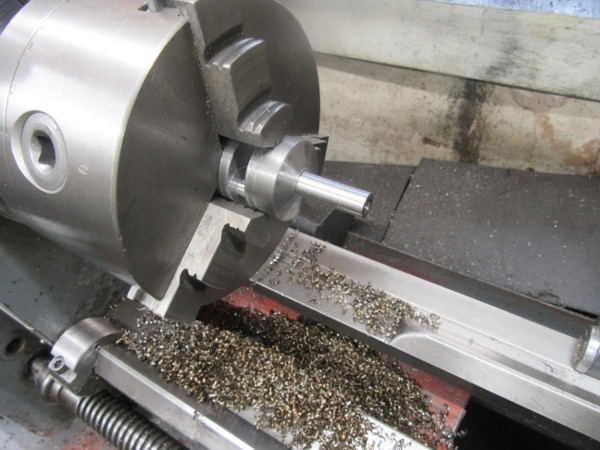
Today's task was easily identified. We have a cylinder, we need a piston. First stage was to turn the bronze provided down to the diameter needed. The size is checked in the usual way!
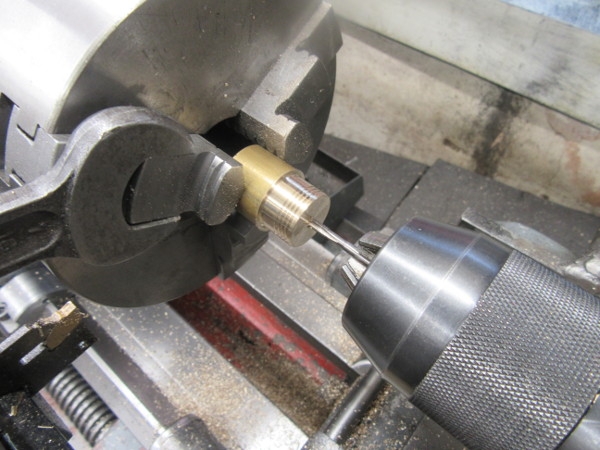
The piston has its oil grooves (no piston ring or seal) and I have drilled it with a No37 drill and here we are tapping it 5BA.
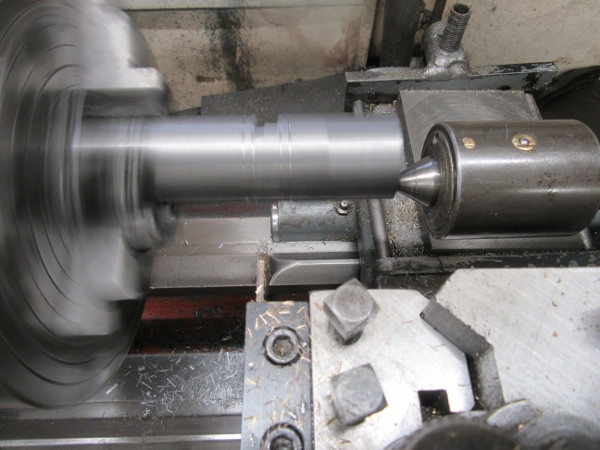
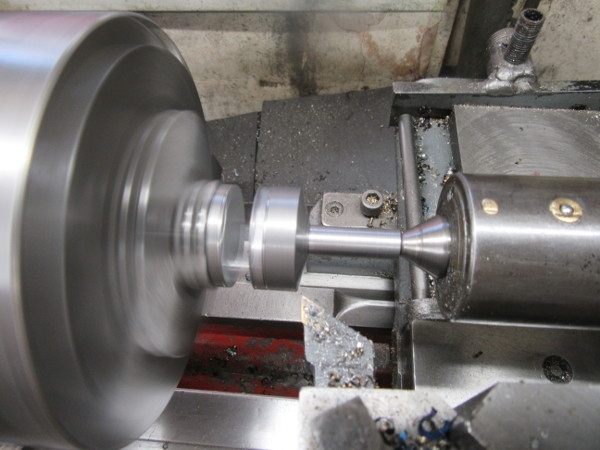
Part it off...
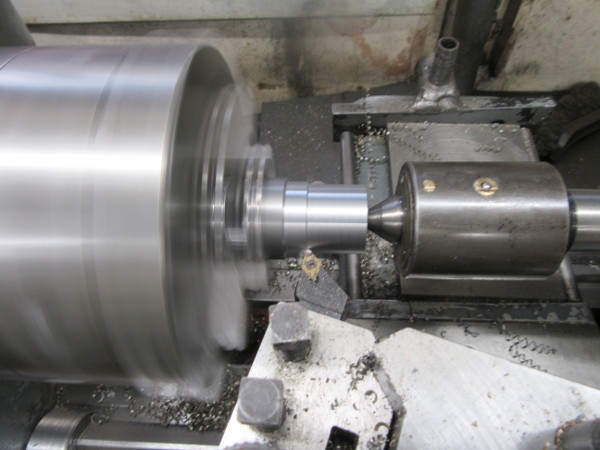
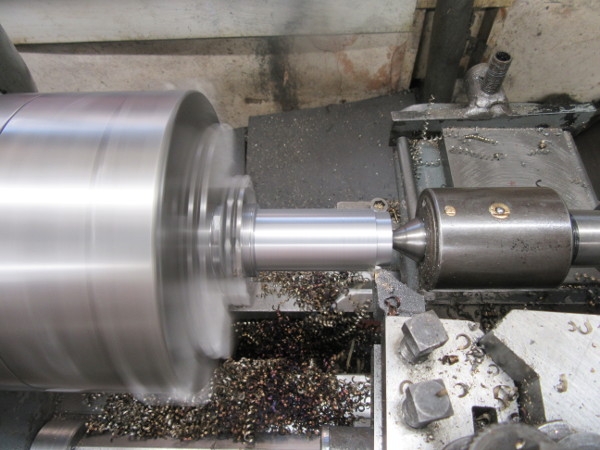
Turn the end of the piston rod down to threading diameter for 5BA and then thread it.
I honed the cylinder bore using this expensive tool, a big split pin with emery cloth threaded through it.
My knees were hurting so an early shut down but we have a piston and the beginnings of a rod. I shall carry on tomorrow. Slow and careful, but no cock-ups.
Re: Shed Matters 3
Posted: 17 May 2021, 07:01
by Stanley
Re: Shed Matters 3
Posted: 18 May 2021, 07:02
by Stanley
Re: Shed Matters 3
Posted: 18 May 2021, 08:10
by chinatyke
Used my number 2 phantom vise this morning, a Stilson to hold the workpiece and mole grips to remove a threaded adaptor piece. It's moving up my "things to buy" list.
Thinking about this, I know I have a 3" vise that clamps to a table and I can't remember the last time I saw it. It was probably left in our rented-out apartment in Nanning along with some other tools, or thrown away by Wifey.
Re: Shed Matters 3
Posted: 18 May 2021, 10:22
by Stanley
Go on China, be a devil and spend some money!
If you pop in I'll give you this machine vise.....
Re: Shed Matters 3
Posted: 18 May 2021, 12:41
by chinatyke
First step: I've always known the object as a vice but have been writing vise on here to match your spelling and superior knowledge. So I've just looked it up in Collins and vise is the American spelling and a variant of the English word vice. Sorry, I'll be reverting to vice in the future!
They are cheap as chips here, but I'm guessing the quality won't be so good at such a low price. Good enough for me though. Now if I bought a vice I would have to have somewhere to put it. We have a covered kitchen on an outside balcony upstairs, the ideal place. Replace the kitchen with a workshop? Can't see me getting away with that! Sounds like I'm doomed to a lifetime of deprivation.
Thanks for the offer, but I'll say no on this occasion.

Re: Shed Matters 3
Posted: 19 May 2021, 06:59
by Stanley
Re: Shed Matters 3
Posted: 20 May 2021, 06:59
by Stanley
Re: Shed Matters 3
Posted: 21 May 2021, 06:57
by Stanley
Re: Shed Matters 3
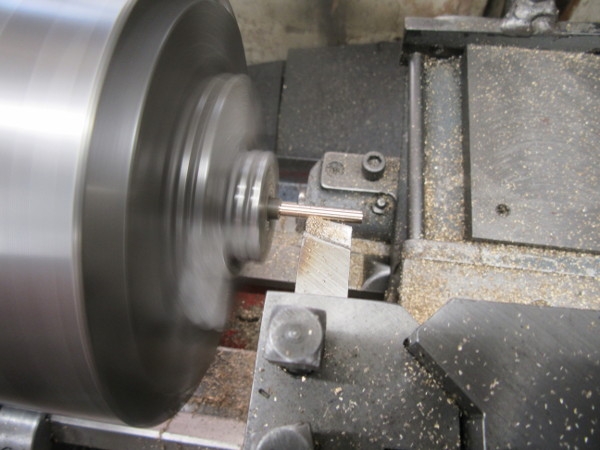
Posted: 22 May 2021, 07:00
by Stanley
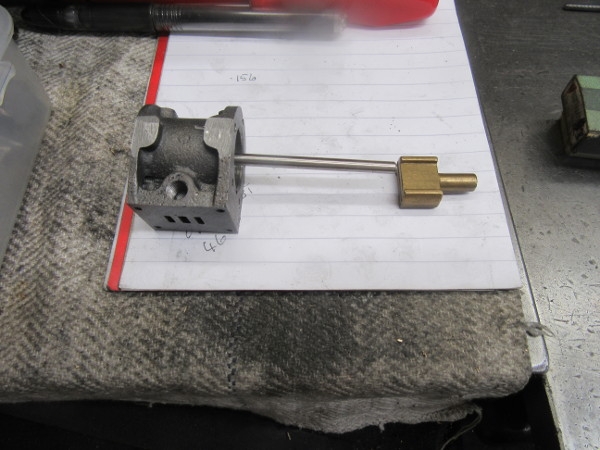
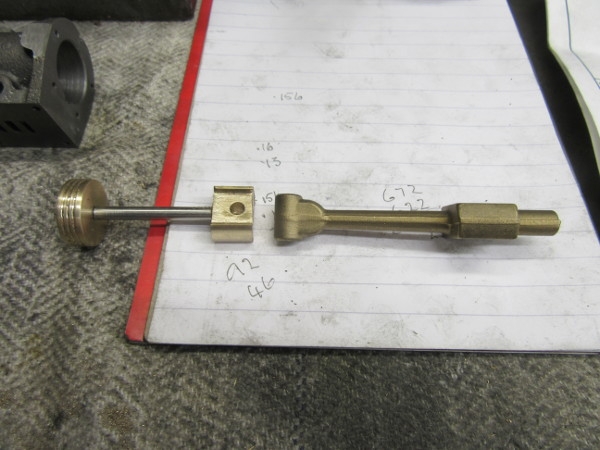
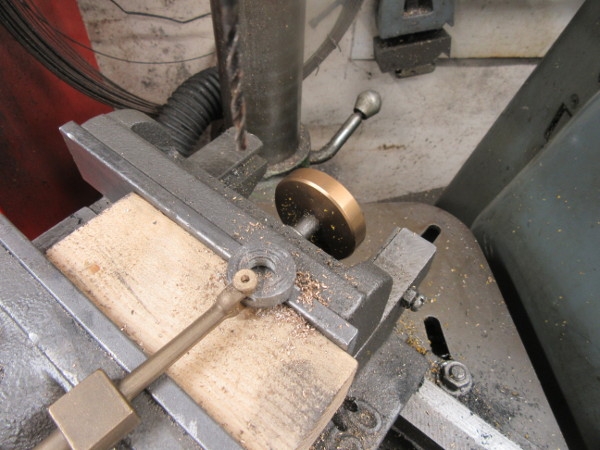
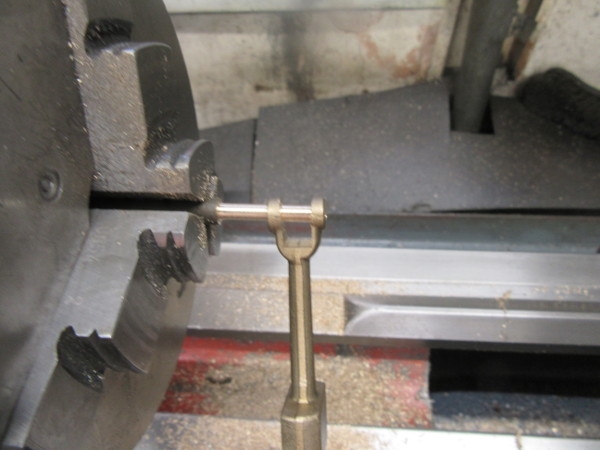
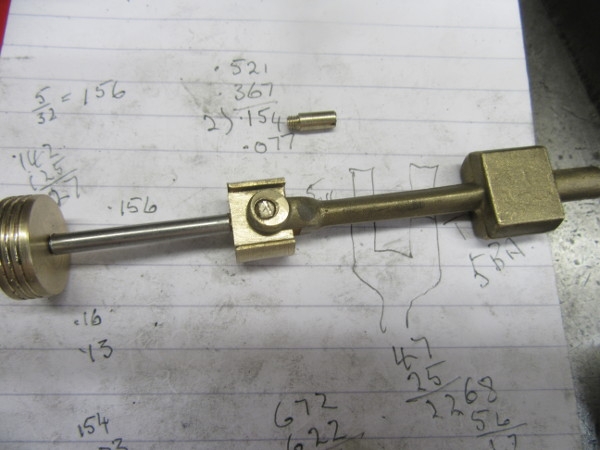
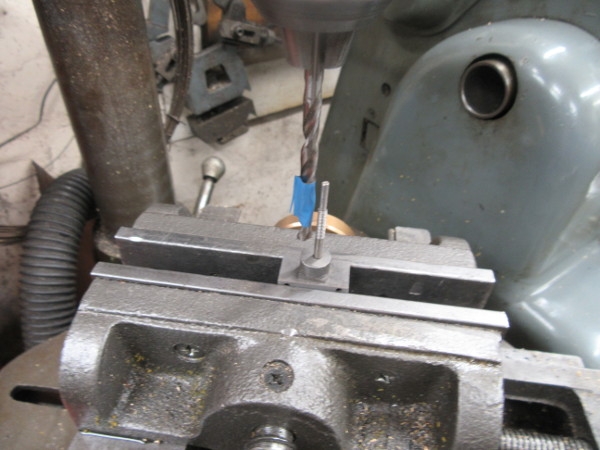
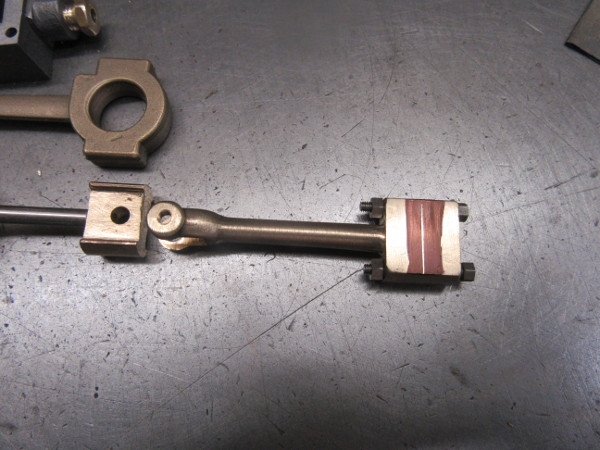
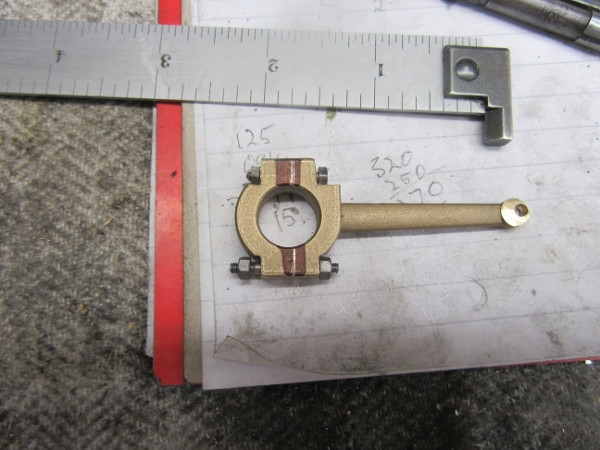
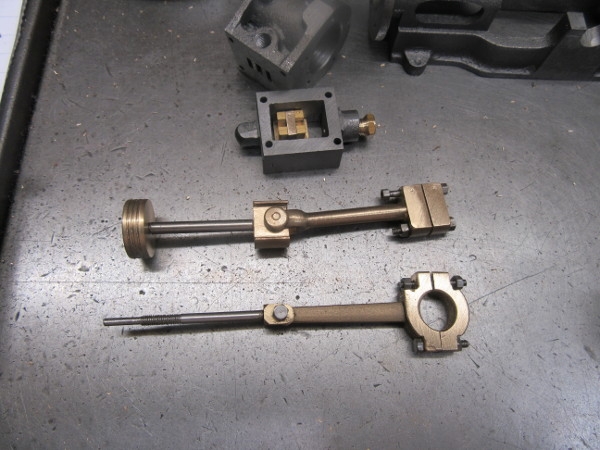
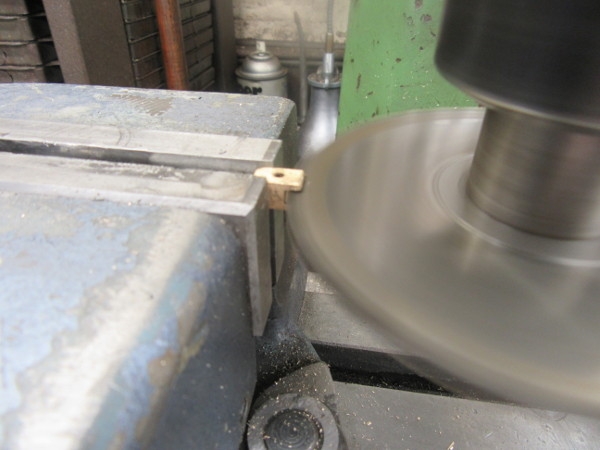
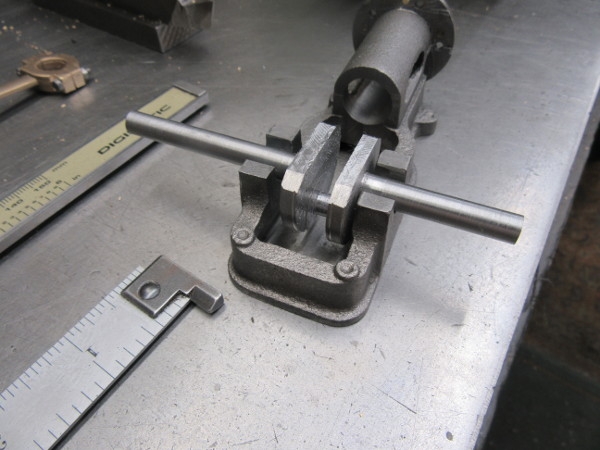
Here's the rabbit, I need to make the rod the right length, thread it 5BA and fit it with the clevis that will connect it to the valve rod.
That takes care of that. I put the 4 jaw chuck on and started to make the clevis.

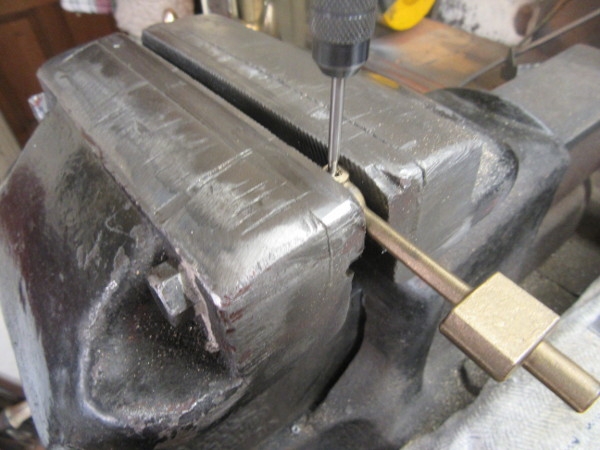
Then under the pillar drill and drill for the clevis pin.
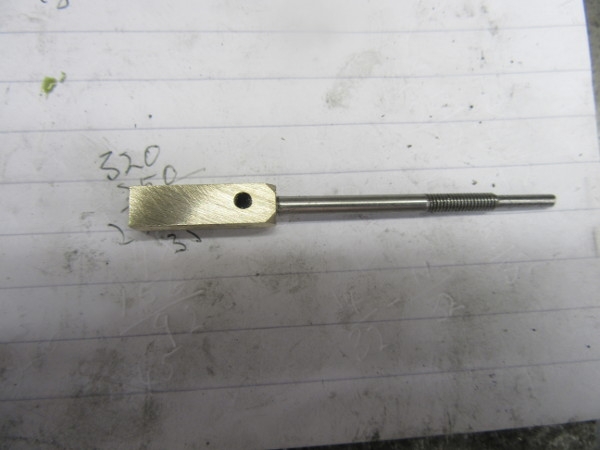
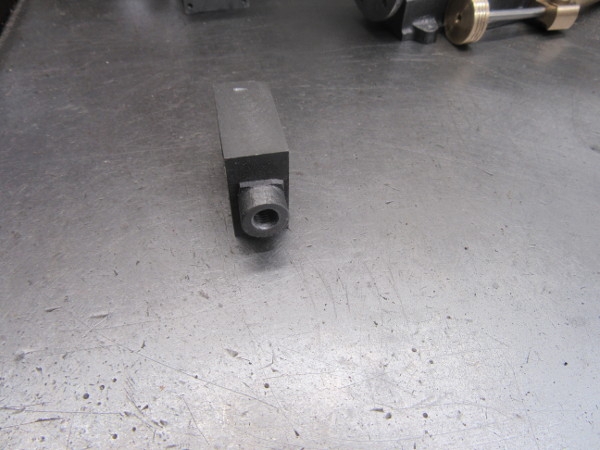
When I cut the jaw of the clevis I will be deep into the body and will be cutting the end of the rod inside the clevis so I Loctited the rod in place. It can set overnight.
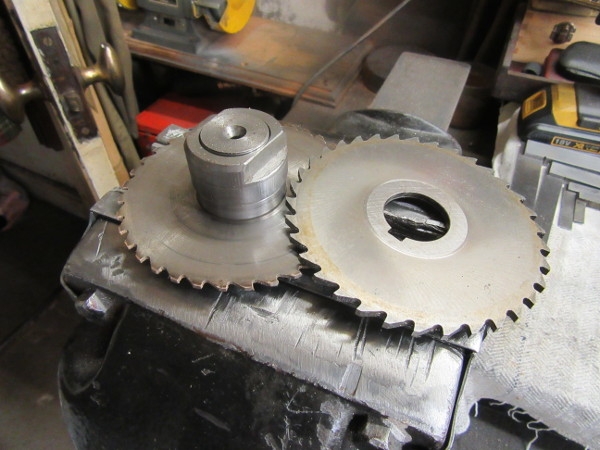
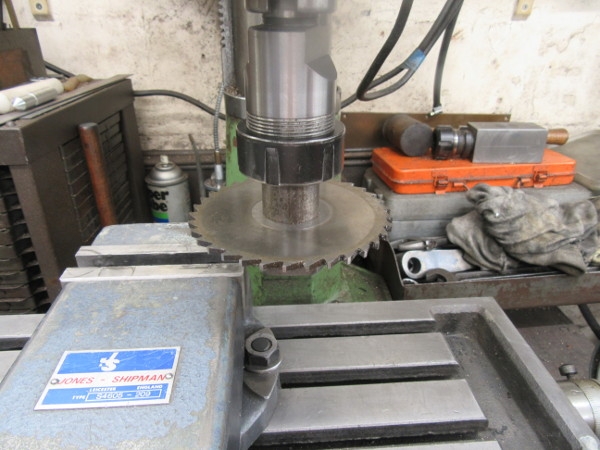
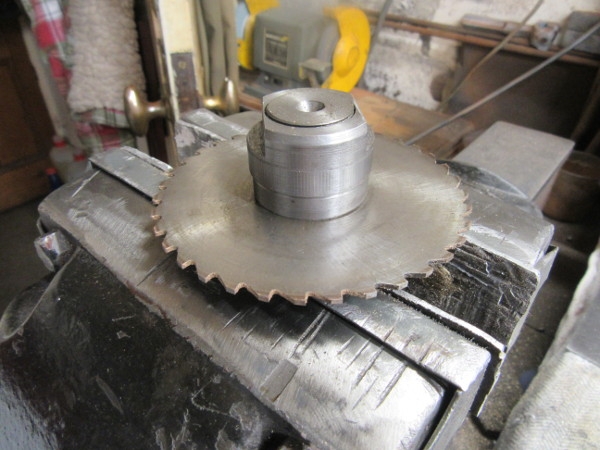
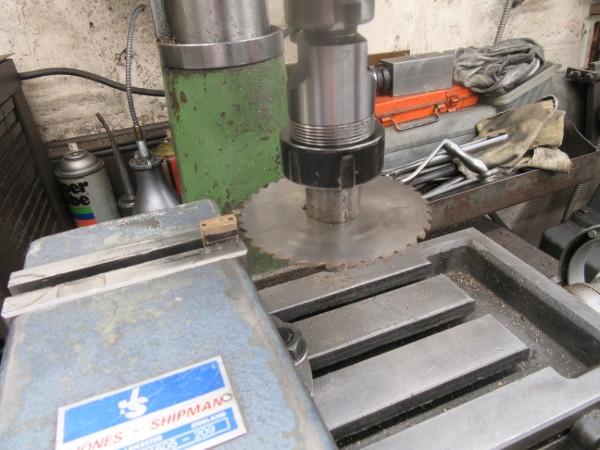
I found a 1'8" thick slitting saw and set it up in the VM ready for cutting the gap in the clevis tomorrow.
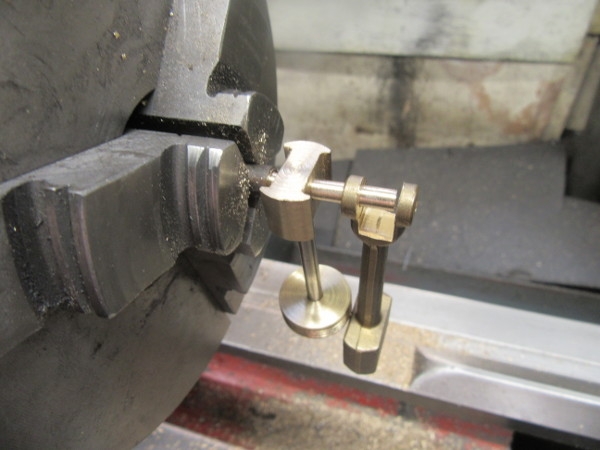
Re: Shed Matters 3
Posted: 24 May 2021, 07:15
by Stanley
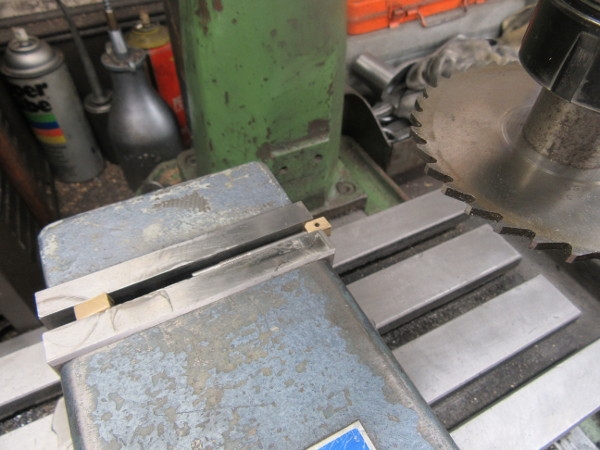
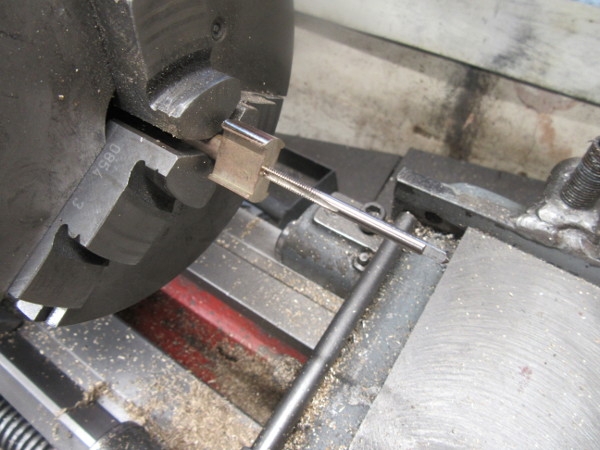
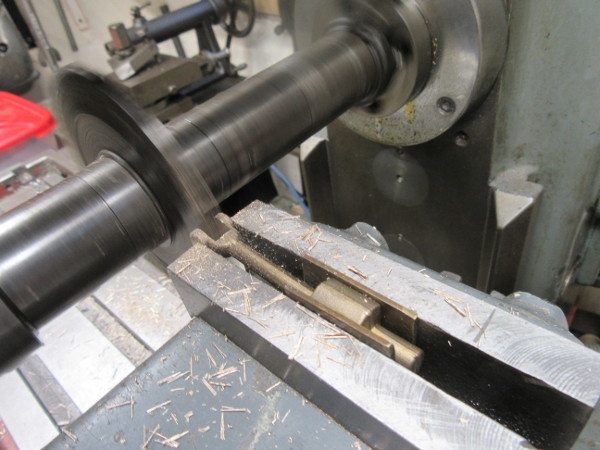
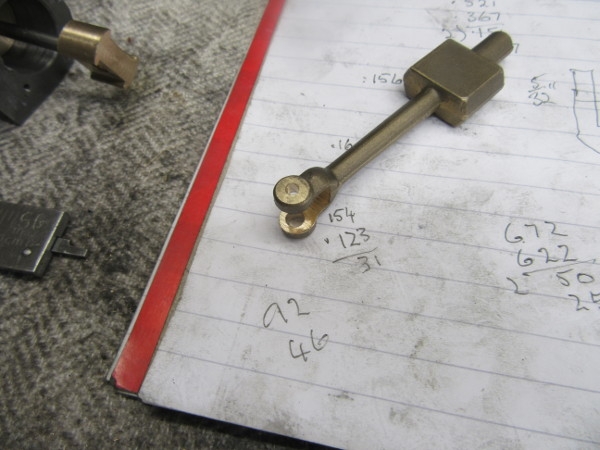
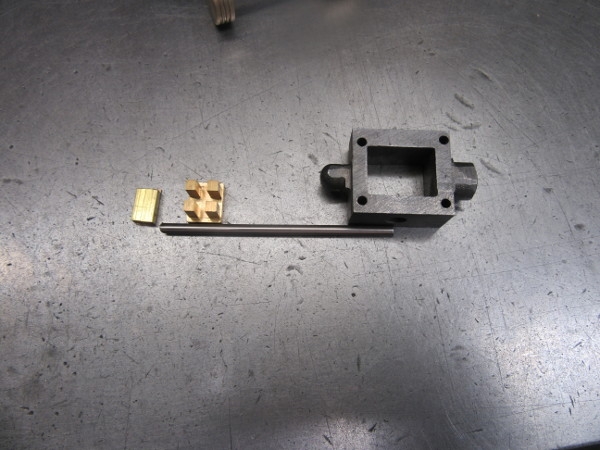
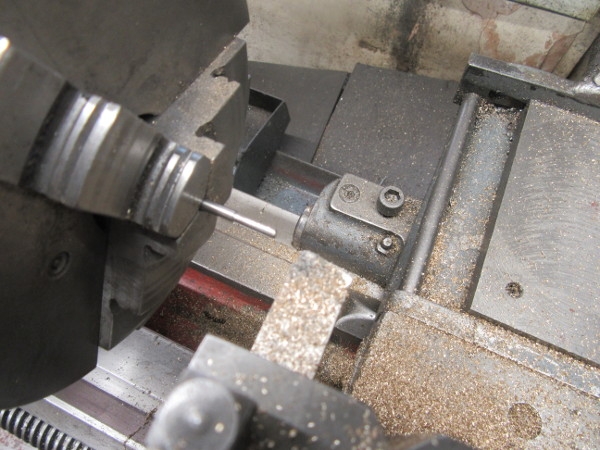
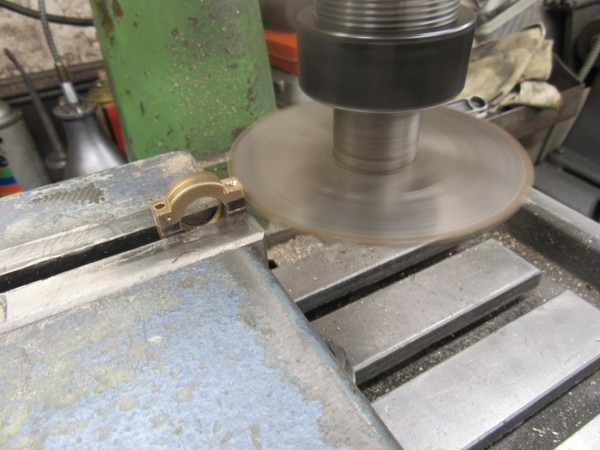
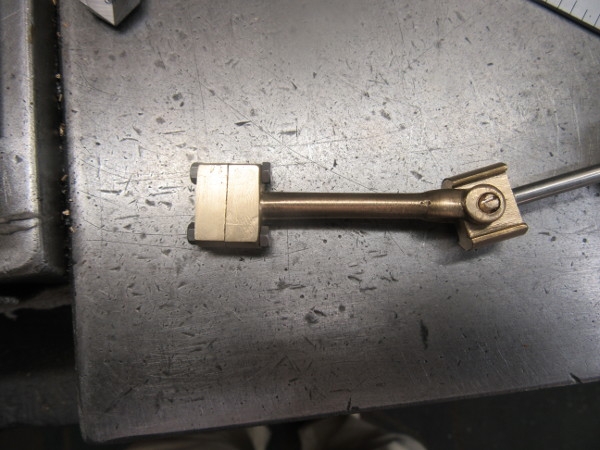
I cut the excess off the clevis and used that in the vise on the opposite side to the clevis so the jaws closed in parallel.
Then a very careful set up and a cut into the clevis. Lovely to have a sharp cutter, I wasn't wasting my time when I spent almost three days sharpening cutters.
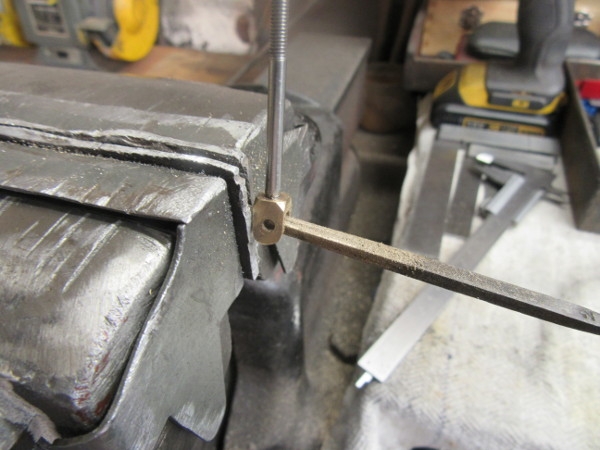
I finished the cut using a hacksaw and a small square needle file. I wasn't going to risk the tenuous hold I had in the miller vise any further.
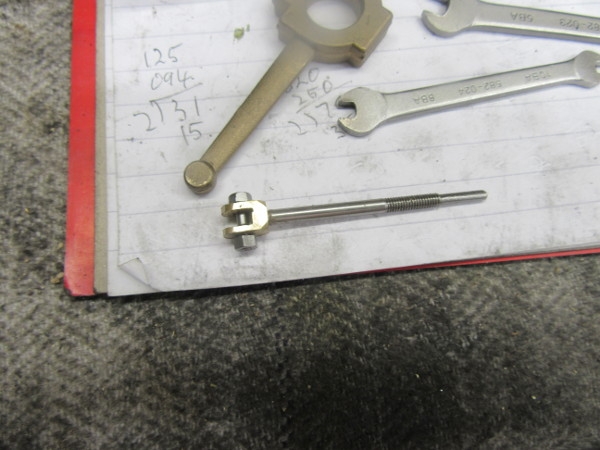
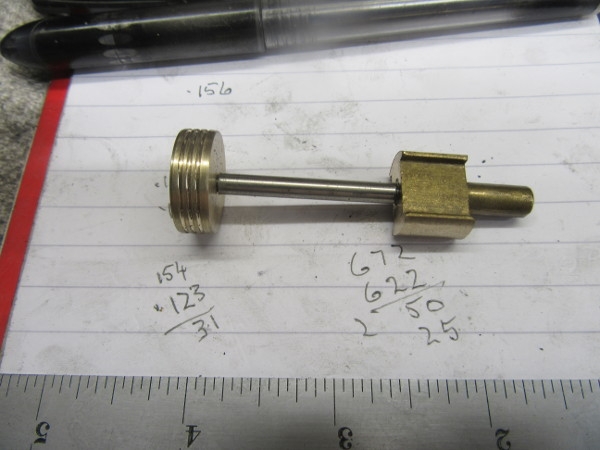
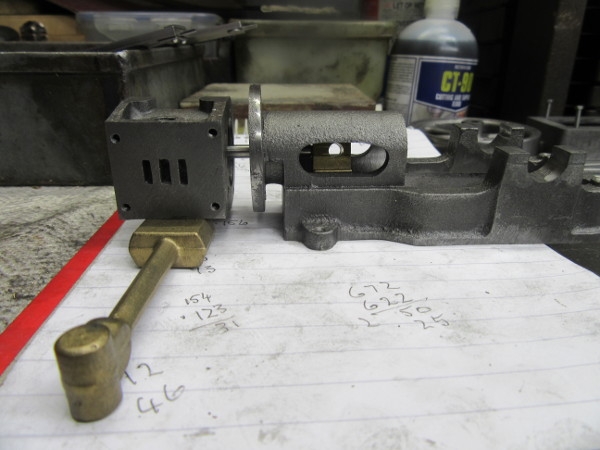
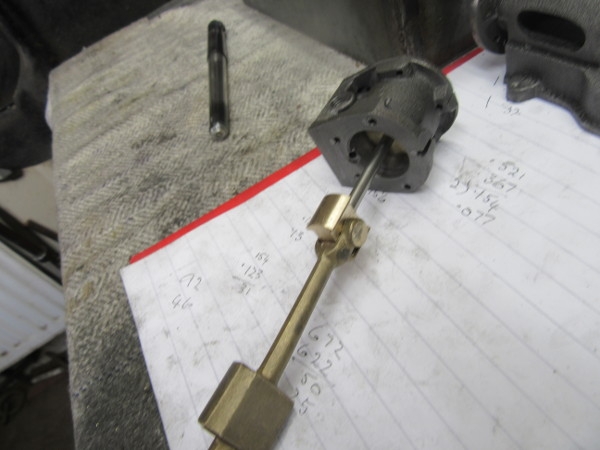
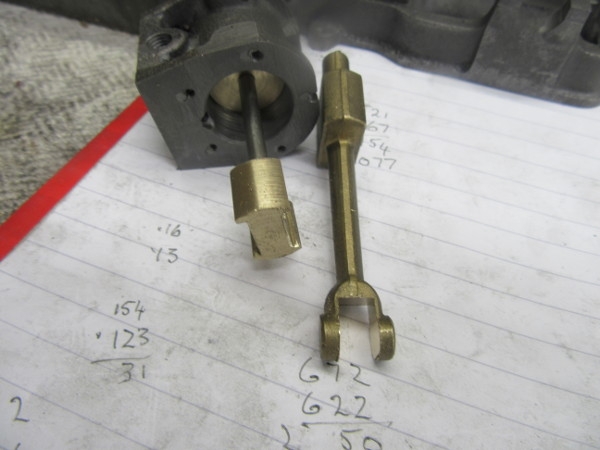
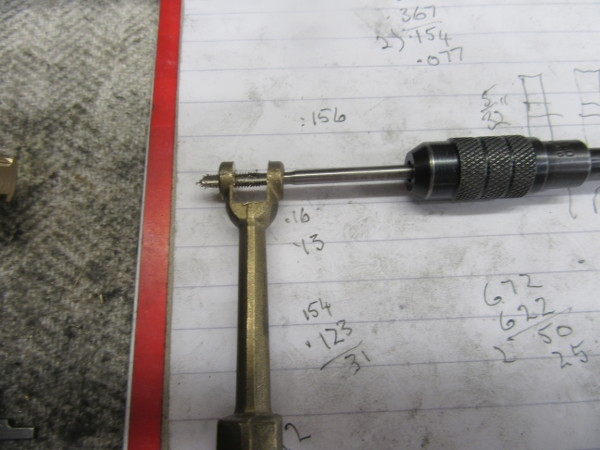
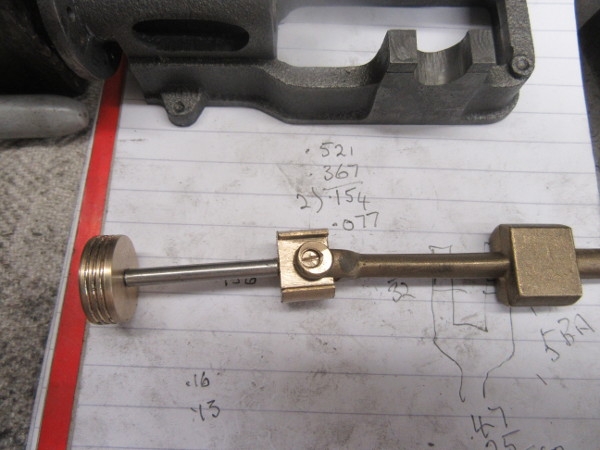
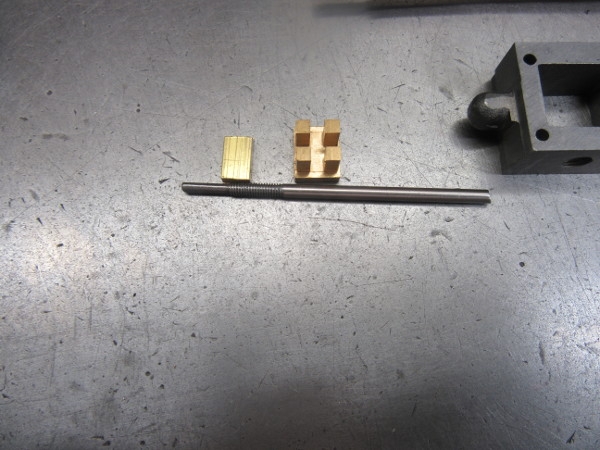
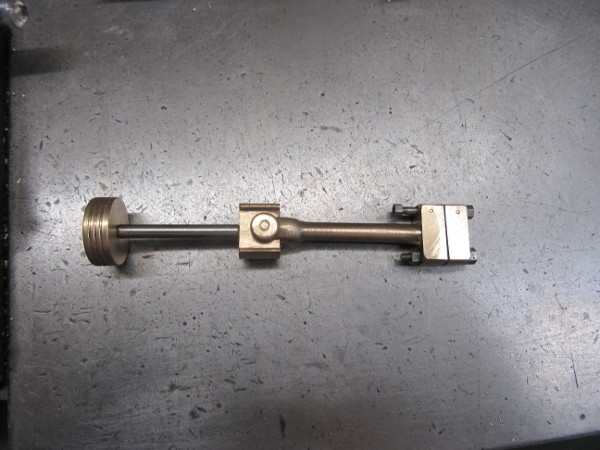
Now I have to make the end of the eccentric rod fit the clevis and fit the 7BA bolt as well. Quiet careful work with constant trial fits.
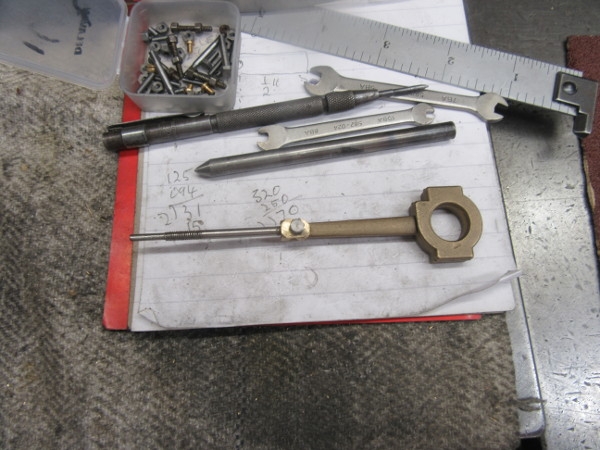
This was closing time, we have the link between the eccentric rod and the valve rod. I haven't decided where to go tomorrow. It needs a bit of thought. A nice interesting 90 minutes and a good result.
My last move was to take the arbor and the slitting saw out of the VM and replace the normal cutter.
Re: Shed Matters 3
Posted: 25 May 2021, 07:16
by Stanley
Re: Shed Matters 3
Posted: 25 May 2021, 08:31
by BobH
That is interesting, Stanley. Stuart must have changed the instructions/drawing since I bought my castings. I had probably had them over 10 years, buying them when an ebay dealer was doing a special offer. I picked them up from a mill near the canal here in Rochdale. The guy was a bit of a wheeler dealer with an interest in steam, though his main line was beer dispensing equipment.
Re: Shed Matters 3
Posted: 26 May 2021, 03:09
by Stanley
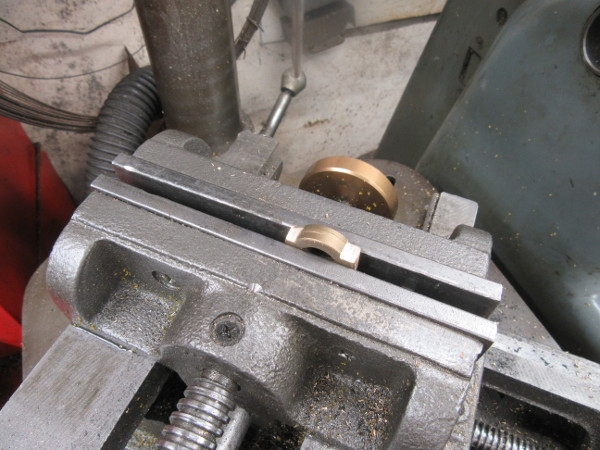
Interesting but wrong Bob. I've just checked and on the drawing the crank bearing is split just like I have done it. It's the eccentric that is only slit on one side, not sure how that works! I'll do it next and split it.
Re: Shed Matters 3
Posted: 26 May 2021, 07:05
by BobH
Yes, I see, the eccentric is outside the bearing so could slip on. Either way will work of course.
Re: Shed Matters 3
Posted: 26 May 2021, 07:44
by Stanley
Re: Shed Matters 3
Posted: 29 May 2021, 07:25
by Stanley

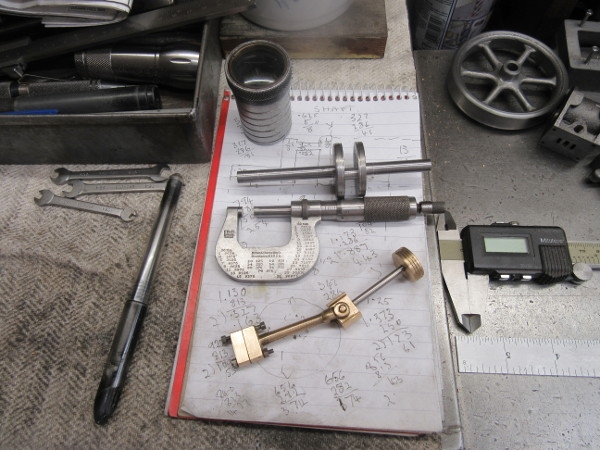
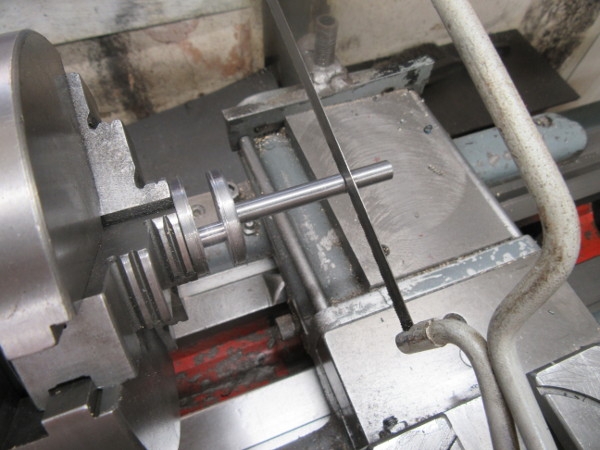
Let's make a crankshaft. I'm not doing it the Stuart Way but by the Newton Pickles approved method. So twenty minutes careful thinking and measuring and then a search for a piece of stock. I found a piece and turned it down to the right size for a blank. Then I went to mark the offset for turning the crank pin and realised I had got my measurements wrong, I made a beginner's mistake.
I had to go back and start at the beginning. Then I put in the crank pin centre. That looks better!

Then, while the 3 jaw SC chuck was still mounted I used the lathe and the top slide to mark the webs and crank pin.
Last job was to clean Mrs Harrison and put the small 4 jaw independent chuck on ready for tomorrow. I wasted a bit of time but on the whole I finished up with a good result! That's my story anyway.
Re: Shed Matters 3
Posted: 30 May 2021, 07:19
by Stanley
This was how I started but I soon decided to use the parting tool, this was too wide and I was getting chatter.
Doing better!
I've got a crank pin but it's undersize, not badly and it will be OK. As if to prove I am getting older note that I started cutting to the wrong mark.... (But I can get rid of most of that.)
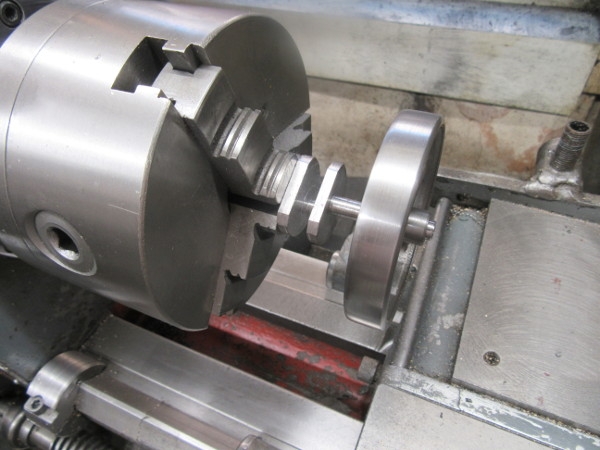
A change to the 3 jaw and I roughed out one side of the shaft, I shall do the other side and finish turn it tomorrow.
Re: Shed Matters 3
Posted: 31 May 2021, 07:25
by Stanley
I turned the shaft round and carried on reducing the shaft, even in a small shaft like this there is a lot of metal to come off!
Lots of chips.
Not quite there yet but we have the shaft and pin turned to the right size.

Then into the mill and start to hide my mistake....
Here we are at closing time. Some final finishing touches but we have a crankshaft. I improved a shining hour and a half by cleaning the Chips off Mrs Harrison and the floor.
My finger has been a nuisance and it hurts if you knock it but I have managed. Roll on healing!
Re: Shed Matters 3
Posted: 01 Jun 2021, 07:03
by Stanley
I attended to my finger and put on a more comfortable dressing protected by a rubber glove and then set to to improve the crankshaft.
First job was to cut the long leg down to 1.5".
Then make sure the flywheel is a good tight fit. As usual I shall be fitting it with Loctite. That way you get it running dead true.
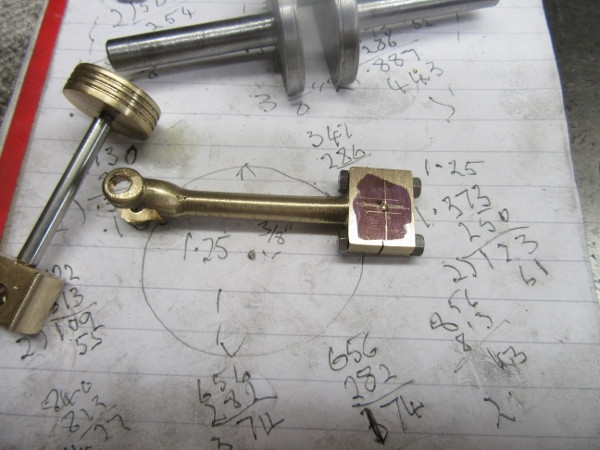
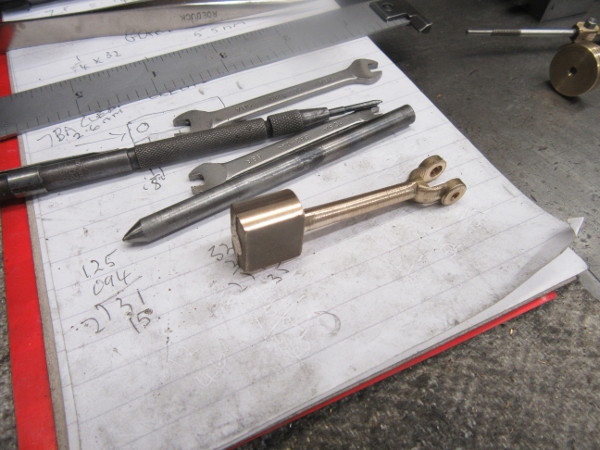
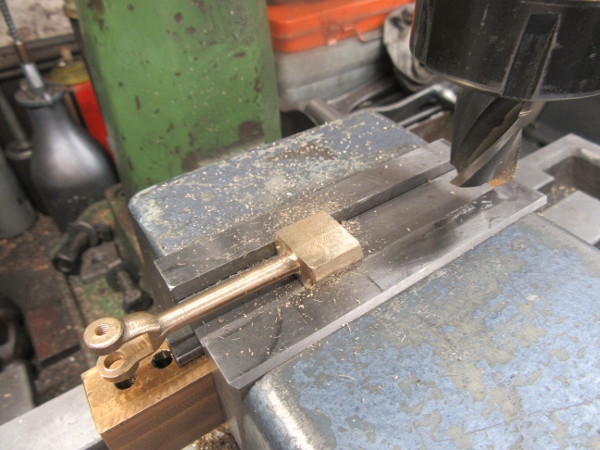
I reduced the thickness of the con rod journal until it was a nice fit between the webs of the shaft and then marked it for centre and drilled it to size.
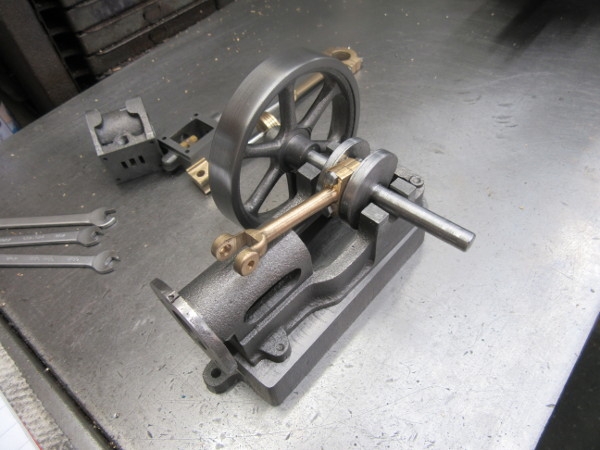
Knocking off time. The con rod is a perfect fit on the crank pin as is the flywheel on the shaft. I think we are into the crankshaft pedestal bearings next. Or should we be finishing the beds..... Decisions decisions!
Re: Shed Matters 3
Posted: 01 Jun 2021, 08:39
by plaques
Stanley wrote: ↑01 Jun 2021, 07:03
Knocking off time. The con rod is a perfect fit on the crank pin as is the flywheel on the shaft. I think we are into the crankshaft pedestal bearings next. Or should we be finishing the beds..... Decisions decisions!
or making sure it will thread through the cylinder???
Re: Shed Matters 3
Posted: 01 Jun 2021, 12:37
by Stanley
I've already done that Ken.....