Page 53 of 125
Re: Shed Matters 3
Posted: 22 Aug 2021, 19:30
by BobH
Hello Stanley, one of my model engineer friends, Keith Sharpe, has these Stuart castings spare and wondered if they would be any use to you. The flywheel is 3inch diameter. Keith is not sure which engine they are for, the 10H or a larger model
Re: Shed Matters 3
Posted: 23 Aug 2021, 02:31
by Stanley
10H I think Bob. I am getting quite a collection of Stuart castings..... Only problem is I am skint at the moment....

Re: Shed Matters 3
Posted: 23 Aug 2021, 06:43
by BobH
I quite understand Stanley, castings and materials have become very expensive. Keith is currently working on a 2inch scale showmans engine. He was telling me that he is making the rear wheel hubs from bar stock due to the price of the castings from Reeves. The Stuart ones he is offering free to anyone who can use them. By the way he lives just over the hills from you in Barrowford.
Re: Shed Matters 3
Posted: 23 Aug 2021, 07:00
by Stanley
I couldn't promise to use them immediately but I can see there being a 10H being built. I leave it to you and him. Give him my email address if he needs it.
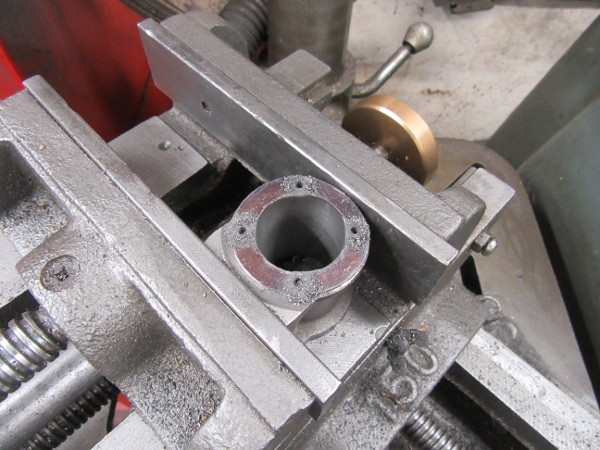
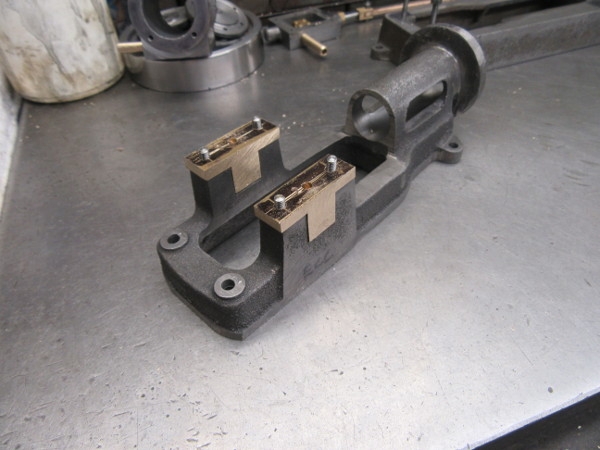
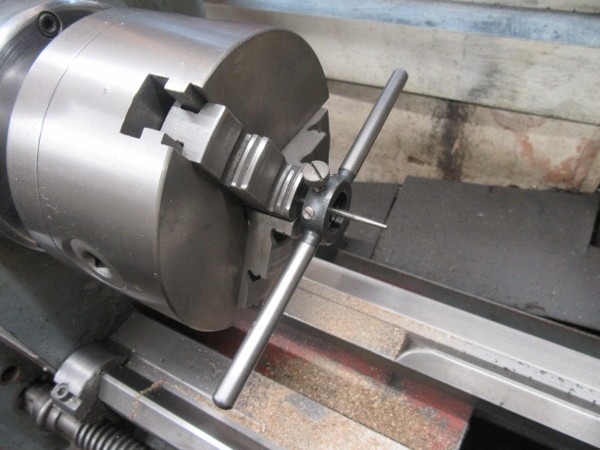
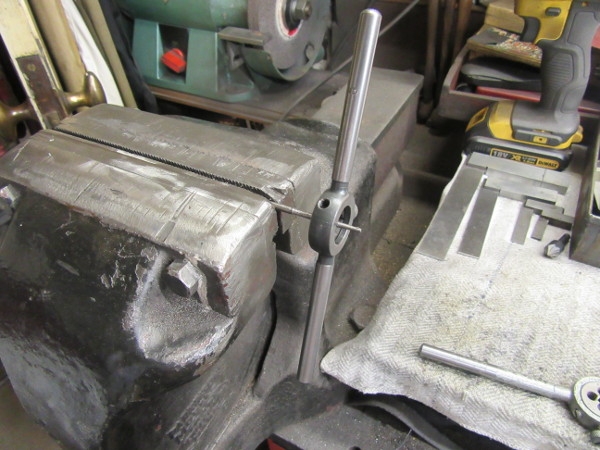
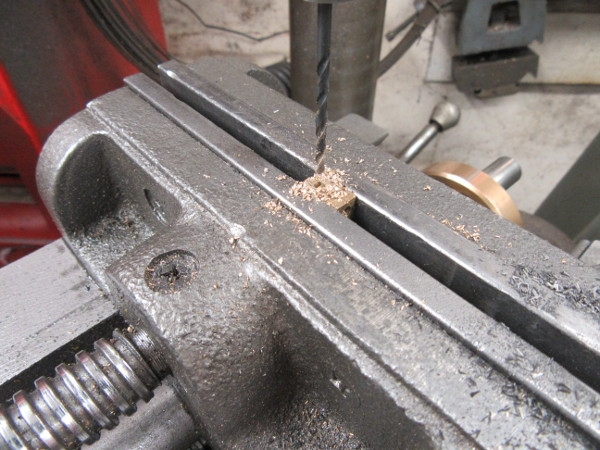
Today I drill the cylinder for the lid studs and also for the exhaust. As I suspected the metal is hard so I have to be very careful. I bear in mind that a threaded rod has maximum hold when the depth of thread is just over the diameter of the stock. So I wasn't heroic with the depth of my holes.
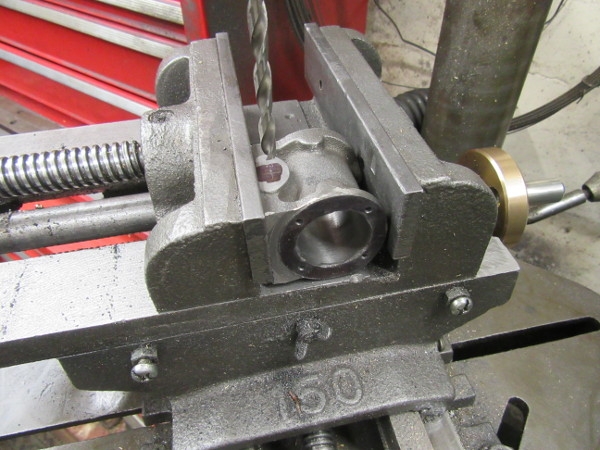
I also drilled for the exhaust pipe. I am not going down the complicated Stuart route which involves two tiny threaded holes and an oval flange threaded for the pipe. I am just drilling it 5.5mm to thread for 1/4" X 32TPI.
Once I had drilled the holes I threaded all the holes. Funnily enough the 7BA that I was dreading were the easiest as was the exhaust port. The really dodgy ones were the 4X 5BA holes for the back lid.
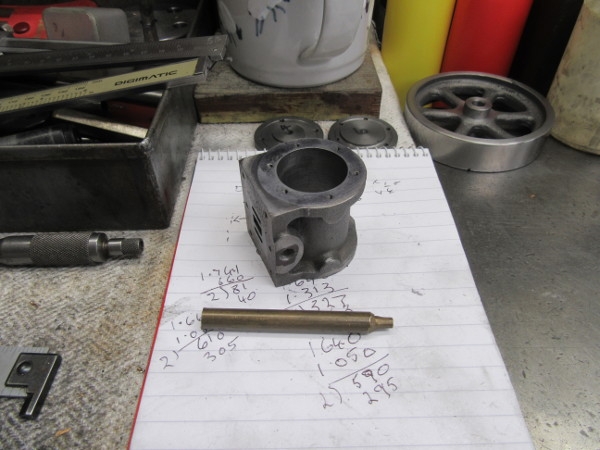
This was closing time, I have all the holes drilled and threaded in the cylinder and I have to stock ready to make the exhaust pipe. Then I can start thinking about the next stages in finishing the cylinder and valve gear.
I think I was very lucky this morning and I'm glad it's over!
Re: Shed Matters 3
Posted: 23 Aug 2021, 10:05
by Stanley
Bob, Keith moves fast, he's been in touch already....
Re: Shed Matters 3
Posted: 24 Aug 2021, 07:17
by Stanley

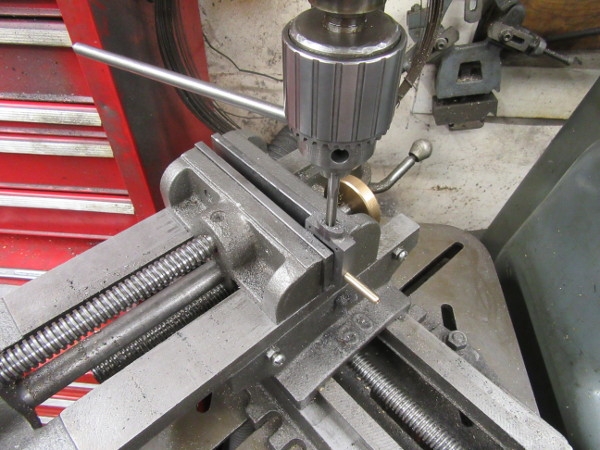
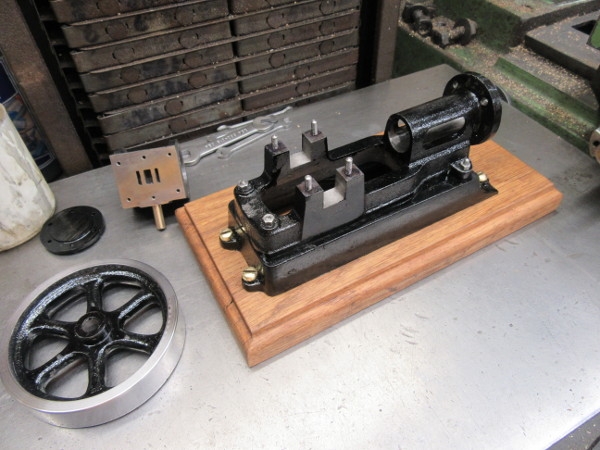
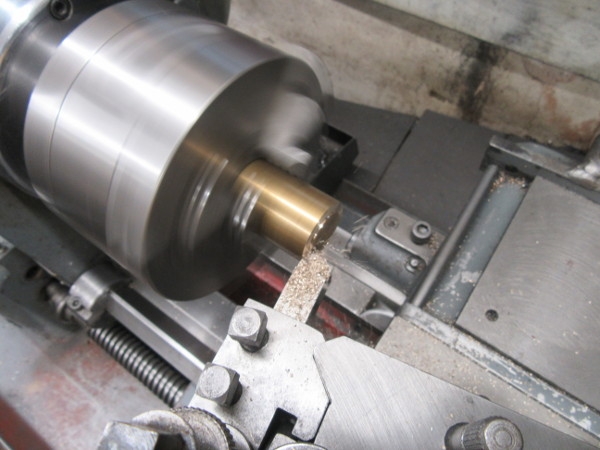
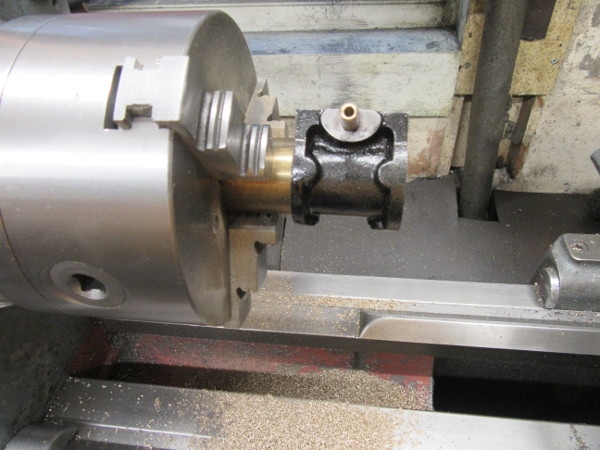
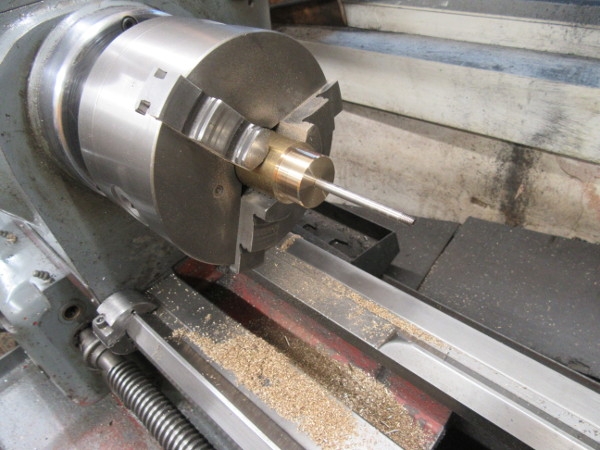
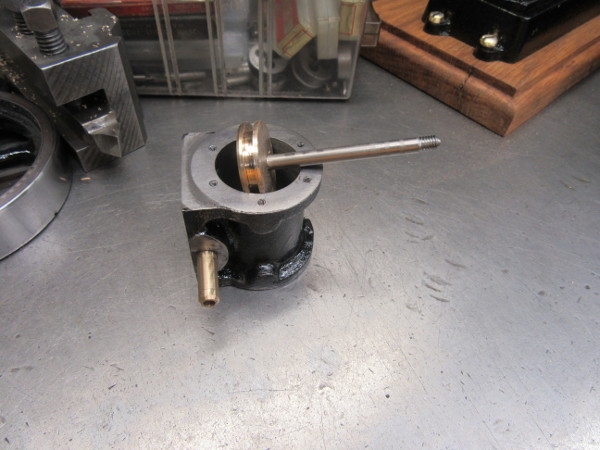
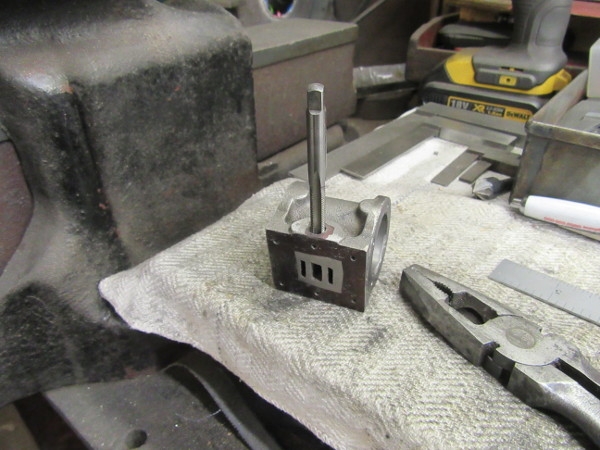
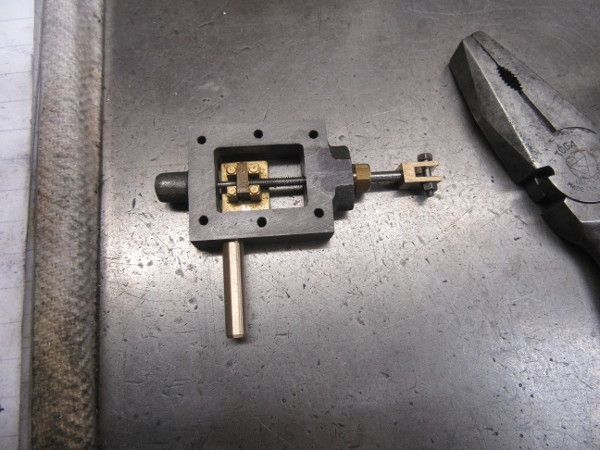
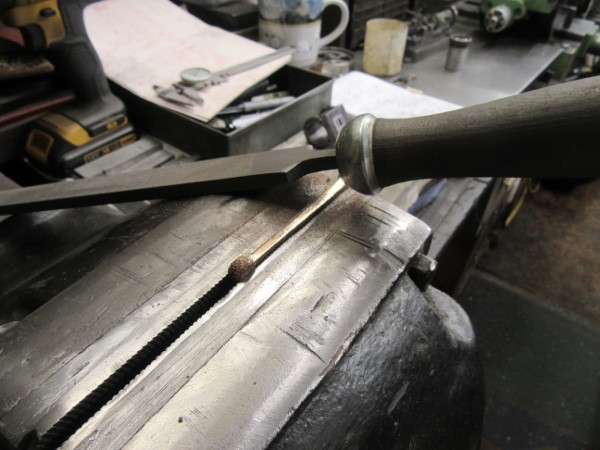
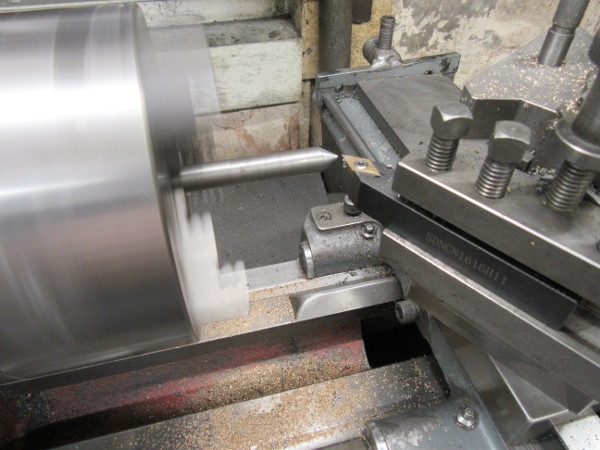
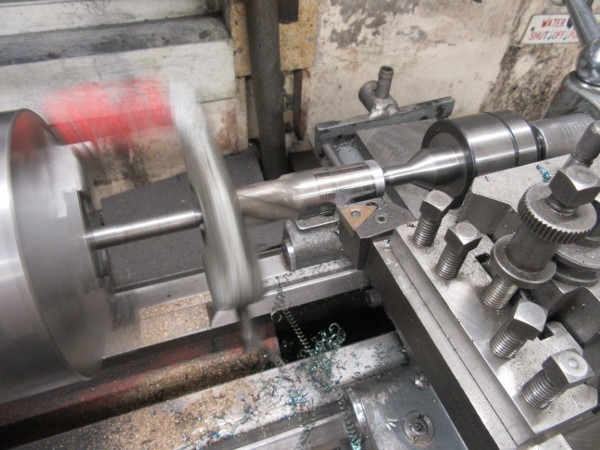
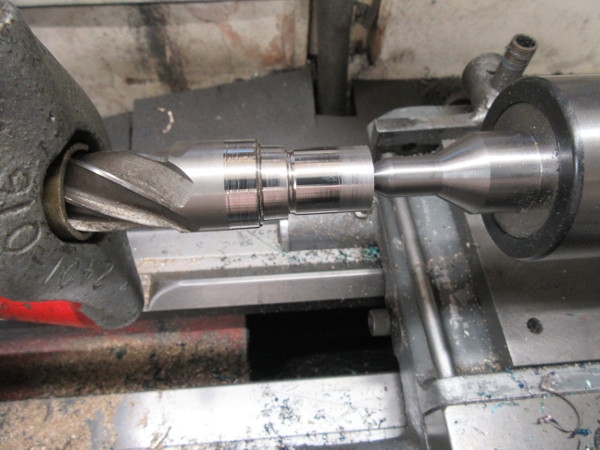
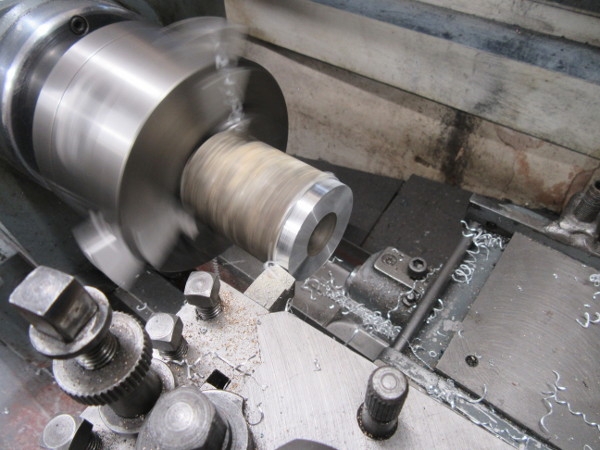
I started this morning by making the steam and exhaust pipe from a very old piece of brass stock in one of my chests. I often wonder how old some of these bits are, this could easily be over 100 years old.
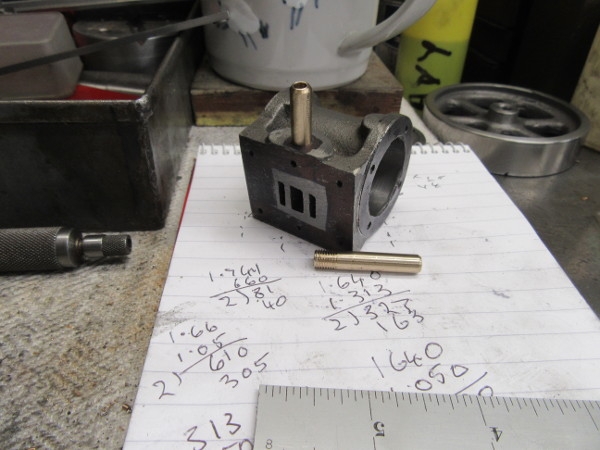
The pictures tell the story. Now I shall look at installing the steam valve.
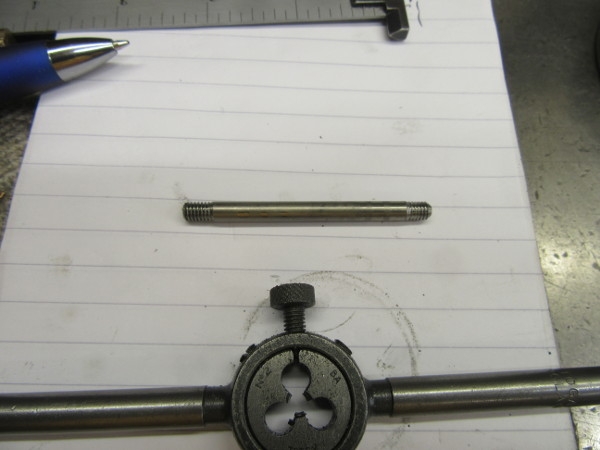
The valve rod is stainless rod and very tough, I had to reduce the end and after bad experiences in the past didn't attempt to turn it but reduced it with files! Then I threaded it 5BA at each end using heavy cutting oil.
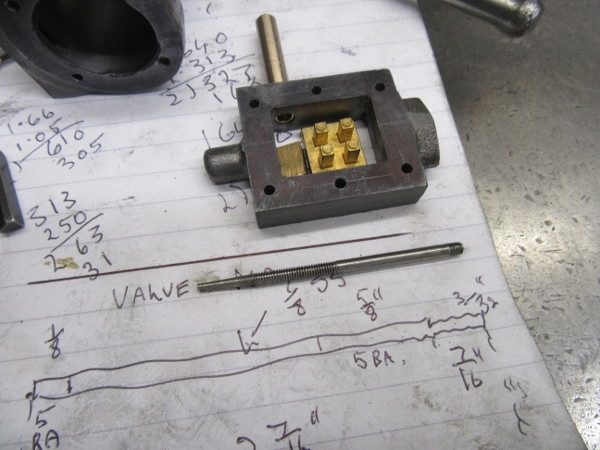
Here we are at knocking off time. I am ready to drill the steam chest for the gland and the rod and fit and drill and tap the driver bar for the valve. I am not going to do the gland that is on the drawing. It's correct as a representation of what would have been used but much more complicated than the way I shall do it.
Bob's friend Keith is coming this afternoon, that will be nice and I shall see what I can give him in return for the castings.
Re: Shed Matters 3
Posted: 25 Aug 2021, 04:06
by Stanley
Keith came yesterday and is a very generous man! He gave me the Stuart castings and I shall get the ones that are missing from Stuarts. But he also gave me this
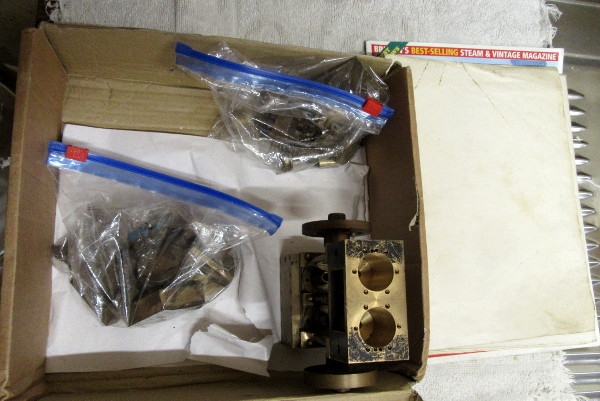
It's a partially build Shand Mason steam fire pump with two bags of castings that I think are going to be the rest that are needed. Oh, and plus a full set of drawings. All I could give him in return was some high speed steel and I suspect he didn't need that but took it to make me feel I had returned the favour. I saw some of the stuff he has done and as usual I have met someone who is far more skilled than I am. I told him this and said I was OK building something like the Whitelees or working with a flywheel weighing 85 tons like the Ellenroad engine but when I got to the small ones like the 10H I fall of the edge!
I shall put the fire pump on one side while I finish the No 8. Then I'll get what castings I need from Stuarts to make the 10H, then I'll have a stab at the Shand Mason pump.
Re: Shed Matters 3
Posted: 25 Aug 2021, 07:20
by Stanley
Re: Shed Matters 3
Posted: 26 Aug 2021, 07:34
by Stanley
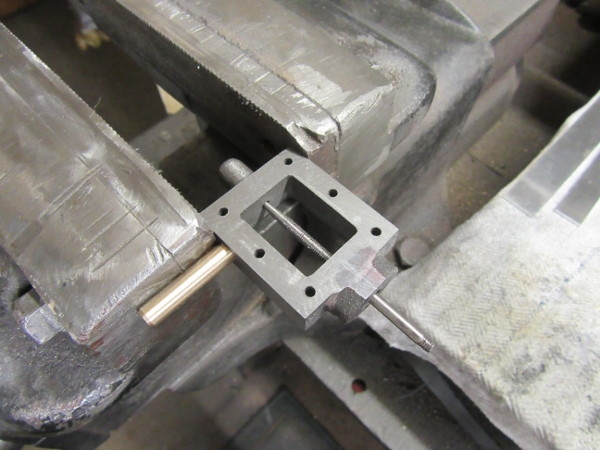
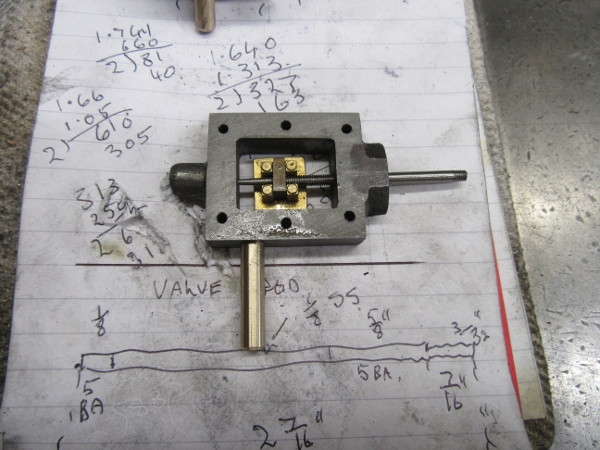
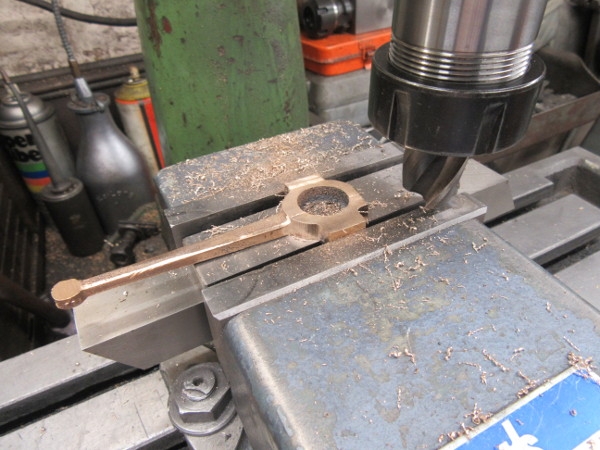
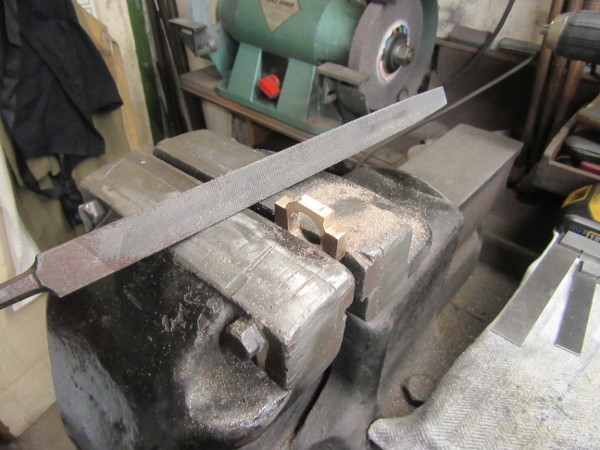
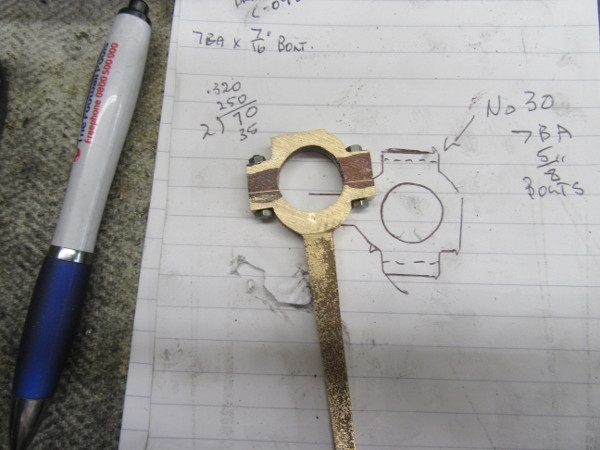
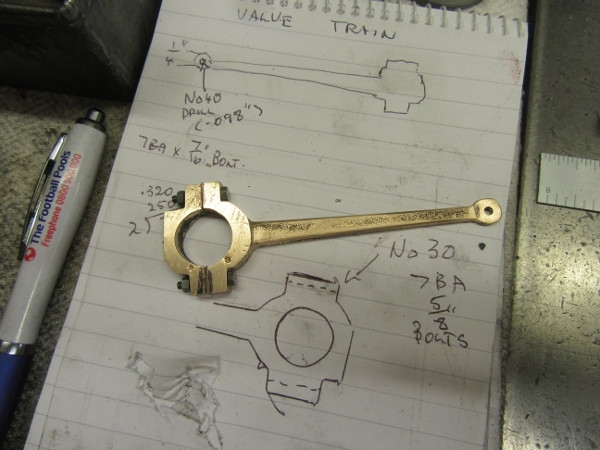
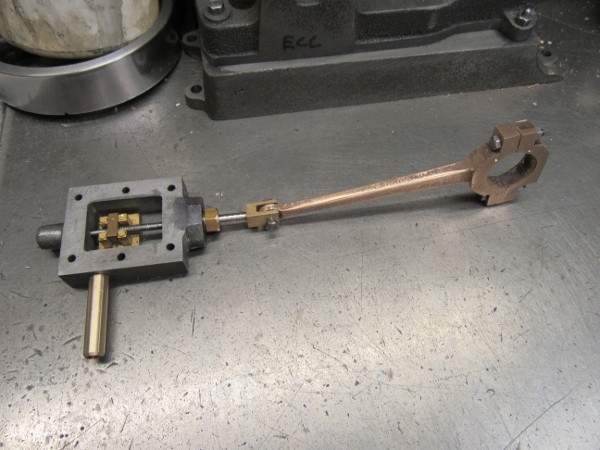
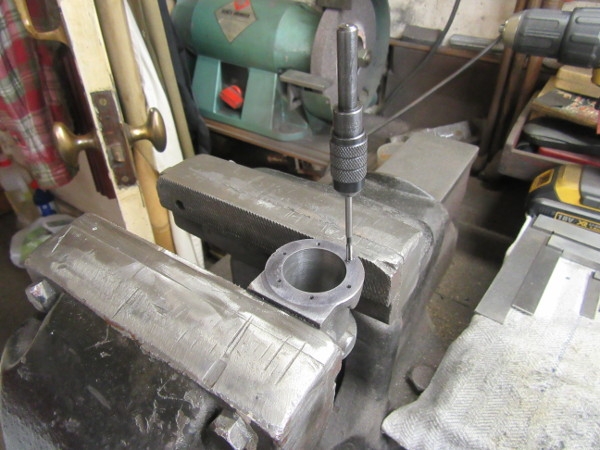
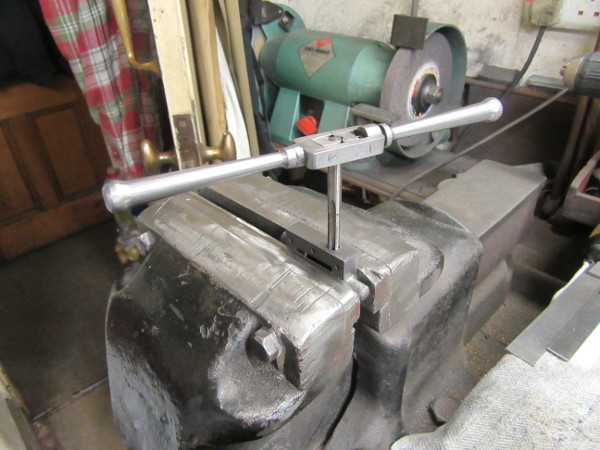
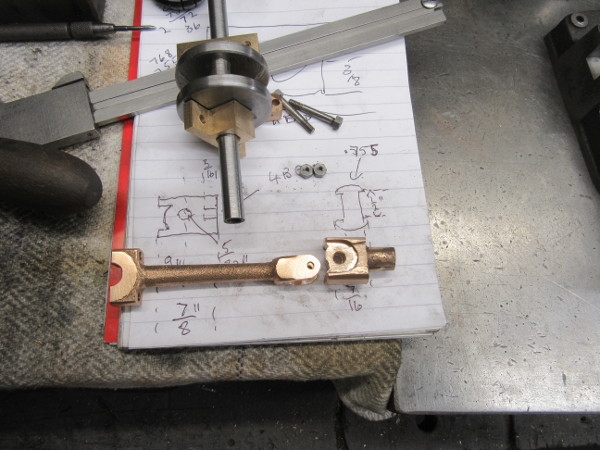
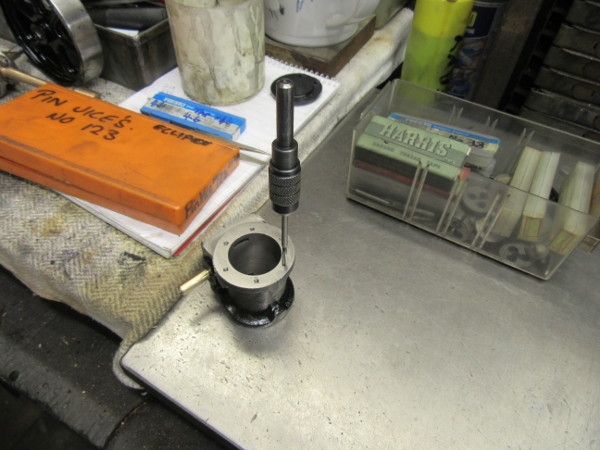
On with the steam chest and the valve. At the moment the thread on the rod is slightly too big, I never close my dies up tight when threading things like this, I leave a bit of room for adjustment later. So that's one thing that needs doing and then I want to make a gland and if all goes well I shall be starting work on the eccentric rod, which by the way is a disgrace. Easily the worst and roughest casting I have ever had from Stuarts.
I re-cut the 5BA thread on the valve rod slightly smaller, it was far too tight in the driver.
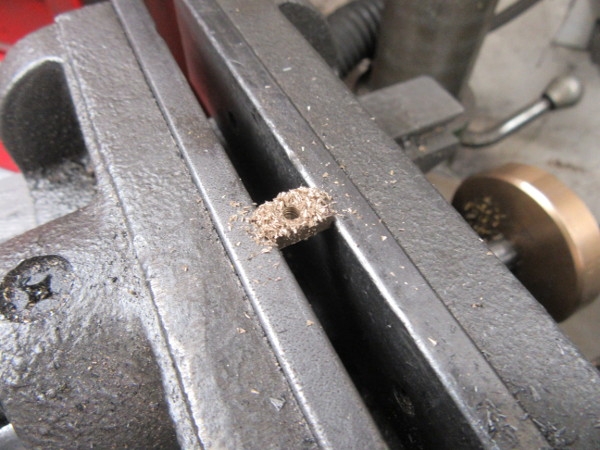
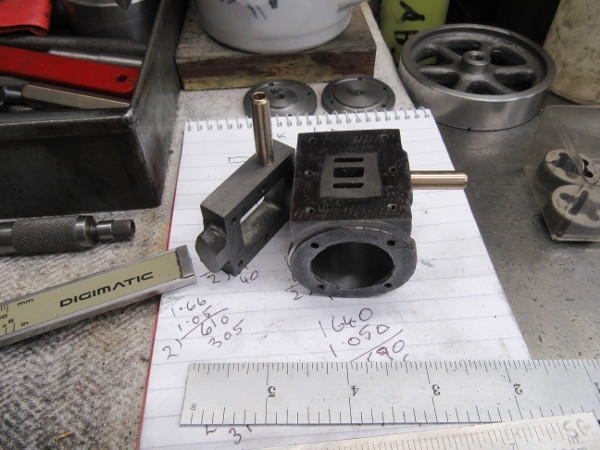
Then I made the clevis and drilled it for the bolt that will connect the eccentric rod to the valve rod. By the way, I have missed a pic. I made the gland for the steam chest out of the tiny off-cut of brass hexagon in the first picture.
Here we are up to date. Still some finishing to do but the basics are coming together.
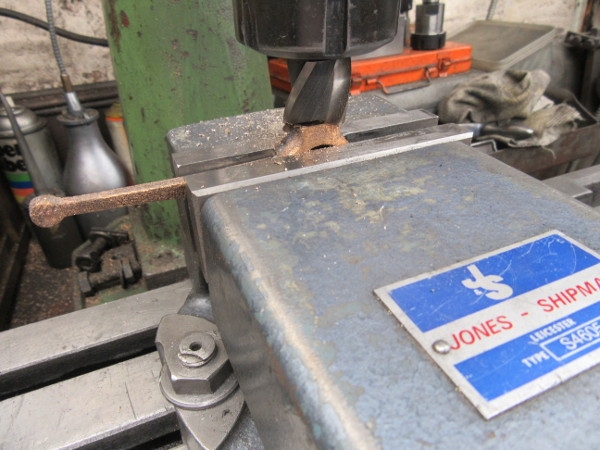
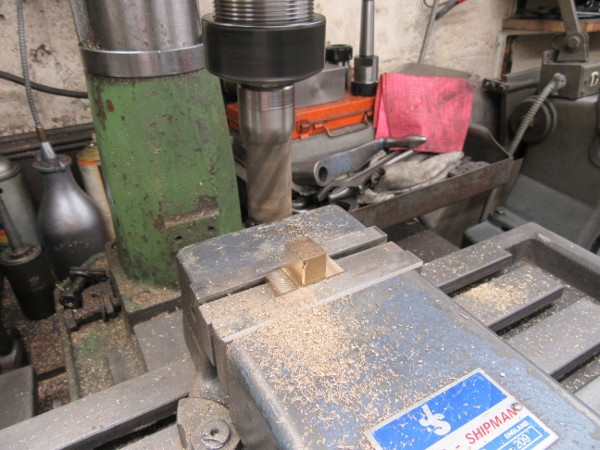
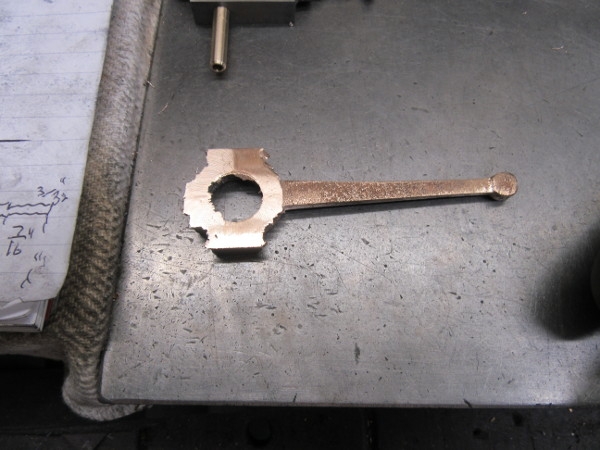
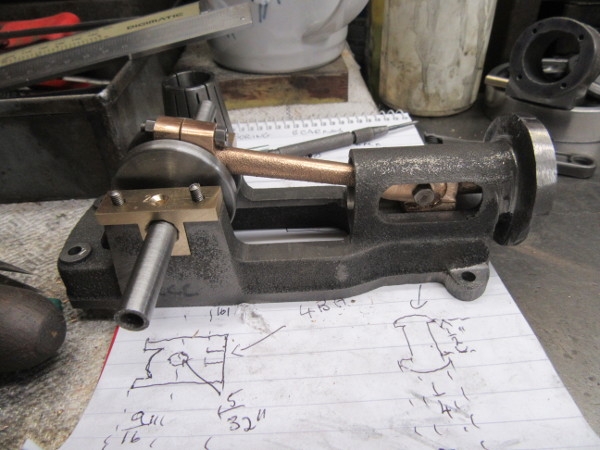
Then I addressed the horrible eccentric rod casting. Big files and high risk milling....
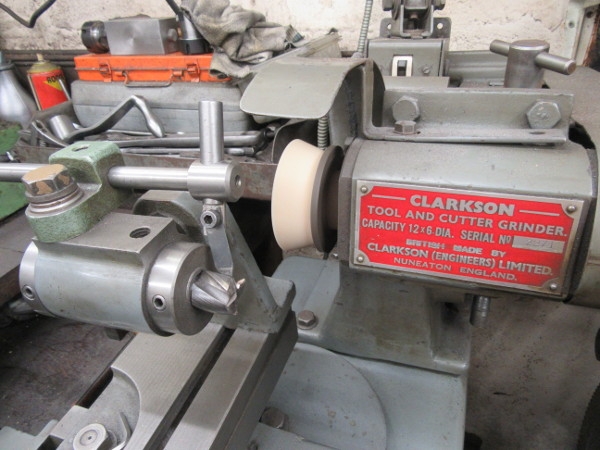
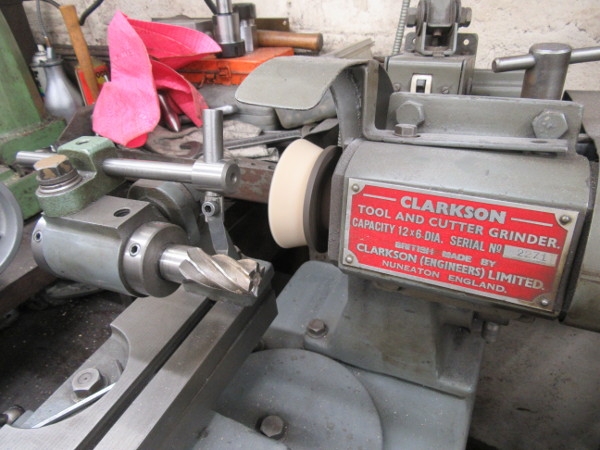
And a visit to the T&C grinder. God knows how anyone runs a mill on HSS without a grinder.
I decided it was closing time. I know where I am starting tomorrow!
Re: Shed Matters 3
Posted: 28 Aug 2021, 07:06
by Stanley
Re: Shed Matters 3
Posted: 29 Aug 2021, 07:17
by Stanley
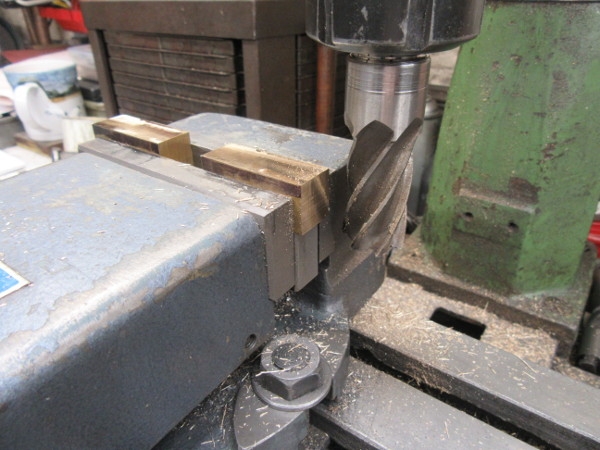
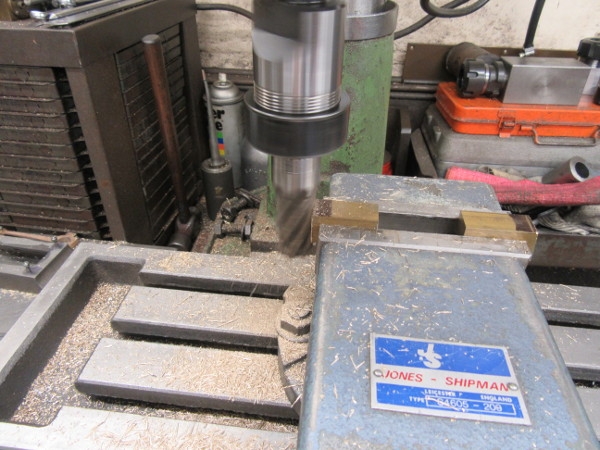
It's been a funny morning. As I said yesterday I have things to do before I can make an eccentric. Like fitting the main bearings and mounting the crankshaft in them.
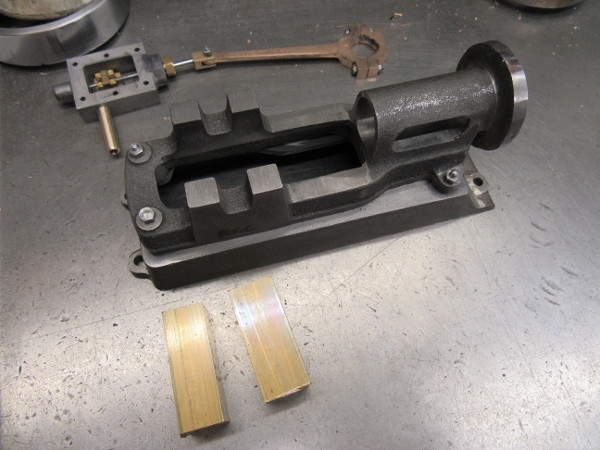
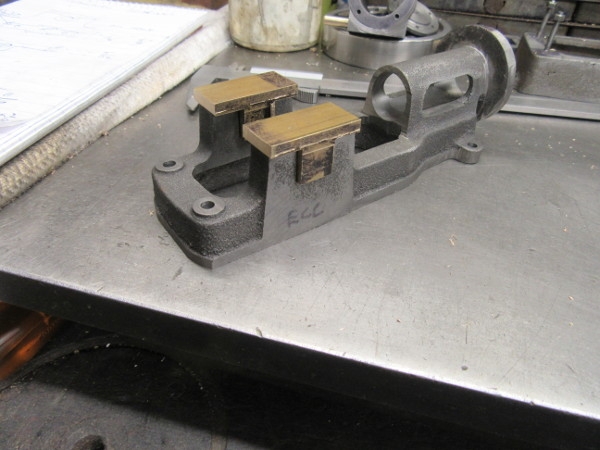
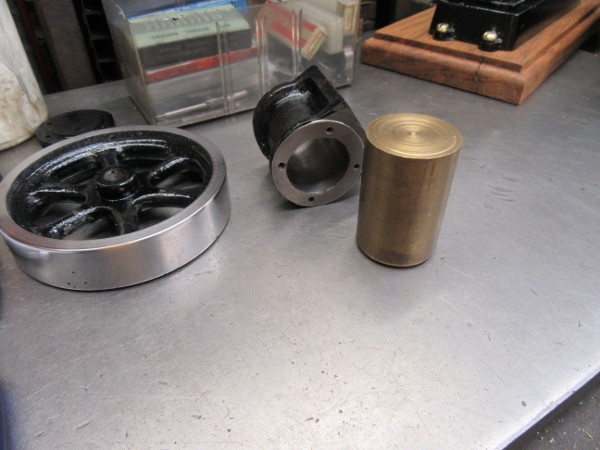
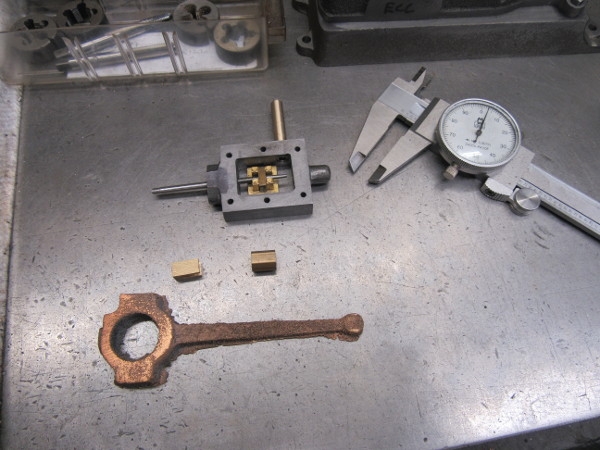
I want into the casting kit and found yet another discrepancy. There are no castings for making the bearings. Instead we have two chunks of brass, it's a DIY kit. I have about me a lot of castings that have accumulated over the years so I decided to go for a furtle and see if I had anything that would do, mainly because I like cast bronze for bearings.

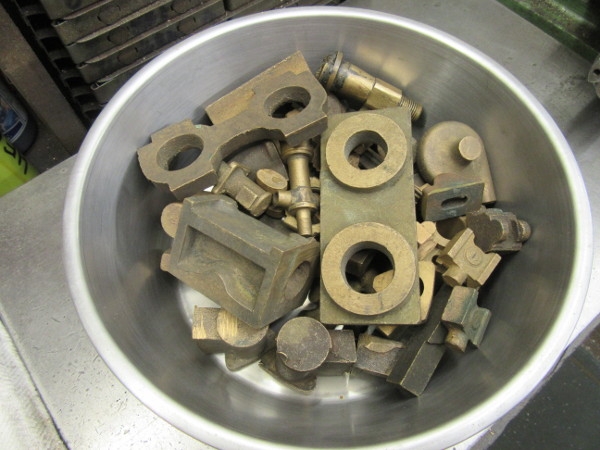
I got my brass ends box out as well and sorted all the castings into the big stainless steel bowl. I shall have to find a box for them. I have lots of castings and know what most of them are but none that will be of any use this morning.
I did a fag packet drawing and interpreted the sizes they give you. These drawings are strange and follow some convention I don't understand. You have to work out the dimensions you need from what they supply you with. Very strange but here you are, I found the right cutter and chopped out the holes for the bearings to 1/2" wide and deep.
While I was in the cutter drawer it dawned on me that if I could turn the shank of this cutter down to 3/4" it could be a useful cutter for the mill, I am wearing my scrapyard cutters down to the bone. So I set it up in the lathe and tomorrow I'll see if I can turn it.
So it's been an unusual morning but worth while. Not wasted time.
Re: Shed Matters 3
Posted: 30 Aug 2021, 07:57
by Stanley
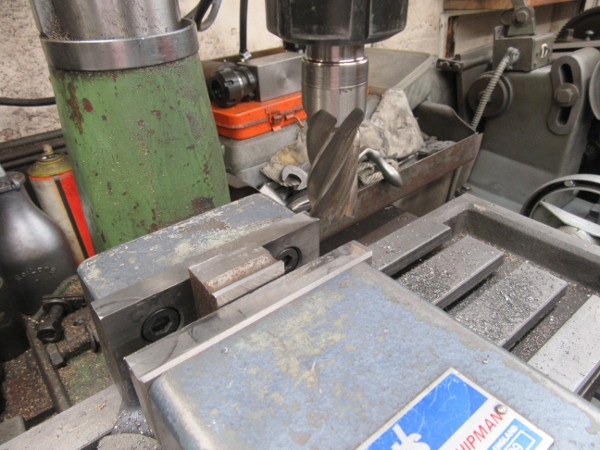
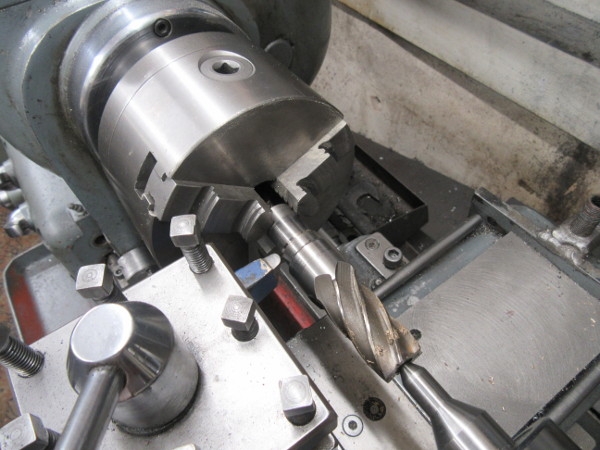
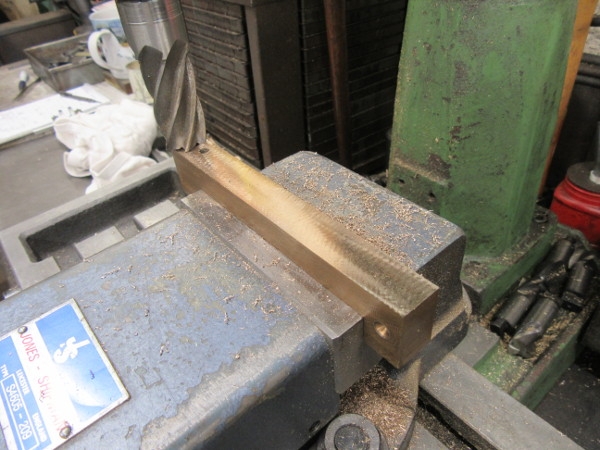
Another unusual day today in that I haven't touched the engine. I am going to see if I can turn the shank of this big cutter so I can use it in my mill. I started by making sure my dead centre was on centre by re-shaping the end as a 60 degree point.
I started turning with a small tip but that didn't last long, this shank is hard and tough. I soon put on my biggest negative rake tool and took two of the three tips of the cutter. When it was cutting it screamed at me!
This was after my last break, I decided to stop at this point and try it.
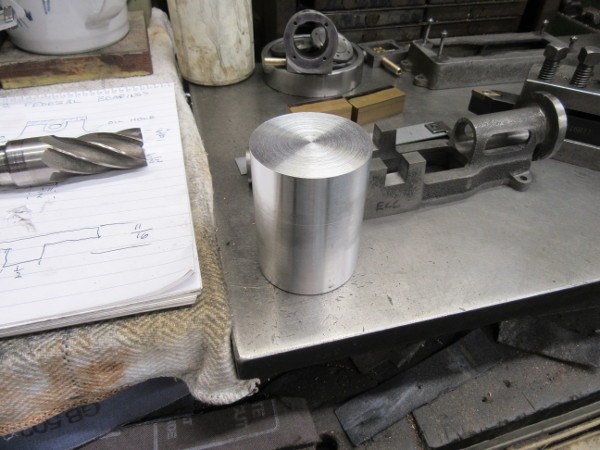
While I had a mucky lathe I cleaned up this very badly corroded slug of aluminium. As you can see It finished up as a useful piece of stock.

I tried the cutter in the mill and realised it needed a good sharpening. Once that was done it worked well and I tried to stress it a bit but it was OK. I finished by having a clean up. Two hours in the shed, no work on the engine but not time wasted.
Re: Shed Matters 3
Posted: 31 Aug 2021, 07:29
by Stanley
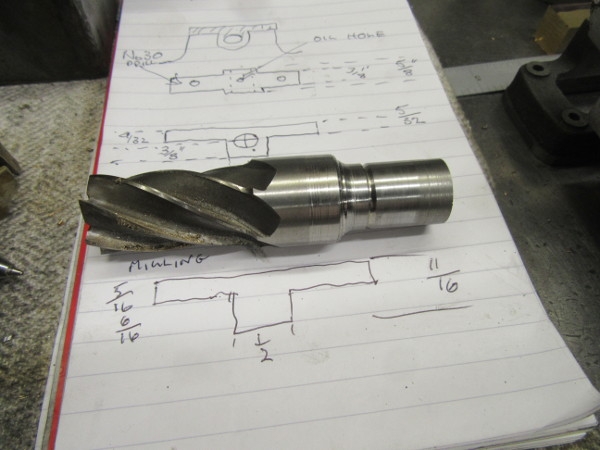
The big cutter had been nagging me all night, I knew it would be better if I could shorten by 1/2" the stick out so I had a go. I used a tough little carbide tipped cutter and it just managed it but needs a good sharpening now. I think you can see I improved the cutter. Then back to engine building!
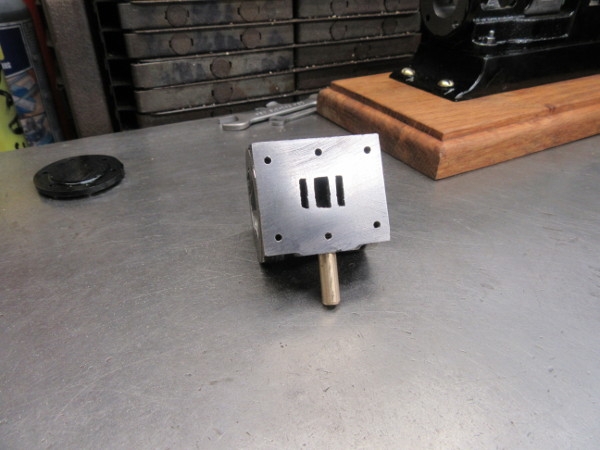
The lumps of brass given to me instead of castings are far too big and a lot has to be cut out of them. The first move was to get a square end on each of the two pieces so I could do some accurate measuring and marking. This cutter is good at this!

I treated myself to a new blade and cut the stock to approximate length.

Then into the mill and once I had squared the end I had cut I marked up what I had to cut out. Then I had a new set up and cut the bulk of the waste out.
At closing time I have the bearings roughly cut out and now we need to do some finishing. I have no doubt more milling will be needed!
Re: Shed Matters 3
Posted: 01 Sep 2021, 06:54
by Stanley
Re: Shed Matters 3
Posted: 03 Sep 2021, 07:04
by Stanley
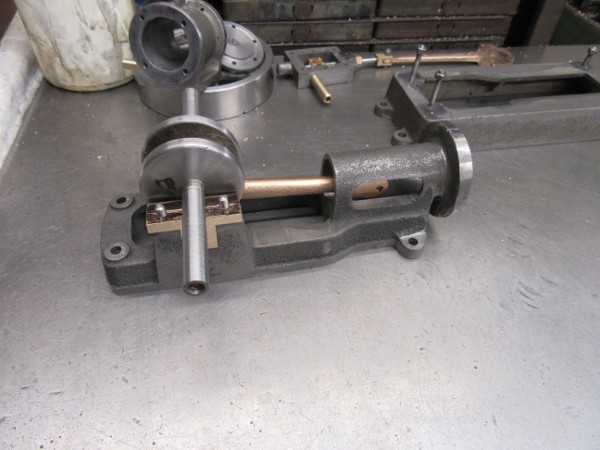
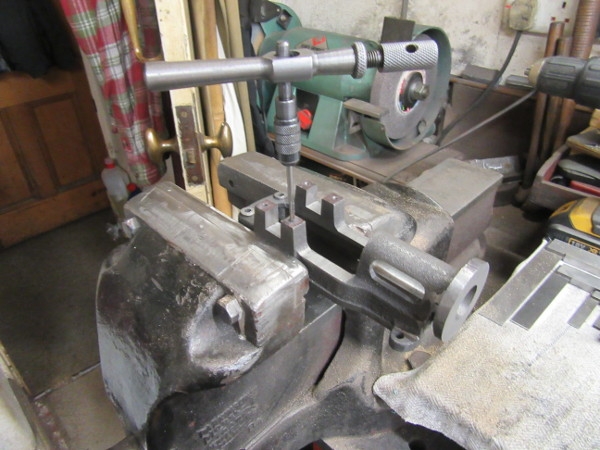
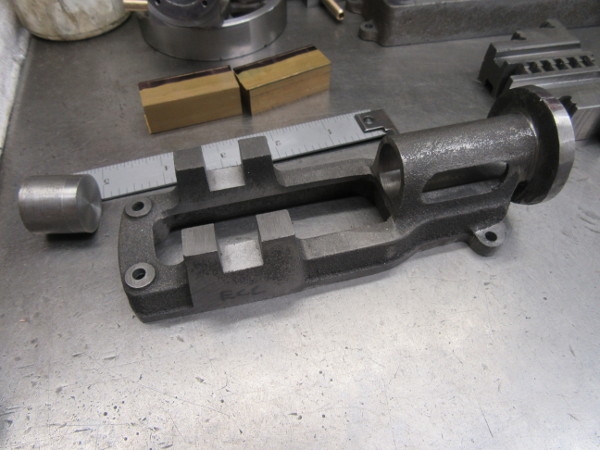
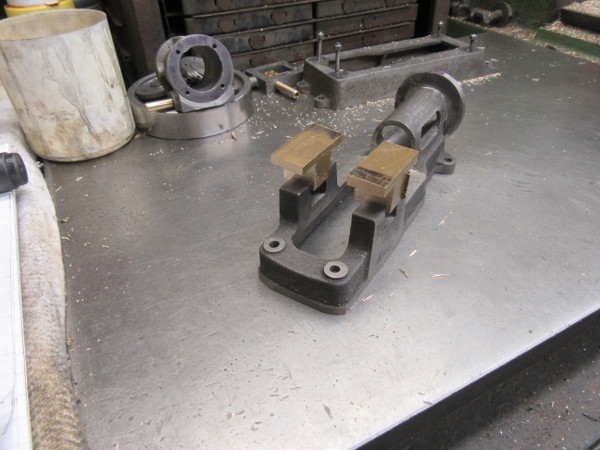
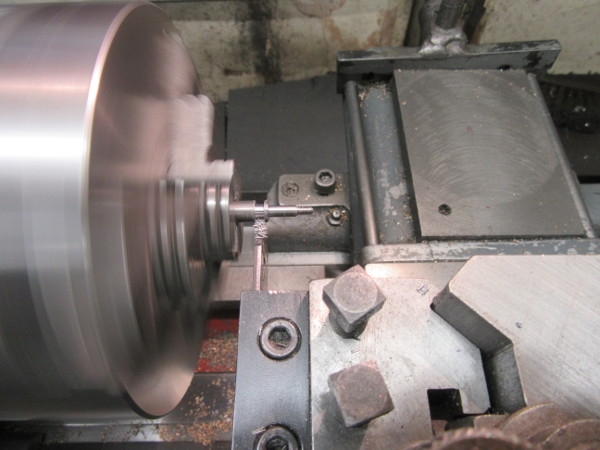
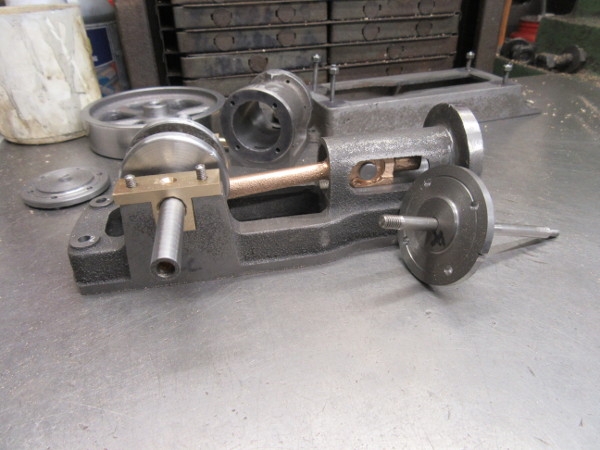
This was the job, fit the crankshaft to the bearings. Some careful work.....
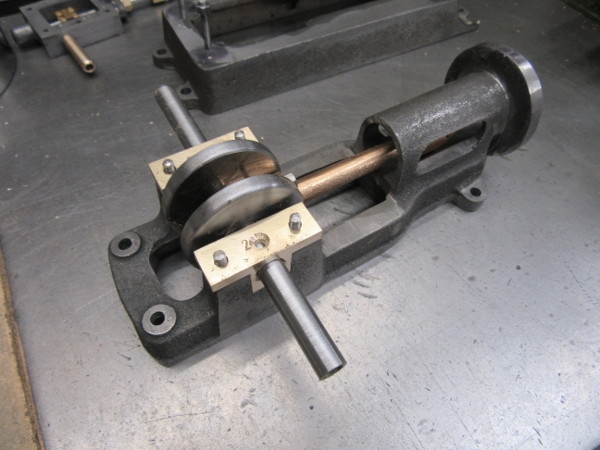
That went well, we have a viable fit and it turns nicely. Now for the crosshead....
I did a bit of enlightened cleaning up on the very irregular casting, got it in the chuck, turned the spigot clean, straightened the end up and turned the external diameter to fit the trunk slide. I took it out to have a measure up and do the other end.
That was when I got my surprise. The casting is neither the right shape or long enough to finish to the sizes in the drawing. A bit of thought is needed before we go any further!
I had a look in the bunch of miscellaneous castings I sorted out the other day and found two crosshead castings, beautiful clean castings but unfortunately not capable of being used in this engine. This set of castings hasn't finished with me yet!
Re: Shed Matters 3
Posted: 04 Sep 2021, 07:36
by Stanley
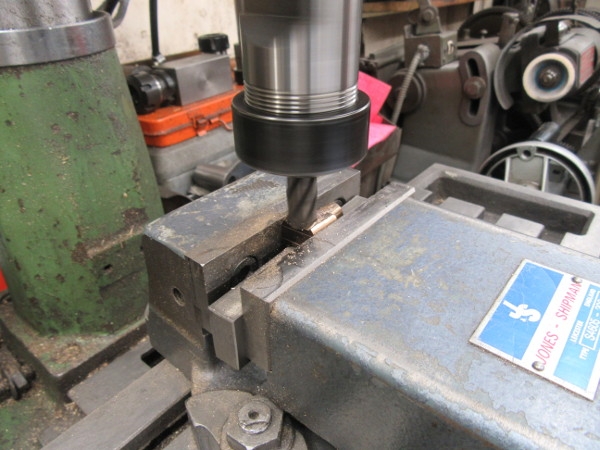
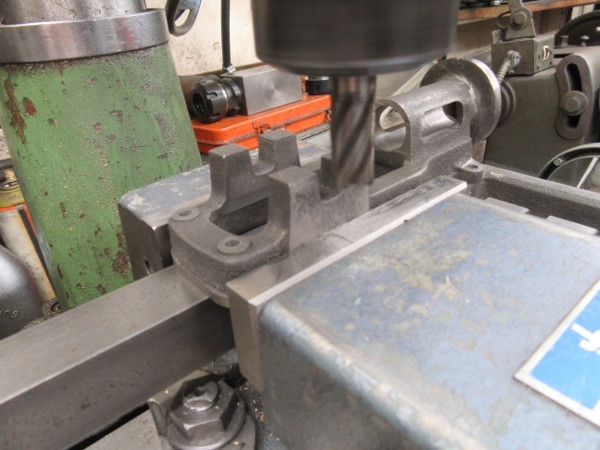
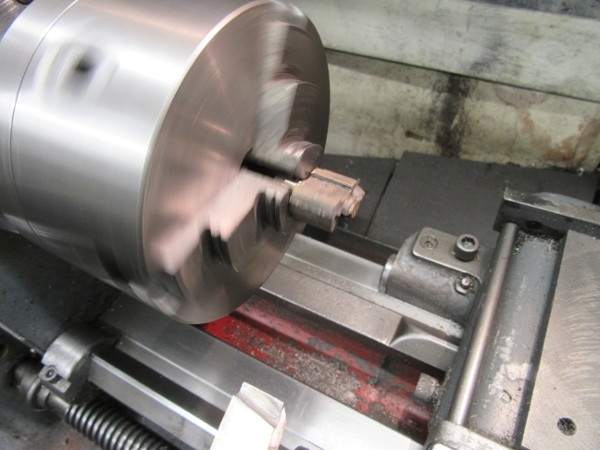
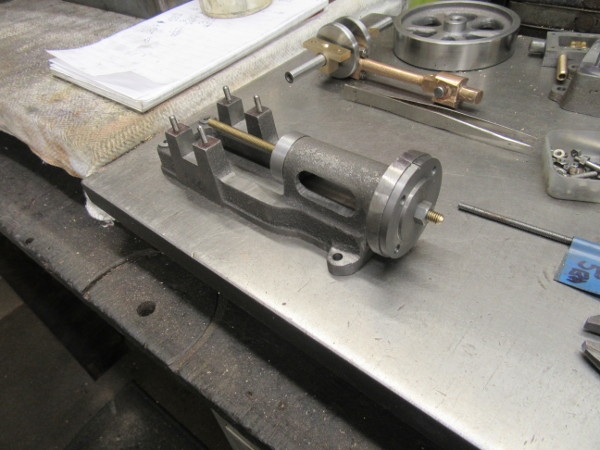
I started the day by doing some milling to get the crosshead nearer to the drawing.
I got to this point and when I drilled the crosshead for the pin I trusted the drawing and drilled it 5/32". Then when I put the connecting rod next to it to start fitting I realised there was something very wrong. God knows where they got that measurement from but my first job tomorrow will be to bush the hole and drill it the correct size.
I had a trial fit and up to press, apart from that hole, all is well and it turns freely with no interference in the crosshead. It shouldn't alter when I correct the crosshead pin hole.
Last stroke was to take the 1/2" cutter out of the mill and replace the bigger cutter. I took the opportunity to give it a touch up because it isn't yet up to my standard. Then I did a test cut and got a better result. That was it, just over two hours and we have made progress. Just annoyed about that 5/32" hole!
Re: Shed Matters 3
Posted: 05 Sep 2021, 06:59
by Stanley
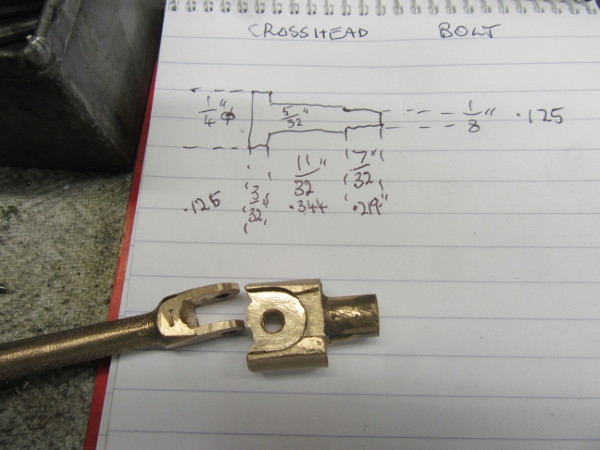
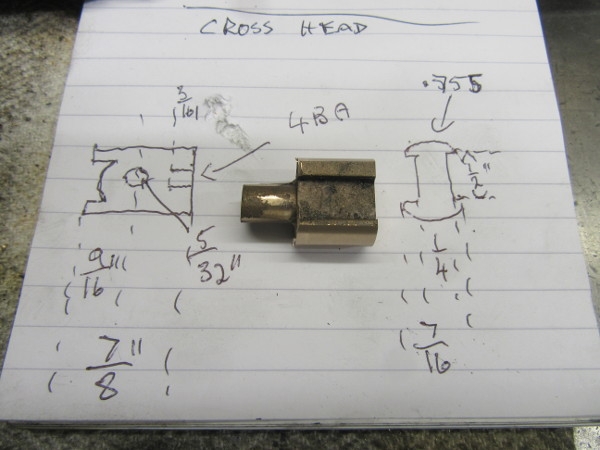
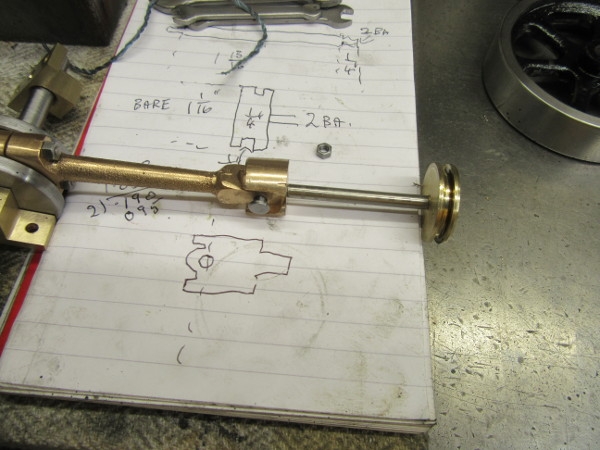
I told you yesterday about the problem I had hit and my first instinct was to make the crosshead fit the bolt I was using for a crosshead pin. But than I had another look at the drawing and found that the crosshead agrees with the drawing of the crosshead pin that is shown in the drawing. I hadn't looked for this because it's different from the dimensions of the clevis in the connecting rod. To further complicate matters the description of the pin in the parts list is 1/4" X 1" which is obviously completely wrong. So I ditched the idea of bushing the hole to fit the bolt and did a fag packet drawing of the original pin. I shall make this and fit it.
A bit later after some watchmaking......
Then another spell of fitting and adjusting. Difficult when you can't see properly! The standard of work isn't high in terms of finish but superb in terms of accuracy. The crankshaft spins easily and the crosshead fits the trunk slide. Tomorrow I shall look at finishing the crosshead, making the piston and rod and fitting it to the cylinder. 90minutes of quiet careful work and more progress despite the drawings speaking with forked tongue!
Re: Shed Matters 3
Posted: 06 Sep 2021, 07:11
by Stanley
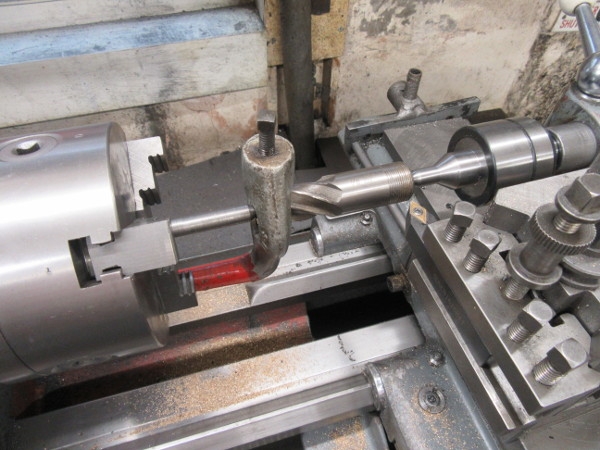
The task today is to marry the cylinder to the target face on the bed. If my previous work had been dead accurate it would be a doddle but of course it isn't because I don't do accuracy any more when drilling and tapping!
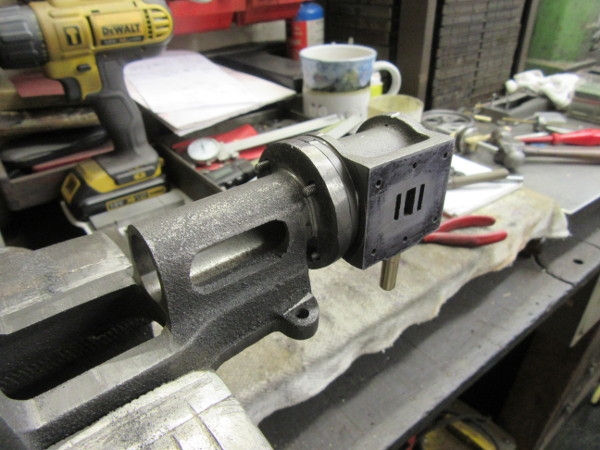
It took me an hour and a half, I won't bore you with the details, suffice to say it's a lot to do with a pot hard cylinder!
I decided that as it was getting close to time for building and the fact that tomorrow I can work without touching these parts it could be time to paint the castings black. I'm glad to get out of the shed this morning....
Re: Shed Matters 3
Posted: 07 Sep 2021, 06:41
by Stanley
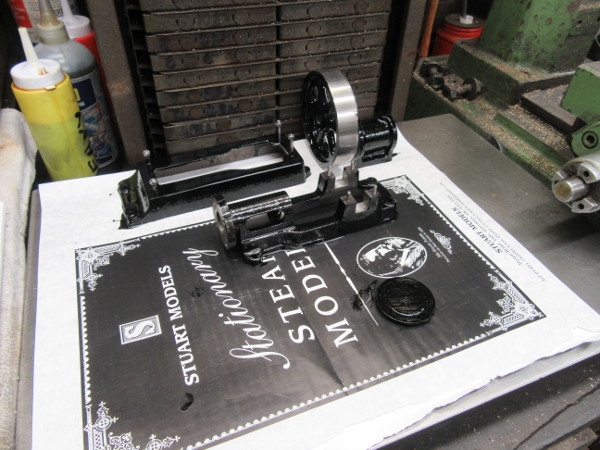
I was in the shed early6 this morning convinced I was going to be working on the piston and rod. When I saw how well the Humbrol black paint had dried I decided to concentrate on the castings.
I got stuck in and here's the bed and sole plate mounted on the oak plinth. I like to do my final fit like this because it takes the original shine of the paint and is more authentic.
I went through my horrible cylinder, re-tapping all the drillings to make sure none were clogged with paint or muck. I polished the valve face and cut the exhaust pipe back because due to the design it was interfering with the stud hole in the valve face.

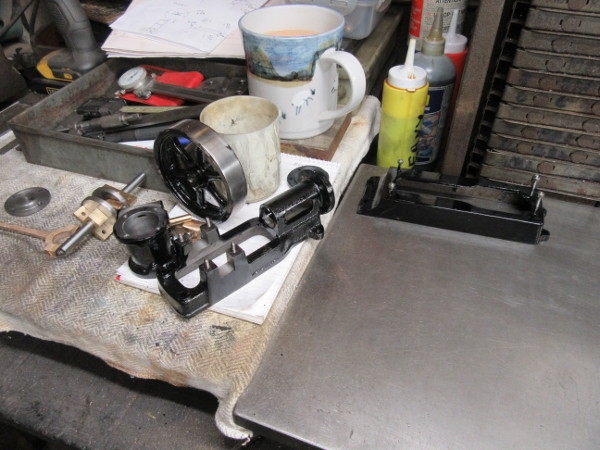
Next I addressed the flywheel, cleaning the excess paint off by re-turning it and then re-polishing both sides. I forgot about the hard shops and knocked the edge off my HSS cutter so I swapped to carbide.
Here's where I ended up with the castings. Ready in all respects for some serious fitting. I cleaned Mrs Harrison and re-sharpened my HSS cutter and honed it. I could have started on the piston and rod but left that for a nice easy start tomorrow. It's good progress, an hour and a half spent effectively and no mistakes. That makes a nice morning!
Re: Shed Matters 3
Posted: 08 Sep 2021, 07:37
by Stanley
Re: Shed Matters 3
Posted: 09 Sep 2021, 07:41
by Stanley

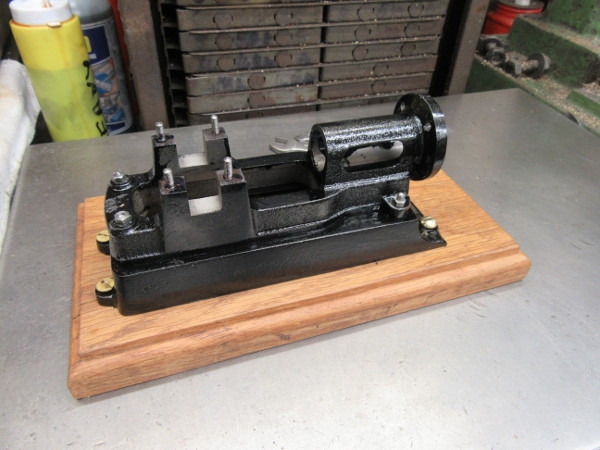
Only two pics today, I was too busy doing fiddly things to my engine. I found that despite checking more times than you could poke a stick at I had the cylinder on the wrong side of the bed. Never mind, it'll have to stay there. I cut the crosshead back to size and refitted it threaded ready for the piston rod. Then I tried to fit the piston..... I haven't managed yet! It was hot in the shed so I knocked off. I shall not be touching it tomorrow as it's a set off day for me and Susan and Co-op shopping as well early doors. The problems are down to two things, the lousy castings in this set and my age.... I am not the man I was when it comes to these things! Never mind.... things could be worse, at least the engine looks good!
Re: Shed Matters 3
Posted: 10 Sep 2021, 10:20
by Big Kev
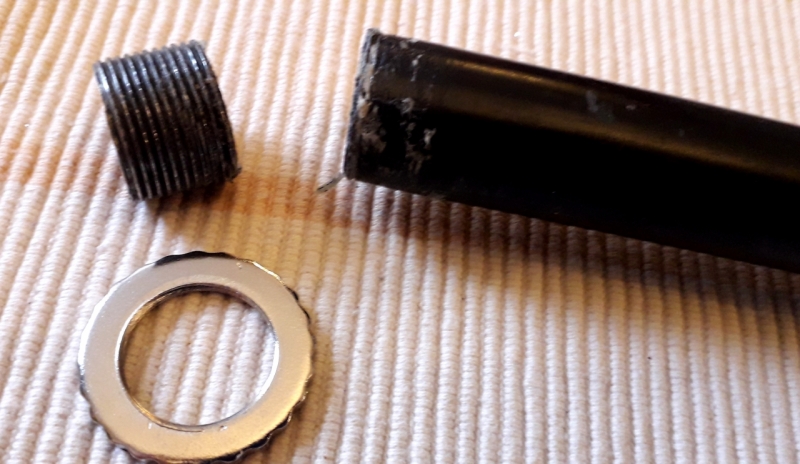
Do you have any 16mm round bar I could have? Middle offspring has snapped his microphone stand, I'm after a bit about 3 or 4 inches long so I can araldite it in the broken tube.
Re: Shed Matters 3
Posted: 10 Sep 2021, 11:53
by Stanley
If I haven't I can soon make some. Pop round Kev.
Re: Shed Matters 3
Posted: 10 Sep 2021, 14:16
by Big Kev
Stanley wrote: ↑10 Sep 2021, 11:53
If I haven't I can soon make some. Pop round Kev.
And he did indeed, top job thank you.
20210910_135845.jpg
Re: Shed Matters 3
Posted: 10 Sep 2021, 17:52
by Big Kev
Middle offspring is very grateful and passes on his thanks. There's a good 4 inches of rod inside the tube. I didn't push it all the way in as the stand was a few inches too short for him, it should be spot on now.
20210910_160420.jpg