Page 56 of 125
Re: Shed Matters 3
Posted: 15 Oct 2021, 03:21
by Stanley
Day off today lads, I am taking daughter Susan for lunch. Eat your hearts out!

Re: Shed Matters 3
Posted: 16 Oct 2021, 06:44
by Stanley
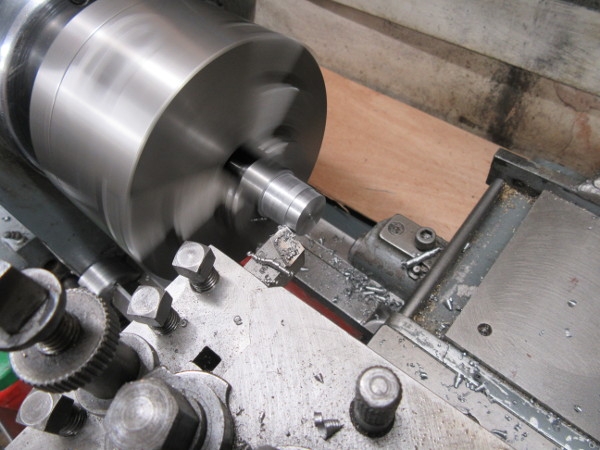
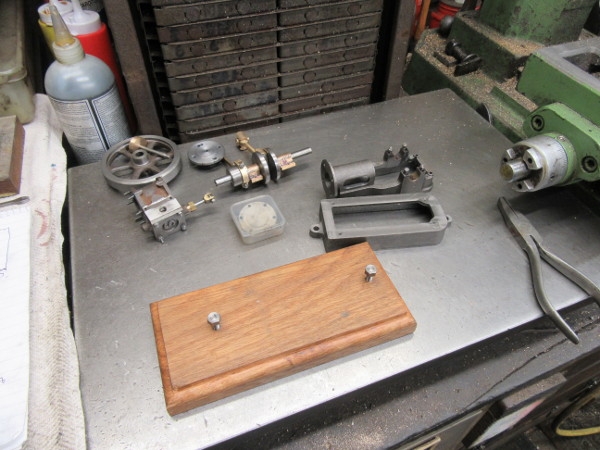
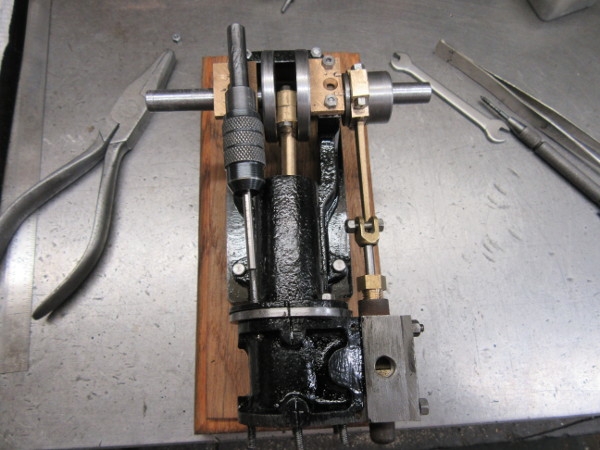
Back at the bench for an hour and a half. The first job was to fit the studs and nuts to the back lid.
The way I did that was to re-tap the holes in the cylinder via the new clearance holes in the lid so they line up perfectly. It worked and I was at the point where I could look at the piston and think about checking the fitting of the cylinder.
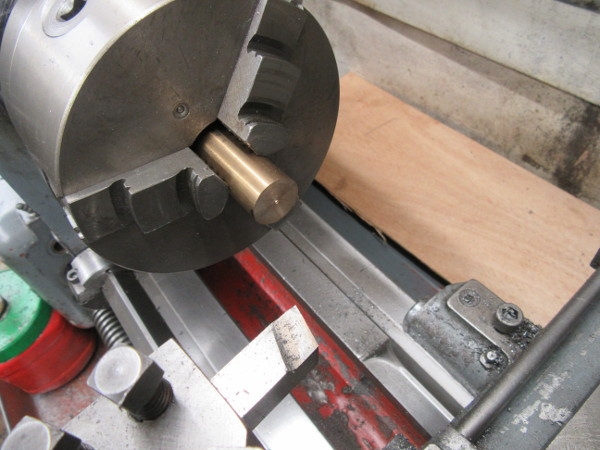
Not sure why but I found the threads in the piston were sloppy so I made another piston out of bronze and fitted it.
This is where I finished up. Before I go any further I need to fit the steam chest and lid. When I fit the cylinder I want to be ready to make the eccentric and fit it, the valve rod and the flywheel. A light 90 minutes but enough. I am aware I have the flu jab in my veins.
Re: Shed Matters 3
Posted: 17 Oct 2021, 07:41
by Stanley
Re: Shed Matters 3
Posted: 18 Oct 2021, 07:32
by Stanley
Re: Shed Matters 3
Posted: 19 Oct 2021, 07:24
by Stanley

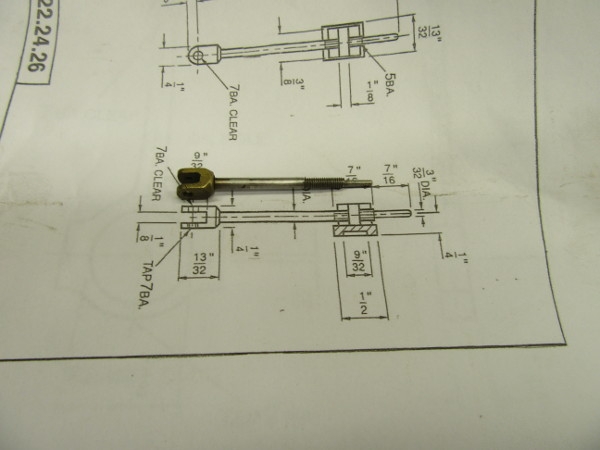
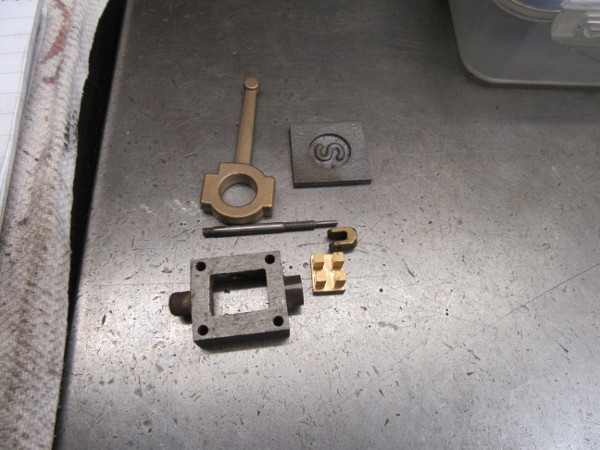
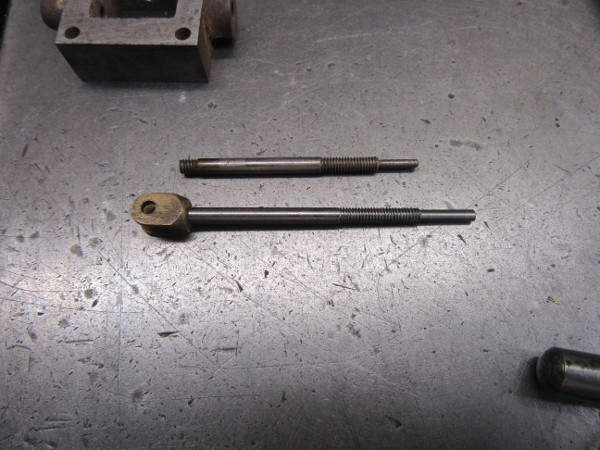
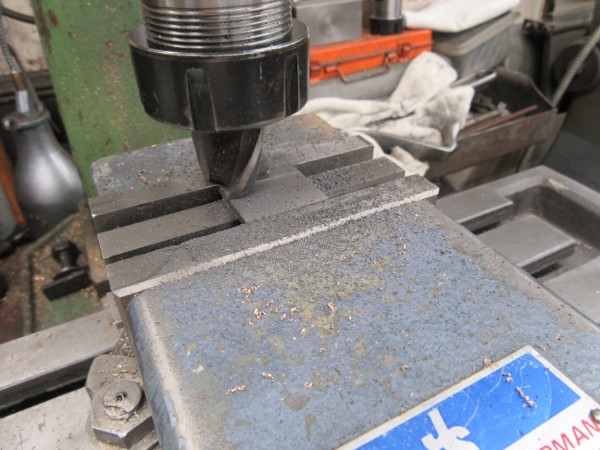
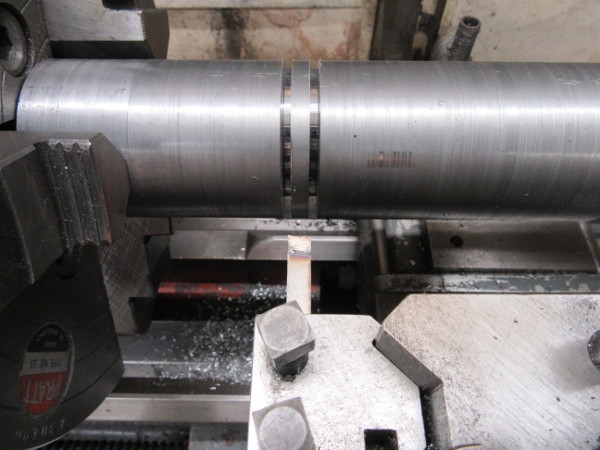
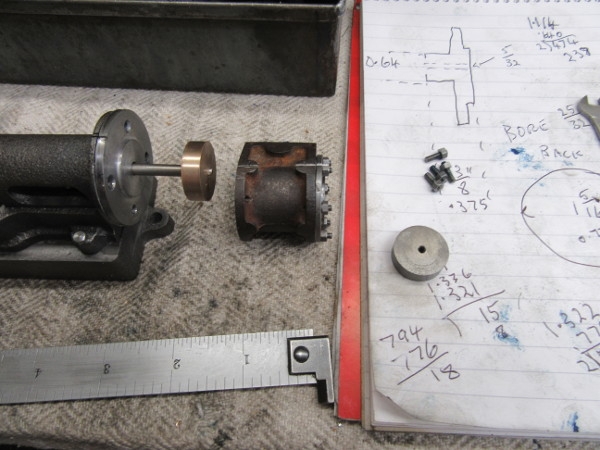
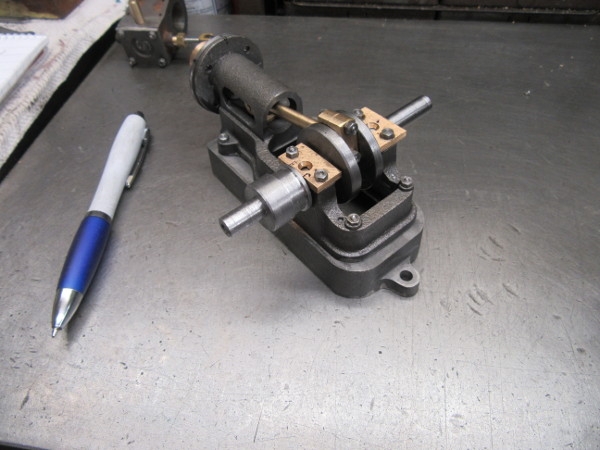
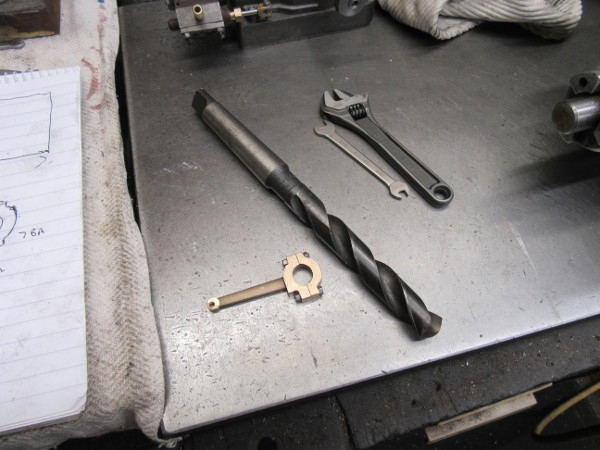
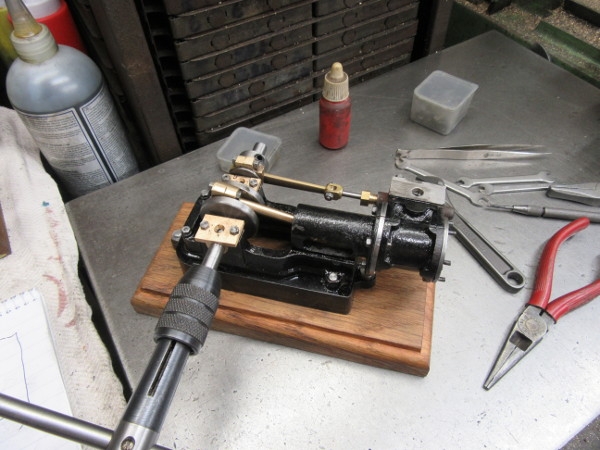
The first job this morning is to make the gland for the valve rod. The pocket for the gland is already threaded but I am running the 1/4" X 32tpi tap into it just to make sure it's correct.
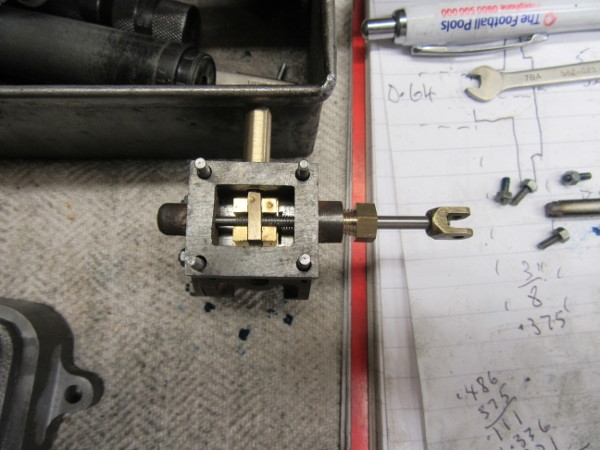
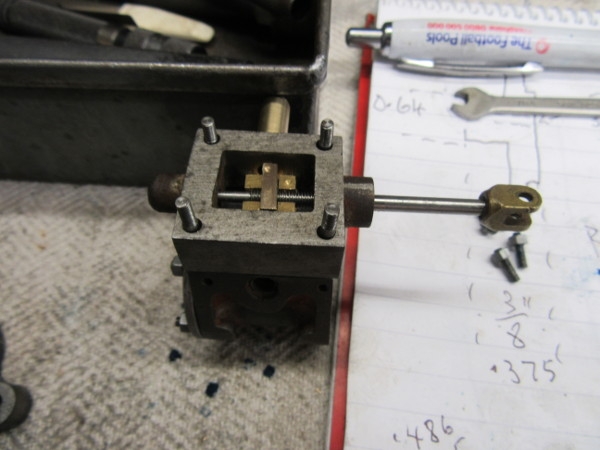
After a short interval here we are with the gland installed and the valve and rod fitted.
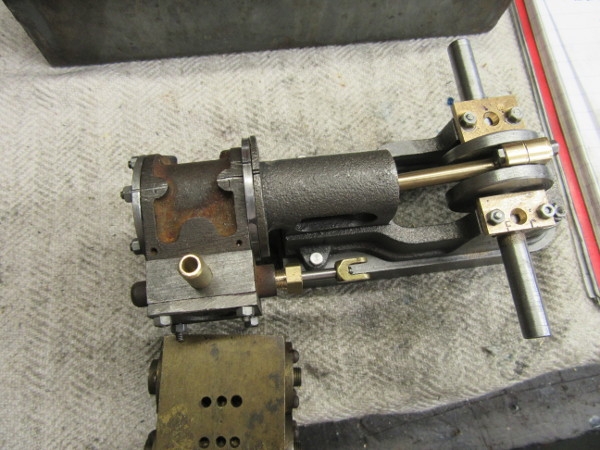
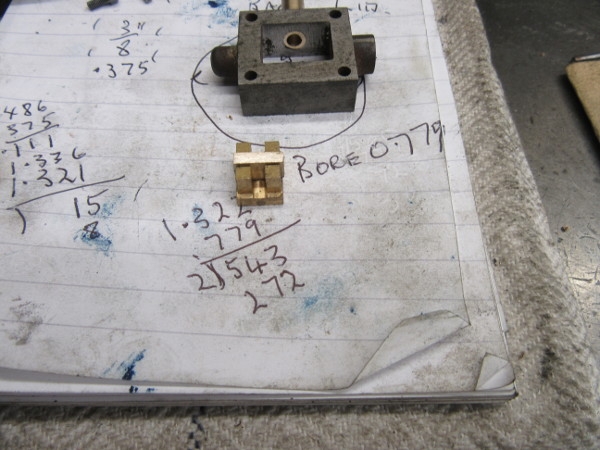
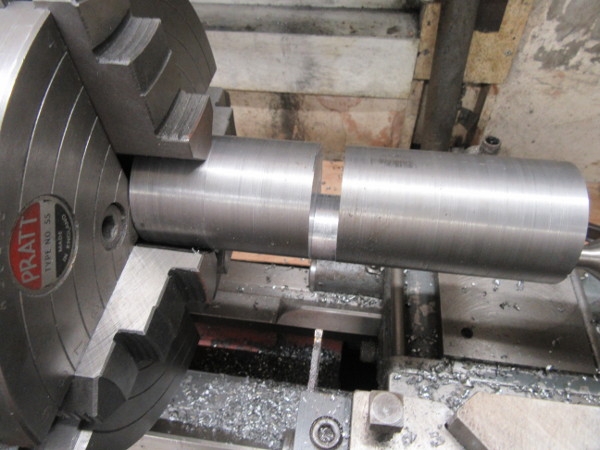
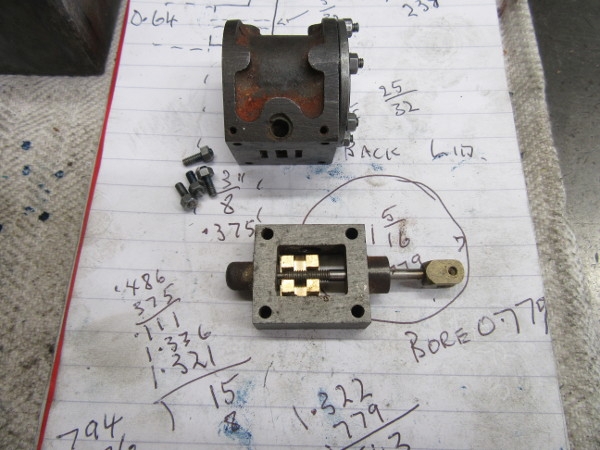
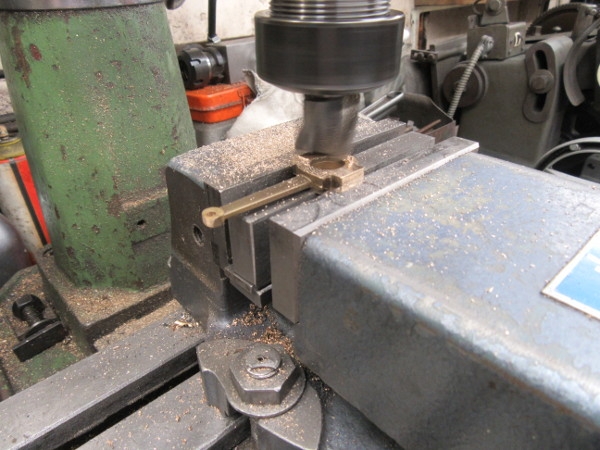
My 7BA nuts arrived yesterday so I popped four on the steam chest lid. Here we are with the cylinder offered up. We need to think about the eccentric.

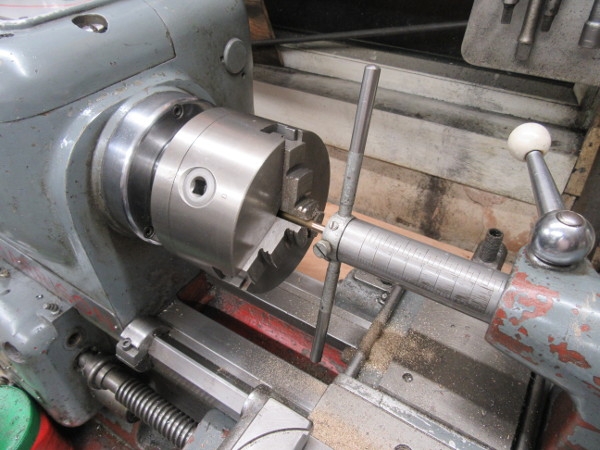
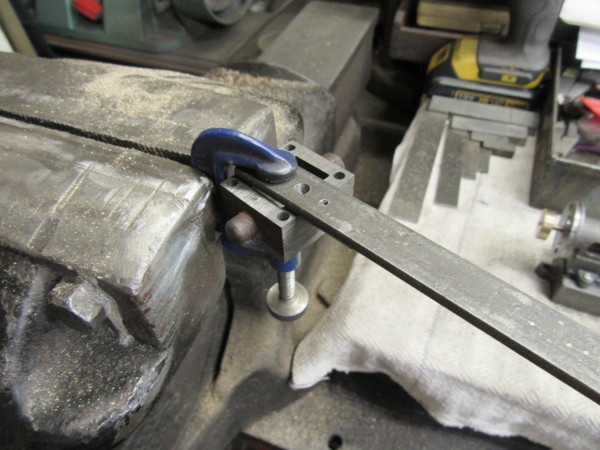
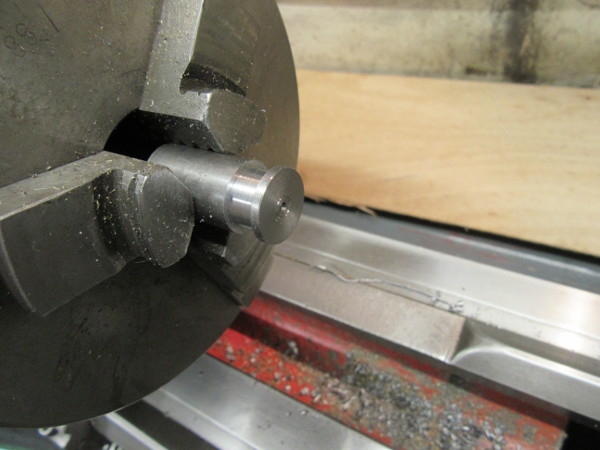
I found a piece of scrap that will do nicely for the stock. Here I am measuring and scribing the throw of the eccentric, 3/32", on the end of the stock.
I measured the eccentric rod and cut a suitable groove for it to run in. I am not doing the eccentric the Stuart way, far better to give it more bearing surface.
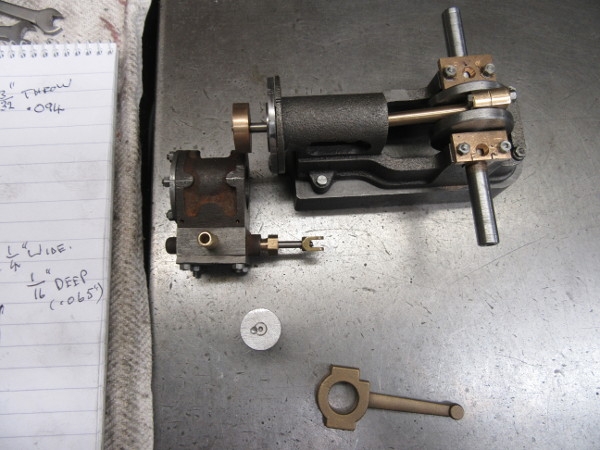
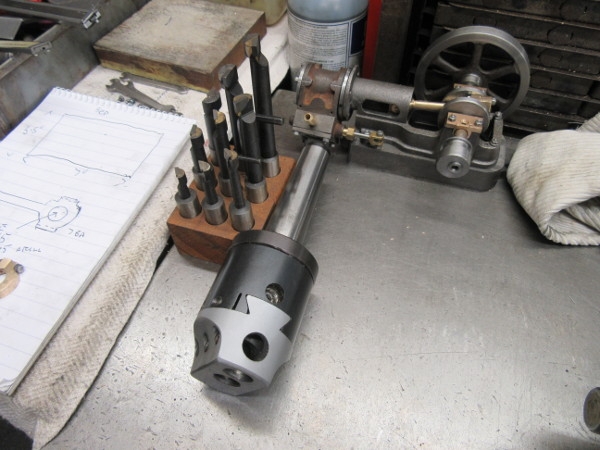
Closing time, we have a cylinder ready for final fitting and the stock for the eccentric ready for mounting in the 4 jaw independent chuck for eccentric turning.
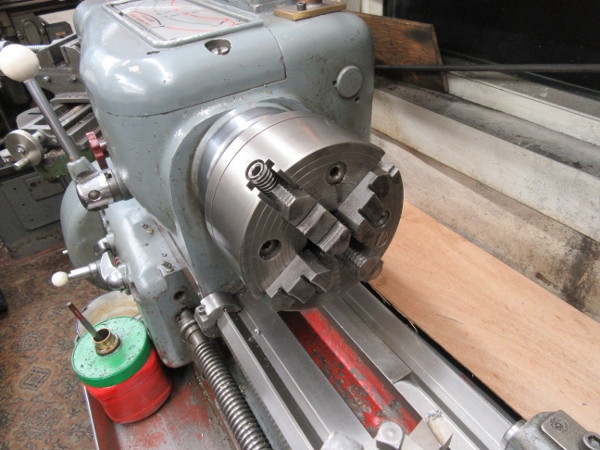
My last move was to clean Mrs Harrison and mount the 4 jaw ready for tomorrow. A nice quiet productive morning.
Re: Shed Matters 3
Posted: 20 Oct 2021, 03:58
by Stanley
The first thought that entered my head when I woke this morning was that I shouldn't have fitted the four jaw as under the new Graham Eccentric Regime all I have to do is drill the eccentric body eccentric and this can be done under the drill.....
Re: Shed Matters 3
Posted: 20 Oct 2021, 07:29
by Stanley
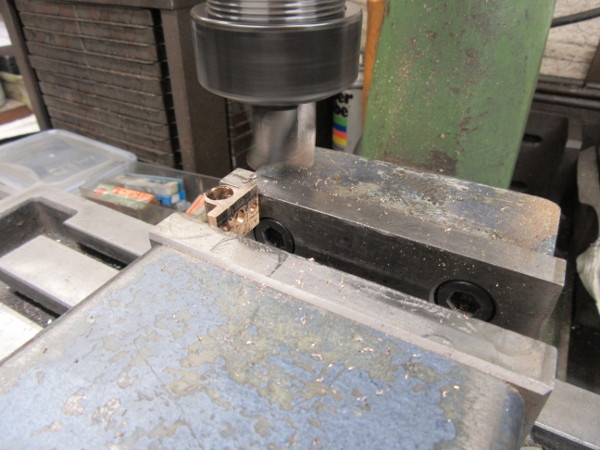
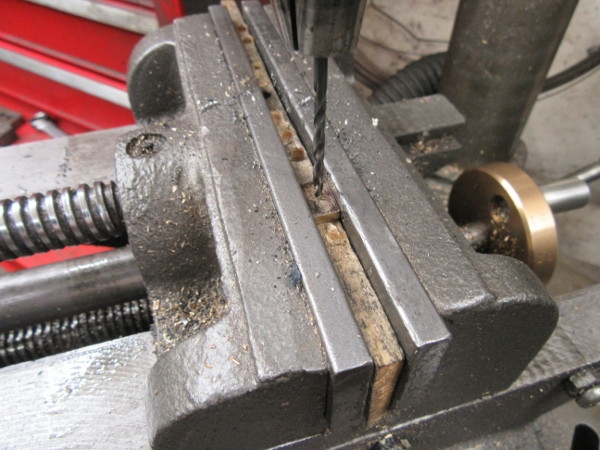
The best laid schemes of mice and men..... I changed the chuck back to the 3 jaw and bored the eccentric to fit the fly shaft.... nowt to it. But then I got this....

I'd got me measurements wrong and the drill broke out of the side of the eccentric.
Only one thing to do, check the measurements, decide what went wrong, get stuck in and make another one!
Knocking off time, I got this one right and need to finish it tomorrow before attacking the eccentric rod. All right I cocked up but time in the shed is never wasted and it's always nice to solve a problem even if it was you who caused it!
Re: Shed Matters 3
Posted: 21 Oct 2021, 07:30
by Stanley
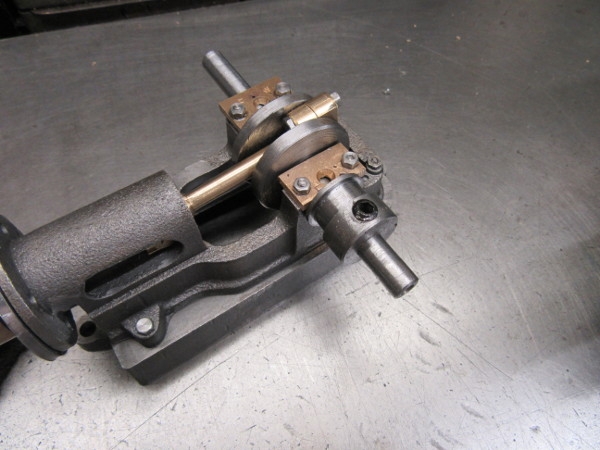
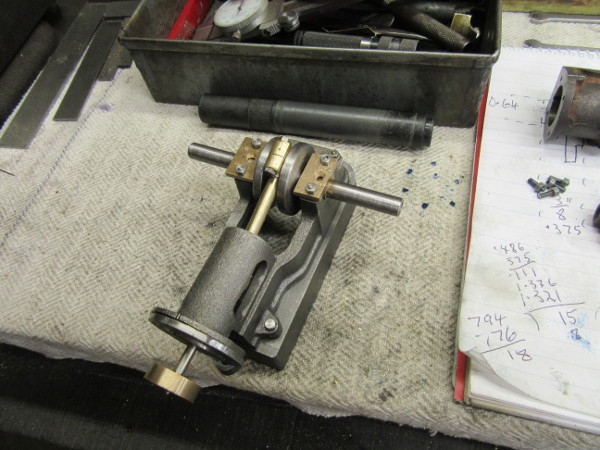
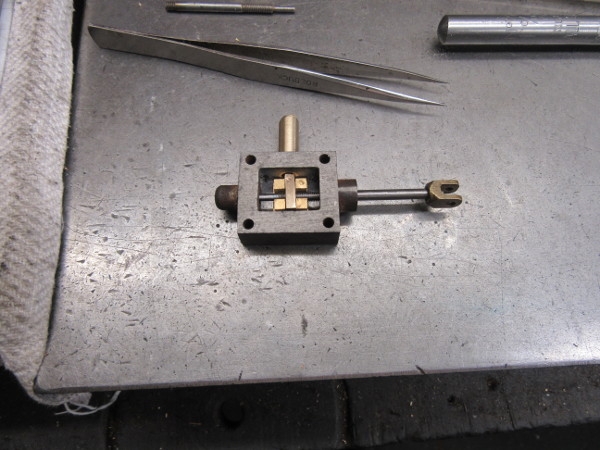
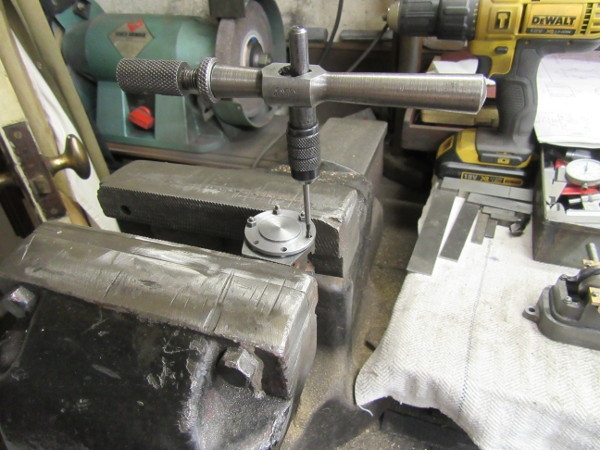
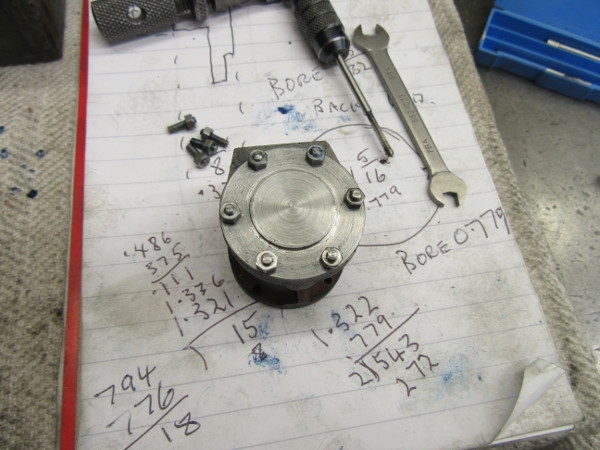
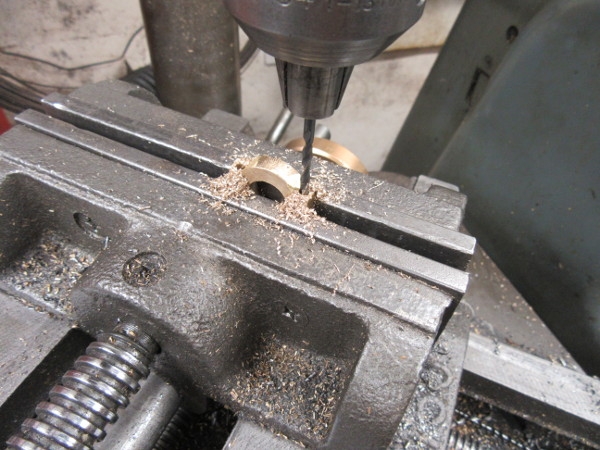
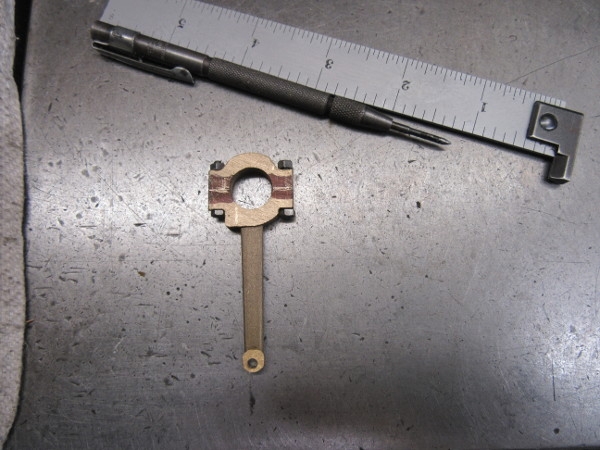
First thing this morning was to finish the eccentric, polishing the track the strap runs in and fitting a 1/4"Whitworth Unbrako grub screw. This is possible because I haven't turned the body down around the bore. It means I have a very positive lock on the shaft.
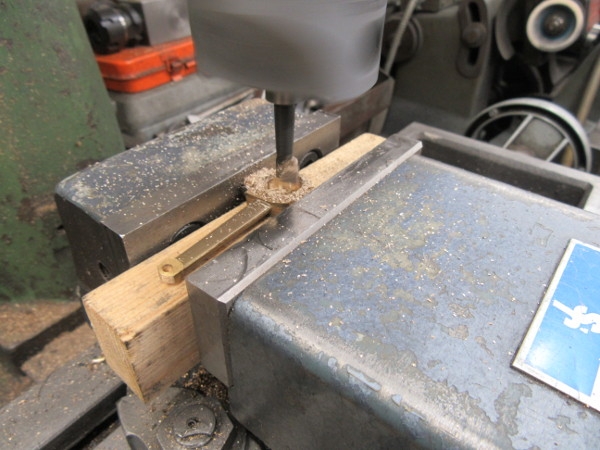
On to the strap. The first job was to make the end a good fit, drill it 7BA clear (2.6mm) and fit a 7BA nut and bolt. It took longer than you'd think.
Then a period of hand work with files in the vise and then under the mill to get the thickness of the big end of the eccentric strap a nice fit in the channel in the eccentric.
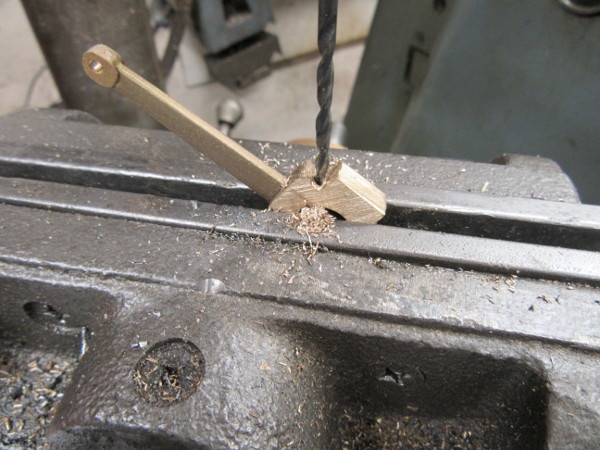
Then drill the oil hole in the strap and spend some time finishing surfaces and breaking sharp edges.
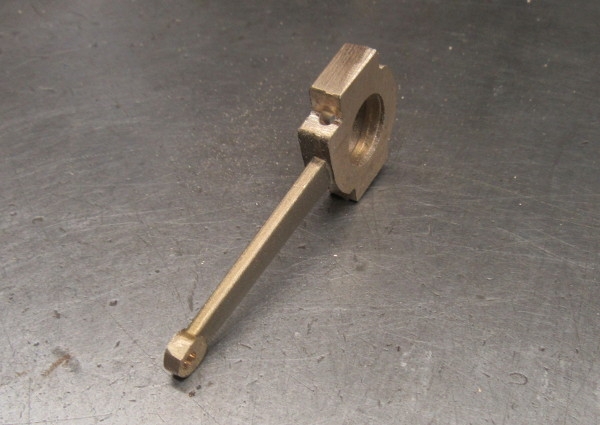
Not a bad morning, here we are at closing time ready for the final moves on the eccentric. We need a wooden base here....
Re: Shed Matters 3
Posted: 22 Oct 2021, 04:18
by Stanley
In a moment of weakness yesterday I ordered another set of castings from Stuarts. I've decided to make a Stuart Number 9 and not get straight into the Shand Mason pump. I need to do a lot more research on that before I get into it.
[Now I'm feeling guilty about spending the money....]
Re: Shed Matters 3
Posted: 22 Oct 2021, 06:45
by Stanley
No shed this morning Lads. I shall be on parade tomorrow.
Re: Shed Matters 3
Posted: 22 Oct 2021, 08:08
by BobH
I always thought that money was for spending, Stanley. Is a no.9 larger than a 10?
Re: Shed Matters 3
Posted: 22 Oct 2021, 10:00
by Stanley
'Money is for spending' only applies when you have plenty....
Is the No 9 bigger? Funnily enough yes, It's 11" 0verall length and a 5" diameter flywheel. (10H is 6.5" overall and a 3" diameter wheel.)
Re: Shed Matters 3
Posted: 22 Oct 2021, 10:26
by BobH
Good, I hope that means larger thread sizes as well

Re: Shed Matters 3
Posted: 22 Oct 2021, 11:37
by Stanley
I think so Bob. I'll admit I had that in mind! The castings arrived this morning. Stuarts don't give you the option, next day delivery with the larger casting sets.
Chunky castings so they might not be as prone to chills! Certainly an improvement on the 10H!
Re: Shed Matters 3
Posted: 22 Oct 2021, 12:06
by Tripps
I did a google and found this.
Stuart No 9 bought on ebay
Two thoughts -
1. Increased respect for the engineers who built the original full size engines. Looks for recording of James and Mary Jane.
2. Love the quote "is it me or does this crankshaft look like a banana"

Good luck with it all. It will look magnificent. More like this one hopefully.
Stuart No 9 running
Re: Shed Matters 3
Posted: 22 Oct 2021, 12:22
by Stanley
I had a look at the video David and yes, that's not good. That crankshaft has been built up and that could be at the root of it looking like a banana. I promise I'll make one out of the solid and it won't be bent!
As it is dry I have just spent half an hour outside with the chop saw, router and sander. I have two nicely moulded oak beds for a 10H. (Two because you never know I might make another for a present.....)
Re: Shed Matters 3
Posted: 22 Oct 2021, 15:13
by MickBrett
Stanley
Regarding your miscalculation with the drill position.
"The man who never did anything wrong, never did anything"...
Re: Shed Matters 3
Posted: 23 Oct 2021, 03:00
by Stanley
Thanks Mick but the real fault was that I was lazy and didn't work out the sizes correctly. Once you go off piste with the drawings (and I have a tendency to do that....
) you have to take extra care and I didn't!
Re: Shed Matters 3
Posted: 23 Oct 2021, 07:33
by Stanley
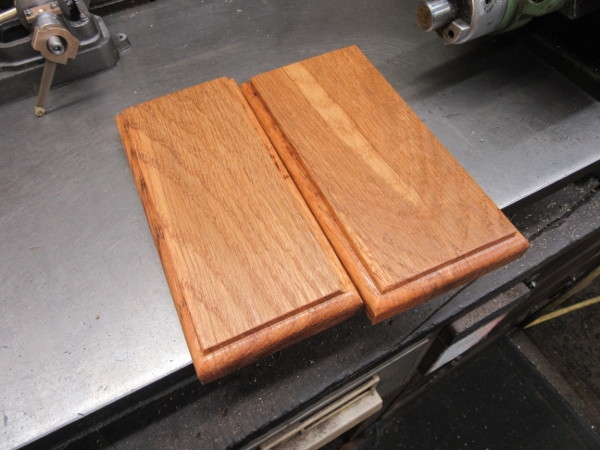
Yesterday I took advantage of the dry afternoon and got the chop saw, the router and the orbital sander out in the back yard and made two moulded plinths that suit the 10H. (I may make another one later as a gift.) This morning the first thing I did was oil them with raw linseed oil, my favourite finish on oak.
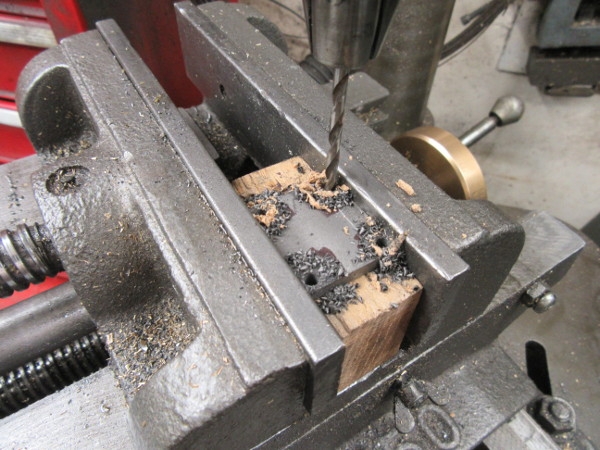
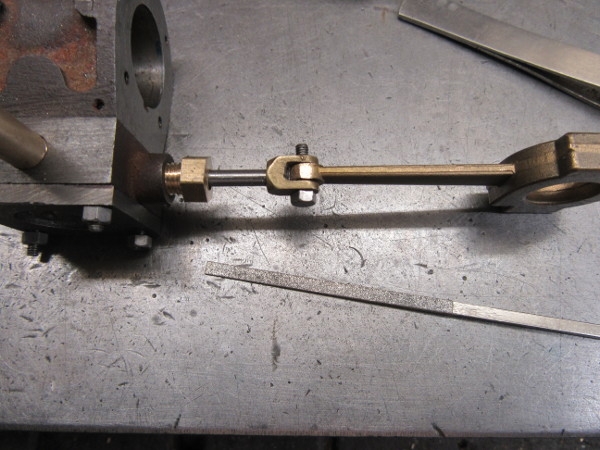
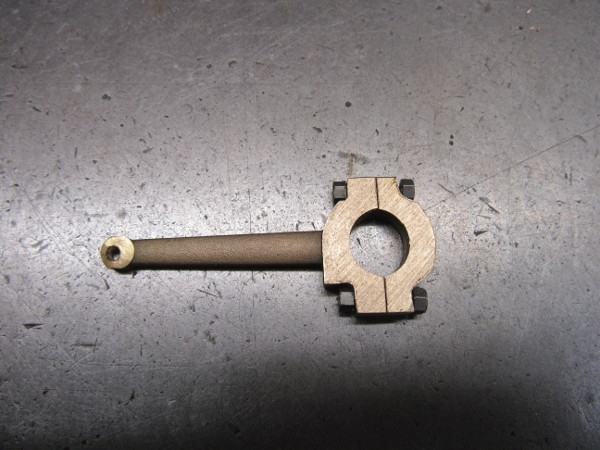
Back to the eccentric rod. First thing was to finish filing it to shape and then drill the holes for the bolts that will hold it together when it has been split and bored.
Marked for splitting.
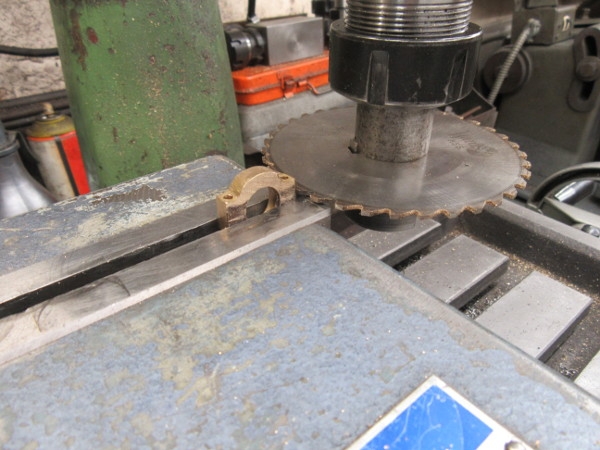
Then into the mill to split it with a slitting saw.
Ready for boring.....
Never miss a chance to touch a cutter up especially when it has signalled it's ready for gulleting.
My last job was to find a 15.5mm drill which will be the finished size for the bore.
Good quiet progress and only one dodgy bit of milling left to do. That can wait until tomorrow.
Re: Shed Matters 3
Posted: 24 Oct 2021, 07:12
by Stanley
I don't know what I was thinking about yesterday. There was no way I could have bored such a delicate part with a 15.5mm drill without destroying it. What we needed was the boring head and a small cutter.
Very careful small cuts and frequent measuring!
I got the size as near perfect as you could hope for. It's a tight fit but will soon loosen up as the engine runs in.
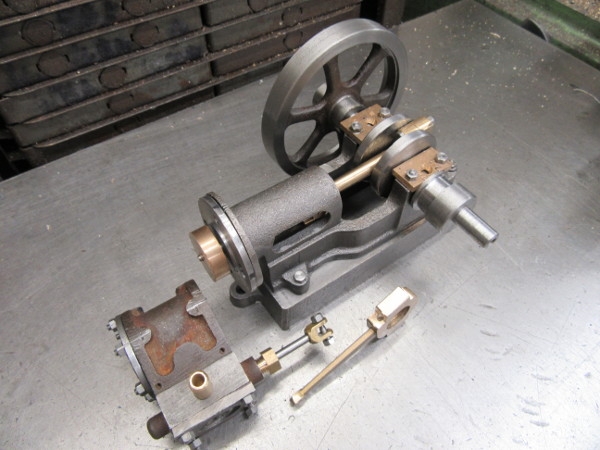
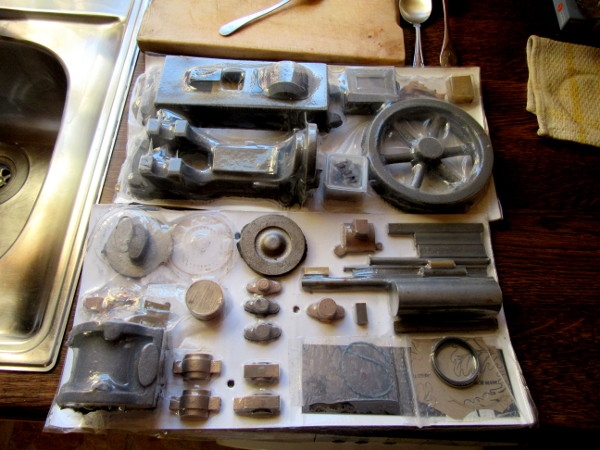
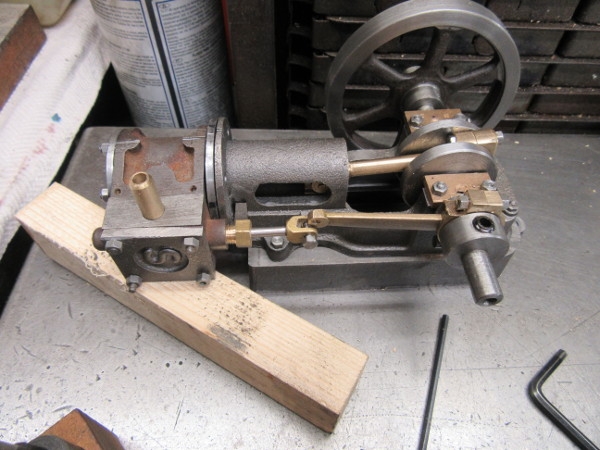
Then I stripped the engine down and attended to one or two parts that needed better fitting. Next, mark the plinth and fit the 2BA holding down bolts for the bed. They are glued in place and should be fine.
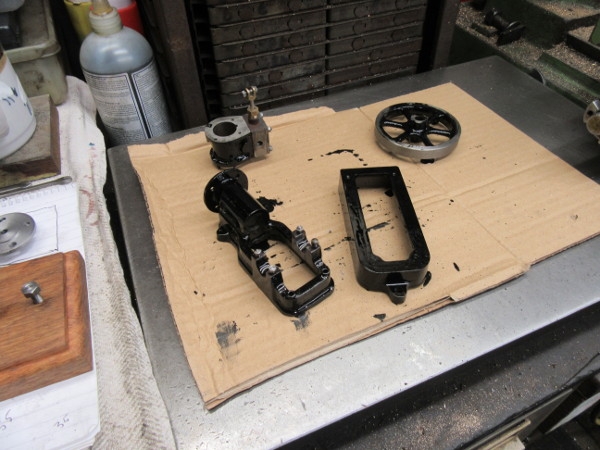
My last move was to give the base castings a coat of black gloss paint. Yes I know the flywheel looks horrible, it is, but when I have had it in the chuck and re-polished it it will be fine.
A very satisfactory couple of hours. Boring the eccentric is always very ticklish and I am glad it is done.
Re: Shed Matters 3
Posted: 25 Oct 2021, 08:03
by Stanley
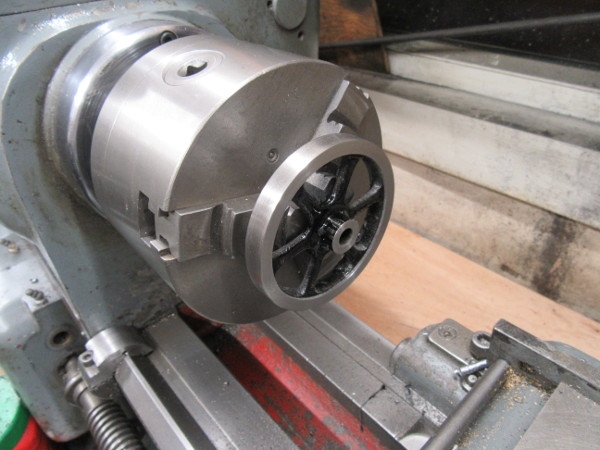
The first jib was to clean up my rough paint job on the main castings. Most of this was handwork but the flywheel needed to be re-finished in the lathe... I soon made it beautiful.
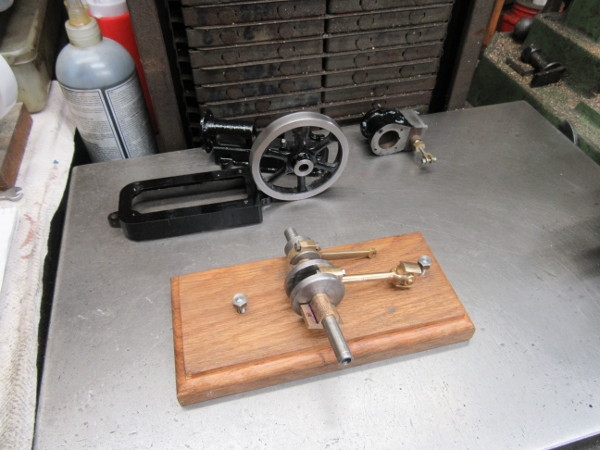
Once I had all the castings cleaned up I was ready to start building. Lots of fiddle work and not many pictures!
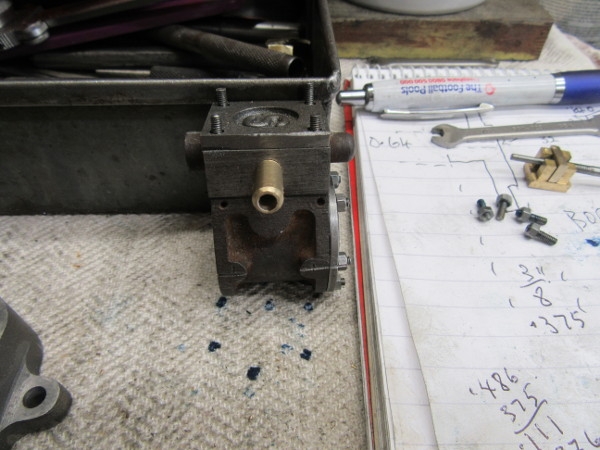
Here's one pic I did while I was fighting the bolts that hold the cylinder on the bed. One was so far out I had to fix it by re-tapping the hole. It worked and anyone who has done this job knows what a fiddle it is, particularly the bottom fastenings were you are hampered by the bed.
Knocking off time, everything is coupled up, I have to finish installing the back lid and then it's finished.
Re: Shed Matters 3
Posted: 26 Oct 2021, 07:41
by Stanley
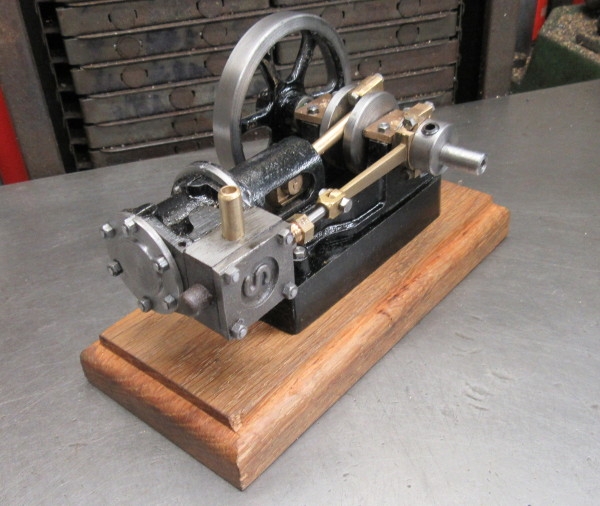
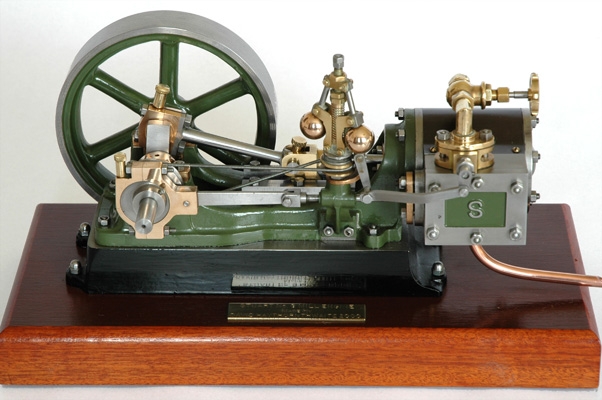
This was the first part of the morning, finish the 10H and get it on the kitchen table as an ornament! I put air on it and it kicked, it's a runner but needs the valve adjusting. I didn't bother, I've left it how it is. The bottom line is that what with bad castings and the fact I am not the man I was this is not a good build. It's adequate and I suppose a bit of a miracle for an 85 year old but that's it finished!
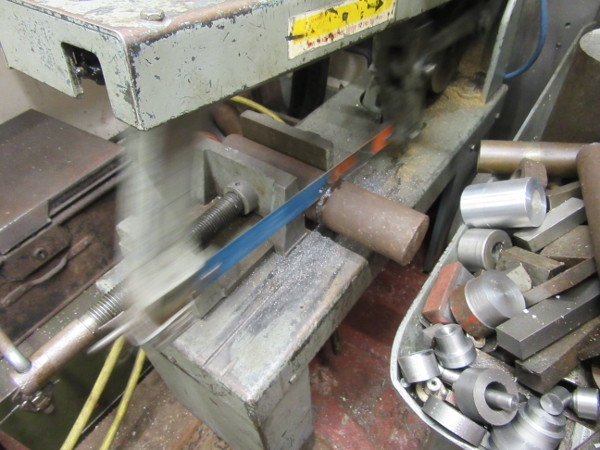
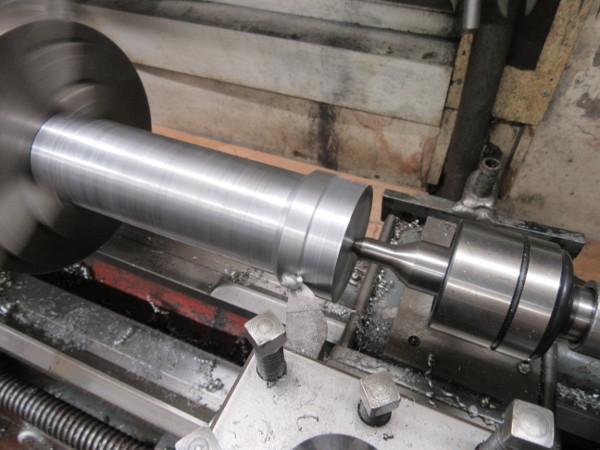
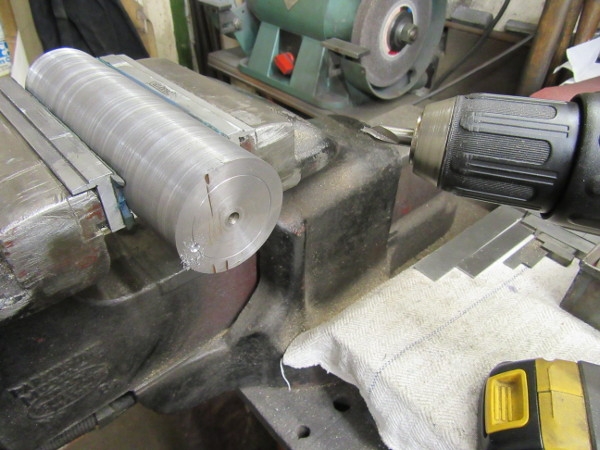
The next order of business is to start on the next engine, the Stuart Number 9. As you'll see it's a lot bigger than the last one and hopefully will be easier on my eyes. (Mind you I did notice that there are a couple of 8BA screws but I think they will be for the cladding.)I got the drawings out, did a fag packet drawing and turned my mind to the crankshaft. You won't be surprised to hear I'm going to chop it out of the solid. The blank for it needs to be 2.25" diameter and over 6" long. I found a piece of old mill shaft and cut it to length in the power saw. (Luxury!)
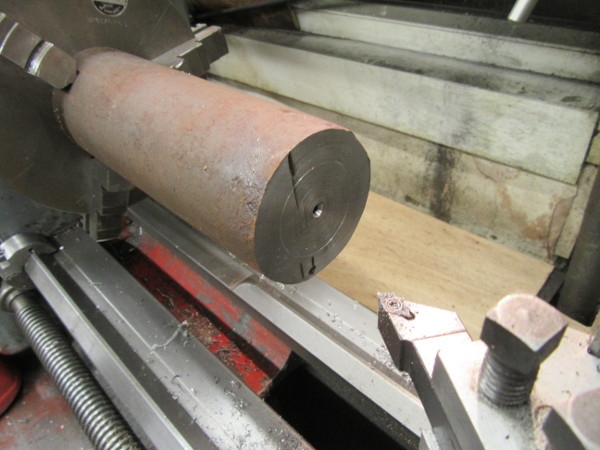
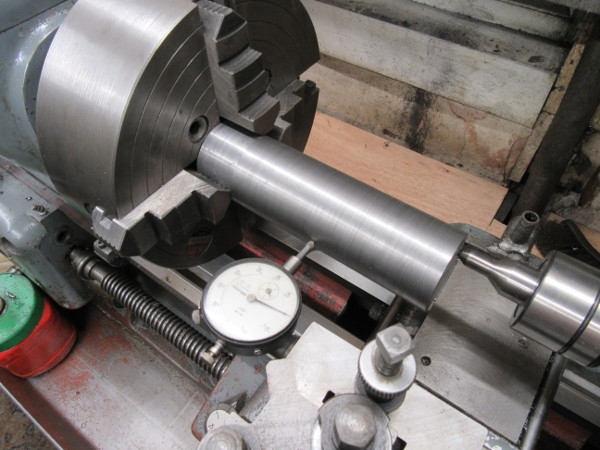
I put the big 3 jaw SC on and got the stock in the lathe, centred it and marked the offset of the crank pin, .75"
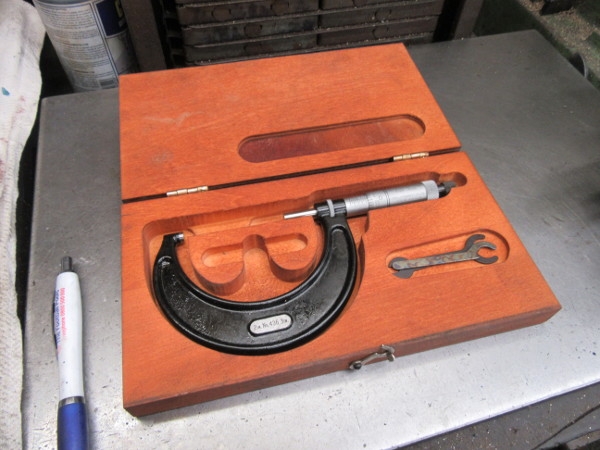
The 2-3" Micrometer had to come out to play.
Closing time. I have the scabs off it, now I need to reduce it to the exact size I need for the finished shaft. That's a good start for today.
Re: Shed Matters 3
Posted: 27 Oct 2021, 07:33
by Stanley
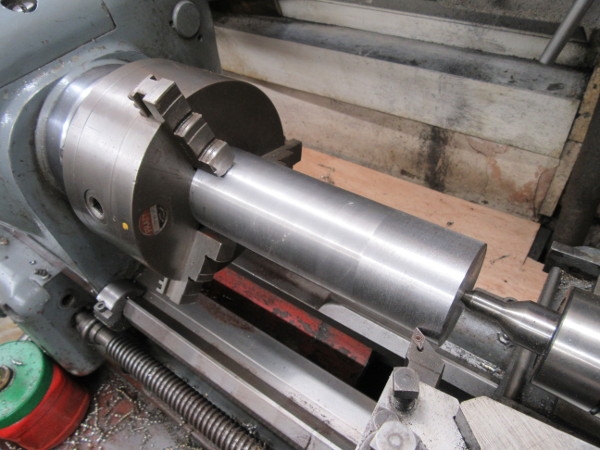
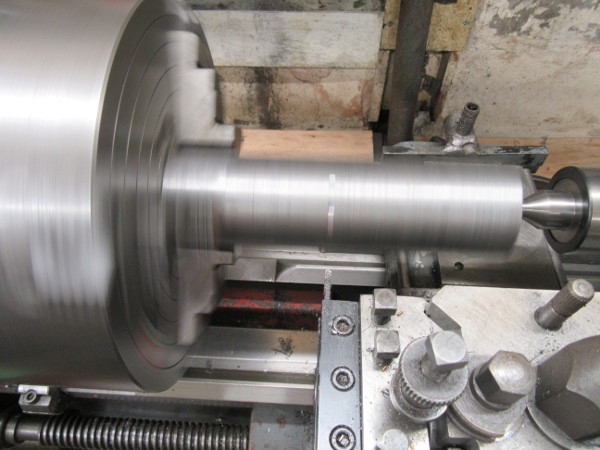
Dead easy today, we're muck shifting and with a small lathe it's hard work. I changed the gutter for a big brazed carbide cutter and it worked well. The steel isn't quite as good as I thought, there are a couple of flaws in it but nothing to cause any problems. As you can see I finished this end and reversed the stock to get it the same size, two inches and an eighth which is the size of the cheeks of the journal.
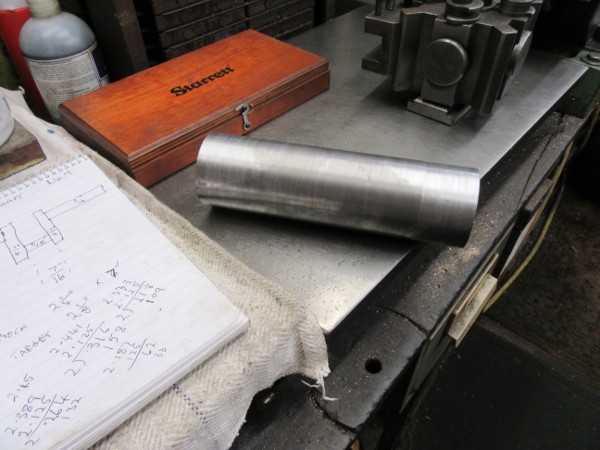
Here it is sat on the bench. I may do the Newton trick tomorrow and take most of the metal out under the mill. This cuts down on the amount of interrupted cut turning you have to do which is a pain in the bum!
I've been carrying excess swarf out to the bin all morning and finished up by having a proper clean up. Then I put the big 4 Jaw on, it's a long time since I had anything big enough in the lathe to justify it. This will make cutting the crank pin out much more stable.
Re: Shed Matters 3
Posted: 28 Oct 2021, 07:36
by Stanley
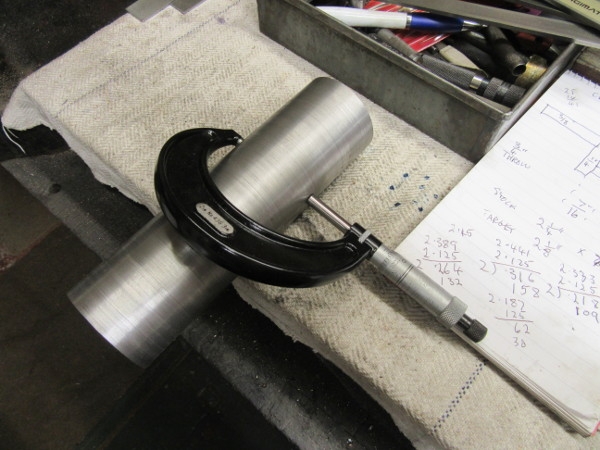
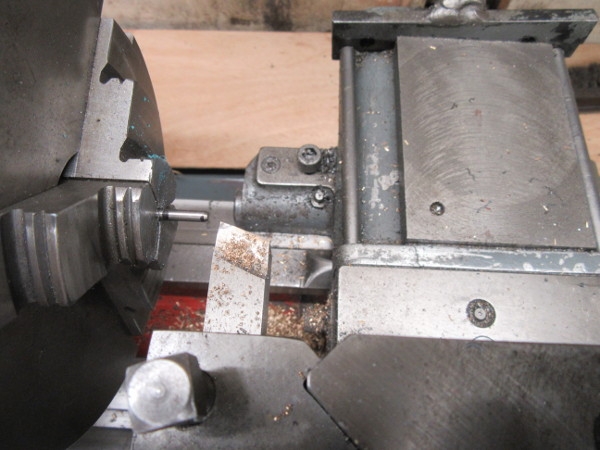
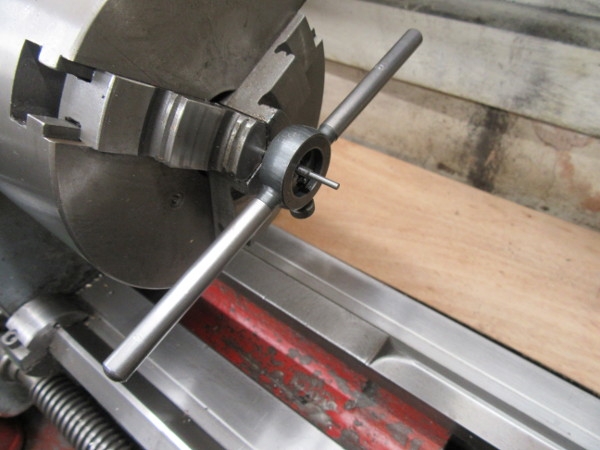
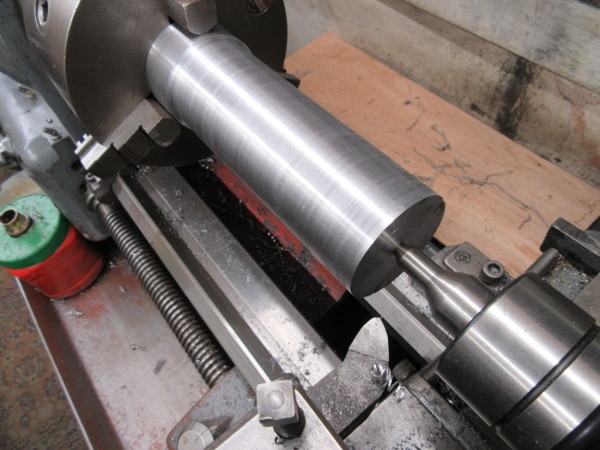
Today the first job was to check the blank for the crankshaft now it has cooled down. The good news is hat it'll do, it's one thou below the target size, 2.125" The next thing was to drill a centre hole on the PCD I put on the stock, .75" throw.
I was considering going down the Newton route and milling a lot of the surplus metal out under the VM but I decided that it would be simpler and less chance of a cock-up to just cut the crank pin by turning in the lathe. So my next job was to set the stock up and here I am doing the last part of that making sure the stock is parallel and running as near true as possible. I got it to within a thou over the length of the bar. That's near enough for me.
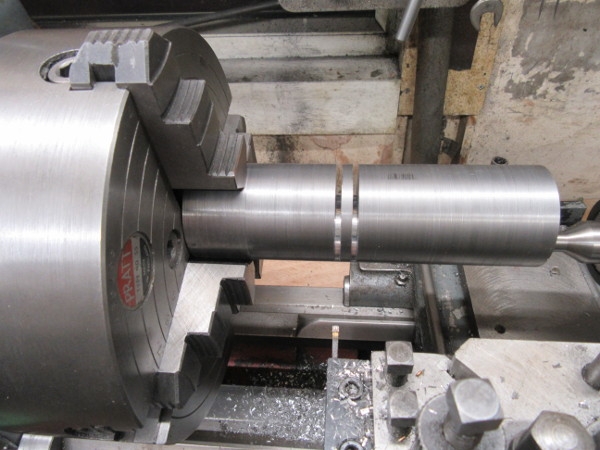
The first pic is the start of the cut. Remember that .75" throw means the lump of steel is wagging 1.5" so I kept the speed down. I haven't got an auto feed slow enough so had to stand there and manually advance the cutter, very slowly and carefully. The second pic is where I was after a solid hour of standing there being careful and alert. I have cut both cheeks to the maximum depth I can on this stick out. Tomorrow I'll advance the cutter and cut down to the crank pin size, then I'll cut the centre out which will be a lot easier because it's standing free.
That was a hard morning. Anybody who has done it knows that eccentric cutting is complicated stuff and tests you. I think, despite my age, I did well this morning. Another tough day on Saturday because tomorrow is my day off and early doors shopping followed by an early sleep and then a light lunch in Colne with Susan.
Re: Shed Matters 3
Posted: 30 Oct 2021, 07:17
by Stanley