Page 87 of 125
Re: Shed Matters 3
Posted: 27 Aug 2023, 06:21
by Stanley
Re: Shed Matters 3
Posted: 28 Aug 2023, 06:23
by Stanley


This morning I addressed the connecting rod. First I did some measuring and marking and then set up the rectangular sock in the chuck checking it for accuracy with the dial indicator. Then I quietly turned down the end to the diameter I need to make the eye for the crosshead pin. I was held up by having to give my digital caliper a good clean to get the metal dust out of it. For some reason, that was suddenly a problem. I finished up ready to do more measuring and cutting tomorrow.
Re: Shed Matters 3
Posted: 29 Aug 2023, 06:19
by Stanley
Only one image needed. I checked all my measurements and carried on cutting the rectangular stock back to the relatively slender body of the connecting rod. Careful turning because of course much of the work was an interrupted cut.
Re: Shed Matters 3
Posted: 30 Aug 2023, 06:22
by Stanley
Re: Shed Matters 3
Posted: 31 Aug 2023, 06:20
by Stanley
Re: Shed Matters 3
Posted: 01 Sep 2023, 06:28
by Stanley
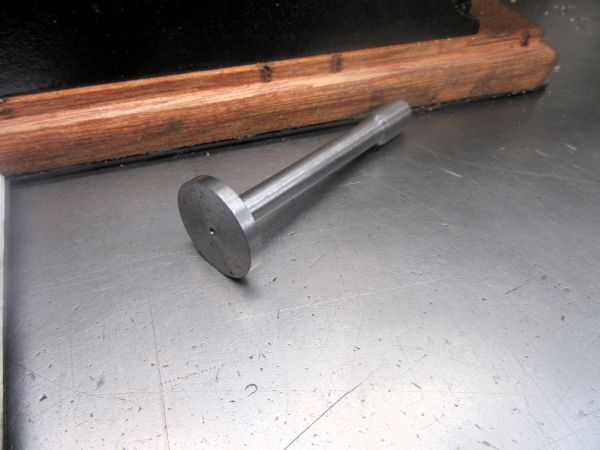
Just one target this morning, a perfect blank for the connecting rod. I spent an hour and a quarter doing some careful turning and at knocking off time I had a perfect blank and what's more, made out of wrought iron which I reckon could be 200 years old and which I had discarded as too difficult to machine many months ago. So I am pleased on two counts, first that I have my con-rod and second that I managed to use this very difficult material.
I don't know whether you can see but the inclusions in the wrought iron are the cause of the speckles on the foot.
Re: Shed Matters 3
Posted: 02 Sep 2023, 06:05
by Stanley
Re: Shed Matters 3
Posted: 03 Sep 2023, 06:26
by Stanley


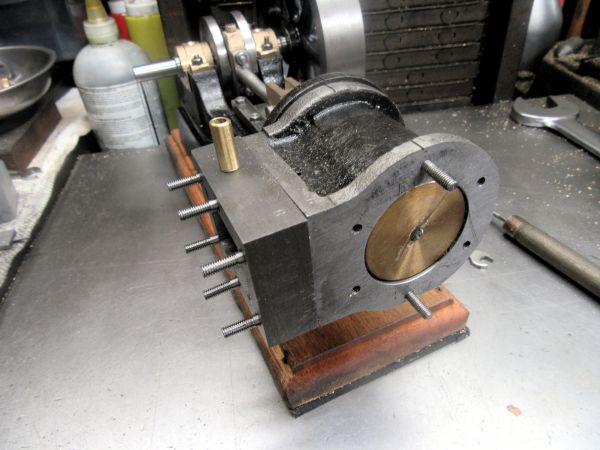
Simple task this morning. Carry on with refining the crank bearing. Careful milling, rubbing down on fine emery paper and finally marking both halves with witness marks. Tomorrow I shall address the oil reservoir.....
Re: Shed Matters 3
Posted: 04 Sep 2023, 06:14
by Stanley
Re: Shed Matters 3
Posted: 05 Sep 2023, 06:17
by Stanley
Re: Shed Matters 3
Posted: 06 Sep 2023, 06:19
by Stanley
Re: Shed Matters 3
Posted: 07 Sep 2023, 06:14
by Stanley
Re: Shed Matters 3
Posted: 07 Sep 2023, 06:16
by Stanley
Re: Shed Matters 3
Posted: 07 Sep 2023, 06:18
by Stanley
As you can see, a simple morning, a bit of fine turning, even finer threading 3?16" X 40tpi and some knurling and we ended up with the oil reservoir cut, threaded and filled with a tiny plug.
Re: Shed Matters 3
Posted: 08 Sep 2023, 06:39
by Stanley


This morning I got a piece of scrap out of the treasure chest and started to make the valve eccentric. I have marked the eccentric circle on the end for boring to go on the crankshaft and cut the groove for the eccentric strap. As usual I am ignoring the Stuart design and going for the Stanley version which is much easier and has never let me down.
I have been for the shopping and put it away. (There wasn't much!)
Oh, and my chicken is roasting in the oven.
Re: Shed Matters 3
Posted: 09 Sep 2023, 06:16
by Stanley

Only one job this morning, part the eccentric off and bore it 3/8" to fit on the shaft. It needed to be a shade over 3/8" so I bored it with a 'V' letter drill and then massaged the bore with a file until it fit the shaft exactly. That's what took the time! Tomorrow it needs an Unbrako grub screw fitting for locking it on the shaft.
Re: Shed Matters 3
Posted: 10 Sep 2023, 06:16
by Stanley
Re: Shed Matters 3
Posted: 11 Sep 2023, 06:18
by Stanley


This morning I worked on the flat link that connects the eccentric strap to the valve rod. First job was to reduce the thickness of the stock from 1/8" to 3/32", which needed some careful milling. Once that was done I drilled the holes at each end and countersunk the one at the eccentric strap end. That was done very carefully with no errors and took an hour.....
Re: Shed Matters 3
Posted: 12 Sep 2023, 06:07
by Stanley

A morning of small steps. First sharpen a 5/16" slot drill and then cut a slot 3/32" deep in the frame of the eccentric strap to accept the valve strap. Then reduce the strap and shape it to fit the eccentric strap. I touched up the everyday cutter while I was in cutter sharpening mode. Tomorrow I can fit the strap and reduce the rest of it to fit the clevis on the valve rod..... Dead easy to cock up, so slow and careful. It worked, it was error free!
Re: Shed Matters 3
Posted: 13 Sep 2023, 06:24
by Stanley

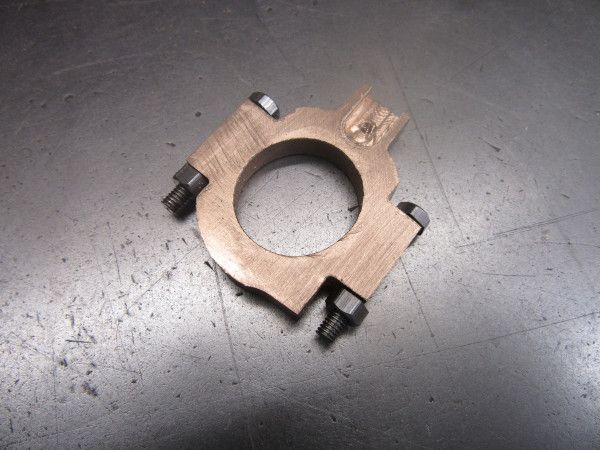
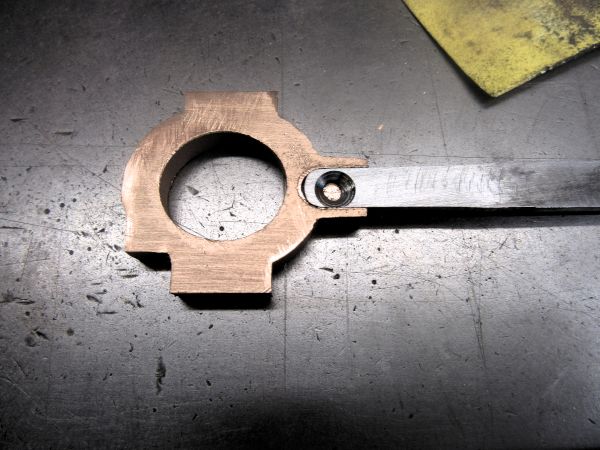
More work on the flat link. It's now fitted at both ends in the valve train. Then I went back to the eccentric strap. I modified the shape and marked and drilled for the 5BA bolts that will hold the two halves together. I am ready now to split the strap and bore it to fit the eccentric. That's for tomorrow. A successful and error free morning.....
Re: Shed Matters 3
Posted: 14 Sep 2023, 06:13
by Stanley
Re: Shed Matters 3
Posted: 15 Sep 2023, 05:54
by Stanley

Just one image. The strap is bored and fitted to the eccentric. We are ready to go forward with the rest of the valve train. I put the boring head away and set the mill up for normal milling because that's where we are going next.
Re: Shed Matters 3
Posted: 16 Sep 2023, 06:30
by Stanley


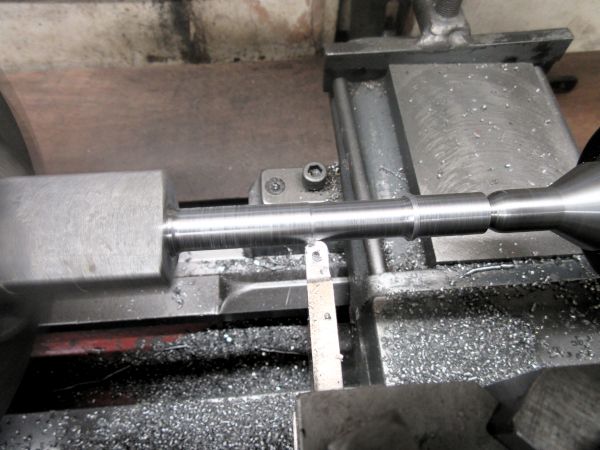
I concentrated on the connecting rod this morning. First some delicate taper turning of the rod to get the cross head end down to 1/4" as this is the best way of marking how deep to cut the flats on the end of the rod and it looks so much tidier afterwards. (One degree of taper.) Then measuring and marking the rod for correct length and I finished with it ready to finish and fit tomorrow. Once more, delicate work done without error. Such a relief given the fact I don't see straight!
Re: Shed Matters 3
Posted: 17 Sep 2023, 06:16
by Stanley


Only two simple jobs this morning, drilling the hole for the crosshead pin and adjusting both ends of the rod to give the right length and fit. Dead simple but scope for such big mistakes so all done very carefully. I ended up with it ready for fitting.
Re: Shed Matters 3
Posted: 19 Sep 2023, 06:17
by Stanley