Page 98 of 125
Re: Shed Matters 3
Posted: 05 May 2024, 06:13
by Stanley

I spent this morning finishing the work on the second engine that prepares it for the steam inlet pipe. Then making two steam pipes and fitting them and finally plugging the steam gallery that is fed by the pipe. (The other gallery is the exhaust passage.) I am ready now to start on the cylinder, con rod and crankshaft and flywheel. Time for breakfast!
Re: Shed Matters 3
Posted: 06 May 2024, 06:09
by Stanley


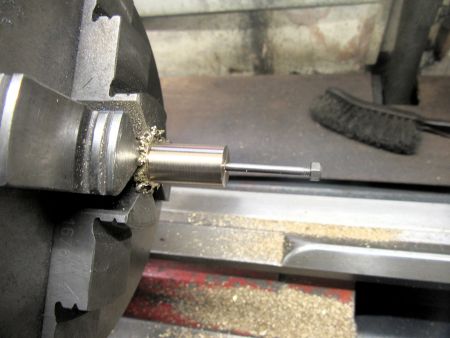
I'm into crankshaft turning again but on a smaller scale. I started by massaging my drilling of the head of the brass standard to refine my original drilling. I admit it was out of line. That done I did my measurements and made a fag packet drawing of where I was going. Almost an hour later I had a crankshaft ready for the flywheel at one end and marked out for drilling for the crank pin at the other. I have another to make exactly the same. But now for breakfast.
Re: Shed Matters 3
Posted: 07 May 2024, 06:10
by Stanley

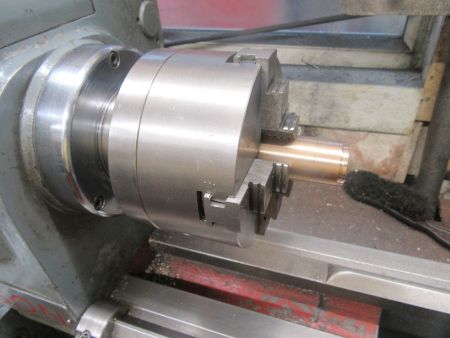
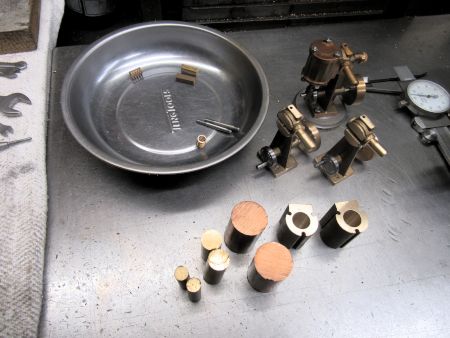
I'm looking at the flywheel for the first engine. The short pieces of bronze in the kit are so wasteful, I found a bar of cast bronze in the treasure chest (A discarded riser from a casting at Dick Bonser's in Rochdale.) It was slightly too big to fit up the bore in the 4 jaw SC chuck so I put the big three jaw on and cleaned it up including facing the ends. Than some careful measuring and I bored it to be an interference fit on the crankshaft. Once I was sure that was OK I took the big three jaw off and replaced the 4Jaw SC chuck. Now all I need to do is make and fit the tiny crank pin!
Time for breakfast I think.
Re: Shed Matters 3
Posted: 08 May 2024, 06:12
by Stanley
Re: Shed Matters 3
Posted: 09 May 2024, 06:18
by Stanley

Work on the cylinders this morning. First I cut them down to the right overall length, 3/4". Then marked them for the central pivot stud that centres them on the top of the standard. This was where I hit trouble and made a cock-up of the drilling and tapping for the 5BA studs supplied. Lots of fun like dropping a stud and having to crawl on hands and knees to find it but in the end I discarded the 5BA studs and started again using 4BA studding. That meant enlarging the holes in the standards for the studs and that's where I ended up with the cylinders mounted and ready for further progress. Not a happy morning but I survived and the new studs will be OK. Now for breakfast!
Re: Shed Matters 3
Posted: 10 May 2024, 06:16
by Stanley
Re: Shed Matters 3
Posted: 11 May 2024, 06:05
by Stanley

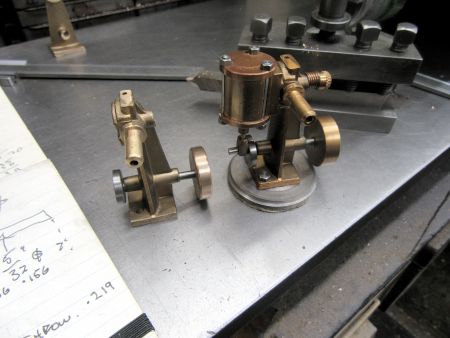
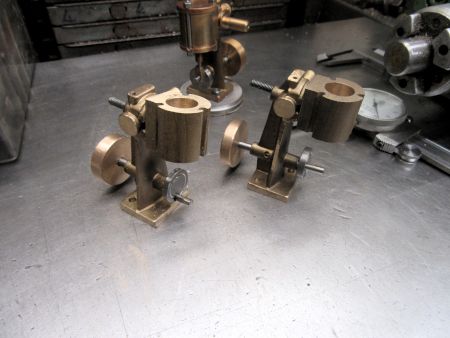
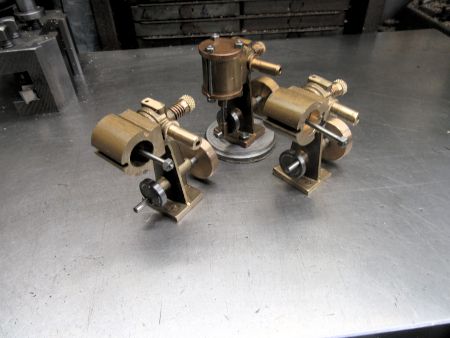
First job was to finish making the pistons and mounting them on their rods. Then I made the knurled knobs that control the pressure of the cylinder on the face of the standard. Tomorrow I shall make the top and bottom lids for the cylinders....
Re: Shed Matters 3
Posted: 12 May 2024, 06:30
by Stanley
I've lost one image but these two will do. This morning's bit of torture was to drill 12 5/64" holes in the right place and some of them at an angle. (The cylinder steam passages.) I have done it without any disasters but it's torture when you can't see properly! Enough complaining, I drilled all the holes and re-assembled the engines. Now I need to make the lids for the new wobblers and and two bases. We are getting close to having 3 engines!
I deserve my breakfast.

Re: Shed Matters 3
Posted: 12 May 2024, 06:32
by Stanley
I've lost one image but these two will do. This morning's bit of torture was to drill 12 5/64" holes in the right place and some of them at an angle. (The cylinder steam passages.) I have done it without any disasters but it's torture when you can't see properly! Enough complaining, I drilled all the holes and re-assembled the engines. Now I need to make the lids for the new wobblers and and two bases. We are getting close to having 3 engines!
I deserve my breakfast.
Re: Shed Matters 3
Posted: 13 May 2024, 06:14
by Stanley

Only one image needed. I have spent over an hour making the top and bottom lids for one of my two cylinders. I have drilled the holes in the top lid but have yet to do the bottom. No way was I going to rush just to try to get a straight edge. I hate these small parts! I shall stop complaining and have my breakfast.
Re: Shed Matters 3
Posted: 14 May 2024, 06:10
by Stanley

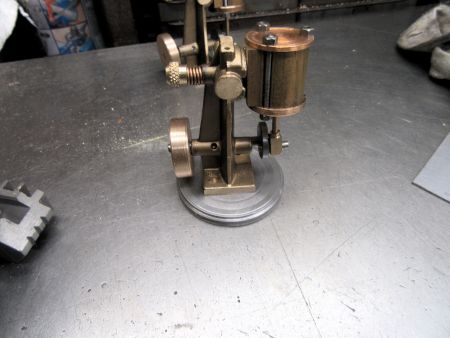
Again, only one image needed. I have spent an hour, first on finishing the top lid for the first engine I am working on. I fitted that, all that engine needs now is the bearing that goes on the piston rod. That can wait until the other engine is at the same stage. Then I made the top and bottom lids for the next engine, drilled the stud holes in the top lid and checked that they fitted. Tomorrow I shall do the bottom lid and take the engine to the same state as the other.
It's breakfast time now.
Re: Shed Matters 3
Posted: 15 May 2024, 06:17
by Stanley


The first part of this morning's work, drilling the bottom lid for the securing bolts went well and I soon had it laced up and ready for the next stage which was to make the tiny bronze bearing for the end of the piston rod. This connects to the crank pin. I made one bearing and fitted it and that's where I started struggling. To cut a long story short I eventually dismantled the cylinder, piston and rod and did some checking. I soon found out what the problem is, the piston rod is about 3/8" short! How the hell I managed that I don't know. Question is, is the other the wrong length as well? I shall find out tomorrow when I have made and fitted a new rod for this first engine. A proper engineering morning, things don't always go according to plan. I shall have my breakfast and come back to the problem refreshed tomorrow.
Re: Shed Matters 3
Posted: 16 May 2024, 06:24
by Stanley
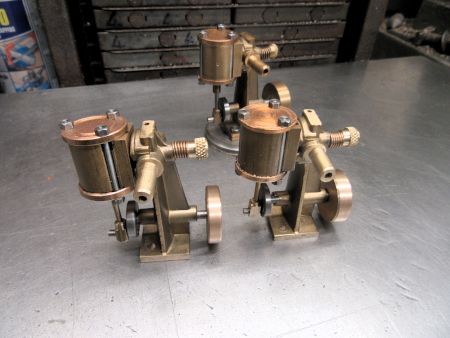
A better morning today! Chicken in the oven roasting and new piston rods made and fitted, both engines are complete. All they need now is a base for each of them. They aren't runners, or at least I haven't tried them to see if they run. They are meant to be toys for two very young people, Evie and Alex who because of kids moving round the world for various reasons, will both have their engines within the next couple of months. Not the best I have ever done but it gets very hard to do these very small projects, it's bad enough with the Number 9s! Now for breakfast.
Re: Shed Matters 3
Posted: 17 May 2024, 06:20
by Stanley

I was late into the shed this morning because of a small computer fault. When I got in I started by harvesting the non-ferocious off the lathe and then got into making the steel plinths on which the wobblers will be mounted. I got one finished before knocking off and will make the other tomorrow. Now for breakfast and second sleep.
Re: Shed Matters 3
Posted: 18 May 2024, 06:11
by Stanley

Only one image needed this morning. I have spent an hour getting both plinths ready for fitting. All tackle put away and Mrs Harrison cleaned up. Now for breakfast.
Re: Shed Matters 3
Posted: 19 May 2024, 05:58
by Stanley

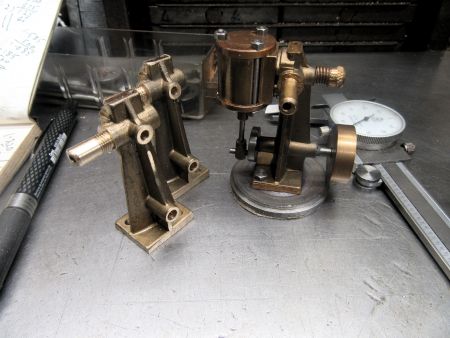
Spot the difference! That's right, the engines are mounted on their base plates and yes, it took almost an hour. If you think that's slow, try doing it yourself! The engines are sat on the kitchen table with the crankshafts. I'm glad they are done, far too small for my old eyes. Now for breakfast!
Re: Shed Matters 3
Posted: 20 May 2024, 06:13
by Stanley
Re: Shed Matters 3
Posted: 21 May 2024, 05:46
by Stanley

Only one image needed. I finished the initial turning of the flywheel and finished up with it being a perfect match to the crankshaft. Then I had a good clean up of the lathe and the bench and I am ready to do the hand fettling of the spokes tomorrow. Right now I want breakfast.
Re: Shed Matters 3
Posted: 22 May 2024, 06:02
by Stanley
Re: Shed Matters 3
Posted: 23 May 2024, 06:00
by Stanley
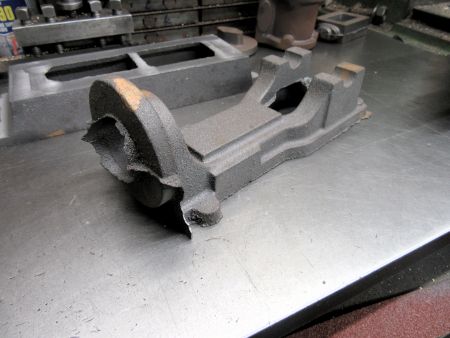
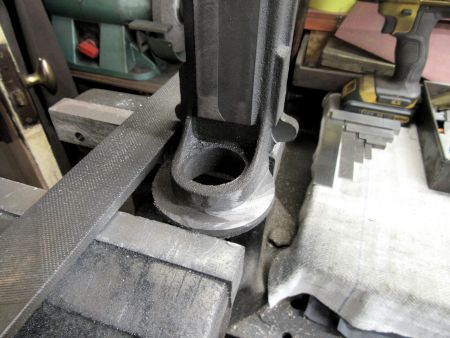
More work on the bed casting. Today, mainly on the milling machine. I touched up the everyday cutter but also used a much longer cutter for the face of the target end. I am ready now to mill out the beds for the crankshaft bearings.... But the immediate focus is breakfast!
Re: Shed Matters 3
Posted: 24 May 2024, 06:01
by Stanley

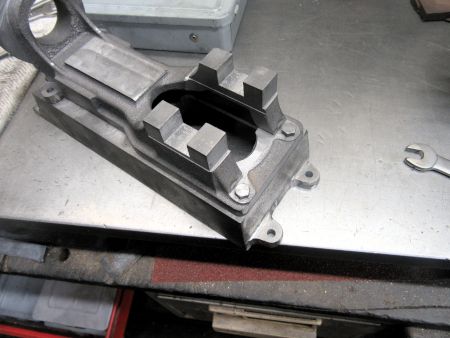
Only one image. I have milled the beds for the crankshaft brasses and refined other aspects of the bed casting. Just one more adjustment needed and that will be done tomorrow, I have spent an hour in the shed. I have had a chip chase..... Now for breakfast and second sleep.
Re: Shed Matters 3
Posted: 25 May 2024, 06:23
by Stanley
Re: Shed Matters 3
Posted: 26 May 2024, 05:53
by Stanley
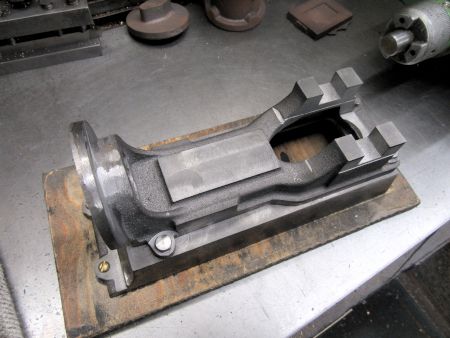
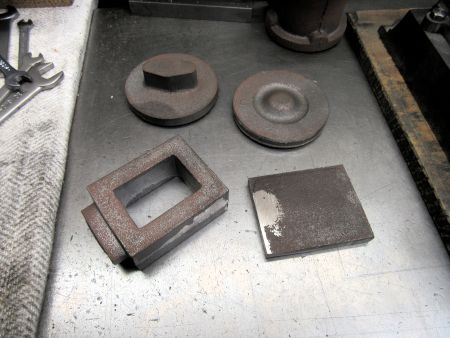
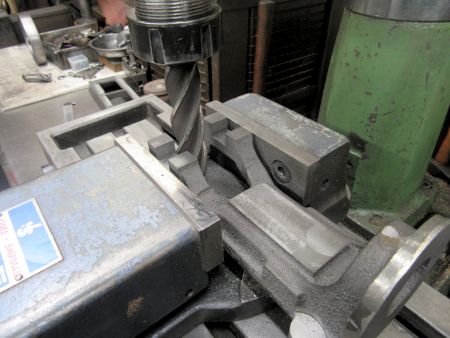
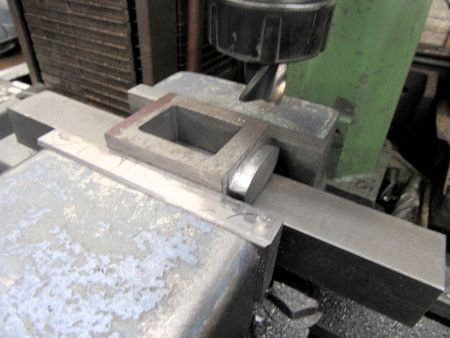
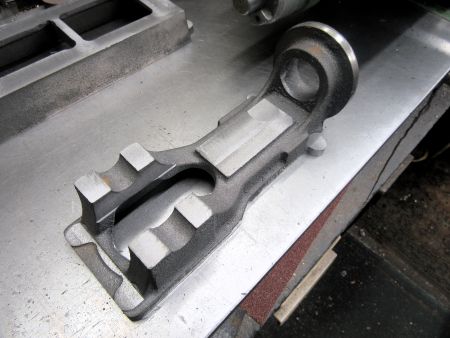
First job was to drill and tap for the remaining 2BA set screws that hold the bed to the base. I installed them and fastened the bed and base assembly down onto the temporary wooden base. Then I turned to the remaining castings and did the initial fettling and refinement on the steam chest, the steam chest lid and the two castings for the cylinder lids. I haven't started on the cylinder, that's a whole hour on its own. That ate the best part of an hour and so I have stopped for breakfast. The chicken is in the oven, I have been multi-tasking!
Re: Shed Matters 3
Posted: 27 May 2024, 06:18
by Stanley
Re: Shed Matters 3
Posted: 28 May 2024, 06:05
by Stanley