Shed Matters 3
- Stanley
- Global Moderator
- Posts: 91297
- Joined: 23 Jan 2012, 12:01
- Location: Barnoldswick. Nearer to Heaven than Gloria.
Re: Shed Matters 3
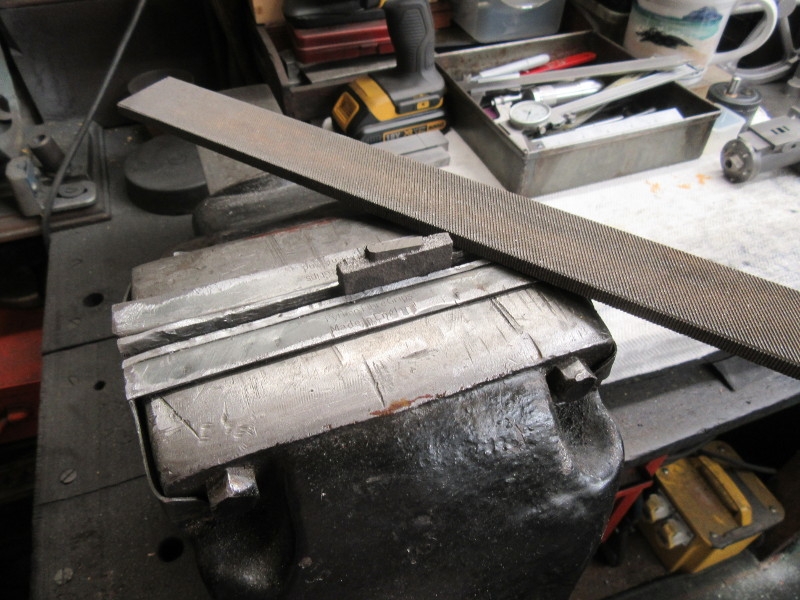
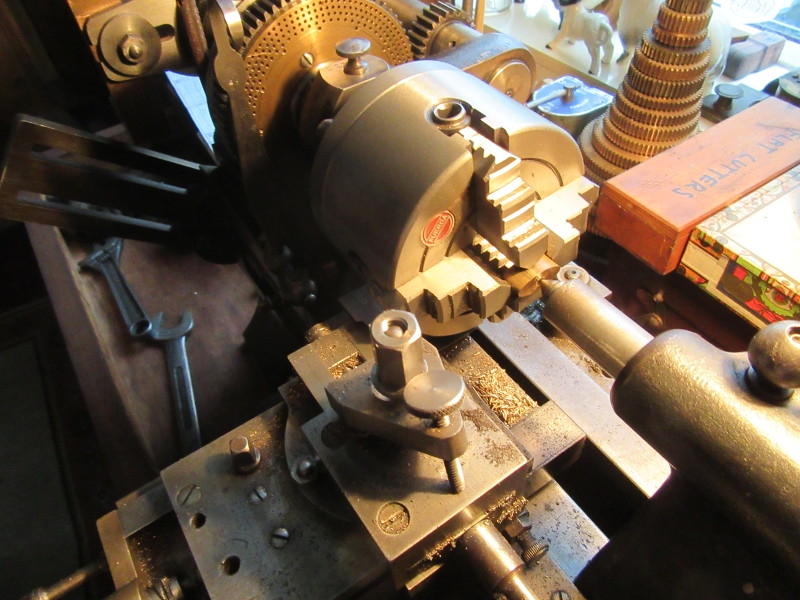
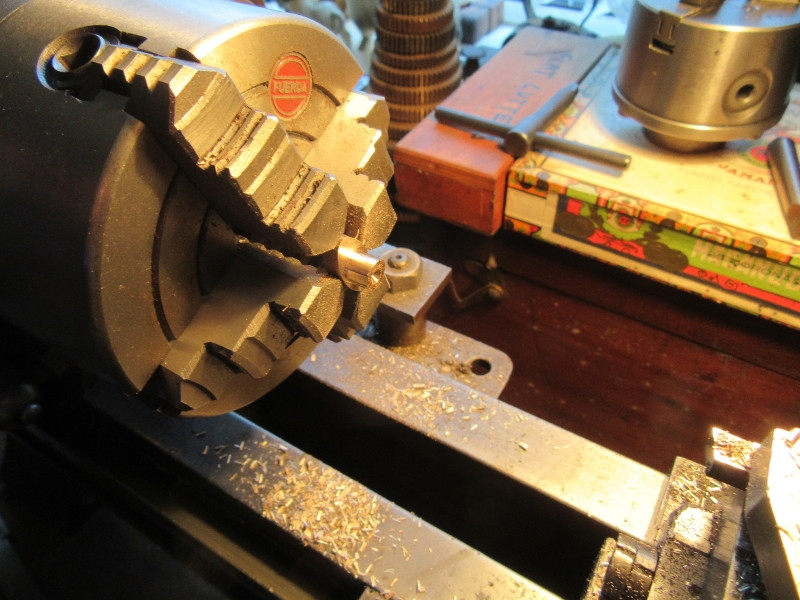
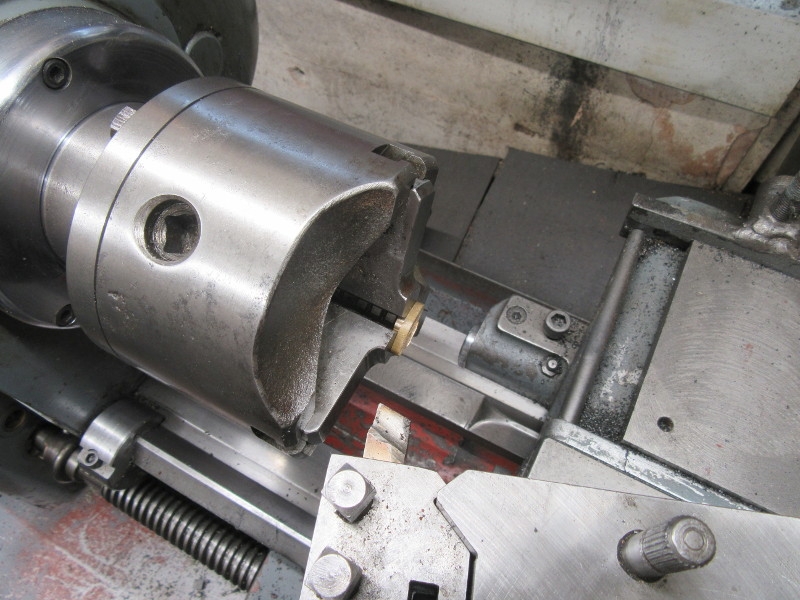
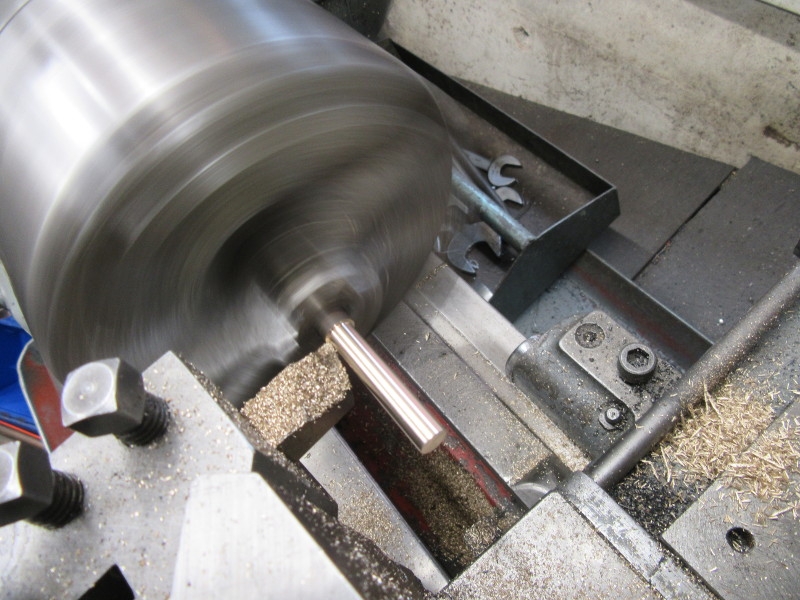
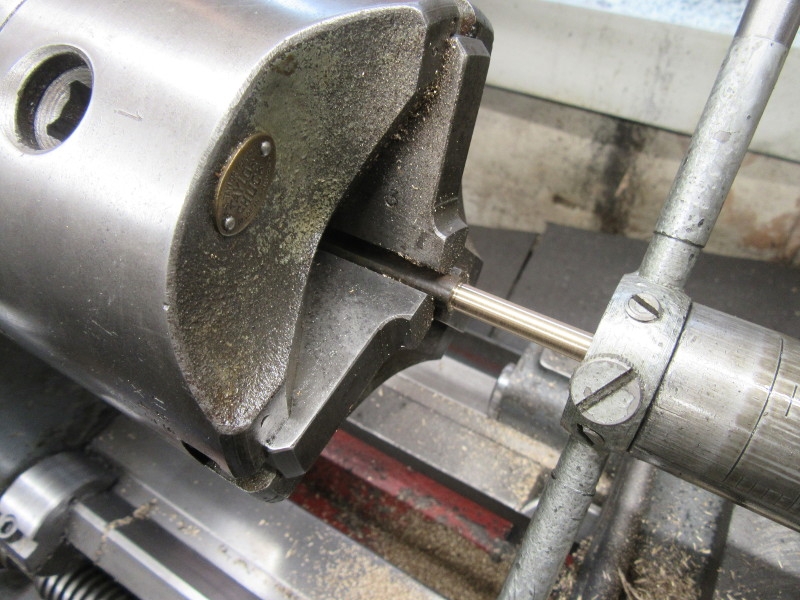
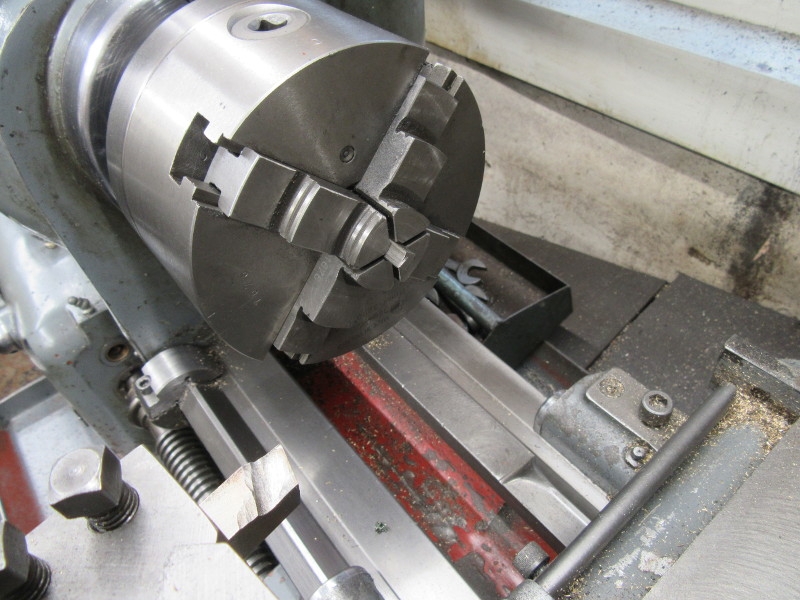
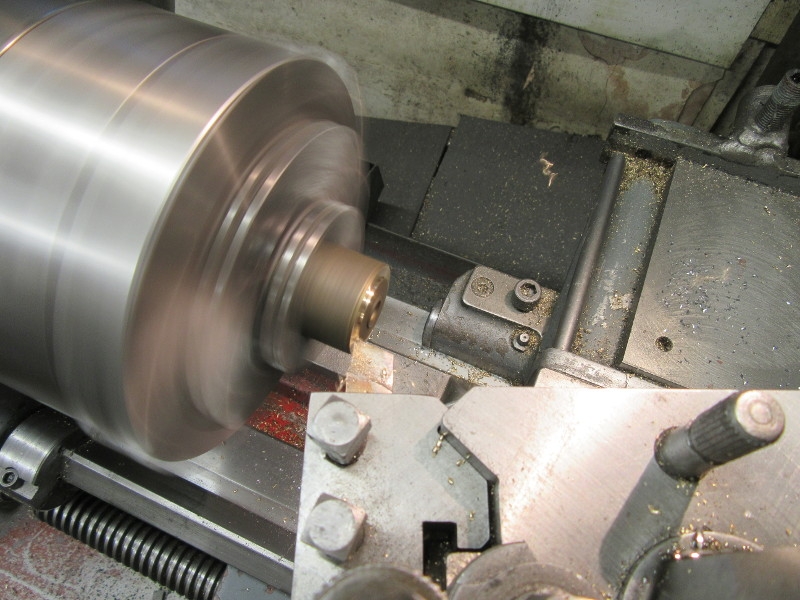
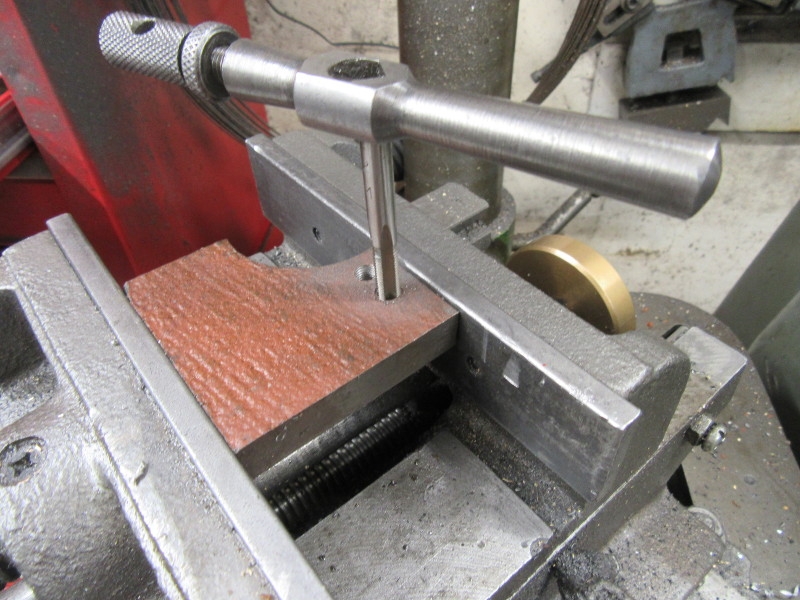
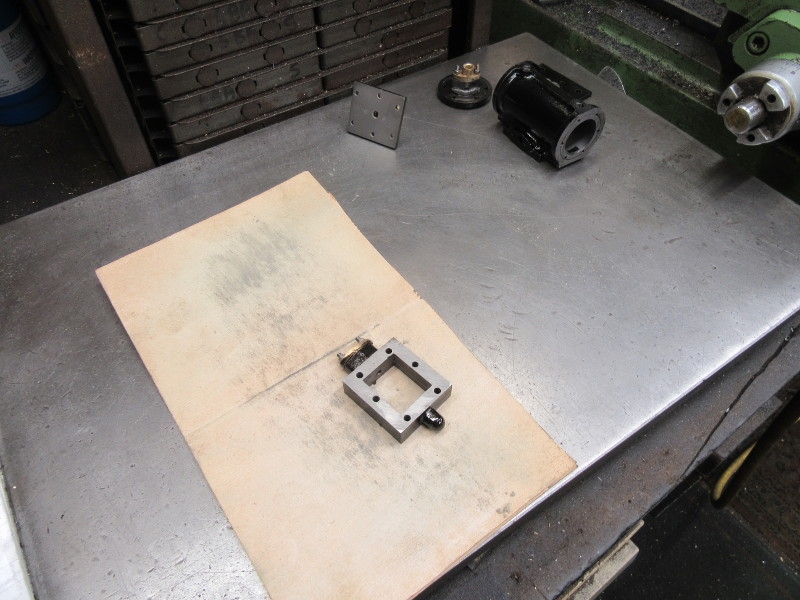
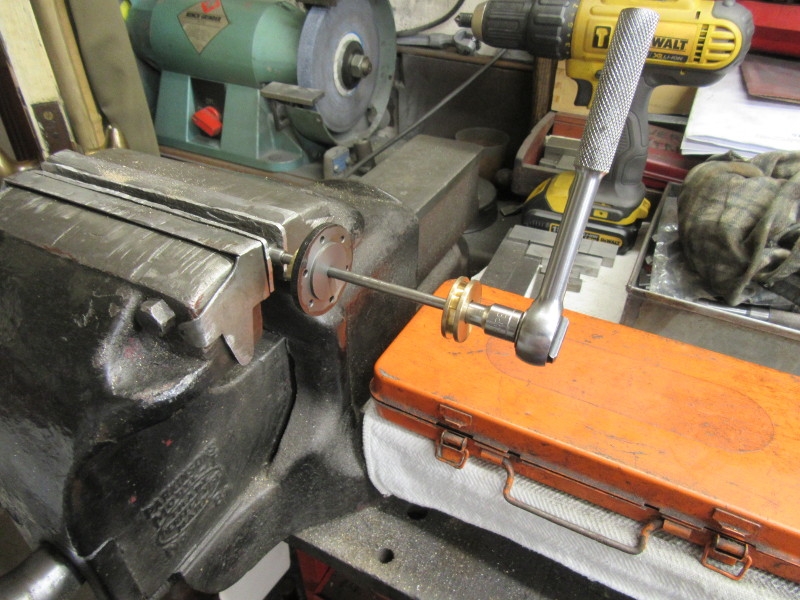
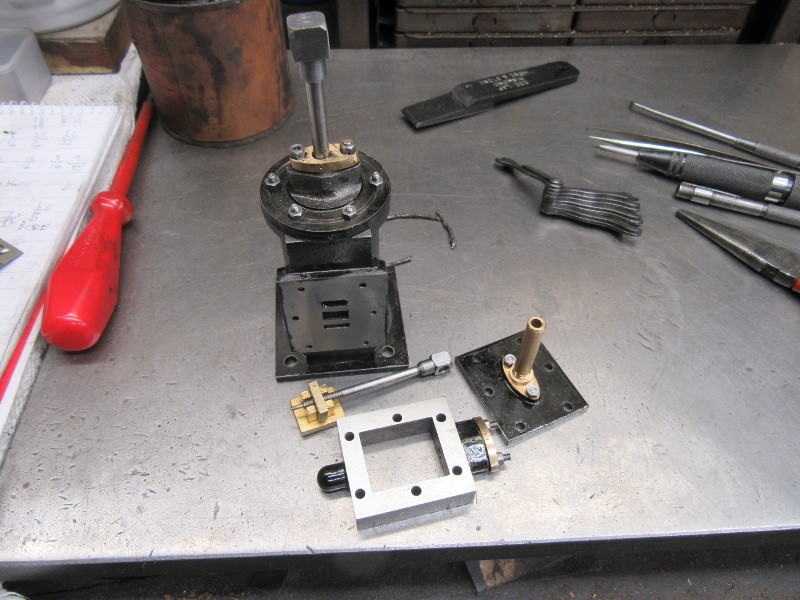
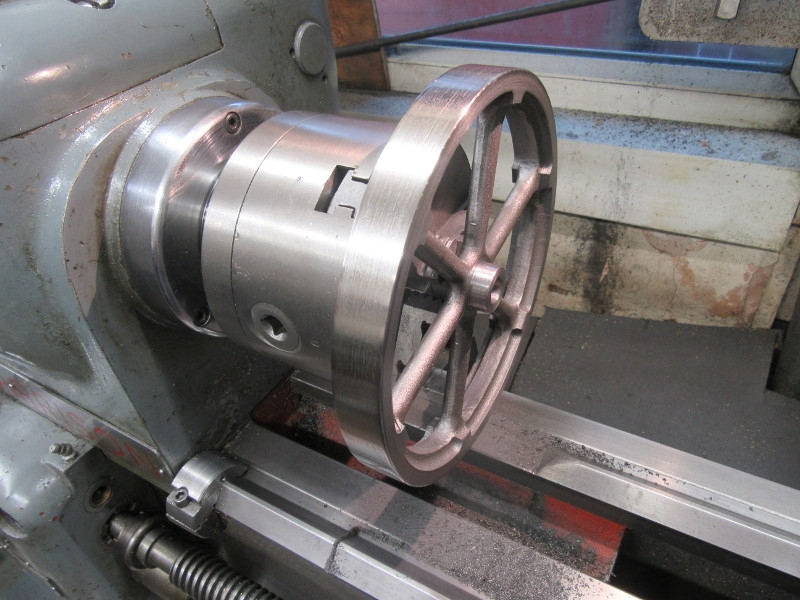
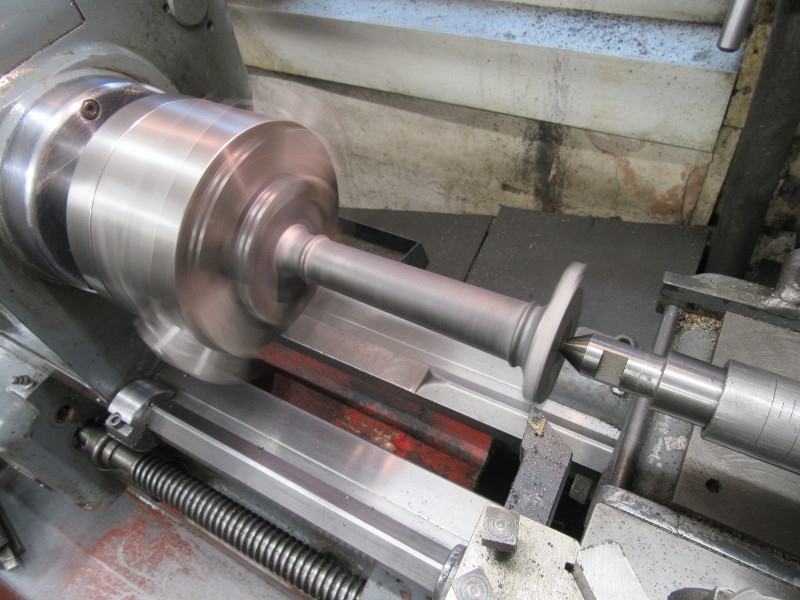
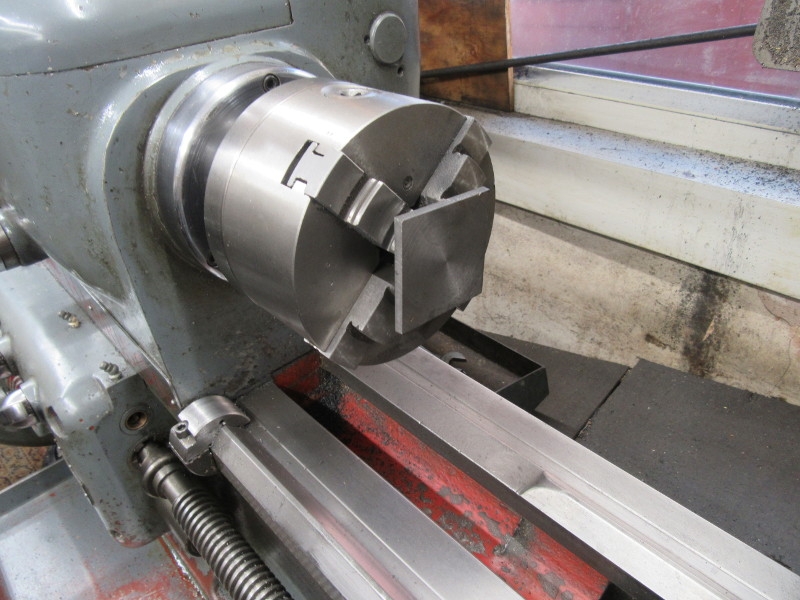
First job this morning was to reduce the thickness of the base to 1/8". I only have 1/16" of hold, that's how deep the register is, so light, careful cuts.
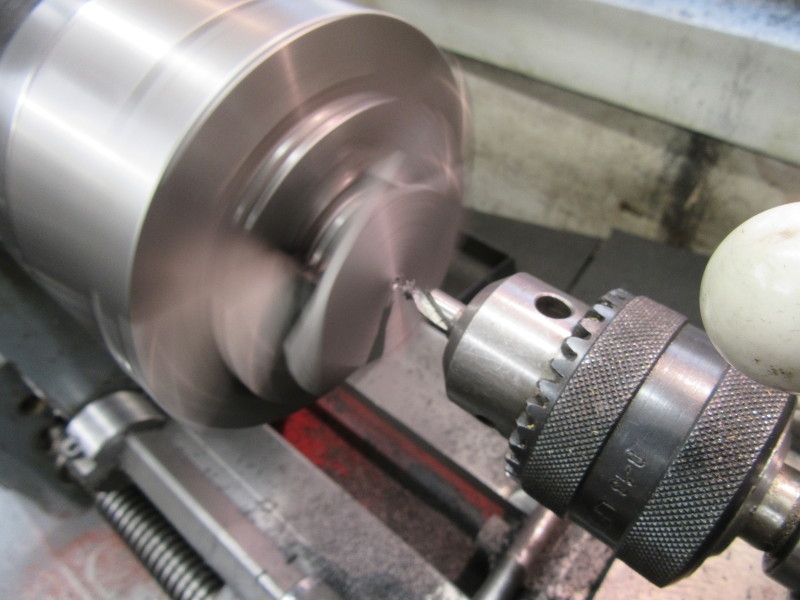
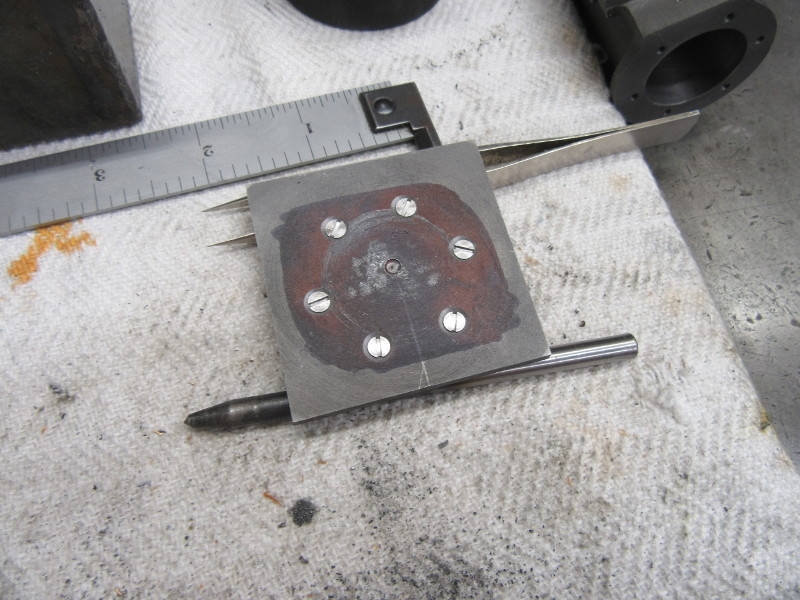
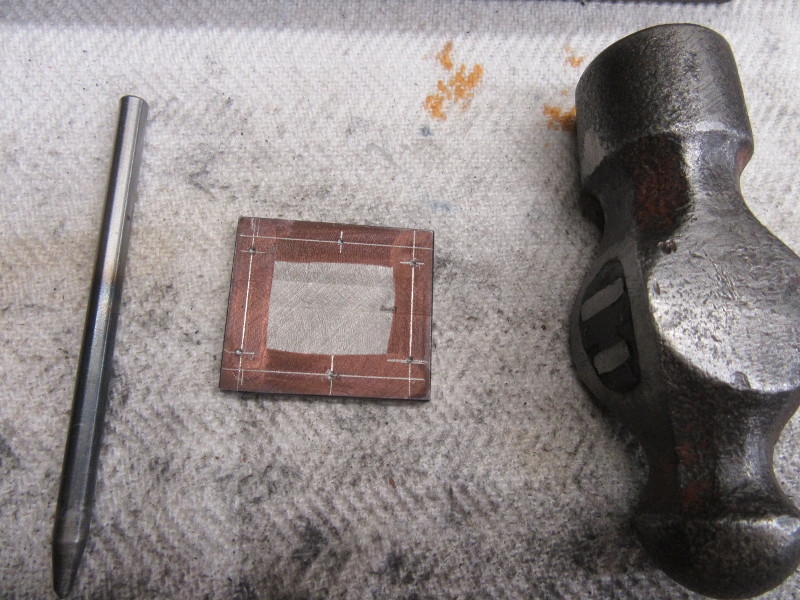
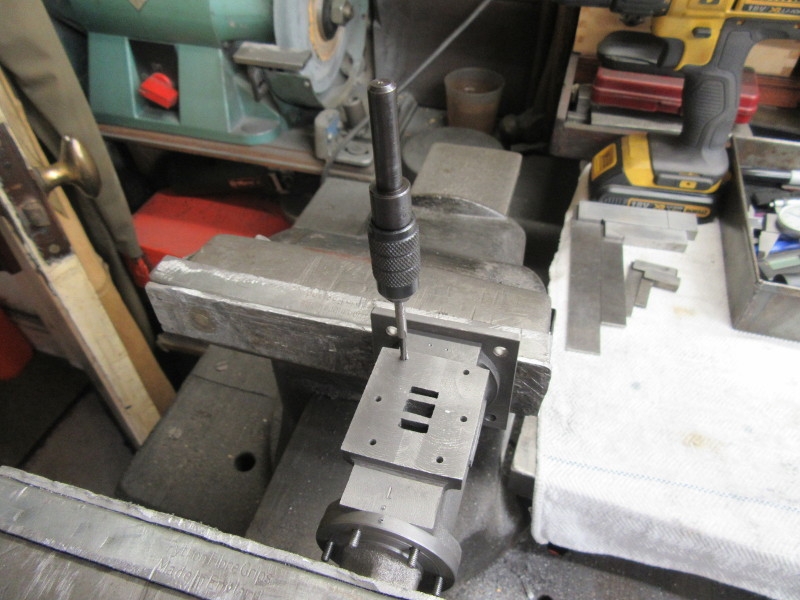
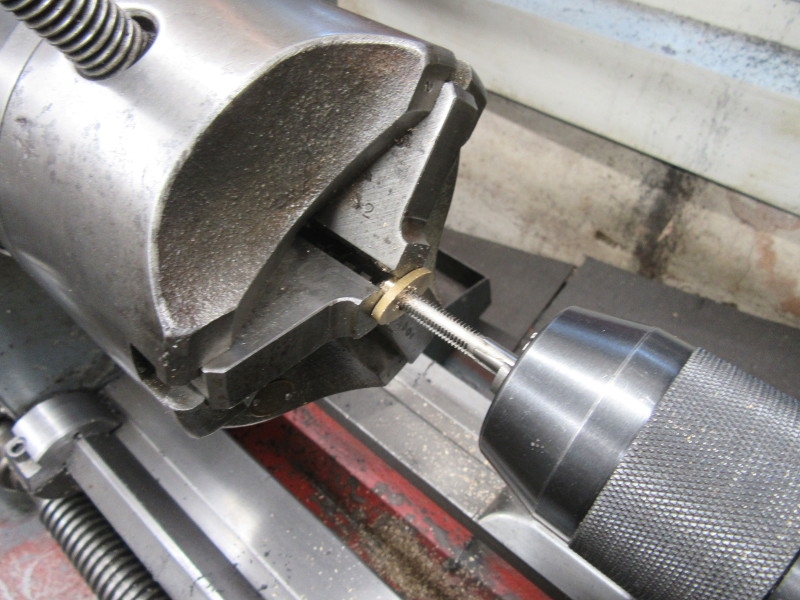
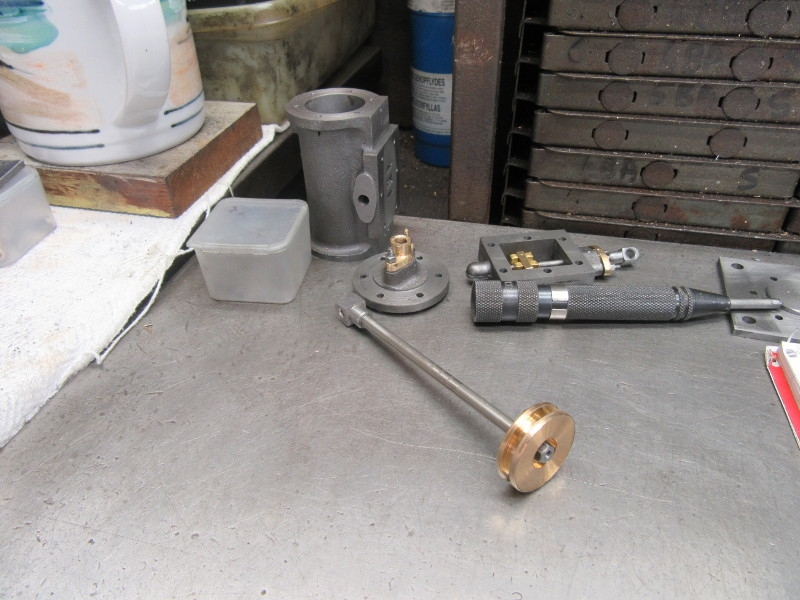
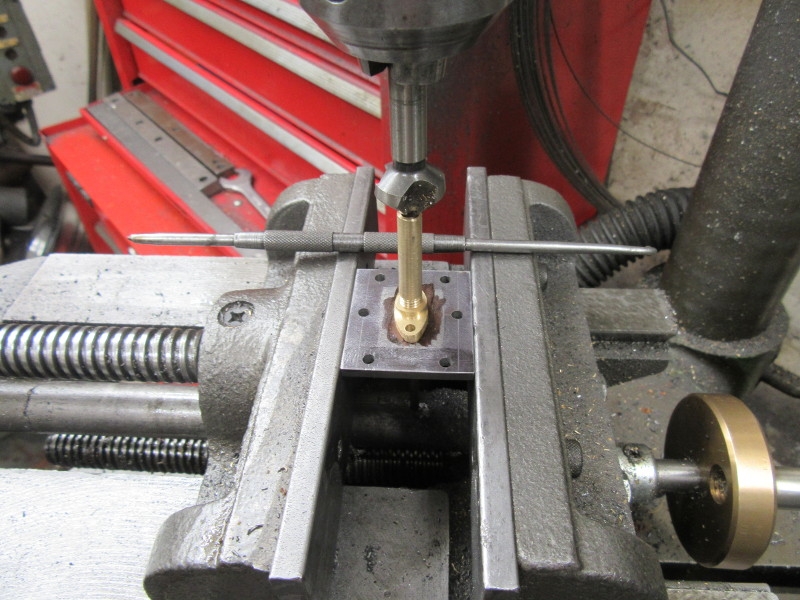
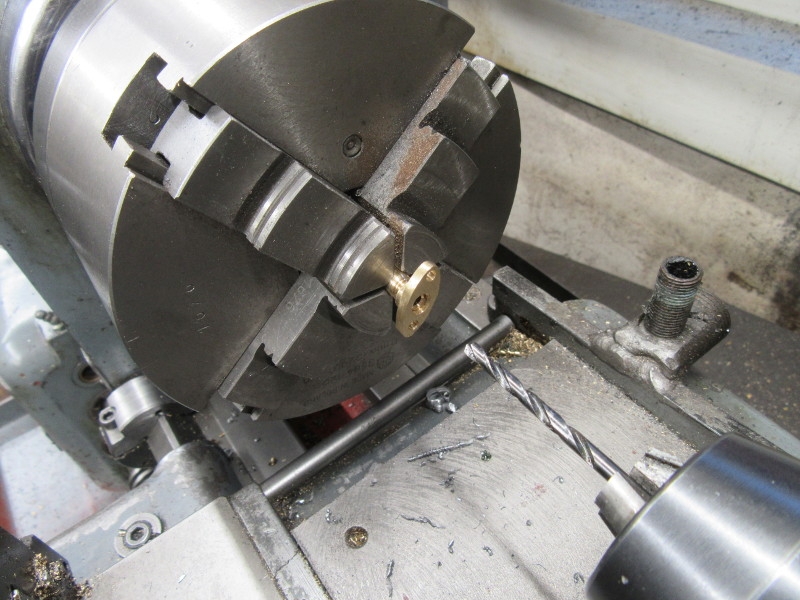
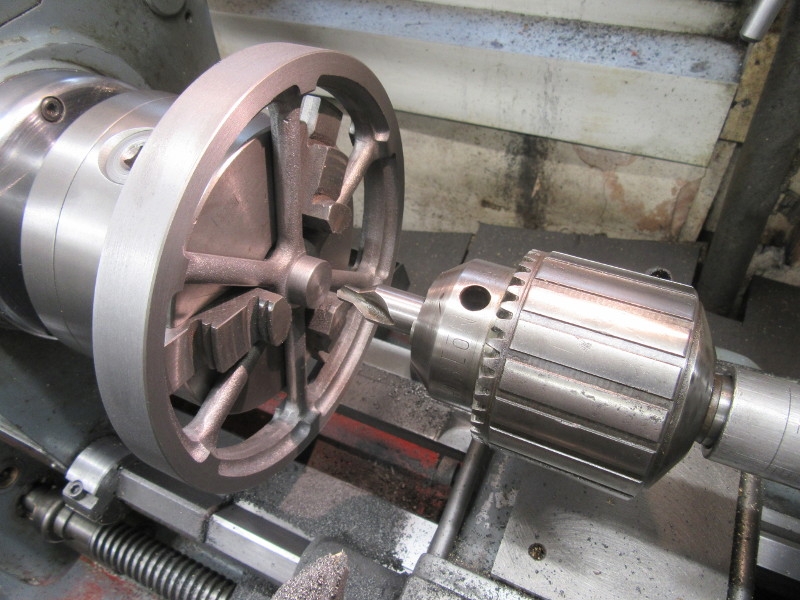
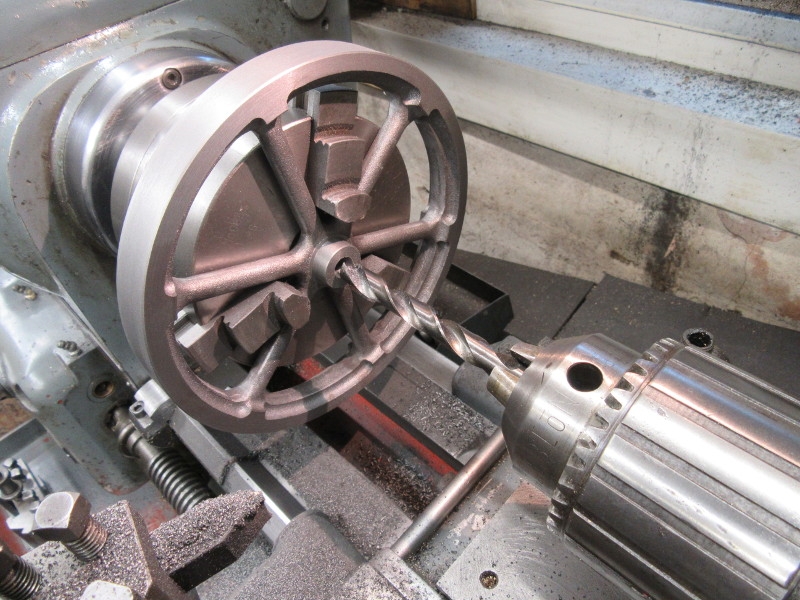
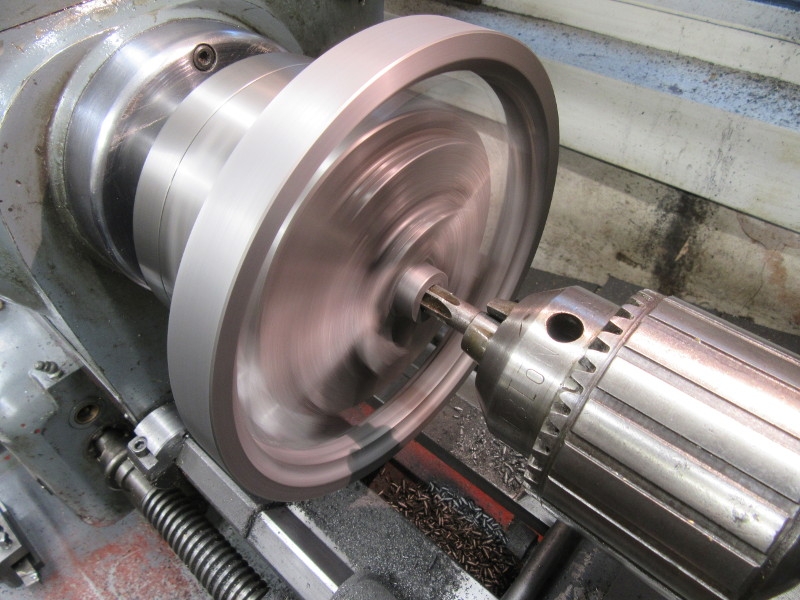
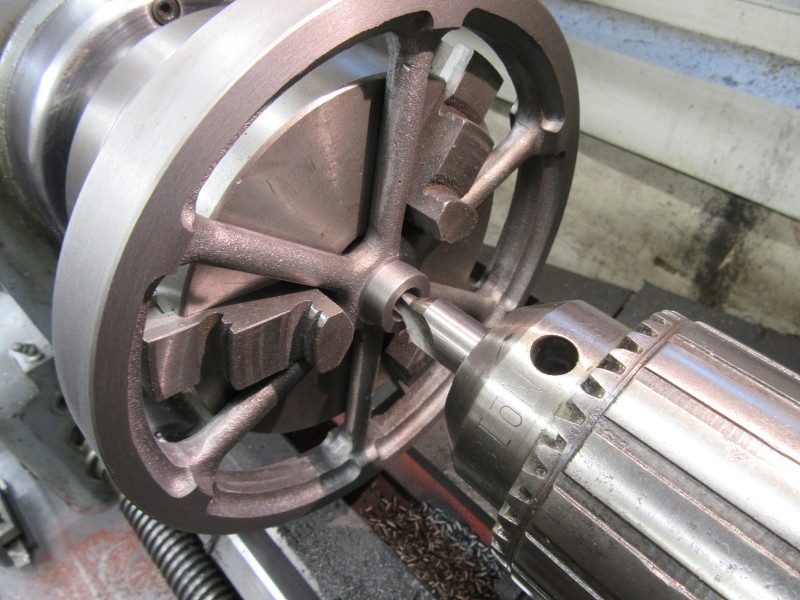
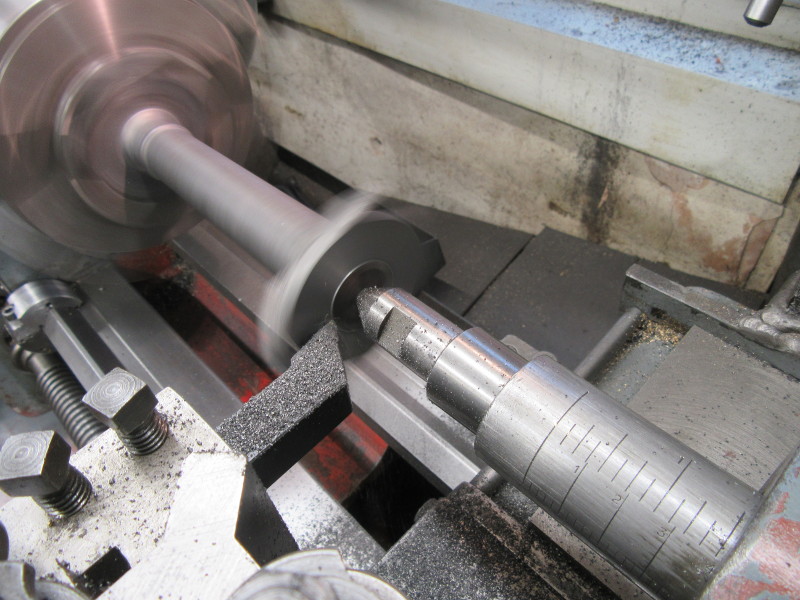
When I had it right I spotted the centre, I need to know where it is for the next difficult phase.
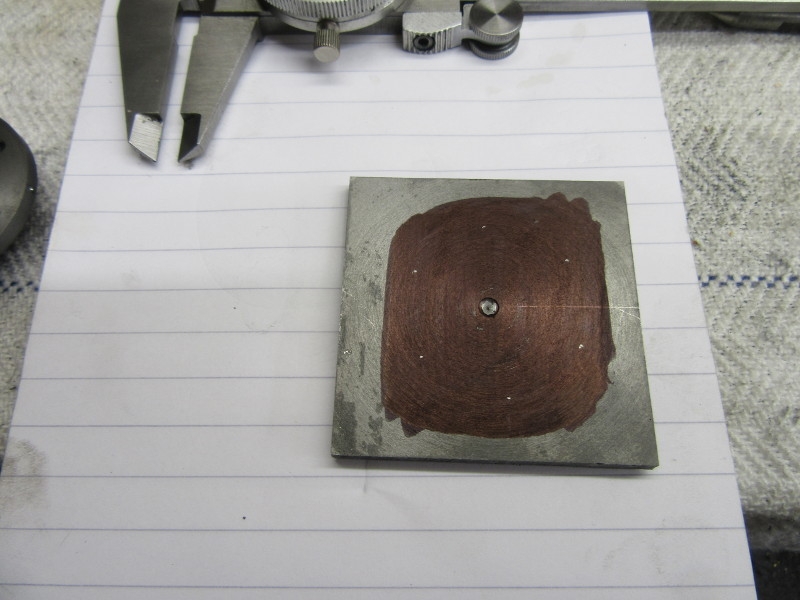
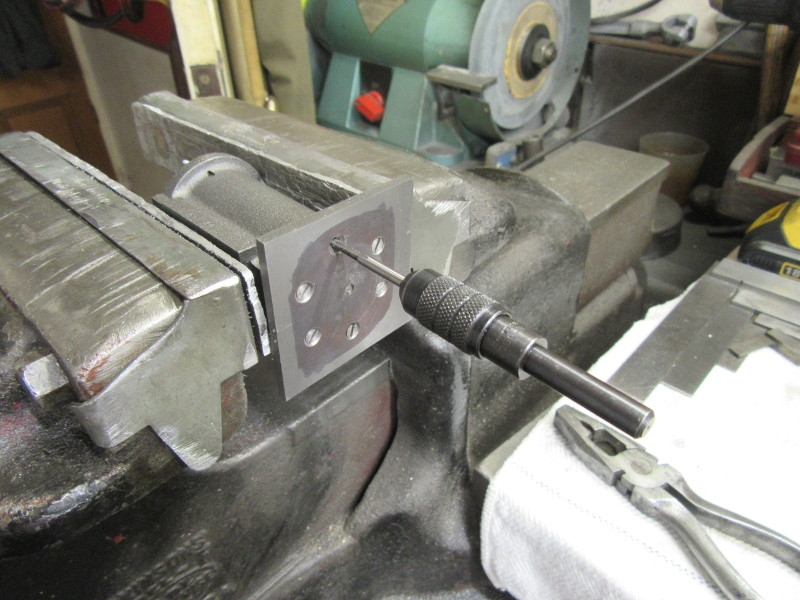
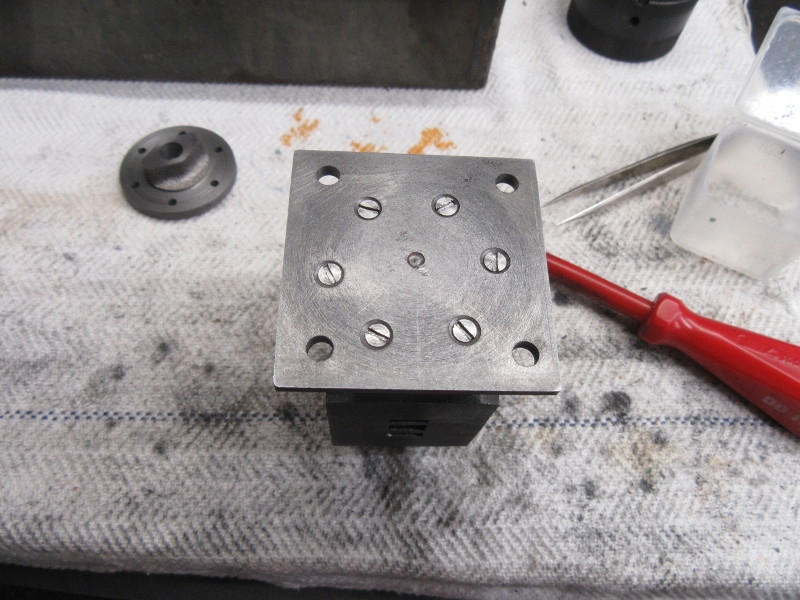
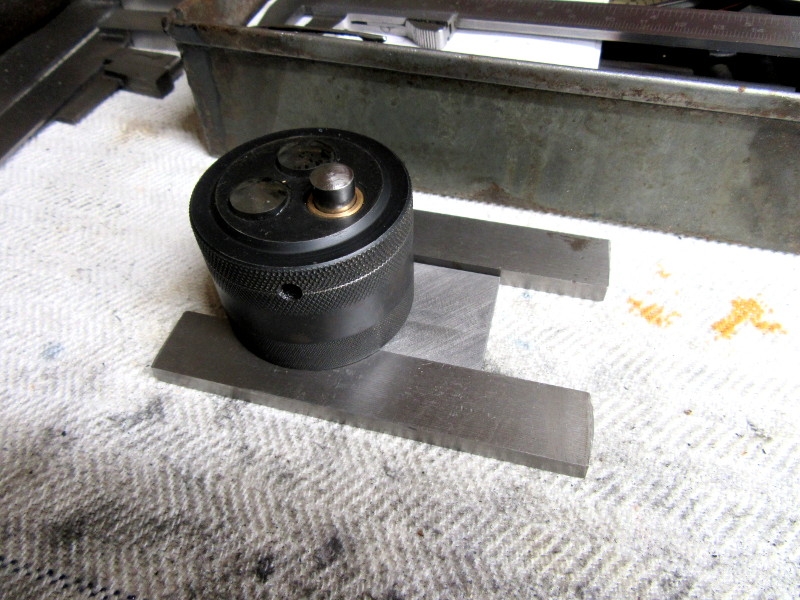
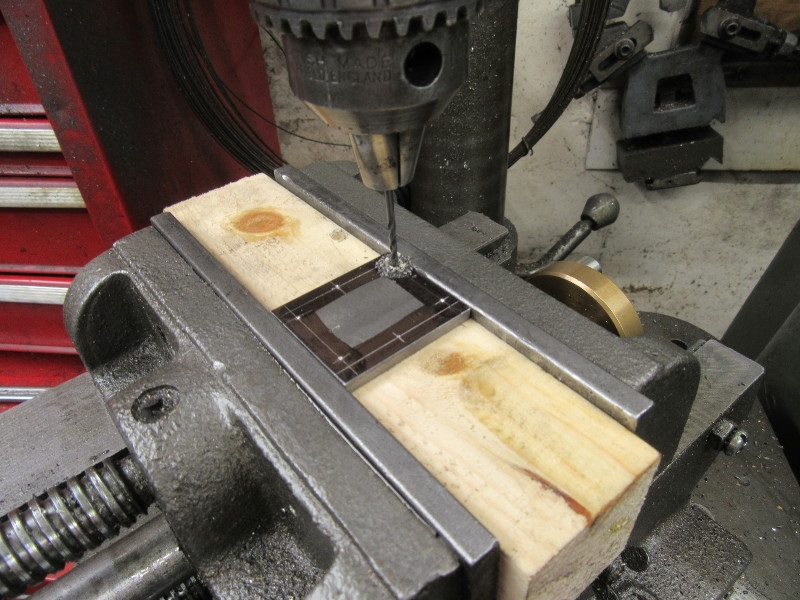
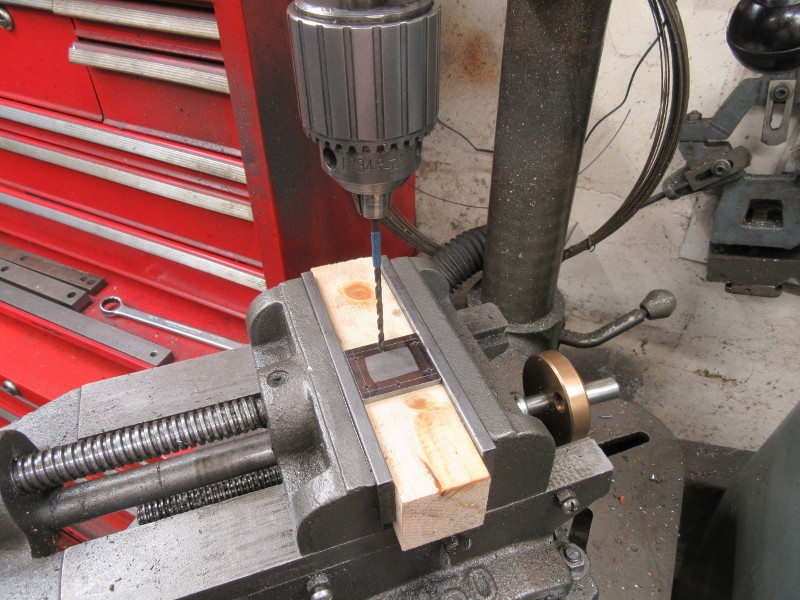
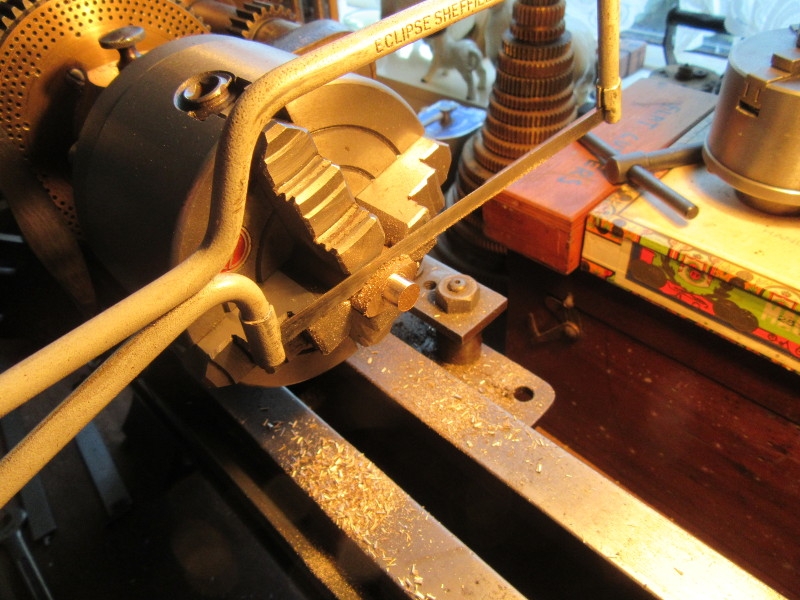
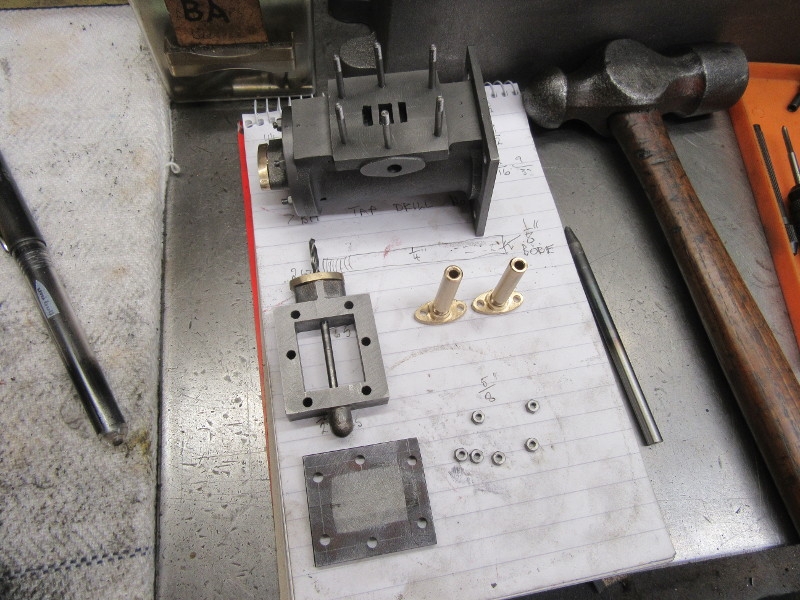
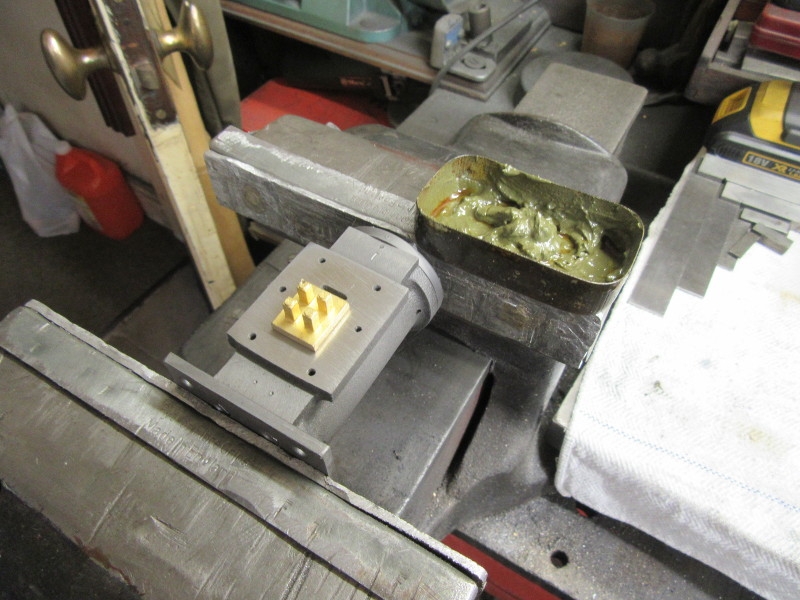
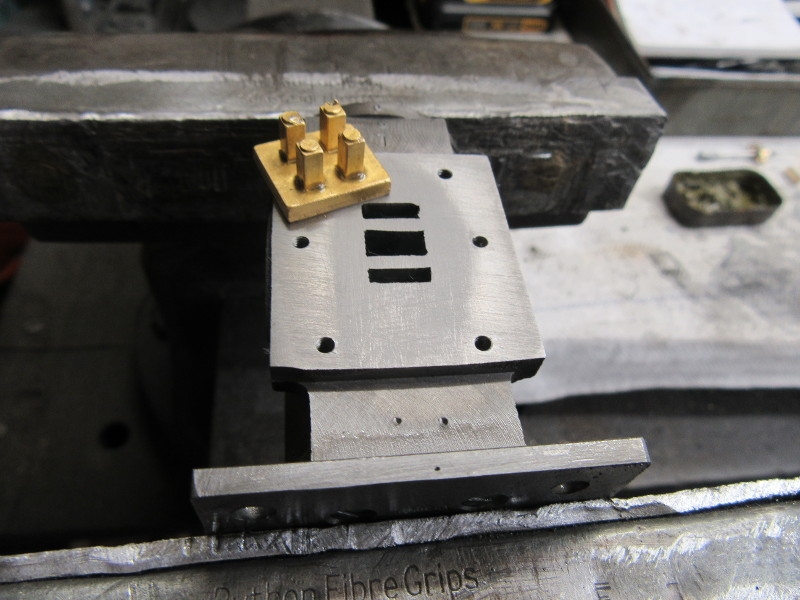
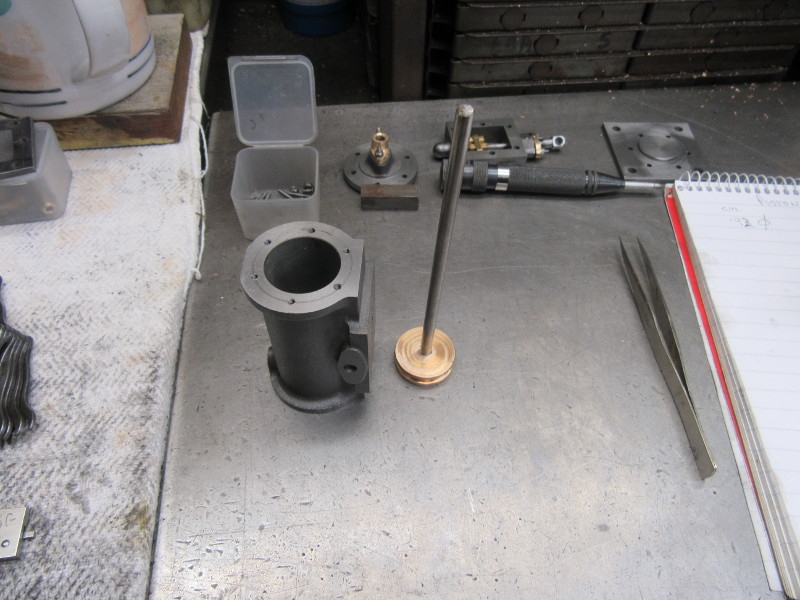
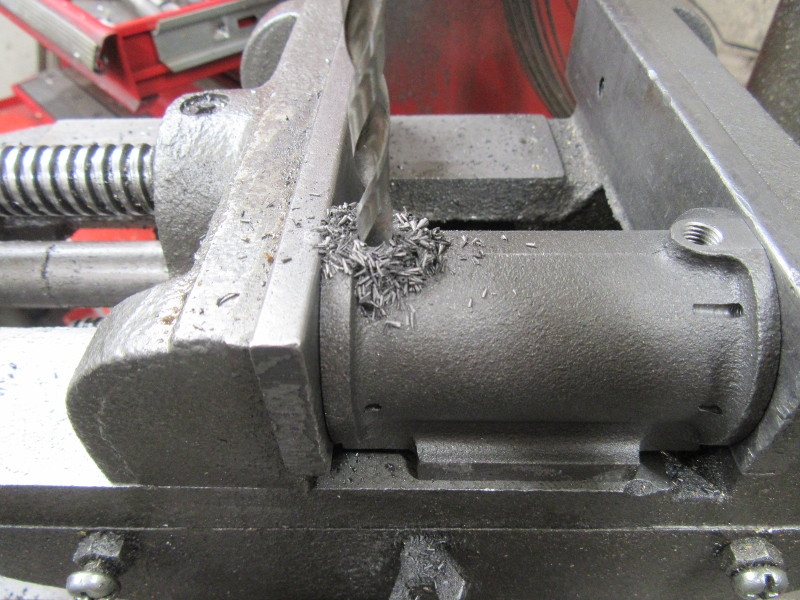
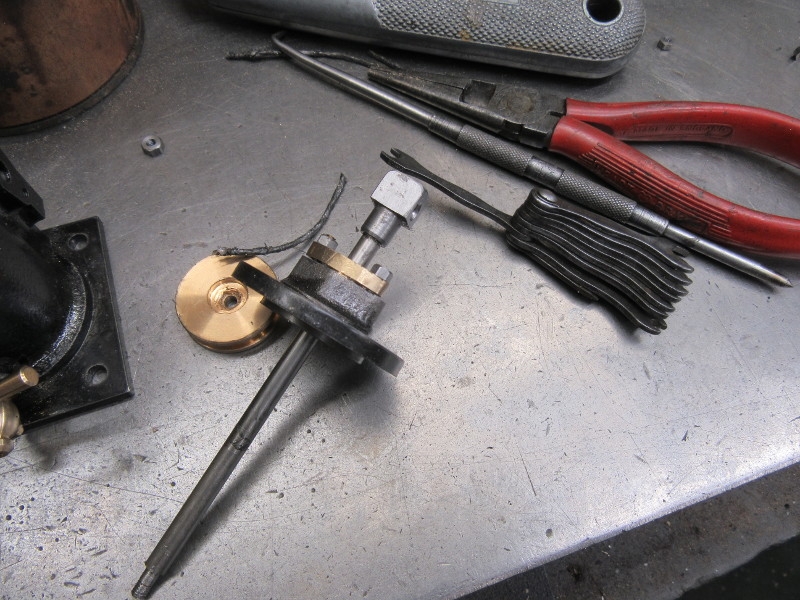
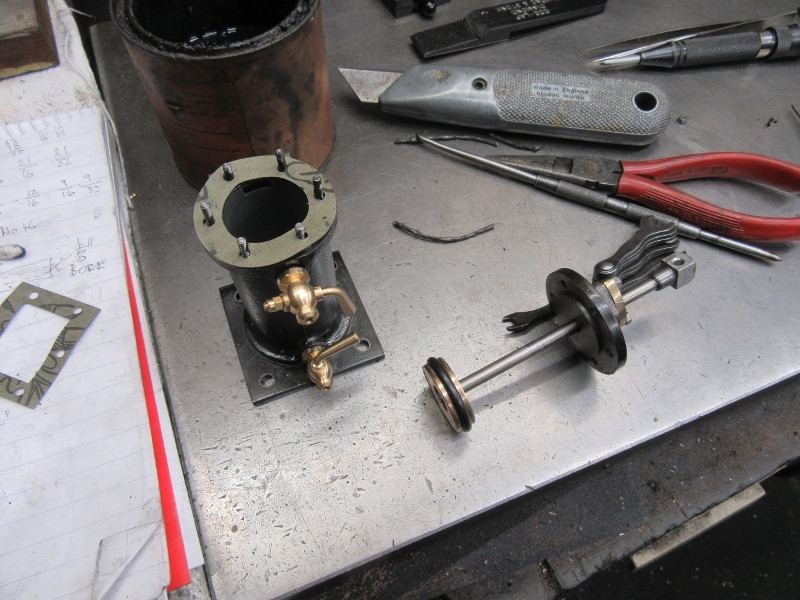
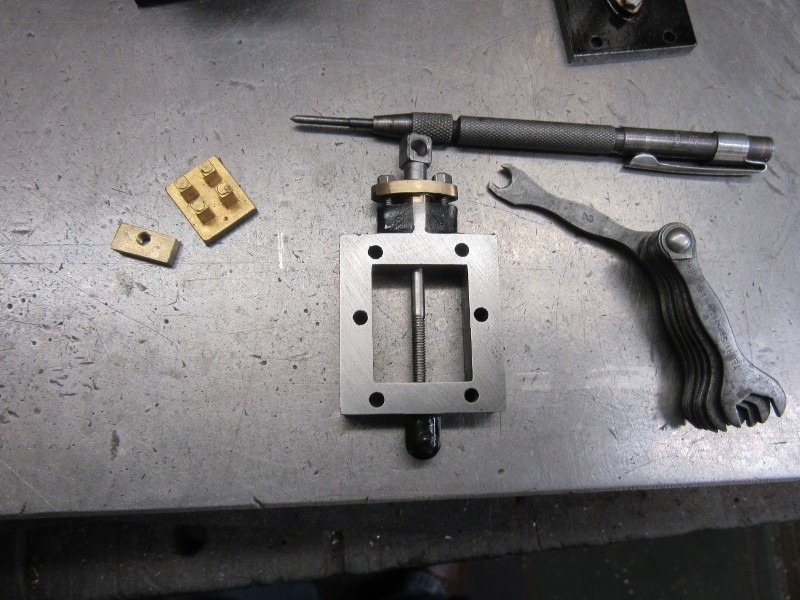
The task was to mark the bottom of the base for six holes in the bottom of the cylinder. If you think about it this is not easy. What I did was use a transfer punch to locate the lid in the centre of the base using the centre pop and then mark the location of the holes with another transfer punch. The tricky part of this job is getting the orientation right. Think about it! However, here we are with six spot marks. Then I Tried my new optical punch but it was no good on this application so I reverted to trusting my eyes!
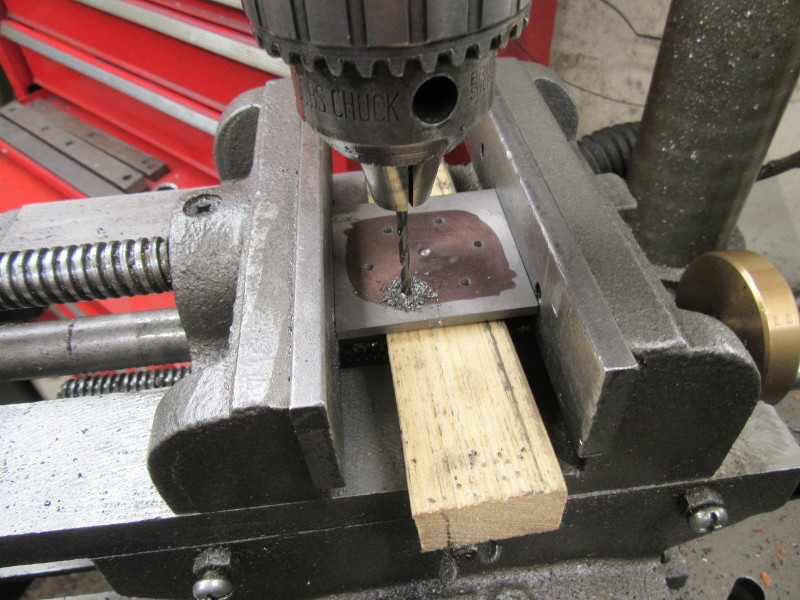
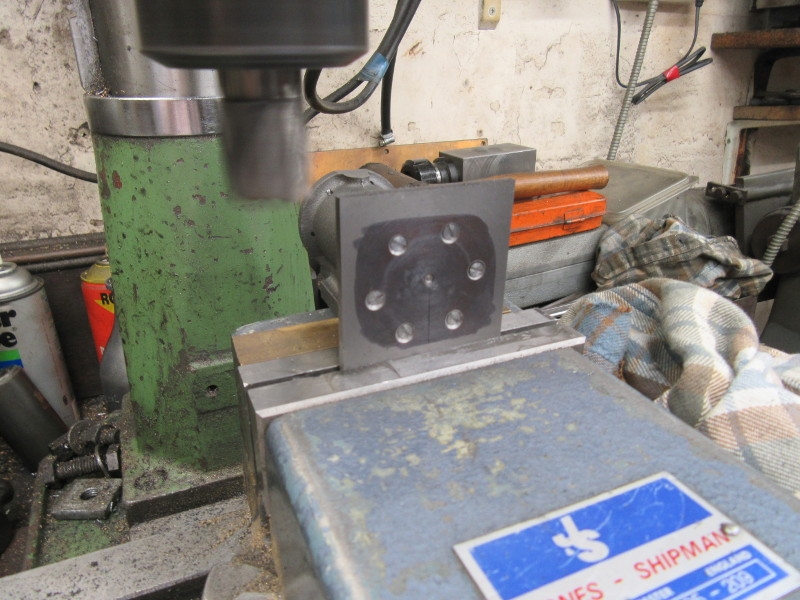
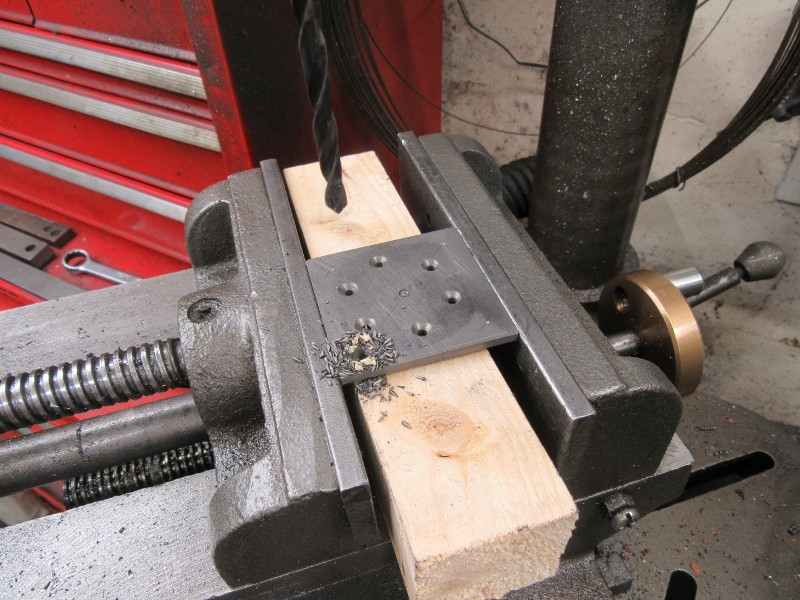
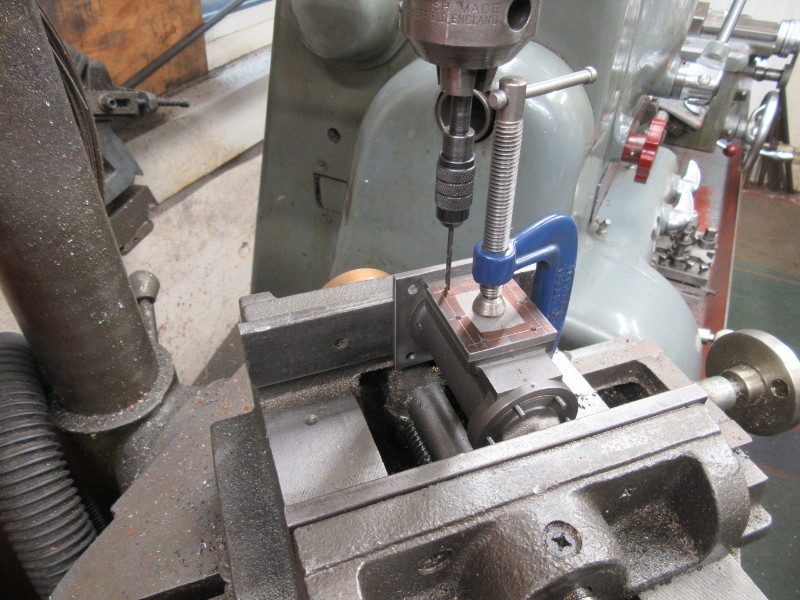
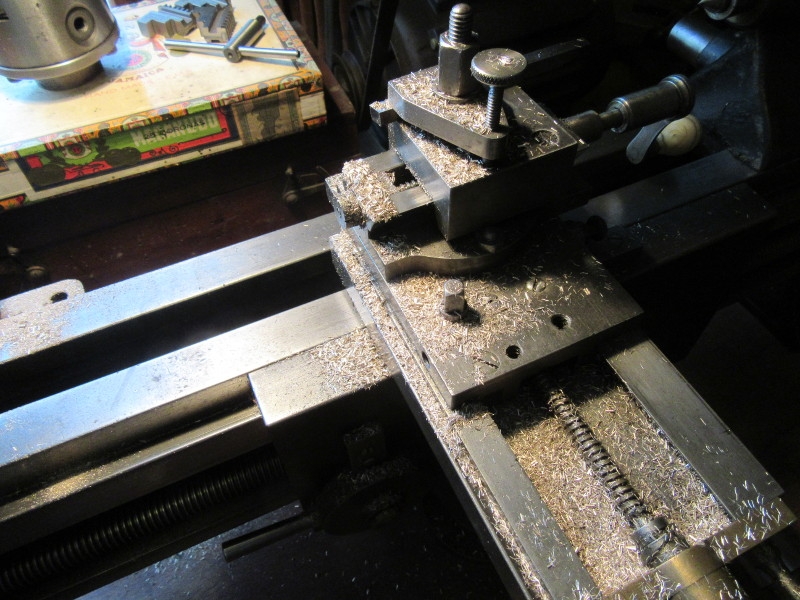
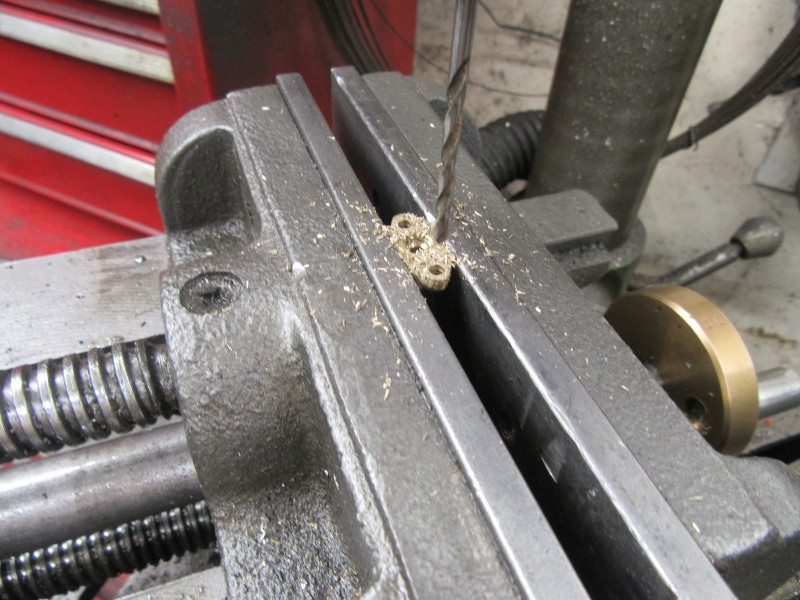
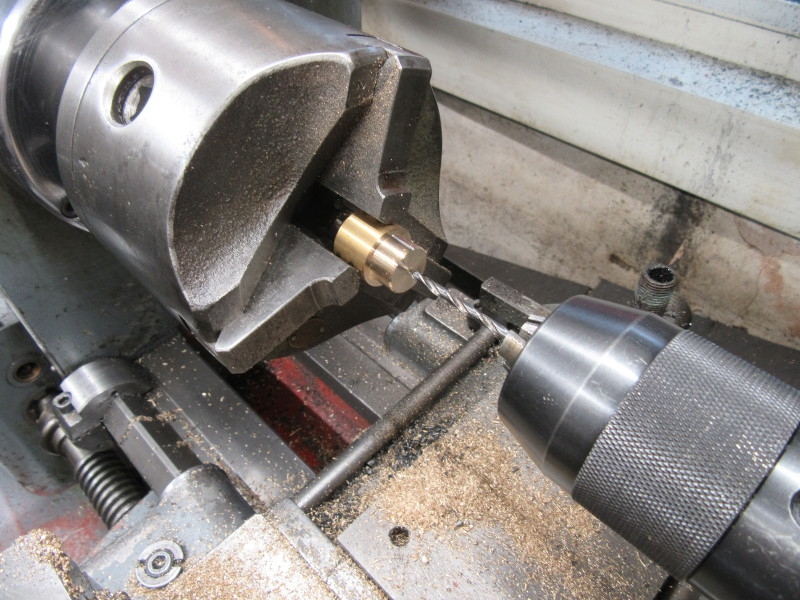
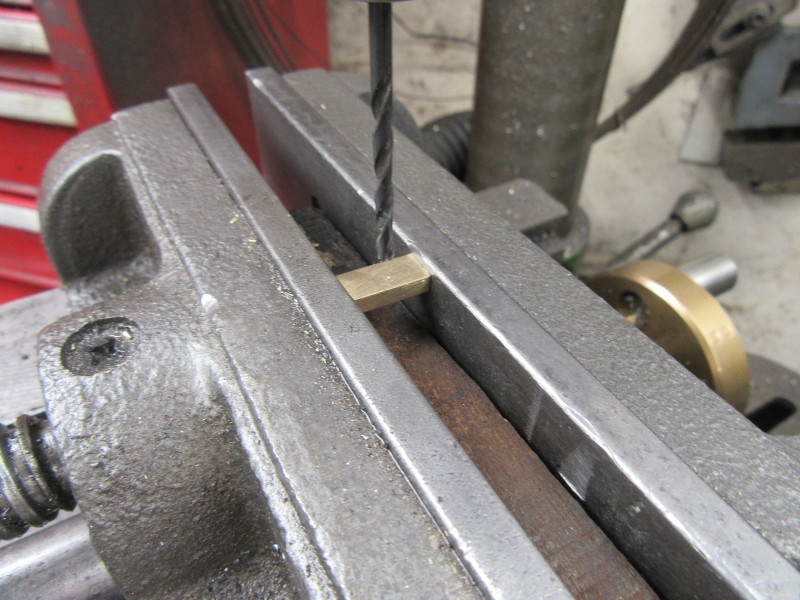
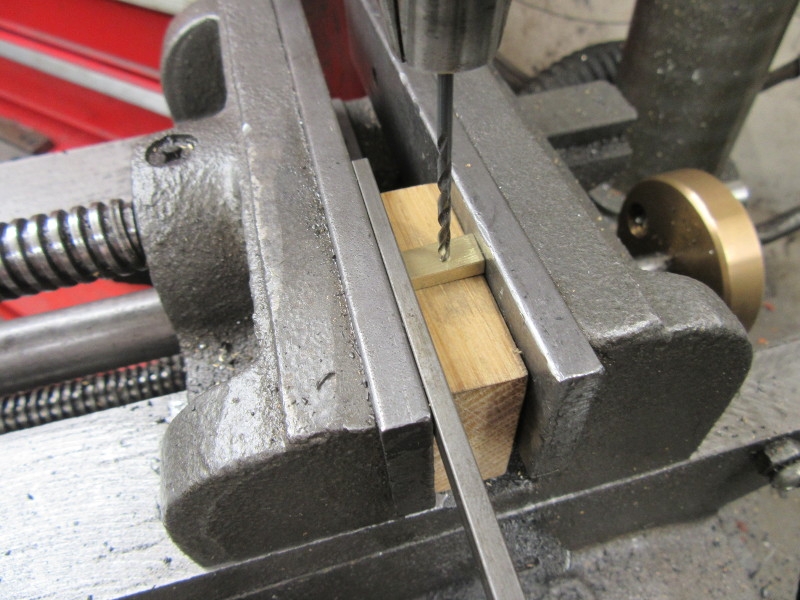
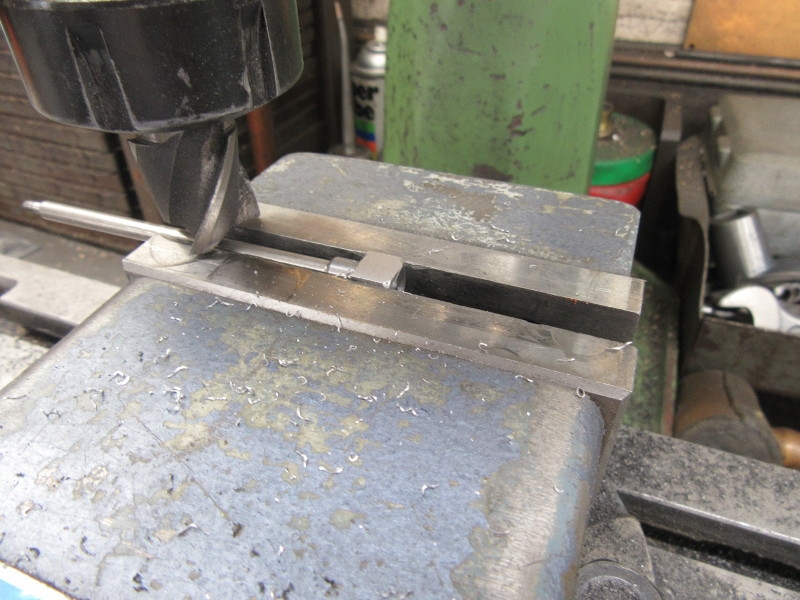
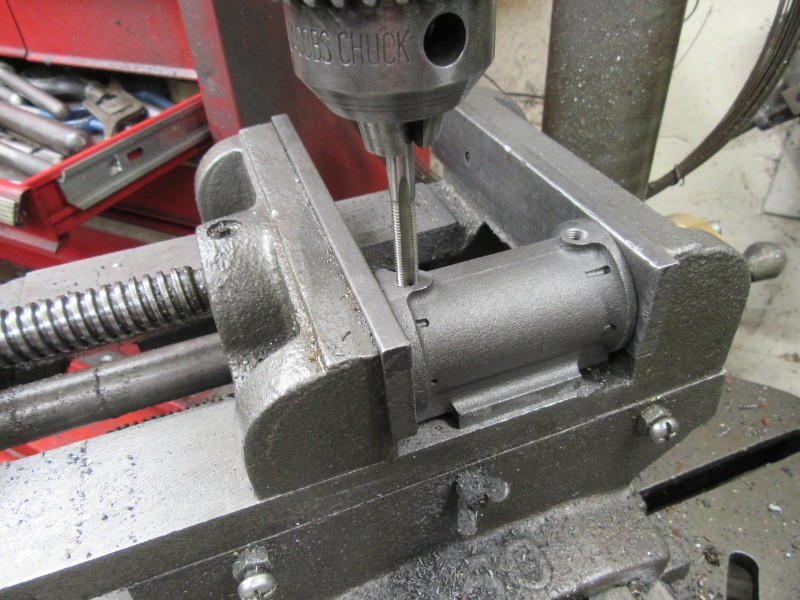
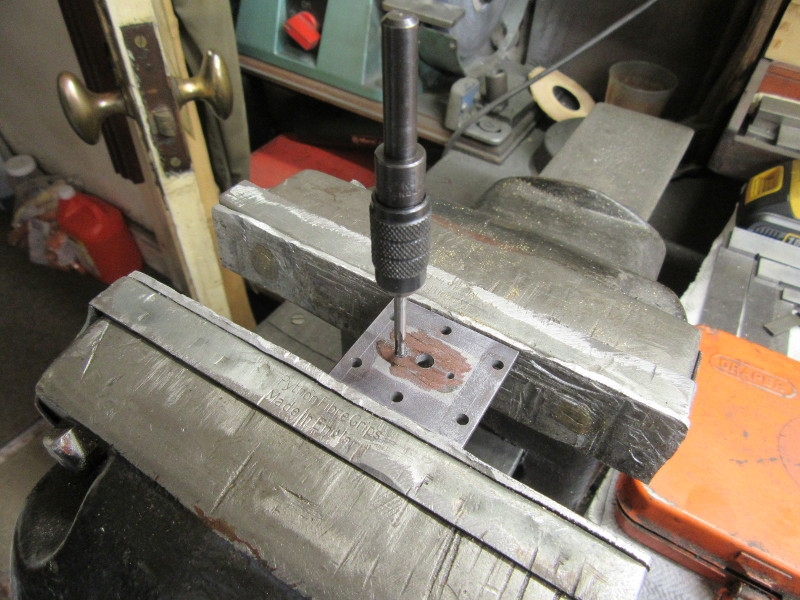
Then under the pillar drill and trust my marks.....
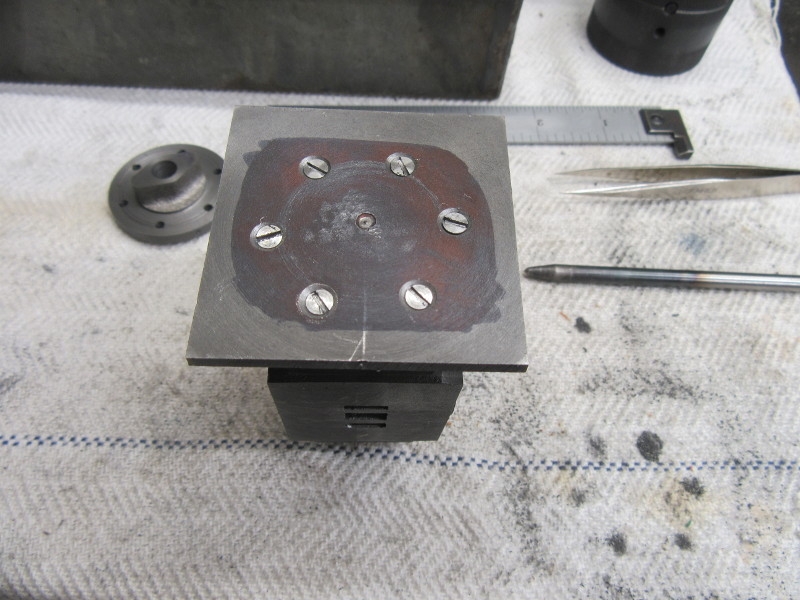
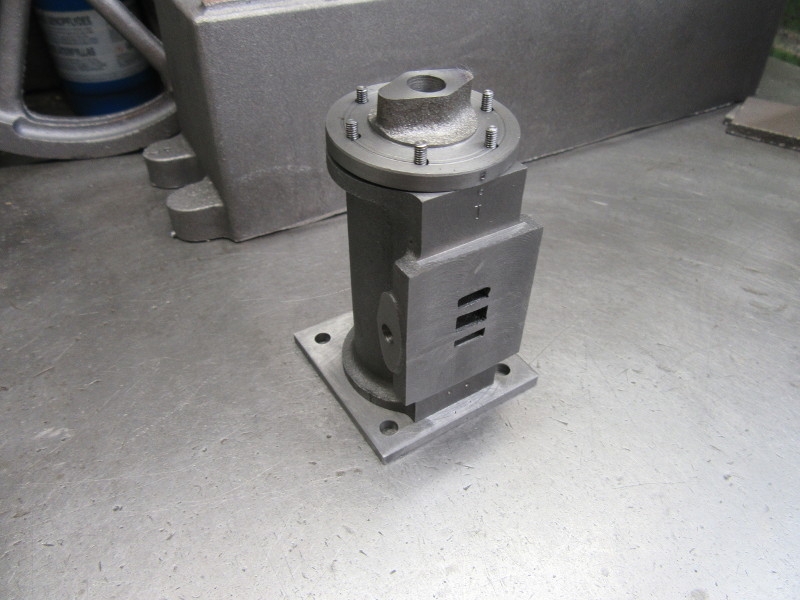
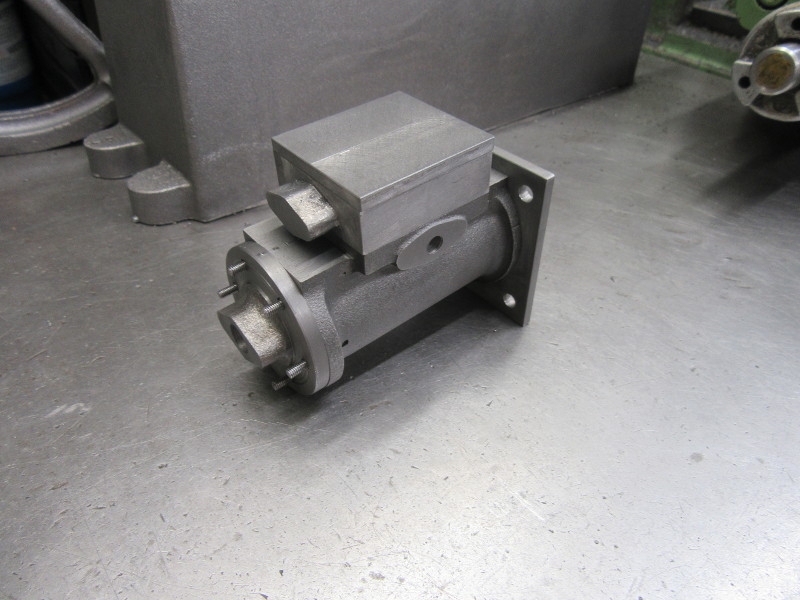
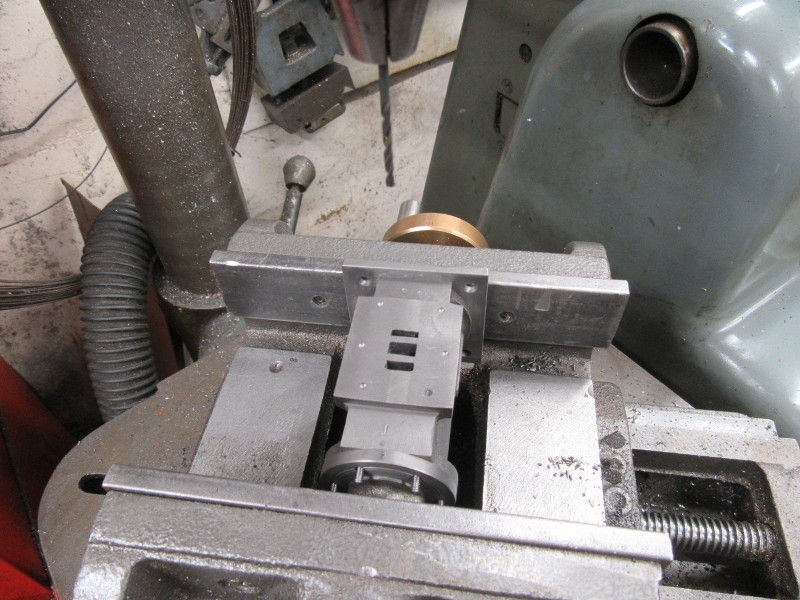
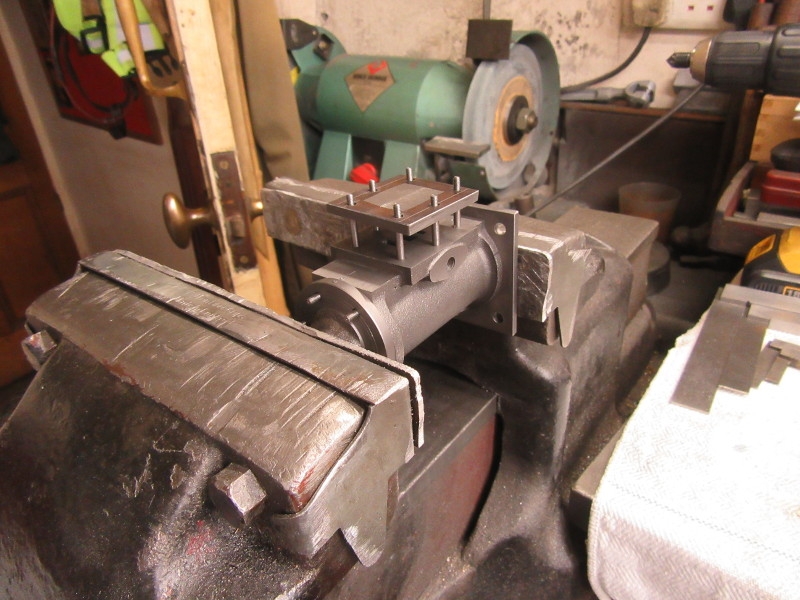
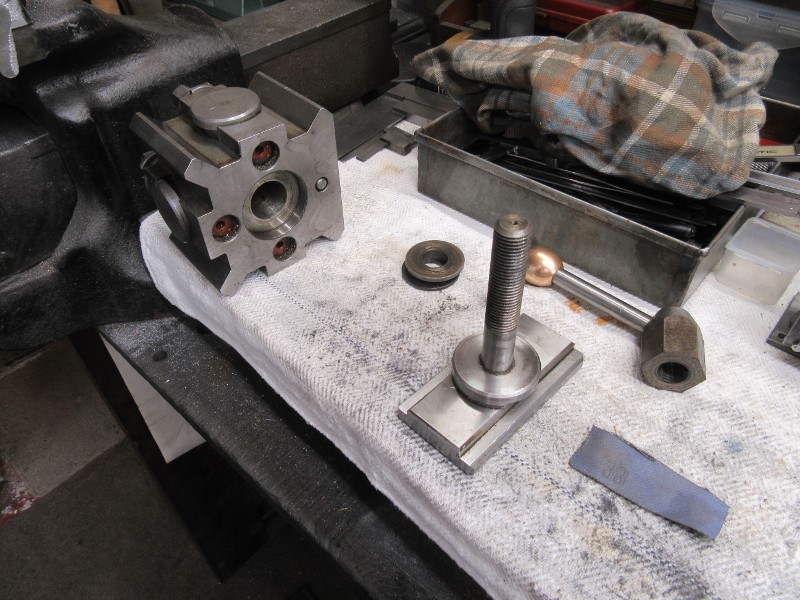
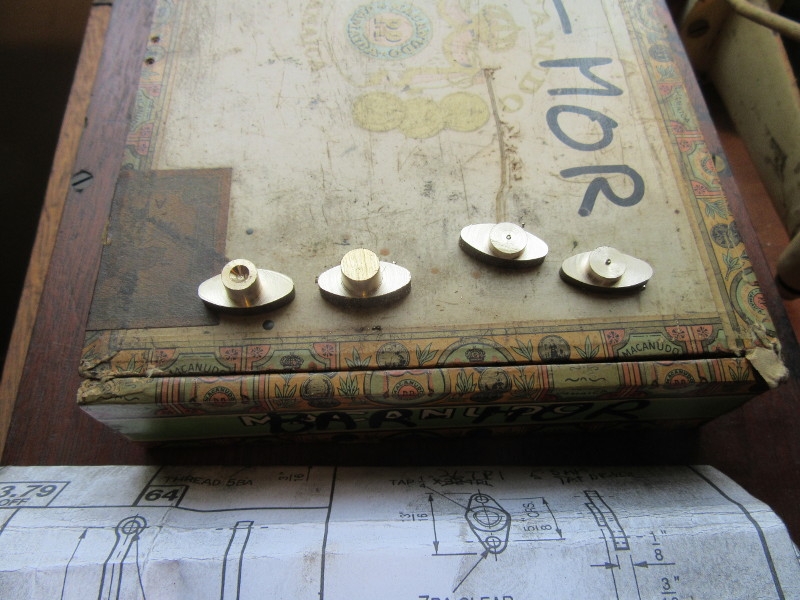
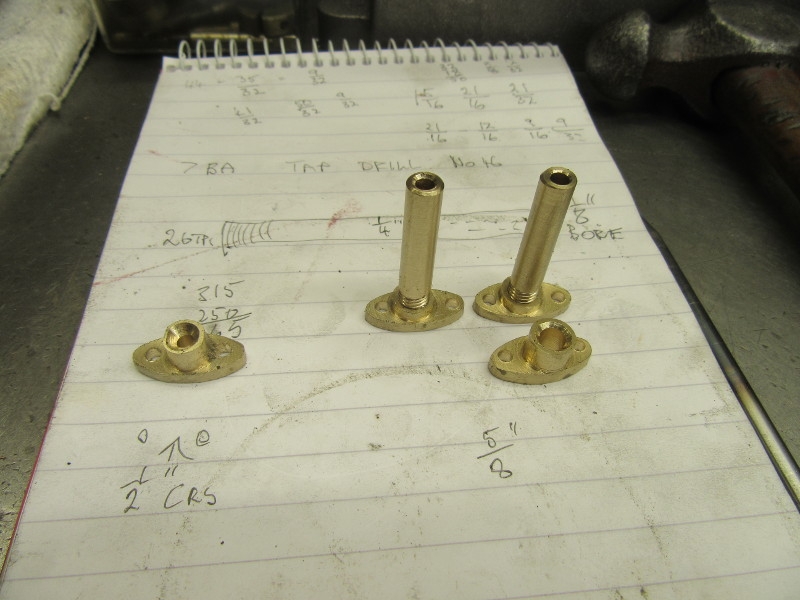
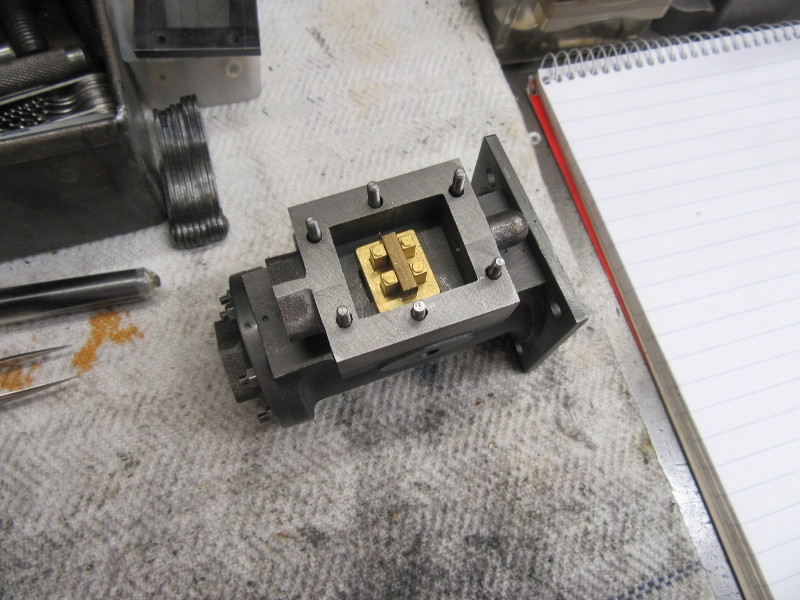
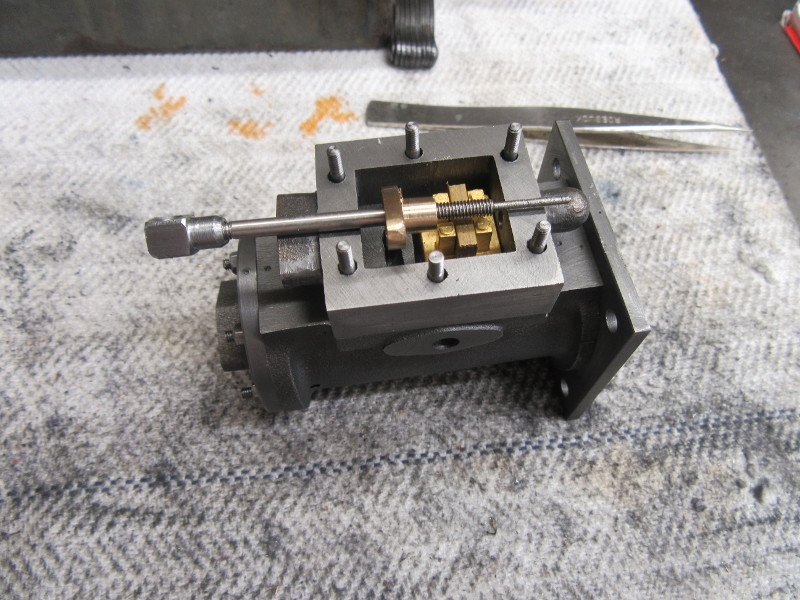
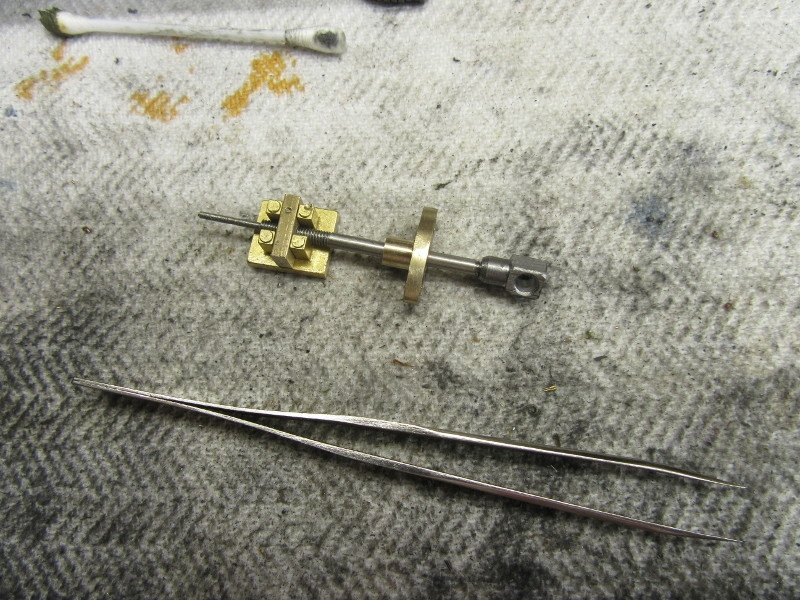
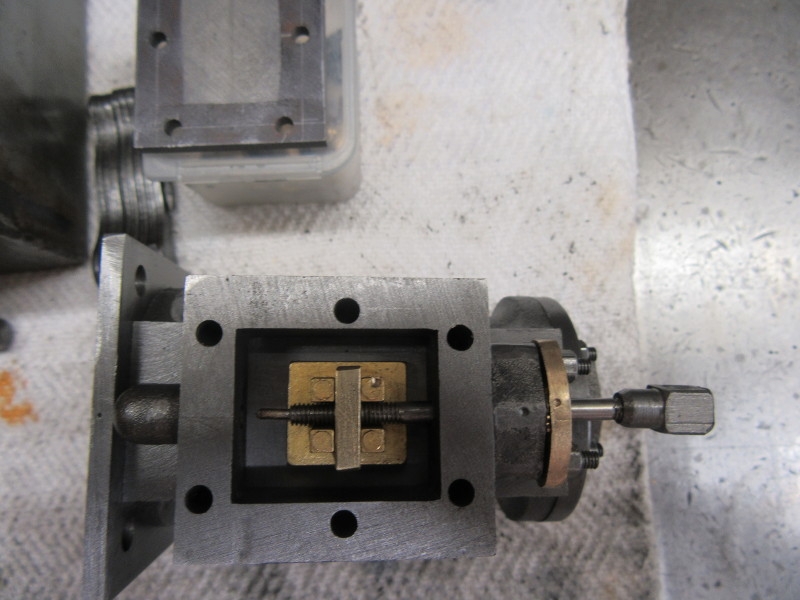
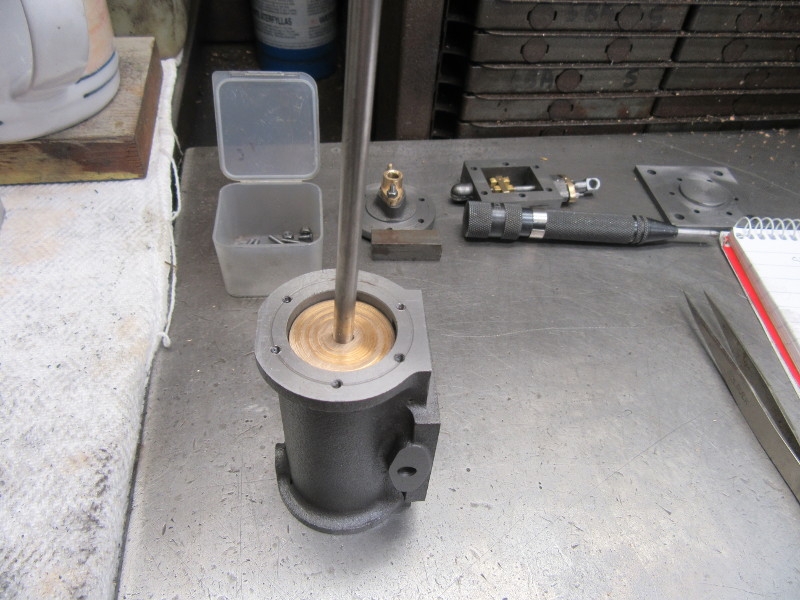
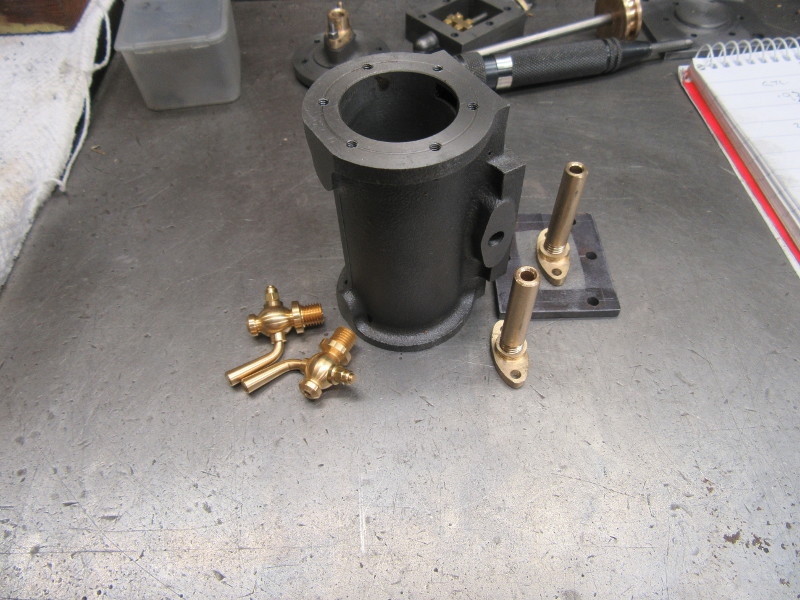
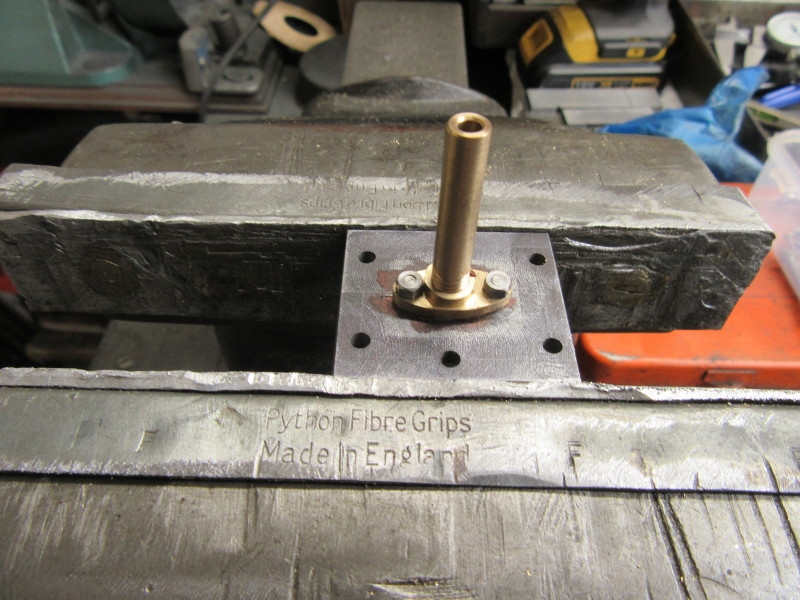
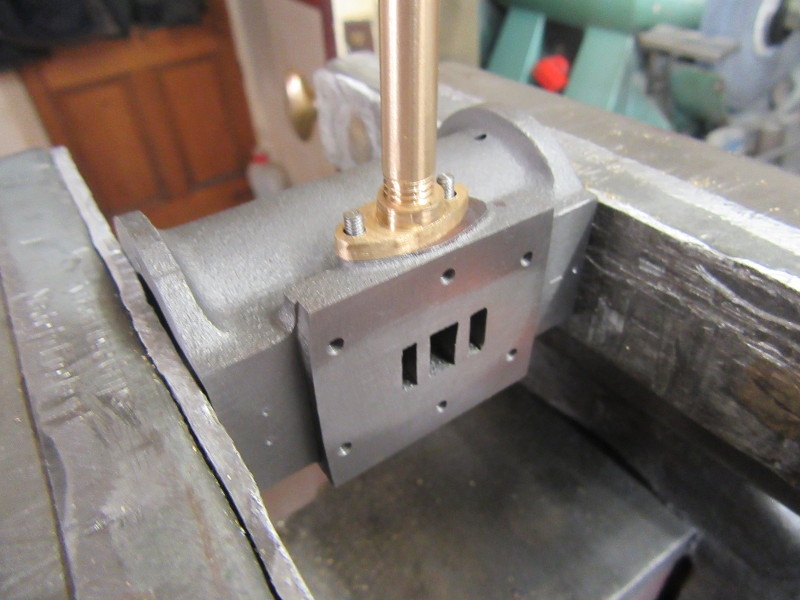
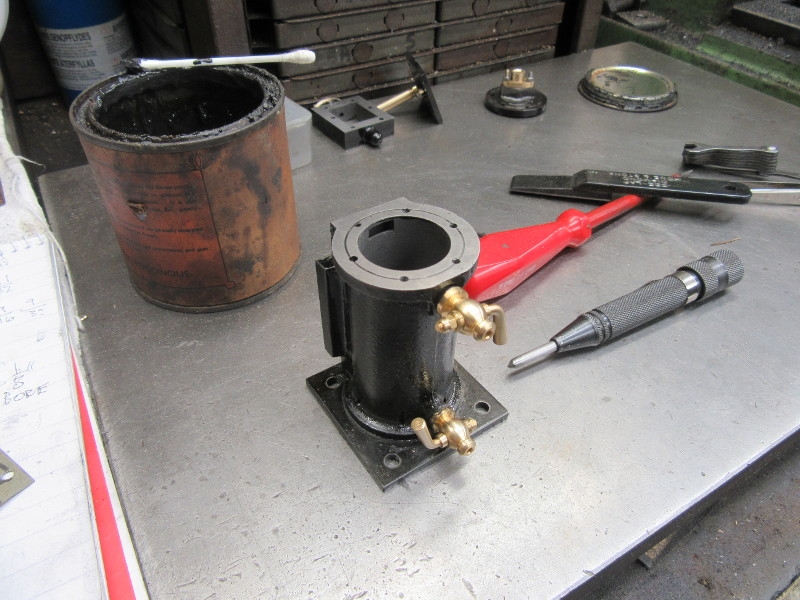
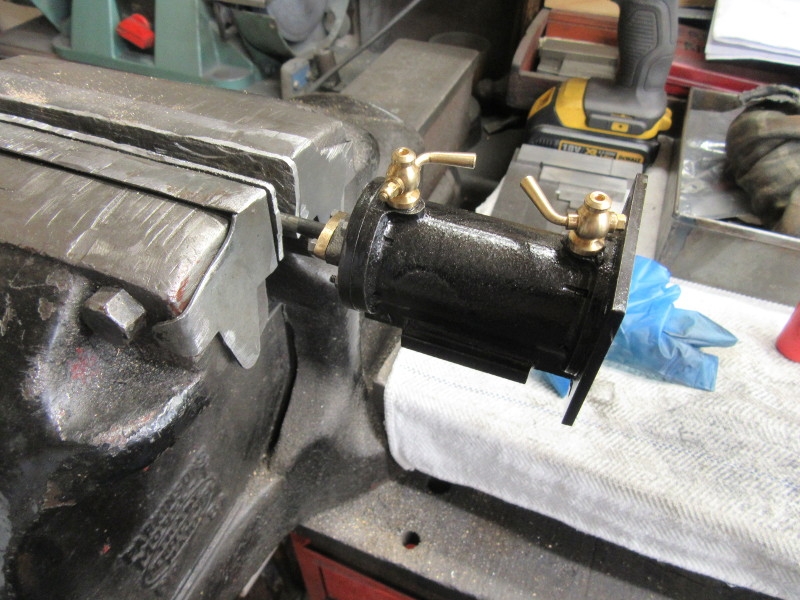
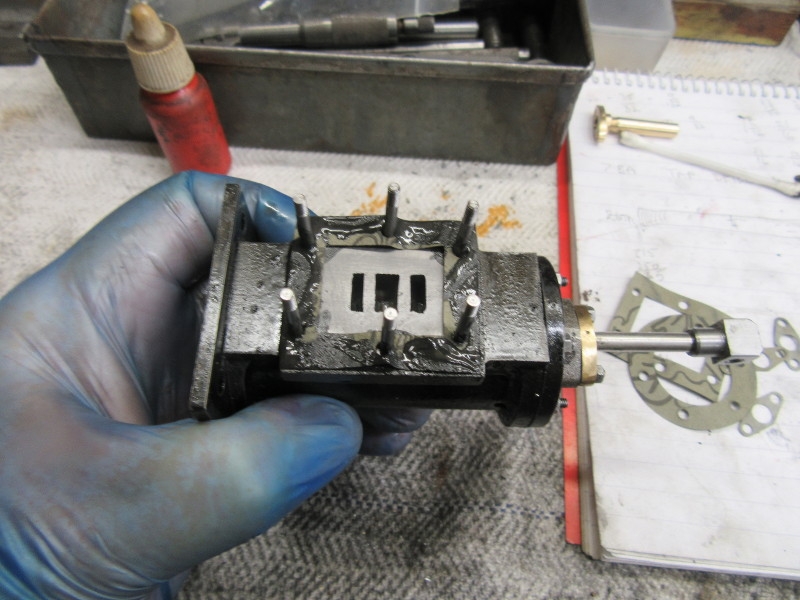
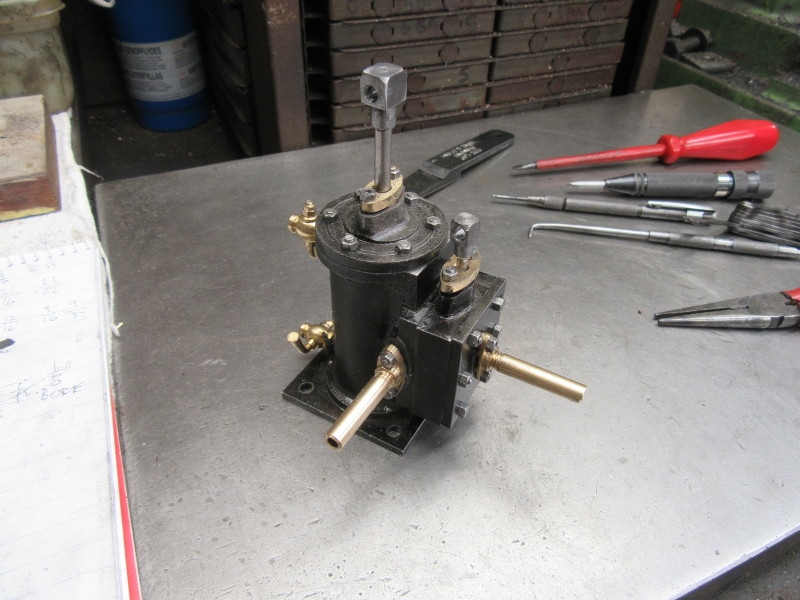
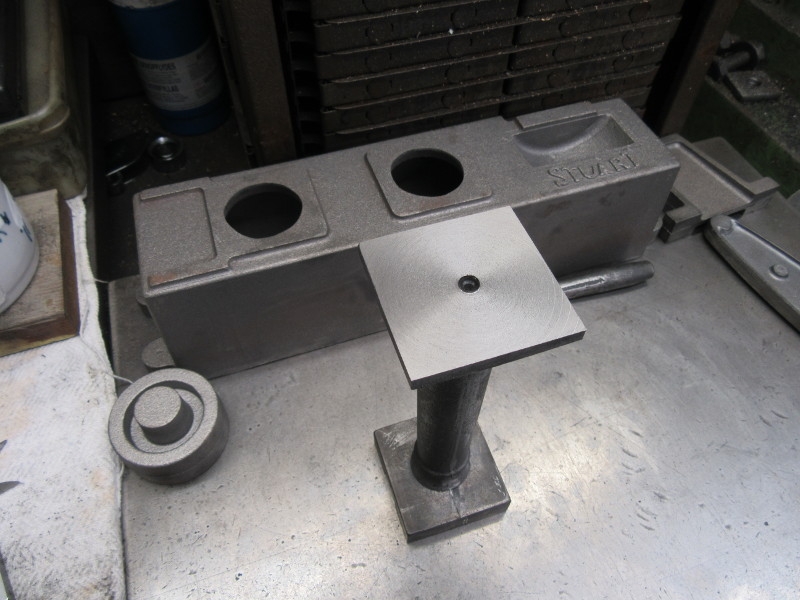
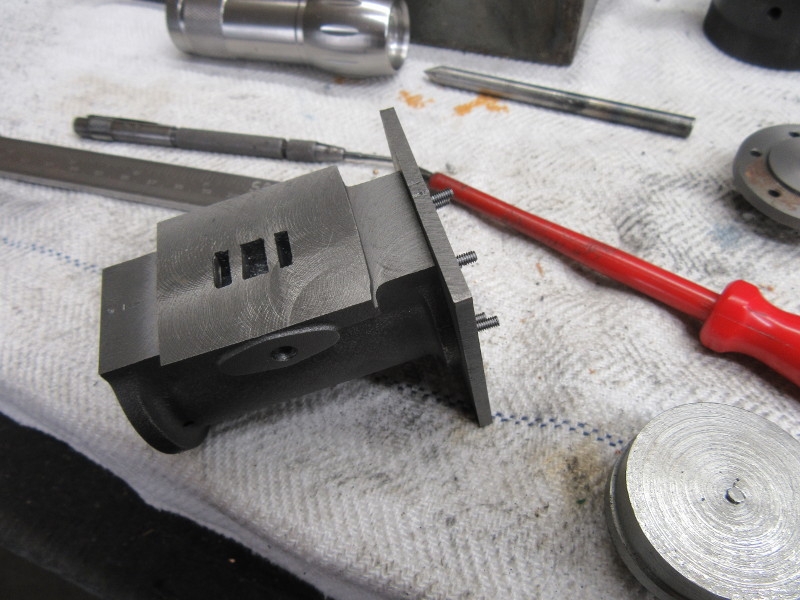
I put the studs in the cylinder and god bless us the hole pattern is almost perfect. Only problem is the register is fouling, I haven't got it quite central so I popped the lid back in the chuck and reduced its size. It's no detriment to how the cylinder will work.
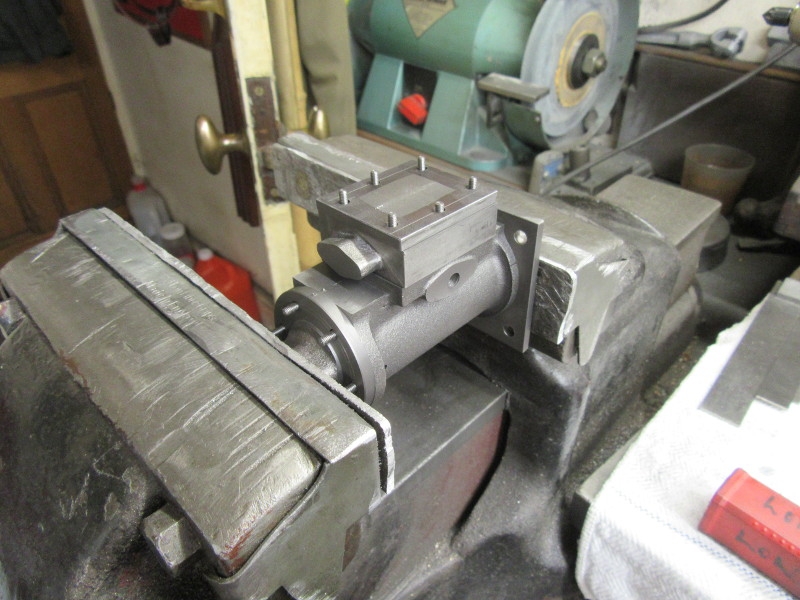
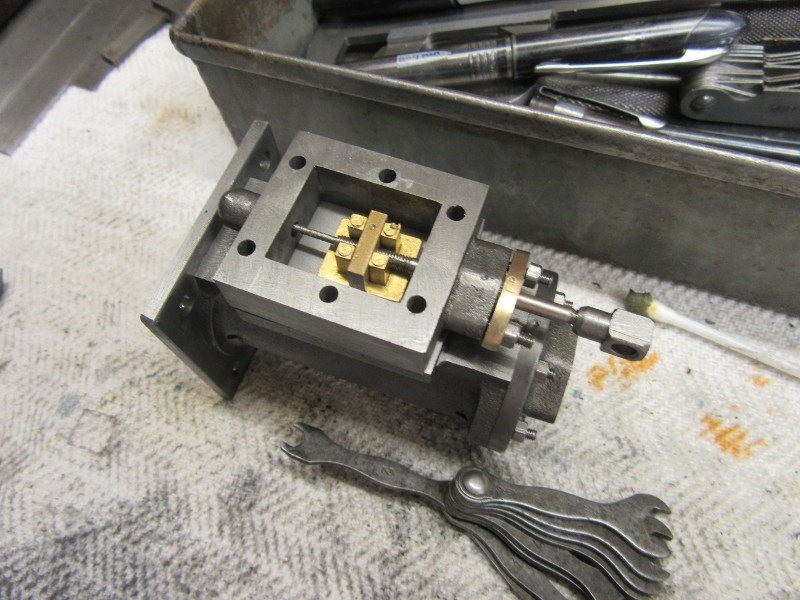
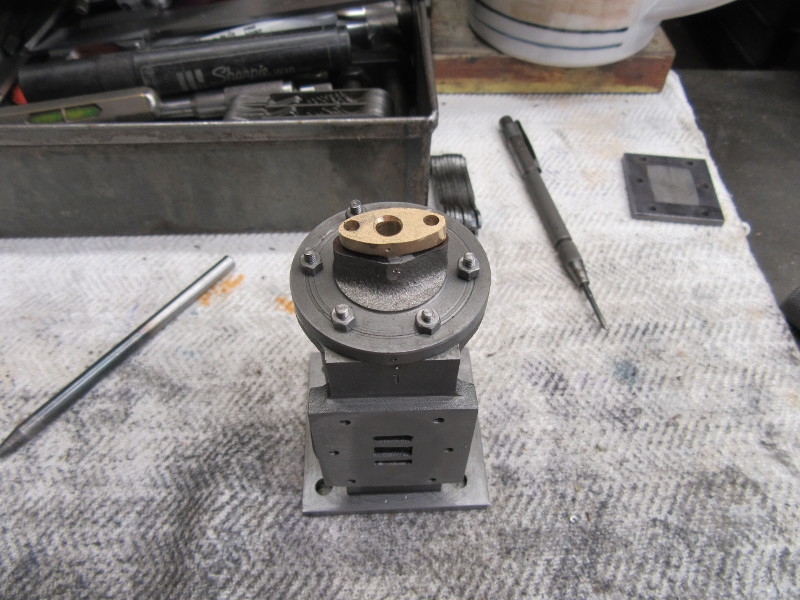
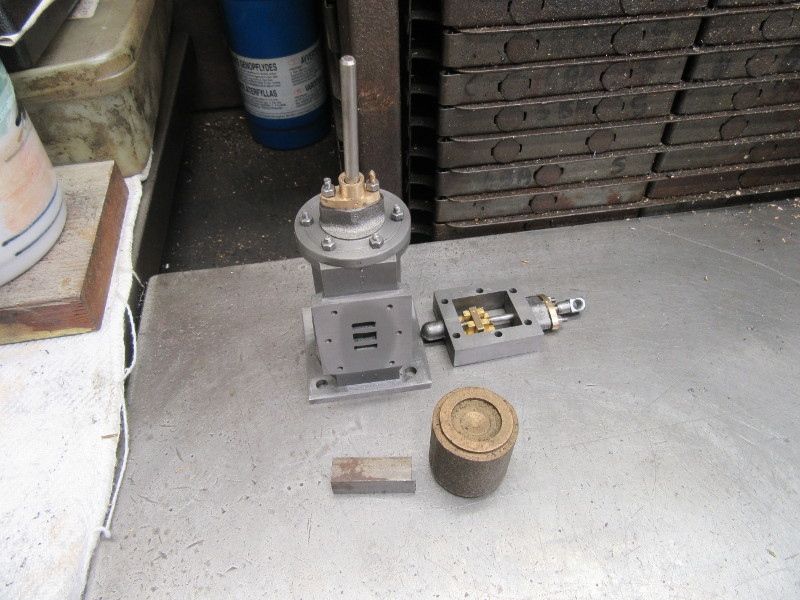
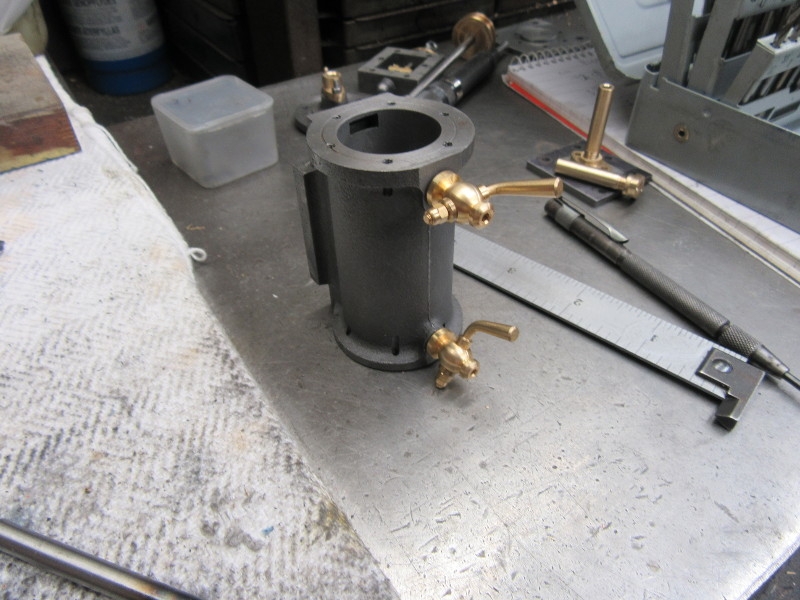
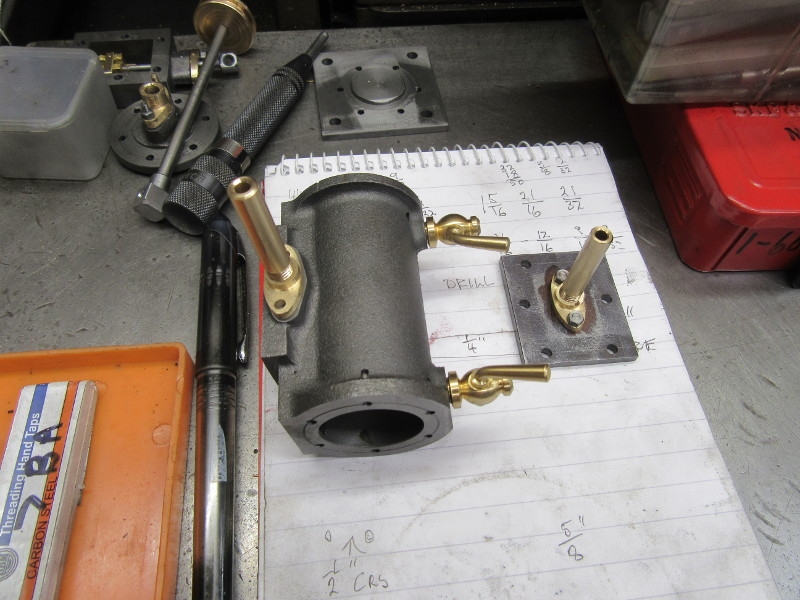
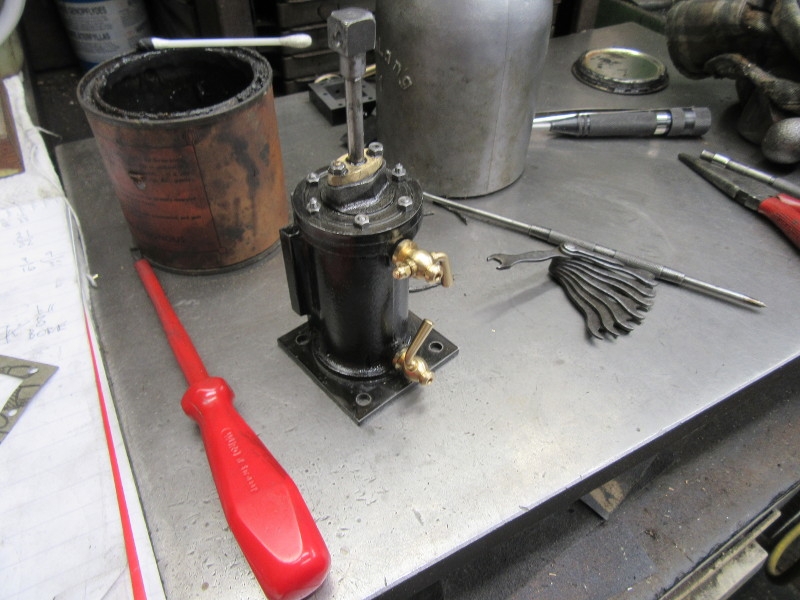
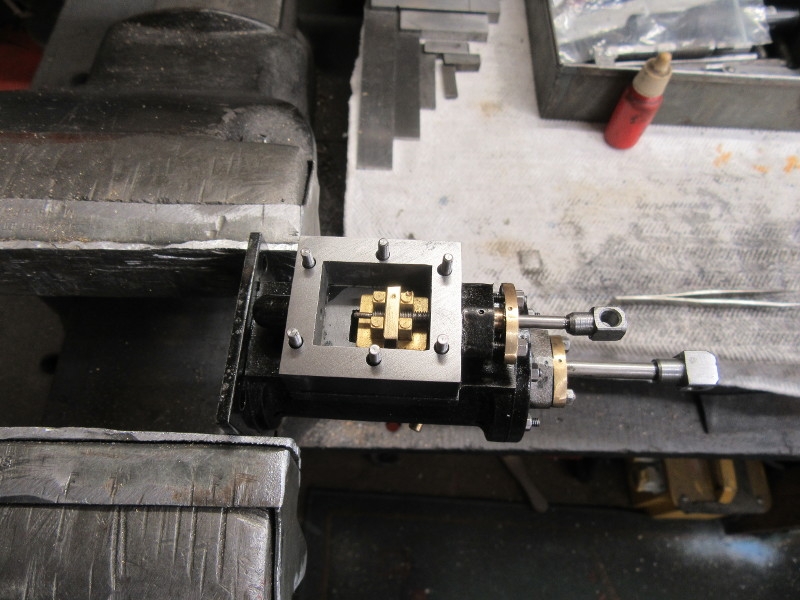
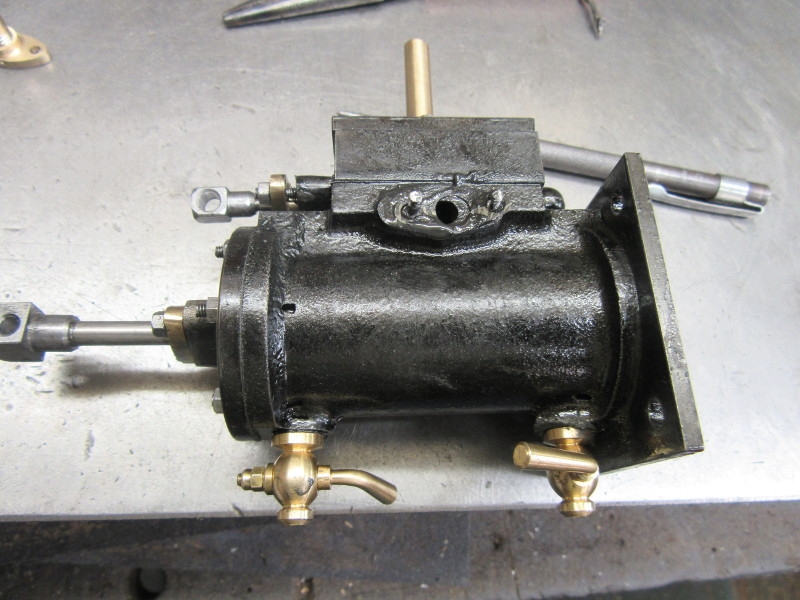
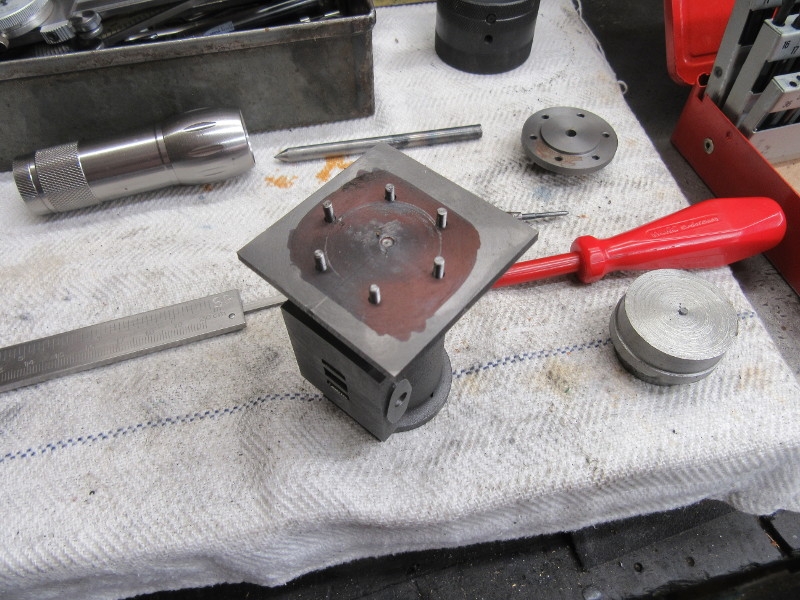
Here it is at knocking off time, the studs are registered and the base is snug against the cylinder. I'm ready to get on with the next step, countersinking the holes and fitting the countersunk head screws. That was a difficult hour, thank god it all worked out well!
Stanley Challenger Graham
Stanley's View
scg1936 at talktalk.net
"Beware of certitude" (Jimmy Reid)
The floggings will continue until morale improves!
Stanley's View
scg1936 at talktalk.net
"Beware of certitude" (Jimmy Reid)
The floggings will continue until morale improves!
- Stanley
- Global Moderator
- Posts: 91297
- Joined: 23 Jan 2012, 12:01
- Location: Barnoldswick. Nearer to Heaven than Gloria.
Re: Shed Matters 3
The first job was to replace the studs with the countersunk screws. First I opened the holes up to the next number drill and countersunk the holes. This is a first fit of the screws in the countersinks.
All the screws entered bar one so I ran the tapping drill in the hole and re-tapped it. Not perfect but quite adequate.
Then a fit up and it's OK. Box on!
During the fitting of the cylinder to the base the position drifted a bit and is not absolutely square to the valve. This was expected and I left the base slightly oversize so it can be adjusted to match the cylinder. Using the valve face for a register I adjusted the first edge, this is a reference for the rest of the sides.
Then I adjusted all the sides so they were square and to size.
Then I measured for the holes for the 2BA holding down bolts and drilled them 3/16". All the time I have been working on this base I bore in mind it's only 1/8" thick and being cast iron, is delicate. No big blow on the punch to mark it and of course very light cuts when it was under the mill.
The final fit at knocking off time. Tomorrow I shall prepare the cylinder for accepting the piston and rod. This is good progress, I have had a nice morning.
I've just popped back in to say that's wrong, just realised the next job is to make and fit the steam chest and lid. More drilling and tapping!
Stanley Challenger Graham
Stanley's View
scg1936 at talktalk.net
"Beware of certitude" (Jimmy Reid)
The floggings will continue until morale improves!
Stanley's View
scg1936 at talktalk.net
"Beware of certitude" (Jimmy Reid)
The floggings will continue until morale improves!
- Stanley
- Global Moderator
- Posts: 91297
- Joined: 23 Jan 2012, 12:01
- Location: Barnoldswick. Nearer to Heaven than Gloria.
Re: Shed Matters 3
Today is steam chest and lid. I need to get them to a stage where I can fit them.
First job is to get the flash, gates and the worst of the skin off. You can't beat a big flat file!
Once I had the worst of the skin off it was a matter of careful milling to get the castings square and to size. A sharp cutter is a blessing. Go bless Mrs Clarkson!
Same for the lid.
Knocking off time after over two hours of careful close work. In terms of sticking to the dimensions on the drawing, this is perhaps one of the best cylinders I have ever made and the steam chest and lid are up to the same standards. I may have to take a little bit off one end of the lid, I'll sort that out tomorrow. I have remembered to put a witness mark on the lid so when I mark it I am quite clear which end is the top and which is the outside face. Then it's marking and drilling and yes, I have remembered I cracked the lid on the last one by being too enthusiastic with the punch! Once bit, twice shy! Nice morning, my legs are tired but everything has gone well.
Stanley Challenger Graham
Stanley's View
scg1936 at talktalk.net
"Beware of certitude" (Jimmy Reid)
The floggings will continue until morale improves!
Stanley's View
scg1936 at talktalk.net
"Beware of certitude" (Jimmy Reid)
The floggings will continue until morale improves!
- Stanley
- Global Moderator
- Posts: 91297
- Joined: 23 Jan 2012, 12:01
- Location: Barnoldswick. Nearer to Heaven than Gloria.
Re: Shed Matters 3
If, like me you have spent money on an optical punch to improve accuracy and have failed to get on with it, try this. The problem is that no light gets in to the work apart from through the viewfinder and that's not enough if you have bad eyes. Lifting the unit up on two parallels like this lets light in and it makes all the difference. Even better if you lay an LED torch on the surface to shine in. I played with it yesterday afternoon and found that the viewfinder with the central spot works best for me rather than the other which has cross hairs in it.
Stanley Challenger Graham
Stanley's View
scg1936 at talktalk.net
"Beware of certitude" (Jimmy Reid)
The floggings will continue until morale improves!
Stanley's View
scg1936 at talktalk.net
"Beware of certitude" (Jimmy Reid)
The floggings will continue until morale improves!
- Stanley
- Global Moderator
- Posts: 91297
- Joined: 23 Jan 2012, 12:01
- Location: Barnoldswick. Nearer to Heaven than Gloria.
Re: Shed Matters 3
I tried with the optical view finder but couldn't make it work for me so I reverted to what I know best, a hammer and a punch. It looked OK.
Under the drill press and drill with a No 46 drill, tapping size for 7BA.
Here's the reason why I used tapping size, I clamped the lid direct on the block and used it as a template for marking the casting ready for serious drilling.
Then under the drill again for finish drilling to the depth I needed for tapping.
Then the fun part.... tapping the six holes. Finger and thumb only and frequent backing out and blowing the blind hole clean with compressed air. I was glad when I had finished.
Then drill the lid again, clearance size, 1/8". I didn't need to use a long series drill for this but I will need it for the next operation.
Then a try out, lovely fit, it fell on the studs.
Here's why I needed the long series drill. I can't completely finish the holes, the clamp in the way. So I put two dowels in the locate the lid and drilled the last two holes with the clamp out of the way. Once I had that done I took the lid and the clamp off and drilled all the holes right through.
How about that! the steam chest dropped on the studs like the lid, not bad for a bloke who can't see and has a lot of miles on the clock. Lots do do yet but that was a big step, two and a half hours honest endeavour.
Couldn't resist doing this pic, you can tell I have been busy. Nice morning, I've enjoyed it.
Stanley Challenger Graham
Stanley's View
scg1936 at talktalk.net
"Beware of certitude" (Jimmy Reid)
The floggings will continue until morale improves!
Stanley's View
scg1936 at talktalk.net
"Beware of certitude" (Jimmy Reid)
The floggings will continue until morale improves!
- Stanley
- Global Moderator
- Posts: 91297
- Joined: 23 Jan 2012, 12:01
- Location: Barnoldswick. Nearer to Heaven than Gloria.
Re: Shed Matters 3
After being held up for half an hour by domestic duties I escaped to the shed with a fair idea of what I wanted to do. I started by putting nuts on all the studs and then rooting about in my bits for the stock to make the small brass fittings, glands and flanges for pipes. A bit of gentle brass turning looked attractive.
In order to make the small parts I need the four jaw independent on Mrs Harrison. In the course of doing this I was reminded of a problem which has been growing and costing me time. My quick change toolpost has been getting more and more difficult to work with or swap out for the standard 4 way toolpost. That was still easy to use and so I knew the problem was mainly in the quick change post. So I stripped it down and using a diamond hone and diamond files I cleaned everything up and rubbed all the mating surfaces down to get rid of the high spots and galls that have built up over the years and were quite evident. Half an hour later I had the toolpost working as smooth as silk, so it wasn't time wasted, in fact it will save me time as it's easy to swap out now if I want to do that.
So, knocking off time is a bit different today, Mrs Harrison is ready to deal with the small brass parts that I shall make next. No regrets, a nice useful morning.
Stanley Challenger Graham
Stanley's View
scg1936 at talktalk.net
"Beware of certitude" (Jimmy Reid)
The floggings will continue until morale improves!
Stanley's View
scg1936 at talktalk.net
"Beware of certitude" (Jimmy Reid)
The floggings will continue until morale improves!
- Stanley
- Global Moderator
- Posts: 91297
- Joined: 23 Jan 2012, 12:01
- Location: Barnoldswick. Nearer to Heaven than Gloria.
Re: Shed Matters 3
I don't know what I was thinking about yesterday when I put the 4 jaw on Mrs Harrison. Obvious that small parts like the ones I have to make are a job for Johnny's 1927 lathe, so this morning I flitted in there with the tackle and got going.
First job was to put the 4 jaw on and get the stock centred. Didn't need to be dead accurate. Then I had to set up the lathe for turning, I haven't used it for that for a while, it's all been dividing. That included sharpening a fresh cutter and getting it set on centre.
Once I got set up and turning it didn't take long, making the parts was the least part of the morning. I sawed the parts off, easier than parting off and I can tidy them up later.
Brass is lovely stuff to work with but the chips don't half fly! I had to vacuum the carpet. Never mind.
A nice two hours, I should use Johnny's lathe more. I'll finish the pads and glands tomorrow.
Stanley Challenger Graham
Stanley's View
scg1936 at talktalk.net
"Beware of certitude" (Jimmy Reid)
The floggings will continue until morale improves!
Stanley's View
scg1936 at talktalk.net
"Beware of certitude" (Jimmy Reid)
The floggings will continue until morale improves!
- Stanley
- Global Moderator
- Posts: 91297
- Joined: 23 Jan 2012, 12:01
- Location: Barnoldswick. Nearer to Heaven than Gloria.
Re: Shed Matters 3
Off with the 4 jaw and I decided to give my Taylor chuck an airing, it has good jaws and will be just right for holding the minimal amount I have for grip. Remember, you can't have too many chucks!
I drilled and tapped for 1/4" X 26tpi. These pads are for the steam and exhaust pipes and they will be what used to be called Brass Thread, 26TPI. I did both of them after cleaning the faces up and then gave them a polish to make them look pretty.
I needed some brass stock to make the pipes. Everybody should have treasure chests, make sure you build them up as you progress! All this lot came out of an old workshop and I have little doubt that the man had also picked up scrap. Some of this stock could easily be well over 100 years old. This piece of brass is heavily corroded so is ancient stock.
Then I made the two pipes, threaded them and bored them out 1/8". Made them look pretty at the same time.
Knocking off time. The two pipes and their mounting pads on the left and the piston rod and valve rod glands on the right. All polished and next job is to drill them for the mounting studs. That's some careful measuring and I shall leave it for tomorrow. A good 2 hours careful work giving good results and progress. What more could an old fart ask for?
Stanley Challenger Graham
Stanley's View
scg1936 at talktalk.net
"Beware of certitude" (Jimmy Reid)
The floggings will continue until morale improves!
Stanley's View
scg1936 at talktalk.net
"Beware of certitude" (Jimmy Reid)
The floggings will continue until morale improves!
- Stanley
- Global Moderator
- Posts: 91297
- Joined: 23 Jan 2012, 12:01
- Location: Barnoldswick. Nearer to Heaven than Gloria.
Re: Shed Matters 3
Today's task was essentially getting the brass bits I made yesterday ready to fit on the cylinder.
First job was to drill the clearance holes for the flanges. Perhaps the most simple job in the shed but when you can't see straight it gets a bit difficult. I didn't do too badly and will drill the castings using the appropriate flange as a template. I had four to do and on the last one I got so fed up of not getting them exactly right that I drilled it without marking it and made a better job of it! It's a funny old world. Anyway they are all fit to go.
Now for another matter. The design committee pointed out to me that I had slipped up in that the two glands, one for the valve rod and the other for the piston rod, were the wrong diameter. I had to put that right, the one for the piston rod was easy, I adjusted the hole in the casting that is the top id. The valve rod was a bit more complicated, I had to drill it for the valve rod, then make the pocket for the gland and next I went in the front room, mounted the gland in Johnny's 1927 lathe and turned the boss down until it fitted.
Here we are at knocking off time. All the gland and flanges are ready for fitting but first I think I have to make the valve and rod and a piston and rod. I'll think about it and make a decision tomorrow.
Stanley Challenger Graham
Stanley's View
scg1936 at talktalk.net
"Beware of certitude" (Jimmy Reid)
The floggings will continue until morale improves!
Stanley's View
scg1936 at talktalk.net
"Beware of certitude" (Jimmy Reid)
The floggings will continue until morale improves!
- Stanley
- Global Moderator
- Posts: 91297
- Joined: 23 Jan 2012, 12:01
- Location: Barnoldswick. Nearer to Heaven than Gloria.
Re: Shed Matters 3
This is today's job, to make a valve rod for the steam valve. I did a fag packet drawing and found my stock, 1/8" silver steel.
I need to turn the end of the rod down to 3/32" and anyone who has tried to do this knows that it is almost impossible. So I went looking for a tool that doesn't often get an outing, this is it. Essentially it's a supporting bush that has a cutter built in it so the stock is fully supported as it's being cut. The brass bush has to be the same size as the stock. I haven't got a 1/8" bush so the first job is to make one.
I found a piece of scrap brass and made it.
Try doing this without help!
A bit of careful threading and here's where we finished up, we have the rod.
Now we need a clevis, so as the stock is 1/4" square bar we need the 4 jaw SC.
Knocking off time, we have a valve rod, now we need to fit the valve.... That's for tomorrow. Two and a half hours of slow careful work with no mistakes. That's all an old fart like me can aspire to.
Stanley Challenger Graham
Stanley's View
scg1936 at talktalk.net
"Beware of certitude" (Jimmy Reid)
The floggings will continue until morale improves!
Stanley's View
scg1936 at talktalk.net
"Beware of certitude" (Jimmy Reid)
The floggings will continue until morale improves!
- Stanley
- Global Moderator
- Posts: 91297
- Joined: 23 Jan 2012, 12:01
- Location: Barnoldswick. Nearer to Heaven than Gloria.
Re: Shed Matters 3
Today's target is fitting the valve rod.
Before I can get into the rod and the valve I needed to spend almost an hour making the valve face and the face of the valve flat by using abrasive paper on the surface plate first and then going onto another scale of accuracy using this diamond hone.
How long do you spend on preparing the faces? I decided I had done enough and went on to finishing the fit with fine lapping paste.
I think you can see the slightly darker area around the steam and exhaust ports. This the frosted area where I have lapped the valve to the face.
Next I marked the driving bar and drilled and tapped it.
Next I marked for the gland studs, drilled the holes and then tapped them in the vise.
Here we are at knocking off time, ready for fitting the steam chest. Not perfect but then not bad for a bloke whose eyes tell lies. It will do, I enjoyed that and look forward to tomorrow.
Stanley Challenger Graham
Stanley's View
scg1936 at talktalk.net
"Beware of certitude" (Jimmy Reid)
The floggings will continue until morale improves!
Stanley's View
scg1936 at talktalk.net
"Beware of certitude" (Jimmy Reid)
The floggings will continue until morale improves!
- Stanley
- Global Moderator
- Posts: 91297
- Joined: 23 Jan 2012, 12:01
- Location: Barnoldswick. Nearer to Heaven than Gloria.
Re: Shed Matters 3
This is what the committee was complaining about, the drilling through the driving bar is not 90 degrees to it. This has to change.
Everyone needs to build up little treasure chests like this box of brass off cuts. I found a piece of brass that was just the right thickness.
Then I got diverted because I wanted to put the piece of brass in the vise to saw it. Problem is that when I re-riveted the aluminium soft jaws I did it in a hurry and left one rivet proud and its been bugging me ever since so I did something about it. Back to the valve....
Now for a bit of filing and polishing.
This is where I went wrong last time so I did it differently and was very careful to get the hole perpendicular to the stock.
A bit later, here we are. I think you can see the difference! That took over an hour...
Next job is to fit the piston rod gland which as you can see is not quite central. I can cope with that. Note also the pop marks to act as witnesses.
Some careful marking and drilling and here we are tapping the last two holes in the cylinder casting. Very careful, finger and thumb only.
One last job on the gland, poke a 3/16" drill through just to make sure there will be no obstruction for the piston rod.
The next stage is to make the piston, rod and crosshead. I gathered the stock up ready for tomorrow. The stock for the piston is cast iron which is of course correct but I don't think I will use it. I'll make it out of bronze because if someone is careless at some point and runs it on compressed air and forgets to de-water it and lubricate it the piston can rust in the bore. This is what happened to Johnny's wonderful mill engine and I still remember the curator of the Moorside Industrial Museum at Bradford calling me one day and asking my advice. I refused to give him any beyond saying that it was careless and the cylinder would need rebuilding. A great shame. That couldn't happen with bronze pistons.
Stanley Challenger Graham
Stanley's View
scg1936 at talktalk.net
"Beware of certitude" (Jimmy Reid)
The floggings will continue until morale improves!
Stanley's View
scg1936 at talktalk.net
"Beware of certitude" (Jimmy Reid)
The floggings will continue until morale improves!
- Stanley
- Global Moderator
- Posts: 91297
- Joined: 23 Jan 2012, 12:01
- Location: Barnoldswick. Nearer to Heaven than Gloria.
Re: Shed Matters 3
This is where I finished up yesterday, the piston rod is fitted in the gland. However, it's on the tight side and I reflected that on the full size beam engines I have been in close contact with the glands were never an exact fit on the rod. So first thing this morning I poked a 13/64" drill through and the rod is now an easy fit. The seal on the rod doesn't come from contact between the rod and the gland but from the packing inside the gland.
I mentioned yesterday that I was going to fit a bronze piston and not the cast iron one that's specified. I went for a trawl of my non ferocious ends and found a nice piece of cast bronze which is exactly the right thing. Cast bronze is much softer than to rolled bar,
Into the lathe and after measuring the actual bore I got on with making the piston.
Here we are at knocking off time, the attachment of the piston is complete and it fits. I had to cock it slightly to one side to make it sit at the top of the bore, if it's straight it falls down to the bottom. Tomorrow I shall do some measuring, cut the rod to length and make and fit the crosshead. Then there is only one job that needs doing, fit the drain cocks and rebuild the cylinder with all it's seals and packings finished. Then it's ready for bolting on the bed in the final build.
(Just realised, I'd forgotten. I have to fit the mounting pads for the steam and exhaust pipes as well.)
Stanley Challenger Graham
Stanley's View
scg1936 at talktalk.net
"Beware of certitude" (Jimmy Reid)
The floggings will continue until morale improves!
Stanley's View
scg1936 at talktalk.net
"Beware of certitude" (Jimmy Reid)
The floggings will continue until morale improves!
Re: Shed Matters 3
I remember in the dark and distant past doing calculations on diameter to thickness ratio that prevents jamming if it tilts. They may be listed in a Machinery's hand book.
- Stanley
- Global Moderator
- Posts: 91297
- Joined: 23 Jan 2012, 12:01
- Location: Barnoldswick. Nearer to Heaven than Gloria.
Re: Shed Matters 3
It is Ken, you are a man of hidden talents. I'll take a small bet you must be familiar with Kempe's as well!
I have a deep affection for Molesworth..... (They can't touch you for it!)
Stanley Challenger Graham
Stanley's View
scg1936 at talktalk.net
"Beware of certitude" (Jimmy Reid)
The floggings will continue until morale improves!
Stanley's View
scg1936 at talktalk.net
"Beware of certitude" (Jimmy Reid)
The floggings will continue until morale improves!
- Stanley
- Global Moderator
- Posts: 91297
- Joined: 23 Jan 2012, 12:01
- Location: Barnoldswick. Nearer to Heaven than Gloria.
Re: Shed Matters 3
We're still on with the piston, rod and crosshead but it struck me that I had just the thing for tightening the 5BA nut on the end of the rod that retains the piston. As you can see it's recessed so as to clear the bottom of the cylinder. On final assembly it has to be dead tight, we don't want it dropping off.
So we have a perfect demonstration of what I say so often, it's good if you have the right tackle! All us oldies can remember the times we struggled in the early days because we hadn't got the right tool for the job. Gradually over the years you fill in those omissions and get to the enviable stage I am at now where, as you may have noticed, I usually have the right tool for the job. Some of them (Like the small diameter turning attachment I used the other day) only come out to play once in a Preston Guild. But when they do they are brilliant. If you're just starting and are struggling like we all did, take heart, as you progress you will also fill in the gaps!
Not many pics this morning, too many ticklish little operations, not least tapping the blind hole in the crosshead 2BA to full depth.
This almost at the end of measuring the rod, cutting it to length, threading the end 2BA and then making the crosshead. The stock is 1/4" square and had to be reduced across one axis to 5/16" so under the mill and a few careful cuts. Than I broke all the edges, made it look pretty and fitted the piston finger tight. Than I checked to see if I had my measurements correct.
So here we are at knocking off time. The crosshead is tightened up hard and bedded in shaft fit Loctite. It will not come off again! The piston is only finger tight because I need to thread it through the gland and top lid first and there are things to do before we get to that stage. I'll start addressing them tomorrow. We are getting fearfully close to having a finished cylinder ready for erection.
Two hours well spent. A nice morning!
Stanley Challenger Graham
Stanley's View
scg1936 at talktalk.net
"Beware of certitude" (Jimmy Reid)
The floggings will continue until morale improves!
Stanley's View
scg1936 at talktalk.net
"Beware of certitude" (Jimmy Reid)
The floggings will continue until morale improves!
- Stanley
- Global Moderator
- Posts: 91297
- Joined: 23 Jan 2012, 12:01
- Location: Barnoldswick. Nearer to Heaven than Gloria.
Re: Shed Matters 3
Today I want to install the drain cocks and the two pads for the steam and exhaust pipes. Just out of interest, those cocks are £16 each! Ridiculous I know but far better than mine and they look lovely.
The cocks are a very rare thread, 14" X 32TPI. No clues on the packaging so the only way I got those measurements was by measuring them myself. Then there was the question of what the tapping drill was, none of my text books gave me a clue until I looked in one of the ME workshop manuals and found that the drill recommended was 5.6mm. I don't trust tap drill sizes with small threads lie these so I drilled a hole in cast iron and tapped it and tried the cock, too sloppy a fit so I did it again with 5.5mm and it's much better. The miracle of the treasure chests is that I had the right 32tpi tap! See yesterdays lecture on tool collecting!
Than I got serious, drilled and tapped for both cocks and fitted them finger tight. Box on!
Next job is the steam pipe into the steam chest lid. I drilled the hole in the lid and here I am holding the pad in place on the lid while I mark for the two stud holes. It worked out fine.
I drilled and then tapped for the 7BA studs. Finger and thumb only! and as you can see they fitted perfectly.
At knocking off time we are here. Just the exhaust pipe pad to fit. Not bad when you consider I had to break off for half an hour to do essential shopping. It's been a good morning!
Stanley Challenger Graham
Stanley's View
scg1936 at talktalk.net
"Beware of certitude" (Jimmy Reid)
The floggings will continue until morale improves!
Stanley's View
scg1936 at talktalk.net
"Beware of certitude" (Jimmy Reid)
The floggings will continue until morale improves!
Re: Shed Matters 3
As you said yesterday, Stanley, it is nice when you have the right tools for the job. I’m getting near that stage most of the time but I can’t always find the tool when I know that I have one. Just too much crammed into the little workshop.
- Stanley
- Global Moderator
- Posts: 91297
- Joined: 23 Jan 2012, 12:01
- Location: Barnoldswick. Nearer to Heaven than Gloria.
Re: Shed Matters 3
Tell me about it Bob! And if you read on you'll see that not having the right tool can be a result of more than one circumstance!
I'm homing in on finishing the cylinder and one thing that I had decided was that I could make it a little easier for it to breathe by opening the steam and exhaust pipes another 64th of an inch so that's what I did first.
I drilled and tapped the last two 7BA threads, a relief but I was hampered by the fact that I couldn't find my No. 46 drill. I had left it safe somewhere and must have spent twenty minutes looking for it. I failed miserably and so went a size bigger to a No 45 and it was all right. (So you see Bob having the tackle is all right as long as you don't lose it!) You can see here I got it right and there's so little difference between 45 and 46 drills that the studs are fine.
Then I did the final finish on all the mating parts except the valve face, that's lapped in and doesn't need anything. At this point I could have started the final build of the cylinder but decided this was a good time to paint the parts.
Knocking off time. I've given the parts a coat of paint, and my hands as well, I am a mucky pup with a paint brush. The parts will be dry enough tomorrow to start on the build after I have removed any paint that has got onto places it shouldn't. A bit of a bugger losing that drill but that's life. Otherwise a nice two hours and we are a step forwards.
Stanley Challenger Graham
Stanley's View
scg1936 at talktalk.net
"Beware of certitude" (Jimmy Reid)
The floggings will continue until morale improves!
Stanley's View
scg1936 at talktalk.net
"Beware of certitude" (Jimmy Reid)
The floggings will continue until morale improves!
- Stanley
- Global Moderator
- Posts: 91297
- Joined: 23 Jan 2012, 12:01
- Location: Barnoldswick. Nearer to Heaven than Gloria.
Re: Shed Matters 3
I broke one of my rules and had a look at the state of the paint. It is dry already and by tomorrow will have set hard enough to stand being handled.
Stanley Challenger Graham
Stanley's View
scg1936 at talktalk.net
"Beware of certitude" (Jimmy Reid)
The floggings will continue until morale improves!
Stanley's View
scg1936 at talktalk.net
"Beware of certitude" (Jimmy Reid)
The floggings will continue until morale improves!
- Stanley
- Global Moderator
- Posts: 91297
- Joined: 23 Jan 2012, 12:01
- Location: Barnoldswick. Nearer to Heaven than Gloria.
Re: Shed Matters 3
First job was to clean any superfluous paint off mating surfaces. I used an old piece of sandpaper because the paint ruins it.
Then I made my decisions about sealing joints. I went for my old favourite, Manganesite. It was a bit dry but the solvent for it is Linseed Oil. 50 years ago Margaret Sharples got me a good deal on two large bottles of Linseed Oil BP and I have only used half a bottle since. It's as good as the day I got it.
First I fitted the base to the cylinder using the paper gasket provided it and Manganesite. Then I fitted the drain cocks.
Next I packed the piston rod gland, far easier to do it at this stage. The rod moves very smoothly. I used graphited asbestos packing. Frowned on nowadays but still the best packing for steam glands.
The 5BA socket came out to ply. That nut will never move!
I'm going to use the plastic 'O' ring supplied in the kit for sealing the piston. I remembered just in time to fit the paper gasket bedded in Manganesite for the top lid.
It took me twenty minutes fighting to get the piston and 'O' ring in the oiled bore even though it is all made exactly to the drawings. I confess I had to reduce the ring before I could get it in. It was very tight and here I have the piston rod captured in the vice and I am making the piston slide by brute force with plenty of oil in the bore. It soon started to move more easily. It is still tight but will move easily when it gets steam pressure on the piston.
Knocking off time. All we need to do now is fit the steam chest and valve. Just like that! Two and a half hours but we are looking good. A good morning.
Stanley Challenger Graham
Stanley's View
scg1936 at talktalk.net
"Beware of certitude" (Jimmy Reid)
The floggings will continue until morale improves!
Stanley's View
scg1936 at talktalk.net
"Beware of certitude" (Jimmy Reid)
The floggings will continue until morale improves!
- Stanley
- Global Moderator
- Posts: 91297
- Joined: 23 Jan 2012, 12:01
- Location: Barnoldswick. Nearer to Heaven than Gloria.
Re: Shed Matters 3
Here's today's task, fit the steam chest and valve. And anything else that needs doing! For instance, first I tightened the drain cocks down to their final orientation. Apart from the valve lid, this is the definitive build, the cylinder will be ready to run. The valve lid will have to come off to adjust the valve. By the way I grabbed the piston rod in the vice and gave it a good work out, it's freeing up already and will be fine.
The first job was to pack the valve rod gland and tighten it down, so much easier to do at this stage. It ended up free enough to be moved by hand and very smooth.
Next job was to fit the steam chest gasket bedded in Manganesite. Notice I have been a good lad this morning, I;m wearing my gloves despite having to deal with 7BA nuts.
Ready for the lid. Notice, no Manganesite or packing, this lid has to come off easily to time the valve when we get to that point.
Next small job was to fit the pad for the exhaust pipe paper gasket bedded in Manganesite again.
Next was a tidy up of the lid studs, filing them down to nut length. We have a finished cylinder!
Next job is dealing with the castings and the first will be the flywheel so I cleaned Mrs Harrison and fitted the small three jaw SC because I know I can grab it with this one in a way that is near enough concentric.
Next job will be to rough clean the castings to get the gates and flash off them. Here they are lined up ready for shaving.
The finished cylinder is in the kitchen now as an inspirational ornament. I think it's perhaps the best and most accurate I have ever made. I tried the piston rod again and found the valve fits nicely, it is sealing the exhaust port so well I have difficulty moving it over the full stroke. Lovely! A very nice morning, I am pleased.
Stanley Challenger Graham
Stanley's View
scg1936 at talktalk.net
"Beware of certitude" (Jimmy Reid)
The floggings will continue until morale improves!
Stanley's View
scg1936 at talktalk.net
"Beware of certitude" (Jimmy Reid)
The floggings will continue until morale improves!
- Stanley
- Global Moderator
- Posts: 91297
- Joined: 23 Jan 2012, 12:01
- Location: Barnoldswick. Nearer to Heaven than Gloria.
Re: Shed Matters 3
This pic says it all. Today I move from 7BA studs and nuts to big files and (what look like) enormous castings. The first job is to get into the vise and get all the flash and gates off the castings.
I won't bore you with an hour and a half of hard work, especially as it was still 75F in the shed after yesterday's heat, far too hot. But I finished up with the worst of the flash etc. filed off and things looking a bit more civilised. First for attention is the flywheel.
The object of the exercise is to get the flywheel to a state where, when it's mounted on the crankshaft everything runs concentric with no wobble. The key to this is to do as many operations as possible on the same setting. In this case true the boss, face the flywheel, finish turn the rim, bevel all the edges and finally bore the boss for the shaft. In this case we are lucky because I was able to mount it on the 3 jaw SC chuck reasonably concentric and quite firmly. Don't worry if it looks a mess when you mount it, no casting is perfect and it's surprising how quickly it will start to behave as you work on it. One word here about turning CI. I love it if they are good castings like these are. You'll see people going to great lengths to 'protect' the ways from CI dust. I never bother, I just start with a clean dry lathe and clean up as I go along, taking care not to get it under the cross slide bearings. It helps if you have a good clean up when you have finished and flush out all the bearings with clean oil. So I went on quietly taking light cuts, you don't want any jam ups that will upset the set up, until I got here.
This is knocking off time, all concentric and not a bad finish. First job tomorrow is to bore for the shaft. After that I can turn it over and face the other side, it doesn't matter if it's a bit out of centre for that as long as the original side is tight to the chuck so the cut will be in the correct plane. I have turned the bevel on the unfinished side already so it will be concentric.
A nice Morning but hard work. Lots to do yet but a good start on the castings with no cock-ups. My sort of morning!
Stanley Challenger Graham
Stanley's View
scg1936 at talktalk.net
"Beware of certitude" (Jimmy Reid)
The floggings will continue until morale improves!
Stanley's View
scg1936 at talktalk.net
"Beware of certitude" (Jimmy Reid)
The floggings will continue until morale improves!
- Stanley
- Global Moderator
- Posts: 91297
- Joined: 23 Jan 2012, 12:01
- Location: Barnoldswick. Nearer to Heaven than Gloria.
Re: Shed Matters 3
We're finishing the flywheel this morning, the task is to bore the boss 7/16" and face the side of the rim on the side we haven't touched yet. First to bore the hub.
At first glance, this might look like overkill for a small hole, the biggest Slocombe Drill I have (and it is an original Slocombe) and the heaviest tailstock chuck, My Jacobs Heavy Duty ball bearing chuck. Look at it this way, the chuck is my most accurate and look on the Slocombe bit as a very rigid drill. In short, this is the best set up I have for accuracy.
Drilled 1/64th of an inch under size and then reamed. Tip, when you are using old reamers, always use the full length as the last bit is the least worn and the most accurate.
Bevel the hole with the centre drill, it's big enough!
Turn the casting over and grab it by the boss. It won't be perfectly concentric but that doesn't matter, it's close enough. Face the boss and turn the side of it then face the side of the rim this side then give it a good polish. We're done!
I decided to do the pillar next. I set it up several different ways but couldn't get the column anywhere near running true, I decided eventually this was because it's not central in the casting so I ditched any idea of making it perfect, a wire brushing and a coat of paint will do like the last engine. However, I realised that the base was running true so I put a face on that.
Here we are at knocking off time. We have a nice true base on the column and a shiny flywheel ready to fit. Not a bad two hours work.
Stanley Challenger Graham
Stanley's View
scg1936 at talktalk.net
"Beware of certitude" (Jimmy Reid)
The floggings will continue until morale improves!
Stanley's View
scg1936 at talktalk.net
"Beware of certitude" (Jimmy Reid)
The floggings will continue until morale improves!
- Stanley
- Global Moderator
- Posts: 91297
- Joined: 23 Jan 2012, 12:01
- Location: Barnoldswick. Nearer to Heaven than Gloria.
Re: Shed Matters 3
Looks like a diversion from engine building doesn't it, but not really. I'd decided since the column casting is asymmetrical that I wouldn't muck about making a cock-up of turning it but accept a clean cast finish with a coat of paint, that's what the full size original would have after all. So I really needed a wire brush on the grinder. I have this wire wheel but it doesn't fit. It needs boring out but how do you centre a wire brush? A bit of thinking and if I admit it, guesswork was involved.
The lathe is no good, the only way I can hold it firmly is clamped flat on the bed of the VM. So off with the vise for the first time in a long time so I had a good clean and degrease and then rubbed the surface down with a big flat diamond hone. This isn't to true or flatten it, it's to take off the dings and high spots. What many people forget is that castings are always moving and adapting to accommodate stress, largely internal from casting but also from use. You can see the bright spots if you look carefully and if you look really hard you'll see that some have been caused by the clamp bolts pulling up on the webs of the tee slots. There is a raised portion around where the vise normally sits, god knows why. Anyway, it's better now then when I started!
A bit later after a lot of guesswork and luck I have the wire wheel mounted and it's almost true. Good enough anyway as it's better than the bum grinding wheel I had on (which I have binned).
Here's the result, a definite improvement.
Now I had to reinstate the vise so I gave it the clean off and diamond hone business before putting it back on the mill bed and tramming it in. I could have sworn I did a picture but it's lost somewhere. So knocking off time was where I started this morning but with a polished column casting. That's progress.....
Stanley Challenger Graham
Stanley's View
scg1936 at talktalk.net
"Beware of certitude" (Jimmy Reid)
The floggings will continue until morale improves!
Stanley's View
scg1936 at talktalk.net
"Beware of certitude" (Jimmy Reid)
The floggings will continue until morale improves!