Shed Matters 3
- Stanley
- Global Moderator
- Posts: 93522
- Joined: 23 Jan 2012, 12:01
- Location: Barnoldswick. Nearer to Heaven than Gloria.
Re: Shed Matters 3
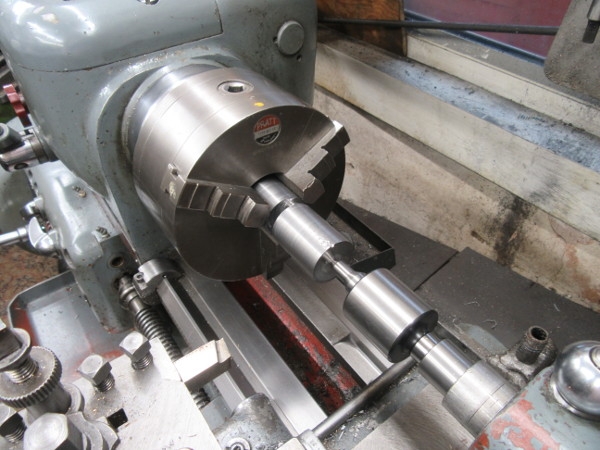
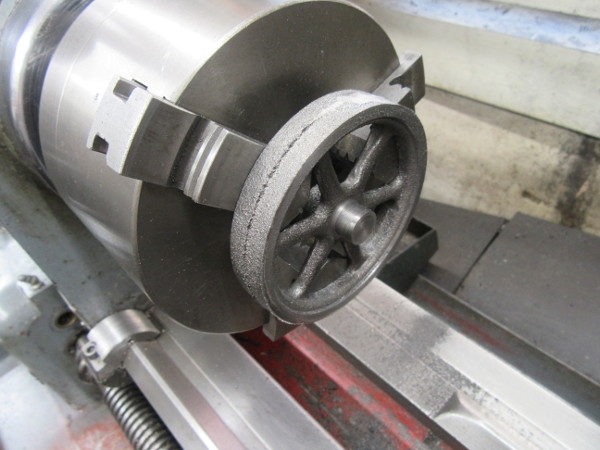
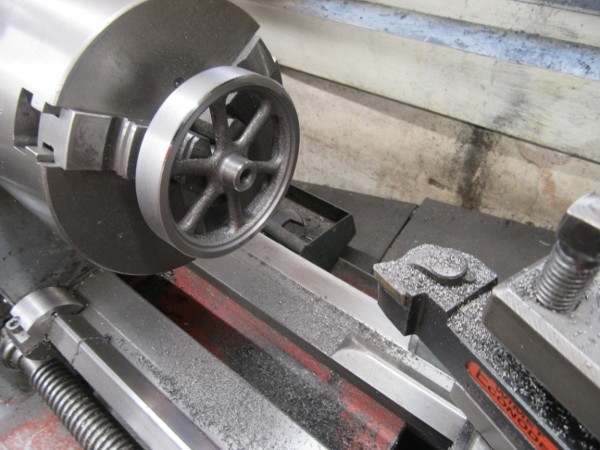
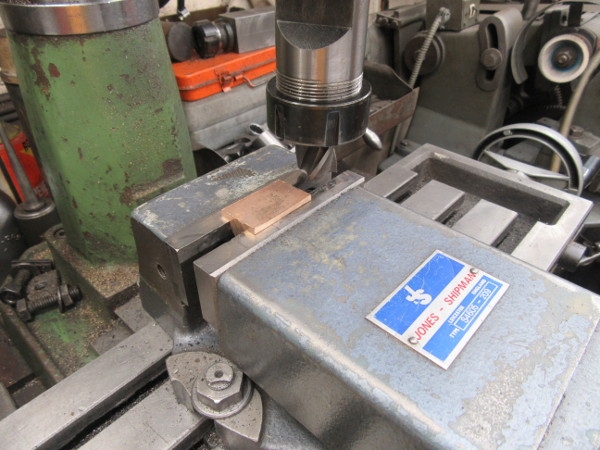
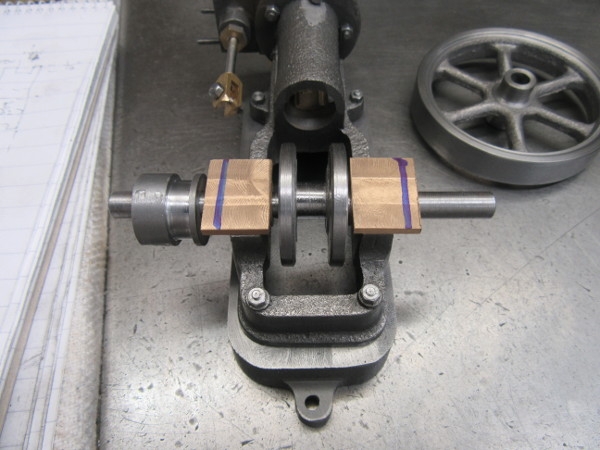
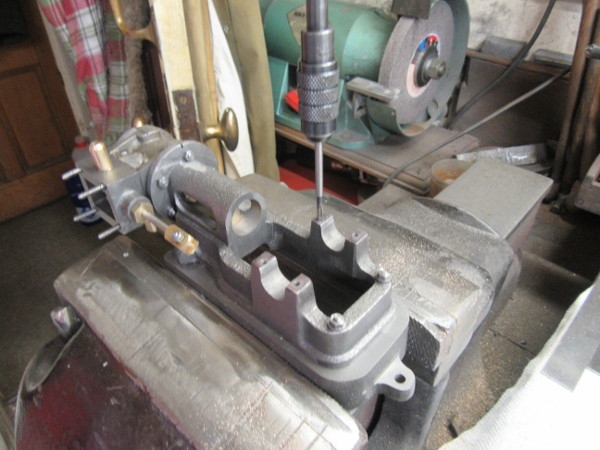
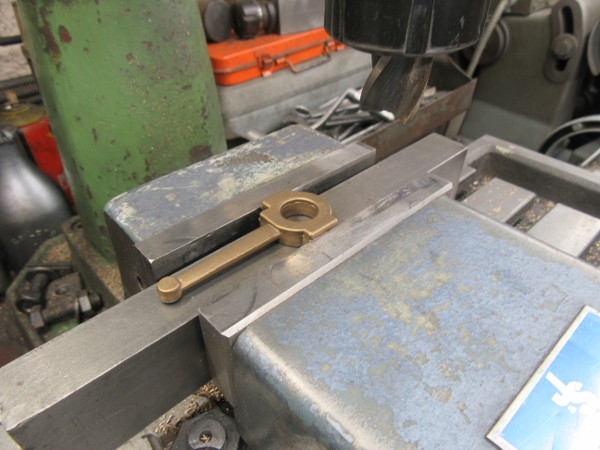
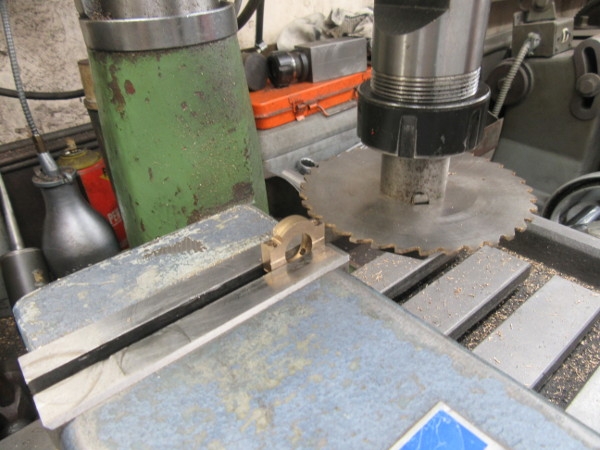
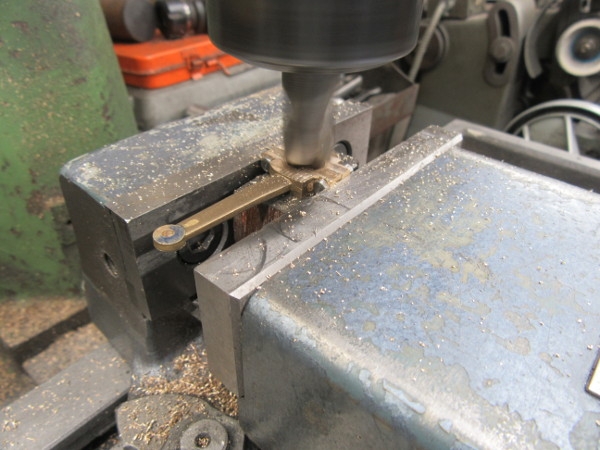
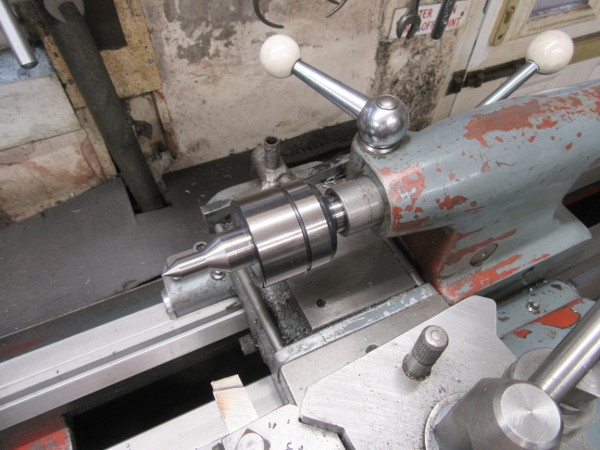
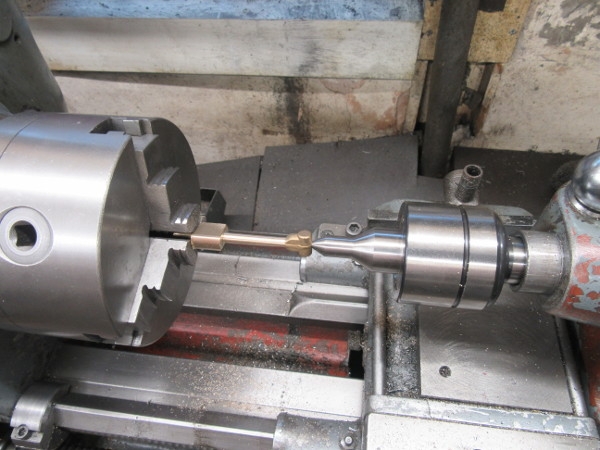
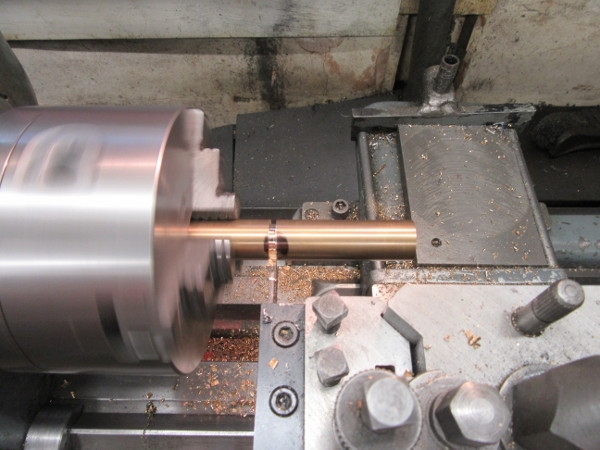
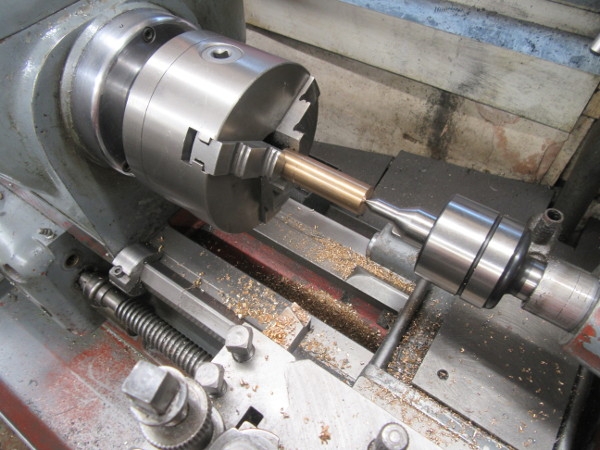
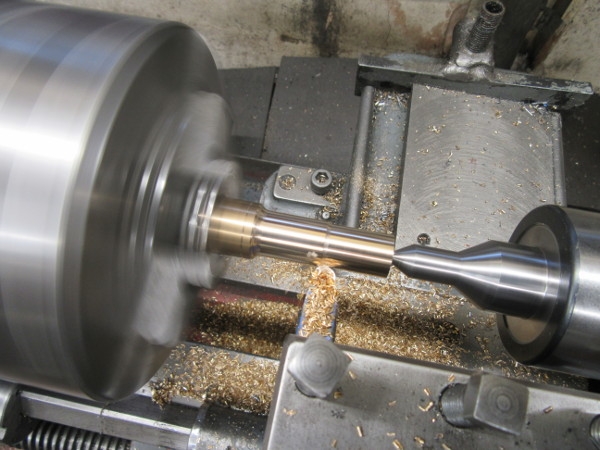
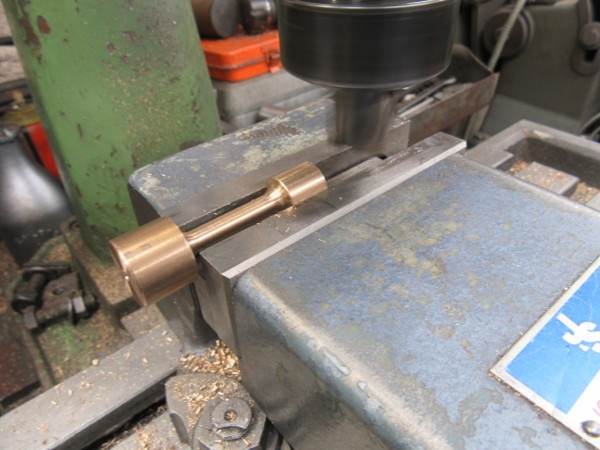
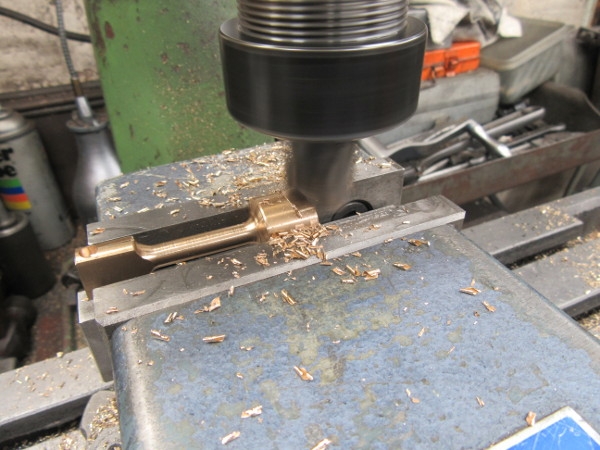
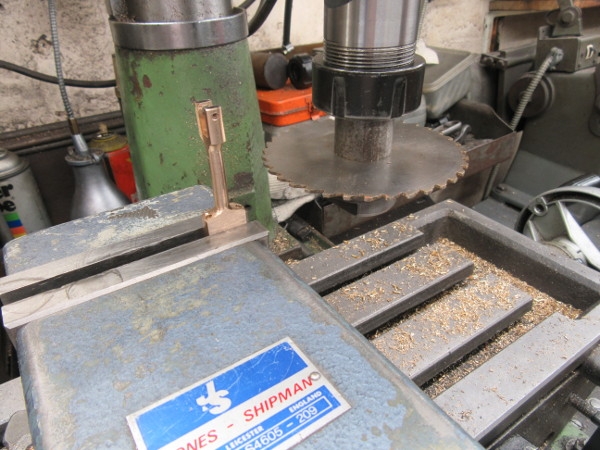
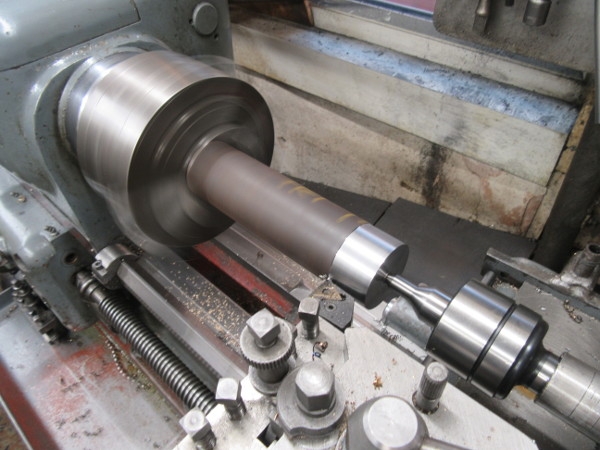
I decided to cut the 5/16"wide crank pin with a 5/16" cutter, it seemed like a good idea at a time. So I got everything set up ready for a perfect bit of turning.
I realised straight away that the new live centre had too much overhang and so I went back to my old heavier centre that is 3MT and hasn't as much overhang. Away we go, cutting well.
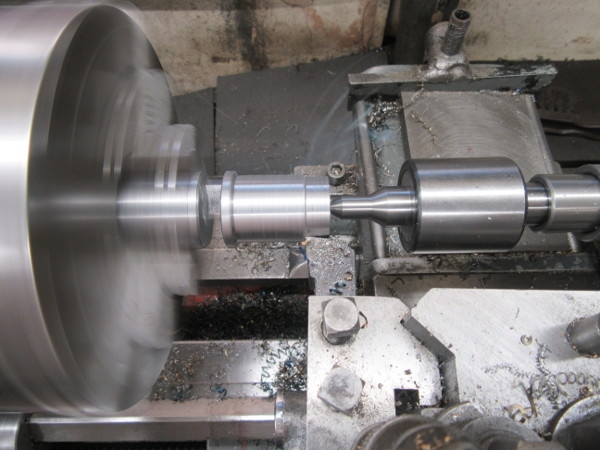
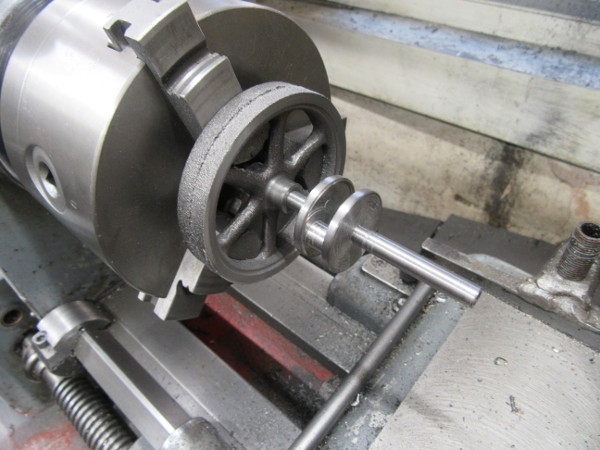
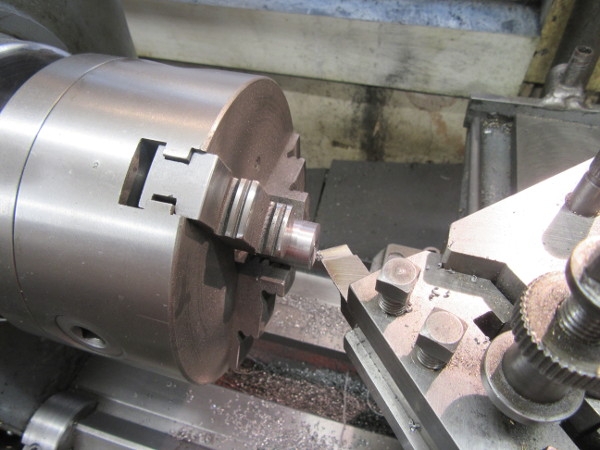
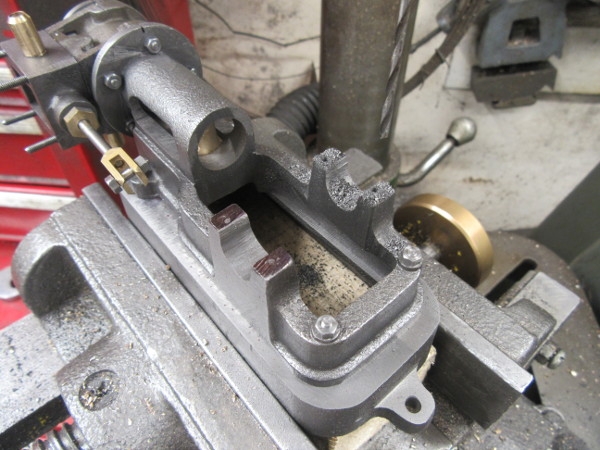
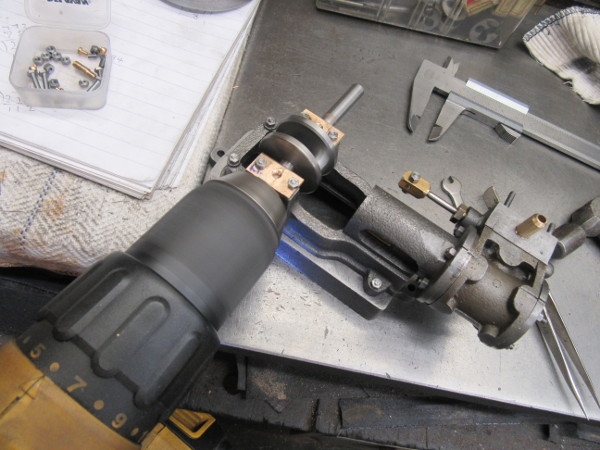
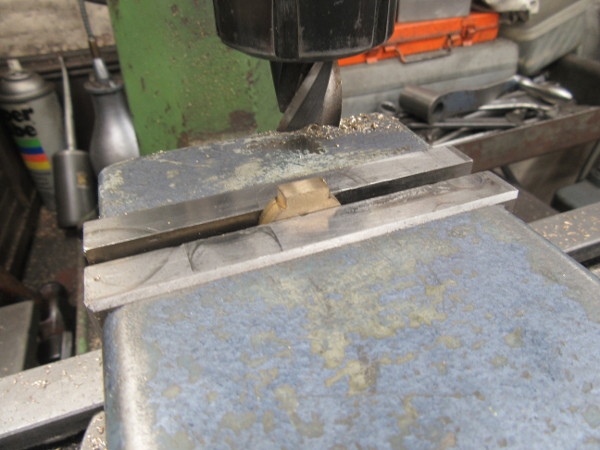
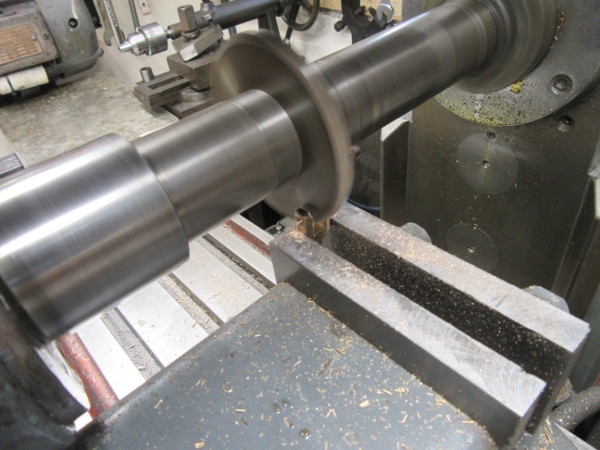
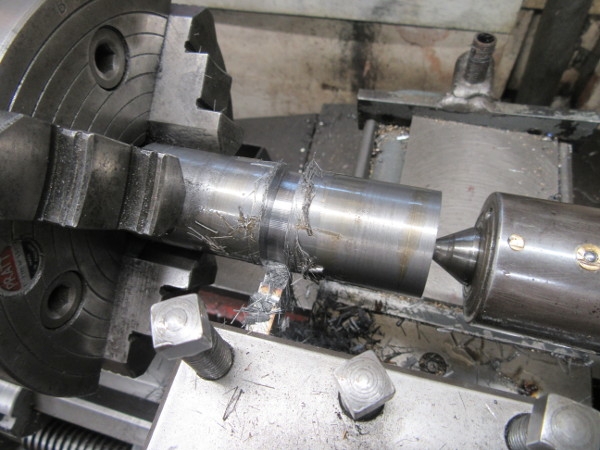
Here's what happened, and it was a direct result of having the cutter as wide as the cut, it dug in and brought me to a dead stop. Luckily it was before I got in too far and there was still enough strength in the workpiece to stand the jam.
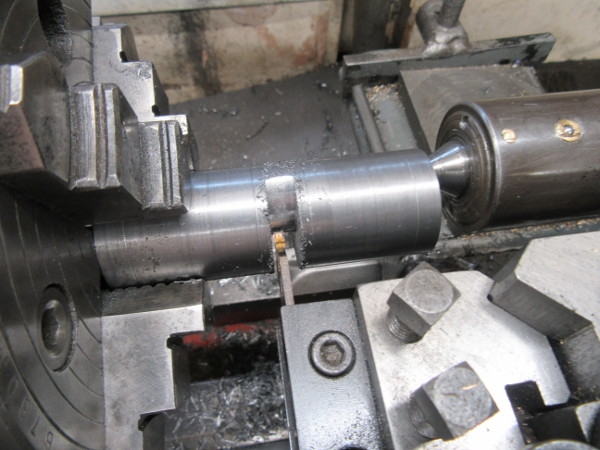
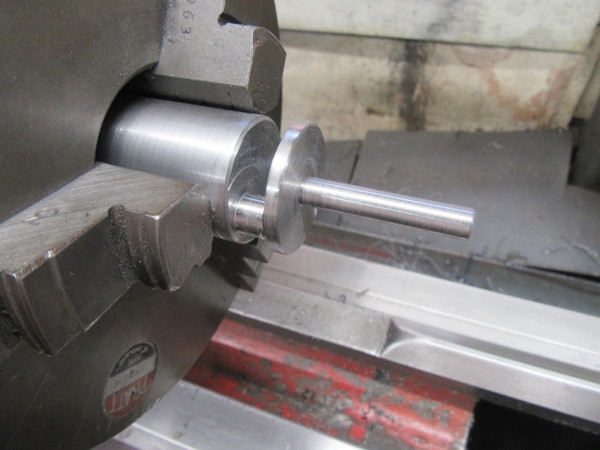
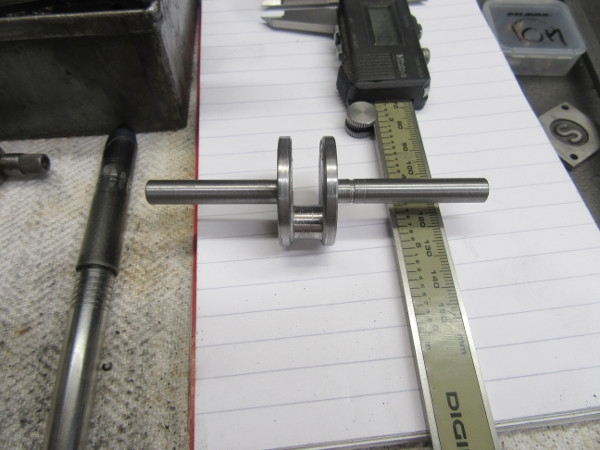
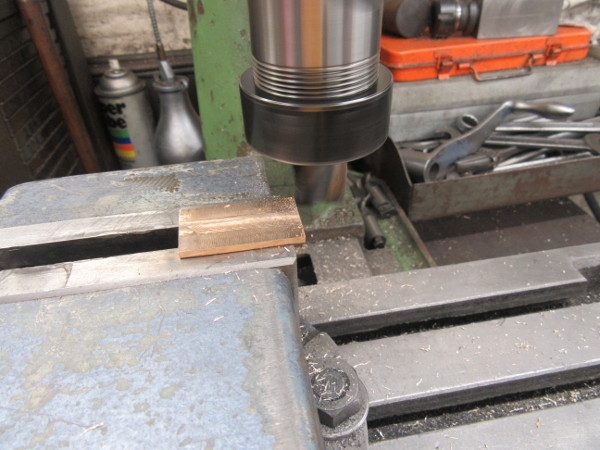
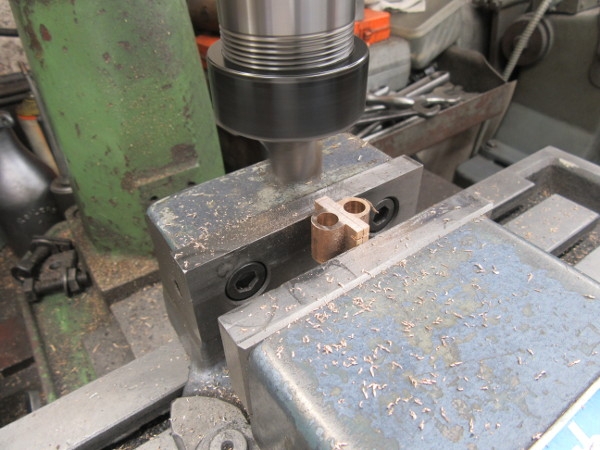
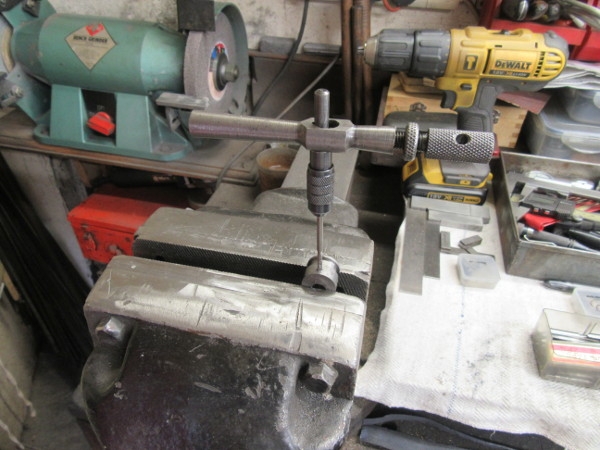
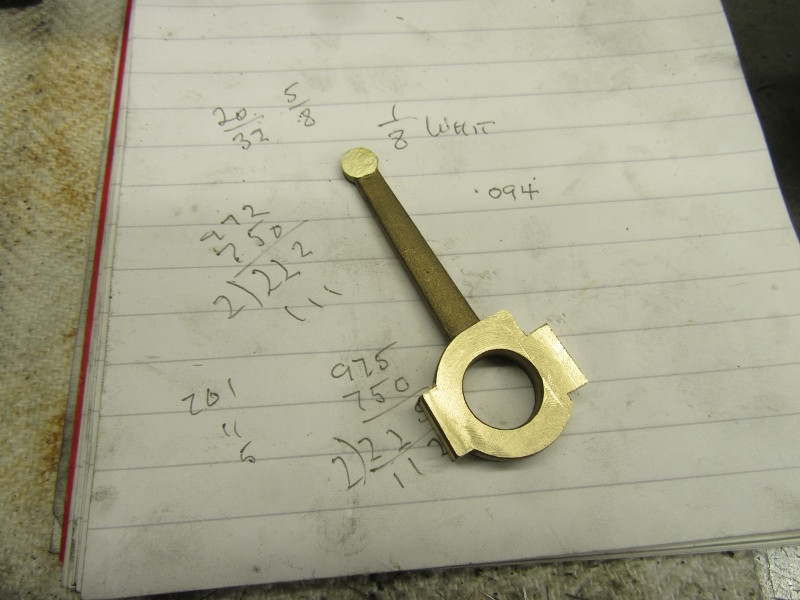
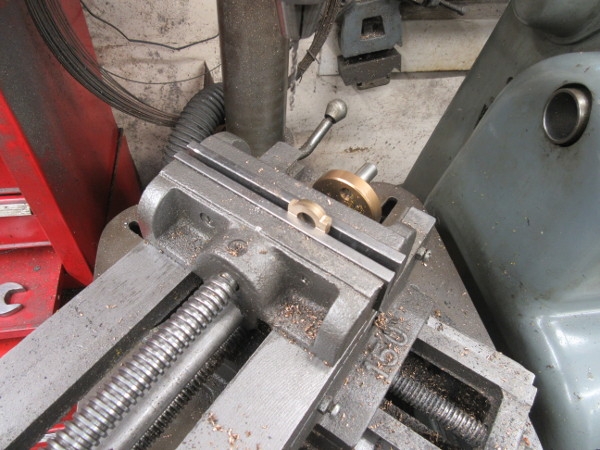
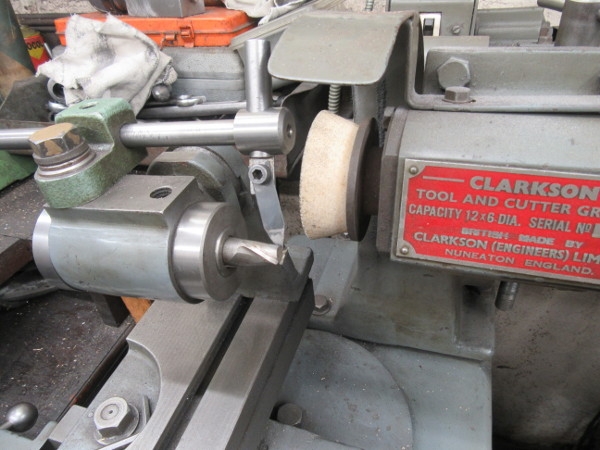
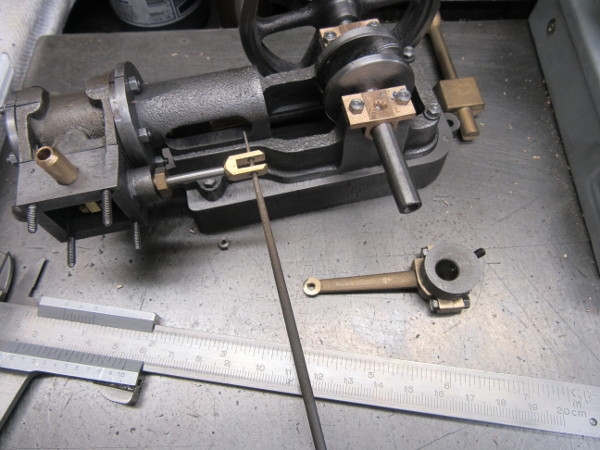
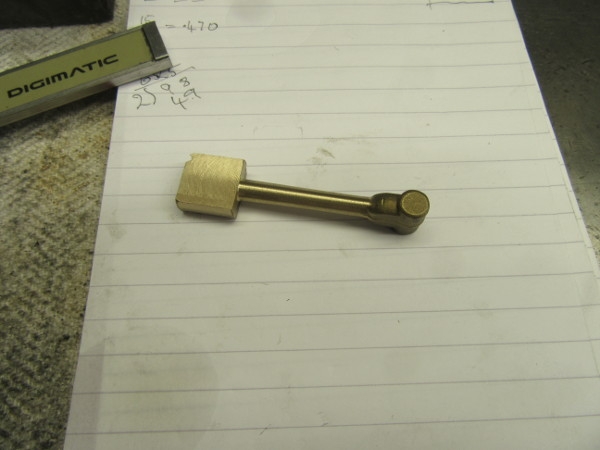
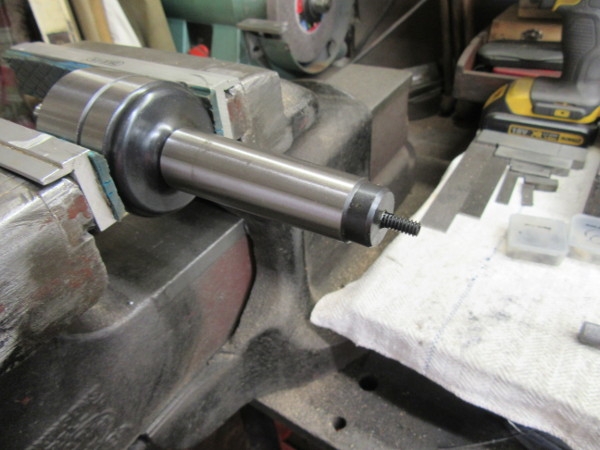
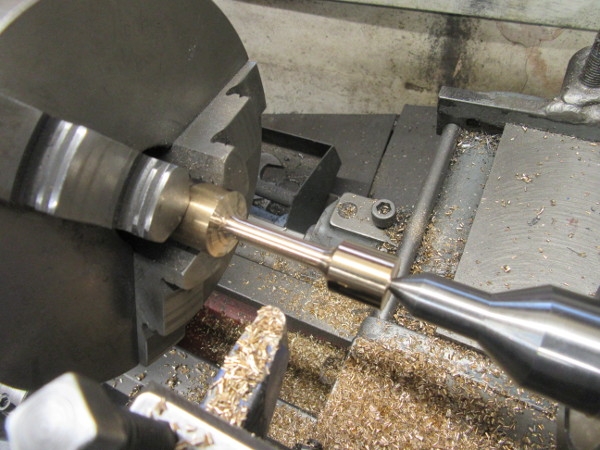
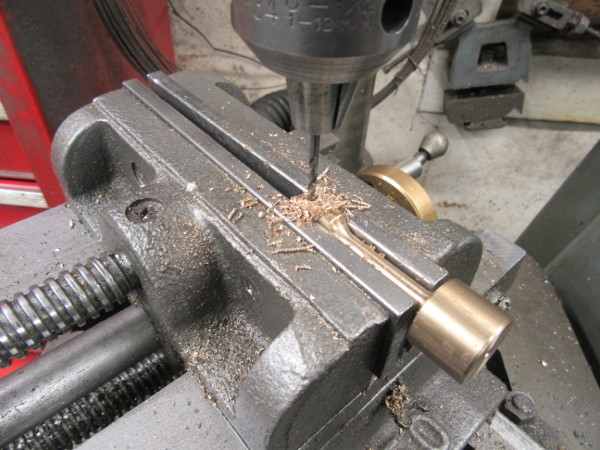
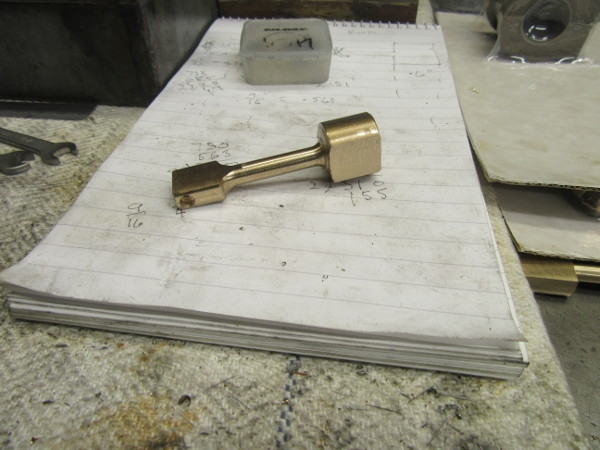
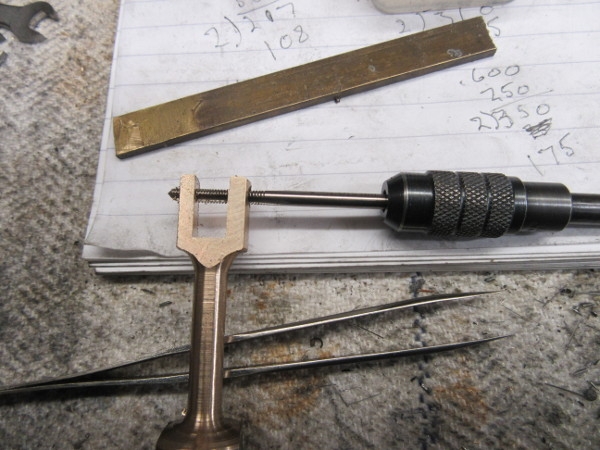
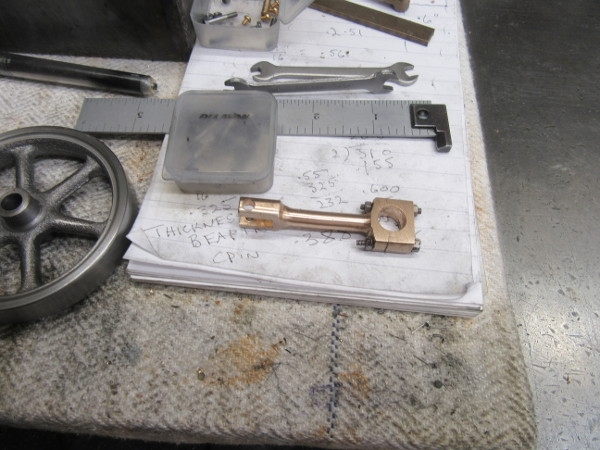
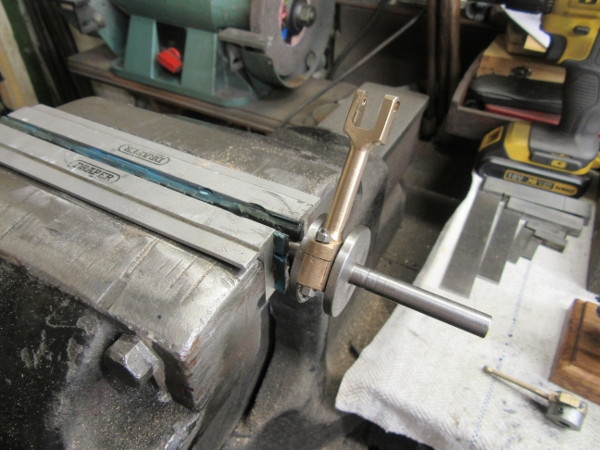
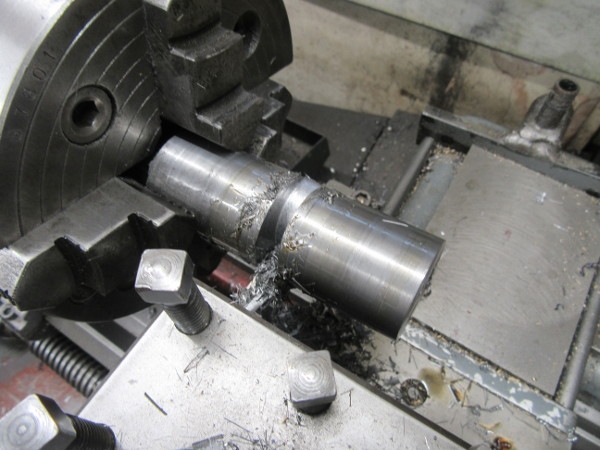
I set up again, this time with an indexed parting tool. This solved the problem and then it was just a matter of quietly cutting away at the stock until I had a 9/32" crank pin.
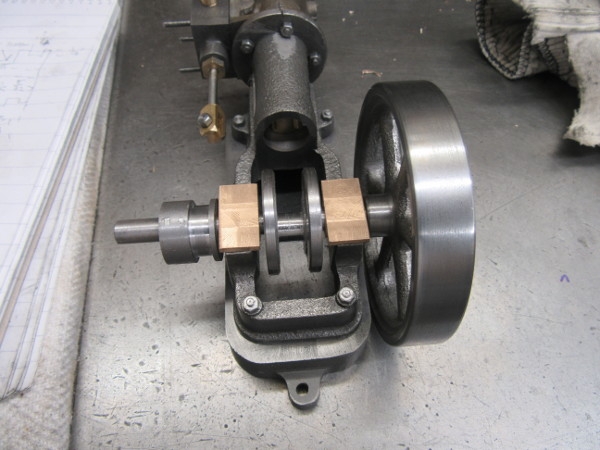
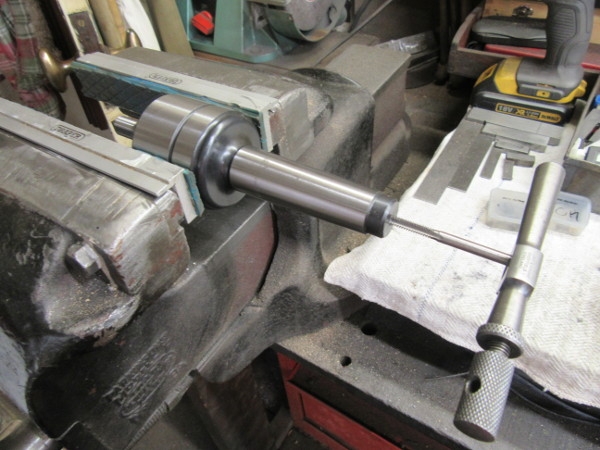
Once I had the pin finished I gave it a polish with fine emery paper.
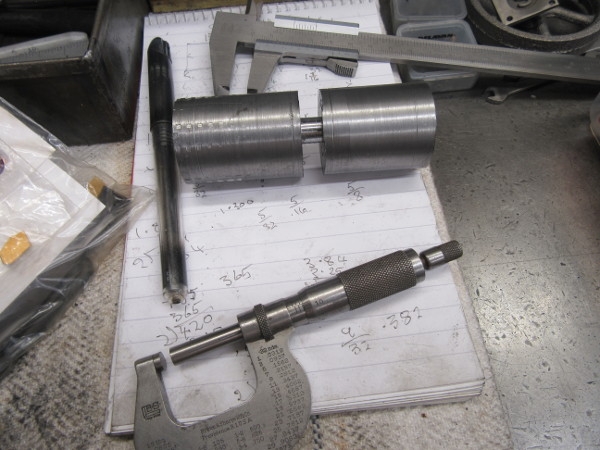
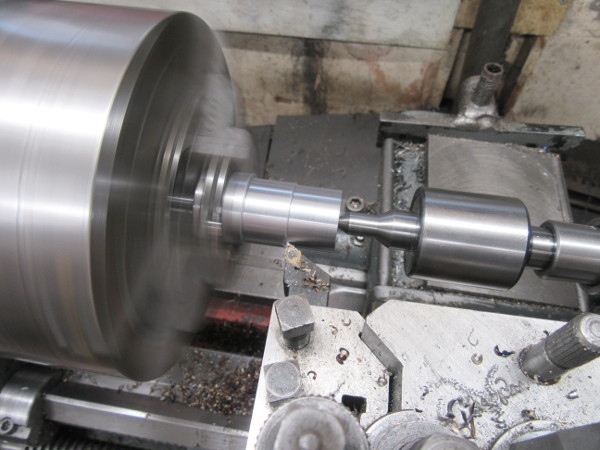
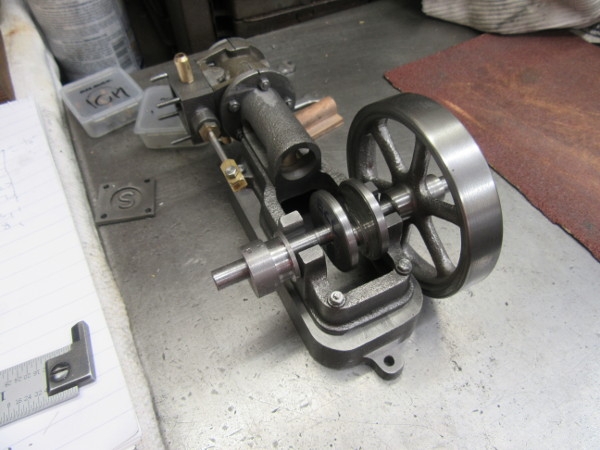
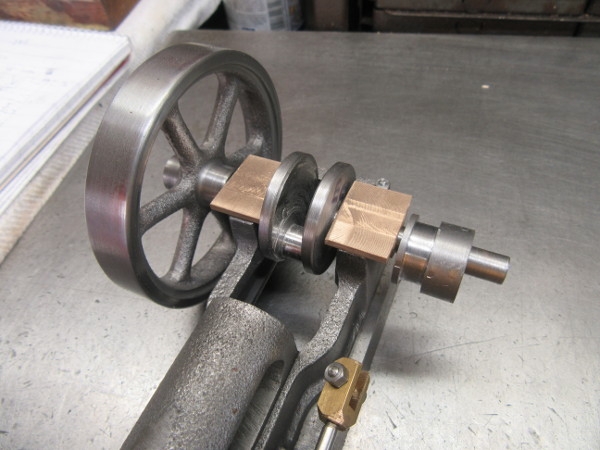
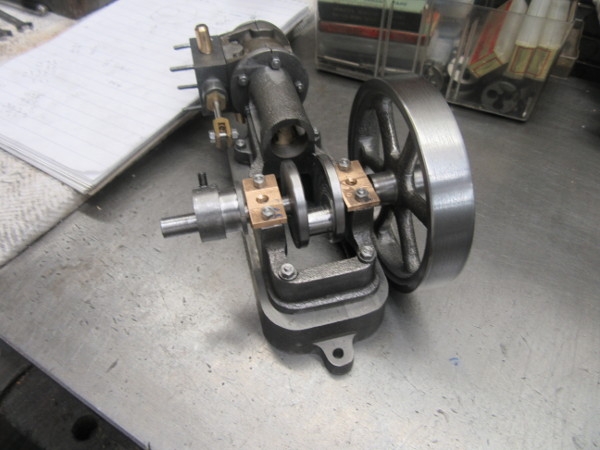
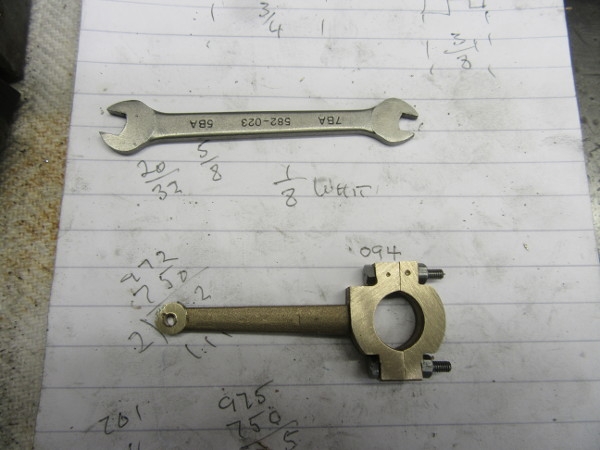
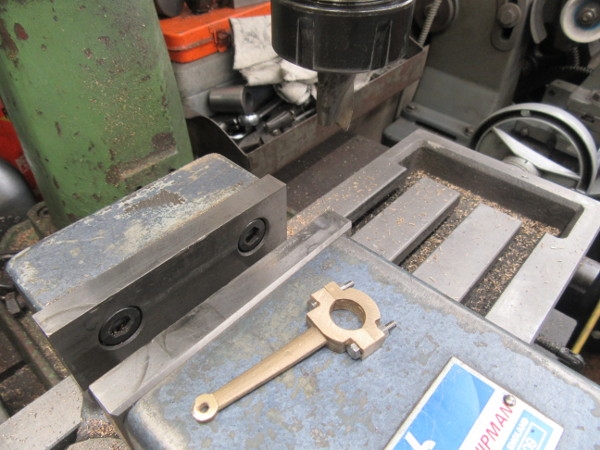
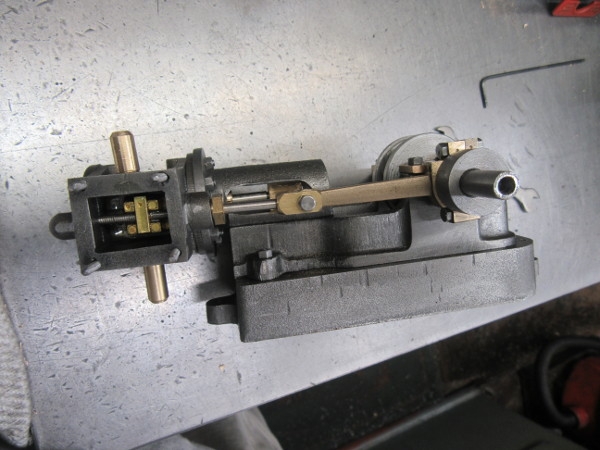
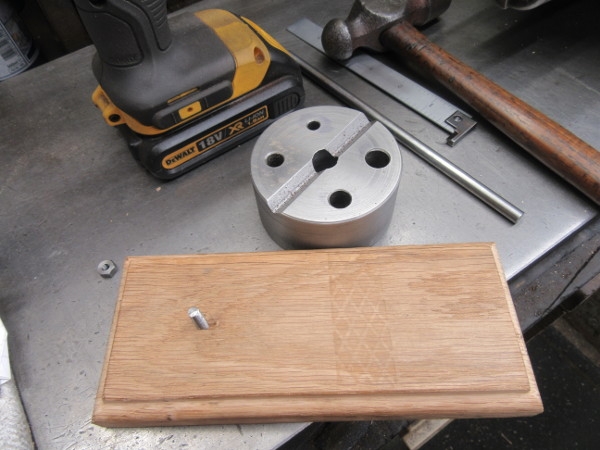
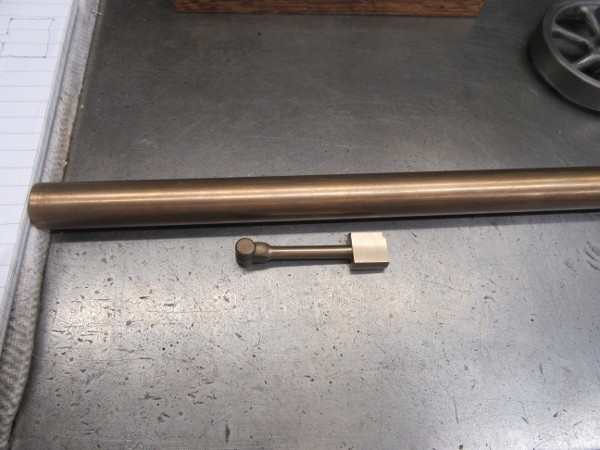
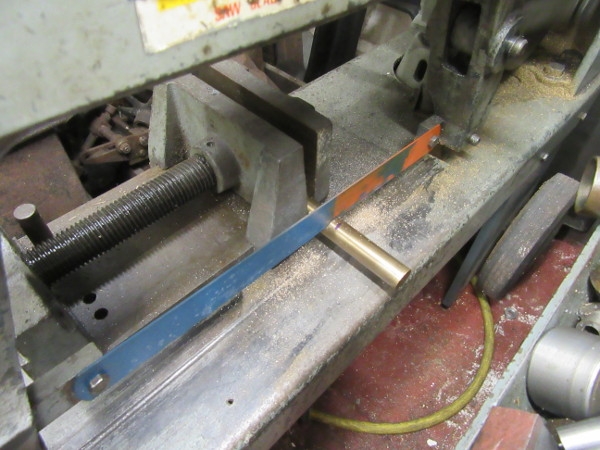
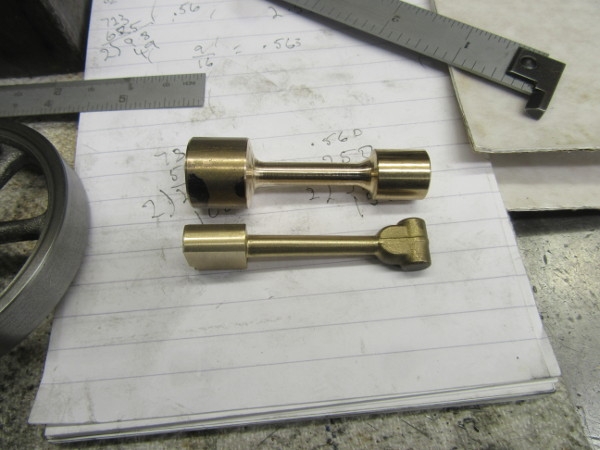
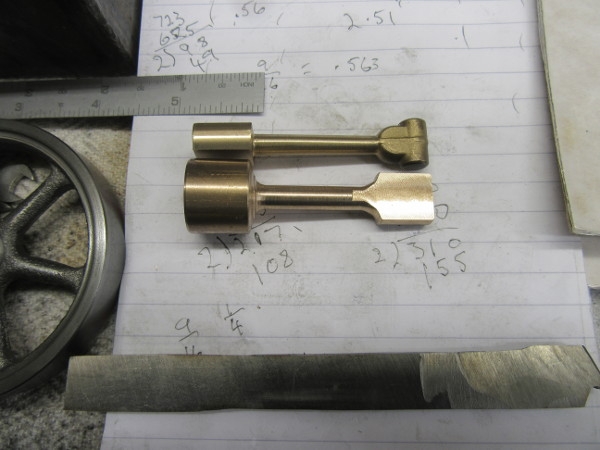
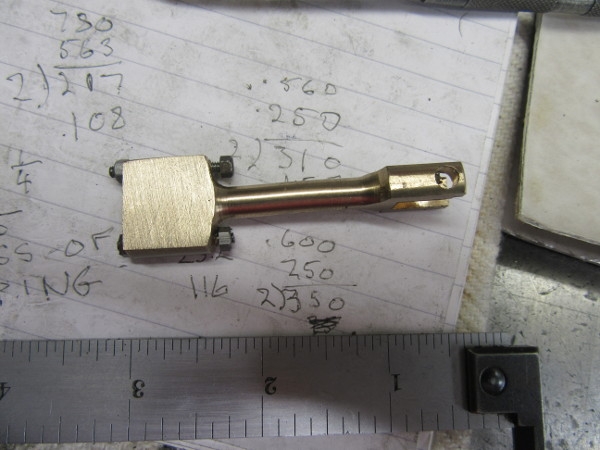
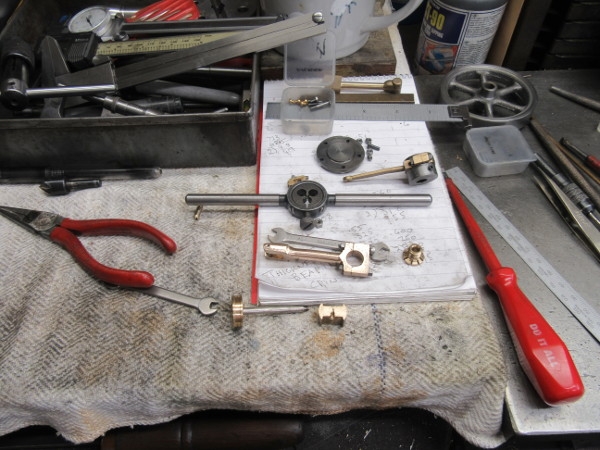
Here we are at knocking off time, we have a crank pin, now to get rid of the excess stock in each end.
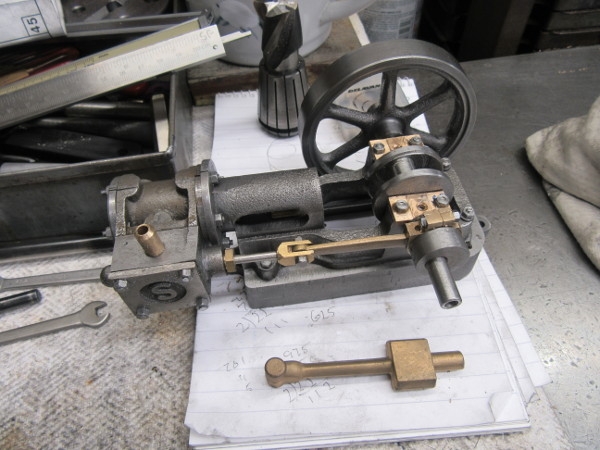
All right that was a mistake but it's all a learning curve and I should have stuck to the cutter always use but you have to experiment sometimes.
Stanley Challenger Graham
Stanley's View
scg1936 at talktalk.net
"Beware of certitude" (Jimmy Reid)
The floggings will continue until morale improves!
Stanley's View
scg1936 at talktalk.net
"Beware of certitude" (Jimmy Reid)
The floggings will continue until morale improves!
- Stanley
- Global Moderator
- Posts: 93522
- Joined: 23 Jan 2012, 12:01
- Location: Barnoldswick. Nearer to Heaven than Gloria.
Re: Shed Matters 3
Other matters held me up this morning so I only got just over an hour in the shed. Here was my first set up using an HSS tool. I had shifted the bulk of the swarf on the lathe bed into the bin outside.
I changed tack and decided to use indexed carbide tools. Very careful progress, this is just the time when you can make a mistake!
Here we are at knocking off time, one side of the shaft is done. I'll do the other side tomorrow to the same standard.
Stanley Challenger Graham
Stanley's View
scg1936 at talktalk.net
"Beware of certitude" (Jimmy Reid)
The floggings will continue until morale improves!
Stanley's View
scg1936 at talktalk.net
"Beware of certitude" (Jimmy Reid)
The floggings will continue until morale improves!
- Stanley
- Global Moderator
- Posts: 93522
- Joined: 23 Jan 2012, 12:01
- Location: Barnoldswick. Nearer to Heaven than Gloria.
Re: Shed Matters 3
First part of the day was to reduce the other side down to the right size. Notice That for the main of the muck shifting I am not relying on the other shaft but grabbing the larger diameter in the centre. When I get close to size I'll go on to the shaft and cut with care. Remember you are transmitting that turning force through a small offset pin.
Here we are completed. Yes, you're right, the mark on the right hand shaft is a mistake caused be not seeing straight. It won't harm anything....
What next? I started on the flywheel. First I got it into the vise and filed the worst of the flash off the spokes. Then put the smaller 3 jaw SC on so I could get inside the spokes.
Then start turning the flywheel. I know exactly where I am starting tomorrow which will be a short spell because of shopping.
On the way though this morning I have cleaned Mrs Harrison. Just thought I'd mention it when you are working out the work rate!
Stanley Challenger Graham
Stanley's View
scg1936 at talktalk.net
"Beware of certitude" (Jimmy Reid)
The floggings will continue until morale improves!
Stanley's View
scg1936 at talktalk.net
"Beware of certitude" (Jimmy Reid)
The floggings will continue until morale improves!
- Stanley
- Global Moderator
- Posts: 93522
- Joined: 23 Jan 2012, 12:01
- Location: Barnoldswick. Nearer to Heaven than Gloria.
Re: Shed Matters 3
As soon as I could hold the flywheel by a finished boss I drilled it to a close fit for the shaft which will eventually be Loctited on.
I had a problem with the flywheel, it has a chill. I had to use a big negative rake carbide tool and fast speeds to cut it. Even so it's not perfect. So I did the best I could and then spent time with abrasives.....
Here we are at finishing time. The flywheel will do and I shall paint it. I don't think anyone will recoil in horror when they see it.
Stanley Challenger Graham
Stanley's View
scg1936 at talktalk.net
"Beware of certitude" (Jimmy Reid)
The floggings will continue until morale improves!
Stanley's View
scg1936 at talktalk.net
"Beware of certitude" (Jimmy Reid)
The floggings will continue until morale improves!
- Stanley
- Global Moderator
- Posts: 93522
- Joined: 23 Jan 2012, 12:01
- Location: Barnoldswick. Nearer to Heaven than Gloria.
Re: Shed Matters 3
Today was eccentric making day. You all know how I do it so not a lot of pics, here I am marking the PCD of the offset centre.
Here we are with a finished eccentric. The purists will notice that once more I have made the Eccentric sheave 1/4" wide because it will run far better with more bearing surface. In addition I have not turned the other end down but left it at stock size because this way I have a good thick wall to drill through when I fit the set screw to lock it on the shaft. By the way, both the flywheel and the eccentric fit the shaft well.
Last blow was to take the 4 jaw independent off and the 3 jaw SC put back on.... I enjoyed that hour and a half!
Stanley Challenger Graham
Stanley's View
scg1936 at talktalk.net
"Beware of certitude" (Jimmy Reid)
The floggings will continue until morale improves!
Stanley's View
scg1936 at talktalk.net
"Beware of certitude" (Jimmy Reid)
The floggings will continue until morale improves!
- Stanley
- Global Moderator
- Posts: 93522
- Joined: 23 Jan 2012, 12:01
- Location: Barnoldswick. Nearer to Heaven than Gloria.
Re: Shed Matters 3
I've had the door open and got the shed down to 75F which this week is comfortably cool! The job is to turn this rough little casting into two pedestal bearings for the engine.
I think the pictures tell the story.The bearings are a good fit. They need cutting back to the correct size and finishing but that was a good hour in the shed.
Stanley Challenger Graham
Stanley's View
scg1936 at talktalk.net
"Beware of certitude" (Jimmy Reid)
The floggings will continue until morale improves!
Stanley's View
scg1936 at talktalk.net
"Beware of certitude" (Jimmy Reid)
The floggings will continue until morale improves!
- Stanley
- Global Moderator
- Posts: 93522
- Joined: 23 Jan 2012, 12:01
- Location: Barnoldswick. Nearer to Heaven than Gloria.
Re: Shed Matters 3
This morning I want to cut the pedestal bearings to size and fit them to the bed. Some careful weighing up and measuring is indicated.
Once marked I cut them to size in the mill.
Once I had the size right I had to address measuring and marking for the studs in the casting that the bearings are mounted on.
Drill and tap, very carefully!
The shaft tightened a bit when I fastened the bearings down so I ran it in using the drill, that sorted it straight away.I have put witness marks on the bearings so that I can put them back in the right orientation.
Next job was to fit the eccentric with the 1/8" Whitworth Unbrako set screw. I have plenty of meat for it but even so it was a bit too long. I shall cut it back when I am doing the final fitting.
Knocking off time, good progress and no cock-ups. Things could be worse!
Stanley Challenger Graham
Stanley's View
scg1936 at talktalk.net
"Beware of certitude" (Jimmy Reid)
The floggings will continue until morale improves!
Stanley's View
scg1936 at talktalk.net
"Beware of certitude" (Jimmy Reid)
The floggings will continue until morale improves!
- Stanley
- Global Moderator
- Posts: 93522
- Joined: 23 Jan 2012, 12:01
- Location: Barnoldswick. Nearer to Heaven than Gloria.
Re: Shed Matters 3
Only an hour in the shed as I am doing my early doors shop. These three pics show what I was doing, working on the eccentric rod for the valve. Fiddly work but all went well.
Stanley Challenger Graham
Stanley's View
scg1936 at talktalk.net
"Beware of certitude" (Jimmy Reid)
The floggings will continue until morale improves!
Stanley's View
scg1936 at talktalk.net
"Beware of certitude" (Jimmy Reid)
The floggings will continue until morale improves!
- Stanley
- Global Moderator
- Posts: 93522
- Joined: 23 Jan 2012, 12:01
- Location: Barnoldswick. Nearer to Heaven than Gloria.
Re: Shed Matters 3
On with the eccentric rod. First read the revised drawing and do some measuring and marking.
First under the pillar drill and drill the end of the rod for the pin in the valve clevis. Then the holes for the 7BA bolts that will hold the strap together on the eccentric. Finally drill the oil hole.
Next fit the VM up with the thinnest slitting saw I have and cut the strap.
It took a lot of fiddly fitting to get to this stage but I'm ready to bore the strap out to 5/8". Question is how....
I decided to use a 5/8" slot drill and so the first job was to make sure I had one that is razor sharp.
I'd done almost two hours so I am leaving finishing the strap until tomorrow.
Stanley Challenger Graham
Stanley's View
scg1936 at talktalk.net
"Beware of certitude" (Jimmy Reid)
The floggings will continue until morale improves!
Stanley's View
scg1936 at talktalk.net
"Beware of certitude" (Jimmy Reid)
The floggings will continue until morale improves!
- Stanley
- Global Moderator
- Posts: 93522
- Joined: 23 Jan 2012, 12:01
- Location: Barnoldswick. Nearer to Heaven than Gloria.
Re: Shed Matters 3
All the preparation yesterday came into play. No dramas, I bored out the eccentric strap and fitted it to the eccentric. A lovely fit.
Some serious fitting here. The valve rod shortened, the eccentric strap fitted to the eccentric, the bolts trimmed and the Unbrako set screw cut to length. Then I fitted the rod and adjusted the valve for throw, setting it equidistant.
Here we are at knocking off time. The steam chest lid is back on and the studs trimmed to length. All that is needed now is to make the connecting rod, fit it and time the valve by adjusting the eccentric. Then we are ready for a run! I am going to order another casting kit today. I have to have an engine on the go to keep me alive!
Stanley Challenger Graham
Stanley's View
scg1936 at talktalk.net
"Beware of certitude" (Jimmy Reid)
The floggings will continue until morale improves!
Stanley's View
scg1936 at talktalk.net
"Beware of certitude" (Jimmy Reid)
The floggings will continue until morale improves!
- Stanley
- Global Moderator
- Posts: 93522
- Joined: 23 Jan 2012, 12:01
- Location: Barnoldswick. Nearer to Heaven than Gloria.
Re: Shed Matters 3
I've ordered a Stuart Number 8 engine. Same as the 10H but slightly larger..... Just for a change!
Stanley Challenger Graham
Stanley's View
scg1936 at talktalk.net
"Beware of certitude" (Jimmy Reid)
The floggings will continue until morale improves!
Stanley's View
scg1936 at talktalk.net
"Beware of certitude" (Jimmy Reid)
The floggings will continue until morale improves!
- Stanley
- Global Moderator
- Posts: 93522
- Joined: 23 Jan 2012, 12:01
- Location: Barnoldswick. Nearer to Heaven than Gloria.
Re: Shed Matters 3
The first thing to note is that my MT3 live centre arrived from China. I think you can see what an improvement this is as it is heavier and has less overhang from the tailstock. Lovely finish and it can't be faulted. The price was right!
We're outside dealing with wood this morning. The chop saw was brought out and two pieces of wood cut, one as the base for this engine and the other big enough for the next one which is slightly bigger. Once I had the base for today cut to size I got the router out and put an O Gee moulding on it. Then the orbital sander to clean it up and the final blow was to sweep all the sawdust up and put it in the bin.
The next move was to fit the 2BA stud to the base. This is for the front fastening that is under the cylinder and can only be reached with a spanner. Notable for the fact it was the first time I have used the staking block I made.
I decided that I wasn't going to paint any part of the engine, raw cast iron will do me. I've given the oak base a coat of raw Linseed oil. It will weather in nicely. Tomorrow I shall be looking at the connecting rod and cross head.
Stanley Challenger Graham
Stanley's View
scg1936 at talktalk.net
"Beware of certitude" (Jimmy Reid)
The floggings will continue until morale improves!
Stanley's View
scg1936 at talktalk.net
"Beware of certitude" (Jimmy Reid)
The floggings will continue until morale improves!
- Stanley
- Global Moderator
- Posts: 93522
- Joined: 23 Jan 2012, 12:01
- Location: Barnoldswick. Nearer to Heaven than Gloria.
Re: Shed Matters 3
I knew exactly what I was doing, making the connecting rod and fitting it. So straight into it.
Dead easy and good progress but then I measured it...... I had not had my brain in gear and have made it to the wrong measurement! No excuses, I just crashed on without thinking.
Only two possible courses of action.... get a new casting from Stuarts or chop one out of the solid. So off into the treasure chests, find a piece of brass bar and cut a slug to length in Mrs McMaster.
This is the state of play at knocking off time. I am ready for a fresh start and will chop the rod out of the solid. I shall check the measurements first!!!
Stanley Challenger Graham
Stanley's View
scg1936 at talktalk.net
"Beware of certitude" (Jimmy Reid)
The floggings will continue until morale improves!
Stanley's View
scg1936 at talktalk.net
"Beware of certitude" (Jimmy Reid)
The floggings will continue until morale improves!
- Stanley
- Global Moderator
- Posts: 93522
- Joined: 23 Jan 2012, 12:01
- Location: Barnoldswick. Nearer to Heaven than Gloria.
Re: Shed Matters 3
I did my measuring and cutting making sure I had it dead right and then broke the tip of the centre drill in the stock. (You do wonder at times why you bother!) No cure for it, I didn't even try. I simply turned the end off to get rid of the piece of broken HSS in the end lurking there for the unwary and started again!
Parted off to the correct length, both ends squared and centre drilled. Ready to start again! But....
I didn't mention it but there was a slight problem with my new centre. As you may or may not know, there is a peg inside the central ram of the tailstock that hits the bottom of the tool held in the Morse Taper and breaks the contact. This centre was not quite long enough and the peg didn't reach it. I had to use a wedge to break the grip. So I solved it by drilling the centre, hard but just soft enough to drill, tapped it and fitted a short 3/16" Whitworth Unbrako set screw. That did the trick, the peg knocks it out now. Back to our connecting rod.
Here's where I decided to knock off. I am measured up and ready to actually start making the connecting rod. Let's hope I do a bit better with my third attempt!
Stanley Challenger Graham
Stanley's View
scg1936 at talktalk.net
"Beware of certitude" (Jimmy Reid)
The floggings will continue until morale improves!
Stanley's View
scg1936 at talktalk.net
"Beware of certitude" (Jimmy Reid)
The floggings will continue until morale improves!
- PanBiker
- Site Administrator
- Posts: 16868
- Joined: 23 Jan 2012, 13:07
- Location: Barnoldswick - In the West Riding of Yorkshire, always was, always will be.
Re: Shed Matters 3
These things are sent to try us Stanley and as you have said in another thread all part of the learning process. I know there will only be one winner.
Ian
- Stanley
- Global Moderator
- Posts: 93522
- Joined: 23 Jan 2012, 12:01
- Location: Barnoldswick. Nearer to Heaven than Gloria.
Re: Shed Matters 3
Dead right Ian and don't worry, as Mr Mainwaring used to say; "Resistance is useless!"
And look what the postman dropped in. This should keep me going for another three months!
Stanley Challenger Graham
Stanley's View
scg1936 at talktalk.net
"Beware of certitude" (Jimmy Reid)
The floggings will continue until morale improves!
Stanley's View
scg1936 at talktalk.net
"Beware of certitude" (Jimmy Reid)
The floggings will continue until morale improves!
- PanBiker
- Site Administrator
- Posts: 16868
- Joined: 23 Jan 2012, 13:07
- Location: Barnoldswick - In the West Riding of Yorkshire, always was, always will be.
- Stanley
- Global Moderator
- Posts: 93522
- Joined: 23 Jan 2012, 12:01
- Location: Barnoldswick. Nearer to Heaven than Gloria.
Re: Shed Matters 3
Stanley Challenger Graham
Stanley's View
scg1936 at talktalk.net
"Beware of certitude" (Jimmy Reid)
The floggings will continue until morale improves!
Stanley's View
scg1936 at talktalk.net
"Beware of certitude" (Jimmy Reid)
The floggings will continue until morale improves!
- Stanley
- Global Moderator
- Posts: 93522
- Joined: 23 Jan 2012, 12:01
- Location: Barnoldswick. Nearer to Heaven than Gloria.
Re: Shed Matters 3
I decided to use a round nosed carbide tipped tool to give me the swell at each end of the middle section. I paid a lot of attention to sharpening it and making sure it was dead on centre.
A short while later after some careful measuring and turning....
Here's what it looks like after it came out of the lathe.
I'm not rushing so I gave Mrs Harrison a good clean while I mentally checked my next move.
Into the VM and after some careful measurement and thought I had the clevis end reduced to the proper thickness.
Knocking off time, No cock-ups today, quietly forwards. Nice quiet morning.
Stanley Challenger Graham
Stanley's View
scg1936 at talktalk.net
"Beware of certitude" (Jimmy Reid)
The floggings will continue until morale improves!
Stanley's View
scg1936 at talktalk.net
"Beware of certitude" (Jimmy Reid)
The floggings will continue until morale improves!
- Stanley
- Global Moderator
- Posts: 93522
- Joined: 23 Jan 2012, 12:01
- Location: Barnoldswick. Nearer to Heaven than Gloria.
Re: Shed Matters 3
Forward with the connecting rod. The first thing was to drill the clevis for the crosshead pin, this includes tapping one leg of the clevis 5BA.
The next thing is to mill the bearing end of the con rod down to the same width as the clevis so I can hold it firmly in the vise on the horizontal mill when I cut the throat of the clevis.
Here we are, ready for the HM
It got exciting, the cutter grabbed and I hadn't been savage enough with the vise. Consequence, a bent rod! An immediate sophisticated repair, put it in the vise and hit it with a hammer. It worked.
I put it back in the HM and cut the clevis. High risk but successful.
Next task was to thread the leg of the clevis and ensure that the crosshead pin fits. It's OK.
My next task is to mill the bearing end of the connecting rod to the correct thickness for the crankshaft where it fits on the crank pin. Here I am marked up and set up ready for cutting. I had done 2 hours so knocked off, an easy start for tomorrow....I was lucky with the snatch in the mill. So, it's a good morning!
Ready for the big end...
Stanley Challenger Graham
Stanley's View
scg1936 at talktalk.net
"Beware of certitude" (Jimmy Reid)
The floggings will continue until morale improves!
Stanley's View
scg1936 at talktalk.net
"Beware of certitude" (Jimmy Reid)
The floggings will continue until morale improves!
- Stanley
- Global Moderator
- Posts: 93522
- Joined: 23 Jan 2012, 12:01
- Location: Barnoldswick. Nearer to Heaven than Gloria.
Re: Shed Matters 3
When you get to the stage where you have invested a lot of time making a component, you tend to be more careful! So, the first thing this morning was to put the cutter in the T&C grinder and make sure it was as sharp as possible.
Then some careful cutting.....
It looks as though we have the thickness of the crank end of the rod about right!
Some careful drilling and we have the bolts fitted.
Knocking off time, I had to do my early doors shopping. Lots of fitting to do yet but I have measured and the stock is big enough to accept the drilling for the crank pin. I shall be even more careful tomorrow morning!
Stanley Challenger Graham
Stanley's View
scg1936 at talktalk.net
"Beware of certitude" (Jimmy Reid)
The floggings will continue until morale improves!
Stanley's View
scg1936 at talktalk.net
"Beware of certitude" (Jimmy Reid)
The floggings will continue until morale improves!
- Stanley
- Global Moderator
- Posts: 93522
- Joined: 23 Jan 2012, 12:01
- Location: Barnoldswick. Nearer to Heaven than Gloria.
Re: Shed Matters 3
First job was to do a careful measure and cut the bearing in two using the slitting saw in the VM. No way I can see straight enough to simply using a hacksaw.
It took me an hour and a half to get here. Dropping a 7BA stud and losing it.... finding 7BA nuts... measuring at least 4 times and lots of small adjustments to get the studs fitted. Then high risk drilling for the .389" crank pin. That was a 'W' letter drill. It had to be backed off so it was negative rake to avoid having a grab. Having to go back to the beginning would be interesting but very frustrating. But we have a con rod ready for fitting!
Stanley Challenger Graham
Stanley's View
scg1936 at talktalk.net
"Beware of certitude" (Jimmy Reid)
The floggings will continue until morale improves!
Stanley's View
scg1936 at talktalk.net
"Beware of certitude" (Jimmy Reid)
The floggings will continue until morale improves!
- Stanley
- Global Moderator
- Posts: 93522
- Joined: 23 Jan 2012, 12:01
- Location: Barnoldswick. Nearer to Heaven than Gloria.
Re: Shed Matters 3
I think these pics tell the story of a frustrating two and a half hours in the shed. Not to put too fine a point on it, there are enough slight faults to mean that I have to pull the engine to bits and start from the ground up. The engine is going to go to my new great grandchild as a toy and I might abandon making it a runner. That would involve too much work. The bottom line is I am getting old! (But the next one will be a runner.... )
Stanley Challenger Graham
Stanley's View
scg1936 at talktalk.net
"Beware of certitude" (Jimmy Reid)
The floggings will continue until morale improves!
Stanley's View
scg1936 at talktalk.net
"Beware of certitude" (Jimmy Reid)
The floggings will continue until morale improves!
- Stanley
- Global Moderator
- Posts: 93522
- Joined: 23 Jan 2012, 12:01
- Location: Barnoldswick. Nearer to Heaven than Gloria.
Re: Shed Matters 3
The 10H engine is finished. I sorted the problems and rebuilt it and it would be a runner if I tried but I know it wouldn't be up to my usual standards and it's going to an infant as a toy so this will be fine.
I unpacked the parts of the next engine a Stuart No. 8. The parts look enormous after the 10H! It will be good to work on something a bit bigger.
I shall have a shed tidy and prepare for the new engine, but that's for tomorrow!
Stanley Challenger Graham
Stanley's View
scg1936 at talktalk.net
"Beware of certitude" (Jimmy Reid)
The floggings will continue until morale improves!
Stanley's View
scg1936 at talktalk.net
"Beware of certitude" (Jimmy Reid)
The floggings will continue until morale improves!
- Stanley
- Global Moderator
- Posts: 93522
- Joined: 23 Jan 2012, 12:01
- Location: Barnoldswick. Nearer to Heaven than Gloria.
Re: Shed Matters 3
I started this morning by tidying up. I wanted all my Slocombe drills in the same box. My residue of parts for the Stuart beam and 10H all gathered in one box. Then I put my 10H drawings away and got the No 8 drawings out. One last thing, I swept up and got all the chips out of the carpet.
Then a decision. I decided to give myself a treat and start by doing something I really enjoy, chopping a crankshaft out of the solid instead of Stuart's recommended way of building the crankshaft up. (I don't understand why they do this. Perhaps they don't have a very high opinion of their customers turning ability. On the other hand it may be that they are still living in the days of pedal powered lathes and high carbon tools. Things have moved on!) So, I did a fag packet drawing and looked for a piece of stock, I have some very rusty lumps under the 1957 lathe and found a piece of 2" black bar, the blank I need is just a shade over 1.5" diameter.
I put the original 3 jaw on because when I get to the size I need it will fit through the centre of the chuck, something I need to be able to do when I am working on it. Here we are set up and with a big negative rake carbide tool on. I won't get as good a finish as I would with HSS but I don't need it. This is muck-shifting.
At the end of this morning I cleaned up again because the disadvantage of working with carbide tooling on an old lathe like Mrs Harrison is that you can't push the tool hard enough to get it to chip break so you end up with hot stringy blue swarf! Here is is in the recycling bin.
Here we are at closing time, a lot of muck shifted and about 30 thou bigger than I need but at the moment it's very hot. I'll get a proper measurement and a finishing cut tomorrow when it has cooled down. A good morning and a good start on another build.
Stanley Challenger Graham
Stanley's View
scg1936 at talktalk.net
"Beware of certitude" (Jimmy Reid)
The floggings will continue until morale improves!
Stanley's View
scg1936 at talktalk.net
"Beware of certitude" (Jimmy Reid)
The floggings will continue until morale improves!